

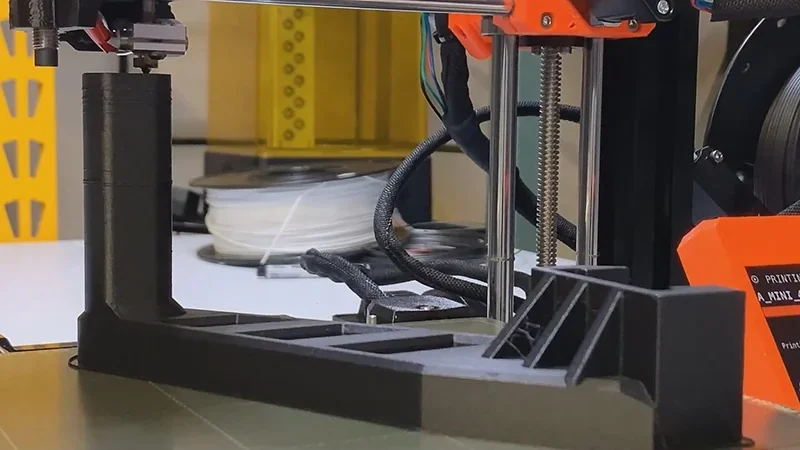
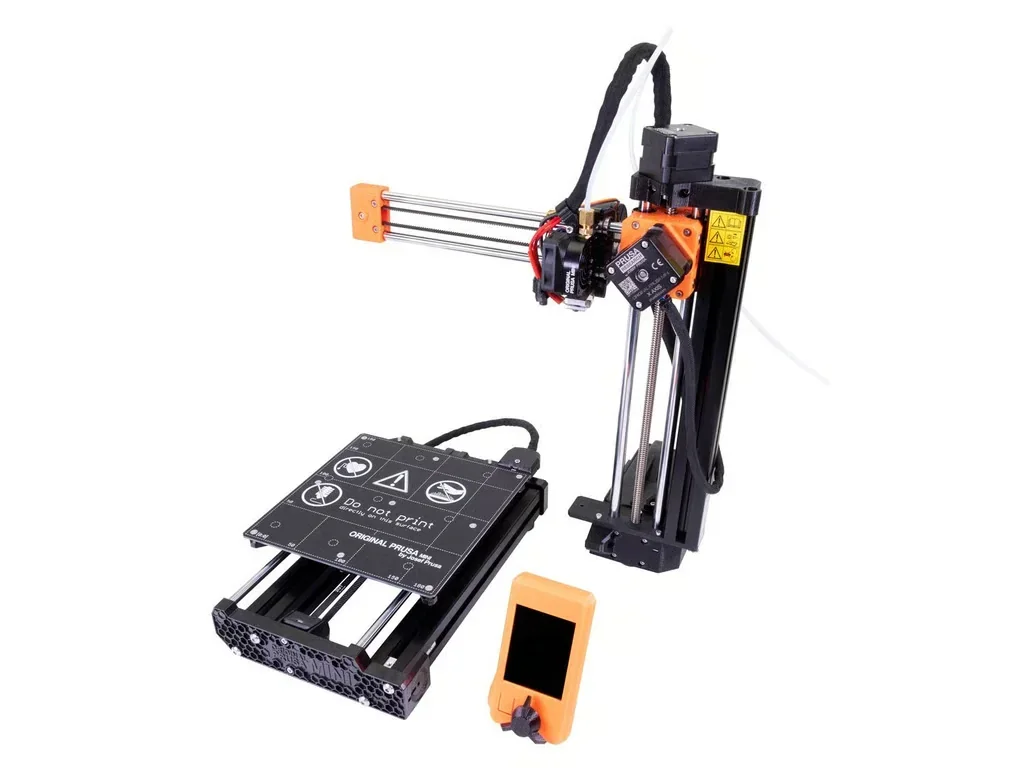
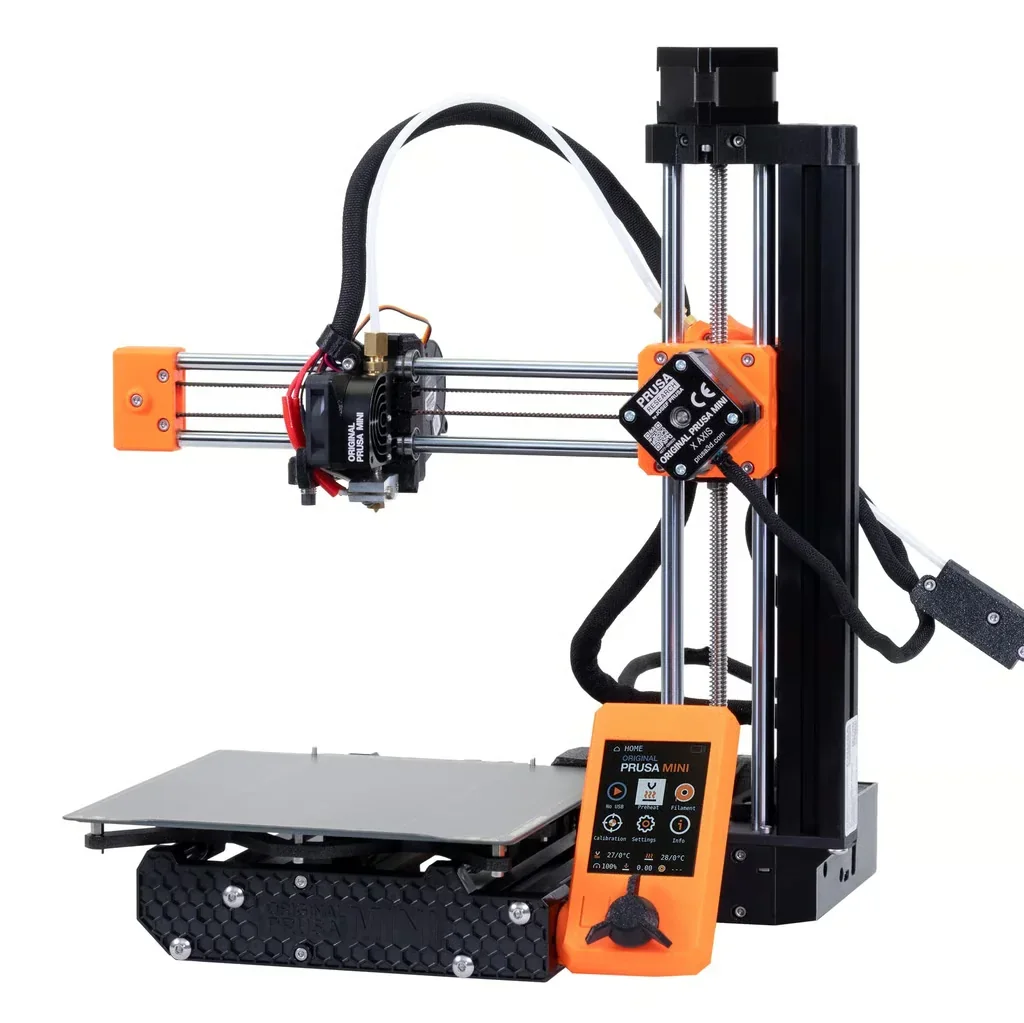
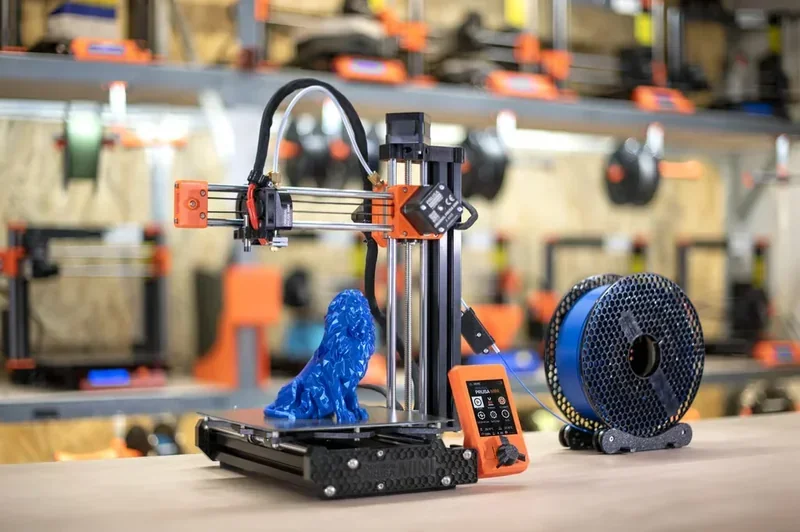
The Original Prusa Mini+ is a compact, entry-level FFF 3D printer with a 180 × 180 × 180 mm build volume, offering pro-quality prints at a budget-friendly price. It features a custom 32-bit Buddy board, silent Trinamic drivers, Input Shaper, and Pressure Advance for fast, high-quality results. With auto bed leveling via SuperPINDA, removable magnetic sheets, and Ethernet or optional Wi-Fi connectivity, it’s easy to use and maintain. Prusa Connect enables remote monitoring, file uploads, and firmware updates. Ideal for beginners and experts alike, it supports materials like PLA, PETG, ASA, ABS, and flexibles, thanks to its 280 °C nozzle and 100 °C heatbed. Praised for its reliability and value, it was Wirecutter’s “Best 3D Printer” from 2021–2023. While it has fewer features than the MK4, MK3, or XL, it retains Prusa’s open-source design and build quality.
The Original Prusa MINI+ upgrades the MINI with a SuperPINDA sensor, stronger hardware, an improved display, and firmware features like Input Shaping for faster prints.
| Feature | MINI | MINI+ | Impact |
|---|---|---|---|
| Bed Leveling Sensor | MINDA | SuperPINDA | Consistent first layers |
| Sensor Temperature Compensation | Dependent | Independent | Reliable leveling |
| Y-Axis Front Plate Design | Flat | Hexagonal | More rigidity |
| Heatbed Mounting | U-bolts | Metal brackets | Easier assembly |
| Stepper Motors | Shorter | Longer | Better performance |
| LCD Display | Basic | Higher contrast, angle | Improved viewing |
| Belt Design | Standard | Upgraded | More reliable |
| Part Construction | 3D printed | Injection molded mix | More durable |
| Availability | Discontinued | Current | Supported |
| Firmware Features | Basic | Input Shaping, Connect | Faster, remote use |
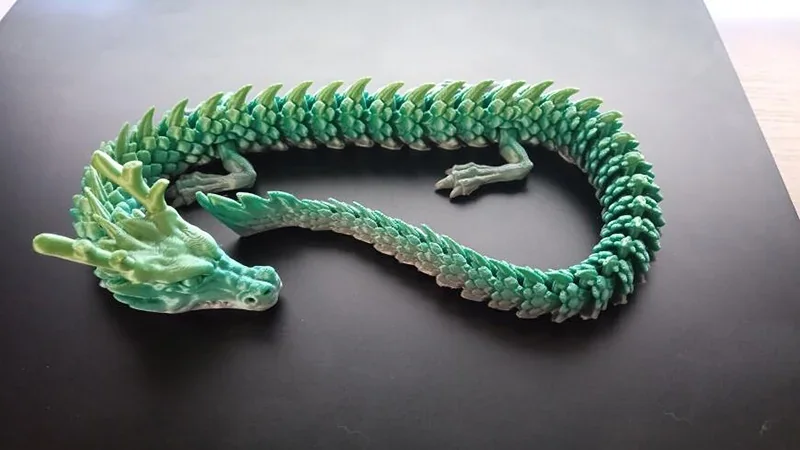
The Original Prusa Mini+ offers 0.05–0.25 mm layer heights for detailed or fast prints. Its 32-bit board runs Input Shaper and Pressure Advance, enabling clean, precise results at higher speeds.

The printer’s Mesh Bed Leveling maps surface irregularities before each print, ensuring accurate first layers.
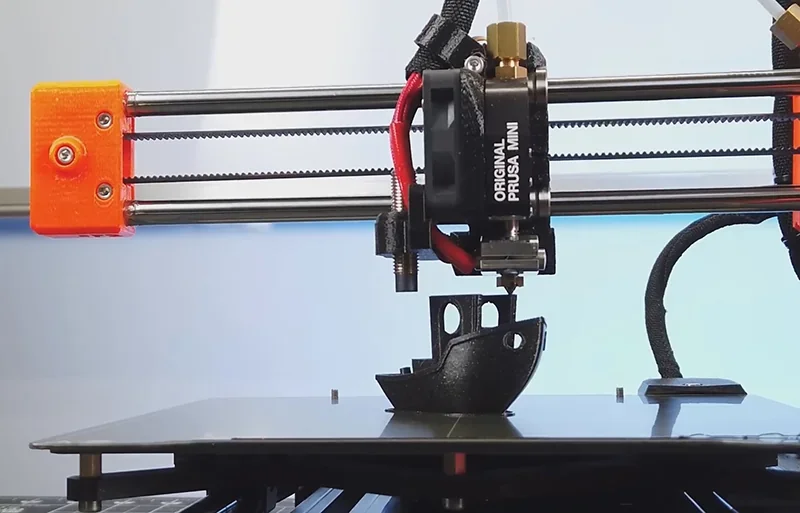
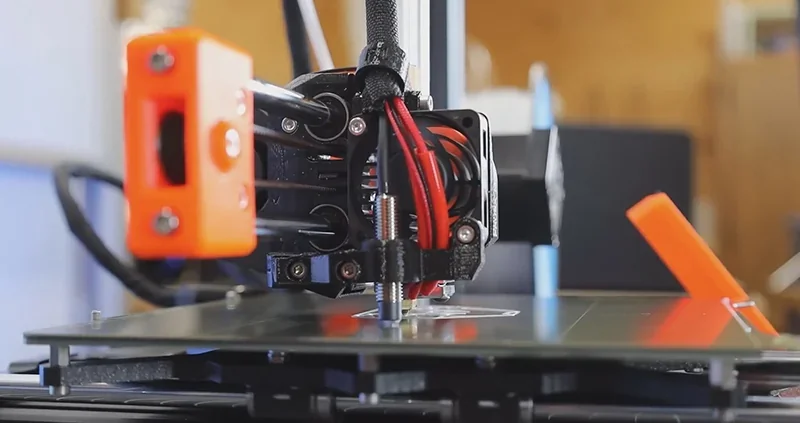
The Original Prusa Mini+ delivers sharp, accurate prints through its sturdy design. Features include sensorless homing, silent Trinamic 2209 drivers, a 3:1 Bowden extruder, and a SuperPINDA probe for stable calibration, reducing layer lines and boosting structural accuracy.
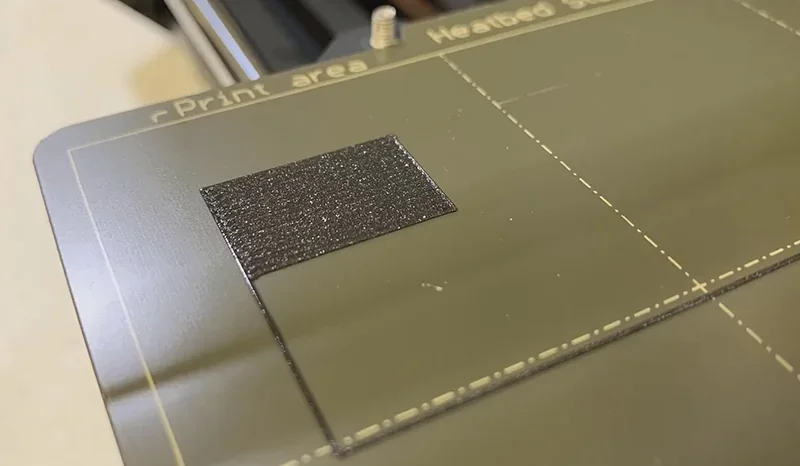
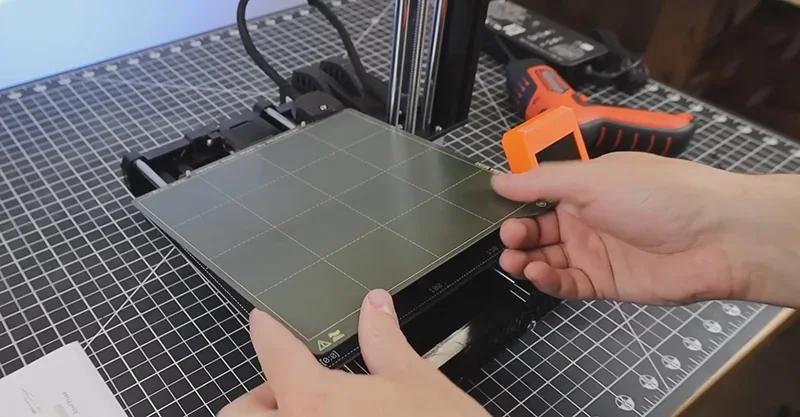
The Original Prusa Mini+ uses removable steel sheets for different finishes. The smooth PEI sheet gives glossy bottoms, the textured sheet adds matte finish and adhesion, and the satin sheet provides a balanced semi-gloss. Users can choose surfaces based on material and finish needs.
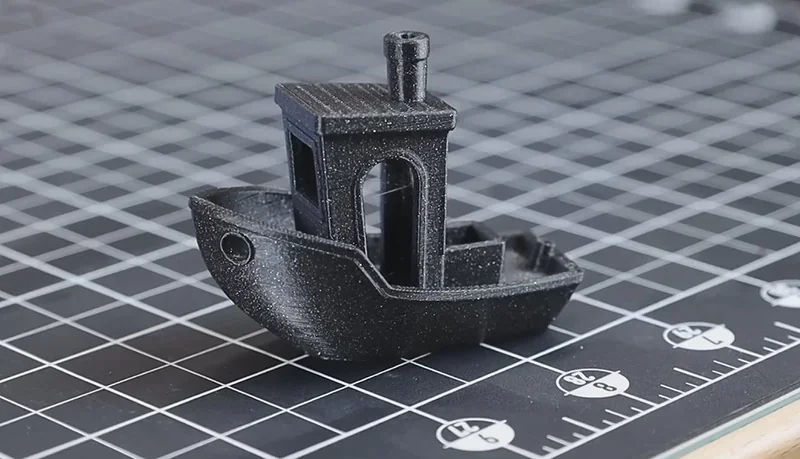
Tests show the Original Prusa Mini+ handles PETG well, with minimal stringing and clean overhangs.
Example: A Raspberry Pi microscope stand printed in Prusament PETG (0.15 mm layer, 10% infill) took 6h 50m. The 60 × 60 × 50 mm part showed ±0.175 mm accuracy, minor surface waviness, but sufficient precision for prototypes and assemblies.
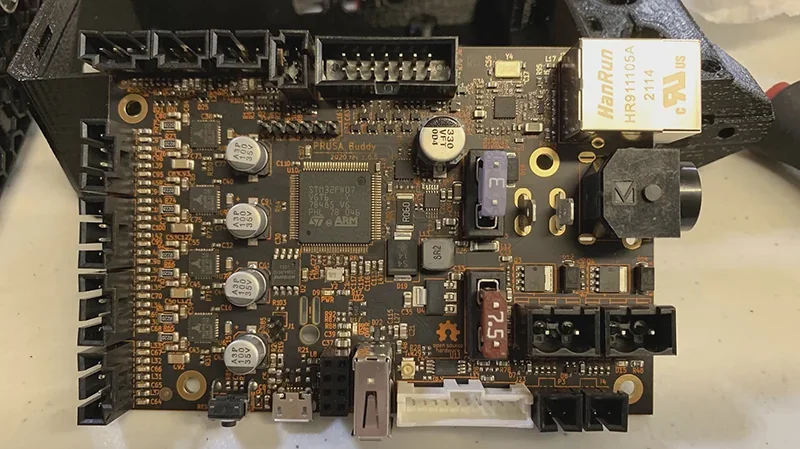
The MINI+ uses a 32-bit Buddy board with STM32, offering more power than 8-bit controllers. It enables Input Shaper, Pressure Advance, silent Trinamic 2209 drivers, Ethernet/Wi-Fi, OTA updates, real-time calculations, and advanced safety features.
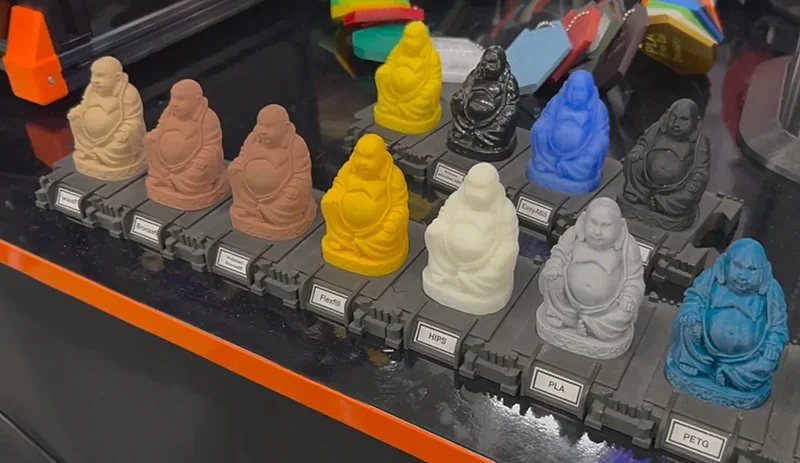
The Original Prusa MINI+ can print over 14 filament types including PLA, PETG, ASA, ABS, PC, Nylon, Flex, and composites like Woodfill, all in 1.75 mm diameter, supported by a 280 °C nozzle and 100 °C heated bed.
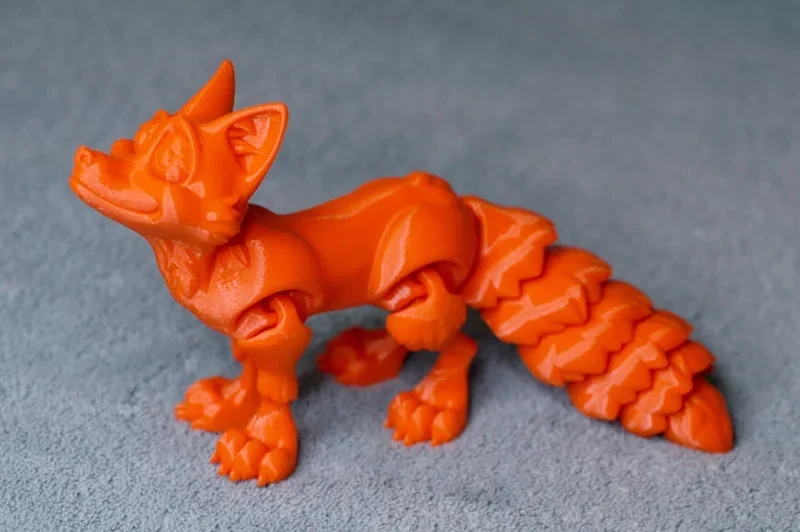
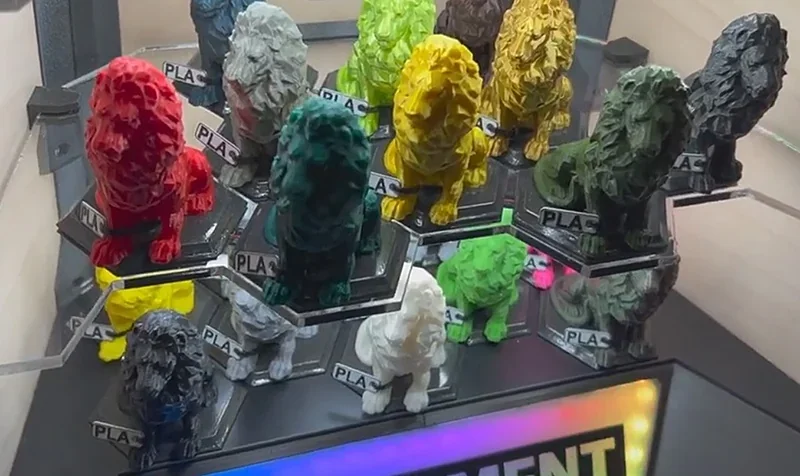
PLA Print Samples:
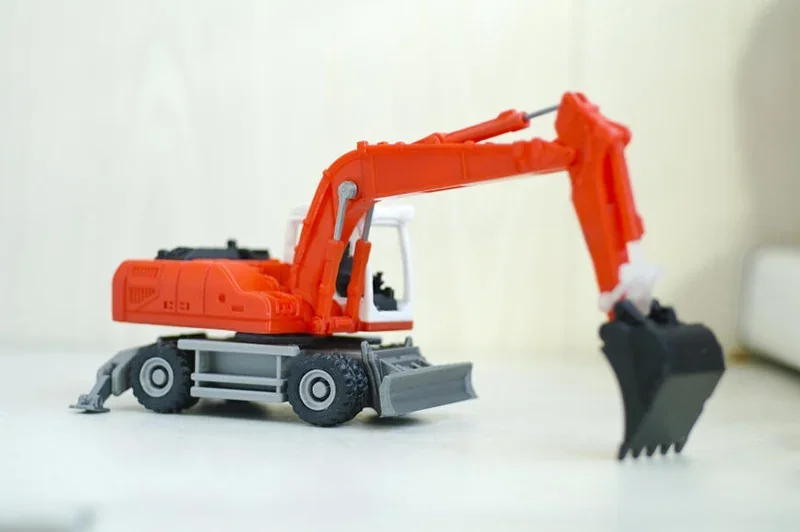
Multi-material test: A construction vehicle model used six filaments—PLA (red, black), Flex (wheels), ABS (gray), PETG (white), and Z-glass (translucent). The MINI+ handled the mix well, showing strong compatibility and precision, even with flexible materials.

The Original Prusa Mini+ prints technical materials like Nylon and PC at 250–280 °C. For abrasive composites, a hardened steel nozzle is recommended. Its Bowden setup handles flexibles down to 94A hardness, though very soft types can be challenging.
The MINI+ supports both Prusament and third-party filaments, with PrusaSlicer profiles for easy setup. Its magnetic sheets expand compatibility: smooth PEI for PLA, textured for PETG/ASA/ABS, and satin for general use.
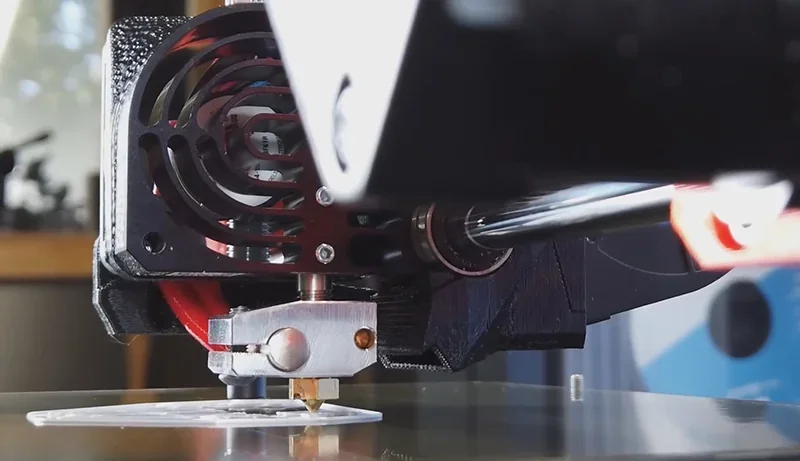
The MINI+ boosts material compatibility with an all-metal hotend for high temps, a SuperPINDA probe for consistent first layers, and Mesh Bed Leveling for better adhesion. Its open-source design also supports upgrades like titanium heatbreaks, specialty hotends, and nozzles for exotic filaments.
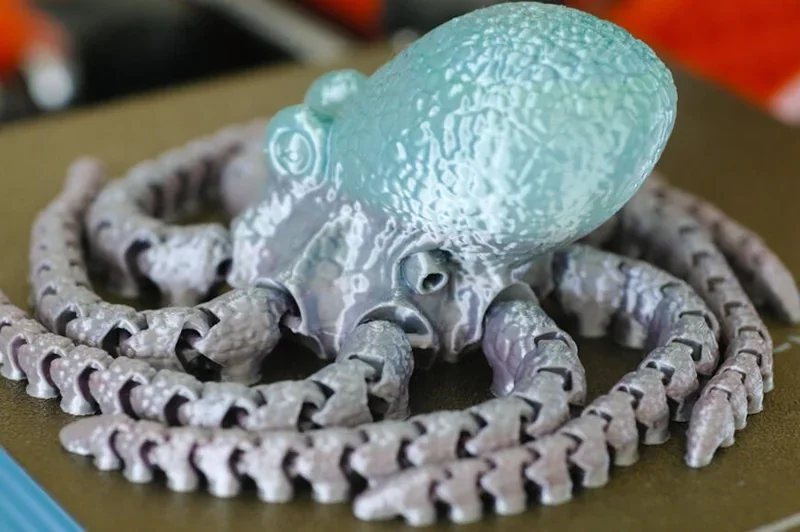
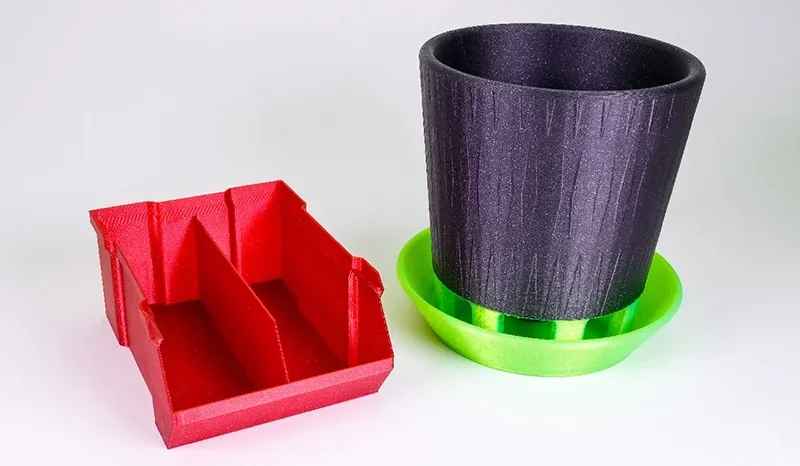
The Original Prusa Mini+ has a 180 × 180 × 180 mm build volume, balancing compact size with capacity. It can print small parts, medium prototypes, assembled mechanisms, figurines, and household or technical items in one go.

| Printer Model | Build Volume (mm) | Build Volume (L) | Price (USD) |
|---|---|---|---|
| Original Prusa Mini+ | 180 x 180 x 180 | 5.83 | $460+ |
| Creality Ender 3 S1 | 220 x 220 x 270 | 13.07 | $190+ |
| Creality Ender 3 V3 SE | 220 x 220 x 250 | 12.10 | $220+ |
| Bambu Lab A1 Mini | 180 x 180 x 180 | 5.8 | $250+ |
| FlashForge Adventurer 5M Pro | 220 x 220 x 220 | 10.65 | $450+ |

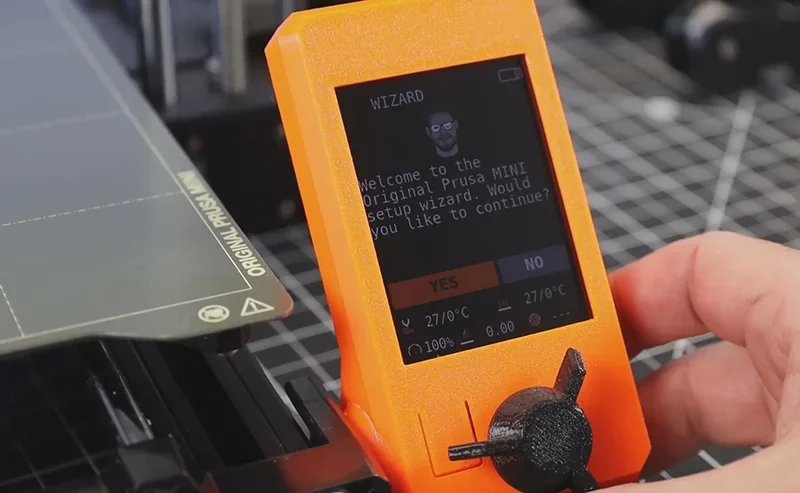
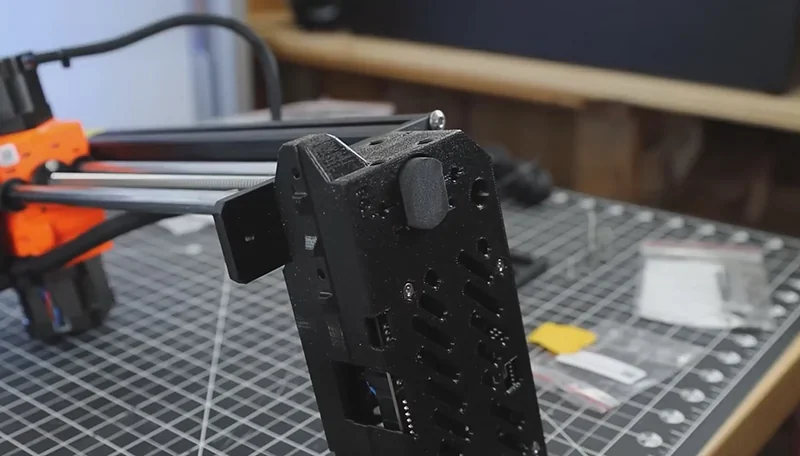
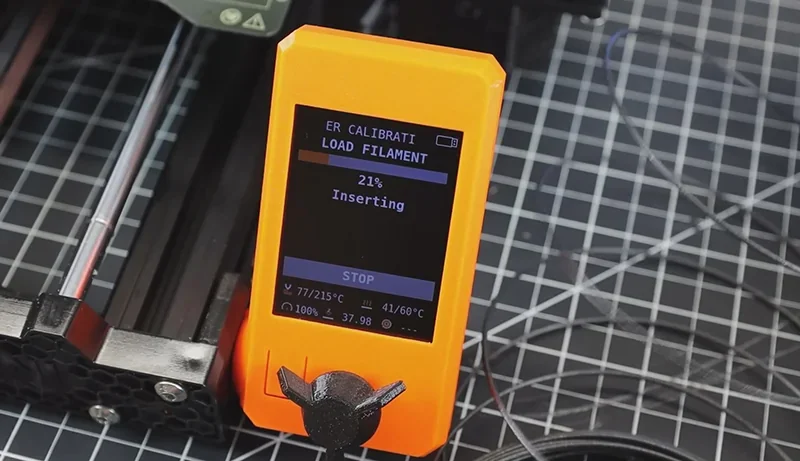
The Original Prusa MINI+ features two physical controls — a rotary encoder knob for menu navigation and selection on its 2.8" color LCD, plus a reset button for hard resets — enabling full offline operation alongside USB, Ethernet, and optional Wi-Fi connectivity.
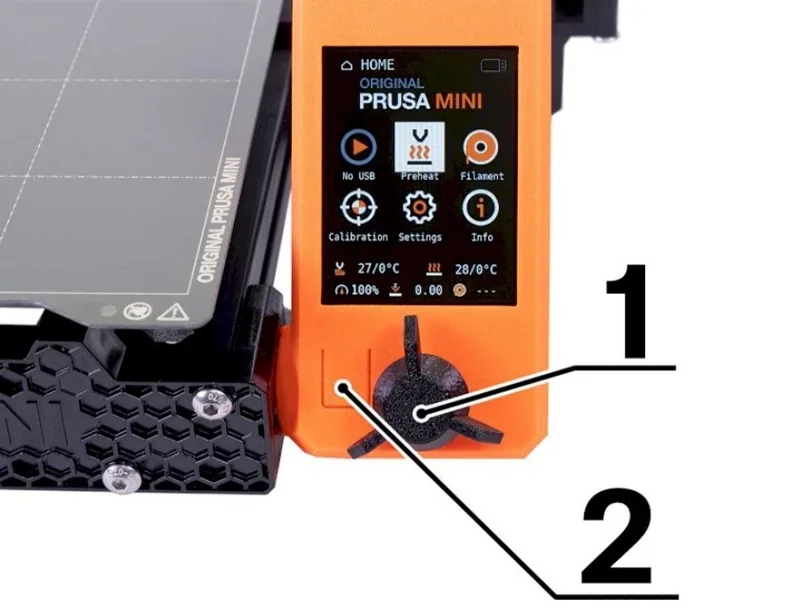
Primary Control Interface
The Original Prusa MINI+ uses two physical controls with a 2.8" color LCD:
The controls allow full offline use, while USB, Ethernet, and optional Wi-Fi enable remote management.
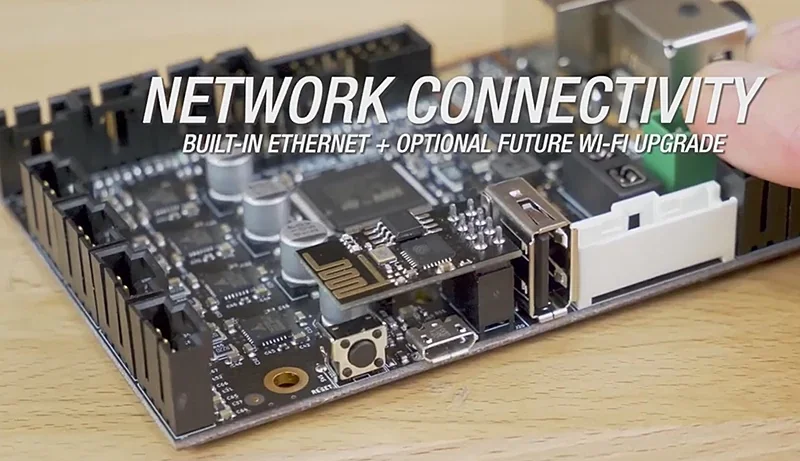
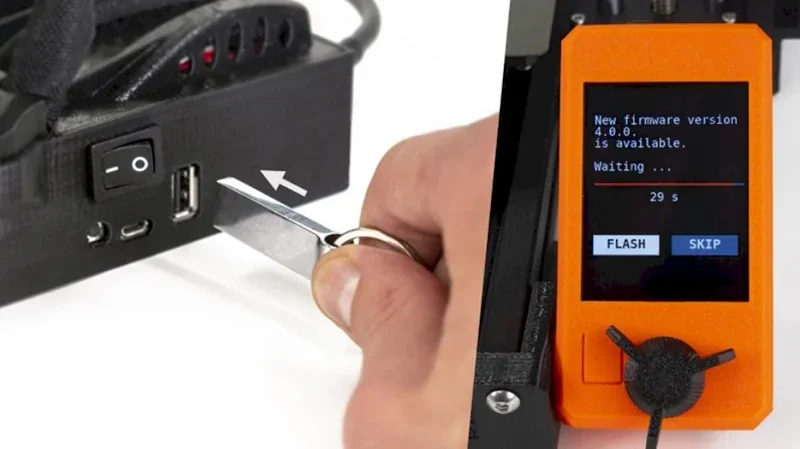
The Original Prusa Mini+ includes two connectivity options: a USB port for flash drive printing and an Ethernet RJ-45 port for wired networking.
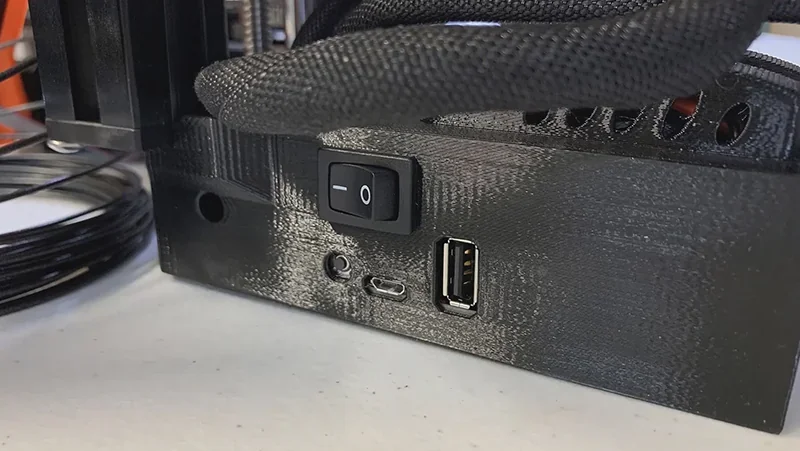
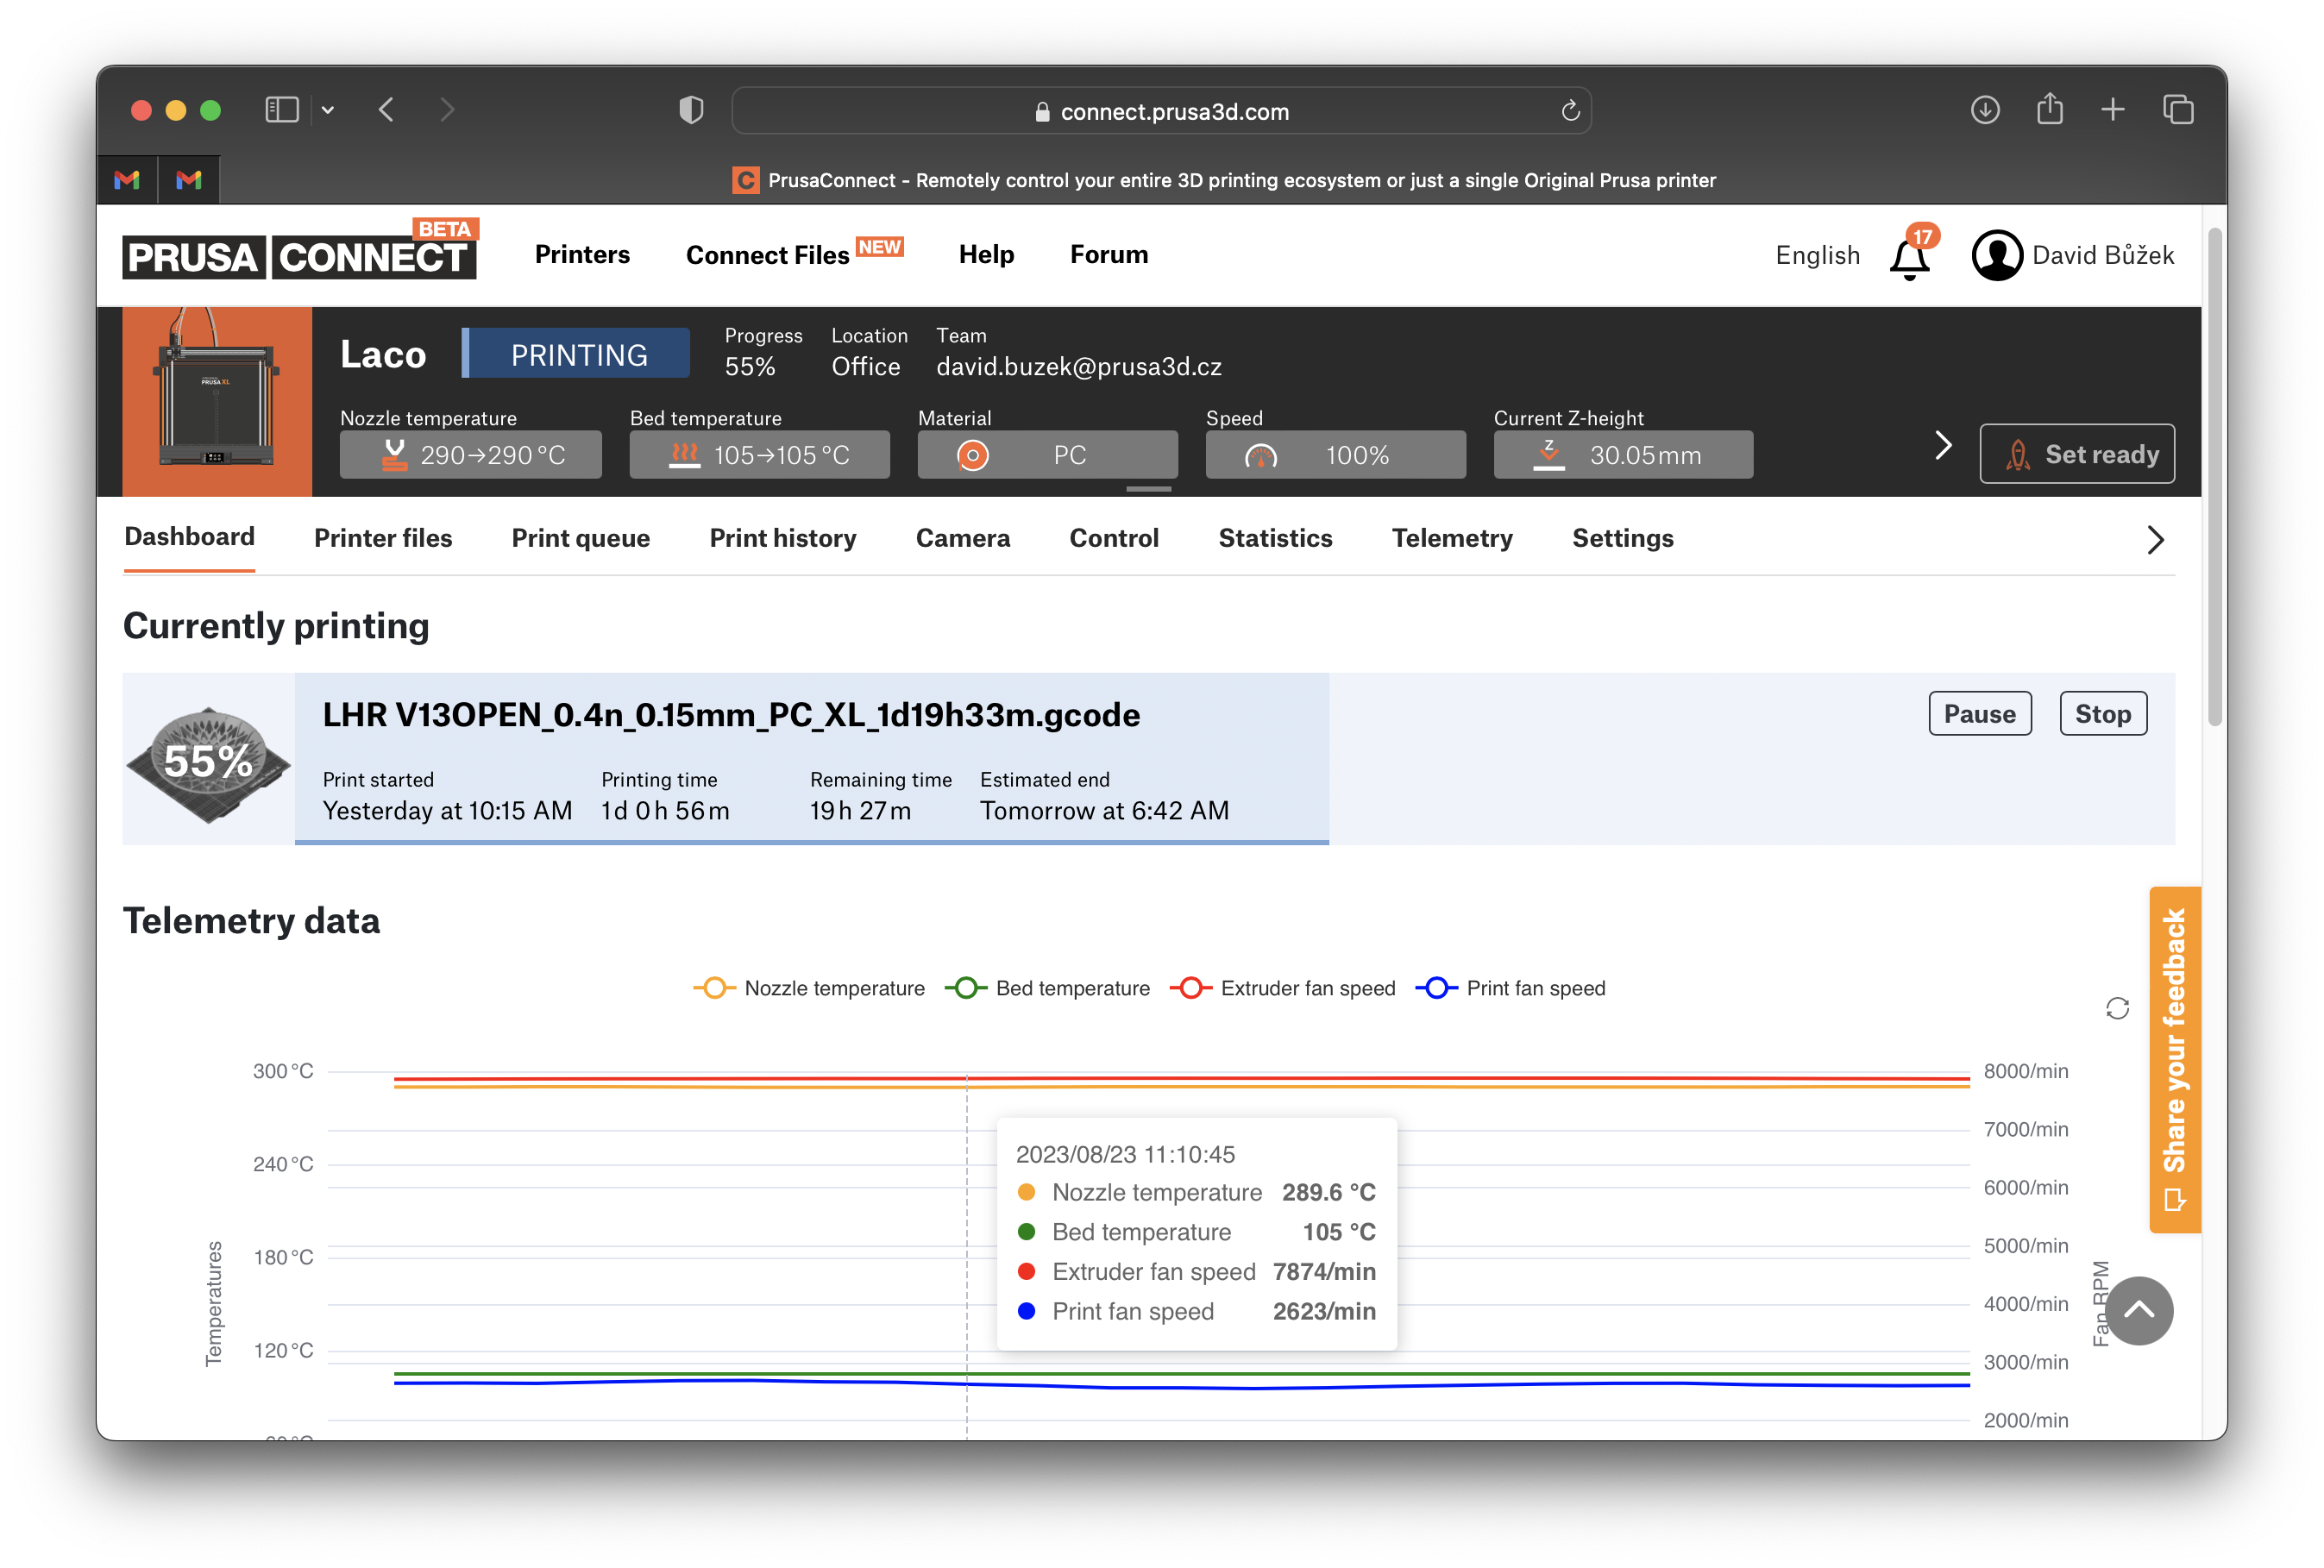
The Ethernet connection uses DHCP for automatic setup and works with PrusaConnect, enabling remote status checks and control from any device on the local network.

With the optional ESP Wi-Fi module, the MINI+ connects to Prusa Connect for full remote management. Users can monitor progress, manage jobs, upload files, and update firmware from any device, turning the printer into a networked tool accessible from anywhere.
The Original Prusa Mini+ includes PrusaSlicer, an open-source slicer for Windows, macOS, and Linux. It provides tested print profiles for all supported materials, removing the need for manual setup.
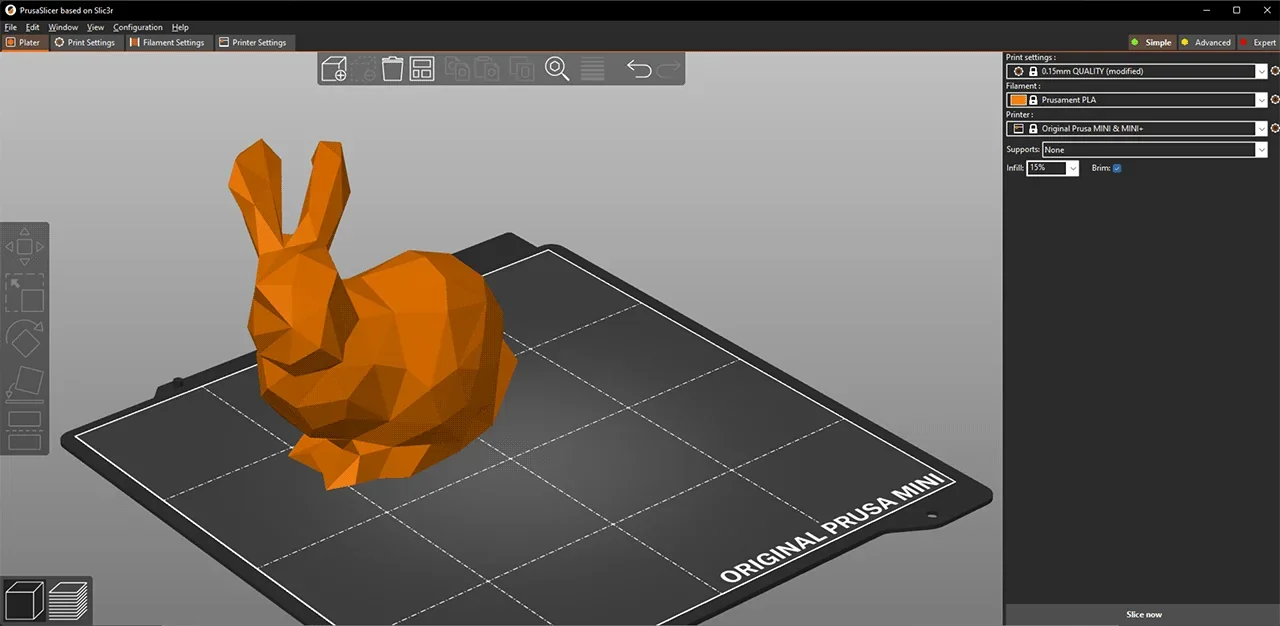
PrusaSlicer offers an intuitive interface with color previews, model repair, custom supports, and multi-material tools. While Cura and other slicers work, PrusaSlicer is optimized with pre-set profiles for the MINI+.
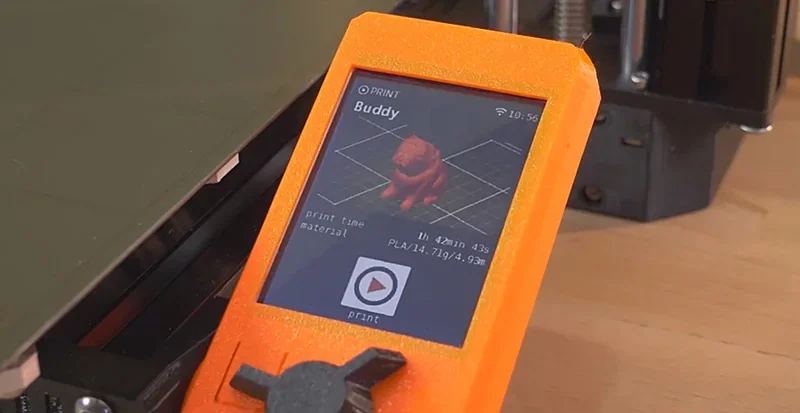
The Original Prusa Mini+ runs custom 32-bit firmware with Input Shaper and Pressure Advance for faster, higher-quality prints. Updates are done via USB or OTA through Prusa Connect, which also enables remote monitoring, file management, and control via web browser with the optional Wi-Fi module.
The MINI+ supports OctoPrint via third-party setups, adding features like time-lapse recording and advanced remote monitoring. Together with PrusaSlicer and Prusa Connect, these tools expand the printer into a versatile, fully controlled production device.
To set up PrusaSlicer for the MINI+, run the Configuration Wizard (Menu → Configuration → Configuration Wizard). Select Prusa FFF as the source, then choose Prusa MINI & MINI+ with the nozzle size (default 0.4 mm). Full guide: https://help.prusa3d.com/article/configuration-wizard_1754
The Original Prusa MINI+ features a compact, open-frame design built on rigid aluminum extrusions with dimensions of 380 × 330 × 380 mm and a 180 × 180 × 180 mm build volume, weighing approximately 4.5 kg, optimized for strength, easy maintenance, and a desktop footprint.
Physical Specs
Design Features

The single-arm design simplifies construction, while aluminum extrusions and 3D printed parts balance weight and function. Its compact size makes it ideal for printer farms.
The Original Prusa MINI+ uses a Cartesian system with the extruder on the X-axis and the bed moving in Y, reducing moving mass for better print quality.
Motion System
Motors
Input Shaper and Pressure Advance run natively, allowing faster prints without quality loss. A 3:1 geared Bowden extruder lightens the X-axis for greater stability.
The Prusa MINI+ runs quietly with Trinamic 2209 drivers and adjustable volume. Noise comes mainly from fans at higher speeds but is still lower than many competitors, including the MK3S.
Noise Characteristics
Operational Noise
Users note the MINI+ runs quietly, with fans as the main noise source. Noise rises during fast moves but stays manageable for desk-side use.
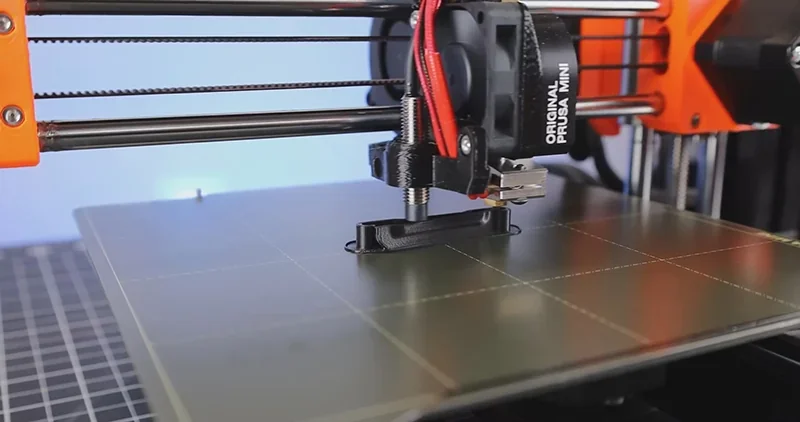
The MINI+ has a heated aluminum bed with magnetic spring steel sheets for easy print removal and reliable first layers.
Build Platform
Leveling & Calibration
Removable steel sheets let users flex the surface to release prints. The SuperPINDA probe, with temperature compensation, maps the bed for consistent first layers.
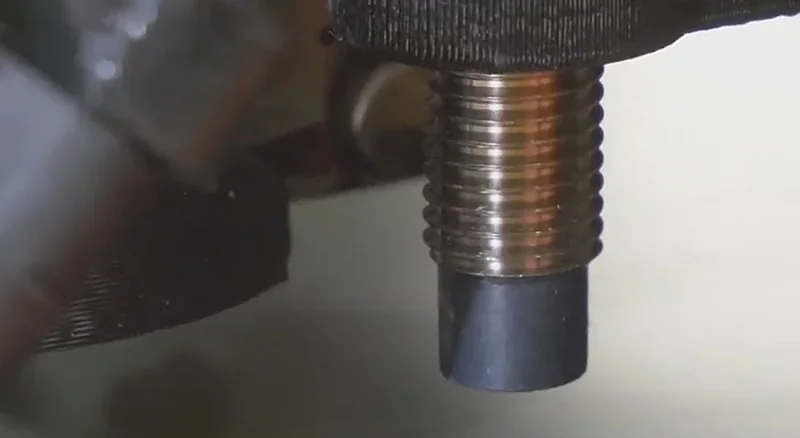
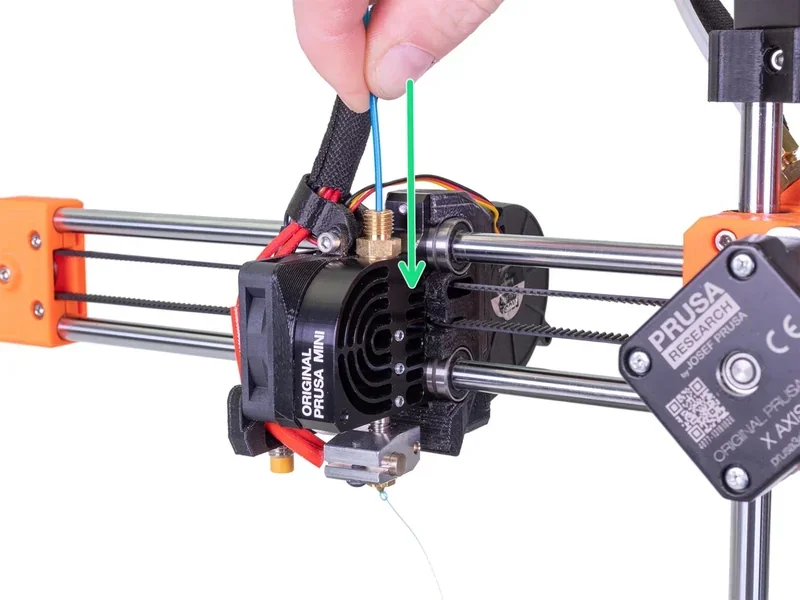
The MINI+ uses a Bowden extruder with 3:1 gearing for precise filament control and reduced X-axis weight.
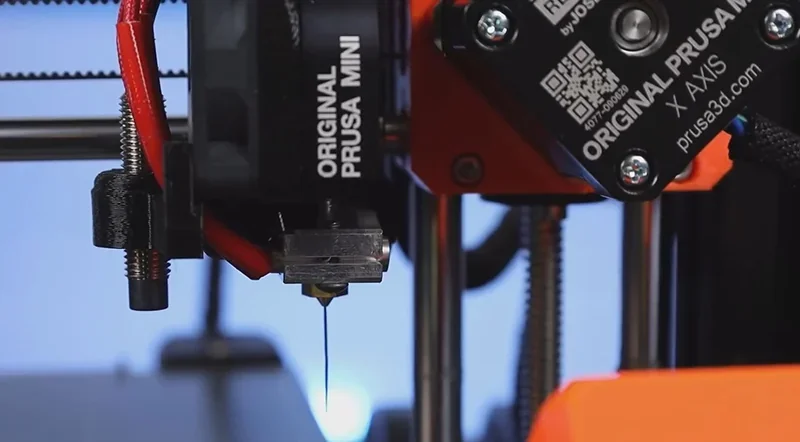
Extruder Specs
Hotend Components
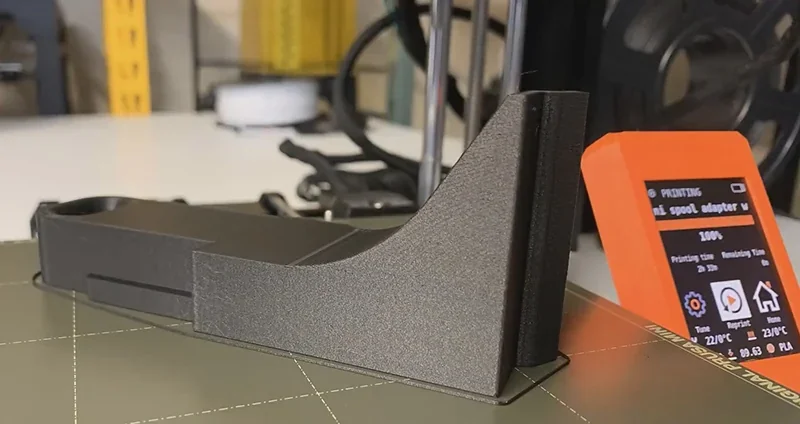
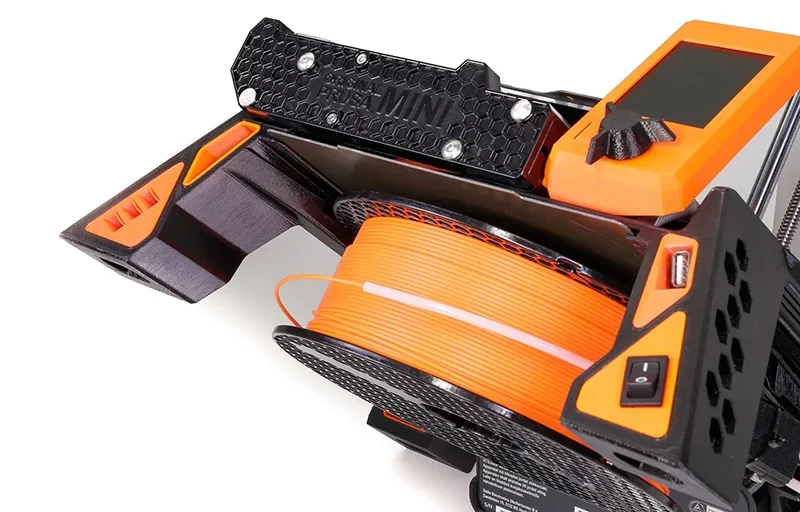
The Original Prusa MINI+ handles filament with a basic rear or side spool holder for 1 kg spools feeding through a 275 mm PTFE Bowden tube, with optional upgrades like a filament runout sensor and the MINI Base accessory for integrated spool and PSU storage.
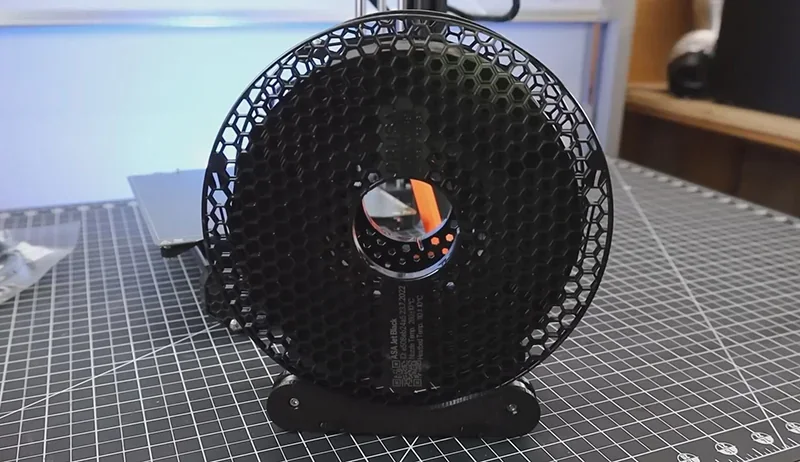
Standard Filament System
Optional Upgrades
Feeding Specs
The MINI Base accessory stores the spool and power supply under the printer, saving desk space by trading width for height.
The MINI+ runs on a custom 32-bit Buddy board with an ARM STM32F407 chipset, enabling advanced 3D printing features.
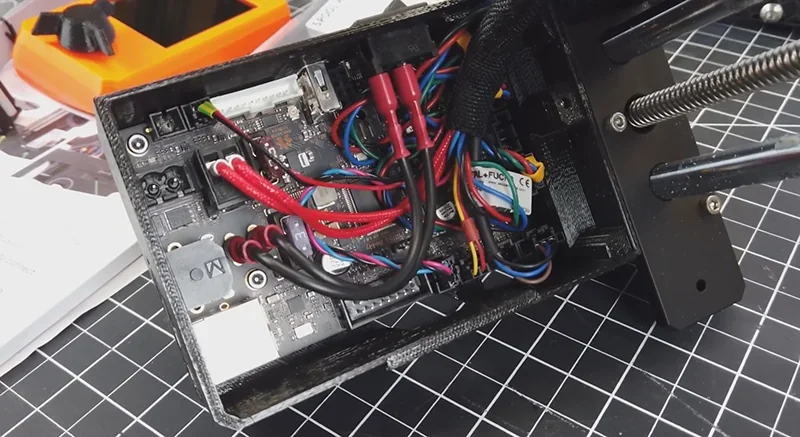
Mainboard Specs
Advanced Features
Control Interface
The Buddy board supports OTA firmware updates, web-based remote management, and advanced safety monitoring, while still allowing full offline use.
The MINI+ uses an external 24V, 150W power supply compatible with global voltages for safe, efficient operation.
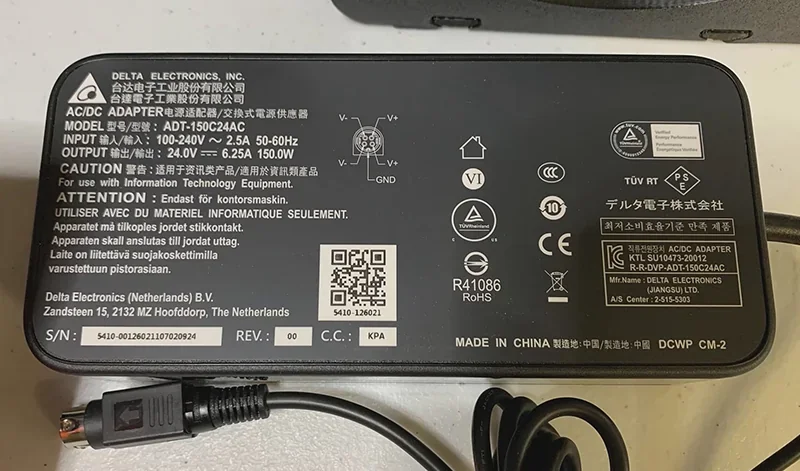
Power Supply Specs
Power Use
Safety & Reliability
The 150W PSU powers all functions, supporting a 100 °C bed and 280 °C hotend. Power use is low compared to household appliances and works well with UPS backup systems.
The Original Prusa MINI+ requires a compact footprint of 380 × 330 × 380 mm with about 35 × 45 cm of operational space and 45 cm height clearance, accommodating standard 1 kg spools behind or beside it, while accessories like the MINI Base optimize space by storing spools and the power supply underneath.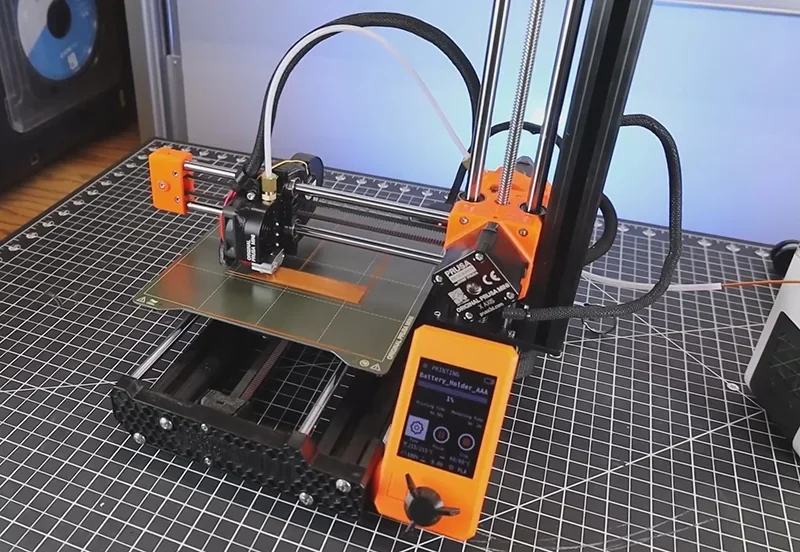
Footprint
Filament Storage
Clearance & Access
Environment
The MINI Base improves space efficiency by storing the spool and power supply under the printer, shifting horizontal space needs into vertical clearance without enlarging the footprint.

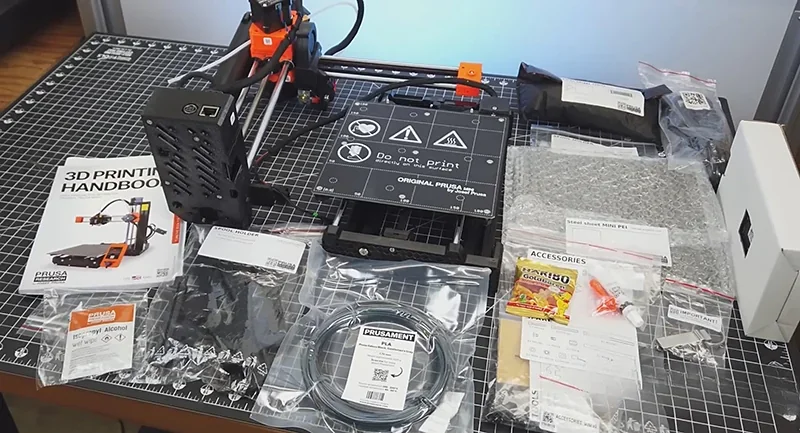
The MINI+ comes in two versions: a full kit for hands-on assembly with digital guides, or a semi-assembled model with access to Prusa’s beginner course. Both include the same parts and Smooth PEI sheet (textured and satin sold separately). Every unit is fully tested before shipping for reliable performance.
Note: Package contents are set by the manufacturer and may change without notice. Confirm included items with a sales representative before ordering.
The Original Prusa MINI+ offers a variety of official upgrades and accessories — including an enclosure for temperature and noise control, an ESP Wi-Fi module for remote management, filament sensor and hardened steel nozzle for advanced printing, plus textured and satin PEI sheets for material-specific adhesion — while also supporting popular third-party mods like the Bondtech IFS extruder and user-designed organization tools.
| Accessory | Description | Price (USD) | Image |
|---|---|---|---|
| Accessories for the Enclosure: Air Filtration, Lighting & Power | |||
| Advanced Filtration System for Original Prusa Enclosure | Side-mounted air filtration module for the Original Prusa Enclosure to reduce ultrafine particles (UFPs) and VOC-related odors. Includes housing, high-pressure blower, and a 2-in-1 filter (HEPA + active carbon granules); HEPA efficiency stated as 99.9%. Designed for easy filter replacement; estimated filter life ≥600 hours of runtime. Requires the Basic Board and PSU (sold separately) for power/control; includes blower o-ring, filter bracket, and vibration dampers. | $125 | 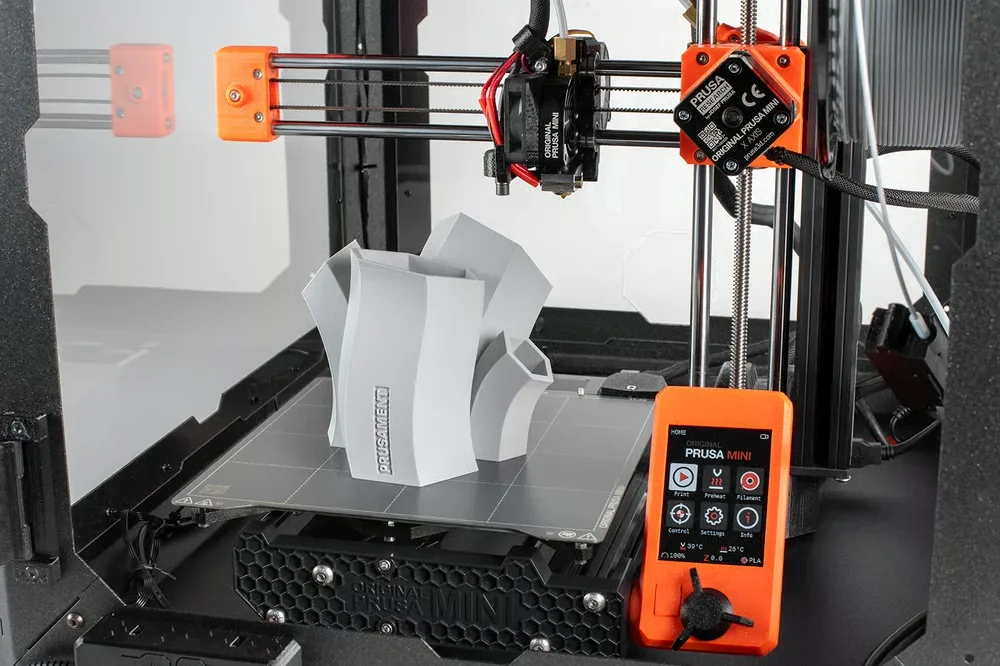 |
| HEPA filter | Replacement HEPA filter element for the Advanced Filtration System. Estimated filter life span is at least 600 hours of runtime (per description). | $49 | 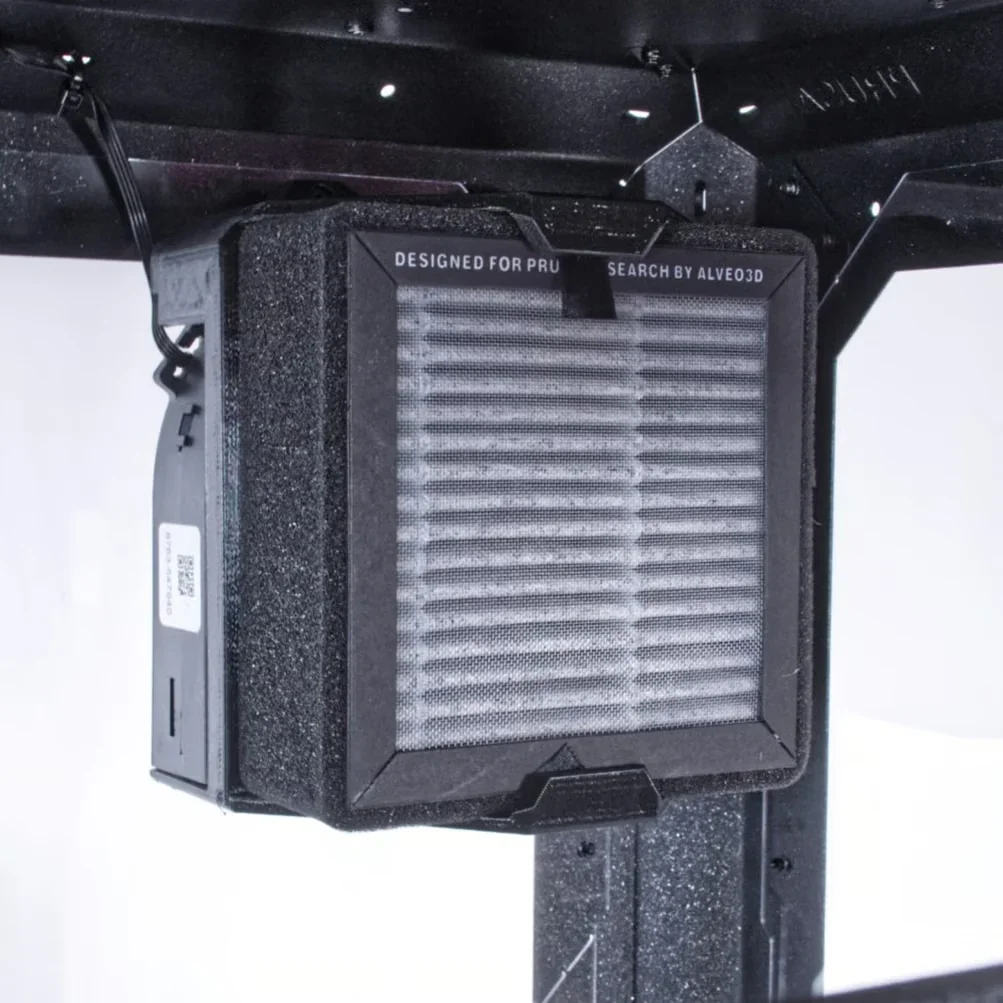 |
| Basic Board and PSU for Original Prusa Enclosure (for Filtration unit and LED) | Power/control electronics pack required for Original Prusa Enclosure add-ons (e.g., Advanced Filtration System and/or White LED Strip). One Basic Board + PSU can power both add-ons at the same time (both connect to a single board). Includes Enclosure Basic Board, power supply, power-cord Y-splitter, and Basic Board cover (PSU mount is not included per description). | $60 | 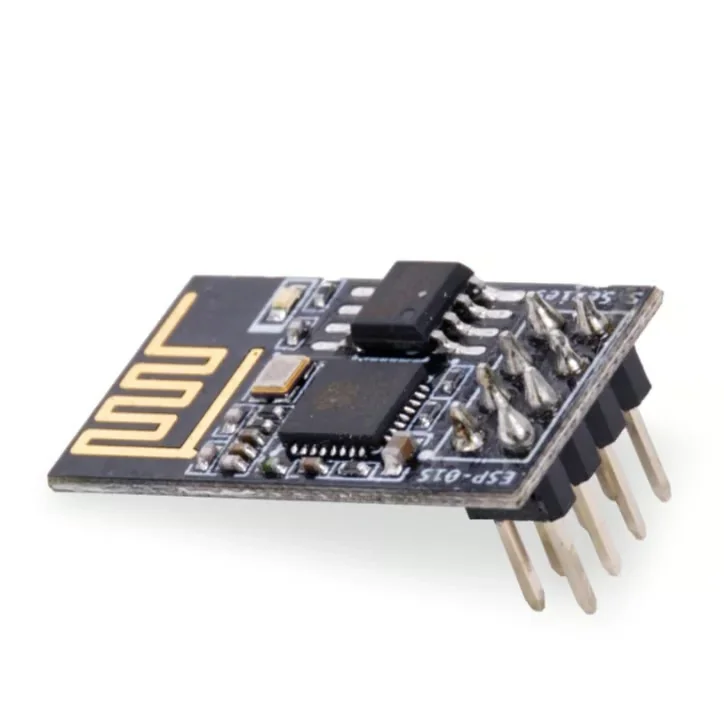 |
| White LED Strip for Original Prusa Enclosure | White LED lighting kit for the Original Prusa Enclosure to illuminate the printer and improve visibility during setup and monitoring. Requires Basic Board and PSU (sold separately) for power. Includes LED strip, LED cable, LED diffuser, and 3× mounting brackets. LEDs are ESD-sensitive (handle PCB only by the sides). | $60 | 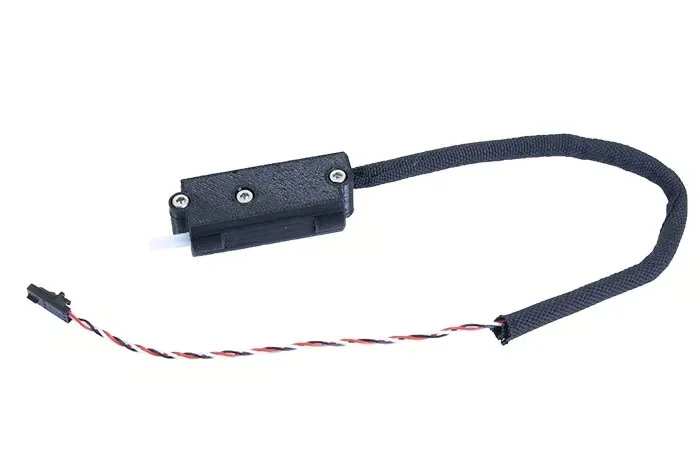 |
| Accessories for the Enclosure: Safety & Access Control | |||
| Fire Suppression System for Original Prusa MINI Enclosure | Self-contained tube-style automatic fire suppression for the Original Prusa MINI Enclosure (BlazeCut T Series, T033E). Activates automatically when exposed to high temperature; operates independently of any power supply. Uses a clean extinguishing medium and is described as harmless to people at the used concentration. Includes fire-suppression tube and 2× P-clamps. | $179 | 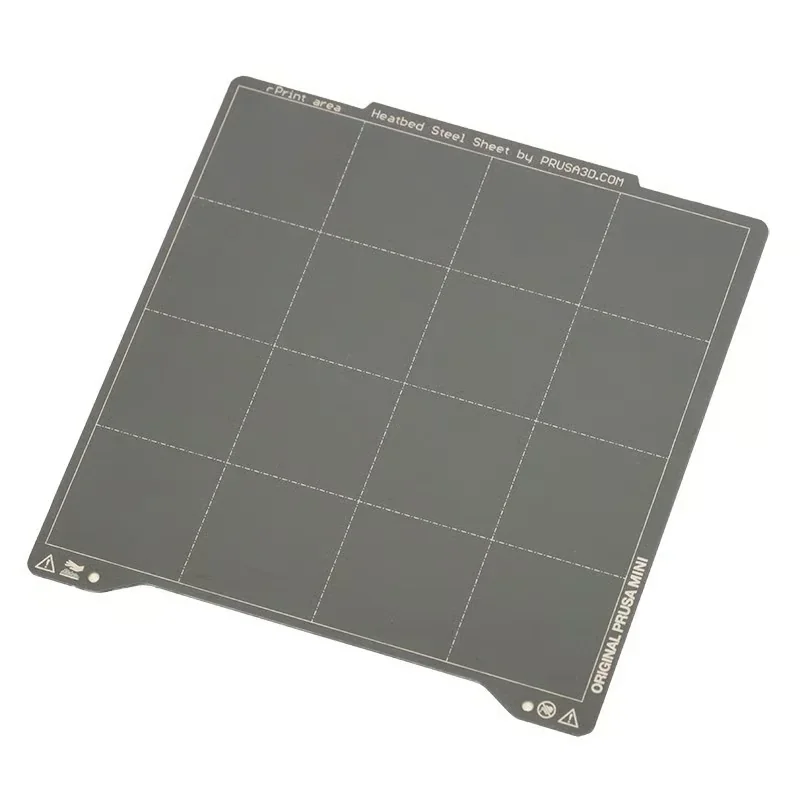 |
| Mechanical lock for Original Prusa MINI Enclosure | Door lock kit for the Original Prusa MINI Enclosure to prevent unsupervised access (useful for schools, labs, makerspaces, and shared environments). Includes lock, mechanical lock lever, 2× magnets (20×6×2 mm), lock wrench, and door handle. | $27 | 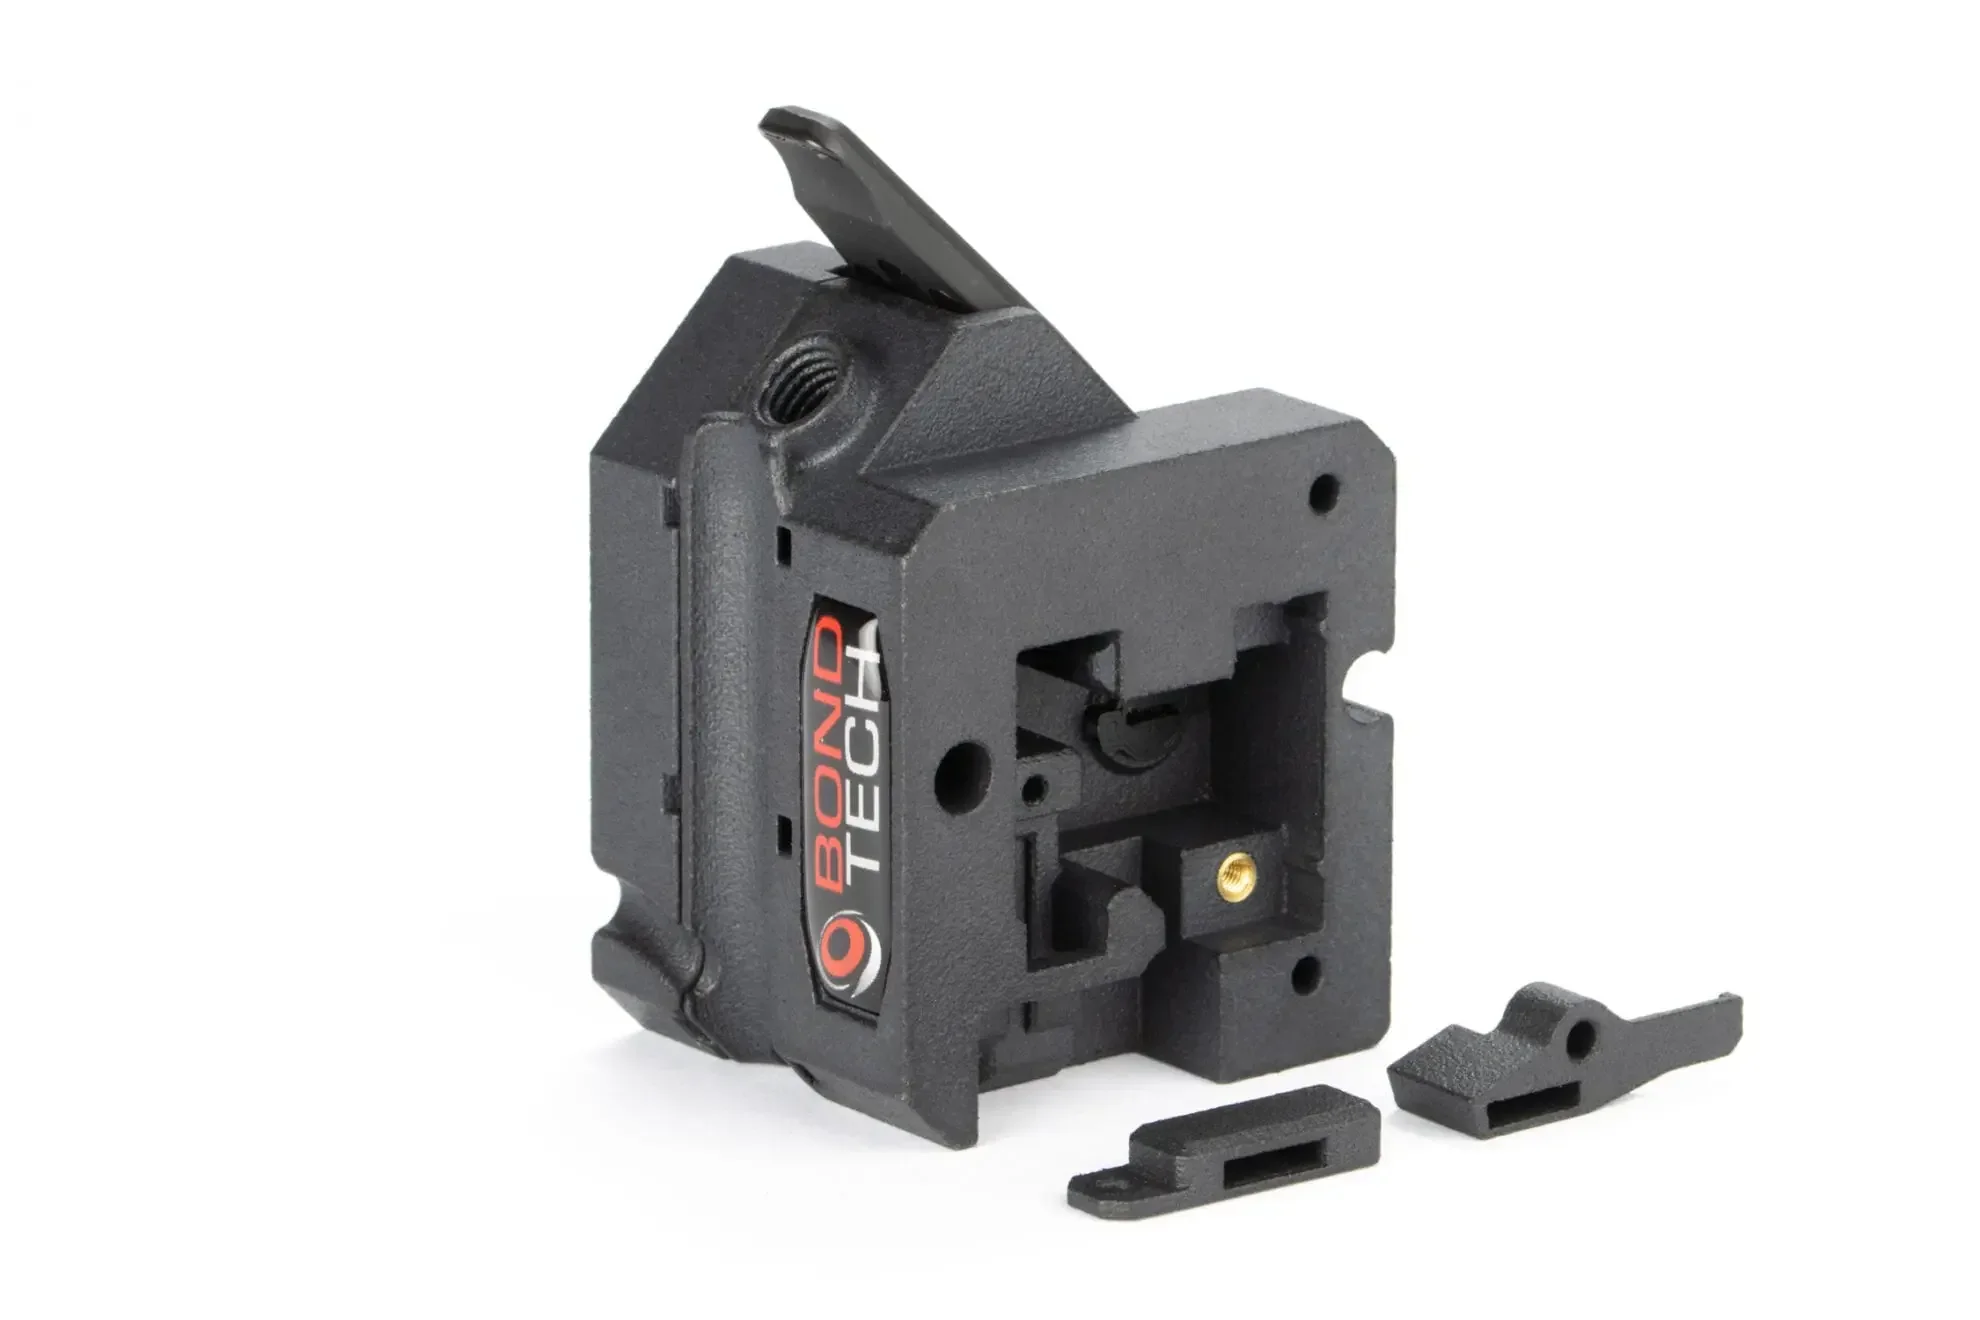 |
| Print Surface Sheets & Build Plate Surfaces | |||
| MINI Sheets | Bundle of three Original Prusa MINI print sheets in one package: MINI Satin Powder-coated Print Sheet, MINI Smooth PEI Print Sheet, and MINI Textured Powder-coated Print Sheet. Useful for switching surface finish and adhesion behavior based on the material and part geometry. | $145 | 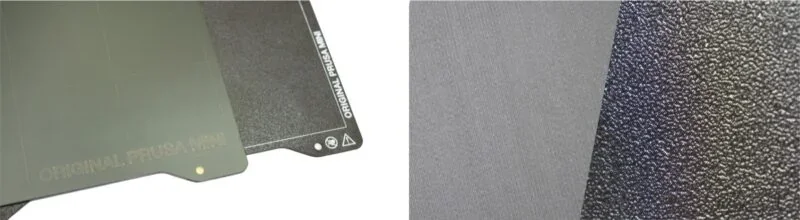 |
| MINI Smooth PEI Print Sheet | Magnetic spring-steel sheet with smooth, double-sided PEI surface for a smooth bottom finish and strong first-layer adhesion. Package includes spring-steel sheet plus 2× PEI-Ultem sheets already mounted. Attributes from description: ideal for PLA; good adhesion with most materials; fine details stick well. Material-specific notes: do not clean with IPA before printing PETG (release agent may be needed); apply glue stick when printing flexible materials. | $40 |  |
| MINI Satin Powder-coated Print Sheet | Powder-coated spring-steel print sheet with a lightly textured satin/matte finish (between smooth and textured surfaces). Optimized adhesion for PLA and PETG; compatible with many other filaments listed in the description (e.g., ABS, ASA, FlexFill 98A, Polycarbonate). Many materials can be printed without a separation layer (e.g., glue); for Polycarbonate, a glue-stick layer is recommended to prevent sheet damage. Maintenance note: never clean with acetone (can cause microfractures and surface deterioration). Usage notes from description: some ASA/PC prints may require a brim/skirt/shield; Live Z needs readjustment when switching sheets; do not use sharp metal tools to remove prints. | $57 | 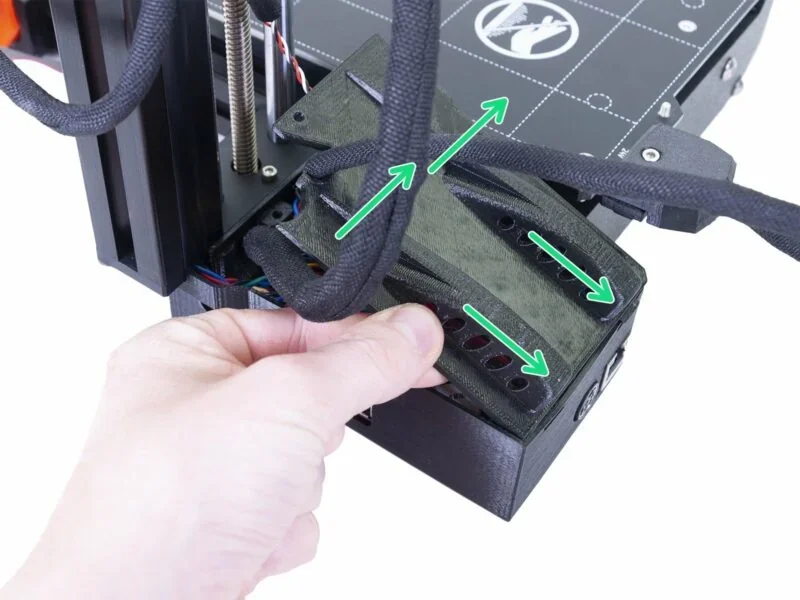 |
| MINI Textured Powder-coated Print Sheet | Double-sided textured PEI powder-coated spring-steel sheet that transfers a textured finish to the bottom of printed parts. Attributes from description: scratch-resistant; more forgiving Live Z setting; PETG typically does not require glue; prints often detach after the sheet cools down. PLA notes: small contact-area prints may need a brim; large footprints may warp. Maintenance note: never clean with acetone. Live Z should be adjusted when switching between textured and smooth sheets. | $50 |  |
| PEI-Ultem sheet | Replacement PEI-Ultem build-surface film with 3M 200MP adhesive backing (for refurbishing a print surface). Specifications: PEI-Ultem, 260 × 242 mm, thickness 175 µm. Note from description: tiny dots may appear and slightly affect bottom surface appearance but do not impact printing reliability. | $15 |  |
| Connectivity | |||
| Wi-Fi adapter ESP-01S for MINI+ and MK4 | Wireless module (ESP-01S) that adds Wi-Fi connectivity to compatible printers (MINI+ and MK4). Enables sending G-code files from a PC directly to the printer, starting/stopping prints, and monitoring printer status and temperatures after installation (latest firmware required per description). | $12 |  |
| Hotend & Nozzles | |||
| Prusa Nozzle V6 set | Brass V6 nozzle set for compatible Prusa hotends. Includes 4× 0.4 mm nozzles (standard), 1× 0.25 mm nozzle (finer details), and 1× 0.6 mm nozzle (higher flow / faster printing with thicker lines). | $60 |  |
| Maintenance & Spare Parts | |||
| Spare Parts Bundle (MINI+) | Replacement parts kit for Original Prusa MINI+ to reduce downtime and restore key subsystems (motion, cooling, extrusion, sensing). Includes: 7× LM8UU linear bearings; MINI+ fasteners bag; print fan (MK3/S/+, MINI/+); hotend fan (MINI/+); IR filament sensor + Buddy board cable; SuperPINDA probe; heatbed thermistor (MINI/+); 0.4 mm nozzle; Prusa lubricant applicator set (5 g); multiple PTFE tubes (4×2 mm ID/OD in several lengths incl. 275 mm, 150 mm, 43.4 mm, 15 mm); cleaning accessories; assembled hotend (MINI/+); 15 zip ties. | $275 | 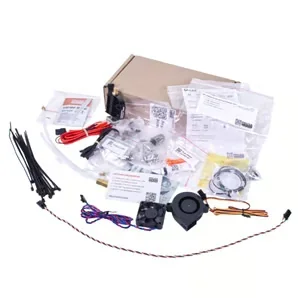 |
Daily/As-Needed Maintenance
Print Sheet Cleaning
Every 200 Hours of Operation
Every Few Hundred Hours
Fan System Cleaning

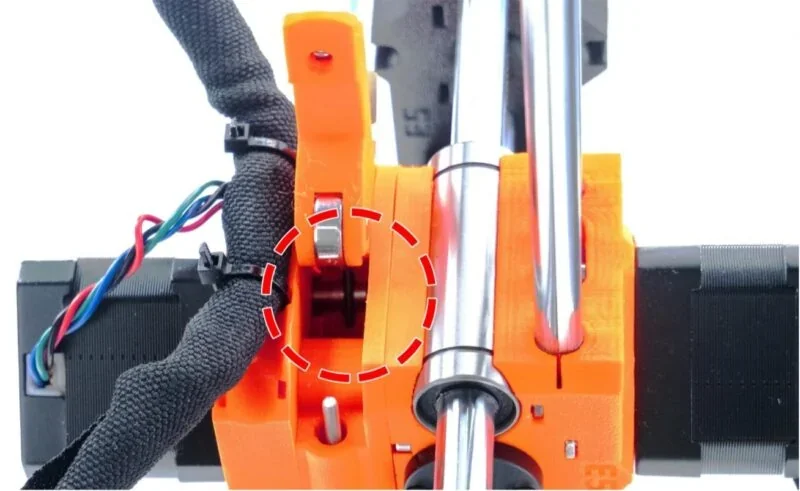
Extruder Gear Cleaning
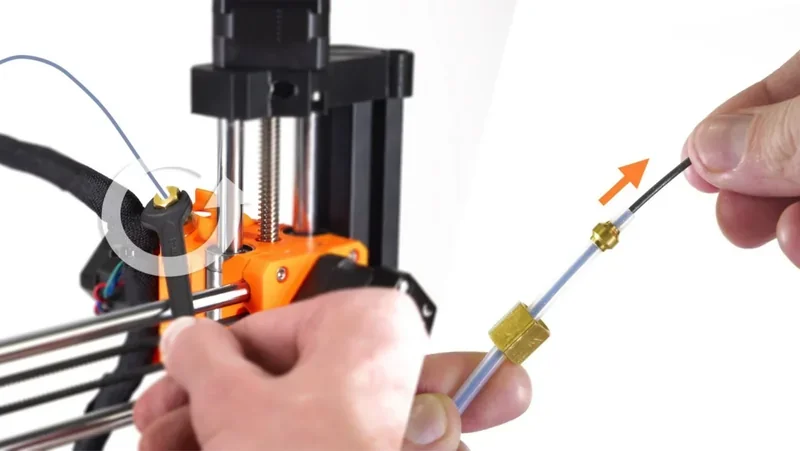
PTFE Tube Inspection and Cleaning
Periodic/Problem-Based Maintenance
Nozzle Maintenance
Firmware Updates
Storage Media Maintenance
All the required maintenance procedures with instructions are listed on the manufacturer's website: https://help.prusa3d.com/product/mini-2/printer-maintenance_247
The Prusa Mini+ warranty varies by region and customer type:
Prusa Research founded by Josef Prusa offers 24/7 after-sales support through live chat and email.
The Prusa Mini+ is supported by extensive resources. Prusa’s knowledge base (help.prusa3d.com) offers guides and troubleshooting. The official forum and YouTube channel provide community discussions, tutorials, and updates.
Dedicated support page: https://help.prusa3d.com/product/mini-2
Full warranty terms: https://help.prusa3d.com/article/warranty_2288
| Service Package | Description | Price (USD) |
|---|---|---|
| 3D Printing and Modeling for Beginners (MINI+) |
Introductory course for absolute beginners using the Original Prusa MINI+. Covers downloading 3D models, PrusaSlicer, basic 3D modeling, and some printer maintenance — useful for many 3D printers. |
Free ($0) |
| 3D Modeling in Autodesk Fusion | Beginner Autodesk Fusion course focused on 3D-printing workflows. Designed for hobbyists and small businesses, and a solid foundation for aspiring professionals. Includes four sample projects with tips and tricks to build skills, even if you already have some modeling experience. | $24.99 |
| Design Principles for 3D Printed Parts |
Course on designing parts for better 3D printing: easier to print, better-looking, stronger where needed, and with less post-processing. Tips apply to nearly any printer brand/model. Assumes you already have basic CAD skills in your chosen software; if you’re starting out and want to use the featured software, Prusa recommends the official Fusion 360 tutorials. |
$14.99 |
| 1-Year Warranty Extension | Extends the standard warranty and 24/7 support for one additional year, including free repairs and replacement parts for eligible items. | $109 |
The Prusa Mini+ base model costs $769.00 and includes a 32-bit motherboard, silent Trinamic drivers, and mesh bed leveling.

Update your browser to view this website correctly. Update my browser now


