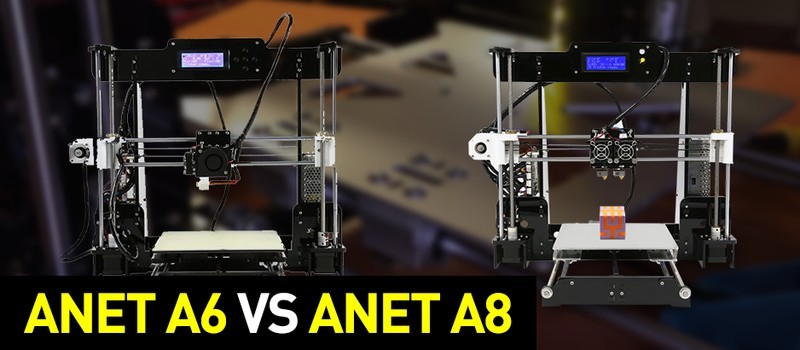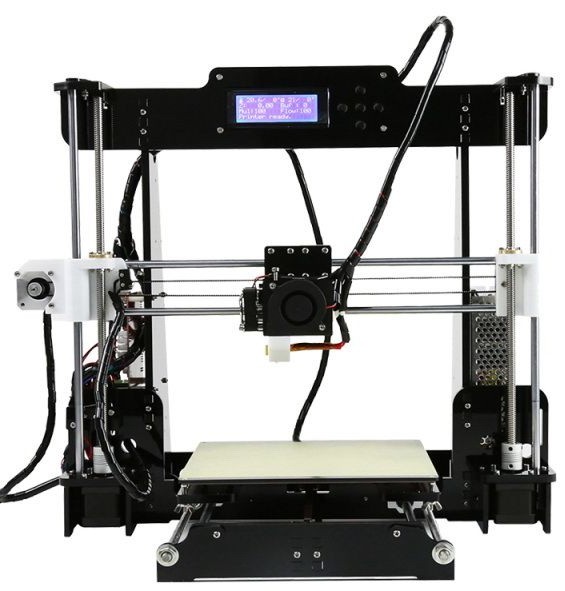
Anet A6 and Anet A8 are among the most popular DIY 3D printer kits. These are the two great alternatives to more expensive machines of the same league. Low price is not the only thing that attracts entry-level 3D printing enthusiasts to these devices. With the right configuration, they can print with a wide range of various materials. In addition, users are free to change and customize the design of these printers. For example, on Thingiverse you can find dozens of 3D models for upgrade.
In this comparative review we will talk about the differences and similarities between the two machines, so that our readers can decide, which model is more suitable to meet their requirements.
To begin with, let us compare the specifications of both machines:
| Model | A8 | A6 |
|---|---|---|
| View |  |
 |
| LCD | 2004 |
12864 |
| Screen | 5 keys | Knob |
| Reset key | On the mainboard | On the screen & mainboard |
| Mainboard | Anet v1.0 | Anet v2.0 |
| Exruder | Vertical | Parallel |
| Hotbed | MK2B | 3mm aluminium PCB |
| Structure | Prusa i3 | Combine i3 with Industrial |
| Print size | 220x220x240 mm | 220x220x250 mm |
| TF card | 8 Gb | 16 Gb |
| Auto leveling | Optional | Optional |
Both printers come fully disassembled. The parts are neatly sorted in multiple compartments of the box. There’s no worry about them getting damaged during delivery.

The assembly does not pose any problems. Don’t forget to apply some thread locker to the screws to prevent them from loosening. Both A6 and A8 come with a user manual. Spending some time to read it can prevent you from making mistakes in the future.

It’s highly unlikely to have trouble with inserting shafts or bearings when dealing with both models. However, sometimes you may find the fit too tight. In this case, you may use sandpaper.
The Anet A6 features an all metal Y carriage plate and 4 SC8UU bearings instead of 3. The owners of the Anet A8 models have to make this upgrade on their own, since the acrylic carriage plate can be deformed and bent due to prolonged high temperature processes. Moreover, the 3 bearings of the carriage plate can easily loosen.

It should also be noted that the Anet A6 features a new hot bed adjustment pattern, since the base of the A6 carriage has a screw thread. The A8 model allows to adjust the hotbed with wing nuts, but in the upgraded version you have to use a screwdriver to level the hot bed, the wing nuts serve only to fixate the position.
Thanks to this design the hot bed will not become loose due to vibration.

The hotbed itself was also changed in the newer A6. The older version comes with a separate hotbed and an aluminum sheet. In the A6 kit they come together as a single part. It takes about 10 minutes for the A6 to warm up from room temperature to 212 °F. For comparison, it takes 15-20 minutes for the Anet A8 to warm up to the same level.

The Anet A6 comes with a V2.0 mainboard. However, at first glance it may seem that it is completely identical to that of the A8 version. Don’t worry, although the mainboards may seem identical, their firmware is completely different. Therefore, your V2.0 mainboard will not work with Anet A8, since it is more advanced.

The A8 version features a standard 4 line display and 5 navigation buttons, while the A6 has a graphic display with a navigation knob and a small speaker that beeps notifying you when the print is done. Although a navigation knob is a cool feature, it takes some time getting used to. Each click moves several values and it is quite difficult to navigate the menu when you’re just getting started. The reset button is useful at the initial stages of the assembly. If you did something wrong you can push this button to avoid long-lasting damage.

The Anet A6 has a superior horizontal X axis design, not vertical as the Anet A8. This design feels more stable and balanced. Unlike the older version, the A6 has two wide LM8LUU bearings instead of three SC8UUs.

Anet A8 users face a lot of problems due to vibration. The frame is not very stable, since it consists of only two horizontal pieces of Plexiglass. Such a low stability causes artifacts in printed models. These prints have to undergo way more post-processing than usual. You can also build the same model several times hoping to get a better print, which isn't really cost-effective. The A6, however, features a box-shaped sturdy frame that allows for a higher stability and better quality.

Although the A8 3D printer is much bigger in size, the two machines have roughly the same build volume. The A6 is 18.8 x 15.7 x 15.7 inches in size and the A8 is 19.6 x 15.7 x 17.7 inches. The large A8 may be better for beginners, since its parts are generally larger and easier to assemble. However, the A6 takes up way less space which makes it easier to work with.

The Anet A6 model is not just a direct improvement of the A8, it’s a correction of errors.
Anet A8 is more popular and has more printable upgrades and various mods. If you want to have fun without performing any serious paint jobs - this is your choice. However, the Anet A6 allows for printing some really awesome things without having to deal with numerous errors. Both printers have large online communities always willing to help a new user.
Both machines are incredible and regardless of what you decide to buy, you can’t go wrong.
Update your browser to view this website correctly. Update my browser now
Write a comment