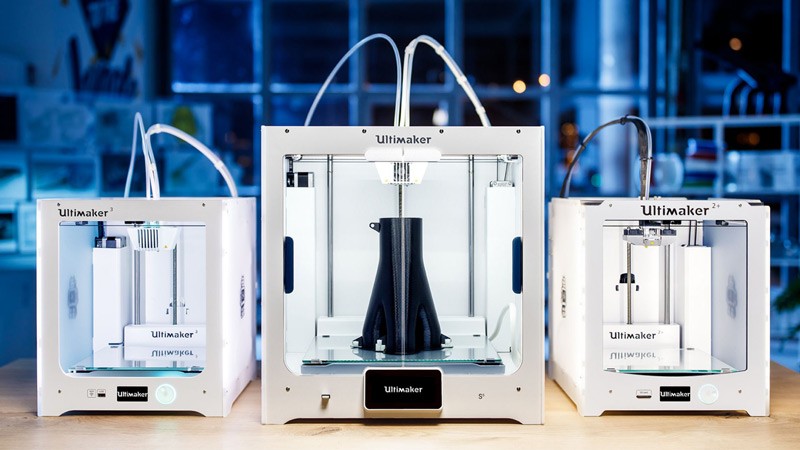
Choosing your first 3D printer is tough.
But here’s the good news:
It turns out you can become a 3D printing PRO in just 6 chapters.
Here’s what one of our clients told us:
“I'm so glad I found this guide. I used to rely on Best 3D printers style guides, but I had no confidence these 3D printers were right for my projects. Now I fully understand the pros and cons of the chosen Ultimaker 2 and just built my third engine prototype. Thank you so much!”
We hope you’ll get a similar result.
You should start by determining what projects you want to complete with your 3D printer. Of course, it is enticing to choose a device that offers as many functions and possibilities as possible. However, such machines don’t come cheap.
And that’s why you shouldn’t be dismissive when it comes to narrowing down your choices to specific printers, preferable for solving your tasks.
Here's a useful analogy:
In my youth days, I wanted a computer that would have the most powerful CPU, the best graphics card, the maximum number of memory slots, plenty of PCI ports for all possible peripherals, and other advanced computer stuff.
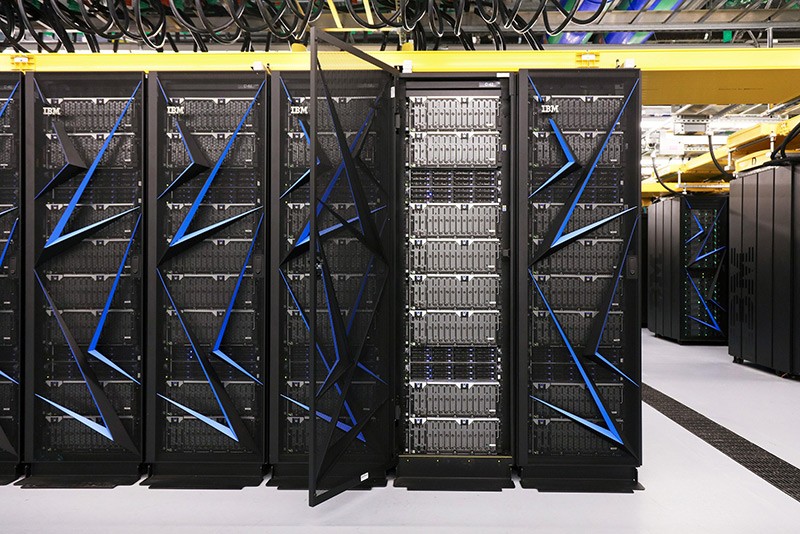
In 2019, IBM's Summit is the world's smartest AI machine. It cost $200 million to build. Credit: Wired.
But what in reality?
The real life experience taught me that having sufficient configuration capable of running office software and a handful of video games is pretty much enough to make me happy. And this costs much less than top-notch configuration.
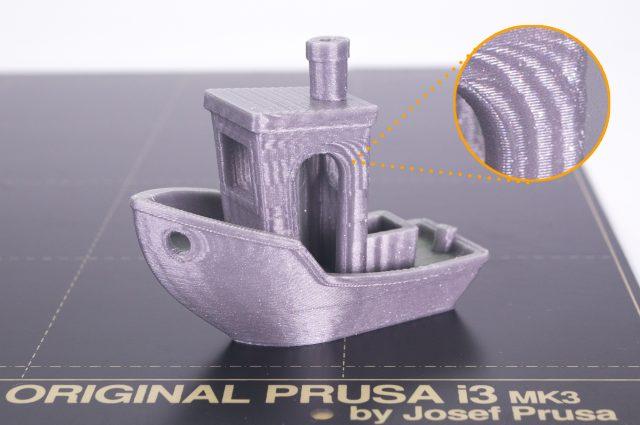
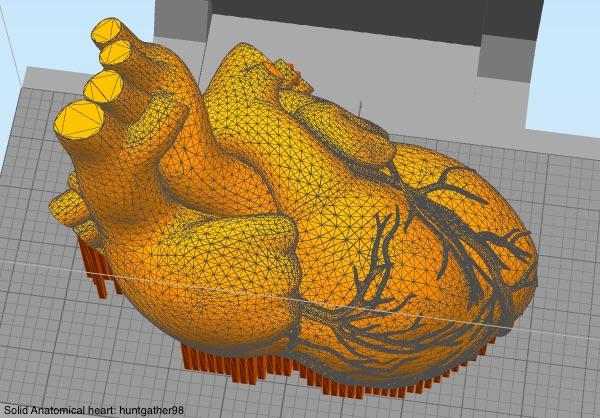
Same thing with 3D printers. You may dream of the largest print area possible. But in fact, a build volume up to 300 x 300 x 300 mm is more than enough to solve the majority of 3D printing tasks. For example, the following Iron Man suit was created using Creality Ender 3 which has a maximum build volume of 220 x 220 x 250 mm.
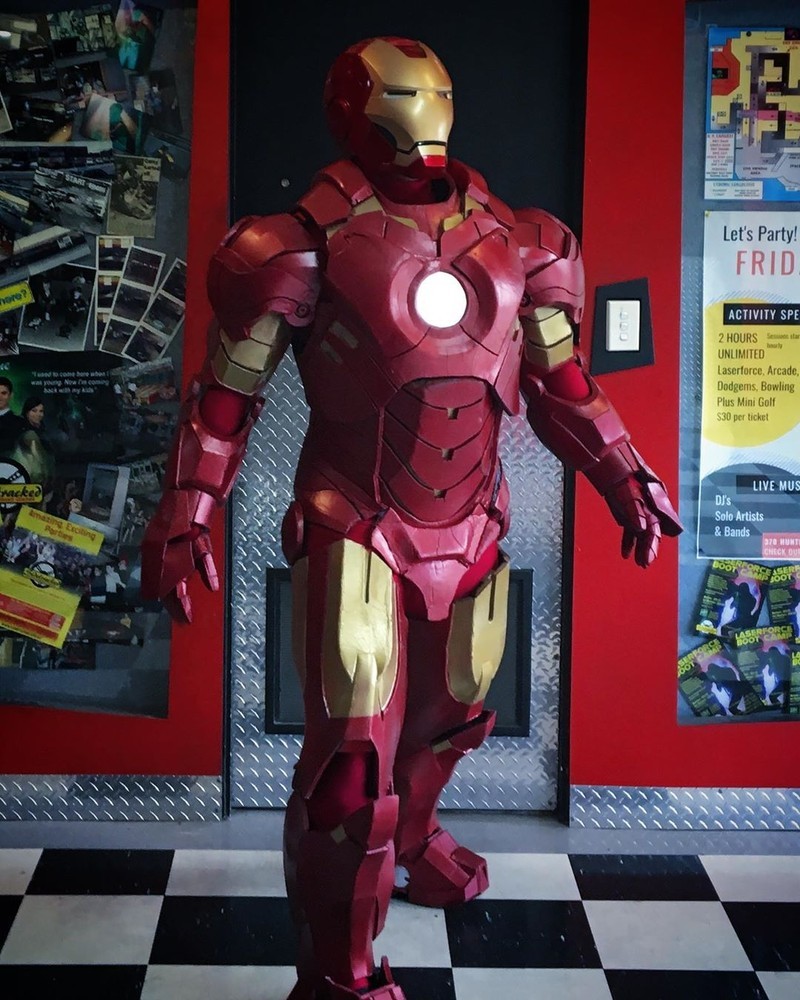
Credit: @melbourne_ironman / Instagram
Printing models in parts and then assembling them together can take you far in 3D printing. Physicist Sterling Backus used the same approach to build a Lamborghini.
The same goes for dual-extruder 3D printer. Surely, printing with multiple filaments offers great opportunities, but printing with two materials at once is generally very slow and adds extra cost. If you’re not planning to 3D print complex expensive objects on a regular basis, it may not be reasonable to buy one.
Ask yourself: Is it for hobby or professional use?
If you have a lot of free time and just want to have fun and experiment with the machine, learn its potential, figure out how it works, the quality of parts plays less importance. In that case cheap DIY kits might be a good option for you. The journey might be rough, but you'll learn all the ins and outs of the 3D printing world.
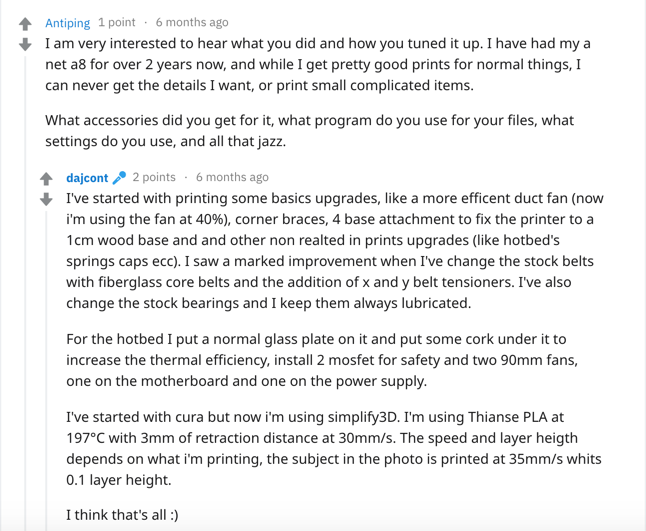
Anet A8 is one of such machines. Although it costs less than $200, you'll be able to make quality prints:
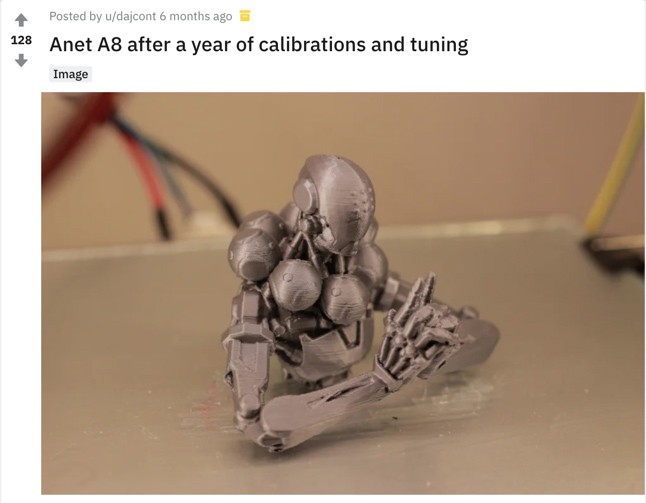
And write Yoda-level posts like the one below:
If you're not the tinkering kind, consider pre-assemsbled or ready-to-work machines.
If you are going to use a 3D printer for professional purposes, the first thing to consider is the quality of printing as well as reliability of the equipment. In this case, it’s all about ready-to-work machines, which you just need to switch on to start printing.
Semi-assembled or DIY kits are not very good for professional 3D printing because they take a lot of time to assemble and adjust (as you saw in the example above). In contrast, machines like Raise3D, Fusion3, Flashforge and many others are built to work around the clock. For example, Australian lighting firm, LimeLite, has a farm of 30 3D printers, producing roughly 20 lamps per day.
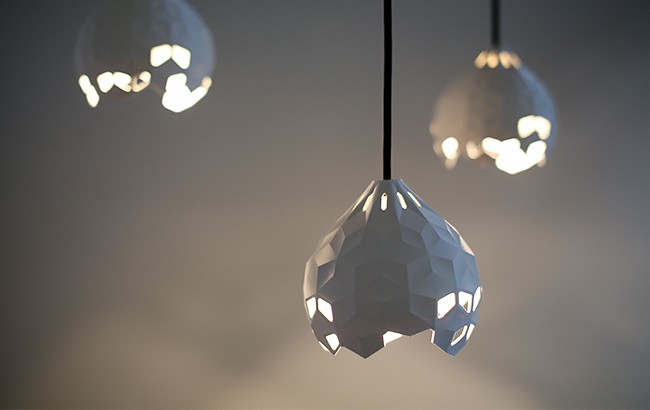
Credit: Zortrax
It does not mean that you need to buy the most expensive 3D printer! It only means that you should make a well-considered decision.
So, it is essential to determine the exact tasks you want your machine to perform.
Here are a few examples:
The history of FDM 3D printers began in 2004 when Darwin, the first FDM machine, was created as a part of the RepRap project.
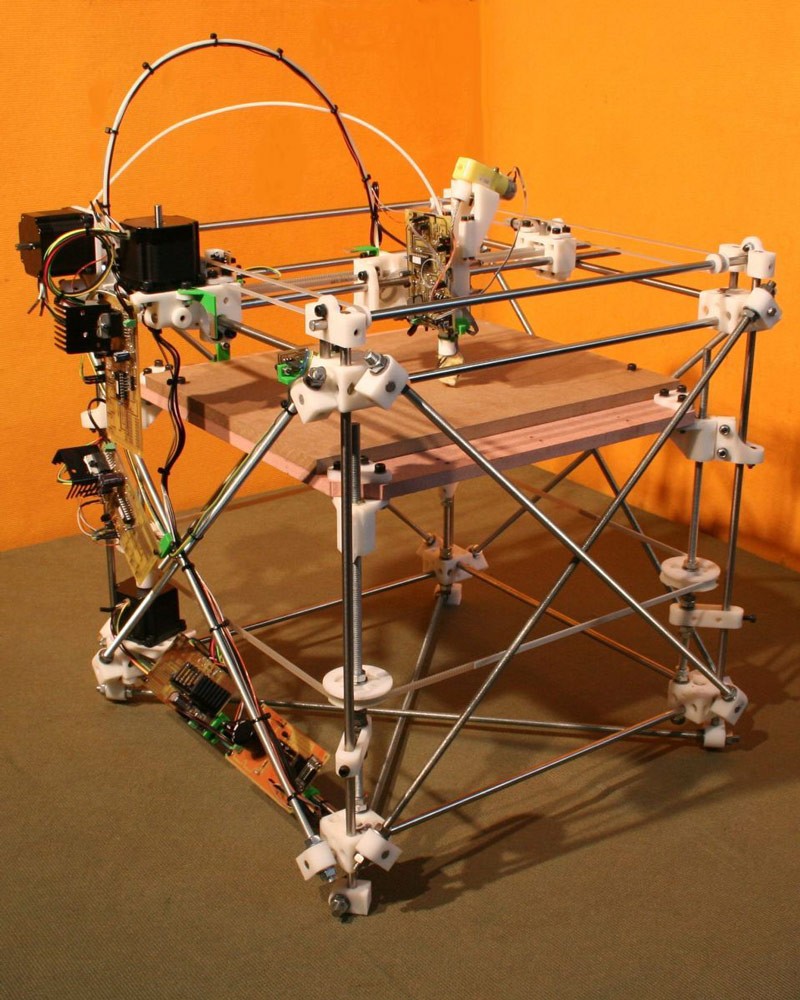
The first 3D printer had the XY-Head Z-Bed design. The extruder of this model sits on the X-axis and Y-axis, while the print bed moves along the Z-axis (up and down). The chief shortcoming of the printer was insufficient rigidity of the construction and too intricate configuration.
In the photo above you can see that the first printer was basically a complex construction consisting mostly of rods and plastic corner brackets and fixators.
The drive mechanism of the print bed was also quite a bulky construction. The RepRap project designers realized that it was a major downside and started the development of a new version of the printer that would have less drawbacks. We will tell you about that a bit later.
However, the design with the platform moving vertically and the extruder sitting on the X and Y axes proved to be the most promising.
As of today, most of the industrially manufactured 3D printers are built precisely according to this design. The unstable construction was replaced with a rigid frame, which allowed to fully unlock the potential of this scheme.
The extruder mechanisms can vary. However, the design remains the same - the extruder is designed to move along the X and Y axes and the print bed is travelling up and down (the Z-axis).
This design was chosen because it allows to easily implement a rigid frame. Most industrially manufactured models are now built this way:
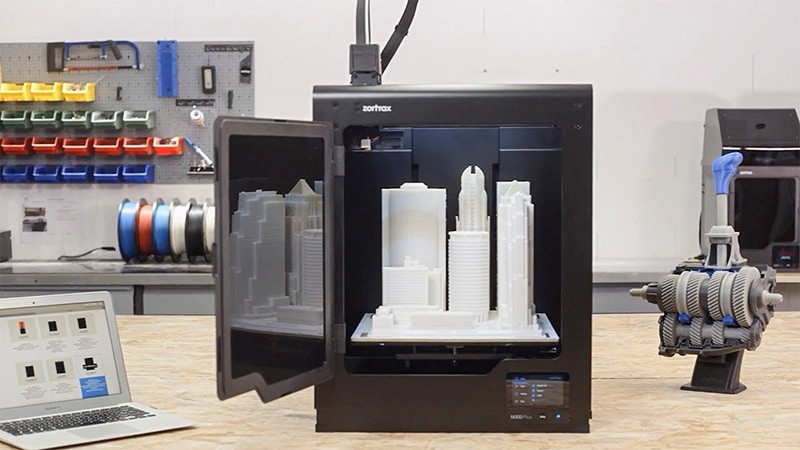
Credit: Zortrax
Today, 3D printers feature frames made of plywood or metal. Some of the recent designs feature machines with metal frames of maximum rigidity and different decorative panels. This helps to reduce vibration and increase the accuracy of extruder positioning. Accuracy is one of the main factors of high quality 3D printing.
Another advantage of such a design is that it is more suitable for including an enclosed chamber. The enclosed casing allows to print with plastics that have a tendency to shrink. For example, ABS is a rather capricious material.

Today, there exist types of extruder movements’ kinematics. And they all have their pros and cons.
Kinematics used in Ultimaker 3D printers is considered by many the fastest and most accurate today. But its great potential is revealed only when it’s equipped with a Bowden extruder that also has certain weaknesses.
Credit: Ultimaker
Makerbot 3D printer built according to H-Bot kinematics
However, it turned out that the most important thing in a 3D printer was not the extruder kinematics but the quality of its design. For example, I saw a 3D printer with H-Bot kinematics, it had an awful print quality and a very slow print speed! It completely debunks the myth about advantages of such a design! At the same time, there are 3D printers with very simple kinematics, but they print very well and at quite a high speed.
XY-Head Z-Bed kinematics is the most popular nowadays and for a good reason.
Let’s return to the RepRap project. In order to increase the construction rigidity and simplify the assembly process, they created another version of their 3D printer and called it Mendel. Attempts to increase the firmness of the construction and get rid of Darwin’s drawbacks, however, led to a much worse result.
Mendel 90 3D Printer. Credit: Nick Miller.
The new 3D printer was constructed based on the XZ-Head Y-Bed design. In such a scheme, an extruder moves along the X-axis and travels up and down, while the print bed moves along the Y-axis.
This scheme has several inherent drawbacks. One of them is the difficulty of installing an enclosed chamber. Usually, these printers featured hand-crafted casings. Because of its bulkiness, an enclosed chamber in such a design wasn’t very widespread.
The second drawback is that the print speed with such kinematics is much lower compared to the XY-Head Z-Bed design because of the necessity to move the large platform.
And the most important thing is that this design is more subjected to wobbling. It occurs because of bearings and rods misalignment along the Z-axis, which makes the extruder slant and wobble.
The first iteration, Mendel 3D printer, couldn’t even exceed Darwin’s frame rigidity. However, problems with assembly and setup only became more numerous. The design featured only one mechanism for moving the Z-axis and it was strapped with belts. This lead to a very complicated adjustment and configuration.
Nevertheless, the XZ-Head Y-Bed design is still popular.
Why did this happen?
A Czech inventor Josef Prusa modified this design and shifted away from the RepRap’s legacy. He created a rigid frame upon which other parts were installed. He also equipped the Z-axis with two bearings for increased stability and simple configuration.
Here is what he got:

This design has the same limitations:
But thanks to its low cost and simple design, users are ready to put up with the inherent disadvantages of the kinematics. For most users, the price difference outweighs the downsides, making this design among the most popular nowadays.

The modern version of the Prusa 3D Printer. Credit: Prusa Research.
X-Head YZ-Bed is yet another kinematics design featured in 3D printers. Its popularity is plummeting, since it doesn’t have any prominent advantages over other versions. In fact, X-Head YZ-Bed is very similar to the previous design we talked about; however, one difference is apparent. In the X-Head YZ-Bed design, it is not the extruder that travels up and down, but the print bed itself. Along with moving vertically, the bed can also shift along the Y-axis.
This scheme originates from milling machines. It is widely used to simplify the design by keeping the movement of the milling cutter to a minimum. This is why milling devices generally have moving work platforms. Milling speeds are fairly slow, so it doesn’t matter how fast the platform moves. 3D printers don’t have spindles, and there is no necessity to process solid materials. However, having a good printing speed is crucial. This is where problems with the X-Head YZ-Bed design arise.
This design has all the disadvantages characteristic of Prusa kinematics not to mention its own weaknesses.
The print bed moving vertically and traveling up-and-down does not contribute to the stability of a printing process. Very few 3D printers are produced with this design.
For example, such printers are produced by Felix, a Dutch manufacturer. Though their design is not very advanced, these machines demonstrate decent quality of printing and are quite compact.
Small dimensions is the answer why these 3D printers print so well. With small sizes, it is possible to mitigate the disadvantages of the X-Head YZ-Bed scheme and create a working construction. However, the bigger the size and speed of such a printer, the lower the quality.
Therefore, the design works well only in small 3D printers. That is why today, there are only few manufacturers that try to develop this scheme further.
The next scheme is a blast from the past. It’s a 3D printer with the XY-Bed Z-Head scheme. In other words, its print bed moves horizontally and the extruder travels up and down.
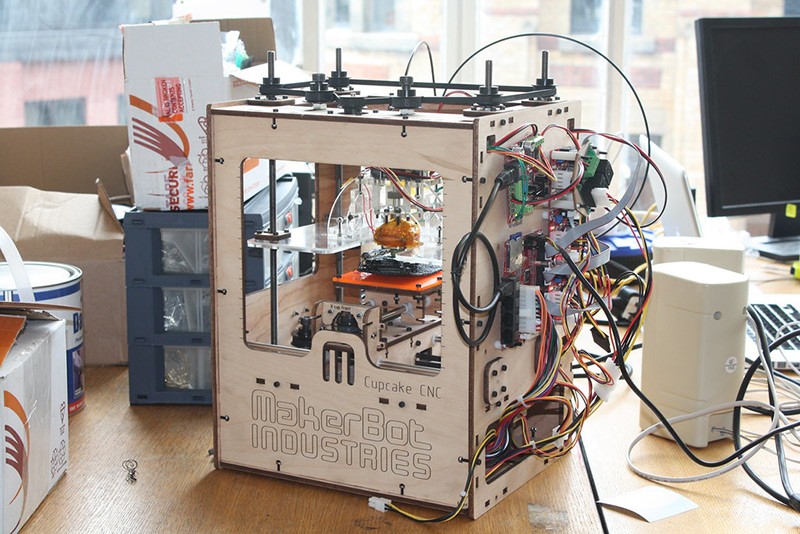
In the photo above, you can see one of the first Makerbot 3D printers called Cupcake. This design of 3D printer kinematics is directly related to that of milling machines. Milling is an industry where the XY-Bed Z-Head kinematics is widely adopted due to its effectiveness. However, this doesn’t really do anything for 3D printers. The main disadvantages of the XY-Bed Z-Head design include the excessive outer dimensions that don’t match the small build volume, not to mention other critical shortcomings characteristic of kinematics with a moving print bed.
Currently, 3D printers with the XY-Bed Z-Head kinematics are out of production, since they don’t have any advantages over other designs.
Credit: All3DP.
Delta was introduced to the market in 2013.
Delta was promoted as a revolutionary design that would replace all others. However, it didn’t live up to the expectations.
Let’s talk about its main strength first.
As for weaknesses,
Although, Delta failed to dominate the market, these printers still managed to find their own niche. They are used in many professional settings where large printing areas are required.
Here is an electric guitar printed with the Rostock Max Delta 3D Printer.
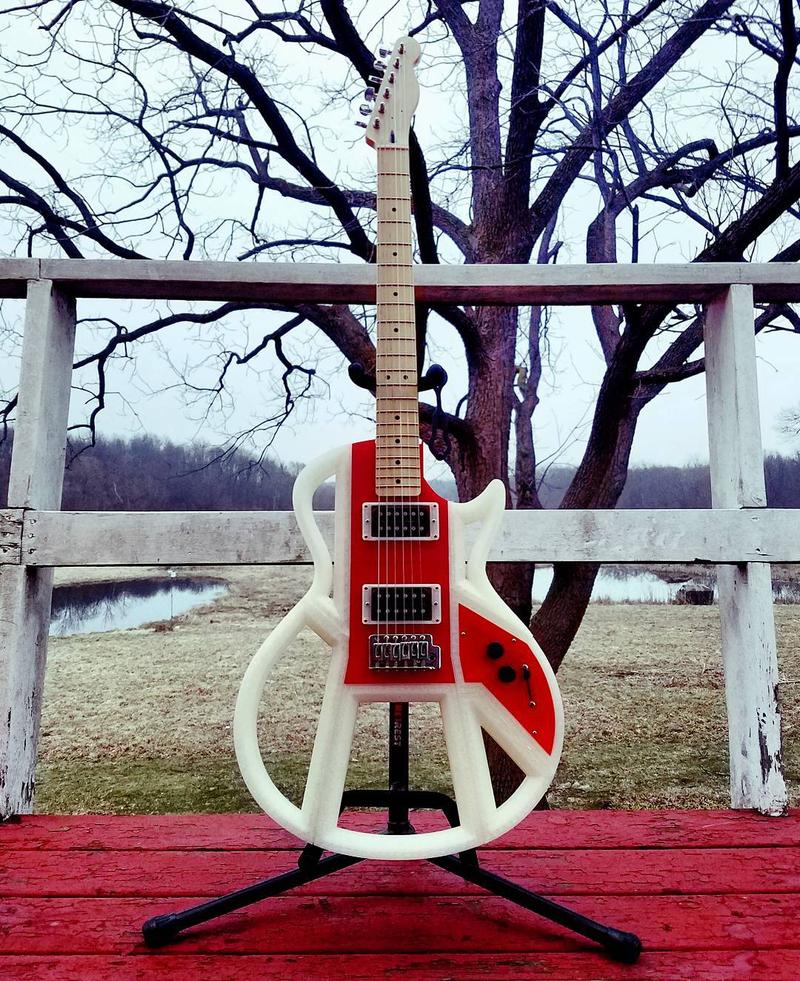
Credit: @classic_kid / Instagram.
Finally, let’s talk about some exotic 3D printer kinematics. For example, Scara. In this guide, we won’t be discussing this design in depth, since it didn’t get much traction and is used only by a number of enthusiasts. None of these machines is mass produced, but if it catches your interest you can find more information about the devices and their assembly on the Internet.
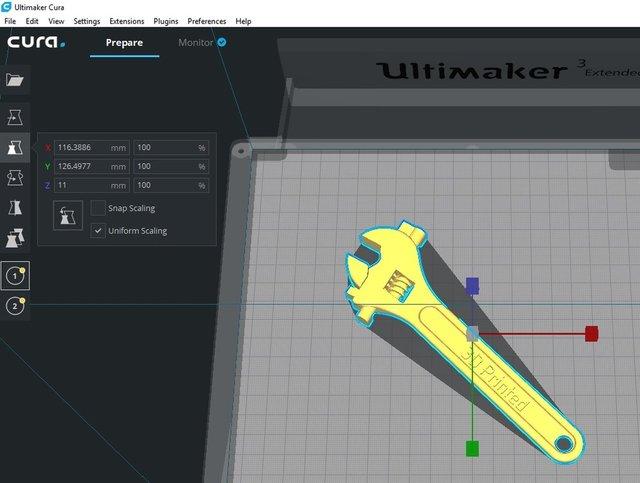
Using the CraftBot Flow IDEX XL as an example, we will review and explain the most relevant 3D printer specifications.
Build volume: 425 x 250 x 500 mm (16.7 x 9.8 x 19.7 inches)

The build volume is one of the key parameters of a 3D printer. It refers to the maximum printable size of objects that can be printed on the given machine.
However, it doesn’t indicate the actual dimensions a 3D printer can produce. Indeed, the printable build volume is always a little bit smaller than the one claimed. Also, depending on the part orientation, it may happen that a print is longer than the maximum length declared by the manufacturer. For example, this happens when the part is placed diagonally on the bed.
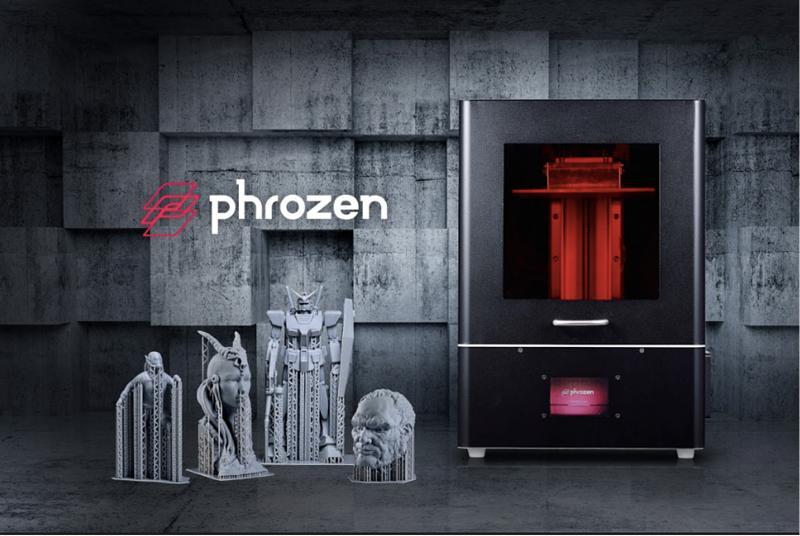
In some other cases, you might position the part taking advantage of the third dimension (Z), just as it happens when printing on a resin 3D printer.
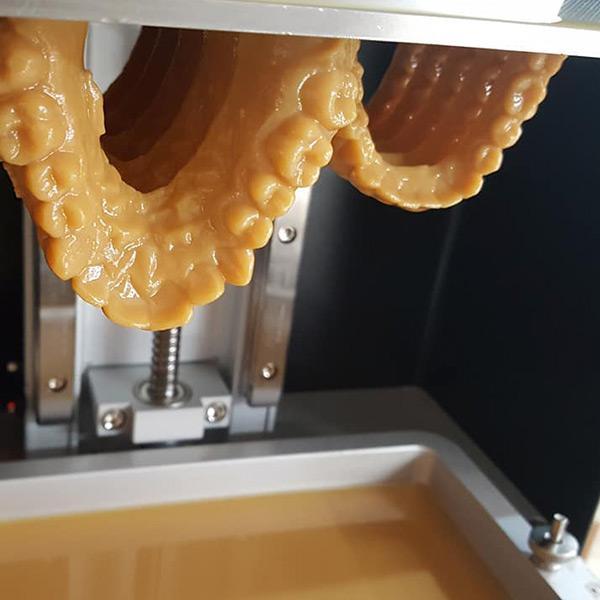
Printed with Phrozen 3D Printers.
For instance, these dental impressions have been printed on a Phrozen Shuffle XL. They have been placed vertically in order to produce multiple models in one print session.
When printing with an FDM 3D printer, you should always keep particular attention to the layer orientation resulting from the part positioning.
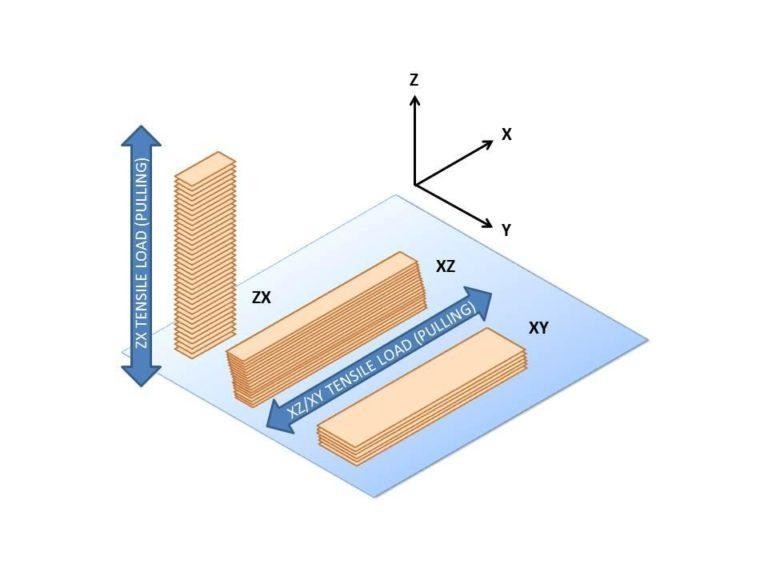
The image above highlights the different orientations of the layers within the same part.
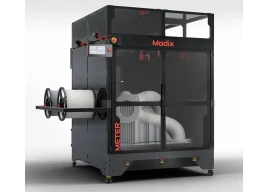
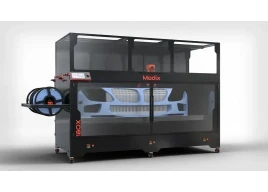
Some 3D printers feature an expandable build volume. The Modix Big60 is one of them. It comes stock with a build area of 610 x 610 x 610 mm. Thanks to its modular design, it can be easily upgraded reaching up to 120cm in X-axis, benefiting from the same print area of its bigger counterpart, the Modix Big120X.
XY-Axis position precision: 12.5 microns (0.0125 mm)
The position precision of the extruder on the X and Y axes is a very important parameter that affects the correct alignment of the printing layers and, thus, the final print quality.
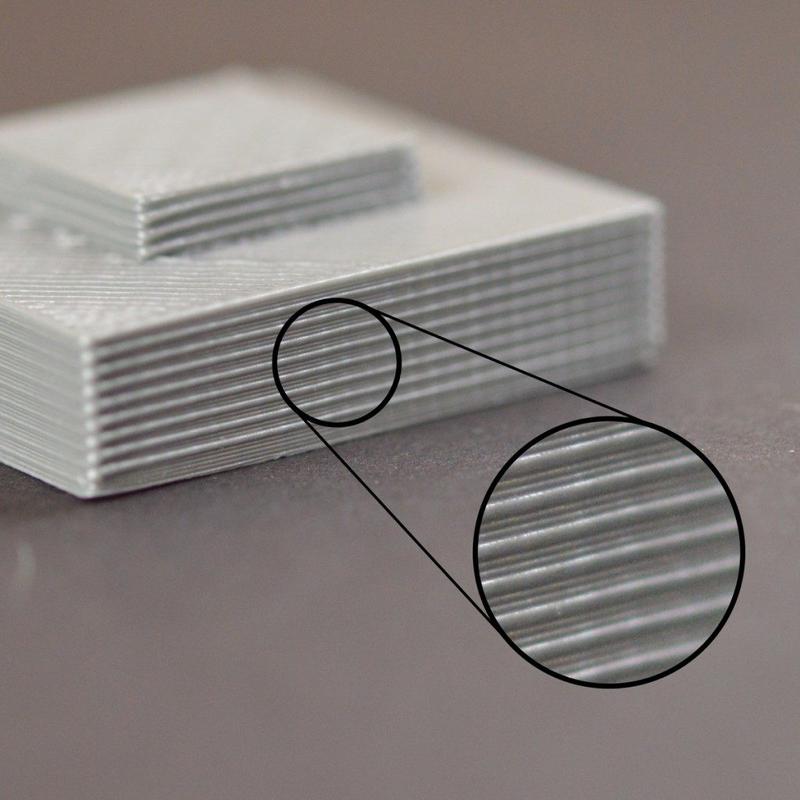
It determines how accurately the extruder can be positioned over the print area (XY-axis) again and again. The higher the accuracy, the smoother the finish.
In case of low accuracy, layer shifting might occur. Then, the surface finish might appear like the one pictured below.
XY-axis position precision strongly depends on the correct functioning and calibration of the mechanics, namely, the belts must be properly tensioned while the linear bearings must always be greased and lubricated.
Z-Axis position precision: 5 microns (0.005 mm)
This is another important feature that can seriously affect the printing quality. It depends on the movement upon the Z-axis. There are several ways this movement can occur, but we will talk about them later.
Filament diameter: 1.75 mm
This specification informs us about the filament diameter supported by the 3D printer. Currently, there are 2 standard sizes of consumables available on the market: 1.75 mm and 2.85 (3.00) mm.
Nowadays, 1.75 mm is the most common size. It is supported by almost any FDM 3D printer, including the well-known Raise3D 3D printers. No wonder that all new 3D printing filaments are first launched in this size.
2.85 mm and 3.00 mm consumables were initially used by Ultimaker 3D printers. These days, they are mostly used by Ultimaker copycats and by some DIY 3D printers.
Since 1.75mm filaments are most common, buying a 3D printer with 1.75mm filament diameter will surely give you a wider material choice. However, standard consumables, such as ABS and PLA, are supplied in both sizes.
Using a 1.75mm filament or a 2.85 (3.00) mm one makes almost no difference, except for the extrusion system.
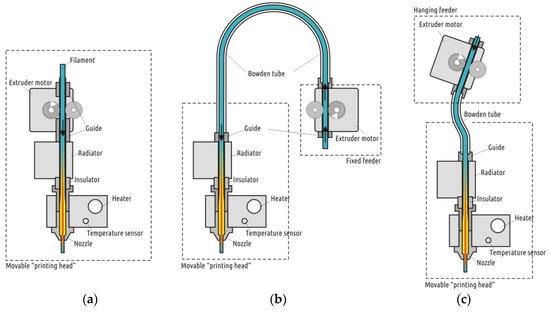
The picture above shows the most common extruder types: direct (a), Bowden (b), and Bowden with short tube and suspended feeder.
The so-called Bowden extruder works particularly well with thick consumables of 2.85 (3.00) mm in diameter. No coincidence that most of the Ultimakers 3D printers equipped with Bowden extruders print with 2.85 mm filament.
Nozzle diameter: 0.4 mm
The nozzle diameter regulates the material flow. Wide nozzles eject a large amount of material. They produce higher layers making for faster prints. Thin nozzles provide finer details but slower printing speed.
According to that, the thinner the nozzle, the higher the printing accuracy. However, you should always consider that thinner nozzles (of 0.2 mm and above) are more prone to clogging.
Generally, nozzles with a diameter of 0.3 or 0.4mm offer the best balance between speed and detail. They can be used to print almost any type of object delivering decent accuracy in a reasonable time. Thanks to their versatility, they are the most used in the 3D printing world.
Larger nozzles - from 0.5 to 1mm and above - are suggested when you need to print big objects in a short time, no matter the accuracy.
In the image below you can see the print quality delivered by different nozzles (from 0.15 to 0.6mm in diameter).

Most 3D printers - including the Modix Big60 and Big120X, Creatbot D600, Creatbot D600 Pro 2, Raise3D Pro3 and Raise Pro3 Plus - sell kits, containing multiple nozzle sizes.
For example, according to the manufacturer's specifications, Modix 3D printers are compatible with nozzles of 0.15 to 1.2mm in diameter. This gives you the possibility to choose the best nozzle for each project.
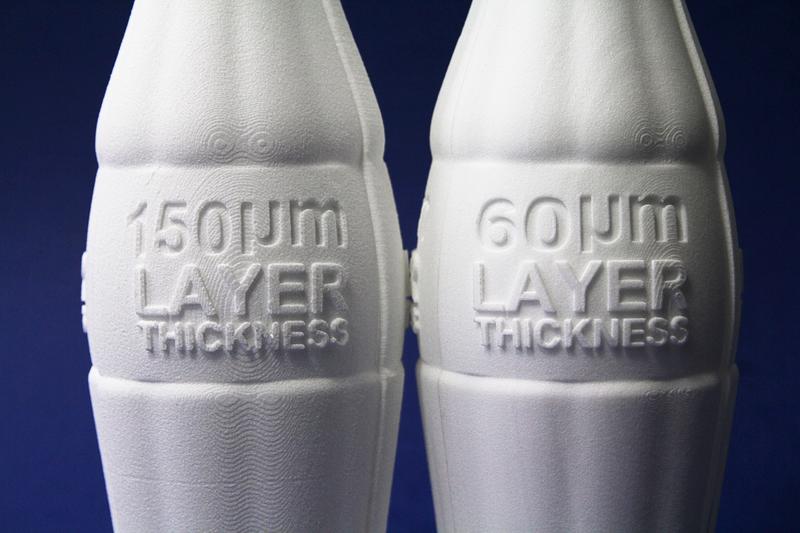
Layer thickness: 50 microns
The layer thickness refers to the height of each layer of material fired by the extruder or, in the case of SLA/DLP 3D printers, cured by a light source. It is an essential feature of every 3D printer. It also determines the vertical resolution of the Z-axis.
As for the nozzle diameter, the lower is the layer thickness, the higher is the accuracy, but the slower is the printing speed. This means that printing a part at 50 microns will deliver higher resolution prints but will take twice as long as 100-micron prints.
The image clearly shows the difference between a higher print height (150 microns) and a lower one (60mm).
The minimum layer thickness of most commercial FDM 3D printers ranges from 50 to 100 microns (0.05 to 0.1mm), as for the CraftBot Flow IDEX XL. Generally, a layer height of 100 microns is more than enough for most of the tasks.
There are also several 3D printers that offer a lower layer height for better accuracy. For example, Modix Big60 and Big120X 3D printers can print parts at a layer height of 40 microns (0.04mm), the Fusion3 F410 prints at 20 microns, while the Raise3D Pro2 Plus can go down to 10 microns.
Here is an example of the printing accuracy achievable by the F410 3D printer:
Printed with Fusion3 Edge
SLA/DLP 3D printers usually benefit from higher Z resolution. Indeed, they are able to produce layer with a very low height. For example, the Phrozen Shuffle XL can print parts at only 10 microns (0.01 mm) layer height.
Printed with Phrozen 3D Printers.
In order to get high-quality results, you should always consider that the layer thickness should never be more than 50-60% of the nozzle diameter. To give an example, when using a 0.3mm nozzle the maximum layer height should be 150 microns (0.15mm).
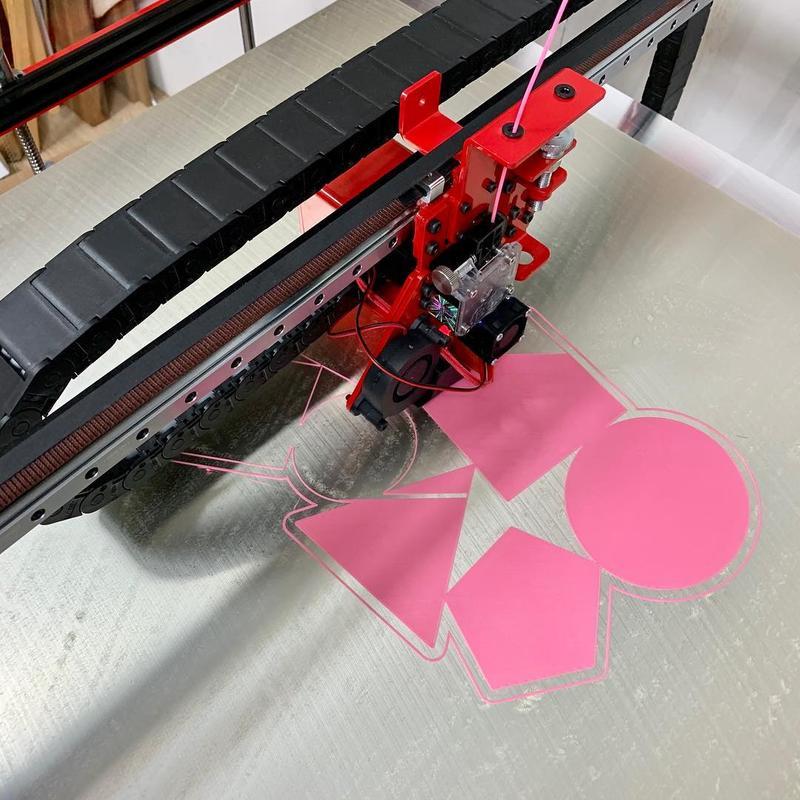
Printing speed: 50-200 mm/s
Printing speed is a relative concept. Indeed, there are no unique criteria to determine it. The highest printing speed is generally calculated when printing large straight-lined objects.
Factors like size, shape and layer thickness of a part strongly affect the actual maximum printing speed a 3D printer can reach.
Objects with intricate shapes and a low layer height will be printed at a considerably slower speed than simple models printed at a lower resolution.
In some cases, printing at a high speed might cause a significant loss of quality. Printing at 30 / 40 mm/s usually grants high-quality printing results.
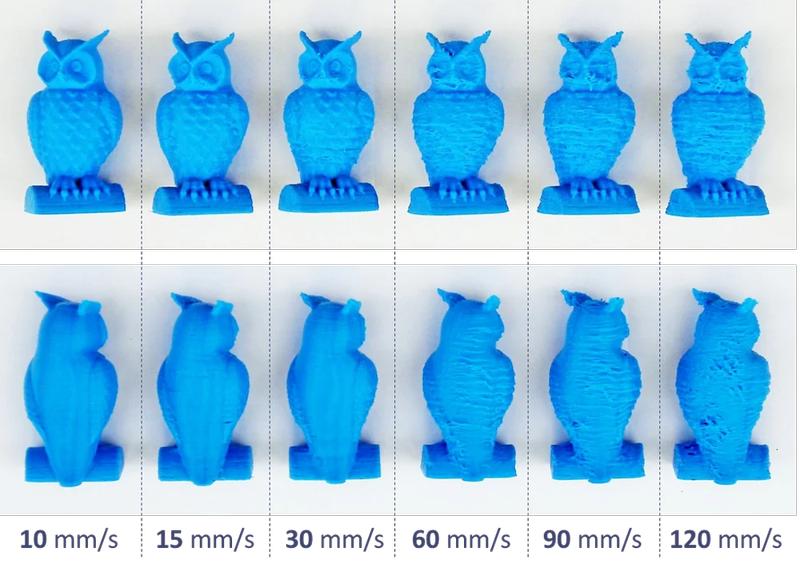
Credit: All3DP.
The image above shows the effect of printing speed on print quality.
Most commercial 3D printers feature an average printing speed of 50-100 mm/s. Some devices are even able to print at 250 mm/s, just like the Fusion3 Edge.
Every 3D printer should be able to print simple PLA- or ABS-made models at least at 50 mm/s.
The printing speed can be adjusted manually on the printer or via the 3D slicing software (print preparation software).
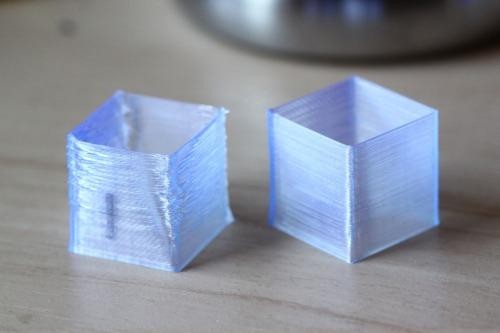
Heated bed: Yes
The heated bed also has a particular importance when buying a 3D printer. The first thing you need to know is that it is strictly required for printing with certain materials, such as ABS.
It provides better control over the cooling process of the printed model, reducing the odds of poor adhesion to the bed and between the layers, shrinkage, and warping.
The picture below shows what you might get when printing ABS-type materials without a heated bed (on the left) and with a heated bed (on the right).
The bed temperature varies from printer to printer. For example, the aluminum bed of the Modix series reaches up to 110°C, the Raise3D series adopts a print bed that can heat up to 120°C, while the Fusion3 Edge benefits from a higher bed temperature of 140°C.
If you are not planning to use ABS-type filaments, you do not need a heated bed.
Also, if you are seeking a safe, kid-friendly 3D printer, you might go for a non-heated build platform.
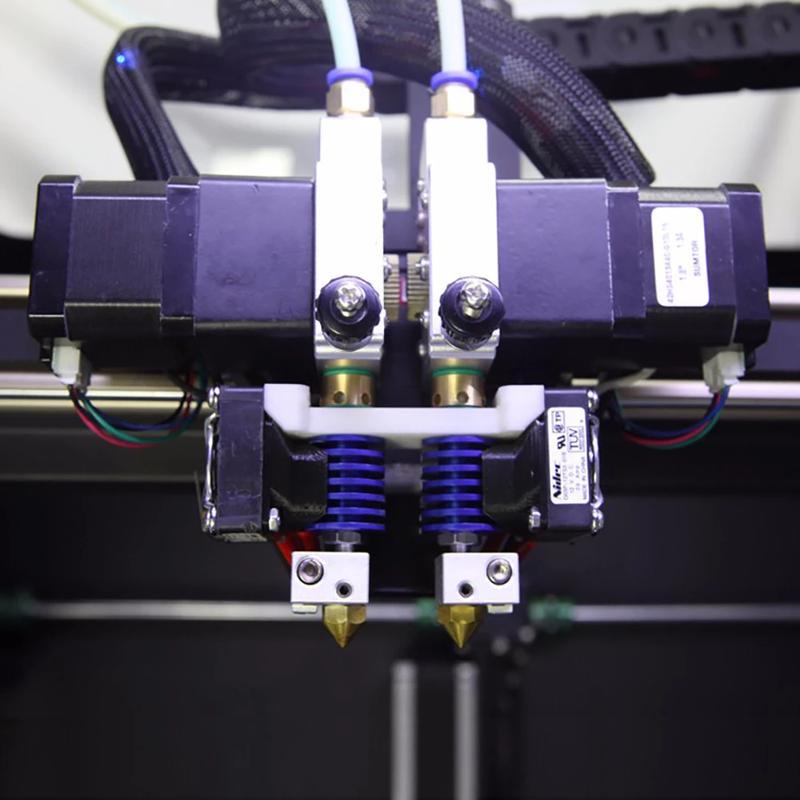
Extruder: Independent Dual Extrusion System
A 3D printer can be equipped with one or more extruders. The single extruder is more than enough for the majority of printing tasks. The dual extruder is ideal for multi-material and multi-color 3D printing.
Indeed, it lets you print with two different filaments and colors. This gives you the possibility to produce complex parts with the aid of removable support structures made of soluble materials (PVA and HIPS). Also, it lets you produce multicolored objects.
Triple and quad extruders are less common. They let you print with up to four different materials. Here’s an example of multi-color 3D printing:
Here is a multi-material print of Gyro the Dodo:
Due to its geometric complexity, it has been realized using water-soluble support structures.
Depending on the multiple-extrusion system, the extruders might work alternately or simultaneously.
In the first case, the printing process might be a little bit slower since the printer needs to switch between the extruders multiple times. During the swapping process some plastic might ooze out of the idle nozzle causing this kind of problem:

To prevent oozing issues, some 3D printer manufacturers, including Picaso 3D, have developed a special technology, namely the Jet Switch. The design of the extruder includes a valve that instantly blocks the flow of one of the materials to ensure there are no leakages onto the model when switching.
In the second case, the Independent Dual Extrusion System - like the one adopted by the Intamsys Funmat Pro 310 3D printers - features two different print heads capable of moving in parallel to each other. In this way, it reduces the risk of multi-color print contamination while doubling the productivity.
In some cases, you will be able to upgrade your 3D printer from a single- to a dual-extrusion system by replacing the print head module. For example, both the Modix Big60 and the Modix Big120X support an optional dual print head available as an add-on.
In case your machine does not come with such an option, you might want to consider a Mosaic Palette 3. It is a filament mixer available as an add-on for the most popular FDM 3D printers. You can feed it with up to four different filaments for multi-color printing on single extruder 3D printers.
Here is how the Mosaic Palette looks on the inside. By cutting and merging the different materials, it can generate a brand new multi-color or multi-material filament.
Printing software: CraftWare.
3D printing files might be generated using a proprietary 3D printing slicing software, as for the CraftBot Flow IDEX XL, or using a compatible third-party slicer.
The slicers are used to convert a 3D printing model into specific instructions for the printer. Each printer supports specific file types.
There are several general-purpose programs available both free and paid. The most renowned are Cura, PrusaSlicer, Ideamaker and Simplify3D.
Connectivity: Web interface, IoT.
There are different ways to transfer 3D printing models to a 3D printer. Most 3D printers, both new and old, feature USB connectivity for data transmission from a USB-tethered computer.
A USB port as well as an SD card reader might give you the possibility to launch your prints directly from a USB stick or an SD card without the need for a computer. Stand-alone 3D printing minimizes printing failures due to slow or interrupted data transmissions from a computer.
Nowadays, more and more printers feature both Wi-Fi and Ethernet connection for easier file transfer and remote control.
For example, the Raise3D Pro3 Plus 3D printer gives you the possibility to wirelessly connect to upload files and monitor print functions remotely. It also includes USB and Ethernet connections. Watch the video to find out how it works:
Dimensions: 635 x 450 x 790 mm (25 x 17.7 x 31.1 inches)
Dimensions refers to the 3D printer footprint. If you have limited space in your working room, you should definitely take them into account.
For instance, a Modix Big120X measures 1,520 X 926 X 1,221 mm. It will require considerably more space than a Raise3D Pro3 Plus (620 x 590 x 1105 mm).
Weight: 38 kg (83.8 lb)
It usually indicates the net weight of the 3D printing machine. Depending on it, you will be able to choose the best countertop where to place the device.
For example, the 38-kg CraftBot Flow IDEX XL or the 39-kg Fusion3 Edge clearly require a solid and fixed table top to be safe.
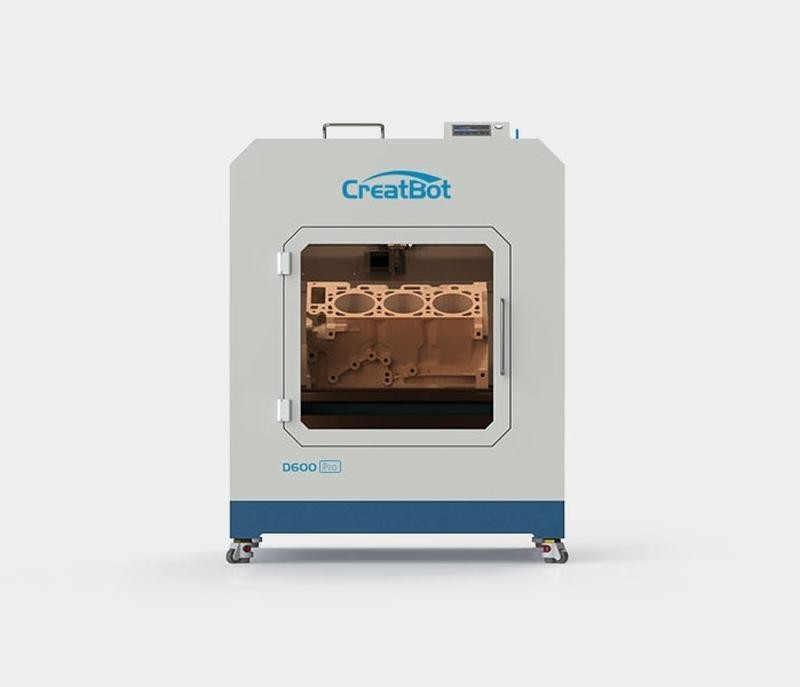
Industrial 3D printers, like the Creatbot D600 and D600 Pro, have a significantly higher weight than desktop 3D printers. In most cases, they are self-standing devices equipped with wheels for easy relocation.
Here is the photo of the D600 3D printer. It weighs 375 lb (170 kg).
Warranty: 5 year
As for most commercial products, the warranty is a guarantee, issued to the purchaser by the manufacturer, promising to repair or replace the 3D printer, if necessary, within a specified period of time.
Most 3D printers currently come with a 1-year limited warranty. In some cases, the manufacturers provide a longer warranty of two or three years.
For example, the Raise3D Pro2 series comes with a standard 1-year warranty for non-electronics and non-consumables. In addition, the company offers an optional warranty, the RaiseShield, which extends the coverage to all manufacturer defects from 1 to 3 years.
CraftBot 3D printers are covered by a 5-year or 5k-hour warranty instead. The longer the warranty, the better for you.
3D printers do not have a particularly complex design. The greatest difficulty in producing a worth-buying 3D printing device lies in the accuracy of the assembly and the perfect positioning of the extruder on each axis. Only the perfect calibration of all parts can provide the highest quality printing results.
In this chapter we will analyze the main components of a 3D printer.
We have already spent a few words on the kinematics of a 3D printer in the previous sections. Now, we will focus on the parts involved.
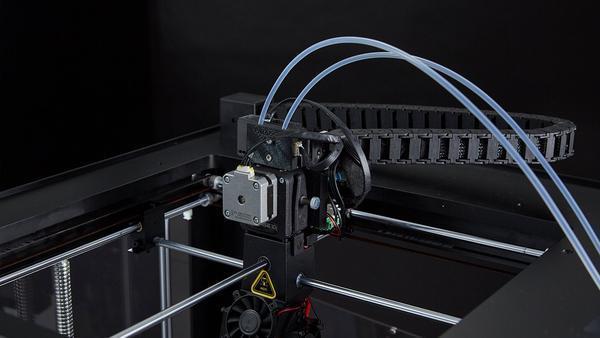
First, let’s talk about the drive mechanism. It features belt driven actuators and stepper motors.
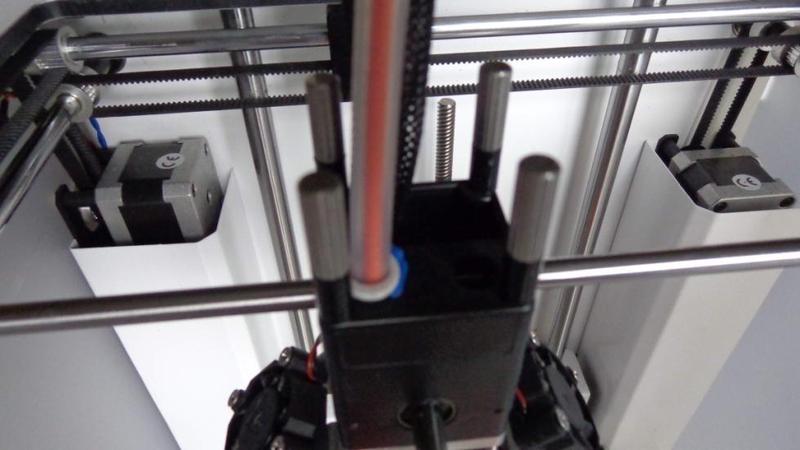
The printer can feature linear rails or rods. Rails are more accurate than rods and, generally, make for better print quality. They are more expensive and heavier than rods.
Linear guide rails are not compatible with all types of design. For instance, Ultimaker 3D printers - with a Darwin-style design - feature a bed traveling up and down along the Z axis and a print head running in the X-Y plane. Thus, they adopt fixed rods - that work as X and Y axes - instead of linear rails.
Let’s see how it works.
All this mechanics requires thorough maintenance. It should be regularly lubricated and kept clean of dust and dirt.
Credit: @nginnovation / instagram
Glass heated bed of a Fusion3 Edge.
The print platform can be both heated and non-heated. It can be calibrated manually, using special knobs, or automatically through an automated leveling system.
Common build plates are covered in glass for optimal first layer adhesion. Others are just perforated boards with no glass cover.
Professional 3D printers might use custom-made multi-layer platforms for either improved layer adhesion and efficient heating. That’s the case of the Creatbot D600 3D printer series, which adopts a multi-layer bed with vertical thermal conductivity.
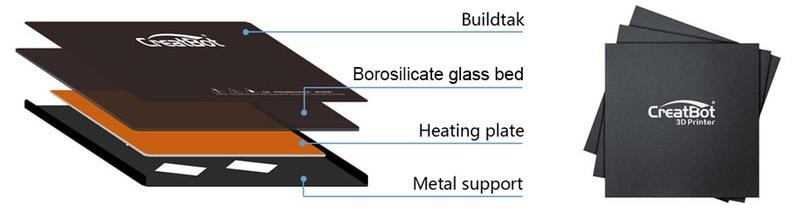
Heated beds can be made from printed circuit board (PCB) heaters, originally designed by Josef Prusa, or using heater mats stuck onto the bottom of the print sheet. The first type includes a thermistor that generally regulates the heat to an average target temperature of about 70 degrees. Depending on its size, the bed might require more or less power to properly heat.
To give an example, the Modix Big 3D printer series adopts a milled cast aluminum bed with a PEI-covered surface and dual heating zones. It includes a 1,600-Watt AC powered bed heater.
Proper bed maintenance requires deep cleaning before and after each print session, if necessary, and regular calibration.
The extruder is a 3D printer component that ejects the melted filament and deposits it in successive layers within the 3D printing area. As previously mentioned, there are various types of extruders with different designs (Direct or Bowden) and a different number of hot ends (single, dual, triple, etc.) for multi-material and multi-color 3D printing.
Some extruders support replaceable nozzles of different diameters. In some cases, the 3D printer might also feature interchangeable extruder modules.
For instance, the Fusion3 F410, the Modix Big60 and Big120X come stock with an E3D Volcano hotend and three swappable nozzles of 0.8, 0.6, and 0.4 mm. The Creatbot D600 and the D600 Pro include two replaceable extruders, one of which can heat up to 420°C. This makes them compatible with both standard and high-performance filaments.
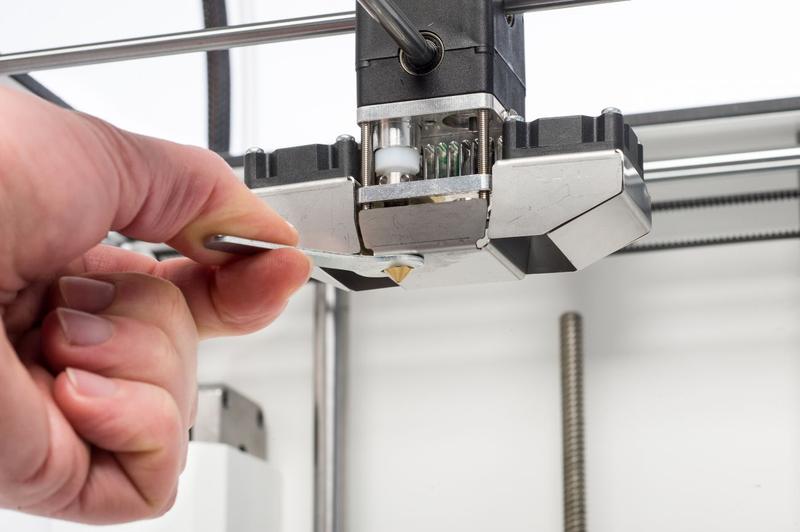
The extruder should always be cleaned to avoid printing failures or contamination. This means you have to remove every bit of stuck plastic and clean the nozzle in case of clogging. That’s why some printers come with a dedicated nozzle cleaning kit.
There are also functional cleaning filaments, like the eSUN eCleaning filament, that have been specifically designed to clean the extruder when transitioning between different materials.
One of the next chapters of our guide is entirely dedicated to extruders. Keep on reading for further details.
The controller board is usually located in the body of the printer. Most 3D printers feature RAMPS control boards, but there are also models engineered with self-developed solutions.
The first control boards featured 8-bit processors. Over the years, they have been constantly improved in order to meet the increasing demand for high productivity and speed. Their evolution along with the reduction of their price has led to the spread of control boards with up to 32-bit processors.
To properly maintain the board, you should always check if the included cooler has been working properly.
The control display is a widespread, optional component. There was a time when 3D printers had no control interface. Nowadays, most 3D printers have at the very least an LCD display with an SD card reader/USB slot for stand-alone operation.
The picture above shows the integrated touch screen of a Modix Big120X. As you can see, it has an SD card inserted into the right side. The printer also includes a USB slot. This means you can control it from a PC or directly from the fitted screen.
Buying a 3D printer with a control screen and additional connectivity options will surely make your life easier. Indeed, it gives you the possibility to operate the printer independently, without the need for a computer. This results in a seamless 3D printing experience free from issues due to bad communication between the printer and the computer.
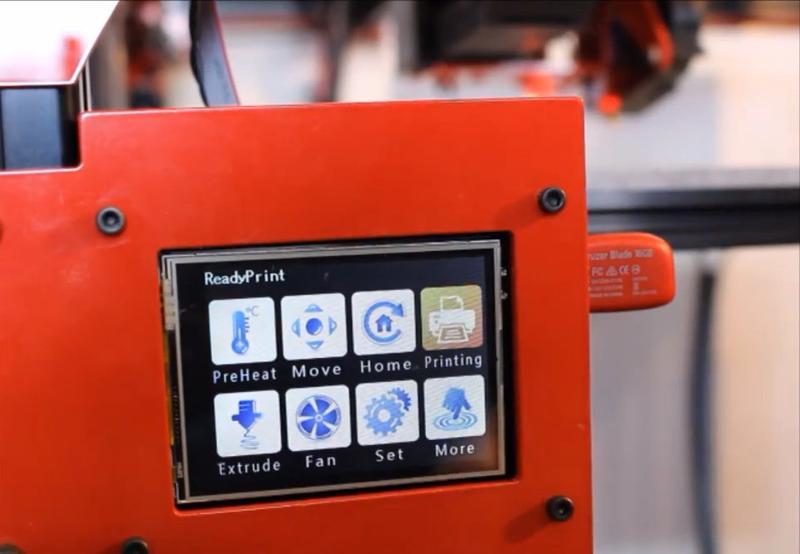
There are several types of screens currently available. Among the basic offerings, you can find simple screens aimed at displaying some useful information about the printer status and settings. The amount of information provided by these interfaces is limited. They generally include some buttons or a dial to navigate the menu.
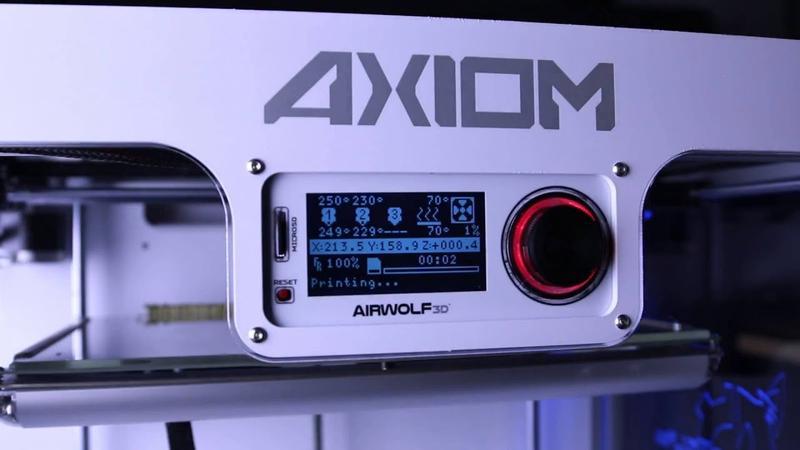
Here is an example of this screen type:
Although its basic features and appearance, this control display is really convenient to use. Also, it grants good functionality and reliability over time. There are lots of expensive 3D printers equipped with this simple key-operated interface.
The below-pictured Airwolf3D AXIOM DUAL Extruder is just one of them.
Among the most advanced solutions, there are the full-color touch screens. Easy-to-interact-with, these touch displays feature either a basic graphical interface or a more compelling, icon-based one. Some 3D printing devices that have a touch-screen interface are the Modix Big ones, the CraftBot Plus, the Creatbot D600, the Fusion3 F410 and the Raise3D Pro2 and Pro2 Plus. In particular, the Pro2 series features one of the best color touch screens available, which also provides a real-time preview of the prints.
Touch screens are more intuitive to use than standard LCD displays. Thus, they are particularly suitable for newbies and kids.
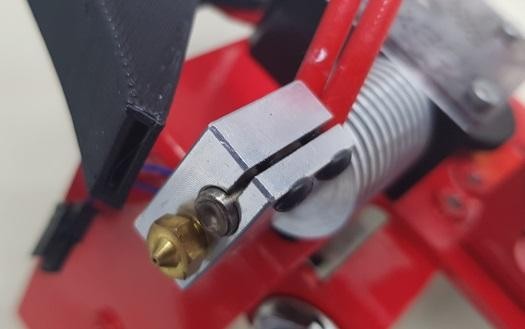
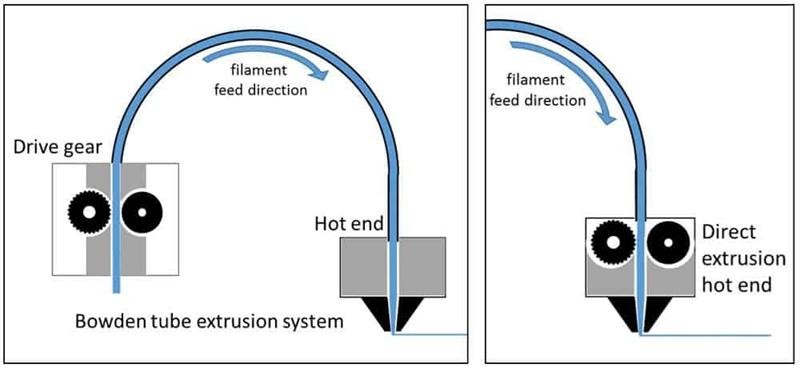
At the moment there are only two main extruder types: the Direct and the Bowden one. They both perform the same function, pushing the filament through a heated nozzle. The Direct pushes the filament directly through the nozzle, the Bowden pushes it through a bowden tube.
Let’s take a closer look at each of them.
Direct extruder
The Direct extrusion system adopts a filament feeder mounted to the print head, right above the hot end. Thus, it can directly feed the nozzle without the need for extra elements.
This design results in better extrusion, fast filament retraction, and low power consumption. The short distance between the feeder gear and the hotend makes it particularly suitable for printing with flexible and abrasive filaments.
Direct-Driven extruders normally support 1.75mm filament, providing wider material choice. They are used in most FDM 3D printers.
The downside of the Direct extrusion system is the increased weight of the print head, which affects both the printing speed and precision. That’s why Direct extruders are usually slower than Bowden ones.
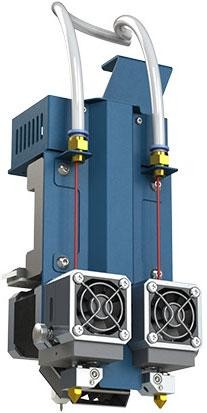
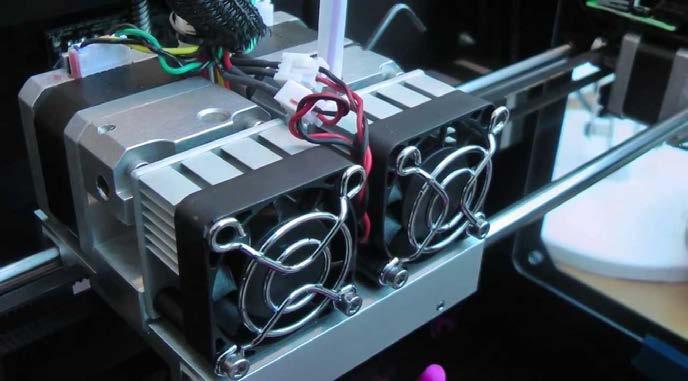
Direct dual extruder of a Creatbot D600.
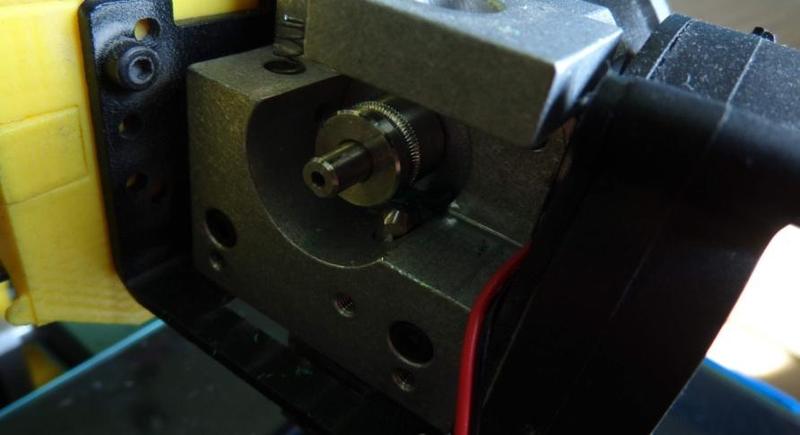
In the picture below, you can see the extruder of a BQ Hephestos 3D printer with a replaced ventilator and a filament clamping lever. The feeder gear and the hot end tube clearly appear:
Bowden
3D printers equipped with Bowden extruders benefit from a larger build volume than the ones with Direct extrusion systems. Bowden-extruder drive gears are mounted on the printer frame. They push the consumables through a PTFE bowden tube and into the hot end. This structure results in smaller sizes and lower weight on the carriage, which also makes for faster speed, quieter movement and higher print quality.
On the other side, it requires more power and torque to pull the filament through the tube. Also, it takes more time to retract the filament and is compatible with a smaller range of materials. Indeed, abrasive and flexible consumables can be worn or bound inside the tube.
Depending on the PTFE tube length, Bowden systems are divided into long-tube and short-tube ones. When using a short tube, they adopt a suspended feeder.
Bowden extruders provide the best results when printing with 2.85mm filament. However, it is not unusual to find 3D printers with Bowden extrusion systems that support 1.75mm filament.
This type of extruder is commonly featured in Ultimaker 3D printers and in most Delta 3D printers.
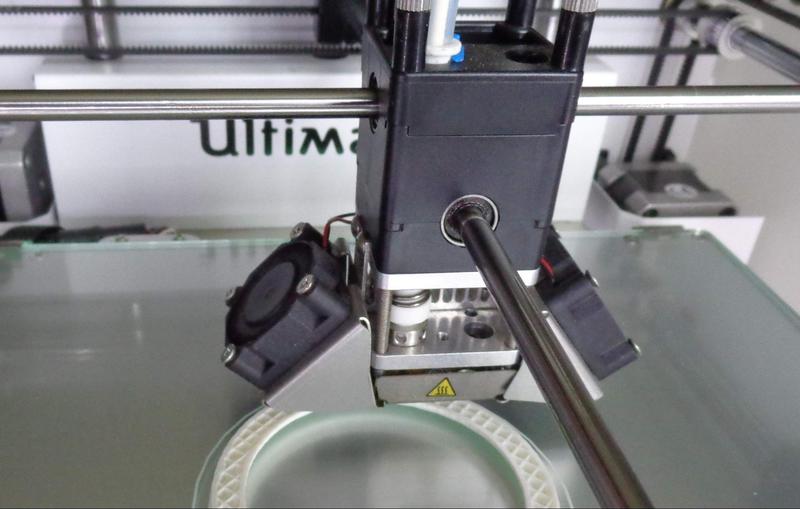
Extruder of the Ultimaker 2. As you can see, there’s no filament feeder on the print head.
Multi-nozzle extrusion system
As already mentioned, a printer might feature a single, dual, triple, or quad extrusion system. This means it can be equipped with one to four nozzles simultaneously.
The most common multi-nozzle extrusion system was first used on the Replicator 3D printers. It is composed of a single print head featuring two or more hot ends, one beside the other.
This makes the print head considerably heavier than a single-extrusion one. The high weight badly affects both printing speed and, depending on the kinematics, sometimes quality. Moreover, the linear arrangement of the nozzles reduces the printable area.
When using a multi-extrusion tool head, you have to print both your 3D model and a prime tower, which is an additional part used to prepare the nozzle before printing the next layer. It reduces oozing and under extrusion issues. Despite this trick makes for higher print quality, it also is a time-consuming operation, which dramatically increases the printing time.
This is an example of a multi-nozzle extrusion system. Among the various 3D printers, both the Raise3D Pro3 Plus and Modix Big series feature this kind of system.
Another worth-knowing multi-nozzle extrusion system is the one developed by Picaso 3D, which relies on the proprietary Jet Switch technology.
It features two rotating nozzles. When one of the nozzles is printing, the idle one is lifted up and its material flow is immediately interrupted. When switching between the nozzles, the print head rotates, the previously active nozzle is lifted up and the idle one starts printing.
In this way, the company reduced the overall printing time, eliminating all the printing issues due to oozing and accidental collisions between the idle nozzle and the printed model. This system is more expensive than standard multi-extrusion ones, but it is worth the price.
Some manufacturers have also developed an advanced multi-nozzle mechanism, the Independent Dual Extrusion System, to increase the printing speed while doubling the productivity. This type of system adopts two different tool heads, which are capable of printing independently from each other. They can print in either duplication or mirror mode producing two identical parts or two mirrored designs symmetrically at the same time.
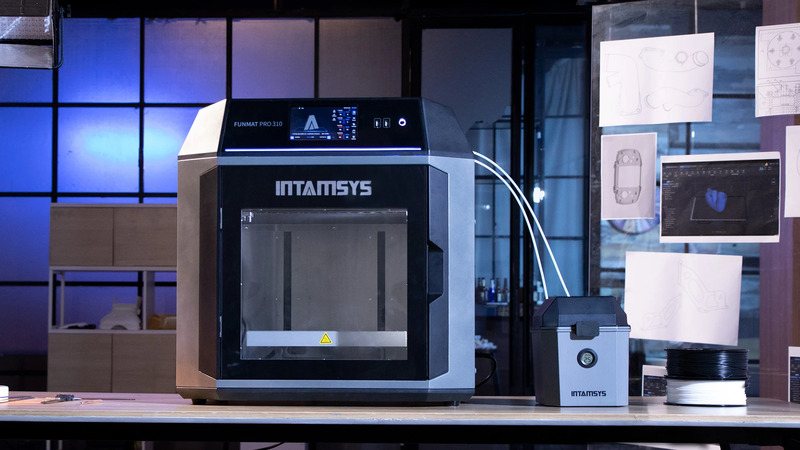
Here is an example of printing in IDEX duplication mode on an Intamsys Funmat Pro 310.
When choosing an extruder, you should always consider your actual 3D printing needs. For example, if you need to print with flexible and soluble filaments, you should go for an extruder capable of printing with them, like a Direct-driven dual extruder. Also, if you usually print with high-performance exotic materials, you surely need an extruder able to heat up to 300°C or more. If not, standard extruders capable of heating up to 250°C will be more than enough.
For example, printers like the Creatbot D600 feature two different hot ends, one that heats up to 260°C for printing with standard filaments (PLA, ABS, etc.), the other one that reaches up to 420°C for processing high-temperature materials.
Creatbot D600 hot ends.
If you are a beginner, just be rational and take some time to better understand which materials you really need to use. In this way, you would be able to choose the right 3D printer for you without spending extra money. Otherwise, you might spend more time solving problems caused by a wrong choice than printing.
In the 2000s, the first filaments were all produced with a diameter of 2.85 (3.00) mm. After a period of great commercial success, their sales volume gradually declined in favor of a new type of filament with 1.75mm in diameter.
What is the difference and which one should you choose?
Printing with 2.85 (3.00) mm or 1.75mm filaments provides almost the same printing results. The main difference between the two 3D printing materials is in the compatibility with the various extrusion systems.
Generally, 2.85 (3.00) mm consumables, even flexible ones, flow better through Bowden extruders. Therefore, if you have a 3D printer with Bowden extruder that supports both 2.85 (3.00) and 1.75mm filament, you should always choose the thicker one.
If your printer features a Direct extruder, you can pick the diameter you prefer without affecting the final quality of your prints. .
Another aspect to consider is the commercial availability of each type of filament. Most of the new materials are first produced in 1.75mm filament and, later, in 2.85 (3.00) mm ones. This can be important if you are planning to experiment with brand new materials.
Summing up, buying a 3D printer that supports 1.75mm filament gives you wider material choice. Purchasing a printer that supports 2.85 (3.00)mm consumables is ideal for producing high-quality prints with standard filaments.
That’s another frequent question. What’s the best 3D printer for your needs? One with rods or linear rails?
Theoretically, rails ensure better position precision and do not tend to deform. Thus, they make for high-quality, fast prints.
Credit: @hwangjoonha_ / instagram
For example, the Modix120X print head runs on Hiwin motion rails.
However, it all depends on the accuracy and quality of the whole structure. If you purchase a 3D printer with rails but made with poor quality parts, this will surely affect the final print quality and speed. On the other side, professional-grade devices equipped with rods, such as Ultimaker 3D printers and Raise3D Pro2 ones, are also able to produce top-quality results.
As you can see, the Raise3D Pro2 Plus print head runs on rods.
That’s why, before buying a 3D printer, you should always pay particular attention to its build quality.
Choosing between a heated and a non-heated bed might not be easy. ABS users might give you a thousand reasons to choose a heatable platform, as much as PLA users to not choose it.
To avoid a wrong pick, you should always consider which material you are going to use. If you are pretty sure you are going to print with only PLA-type filaments, a non-heated bed is your choice. This is also true if you consider that a lot of new printing materials, which behave like or better than ABS plastic, are now printable on a simple non-heated platform.
Otherwise, if you need to produce parts made of ABS-type materials, you will not be able to do it without a heated bed. A non-heated plate might cause warping, stringing or adhesion issues.
Here is an example:
However, you should always consider that 3D printers with a heated bed perform at their best only when paired with an enclosed chamber. Indeed, keeping the printing temperature constant is almost essential to produce high-quality ABS-made large parts, a difficult task when printing with Prusa-style 3D printers equipped with a heatable platform.
Nevertheless, most modern 3D printers come with a heated platform, clearing almost all your doubts.
Most 3D printers come stock with nozzles of 0.3-0.4 mm in diameter, granting the optimum balance between print speed and detail. This makes them capable of performing up to 90% of 3D printing tasks. If you don’t have particular printing requirements, you can settle for these standard sizes.
If you need to produce large parts in a short time as well as highly-detailed models, a 3D printer with replaceable nozzles is what you need. Nozzles with a diameter of 0.5mm or above grant fast print speed. Thus, they are generally recommended for producing large-format parts. Thinner nozzles (0.2 mm or below) deliver accurate prints with a high level of detail. Their precision results in a longer print time.
Despite almost all commercial 3D printers support stand-alone 3D printing with USB sticks and SD cards, there may be some exceptions. In those cases, you should always check if the device has at the very least an internal memory. If not, you should go for a different machine.
Why?
Printing from a computer via a USB cable is a resource-hungry operation. It might significantly slow down your PC, in particular when running alongside third-party apps and software. This could result in printing interruptions and failures.
Stand-alone 3D printing lets you manage your prints directly on the printer, without the need for a computer. 3D models can be stored on external devices (USB sticks and SD cards) or - if available - in the internal memory of the device. In this way, it will dramatically reduce the risk of both communication and printing failures.
Modern 3D printers also offer the possibility to transfer the files over Wi-Fi or Ethernet, streamlining the overall process.
An enclosed chamber is always the best choice. It protects the print from air drafts while keeping the printing temperature constant. This allows producing high-quality large parts with the majority of materials, including difficult-to-print ones (e.g. ABS).
In addition, a closed-box design makes for a safer 3D printing experience, minimizing injuries and burns.
In our opinion, fully-enclosed 3D printers are also more aesthetically pleasing than open-frame ones.
Buying the cheapest 3D printer doesn’t always save you money. Low-priced 3D printers generally sacrifice quality to reduce their costs. This might result in printing issues and frequent breakdowns.
That said, remember that you don't necessarily have to buy an expensive printer. There are many good solutions sold at a reasonable price.
When looking for a 3D printer to buy, you will come across three main assembly categories: ready-to-print fully-assembled devices, 3D printer kits (also known as do-it-yourself 3D printers), and 3D printers built from scratch.
In this chapter, we are going to analyze the pros and cons of each category.
This kind of 3D printer comes already assembled, ready to work right out of the box, as for the Fusion3 Edge and Raise3D Pro3.
Raise3D Pro3.
Usually, these reliable devices also include a pre-configured software and a factory warranty. They deliver reasonable print quality without the need for time-consuming manual interventions. In addition, they generally benefit from higher durability, precision assembly, efficient manufacturer support and, in some cases, initial training.
Among all these pros, there is just one relevant disadvantage: the price. Indeed, plug-and-play 3D printers are often more expensive than DIY and self-built devices.
If you don’t want to get your hands dirty, fully-assembled 3D printers are your right choice. Ideal for both commercial and personal uses, they can be easily operated by newbies, hobbyists, and experts. You’ll only need to select the best settings for your project to start printing immediately.
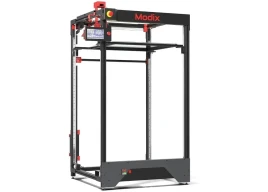
3D printer kits ship flat pack. Cheaper than plug-and-play devices, they need to be assembled, just as the Modix Big60 and Modix Big120X.
Modix Big60.
Their proper functioning strongly depends on your assembly skills. Indeed, you have to set it up with extreme accuracy and precision to get quality results. This might require some technical knowledge.
They are usually more complex to use than ready-to-work 3D printers. However, when properly assembled, they are capable of producing high-quality prints at a far lower price. If you are a tinkering type, you might give it a try.
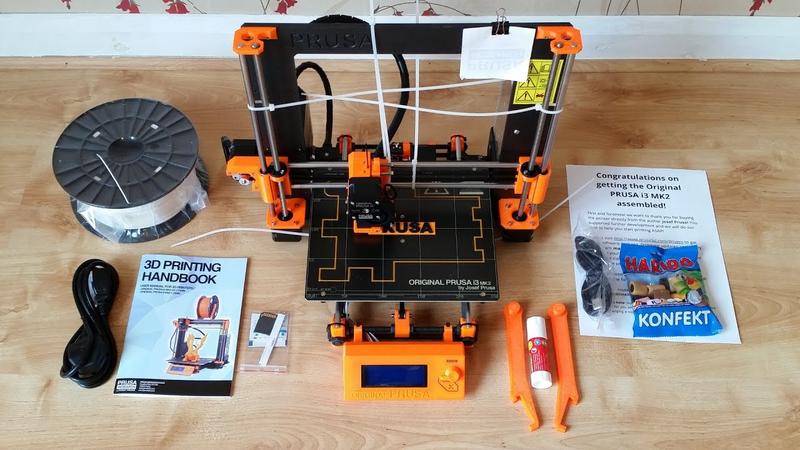
The most popular 3D printer kits are the Prusa and Creality ones, which are backed by a lot of positive user reviews. Despite their kit nature, their assembly is quite straightforward and - thanks to the clear instructions - it doesn’t take long.
Before buying a DIY 3D printer, remember to pay particular attention to the build quality of its components as well as to the assembly instructions provided. It is not uncommon to come across low-cost 3D printing kits - sometimes Chinese ones - composed of bad-quality materials or shipped with no instructions. So, don’t be fooled by the price.
Purchasing a kit from an unknown or unreliable manufacturer could only cause you problems. To avoid unpleasant surprises, collect as much information about the printer as possible before buying it. Also, look for opinions and communities online. Otherwise, you might risk getting just a pile of rods, screws, and electronics, which will surely give you a bad headache.
Here is how a typical kit from China looks like.
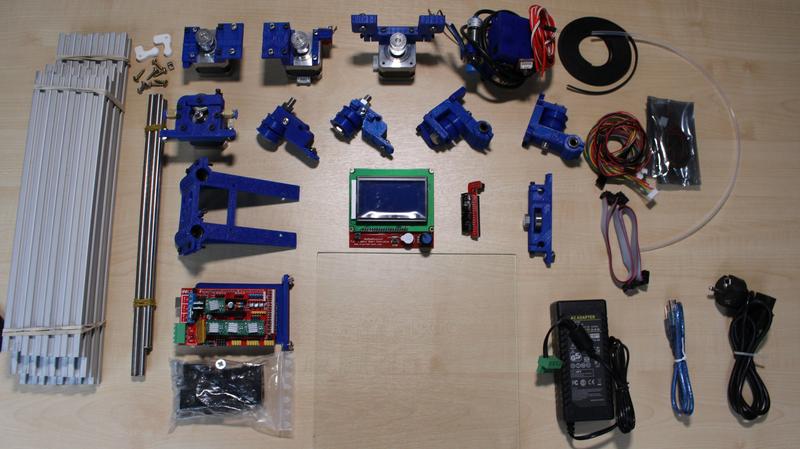
Would you be able to assemble it without instructions? If yes, you can pick the kit you want and give it a shot.
Assembling a 3D printer is a valuable learning experience. Indeed, it gives you deep knowledge about its operation. If you like getting your hands dirty, this is the right opportunity to do it.
Theoretically, building a custom-made 3D printer is the most budget-friendly solution. Indeed, it allows you to freely choose the parts with the best value for money to set up a cost-effective performance 3D printer.
Actually, a custom-built printer might end being as expensive as a ready-to-use one. In fact, 3D printer manufacturers always benefit from wholesale prices not intended for private customers. This lets them produce a fully-assembled machine at an affordable cost.
In addition, building a 3D printer from scratch requires advanced technical and engineering knowledge. Also, in case of issues, you will have no warranty on your side.
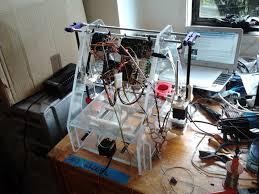
However, if you feel ready for the challenge and have enough time, you can try the feat. There are several growing online communities of 3D printing enthusiasts, who constantly share step-by-step tested instructions and tips to build custom 3D printers from scratch. Thanks to their know-how, you might be able to create a real workhorse made of top-quality parts.
Here are some useful tutorials:
The 3D printers currently available for sale can virtually meet everyone’s needs, in terms of both quality, speed, and price.
For a seamless 3D printing experience just after unboxing, you should opt for a fully-assembled, plug-and-play printer. It may cost more than other DIY devices, but it is surely worth the price.
If you have some free time and like to tinker, a reliable do-it-yourself solution may be right for you. If you are on a budget and prefer to invest your time and skills instead of money, then you can try building your custom 3D printer from scratch. The final result could be rewarding.
Just choose your path.
Many people think that the only thing that matters in a 3D printer to properly work is the number of features it includes. We have a different opinion.
Every 3D printer relies on a set of interconnected parts carefully assembled and calibrated. The right balance between the components grants the highest print quality achievable. Every single element - no matter its quality - is useless if not properly set up.
We think that a worth-buying 3D printer should print well while being reliable. We also agree with the common idea that a 3D printing device should be durable and shouldn’t require advanced maintenance.
The purpose of our 3D printer buying guide is to provide useful knowledge for choosing the best 3D printer based on your actual printing needs.
Now that you read it, we hope you are ready to pick your brand new machine.
Update your browser to view this website correctly. Update my browser now


Write a comment