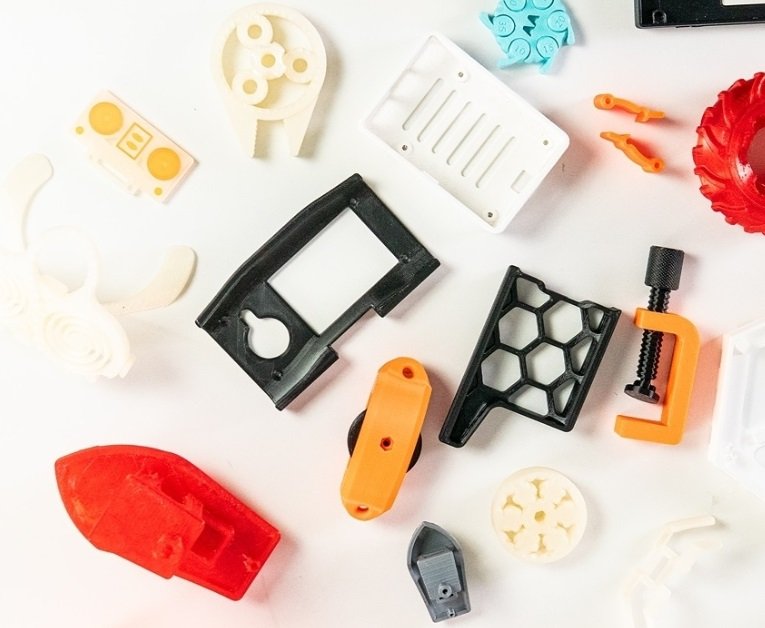
3D printing has never been so accessible as in recent years. It has gone far beyond hobbyist scope and become a common tool for manufacture and businesses. Prototyping, tooling, dentistry, jewelry, science, education, design — 3D printers handle it all both in desktop and industrial scale.
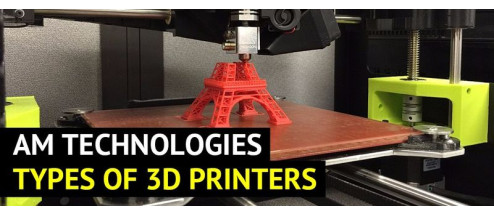
As for the major technologies ruling the market at the consumer level, one of them is clearly FDM. Since its emergence, this method has been quite popular among 3D printing beginners due to its increased simplicity and affordable costs, while seasoned users enjoyed the extensive level of creative freedom and modification. Furthermore, some FDM machines are now capable of printing with such materials that allow them to be utilized by industries as well.
Credit: Hubs / YouTube
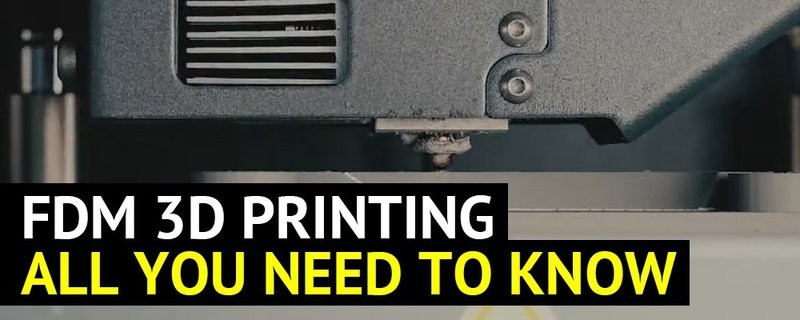
This is Top 3D Shop, and in this article we are going to tell you everything you should know about one of the most popular 3D printing technologies at the moment: what FDM stands for, how it works, what its pros and cons are, and more.
Credit: Hubs / YouTube
FDM, or Fused Deposition Modeling, is one of the most widespread additive manufacturing technologies that applies thermoplastic or composite materials to create 3D objects in a layer-by-layer fashion. Specifically, an FDM 3D printer feeds melted filament through the extruder nozzle and selectively deposits it on the build platform, creating a component of the defined shape and properties.
Given its simplicity as well as high diversity and availability of corresponding printers and materials, the FDM method is globally considered a perfect starting point for average 3D printing enthusiasts and businesses that are ready to expand their production scale.
Apart from the mentioned educational purposes, FDM offers enormous opportunities for further development. At comparatively low costs, beneficial cost-to-size ratio, with multiple material types, and a vast selection of customizable printing parameters, one can always take a next step and create more intricate designs, use new high-performance consumables, upgrade their desktop machine to industrial scale, and turn their hobby into a small yet lucrative manufacturing enterprise.
Let’s look back at history, namely — the origin of FDM technology.
Credit: @olgong_3dp / Instagram
In 1989, Scott Crump, a future co-founder of Stratasys Inc, together with his wife and fellow inventor Lisa Crump created a new additive manufacturing method that became known as Fused Deposition Modeling, or FDM. The patented technology was inspired by Crump’s attempt to make for his daughter a toy frog a year before. He decided to do this by combining plastic and candle wax and using a hot glue gun to build the desired shape layer upon layer. The process turned out to be rather tiresome, so the innovator chose to automate it. Shortly afterwards, FDM embarked on the road to popularity.
In the late 2000s, it all started with the emergence of hobbyist 3D printers. Years later, industrial-grade machines joined the ever-expanding family of FDM devices. Eventually, the field continued to grow in terms of available materials, which made the technology increasingly enticing.
With the expiration of the patent in 2009, the FDM process became twice as accessible, since there was no more need to pay Stratasys remaining one of the most prominent AM companies for the rights to use this technology. From then on, multiple commercial, DIY, and open-source 3D printer applications occurred and spread throughout the world progressively raising it to a new standard.
Credit: @all3dp / Instagram
As described above, Fused Deposition Modeling implies extruding a certain amount of melted filament onto the printer’s build platform to form a specified 3D object. The details of the process can vary depending on the printer, filament type, complexity of the model, etc. In this section, we will try to cover the main points of the process.
In the following picture, you can see a basic dual-extruder FDM printer construction.
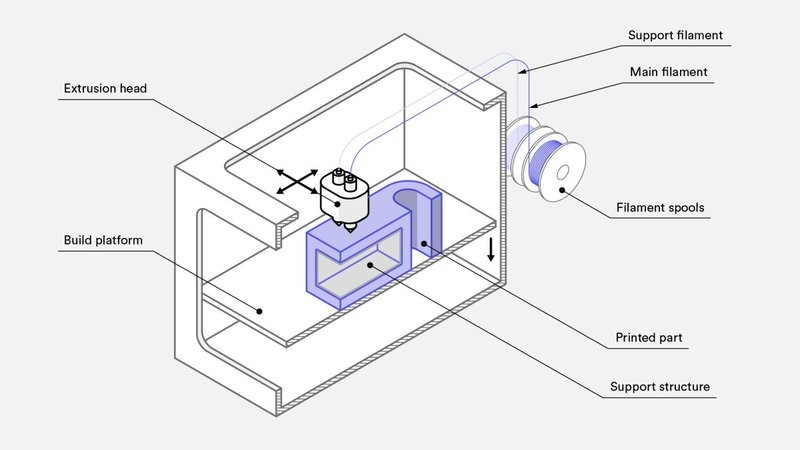
Credit: hubs.com
As you can see, one of the extruders is used to feed main filament for the printed part, while the other manages support structures required in some cases that we will dwell upon later. Dual-extruder printers are capable of printing two different material types (for example, insoluble and soluble) or colors. However, most hobbyist-grade FDM 3D printers come with a single extruder used for both a model itself and supports.
The printer’s type and brand determine the components’ movement along the axes. In the schematic, the extruder is able to move in the X and Y direction, while the build platform moves up and down. There are different variations depending on the machine’s version.
As with any AM technique, first you should prepare a 3D object model in the dedicated software. Start with importing the design file and setting all the necessary building parameters, such as orientation, layer height, infill percentage, etc. The program will do the rest by analyzing the chosen model and slicing it into layers. Then, it will define extruder paths and printing instructions in line with the acquired data.

Credit: materialise.com
This procedure may vary according to the manufacturer and device itself, but the core actions always remain the same.
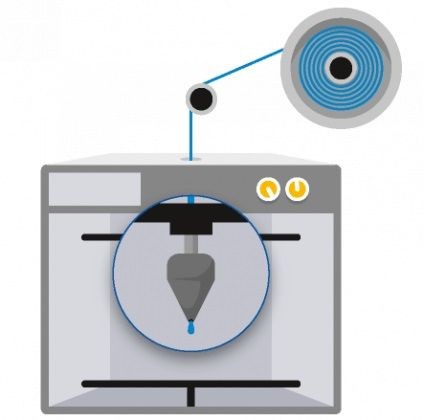
To proceed, filament must be loaded into the printer. For a dual-extruder machine and models with supports, two material spools should be used.
The building process starts with preheating the platform, which will maintain the required temperature to control the cooling of the extruded material. Once the extruder reaches the appointed temperature, filament melts, comes from the nozzle, and is distributed over the platform in a pre-configured pattern eventually forming the 3D model.
Credit: materialise.com
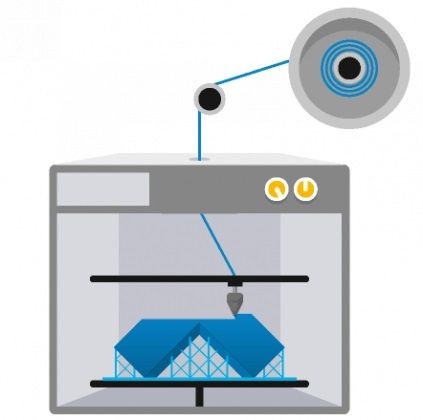
Due to the three-axis system, the extruder and build platform can move in three directions while building the object. The filament is deposited in certain areas layer by layer, which will rapidly cool (with or without built-in fans mounted on the extruder head) and solidify.
Credit: materialise.com
Depending on the object structure, some areas might require multiple passes to cover the prearranged patterns. Once a layer is completed, the print head moves along the Z-axis by a layer height. Afterward, the printing cycle repeats again till all the layers are built.
When the model is fully printed, all that remains is to remove it from the platform and clean it from the support structures.
Credit: materialise.com
After this, FDM-printed parts may require some additional post-processing operations to improve their finish and general look. Read on to find out more about this.

Credit: materialise.com
Like any other 3D printing method, FDM should be considered from both perspectives. Let’s take a look at its major pros and cons.
Credit: @divisionxc / Instagram
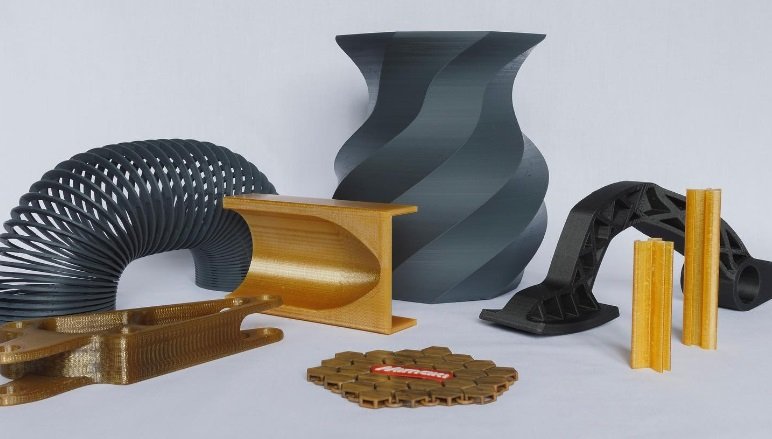
FDM 3D printers work with an impressive range of filaments. From customary PLA and ABS to high-performance engineering plastics such as Nylon, PETG, TPU, PC, and more. Let’s look at some of them.
Credit: Hubs / YouTube
One of the most common materials for FDM technology based on natural sources. It is inexpensive, good for beginners, and can be used to build objects for numerous applications.
Great material for conceptual modeling, producing end-use parts, tools, and functional prototypes. Due to high tensile, impact, and flexural strength, it is suitable for making durable parts with decent thermal resistance.
PC (polycarbonate) possesses excellent durability and strength which make it a widely used material in the medical, automotive, aviation, aerospace, and other demanding industries. With its inherent precision and stability, printed parts get impressive rigidity and can resist functional testing.
Blends the best features of the designated materials, including excellent strength, heat resistance, and flexibility. Thanks to these qualities, it is widely used in automotive, electronics, and telecommunications spheres.
Combines good toughness, semi-flexibility, and decent tensile strength. Mostly used for rapid prototyping, producing jigs and fixtures as well as small-volume manufacturing with less demanding functional parts.
Easy-to-print filament providing smooth surface finish and outstanding water resistance. Boasts semi-rigid nature and distinct thermal characteristics, which makes it not prone to warping.
Widely used to make high-functional long-lasting parts with elastomeric characteristics, including high abrasion, scratch, and UV resistance, exceptional durability, transparency, and aesthetic looks.
Provides a handy combination of great thermal, mechanical, and electrical properties. Actively used in demanding areas, such as automotive, aerospace, high-end engineering, industrial production, etc.
Each technology has its capabilities and limitations. Fused Deposition Modeling is not the exception, and knowing its peculiarities will definitely improve your results, so let’s see what they are.
The majority of FDM 3D printers let you adjust the build speed, nozzle and build platform temperature, layer height, and cooling intensity. All of these are usually changed in accordance with the material used.
You may consider FDM quite slow, but mind that over-speeding can lead to unpleasant consequences for your model. Apart from the low overall quality and spoiled finish, you risk breaking the object’s structure by ruining some areas in the process of building. A decent result is totally worth the wait.
One of the first things you should consider when searching for a 3D printer is its build volume. Regular desktop devices usually come with about a 200 x 200 x 200 mm chamber. As for industrial machines, they can offer a build volume of up to 1000 x 1000 x 1000 mm. The basic criterion for this choice is your purpose and potential designs: how big and how many parts do you want to make? Mind that larger objects can always be split into parts, printed in several sessions, and glued afterwards.
Pay special attention to this parameter if you want to print intricate models with highly detailed design. The standard nozzle diameter is 0.4 mm. In most cases, it is a decent option, while lower options might cause some printing difficulties. Still, if you desire to get smoother surfaces and finer features, use a nozzle with a smaller diameter. Note that this change will also affect the build speed.

Credit: @ideal3dprinting / Instagram
FDM usually offers a 0.02–0.4 mm layer height. The smaller it is, the smoother your model’s surface will be, including complex forms and finer details. However, if you aim for high production speed and lower costs, you can increase this parameter. The latter is recommended for rapid prototyping with low fidelity requirements.
This parameter is crucial for FDM-produced components, as their quality depends on the adhesion between the deposited levels. It relates to the binding strength of multiple material layers caused by high temperature and pressure applied to the melted filament. It is important to remember that this strength will always be inferior to the material’s own strength. This contributes to the anisotropic nature of the FDM parts. Moreover, a slight deformation while pressing filament to the previous layers results in a wavy surface and visible lines that can still be seen even by the smallest layer height setting. That is why such printouts usually require post-processing.
Credit: @nisha_productdesign / Instagram
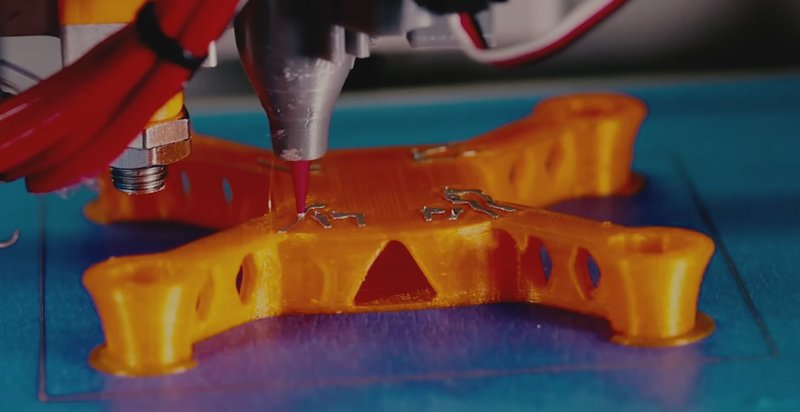
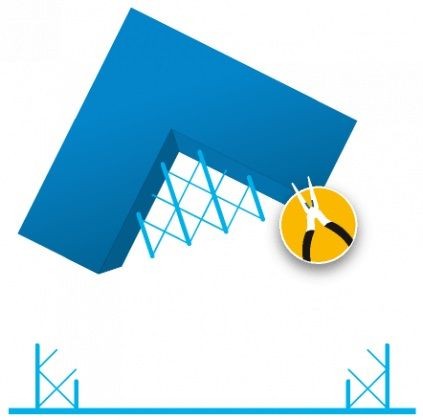
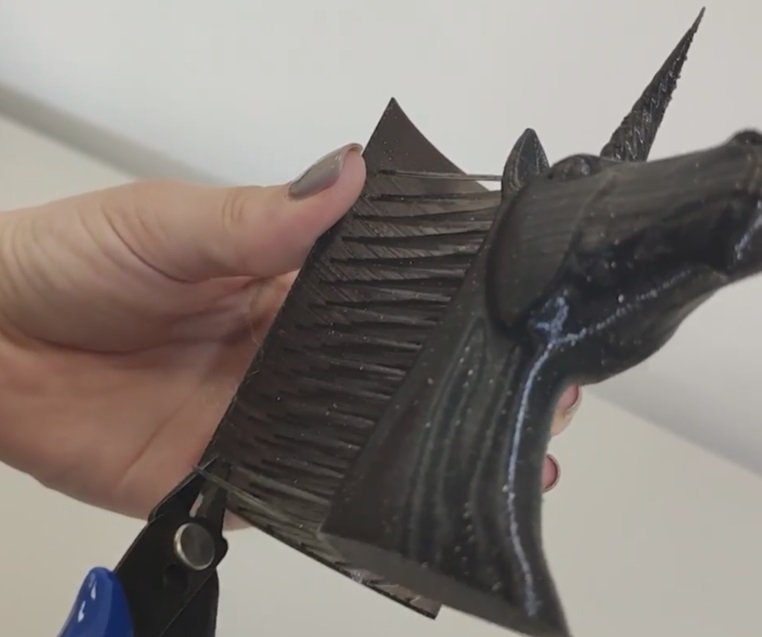
Some models have overhang areas that require support structures to be printed correctly owing to the peculiarities of FDM technology. Clearly, it is impossible to deposit filament layers over the air, thus some reliable base is needed.
Supports can be made from the same filament as the model itself; however, in some cases, mostly for high-grade and industrial applications, more expensive dissolvable materials, like PVA, can be used to make the removal process easier. Note that this usually requires a dual-extruder 3D printer. Insoluble supports will naturally affect the model surface quality, so it is advised to minimize their use to a reasonable limit or devote sufficient time to post-processing.
Credit: Hubs / YouTube
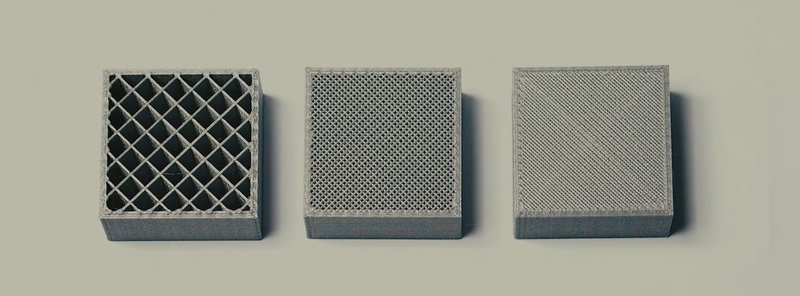
All FDM models have a certain peculiarity: they are often printed hollow to save on material and time. The external solid layer is known as the shell, while the internal structure with low density is called the infill. Both these parameters have a direct impact on the model’s strength. For a desktop FDM 3D printer, the infill is customarily set to 25%. As for the shell thickness, 1 mm is enough to rapidly produce parts with decent characteristics.
Credit: CNC Kitchen / YouTube
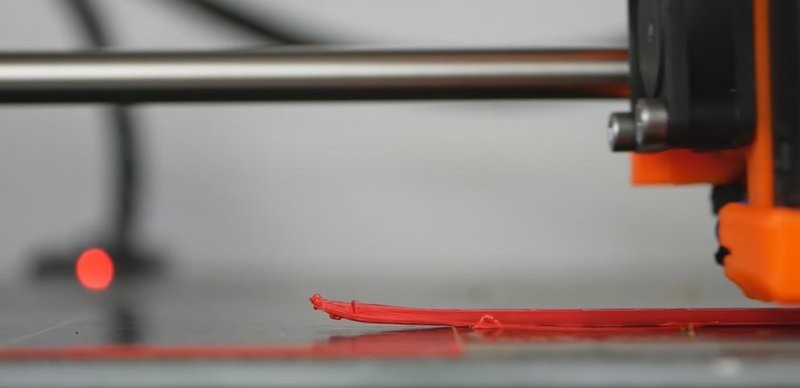
Being one of the best known FDM printing problems, warping requires special attention. Since the extruded filament tends to shrink while cooling down during solidification, different areas acquire varying dimensions and properties. Thus, it affects internal tensions and causes distortion of the bottom layer. Despite regularity of this process, it can be prevented by improved adhesion, close observation, and careful temperature control for the bed and build chamber.
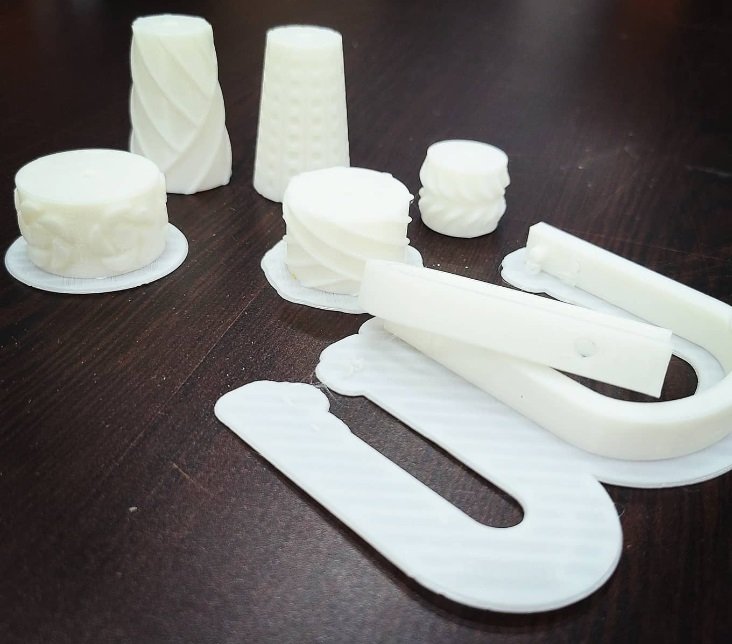
As we have already mentioned, parts printed with FDM require post-processing to achieve a better look. There are different techniques for this purpose, but let’s stick with the most common of them.
Credit: @fluxaxis / Instagram
Due to the method’s specifics, FDM-produced parts are frequently printed with supports to preserve their structure. As we have already mentioned, there are two types of supports: soluble and insoluble. In both cases, they must be removed after printing, which may result in some trace marks that should be taken care of further.
Insoluble support structures are made from standard materials, such as PLA, ABS, PC, Nylon, etc. They are primarily removed by hand, pliers, or other similar tools. Still, sometimes they can be located in critical positions, which makes it difficult to remove them in a neat way.
Credit: @gekko.center / Instagram
Nevertheless, there are soluble materials that perfectly fit the role of support structures, such as HIPS (applied together with ABS) and PVA (used for PLA models). They greatly facilitate the removal task as they tend to dissolve in limonene and water respectively.
This post-processing technique is fairly simple and overall resembles sanding wood objects. The process is rather long, labor-intensive, and should be performed in several stages. Start with a low-grit sandpaper and proceed with finer grits appropriate for your needs: the higher detailing you want to achieve, the higher the grit should be taken. Mind that excessive or improper sanding can damage the surface of the processed part. Additionally, one should avoid breathing in small material particles, so it is better to use a mask in the process.
This method applies acetone vapors when dealing with ABS. As acetone is flammable and its vapors are poisonous, the procedure must be carried out in a closed environment and under careful supervision. Due to the chemical interaction between acetone and outer ABS layers, the model surface melts and becomes smooth and glossy. The process is uncontrollable and uneven, therefore it will not fit applications requiring high dimensional accuracy. Still, it is great for aesthetic purposes.
To give a model or part a truly unique and professional look, creators often resort to priming and painting techniques. To color an FDM-printed object, one should first sand it and consistently coat with primer, which provides a base for further painting. Usually, the latter is performed with a brush or spray depending on a desired result or available time, since the first option is better for complex designs, while the second is much faster.
For higher surface quality, one may perform polishing after sanding. It is usually done by using a buffing wheel or special tools.
When you need to print an object that exceeds the printer’s build volume, it is only natural to split the model into several parts, which can be further easily glued or welded together by means of industrial bonding agents or acetone in case with ABS filament.
Hydrographics, also known as water transfer printing, is one of the most curious post-processing techniques for FDM-printed objects. It implies dipping a model into water and covering it with ornamental images. This way, you can get a printout with a unique design. The method is suited for plastic, metal, glass, wood, and other materials.
Credit: @divisionxc / Instagram
Now, there are a number of points that one should pay attention to when considering printing with FDM technology. Let us look at just some of them.
Fused Deposition Modeling is currently recognized as one of the best 3D printing technologies for various goals. Being accessible, straightforward, versatile, highly customizable, and increasingly cost-efficient, FDM 3D printing provides sufficient accuracy, quality, and performance to meet manifold additive manufacturing needs on both beginner and professional level.
In spite of certain weak points, such as an occasional lack of speed and almost mandatory post-processing, FDM has much to offer in terms of smooth and user-friendly 3D printing experience. With some simple rules in mind, you are sure to get the right output worth the initial training.
Credit: @leonidas_3d_printing / Instagram
Basically, FDM (Fused Deposition Modeling) and FFF (Fused Filament Fabrication) define the same 3D printing technology. The main difference lies in that the FDM term was coined by Stratasys. If you are interested to find out more, read our article on the subject.
Generally, FDM systems fall into two main groups: desktop/prototyping 3D printers mostly for home use and industrial/professional machines of greater production scale. Both categories have their advantages based on the user’s purposes. Industrial devices excel their counterparts in size, power, speed, efficiency, and price, so they are clearly better for manufacturing end-use parts, functional prototypes, and tools. Furthermore, they ensure high repeatability and reliability as well as a certain degree of automation. In addition, desktop FDM printers require routine calibration and maintenance. Still, they are perfect for beginners.
It depends on the device’s initial characteristics, current calibration, and overall complexity of the chosen project. In case high accuracy is required, it is better to use a machine with industrial capacity. Nevertheless, desktop 3D printers are rapidly evolving, offering ever more capabilities.
The cost of FDM printing is affected by a number of factors: the type of machine, the quality of materials used, the total complexity of models printed, etc. However, it is common knowledge that FDM 3D printers are the most cost-efficient solution along with available consumables. One thing you should consider is relatively low quality when it comes to desktop devices and parts requiring strength and reliable mechanical properties. Other than that, FDM is what most beginners need to get an easy start and smooth learning curve.
FDM technology often boasts a relatively high speed of production for custom-made parts. Still, apart from particular 3D printer models, the printing time obviously depends on the object to be printed.
Due to the layer-by-layer deposition, FDM-printed parts usually require post-processing to get a smooth surface and nice look.
Credit: @divisionxc / Instagram
According to the printer category, the FDM method is well suited for conceptual modeling, rapid prototyping, small-scale production, and more. Due to better qualities, fine parameters, and more materials supported, industrial machines are fit for making durable end-use parts, tools, and functional prototypes, including some other applications. From beautiful figurines to accurate technical components — FDM printing capabilities are nearly endless.
3D printers applying FDM technology tend to produce high-quality parts from a wide range of materials with great properties in an easy and cost-effective way. Both categories of these machines often provide good dimensional accuracy, albeit not as high as resin 3D printers.
Update your browser to view this website correctly. Update my browser now


Write a comment