Printing with FDM technology might result in a number of defects due to incorrect mode, uneven quality of consumables, or some printer-related issues. We will consider the process of thread formation during nozzle movement, generally known as stringing or oozing.
When the nozzle is idly moving from one printing area to another within one layer, the melted filament may slightly leak and form a string between the start and end points of the route. The defect occurs most often with PETG printing, but it is possible with other materials as well.
The main causes of stringing are:
It might be hard to determine a specific cause from external signs, that is why it is better to consistently check and rule out all the possible reasons.
Wet filament makes it drastically more difficult to adjust the print mode, and it is relatively easy to detect excessive humidity.
Extremely wet PETG. Characteristic features can be clearly seen: loose surface of the part, filament lint over the entire length of the threads.
It is widely believed that PLA, PETG, and ABS have little moisture absorption. Indeed, many users do not encounter problems with wet filament. At the same time, manufacturers offer drying modes for most of their consumables.
When printing with damp filament, there is usually an extraneous sound similar to hissing or crackling. The surface of the printout comes out matte and porous, and strings are formed over the non-print area.

Credit: maker.pro
In this case, threads occur when water in the filament starts to boil, and the steam provides an excessive output of plastic. When these signs are recognized, drying is definitely necessary.
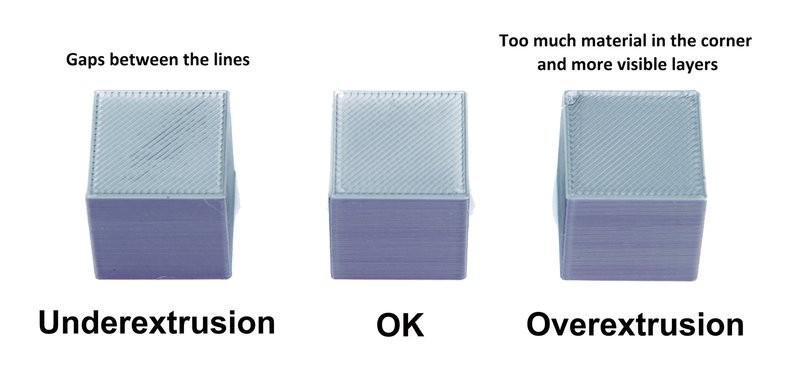
Wet filament is a factor that can be detected separately, but the others are similar and should be dealt with sequentially. To begin with, it is necessary to make sure that the right amount of plastic is fed and the temperature regime is correct. Overextrusion manifests itself in oozing blobs, distorted geometry of the print, and ribbed horizontal surfaces.
Credit: prusa3d.com
And in this case, strings are formed when an excessive amount of plastic starts leaking from the nozzle during its idle movement.
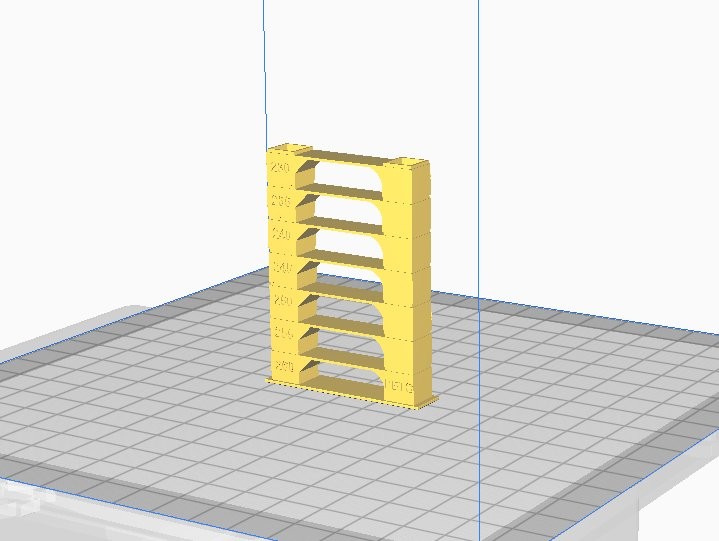
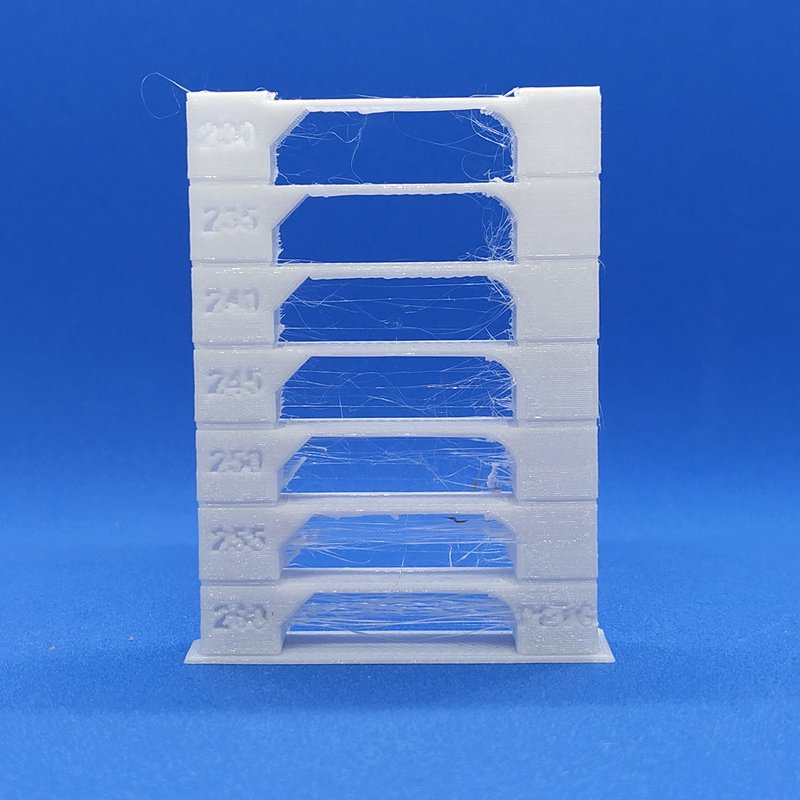
There are special test patterns called "temperature towers" to check the temperature mode. These are a sequence of vertically positioned identical elements printed at different nozzle temperatures.
There is also a plugin for automated creation of test patterns in Cura, so let's see how it works. To install the plugin, you must create an Ultimaker account and log in to it. This will give access to the repository.
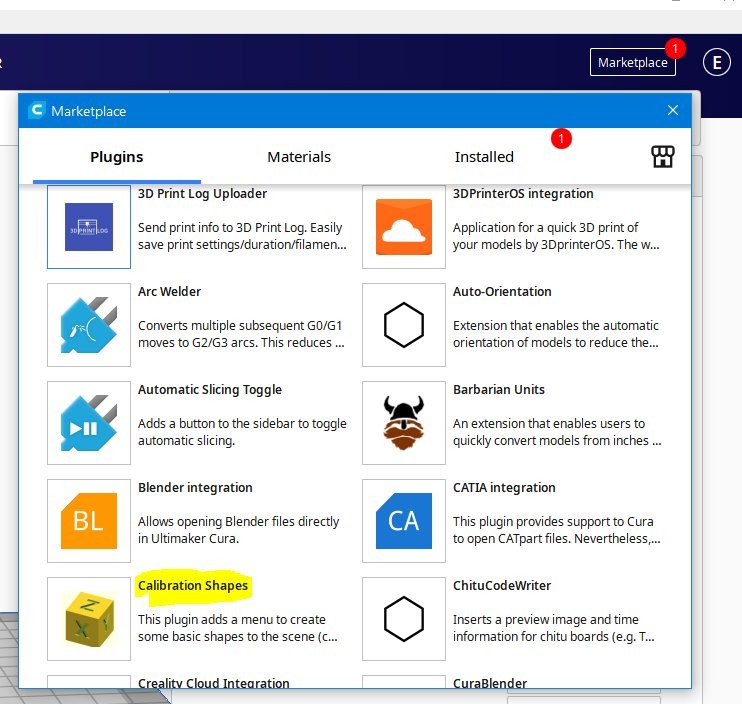
Install the Calibration Shapes plugin. After reloading the slicer, the Parts for calibration item appears in the Extensions menu.
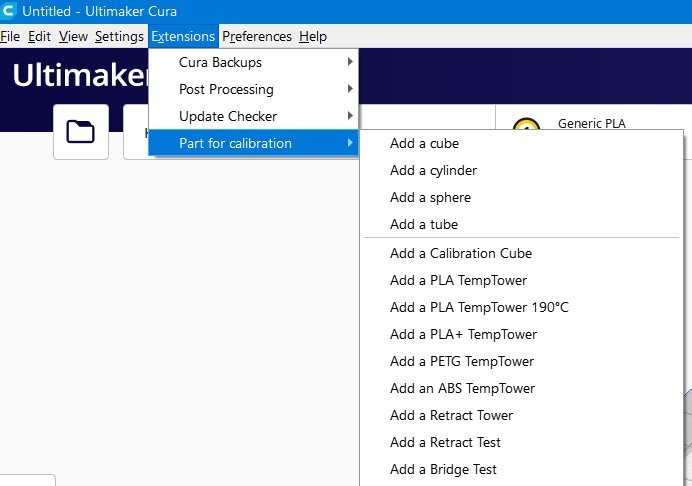
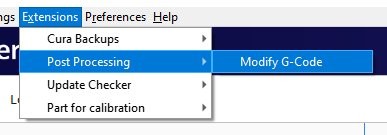
To set up the PETG print temperature, select Add a PETG TempTower. The temperature tower model will appear on the screen. Now it is time for a post-processing script (a set of scripts will be installed with the plugin).
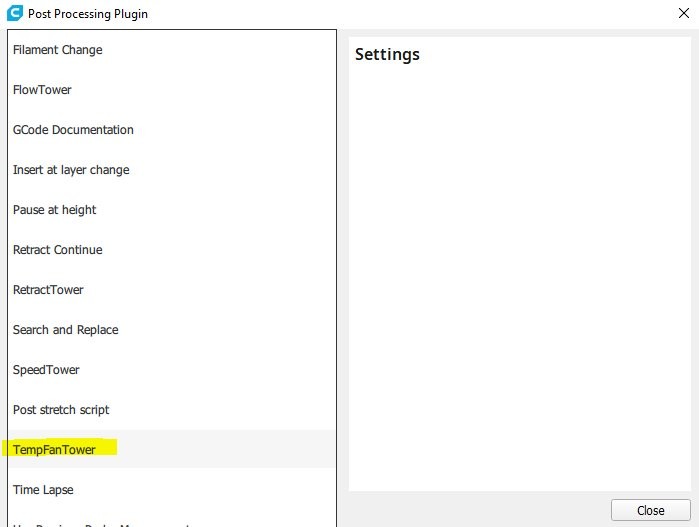
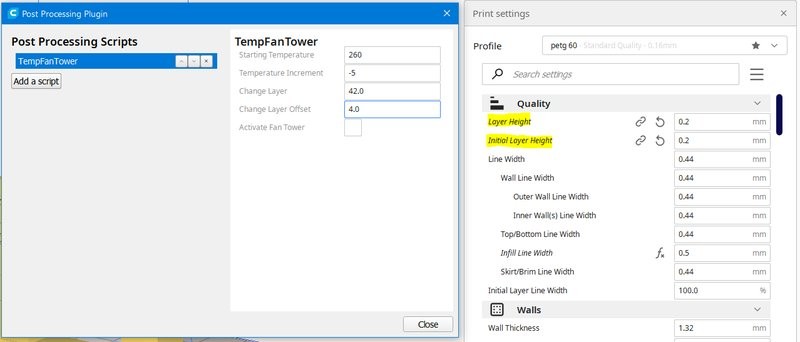
The settings in the screenshot above are set for a temperature tower with a range from 260 °C to 230 °C in increments of 5; the layer height is 0.2 mm.
For PETG, it might make sense to print a second tower with lower temperatures. For instance, it applies to PLA+. The settings are the same, only the starting temperature is 230 °C.
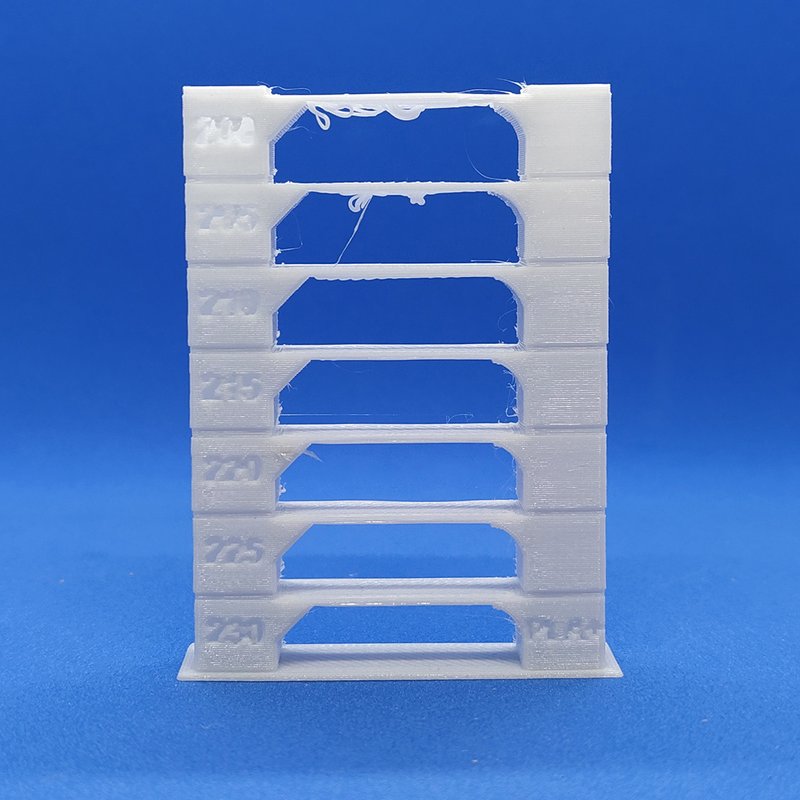
A tower allows visually selecting the correct print temperature. A temperature that is too high results in blobs, indistinct outlines, and a large number of strings. Lower temperatures lead to disruptions in feeding and poor mechanical strength of the part. Our towers in the photos show that evident stringing stops after 230 °C, and at 215 °C there are issues with feeding and layer adhesion. That is why 220 °C will be the optimum printing temperature for this particular filament on this particular machine. Therefore, set the appropriate value in the Printing Temperature field and make sure that the other temperatures are synchronized (they are dependent on the first value, but can be set manually).

Retraction is used to prevent unwanted plastic leaking from the nozzle. This function will pull back the extruder before moving it over the non-print area. The basic settings for retraction in the slicer are length and speed. Insufficient length is a common cause of stringing. Excessive length leads to thread stretching, plastic getting into the cold zone, insufficient feed after moving the nozzle to the finish point, or plugging.
At too high a speed the thread will break in the melt zone or cause feed slippage. At too low — the thread will stretch without being pulled back inside the nozzle.
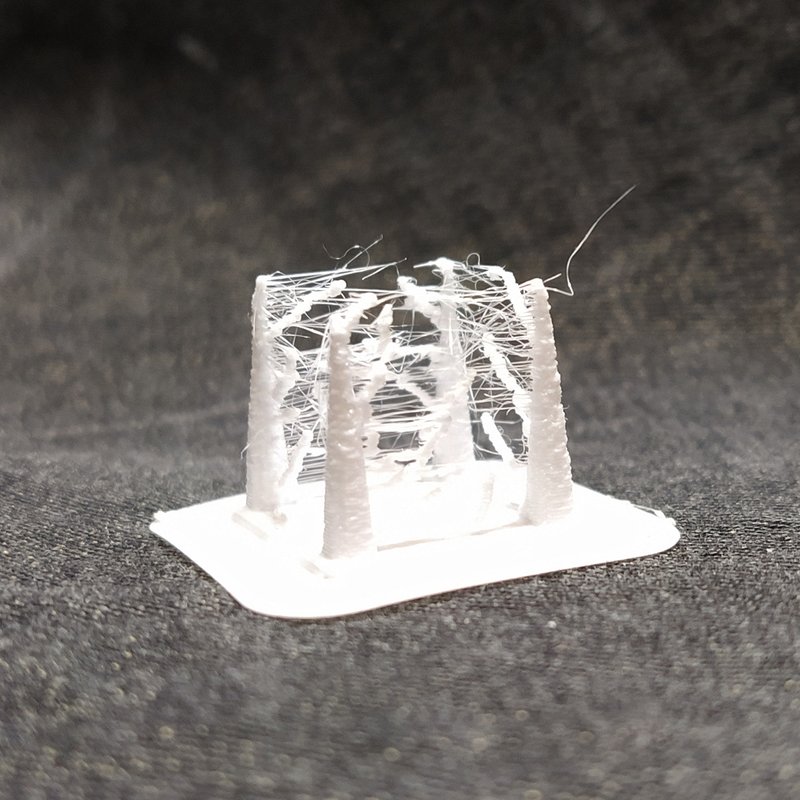
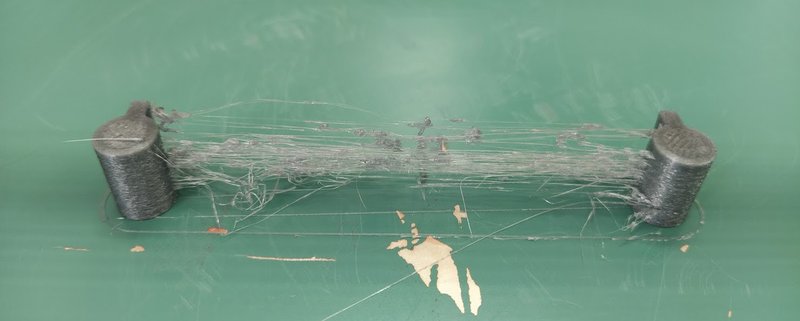
Terminal example: high print temperature with disabled retraction.
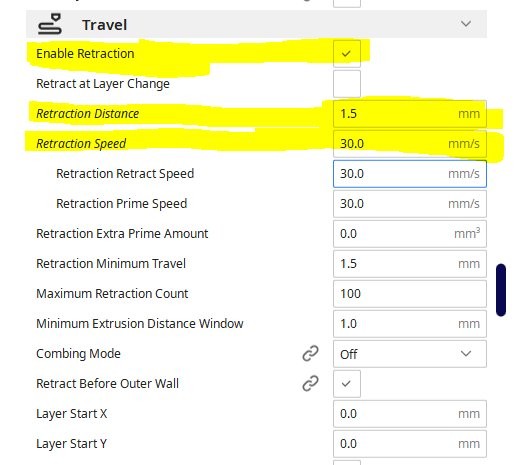
Typical values at which it is reasonable to start adjusting retraction are 30 mm/s speed, 1–2 mm length for a direct extruder, and 5–7 mm length for a Bowden. For instance, in Cura, retraction can be adjusted in the Travel section.
To check retraction, test patterns like "four square cones" are printed, but there are more functional tests to select retraction mode by analyzing a single printout. For example, this service generates a G-code with different retraction settings. It should be used with caution, because a large number of retracts per unit time occur during printing.
This service allows determining the optimal settings without having to reprint the test several times.
The default settings need to be adjusted for the printer in use. You can also reduce the number of vertical iterations — too high retraction makes no practical sense.
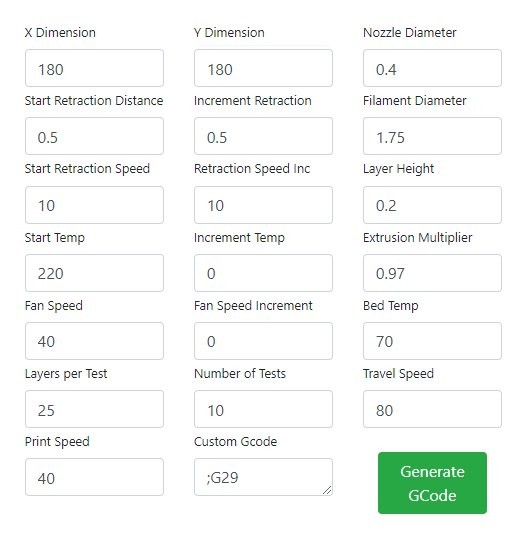
Appropriate settings for Kingroon KP3S with 0.4 mm nozzle, PETG.
The settings to attend to:
The point of the test is as follows: the retraction length increases in increments of 0.5 mm along the perimeter, i.e. from 0.5 to 8 mm. The retraction speed increases with height, from 10 mm/s in increments of 5 mm/s.
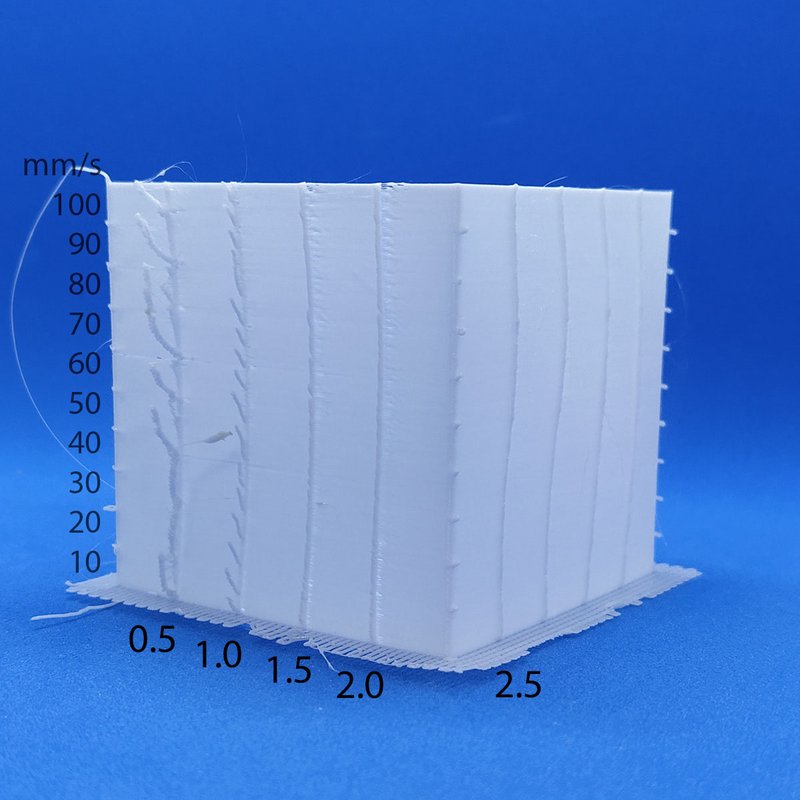
The printout shows that when you increase the retraction length more than 1.5 mm, the quality of the protrusion does not change.
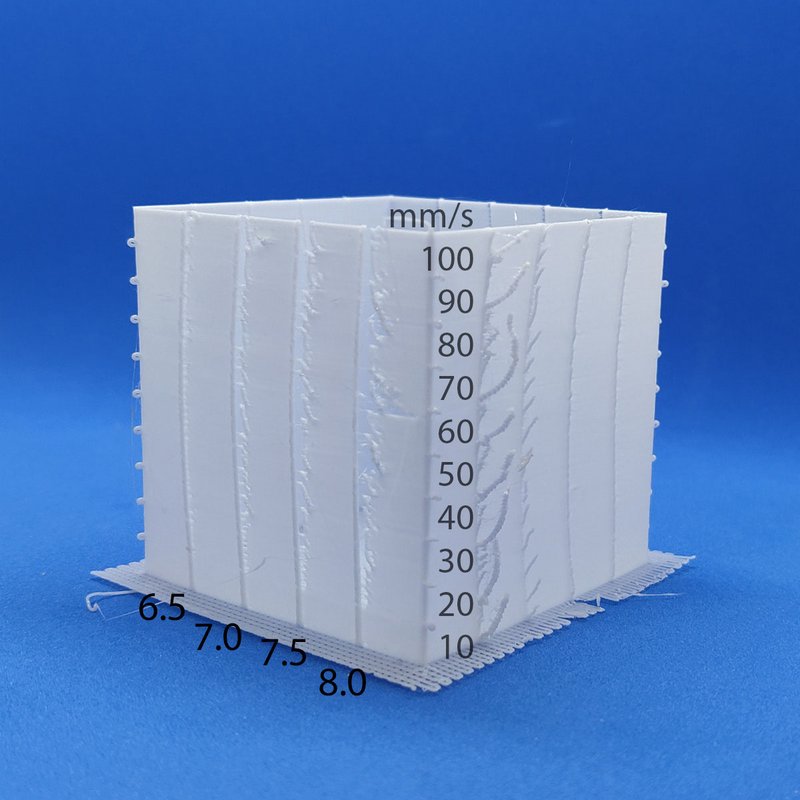
The photo shows the inadequate feed after retraction, which occurs when the length is too long and the speed is too high.
The final retraction length not only depends on the plastic and the type of extruder, it is also affected by a number of other parameters, such as the cooling efficiency of the hotend and design of the thermal barrier. Therefore, the settings for the same spool installed on different printers can vary significantly.
The printed test does not allow determining the exact retraction speed, so choose a standard value of 30 mm/s to avoid filament break and print at normal speed.
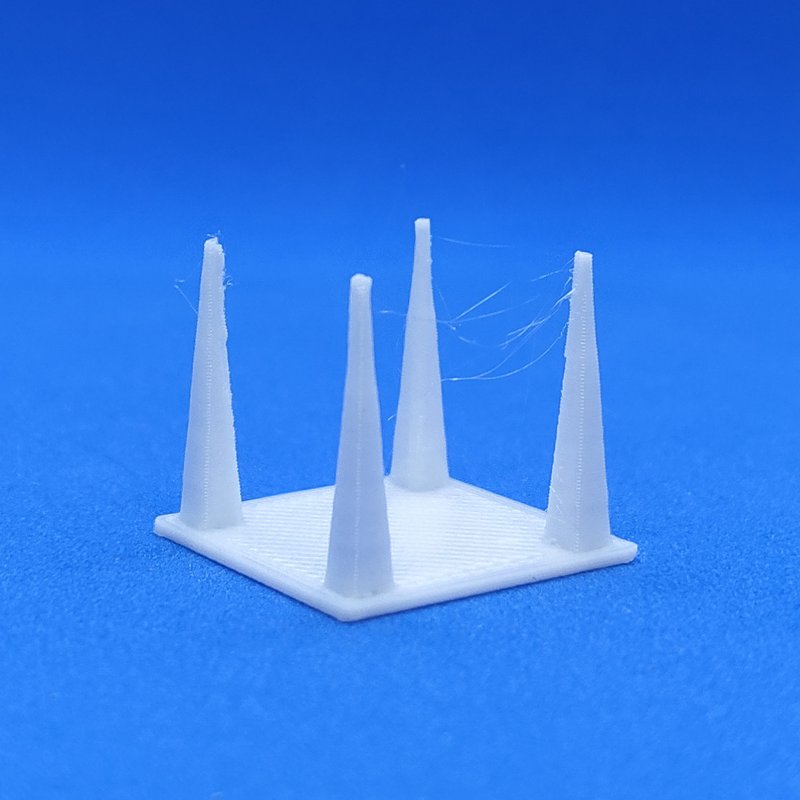
The "four cones" test, printed with the settings selected earlier. The retraction length is 1.5 mm, the speed is 30 mm/s. The printer is a Kingroon KP3S with the Titan direct extruder. Note that the printing of relatively large objects produces fewer strings than with "cones".
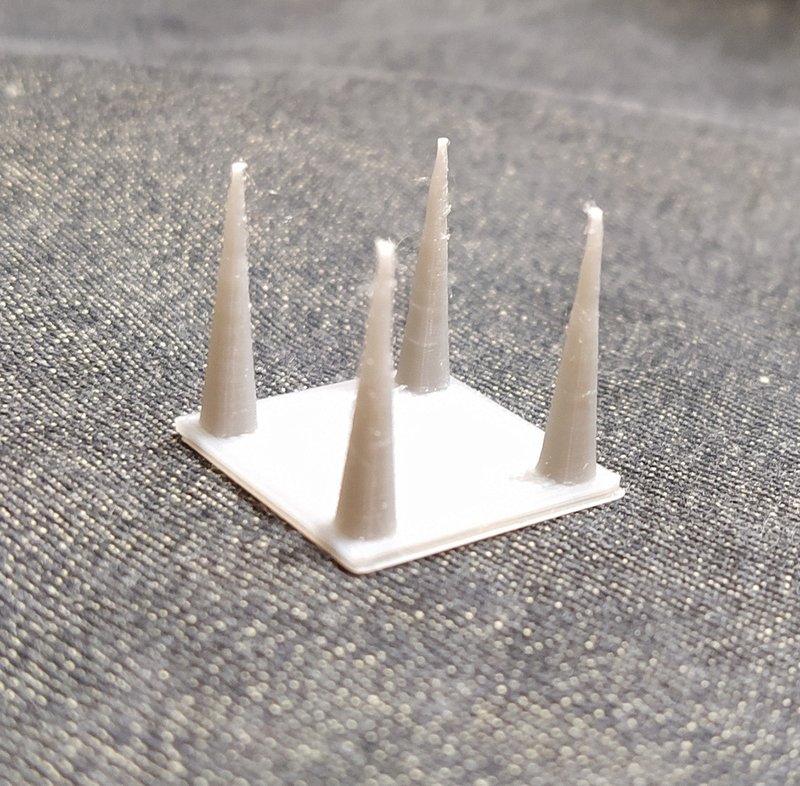
By comparison, the same test with PLA. No stringing already at a retraction length of 1 mm.
Different slicers have additional features designed to improve retraction performance and reduce stringing. For example, in Cura, it is Combing — moving to the next section not in a straight line, but over the already printed path.
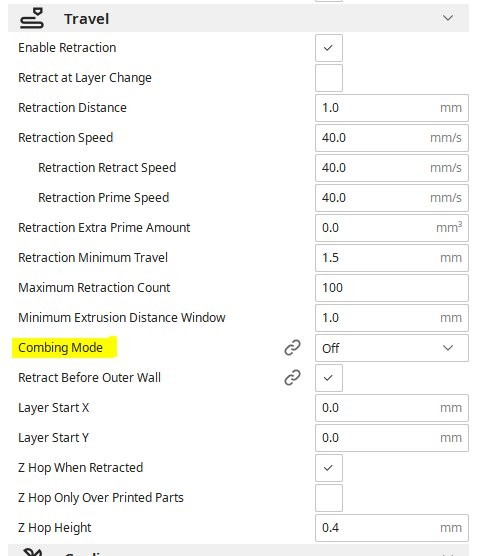
Cura 4.11.0
If the Combing mode is on, stringing may be reduced. However, its use often leads to certain surface defects where it contacts with the nozzle.
Worn or low-quality nozzles can also contribute to stringing. A normal nozzle has a thin channel in front of the outlet, but there are also nozzles that have virtually no channel. Practice shows that in the second case, the retraction works worse. Finally, it is reasonable to check that the nozzle is clean. The filament leftovers will drip and stick to the printout.
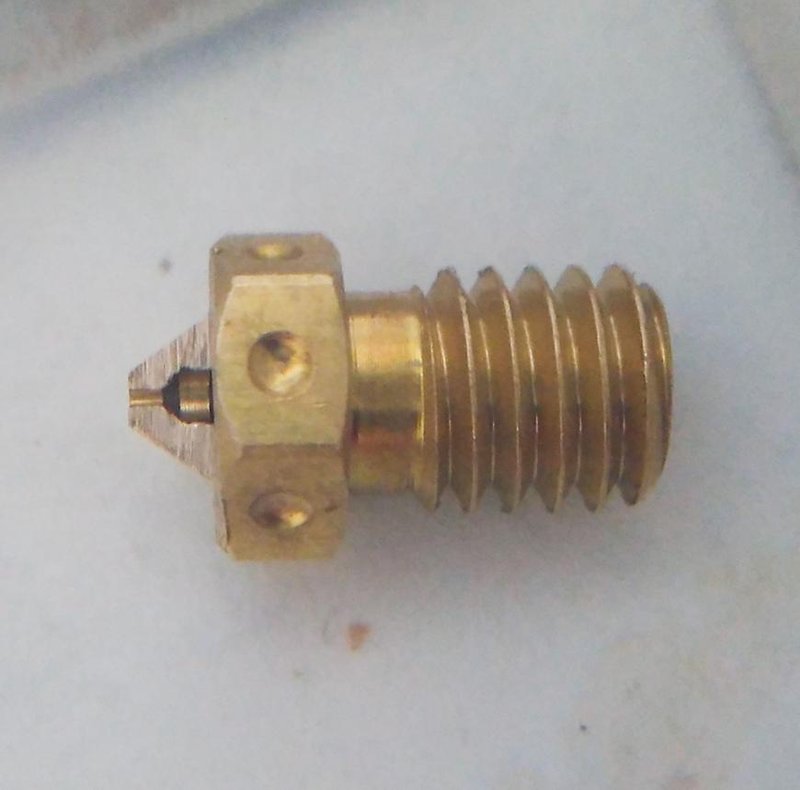
The inside of a quality nozzle.
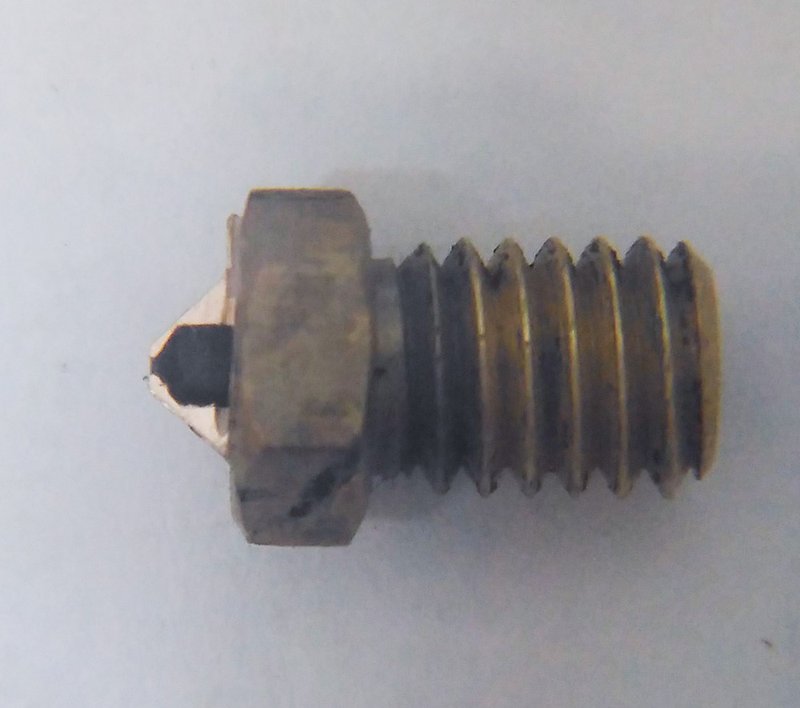
Here, there is practically no output channel.
Speed also matters. It is more likely that the plastic will leak more at a low speed. The upper end is determined by the capabilities of the printer. On average, this value is in the 80–150 mm/s range.
To minimize stringing, you should first make sure that the filament is dry and that the temperature and feeding rate are correct. Only after that is it reasonable to proceed to the retraction settings adjustment. Specific length and speed will depend not only on the plastic, but also on the design of the extruder and the printer's hotend.
Update your browser to view this website correctly. Update my browser now


Write a comment