Sinterit Lisa Pro is the improved version of the Sinterit Lisa and the undisputed leader among SLS 3D printers. Here, we will tell you about its characteristics, features and how it differs from the older model. We will also review the printer’s applications and thoroughly explain how to operate it.
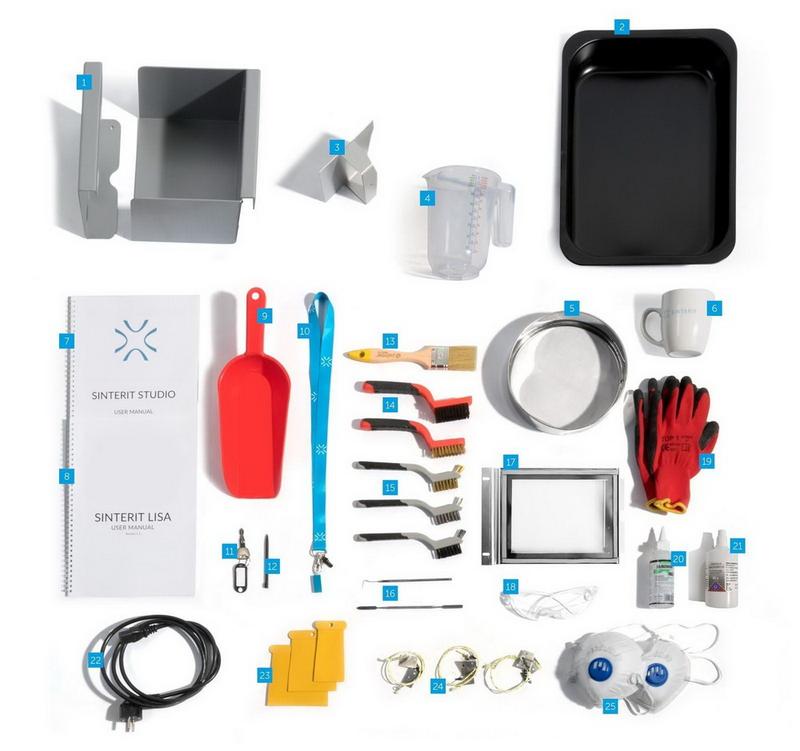
Before we get to the good part, it’s worth mentioning that a Sinterit Lisa Pro 3D printer can be purchased either separately or with all the necessary equipment - a powder handling solution Sinterit Sieve and a Sinterit Sandblaster cleaning station. If you already own similar equipment, you can buy the printer separately.
Now let’s finally get to our review!

Selective Laser Sintering (SLS) is a 3D printing technology for creating functional prototypes and small batches of products from synthetic powders. The technology is based on using lasers to sinter layers of powdered material into a solid structure.
SLS technology allows to produce high tensile models with a high quality surface without supports. The finished prints have no visible layers.
Although the selective laser sintering method has existed since the mid-80s, its use in 3D printing was constrained by long-lasting patents, as well as the high cost of implementing the technology. This continued until 2014, when Sinterit, a Polish manufacturer introduced Lisa, a desktop SLS 3D printer at an extremely low price.
Since then, many companies, such as Formlabs, have decided to enter the SLS 3D printing market. However, only a few of them succeeded. Meanwhile, Sinterit introduced the second, more advanced model. We’ll talk about it further on.
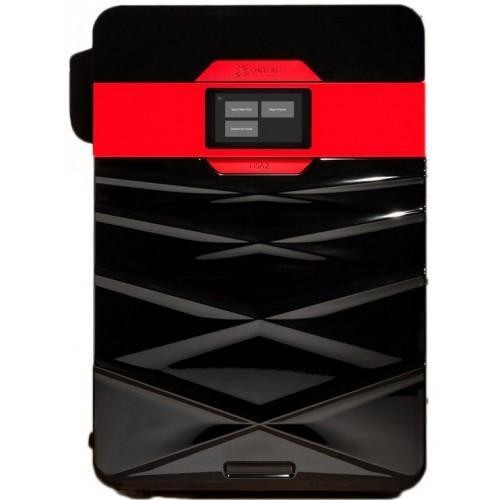
In 2019, Sinterit introduced Lisa Pro - a new desktop SLS 3D printer, designed in Kraków (Poland). Compared to the older version, Lisa Pro has an enlarged print chamber and an integrated gas supply system that injects inert gas (nitrogen or argon) into the print chamber.
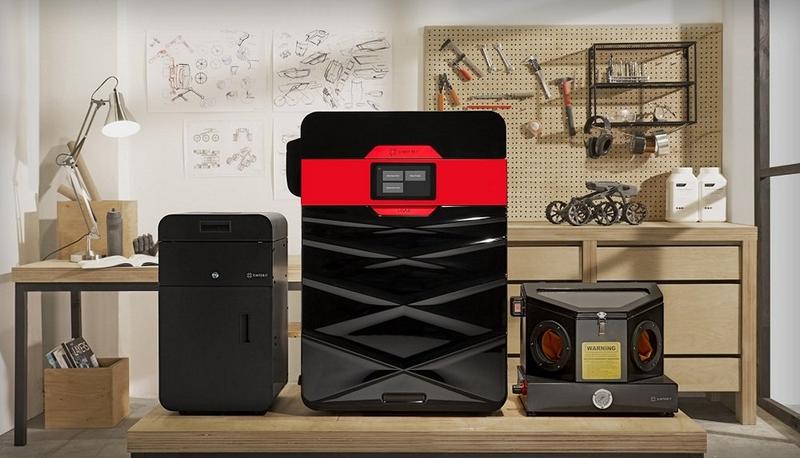
The Lisa Pro model has several significant improvements over the first Sinterit SLS 3D printer. Nevertheless, the main goal remains the same: to offer an affordable, reliable and easy-to-use SLS 3D printer.
The most significant features of the Lisa Pro model include not only enlarged print chamber and gas supply system - the new printer can produce very large details, their size can be up to 32 cm, when the model is located diagonally in the print chamber.
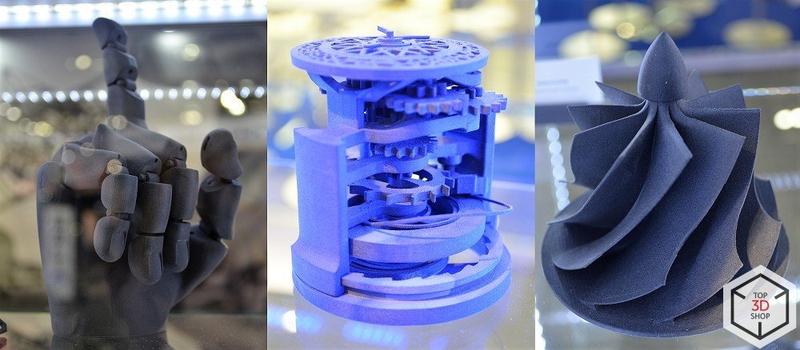
As with the previous Lisa model, this SLS 3D printer can produce high-precision prints and details that consist of several assembled parts in one print cycle, with no supports, since the powder itself acts as a supporting material.
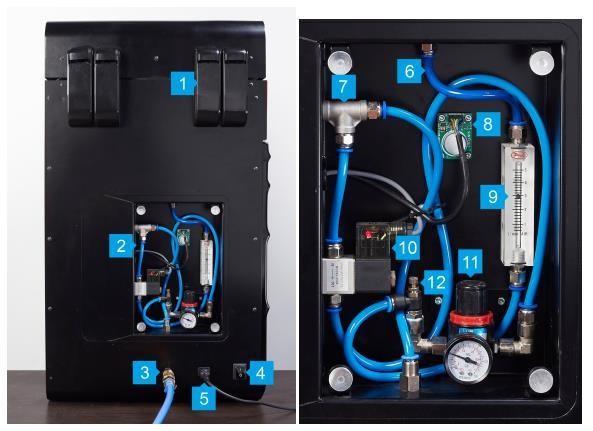
The printer’s gas installation
1.Lid’s Hinges / 2.Gas installation housing / 3.Gas input / 4.Power switch / 5.Power socket / 6.Nitrogen hoses / 7.T-piece of the pressure sensor / 8.Oxygen level sensor / 9.Rotameter / 10.Electrovalve / 11.Pressure reducer with manometer / 12.Throttle valve
One of the most notable features of Sinterit Lisa Pro, which distinguishes it from the older version and most of the competitors, is the built-in gas supply system. Nitrogen and argon are added to the build chamber to oust atmospheric air.
The absence of oxygen will allow you to use РА11 Onyx, that offers better strength and rigidity of prints compared to standard PA12, but it can only be printed in an inert atmosphere.
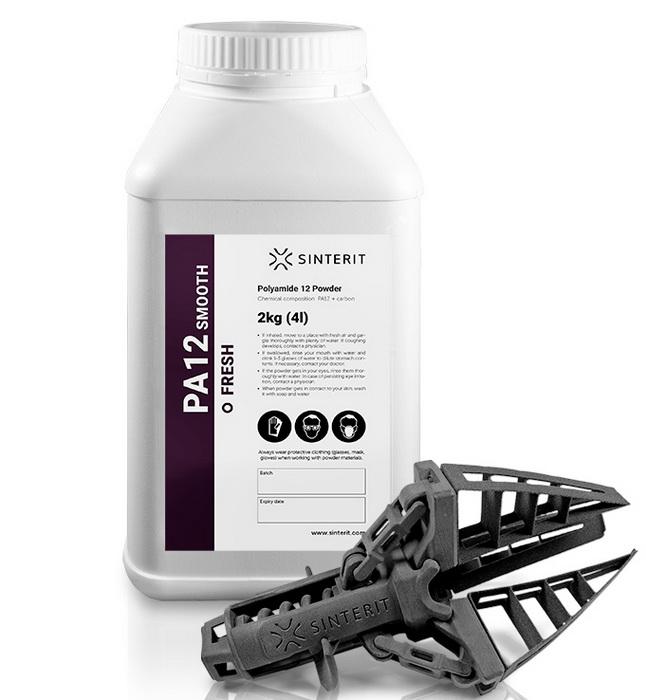
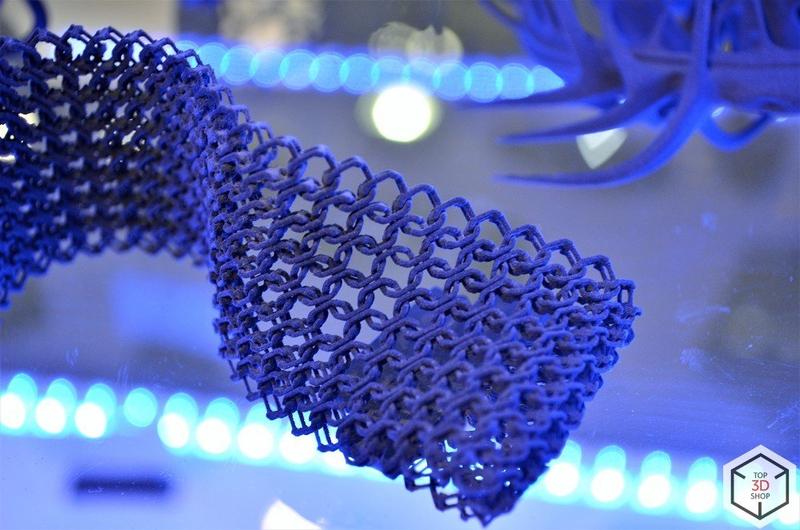
Sinterit Lisa Pro can also work with elastic Flexa Black and thermoplastic polyurethane (TPU) to create rubber-like prints. The company also introduced Flexa Grey, which provides enhanced flexibility. The printer supports all Sinterit powders.
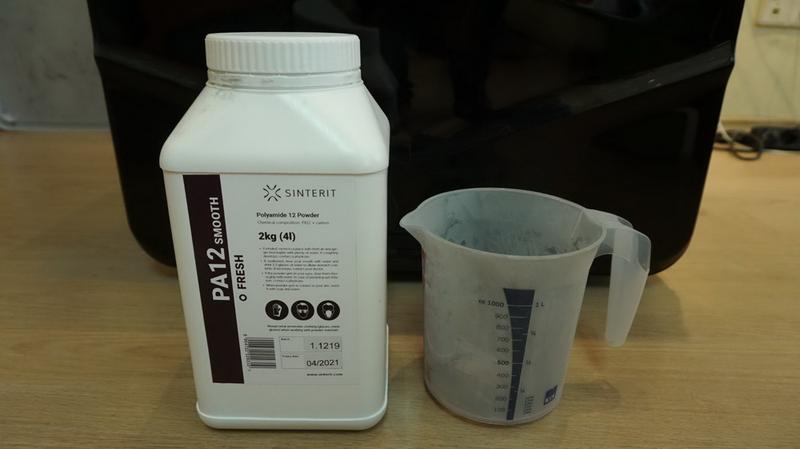
If the SLS powder wasn’t used during the printing process, you can use it one more time, just add some fresh powder. You can reuse up to 70% of powder for РА11, as well as PA12, and up to 100% of powder when working with TPE or FLEXA.
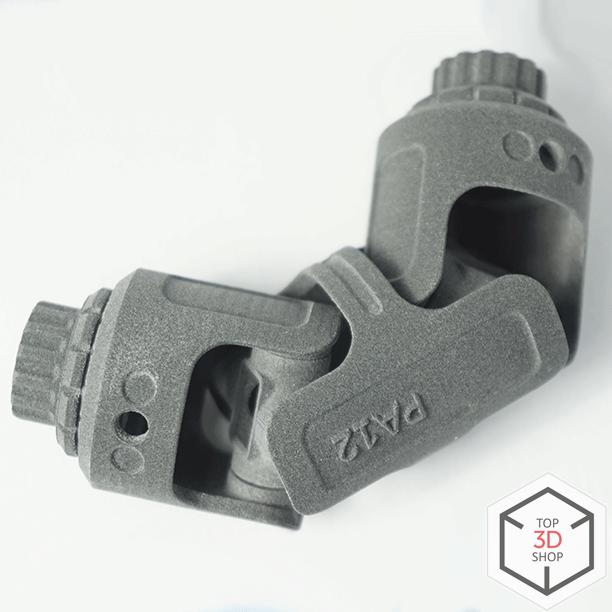
For example, let’s take one of the most common materials, PA12, and dig into its properties in more detail.
|
General information |
||
|
Material type |
Nylon 12 |
|
|
Granulation |
18–90 [μm] |
|
|
Color |
Black |
|
|
Material refreshing ratio |
30 [%] |
|
|
Compatible with |
Lisa & Lisa Pro |
|
|
Parameters |
||
|
Tensile Strength |
41 [MPa] |
|
|
Elongation at Break |
13 [%] |
|
|
Impact resistance (Charpy test / unnotched) |
15–20 [KJ/m²] |
|
|
Shore hardness in type D scale |
74 |
|
|
Thermal properties |
||
|
Softening point (Vicat method type A50 / B50) |
172 / 155 [°C] |
|
|
Melting point |
182 [°C] |
|
|
Heat deflection temperature B |
143 [°C] |
|
|
Printout density |
1.00 [g/cm³] |
|
|
Applications |
||
|
Detailed printouts, structural or mechanical (with complicated internal geometry) elements, functional prototypes or final parts. |
||
|
Charpy U- and V-notched impact testing |
||
|
U |
5.23 |
|
|
V |
3.28 |
|
|
Charpy impact test results for specimens tested using pendulum of maximum energy of 50 [J], weight of 6.8 [kg] and length of 380 [mm]. |
||
|
Surface roughness |
||
|
Roughness parameter |
side surface |
top surface |
|
Ra |
9,680 [μm] | 6,470 [μm] |
|
Rz |
54,184 [μm] |
31,633 [μm] |
|
Roughness of test speciments surfaces printed with layer thickness of 100 [μm] |
||
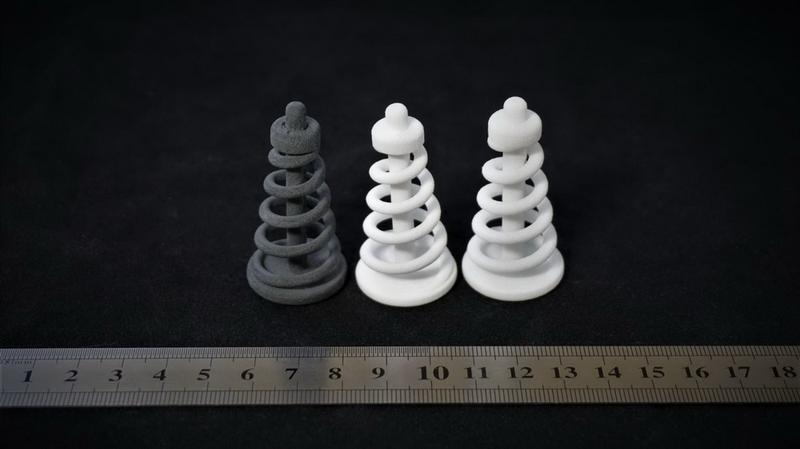
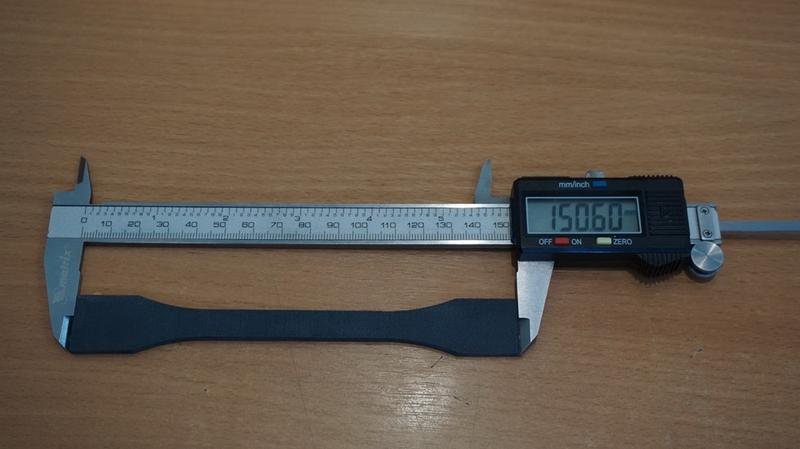
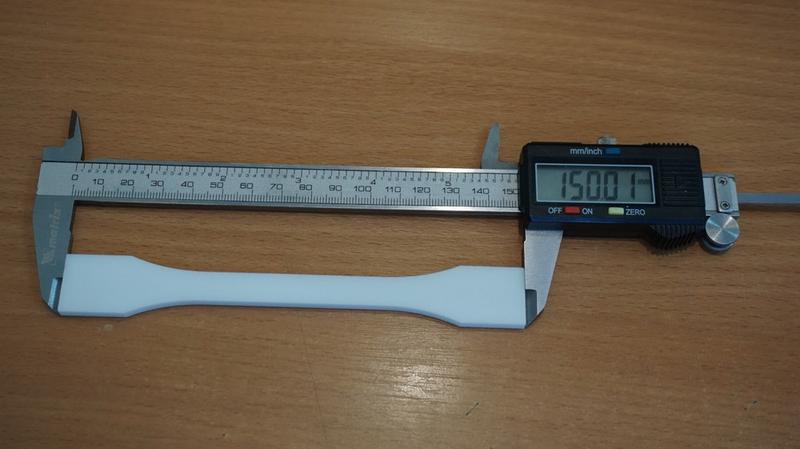
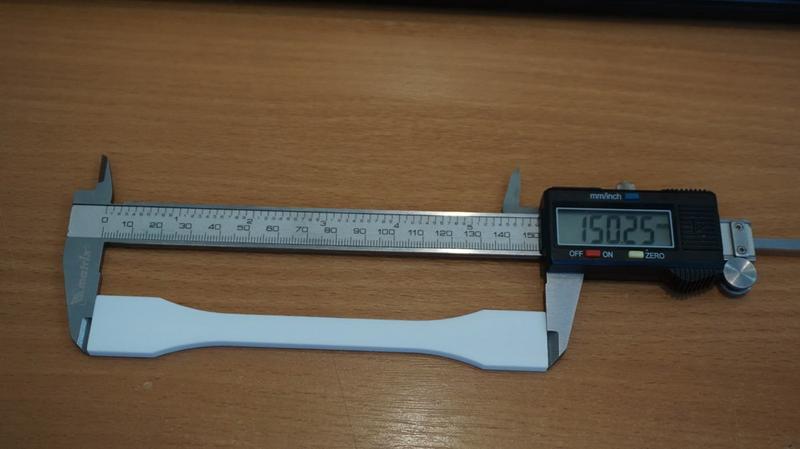
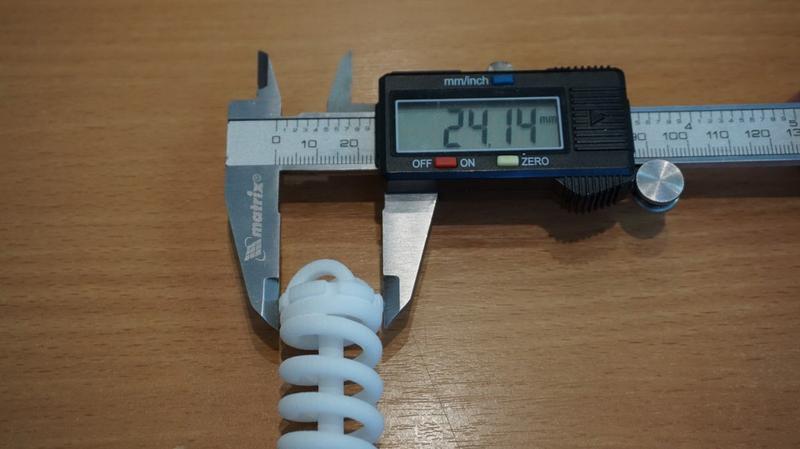
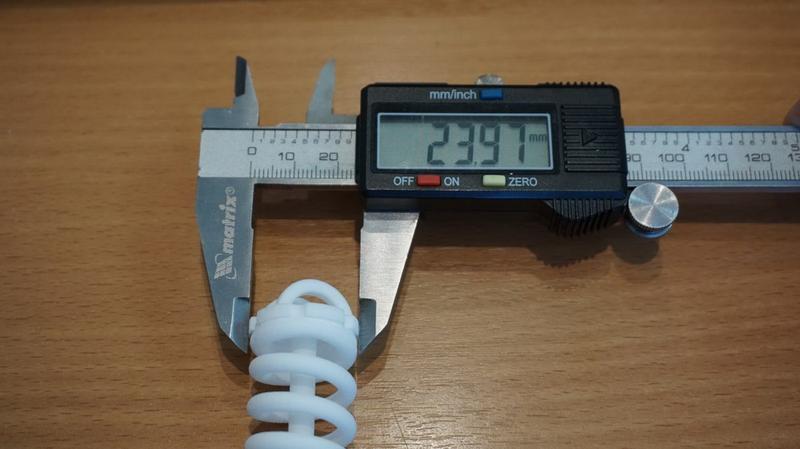
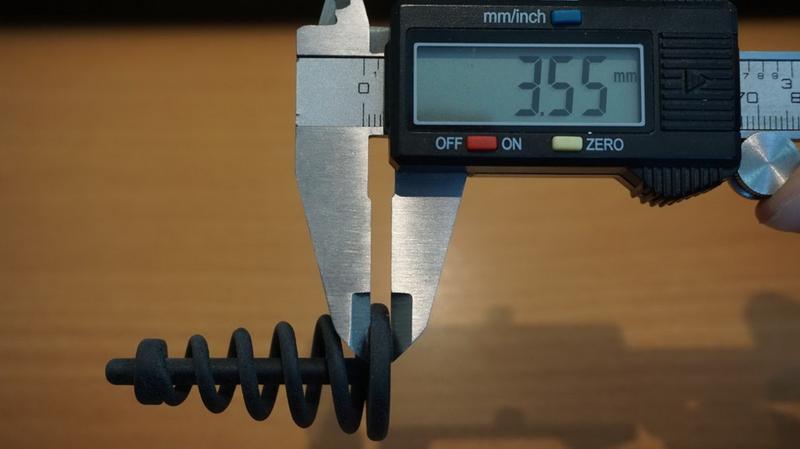
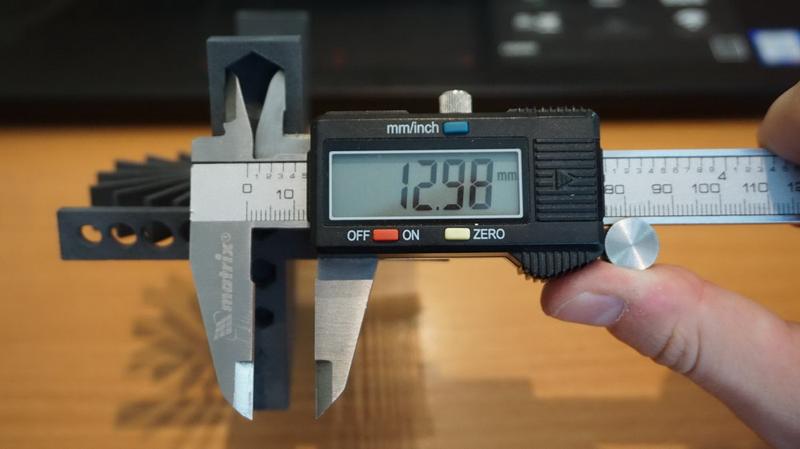
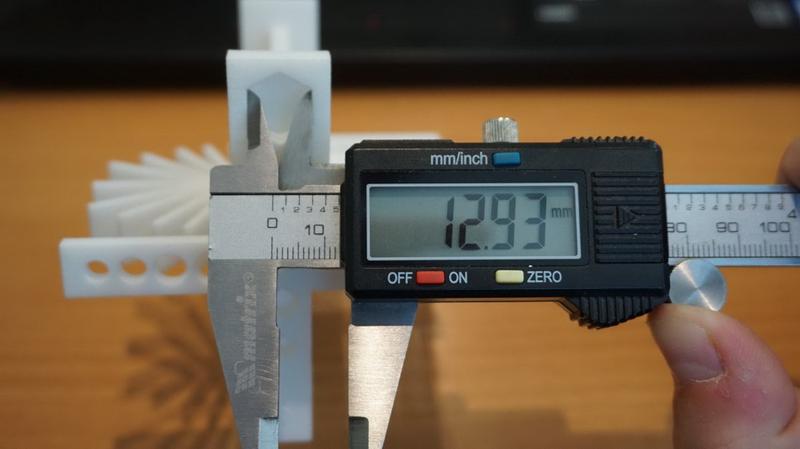
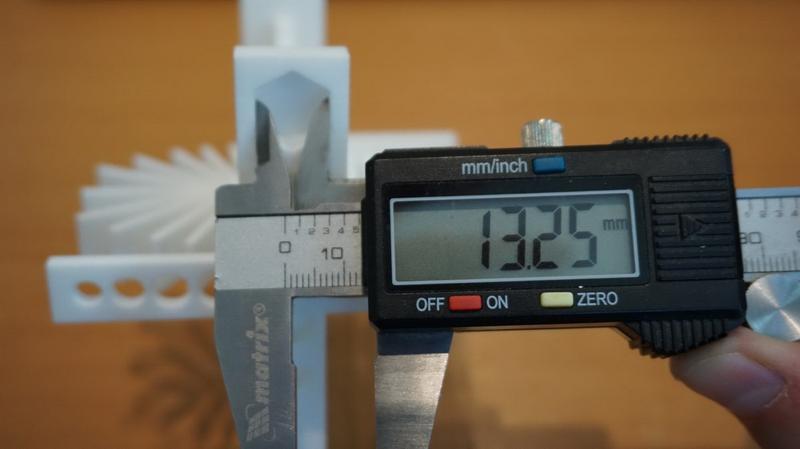
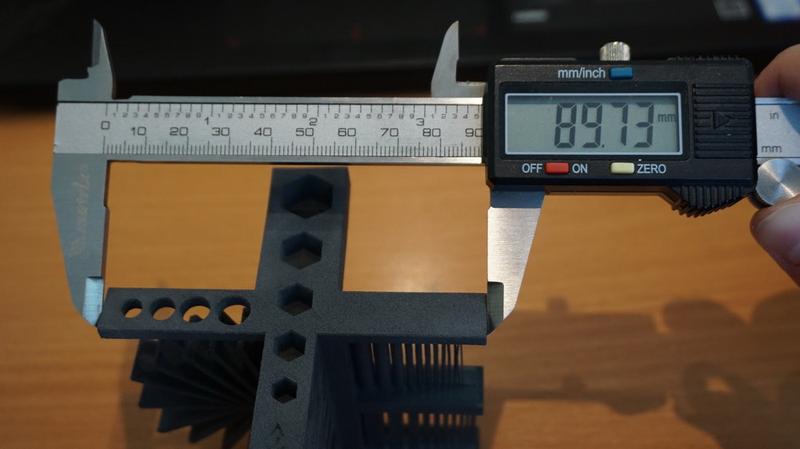
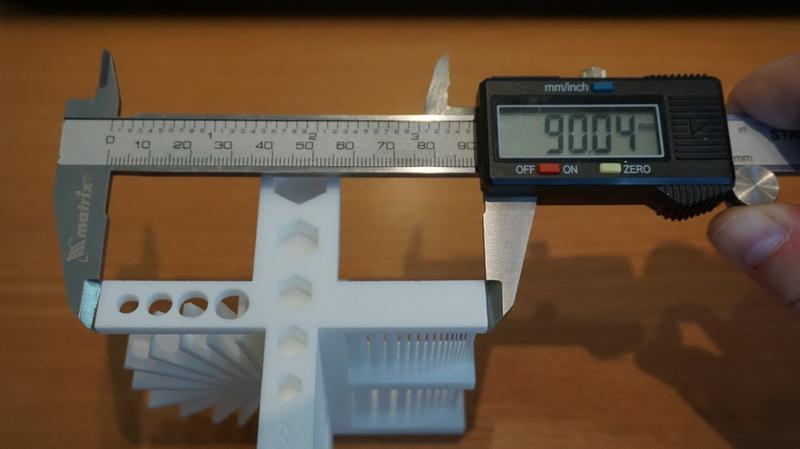
We compared the parts printed on Sinterit Lisa Pro, Shining 3D EP-P3850 and EOS Formiga P100 3D printers.
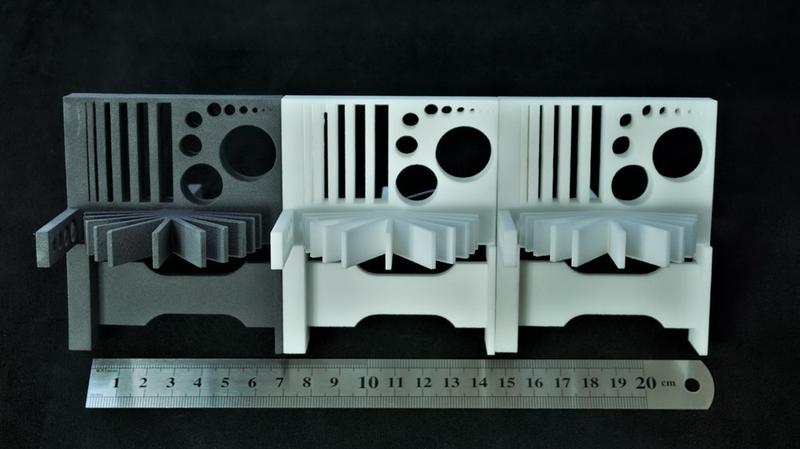
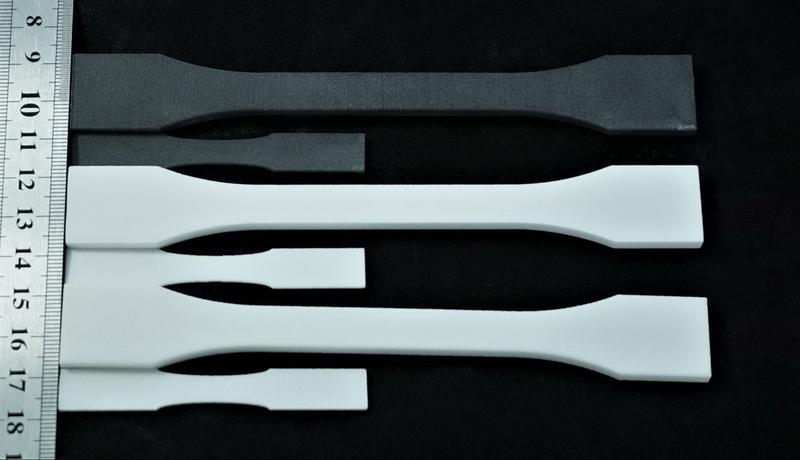
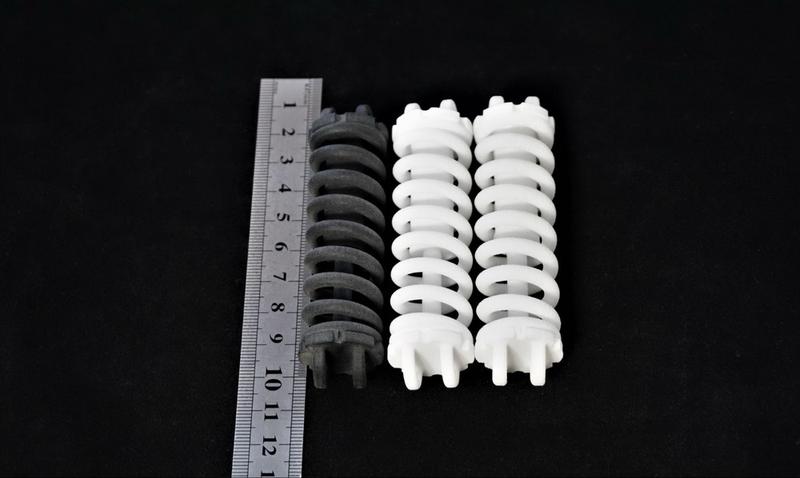
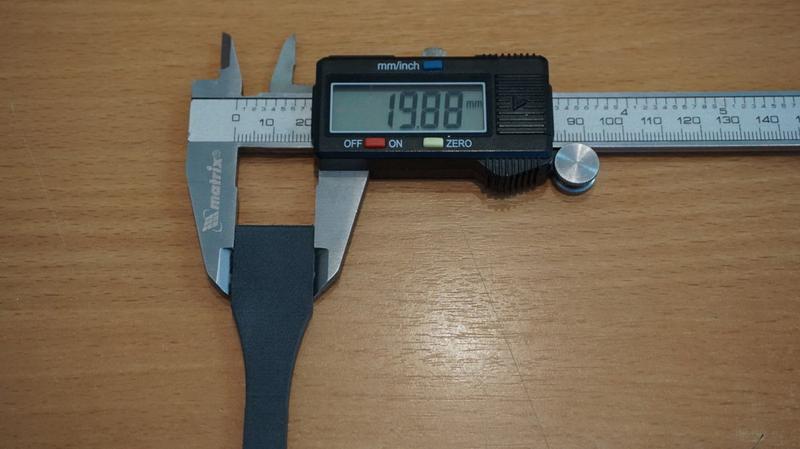
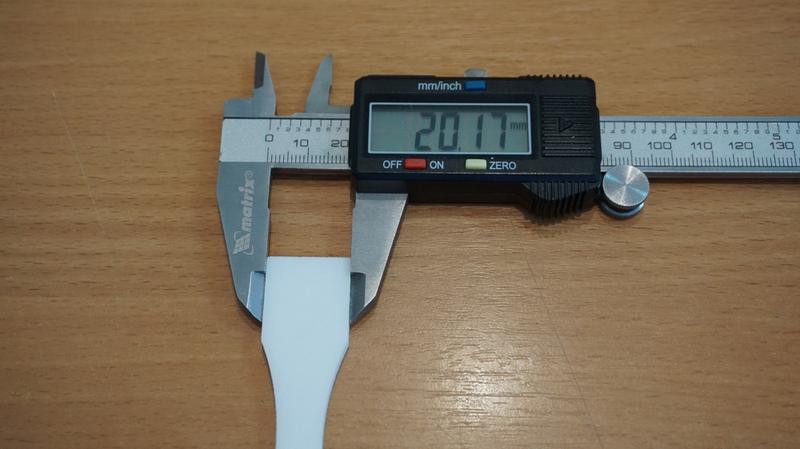
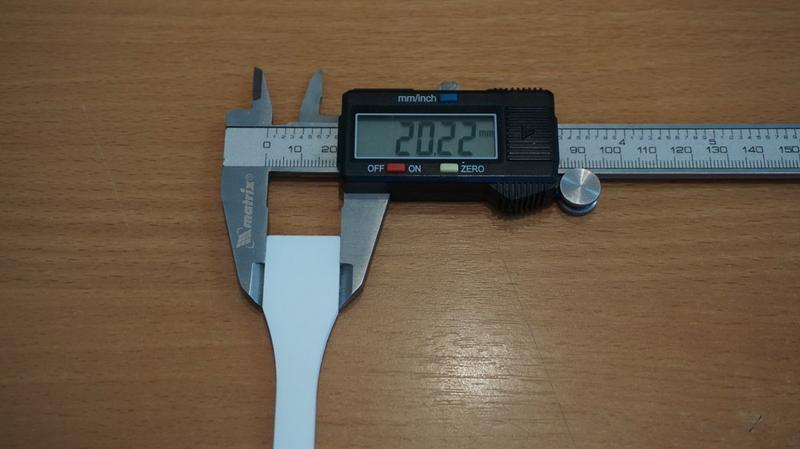
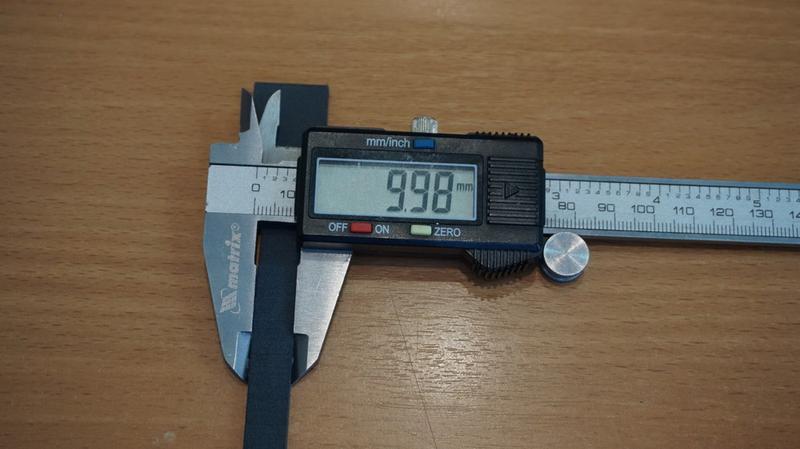
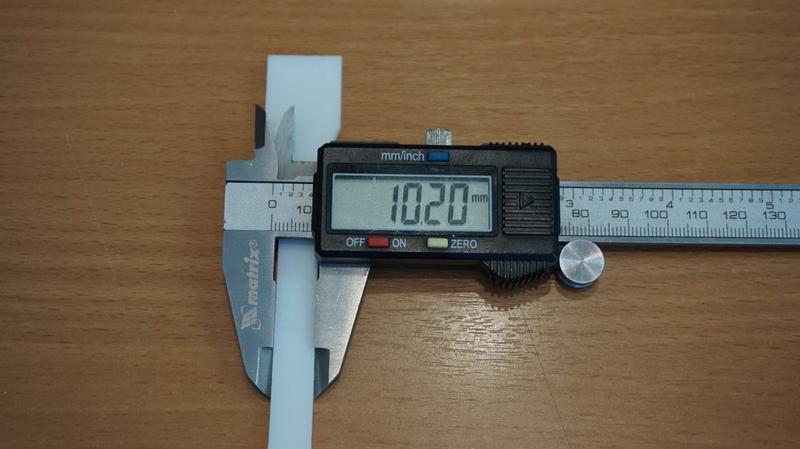
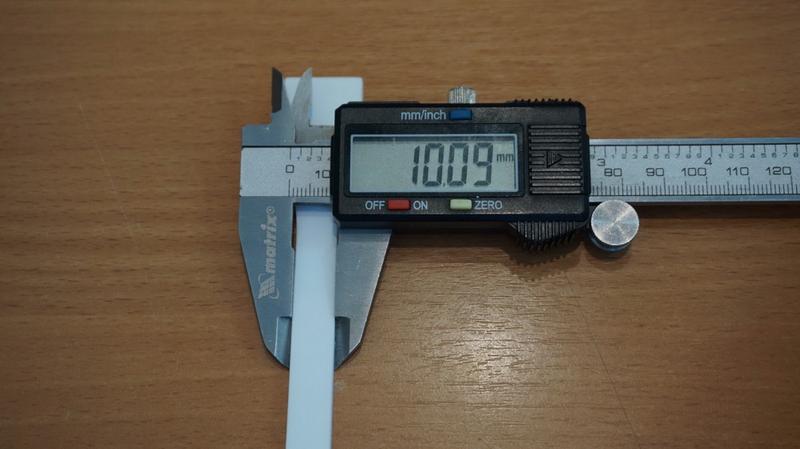
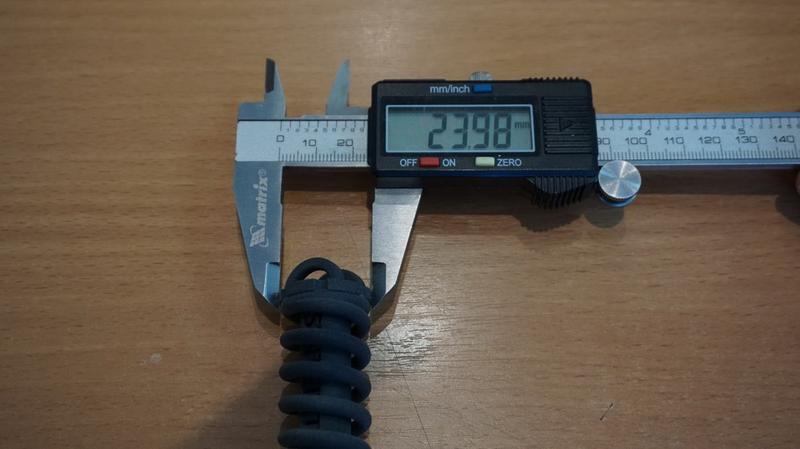
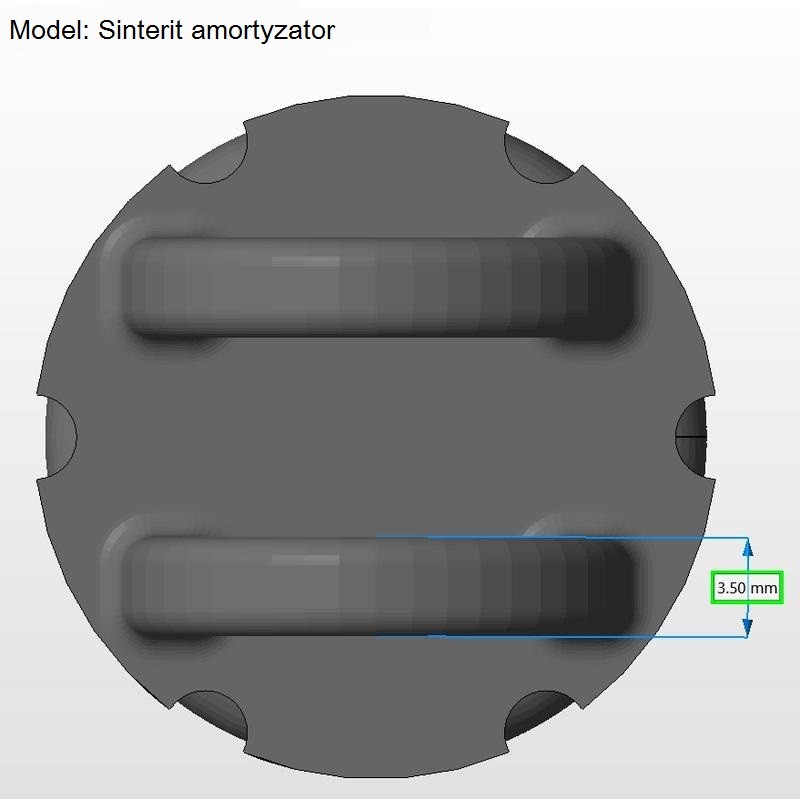
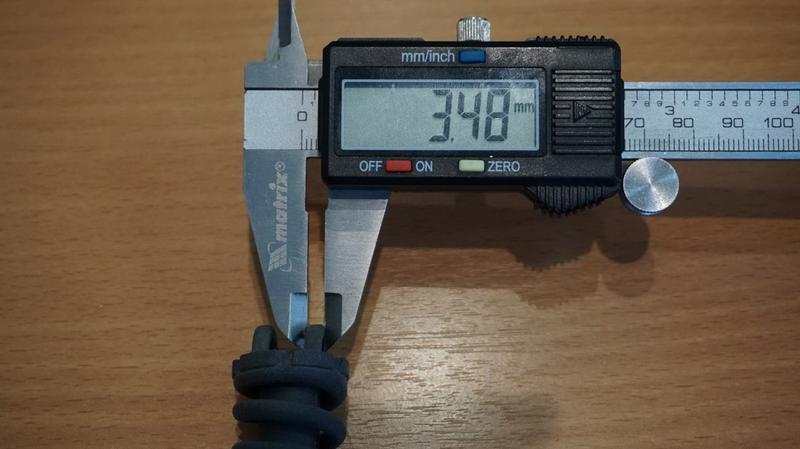
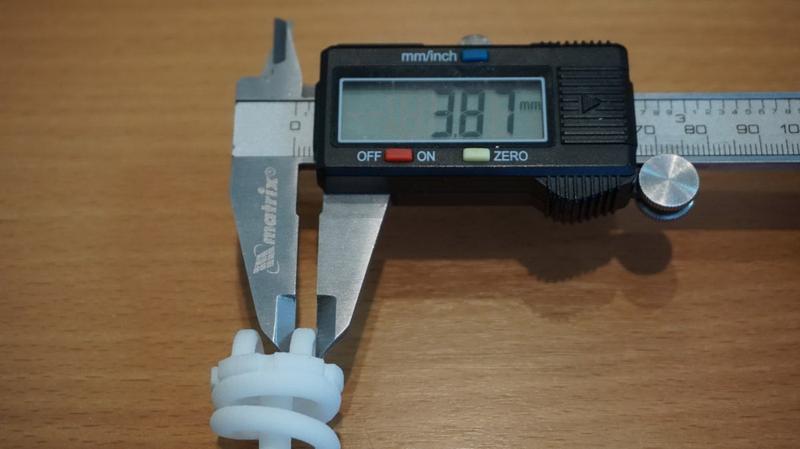
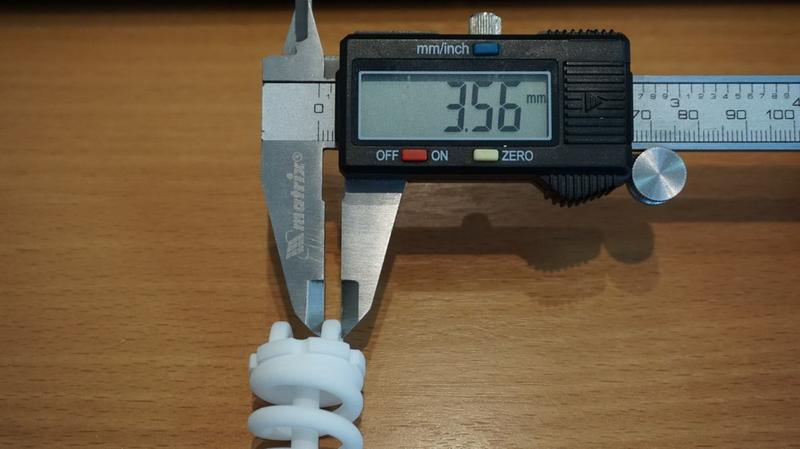
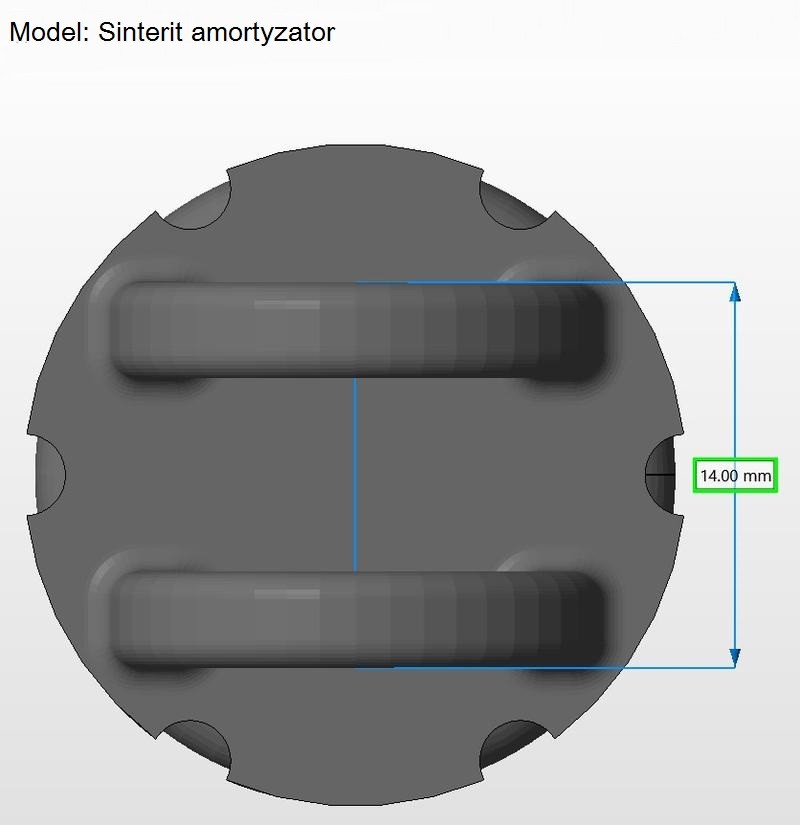
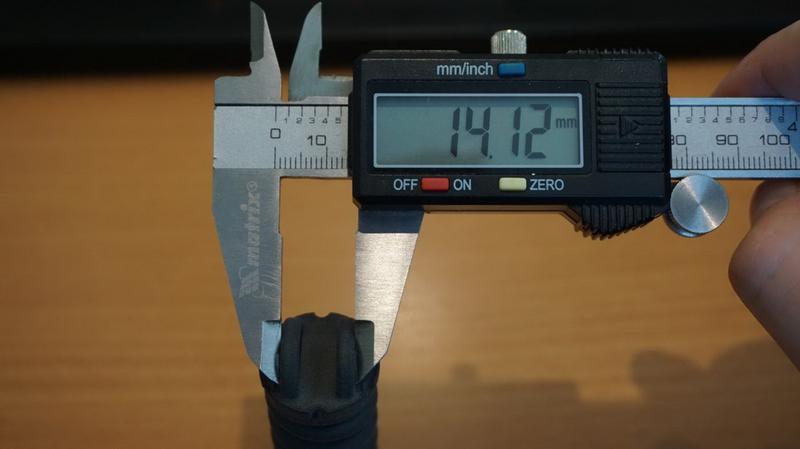
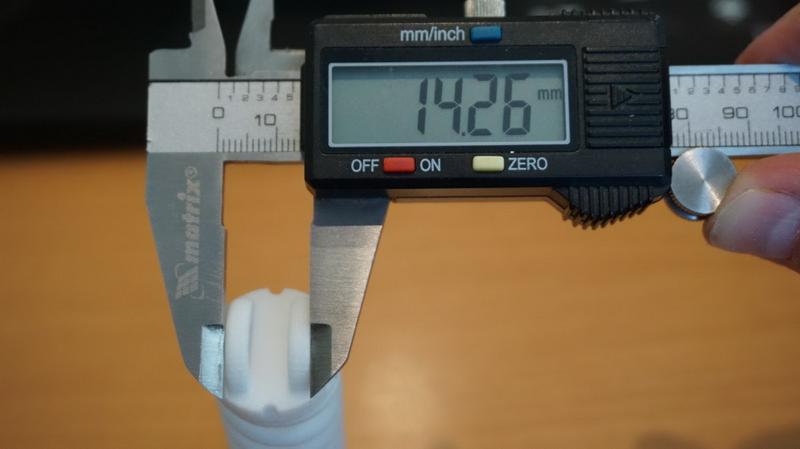
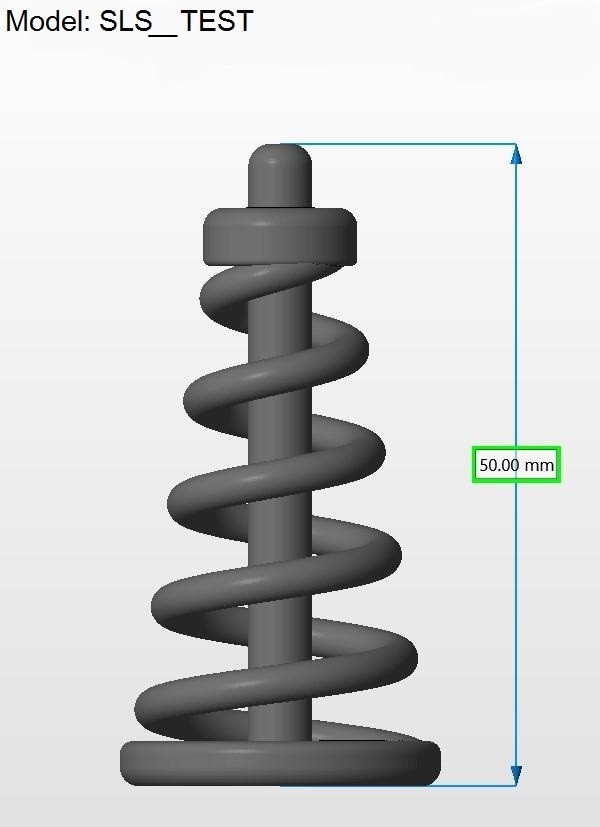
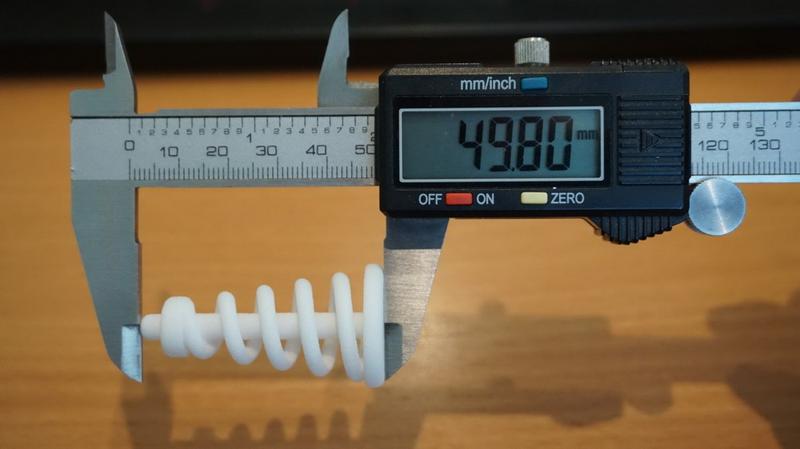
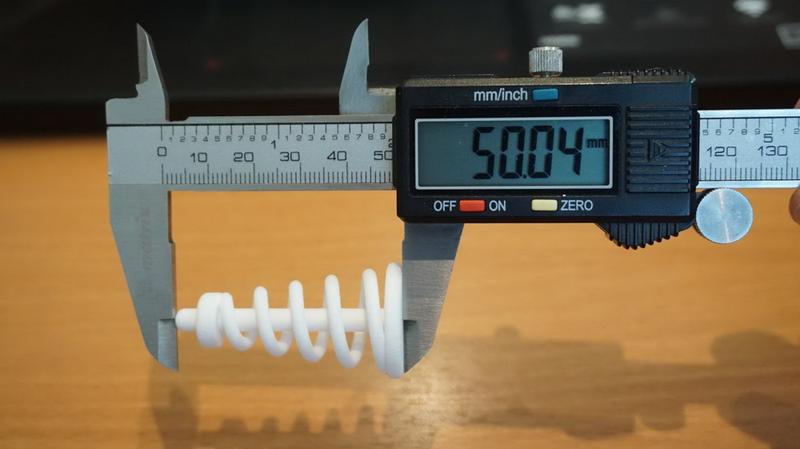
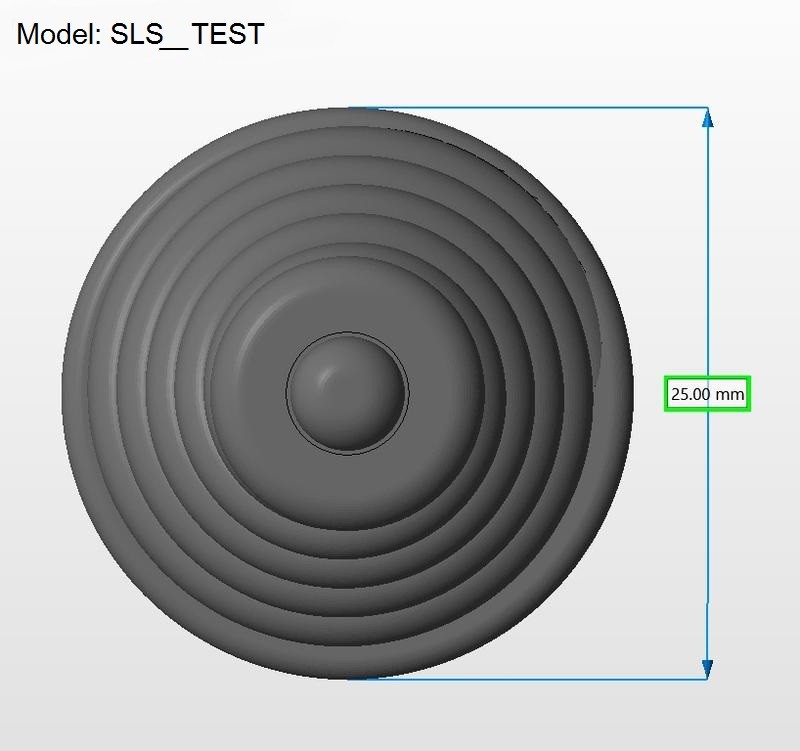
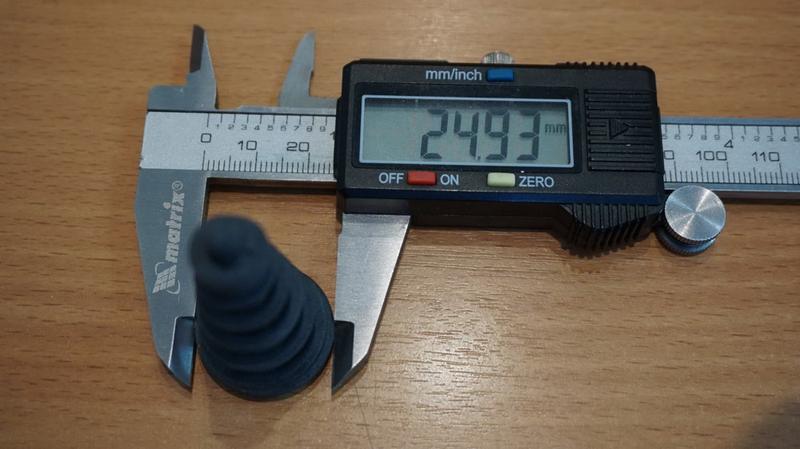
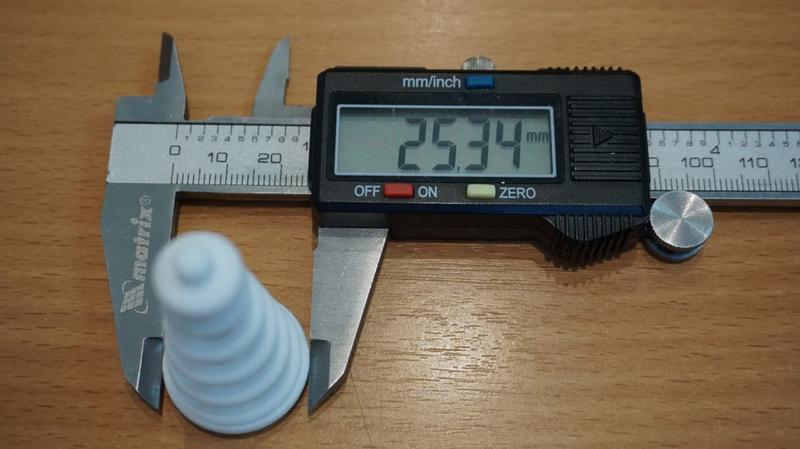
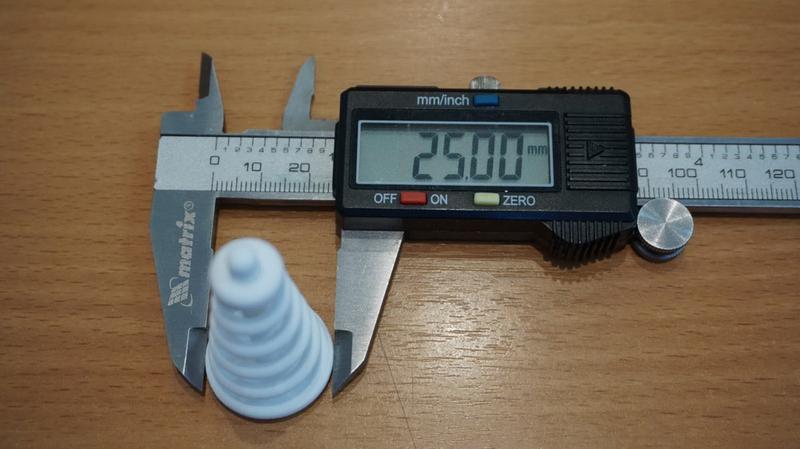
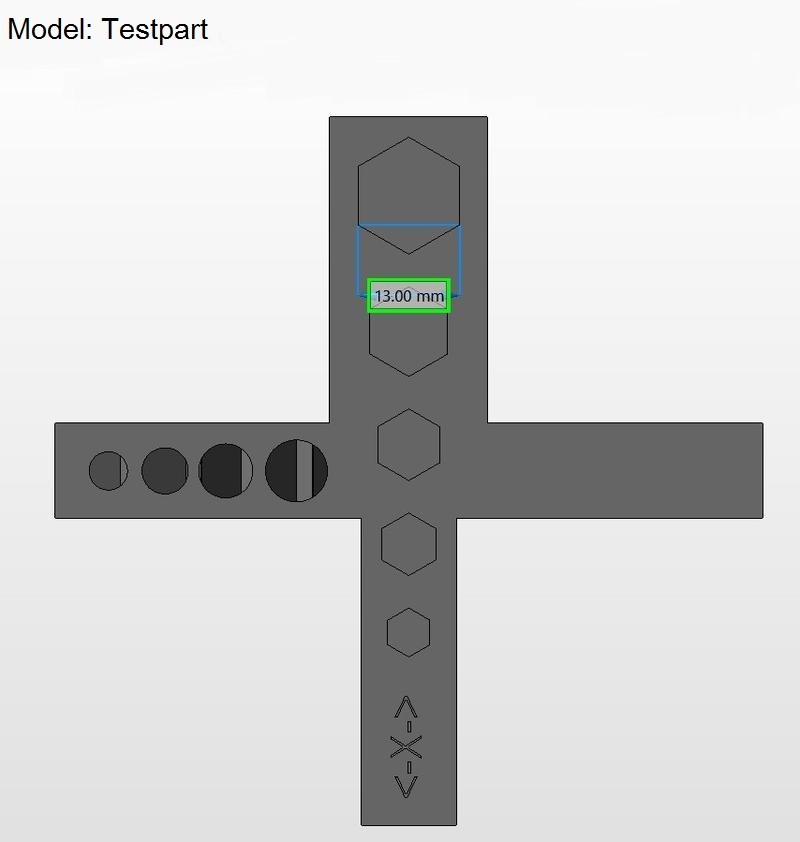
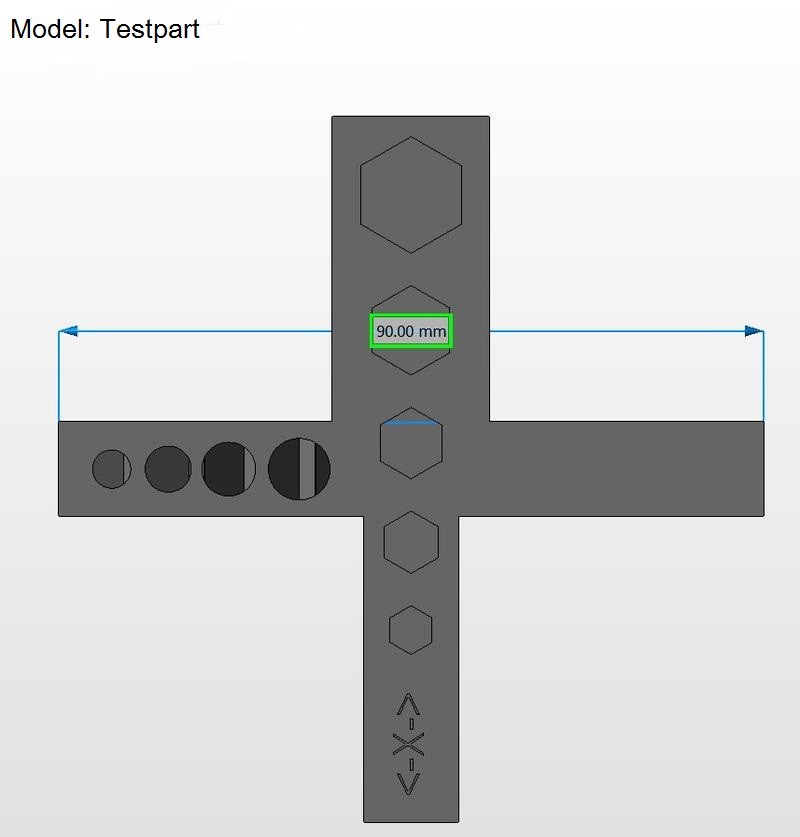
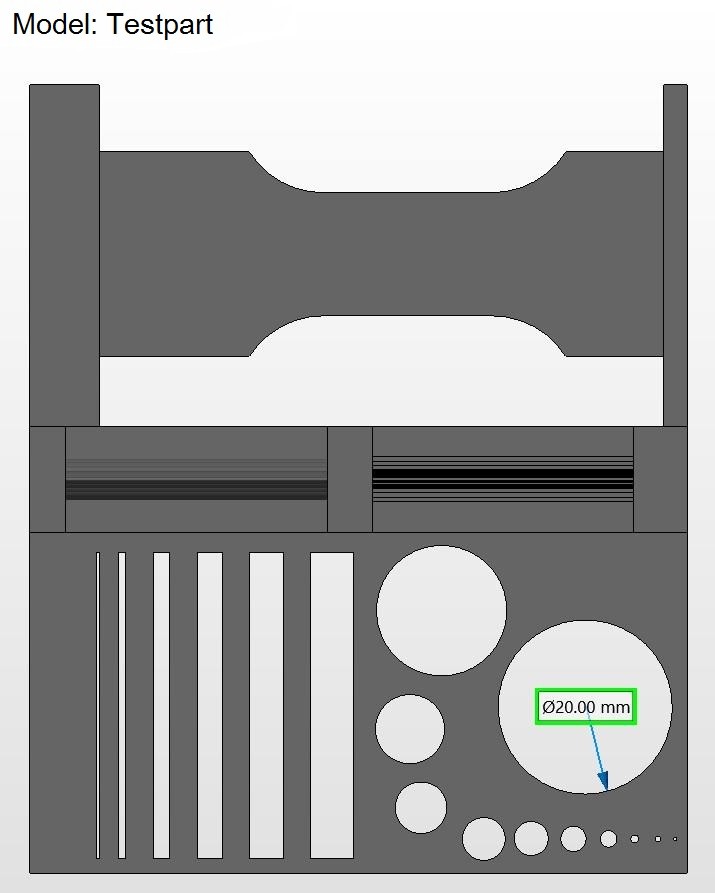
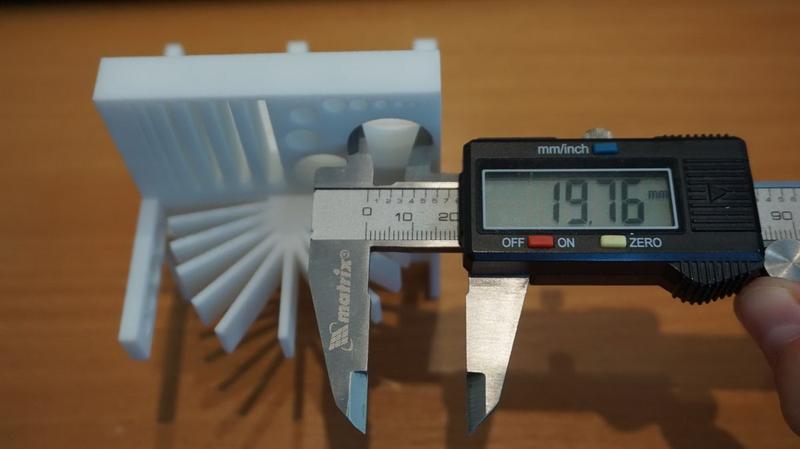
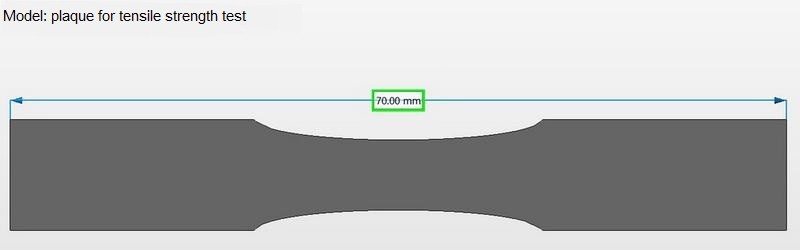
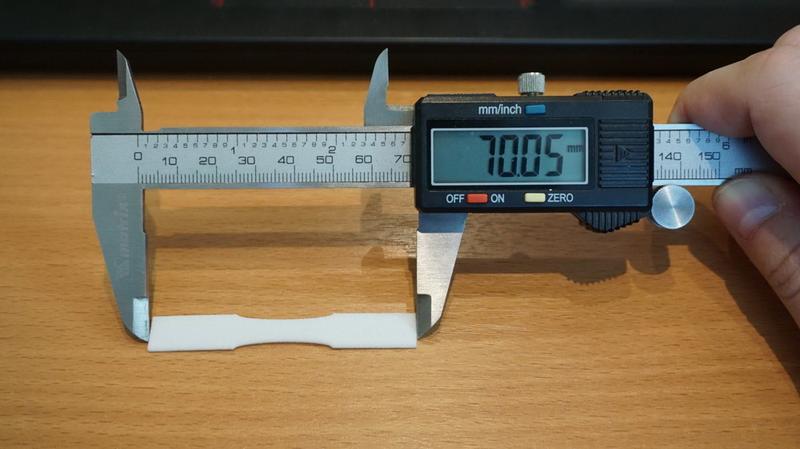
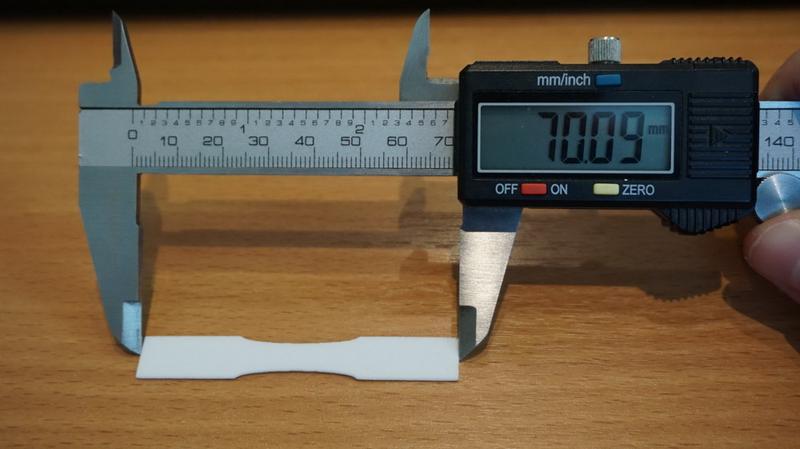
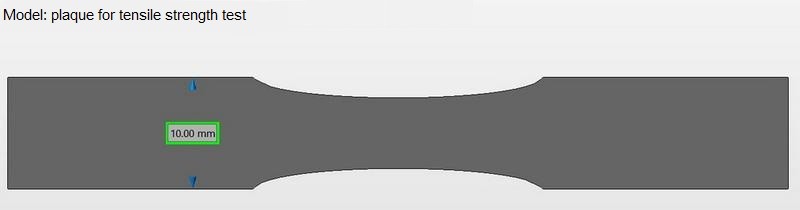
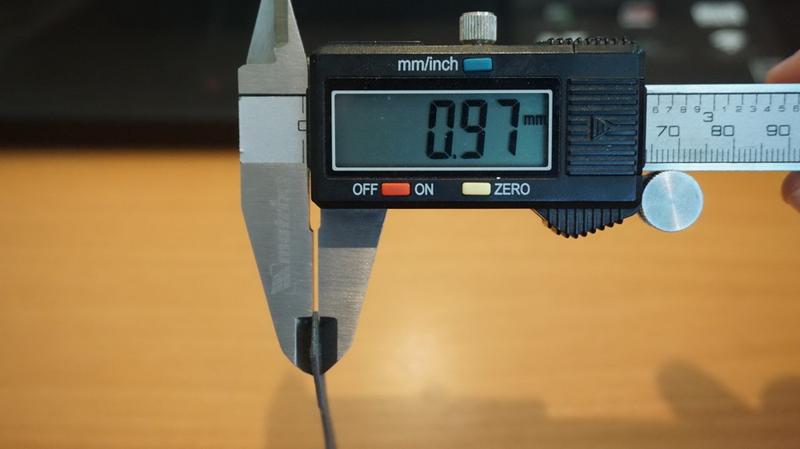
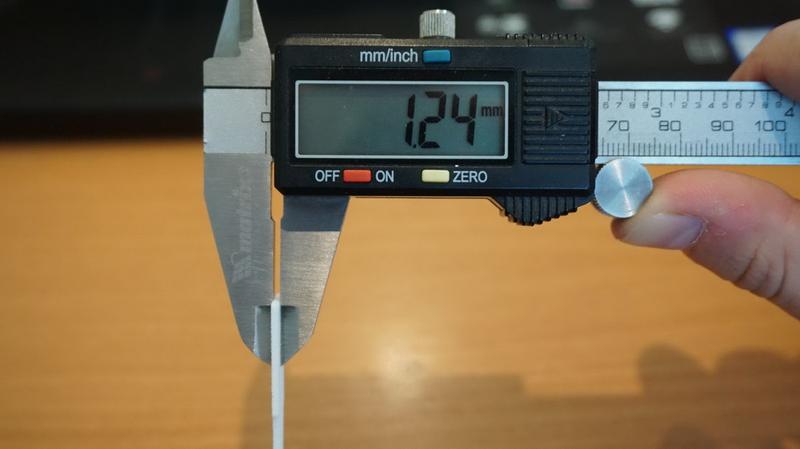
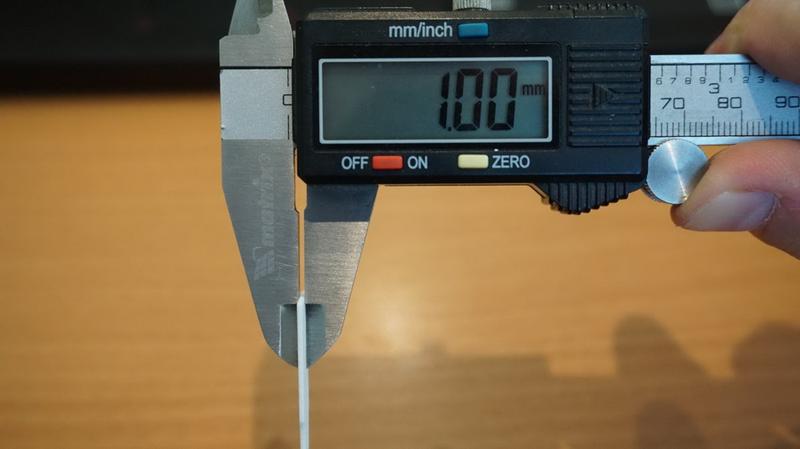
In the pictures below you can see the deviations of print sizes from digital models. The order from top to bottom is as follows:
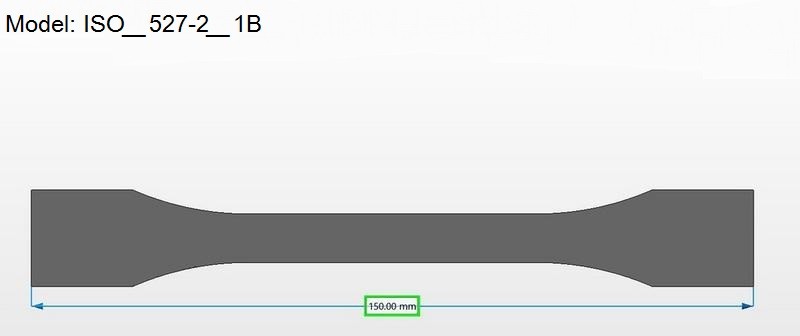
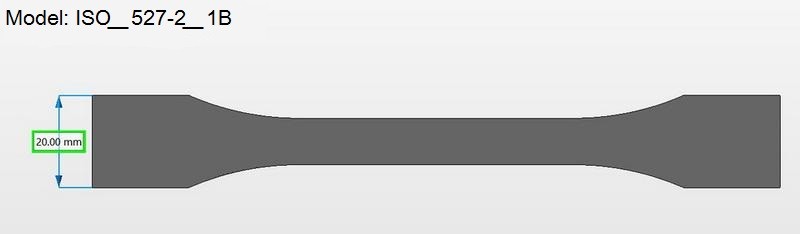


|
Digital model |
Sinterit Lisa Pro |
Shining3D EP-P3850 |
EOS Formiga P100 |
|
150.00 |
150.60 |
150.01 |
150.25 |
| 20.00 | 19.88 |
20.17 |
20.22 |
|
10.00 |
9.98 | 10.20 | 10.09 |
|
24.00 |
23.98 | 24.14 | 23.97 |
|
3.50 |
3.48 | 3.87 | 3.56 |
|
14.00 |
14.12 | 14.26 | 13.92 |
|
50.00 |
50.18 | 49.80 | 50.04 |
| 25.00 | 24.93 | 25.34 |
25.00 |
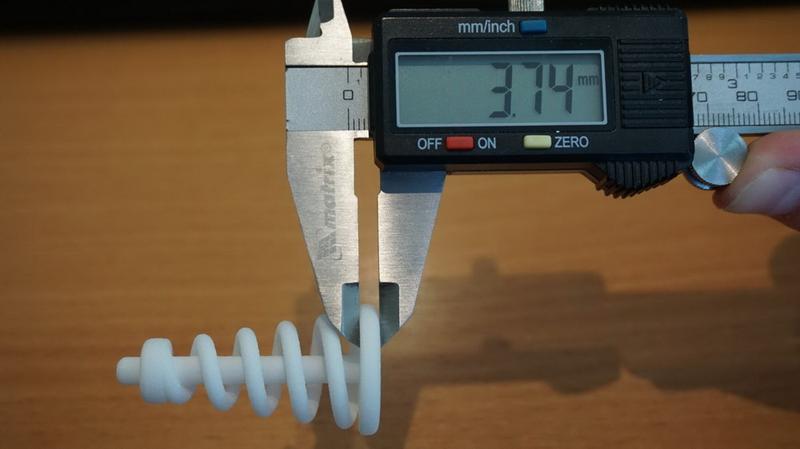
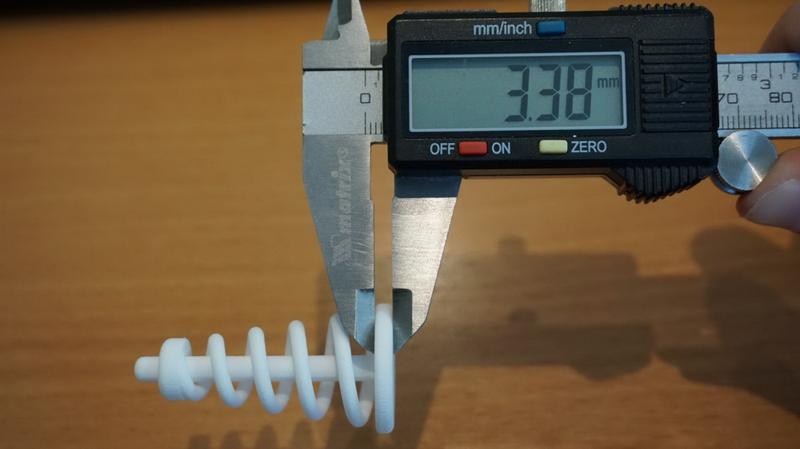
| 3.50 | 3.55 |
3.74 |
3.38 |
| 13.00 | 12.98 |
12.93 |
13.25 |
|
90.00 |
89.73 | 90.04 | 90.04 |
|
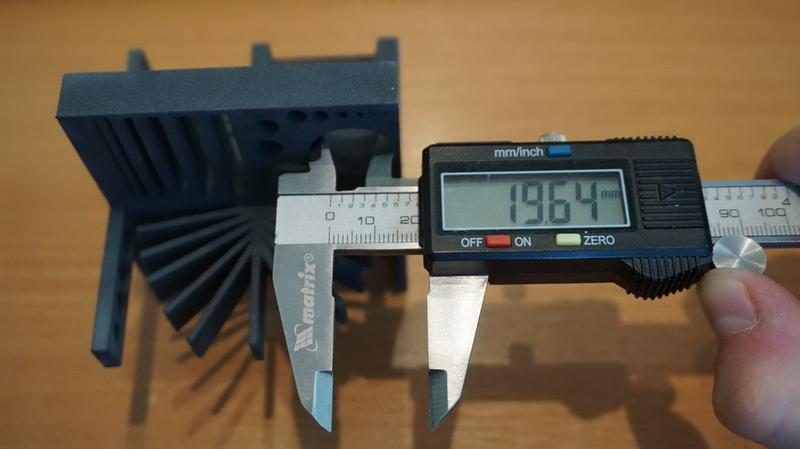
20.00 |
19.64 | 19.76 | 20.06 |
|
70.00 |
70.22 | 70.05 | 70.09 |
|
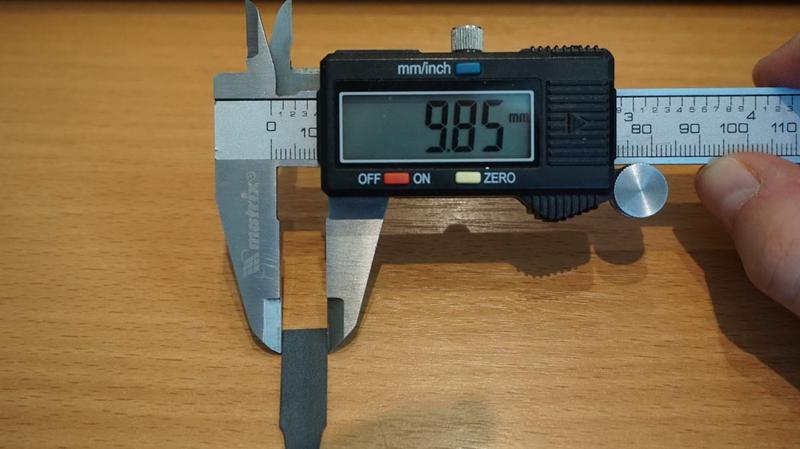
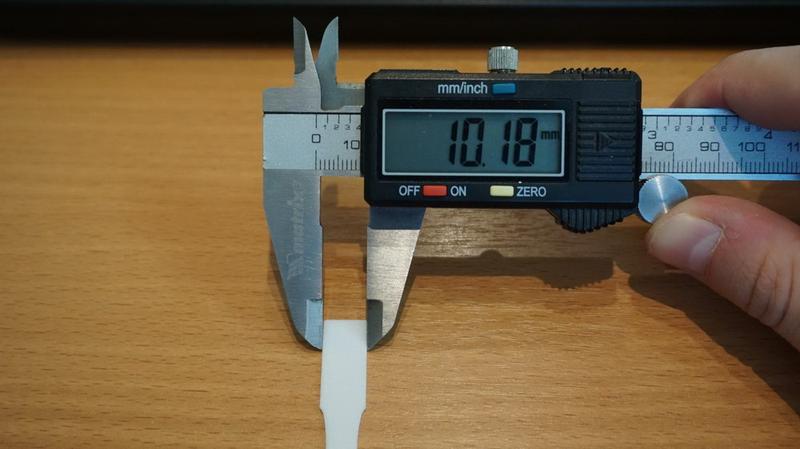
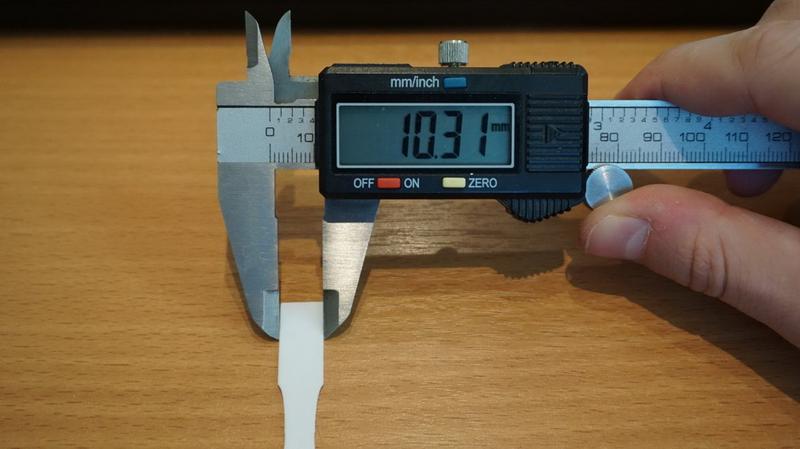
10.00 |
9.85 | 10.18 | 10.31 |
| 1.00 | 0.97 | 1.24 |
1.00 |
The results of the measuring show no significant deviations in any of the printers. Possible errors in hundredth of millimeters can also depend on the quality of the measuring tool.
First of all, the deviations occur due to tilting and arrangement of parts in the printer chamber, the quality and size of the polyamide fraction, as well as the number of powder reuse cycles (Lisa PRO - 3 cycles, Shining - 5 cycles, EOS - 1 cycle). The printer itself is the last thing that can cause such errors.
The results of test printing show us that the dimensions of printed parts can deviate from the digital model by hundredths of a millimeter. Such errors are due not so much to equipment, but also to other factors.
Lisa Pro can adequately compete with other, more expensive SLS 3D printers, providing similar print quality at a lower cost.
Preparation of models for printing on Sinterit Lisa Pro begins in Sinterit Studio. It’s a very simple and easy to use slicing software. All you need to do is select the material, the layer height, correctly position the models in the visual camera of the printer and then just prepare the model and save the file. More about it further.
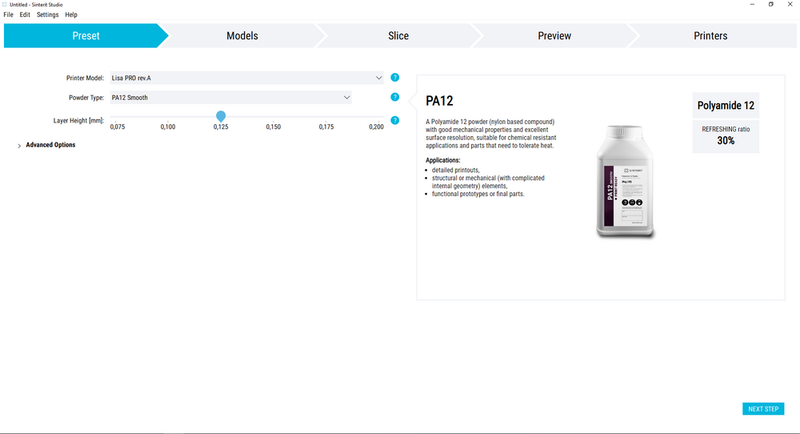
The picture shows that first of all you need to select your printer model. In our case, it’s Lisa PRO rev.A. Then you need to choose the material and the layer height.
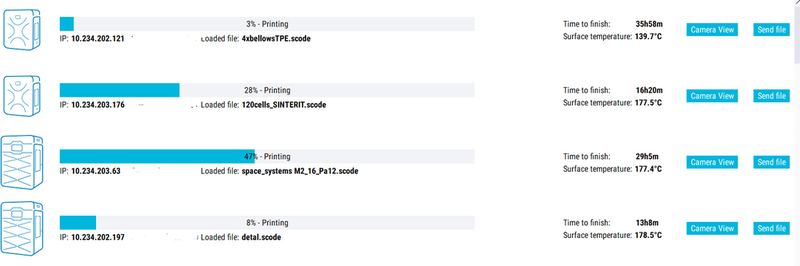
Sinterit Studio can work with multiple Sinterit printers if they are on the same enterprise network. This will allow you to monitor the printing process and organize a printing farm with several Sinterit machines.
When selecting the material, take a look at the right side of the screen to see the brief description and the percentage of Fresh Powder material that needs to be added. Then click “Next Step” and go to the “Models” tab.
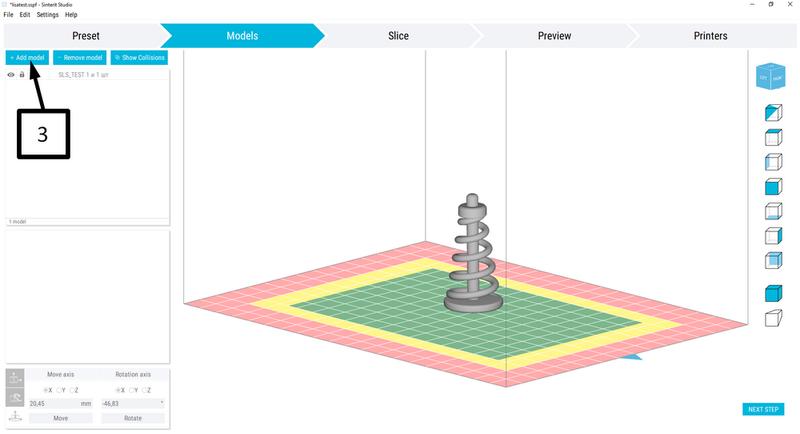
Click “Add Model”, select the needed file and load it into the program. Next, you need to make the model active. You can do this by clicking on it with your mouse. Then you will see axes for various manipulations.
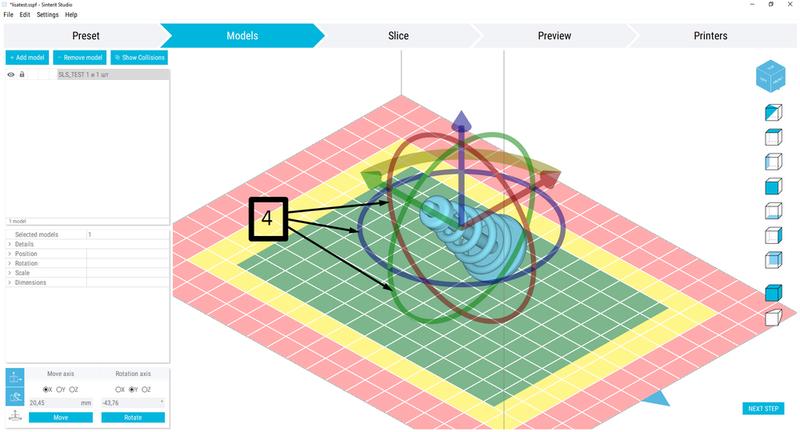
You need to correctly set the position of the print by rotating the model in the directions indicated by arrows. On the flash drive that comes with the printer or on the manufacturer’s website you can find the user manual that thoroughly explains various positions with examples for different geometries.
The optimal arrangement of models is at 45 degrees at each axis. This works best for round cylindrical objects with a flat base. The purpose of such an arrangement lies in the fact that the starting point of the model or its first layer should have the smallest area to avoid deformation during thermal shrinkage of the material.
The same way, you can add other models, applying the rules of their correct placement. By dragging the models along the indicated arrows up, along the length and width of the chamber, you can ensure that the models do not intersect with each other, do not fall into the yellow and red zones.
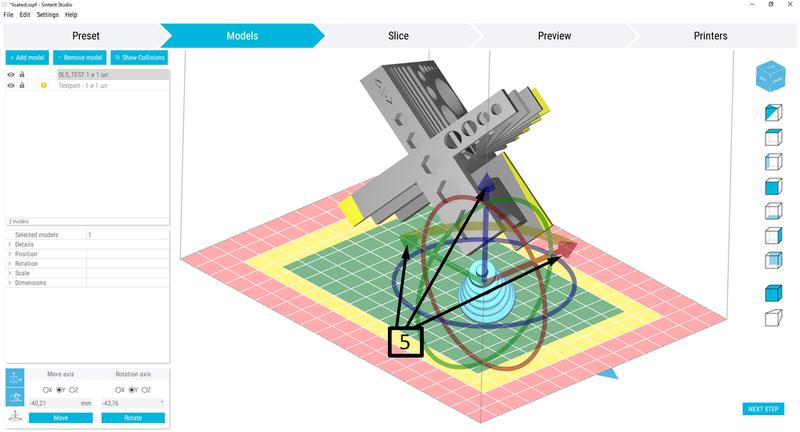
The image shows one of the cases, when due to the increased size of the models, you may have to slightly deviate from the placement rules. This can be both the angle of inclination and falling into the yellow zone. In such cases, you will have to find a compromise between the two.
The main part of your model should be inside the green zone and support the small parts that fall into the yellow zone. Such division and limitation of the print areas inside the chamber are caused by the mobility of the powder and the friction against the stationary side walls of the printer.

Fill the chamber with models. Your purpose here is to place them correctly, with no intersections. At the same time, the models should be arranged as tightly in the chamber as possible.
In the picture above you can see that the detail at the top slightly falls into the yellow area, it should be lifted upwards and move a bit to the side.
Here, it’s imperative to understand, that for every additional centimeter of height approximately 300 milliliters of powder is consumed. Now imagine that you have a piece of your model sticking out 1 cm. Let it be 5 cc in volume. It’s not small, but it will still take up 5 mil of powder out of 300.
The wasted 295 mil will become secondary material. Arranging the models as tight as possible, especially vertically is very important, since printer performance and the amount of secondary materials depend on it.
After carefully arranging the models, go to the “Slice” tab.
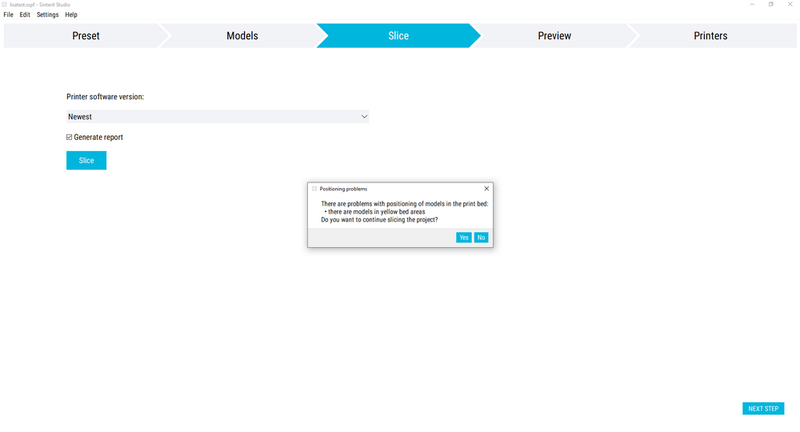
Select “Generate report” in the left side of the screen and click “Slice”. Despite this, click “Yes” and select a pre-created folder or any other you want.
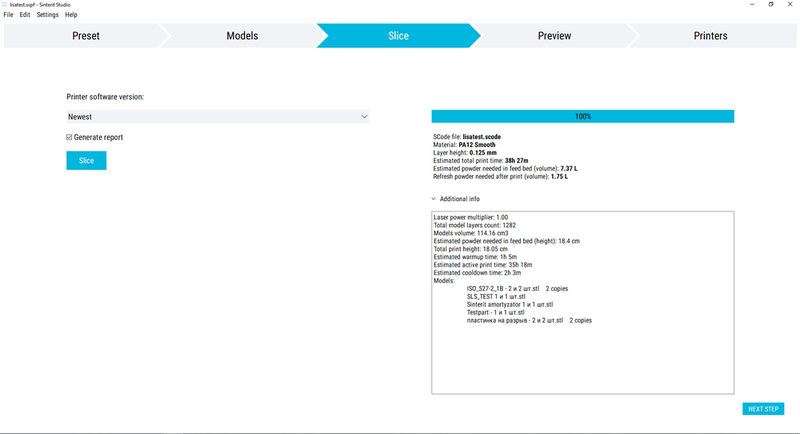
In the right side of the screen, you will see the general information about the process: printing time, the required amount of material, how much fresh powder you need to add and the total volume of models in the chamber.
At this stage, two files will be saved: a “.skode” file for running it on the printer and a “.txt” file with general information from the right side of the screen.
Next, go to the “Preview” tab.
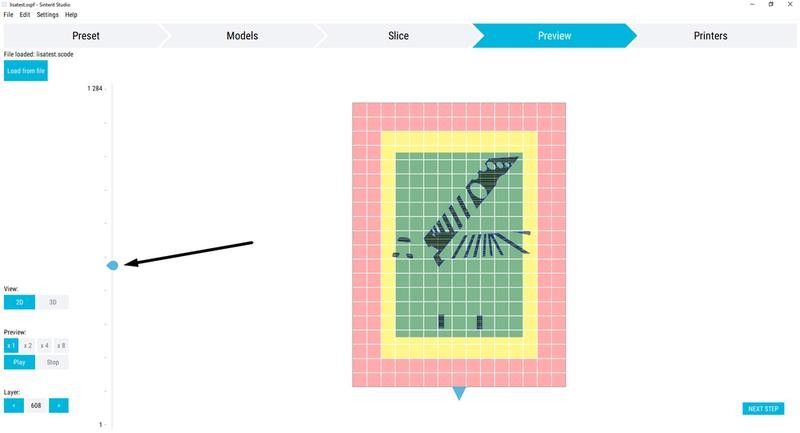
Here, you can move the sliding scale that allows you to see each layer in section.
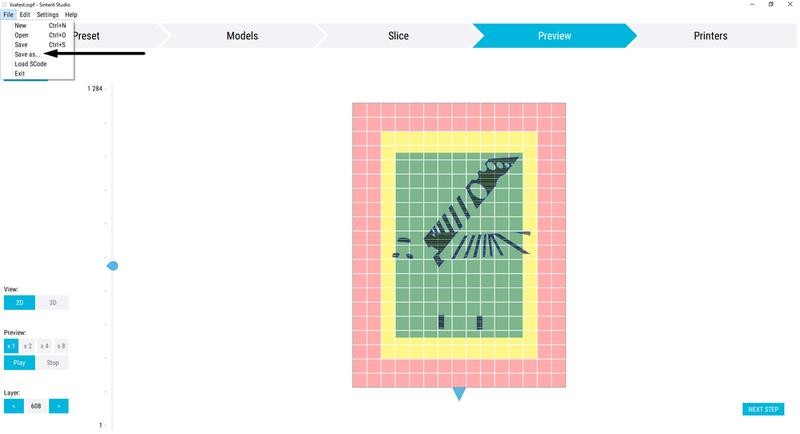
After you’ve done all the steps, save the project in the “File” menu, so that later you could open it again. It’s important that the models stayed where you originally placed them, otherwise, the program won’t be able to find the files and will ask you to choose another path.
It is recommended to create a separate folder for each print in advance. There the models will be stored and then prepared for printing.
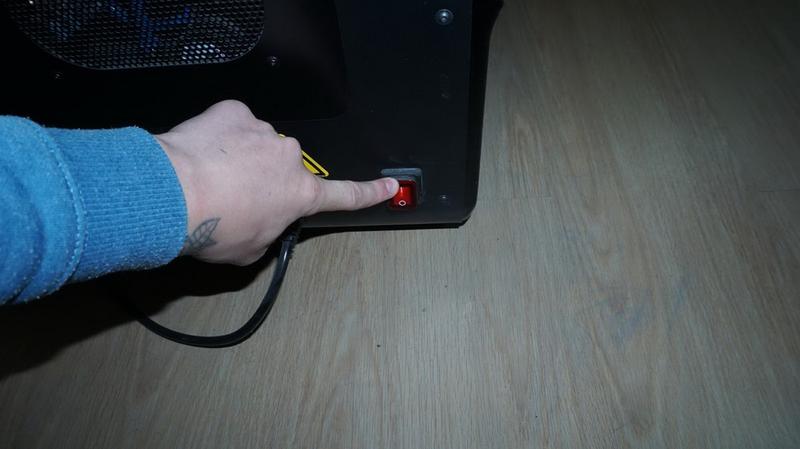
First, switch on power supply.
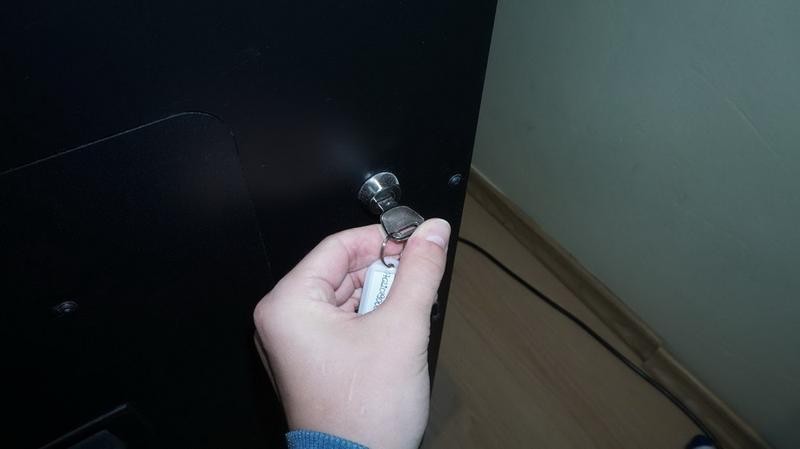
Turn the ignition key.
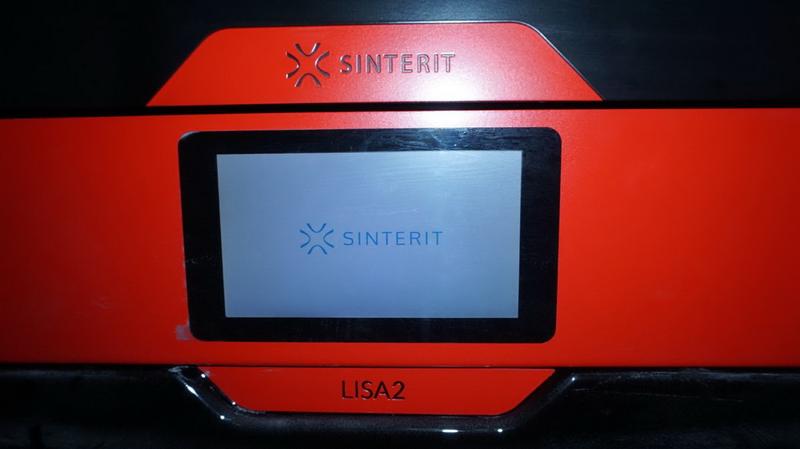
The printer is running.
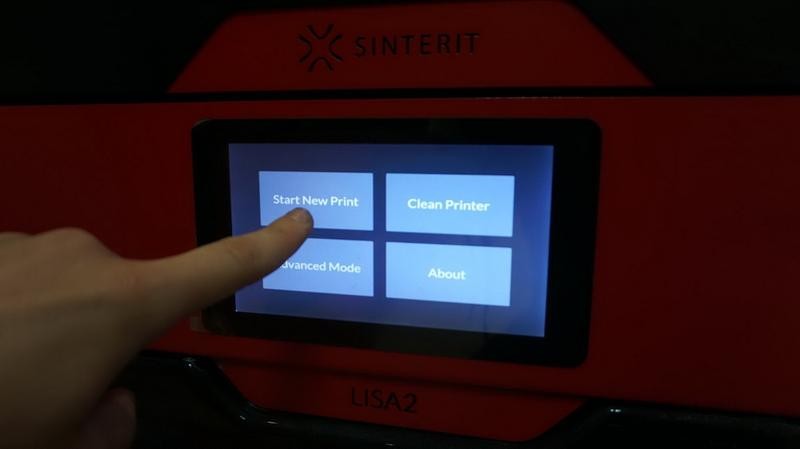
Press “Start New Print”
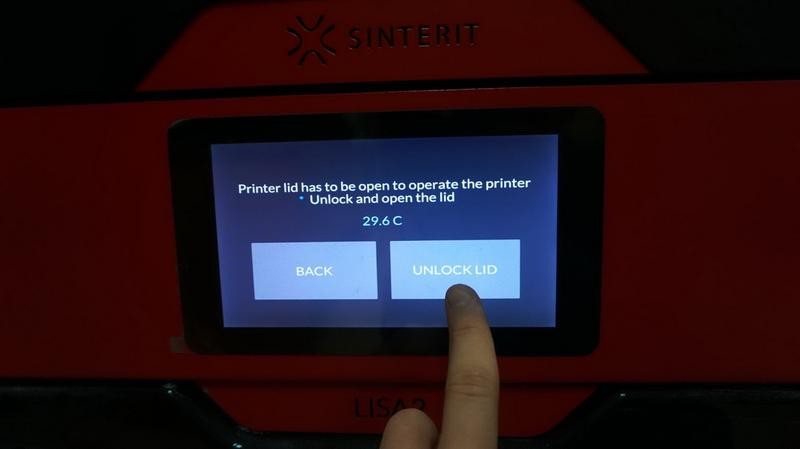
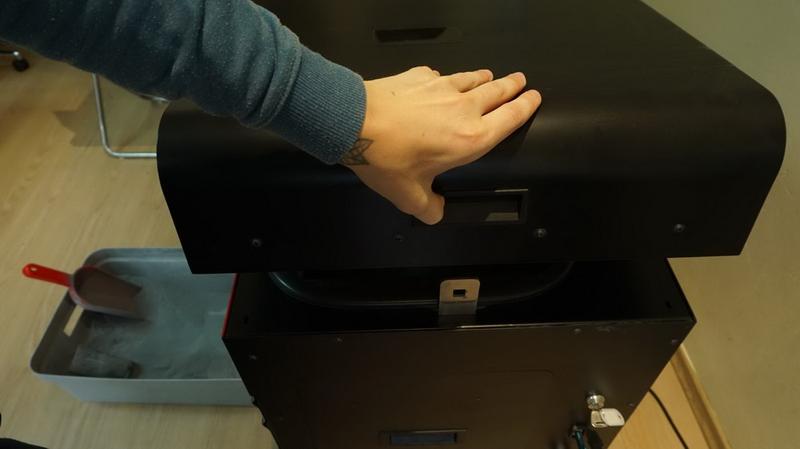
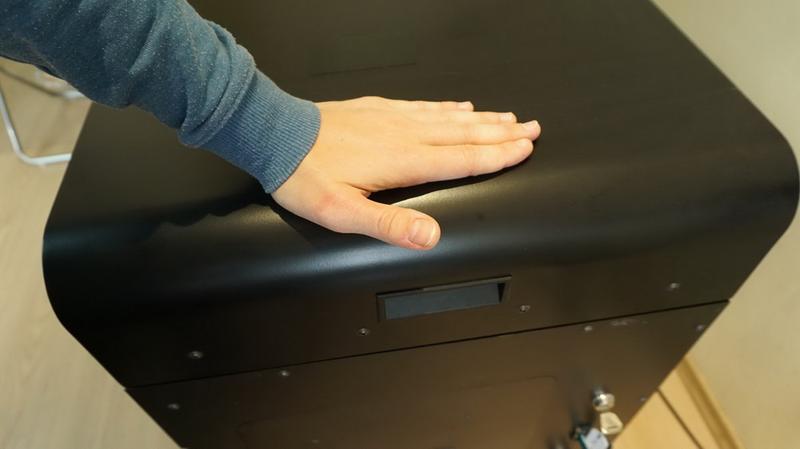
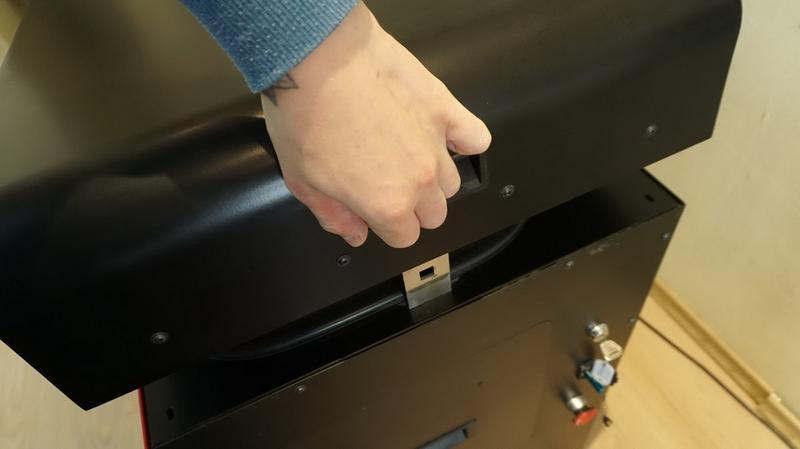
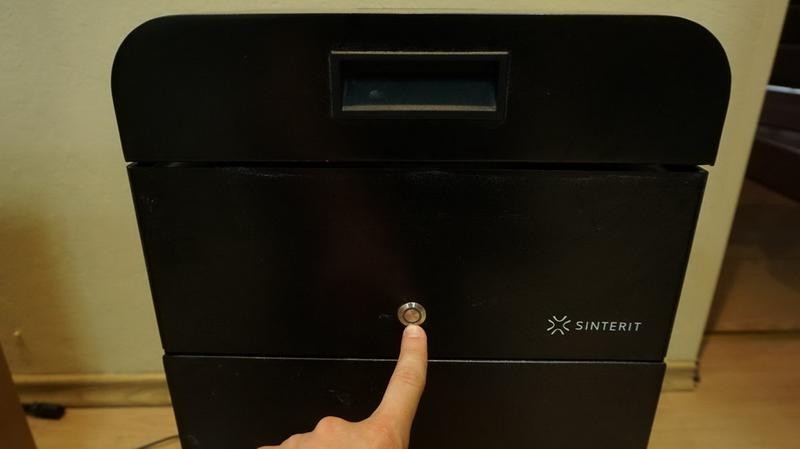
Press the unlock button on the top cover of the printer. The case unlocks for a few seconds. If you missed it, try again.
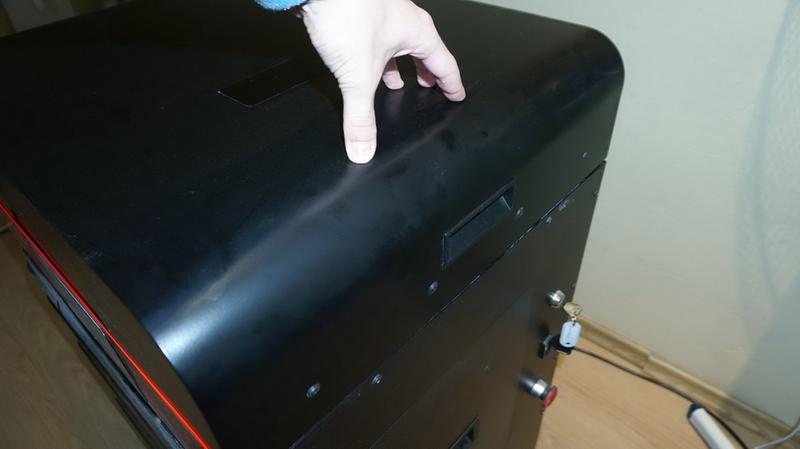
To open the top cover, first slightly press on it, you will hear a click. Then just pull the handle upwards.
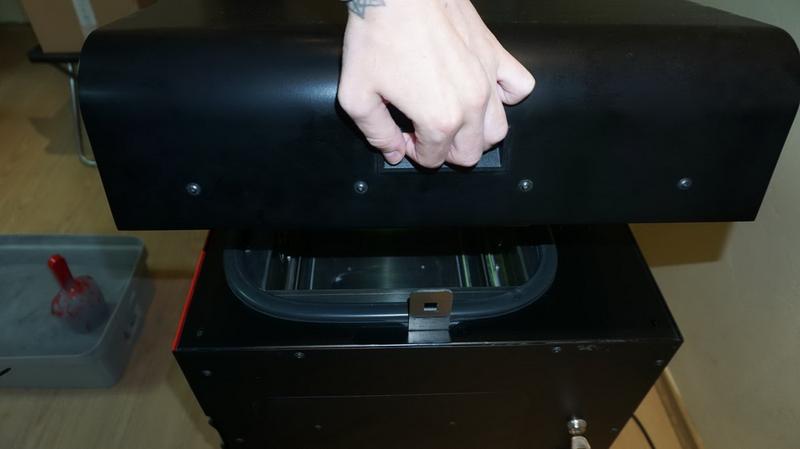
Open the cover.
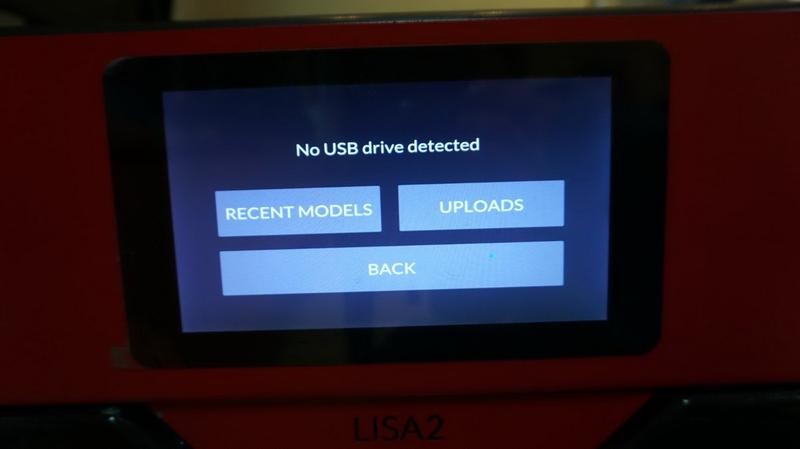
If you haven’t inserted a USB drive, the printer will notify you.
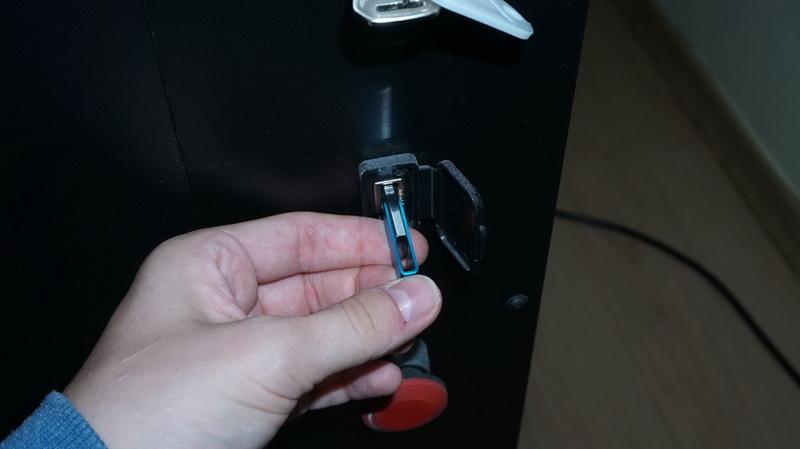
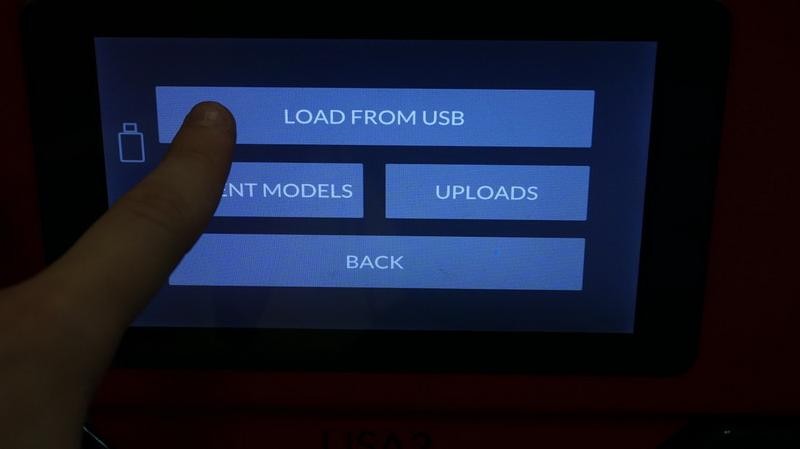
Insert the flash drive, find and load the file you need.

Press “Next”.
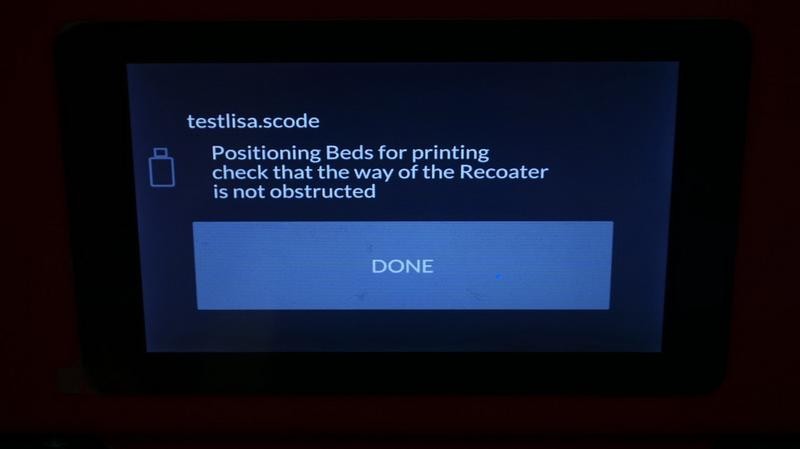
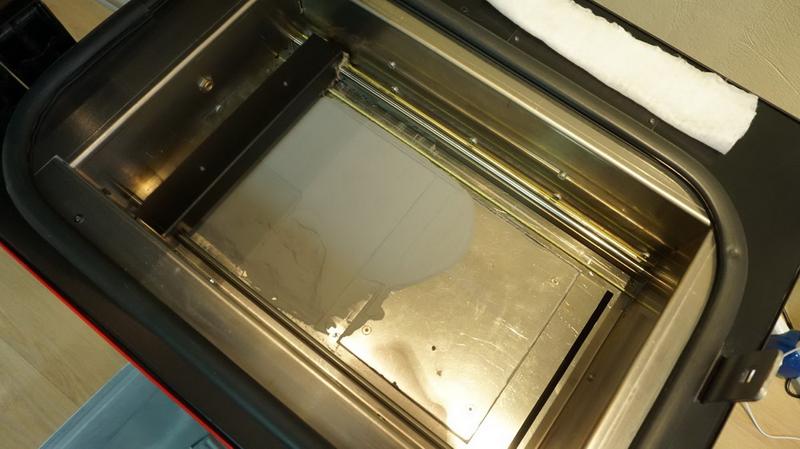
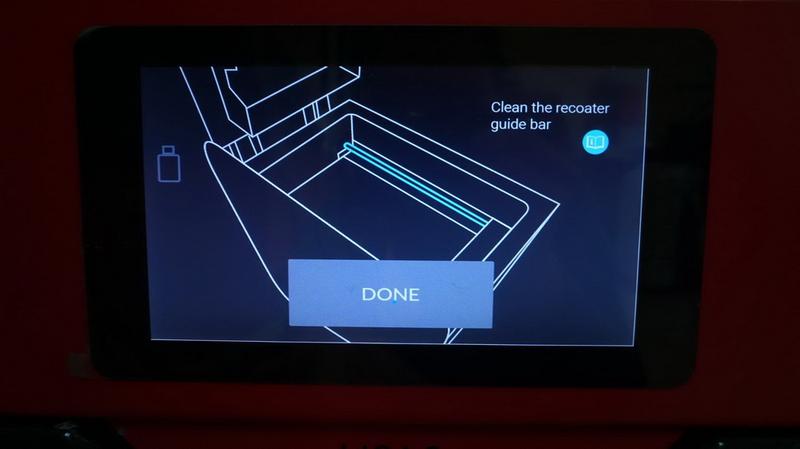
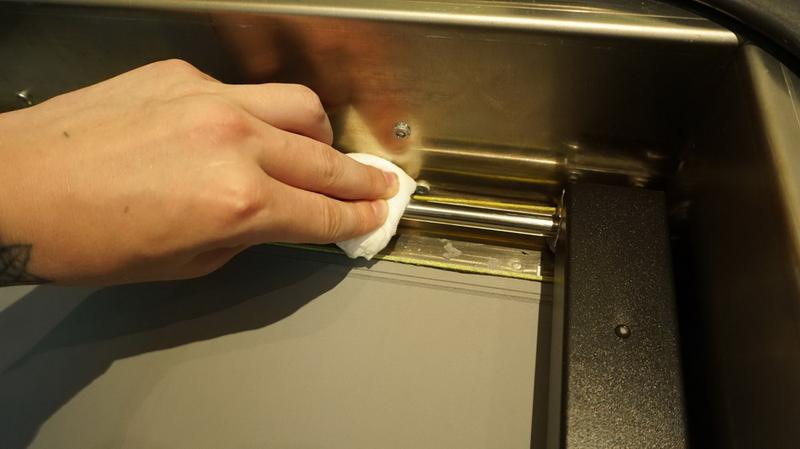
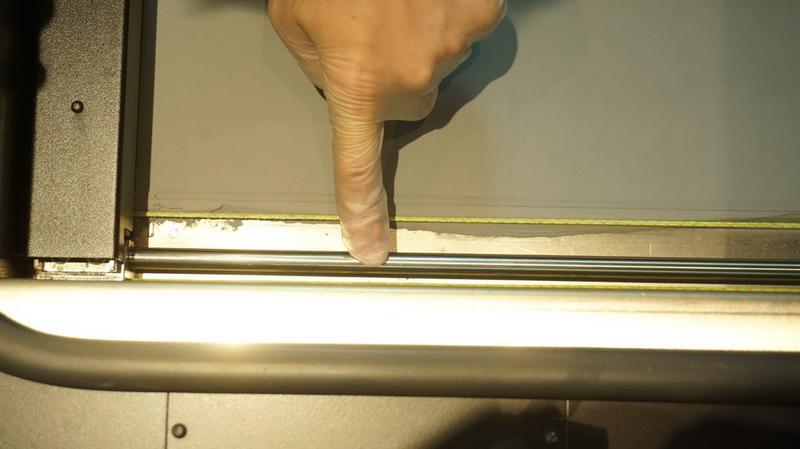
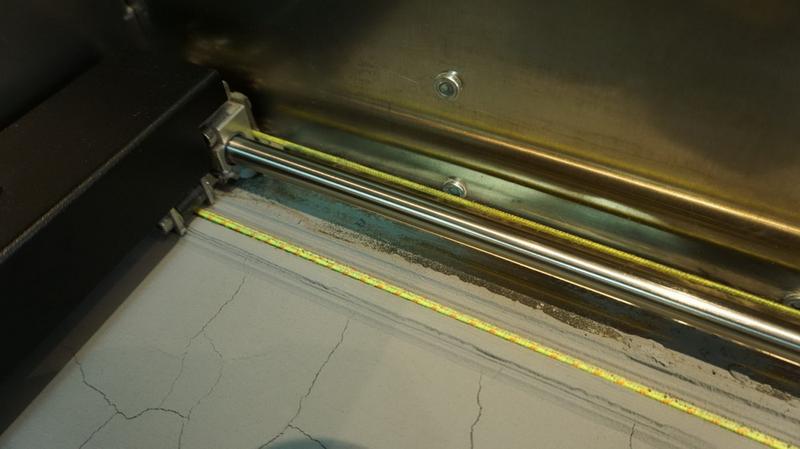
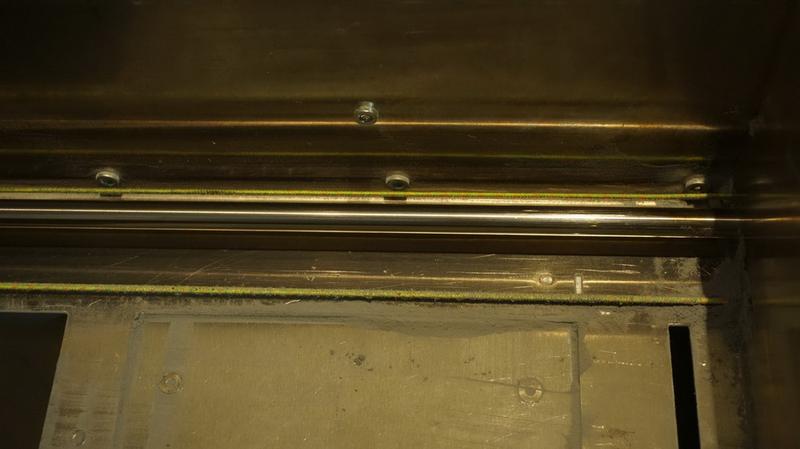
Make sure that the bed positioning goes well. Nothing should be on the way of the recoater and the guides should be clean.
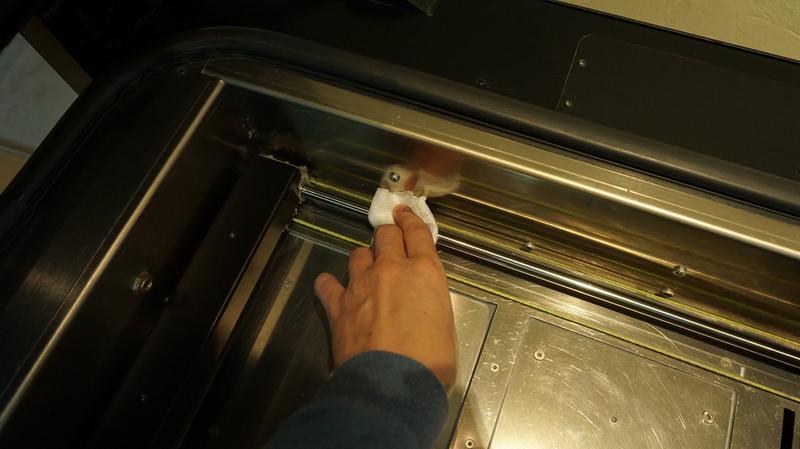
Viscose napkins are the best for cleaning the guides.
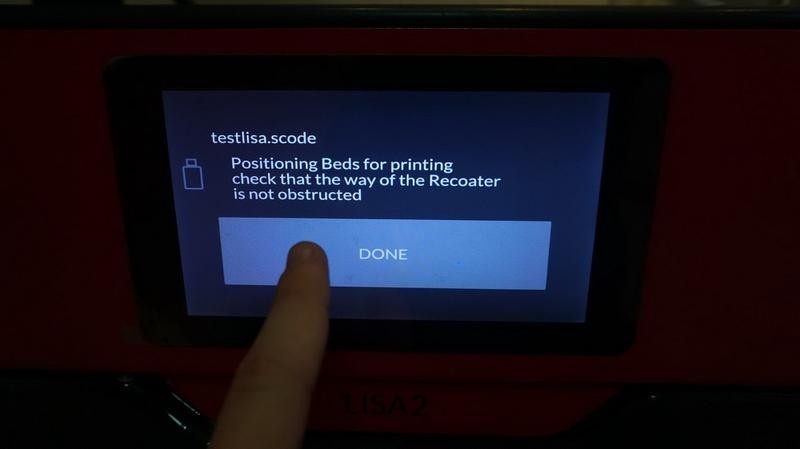
Once the rails are cleaned, press “Done”.
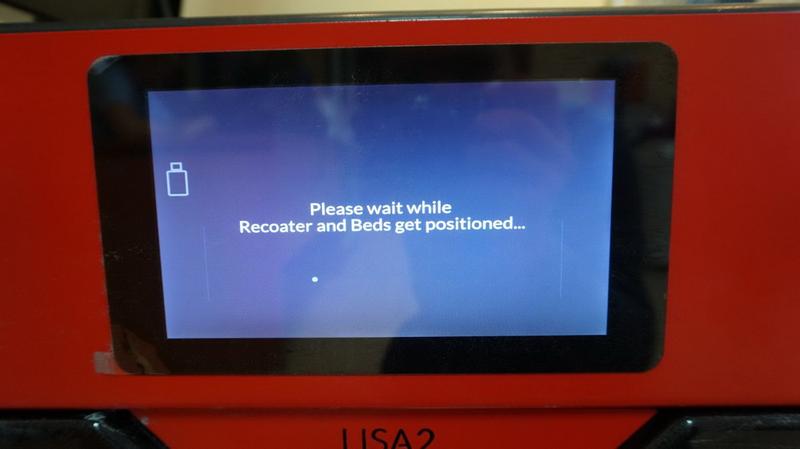
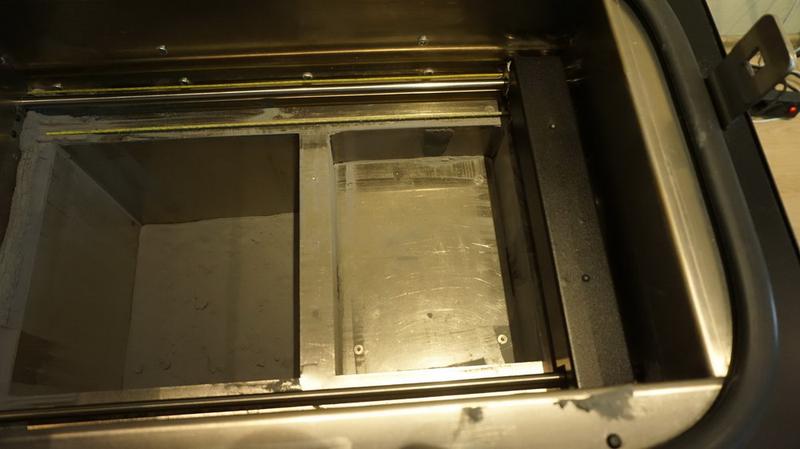
First, both platforms will go down, the recoater will move to the right and the right bed (Print Bed) will move upwards. Then the left bed (Feed Bed) will rise to the level necessary for being filled with material.
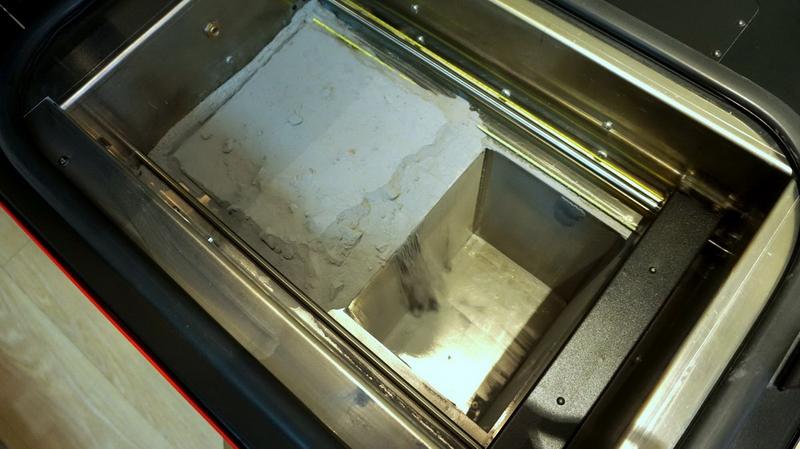
When the print area is filled with powder, don’t forget about protecting your breath and skin.
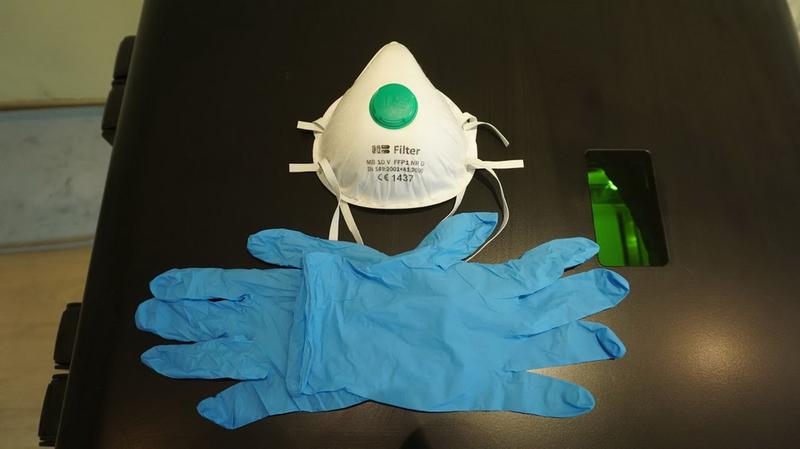
Since the material is a fine powder with a grain size of 20-80 microns, it’s necessary to use a respirator and gloves.

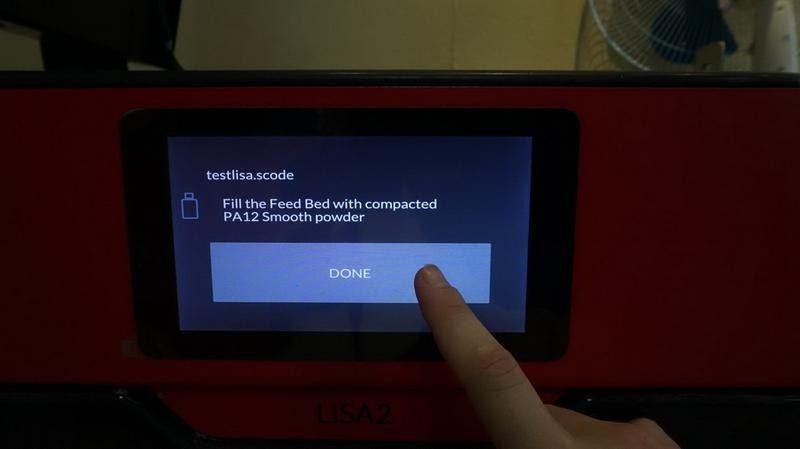
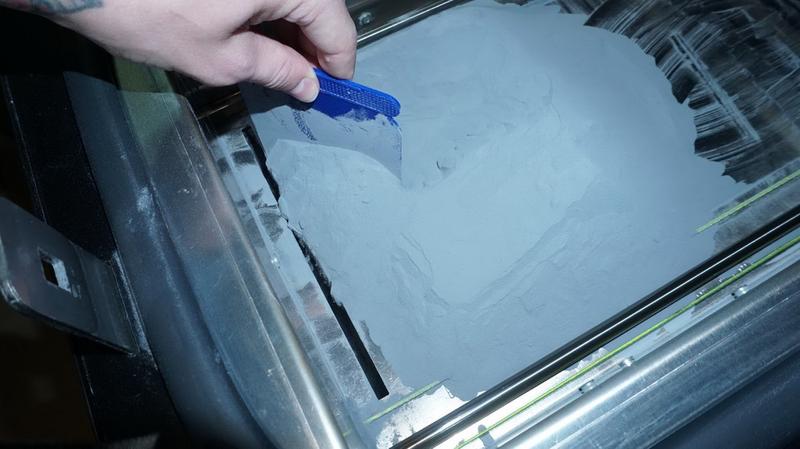
Carefully and without sudden movements fill the Feed Bed with powder. Preferably, leave a small pile of powder in the center.
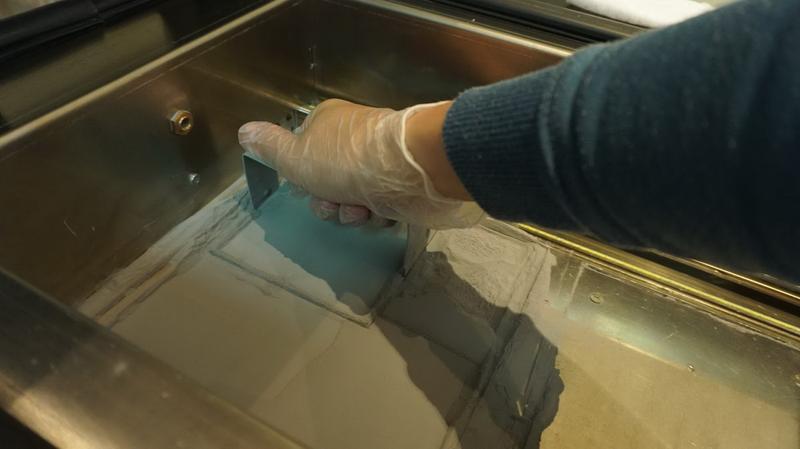
Firm the material with the special tool, leveling the surface. Don’t overdo it!
You’re done with filling the Feed Bed, let’s get to the next step.
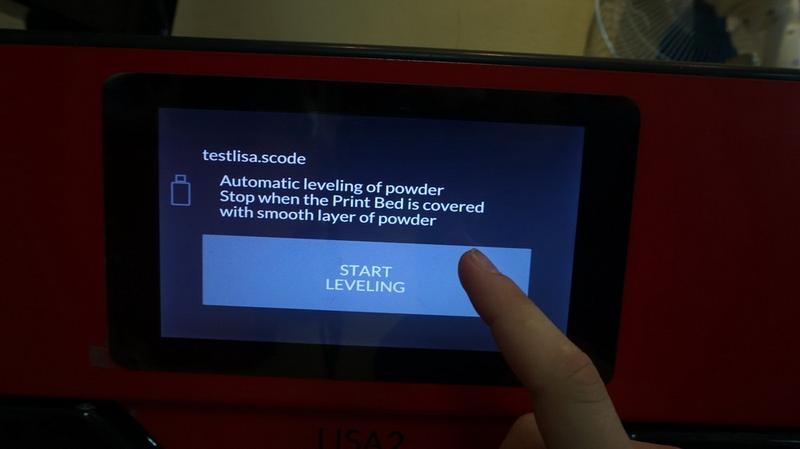
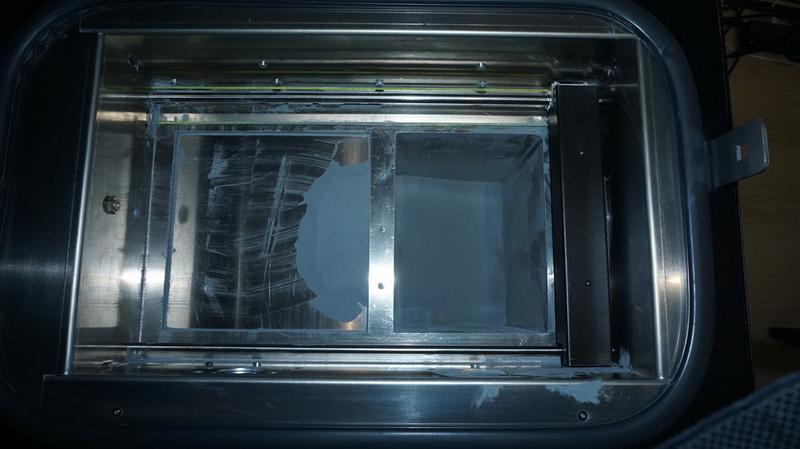
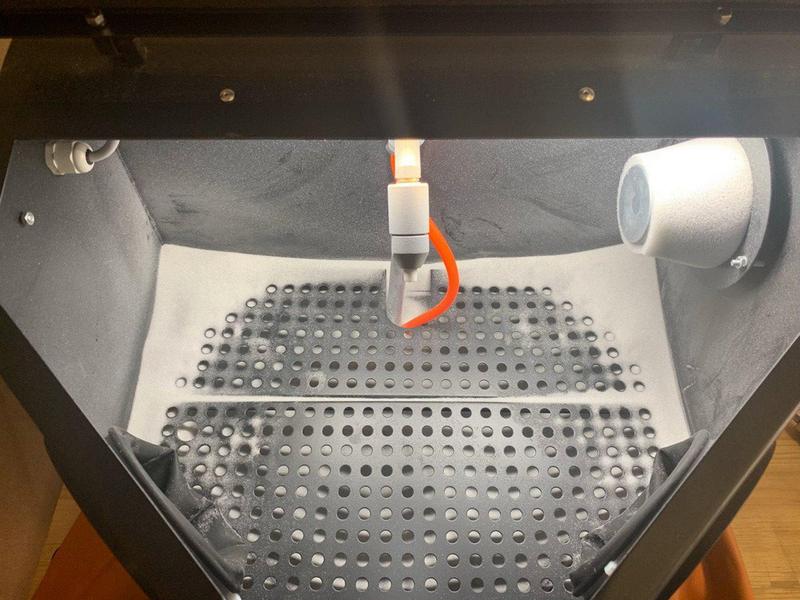
Make sure that there are no foreign objects in the build chamber, then start the bed leveling process until the right platform is completely covered with a smooth layer of material.
At the beginning of the process, every time the recoater moves to the leftmost position, you can gently pour a little material into the right bed. The recoater will smooth it out and the process will go faster. Also, if you spot gaps in the corners, you can pour some material there when the recoater is at its rightmost position.
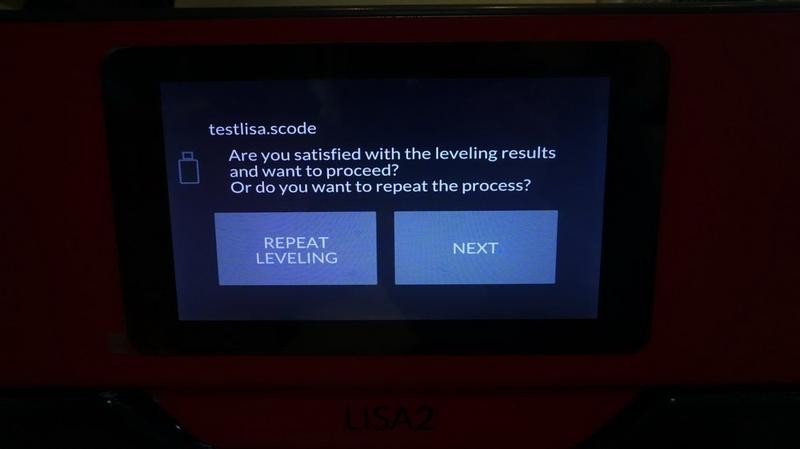
If the leveling process is done, but the platform is not completely covered with material, you can repeat leveling.
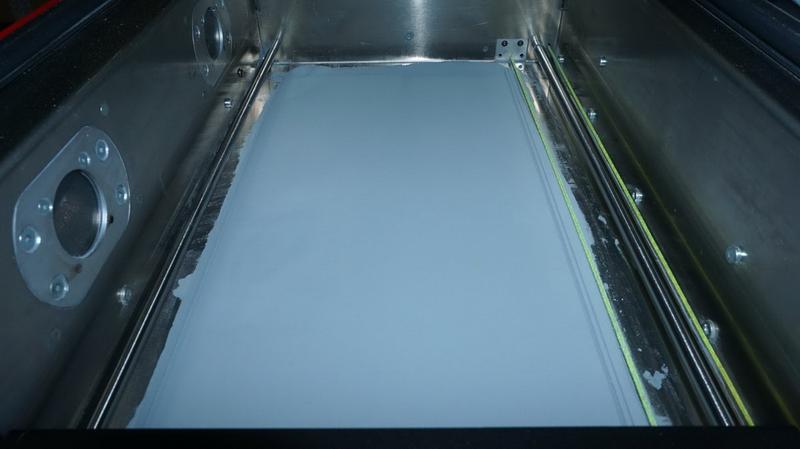
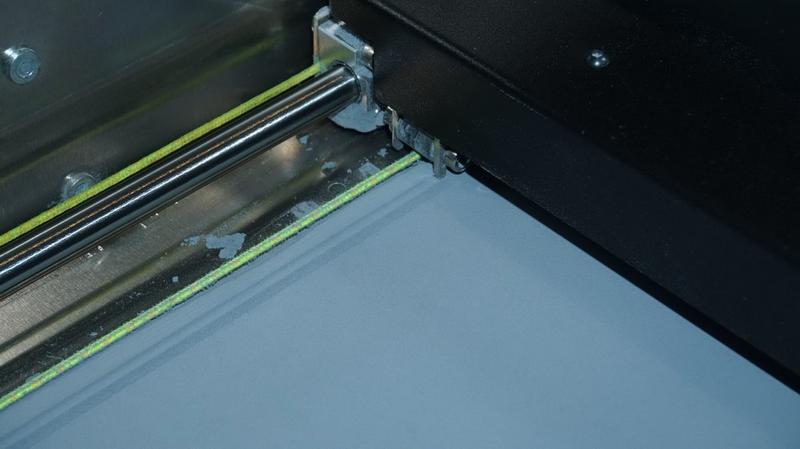
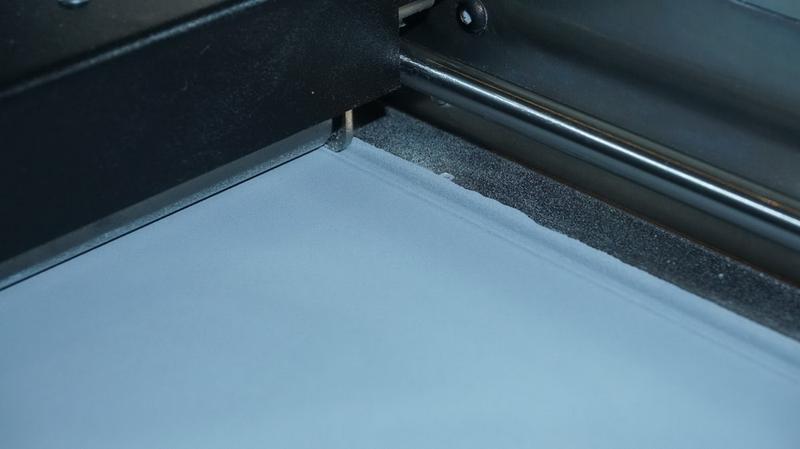
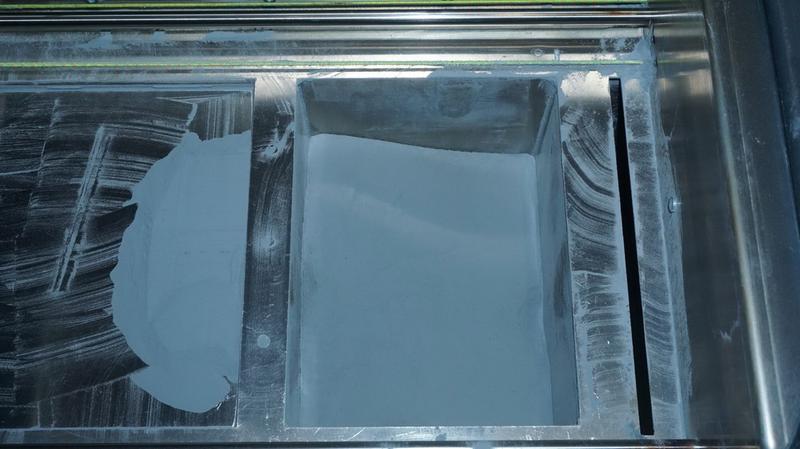
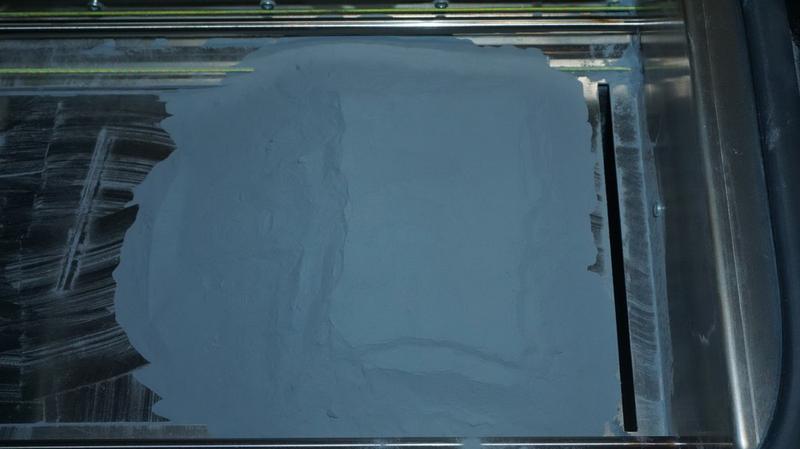
As a result, the surface should be completely smooth, and the recoater should leave marks along the entire length, as in the pictures above.

Finish the leveling process and let’s get to the next step.
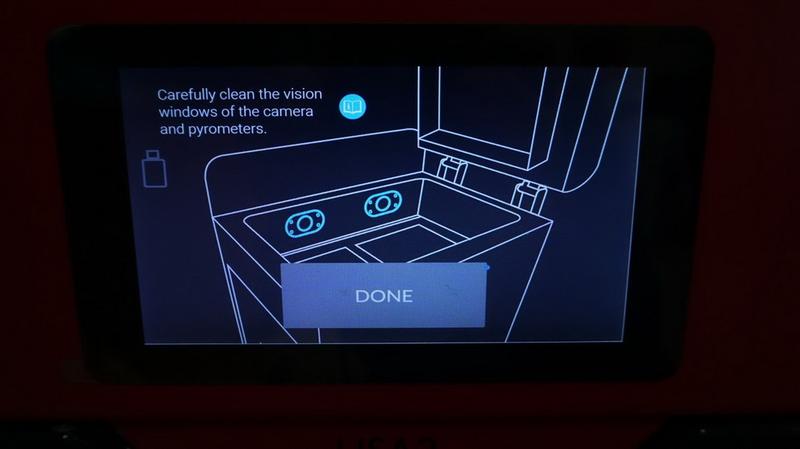
Use salicyl alcohol to clean the windows of the camera and pyrometers.
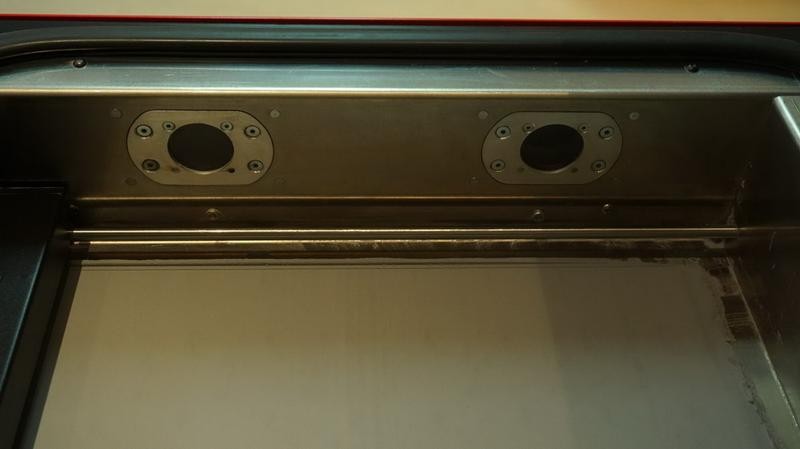
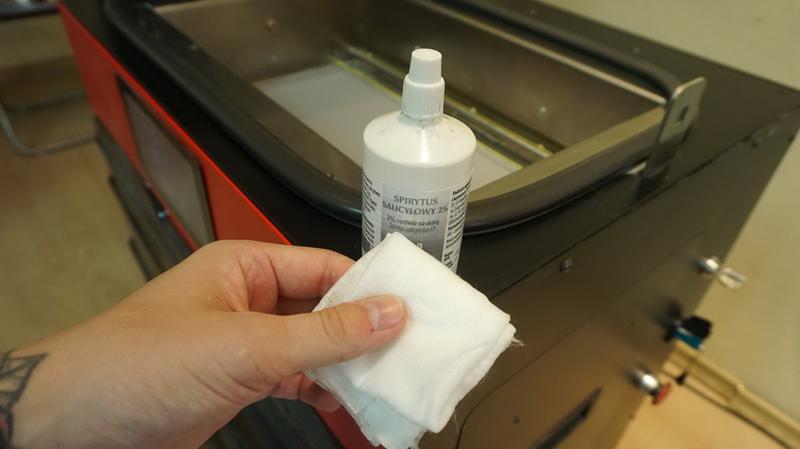
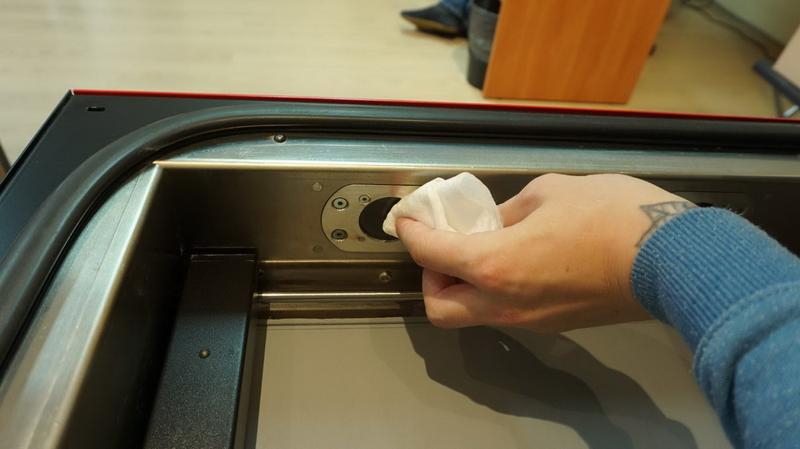
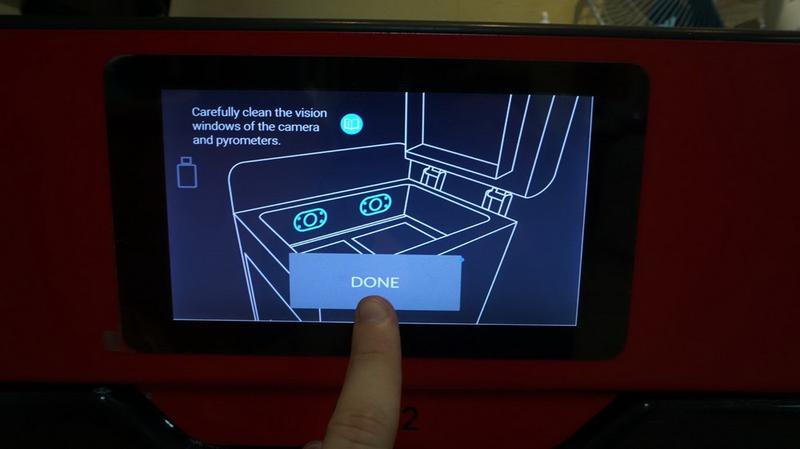
Once again, check if the guides are clean. Then press “Done”.
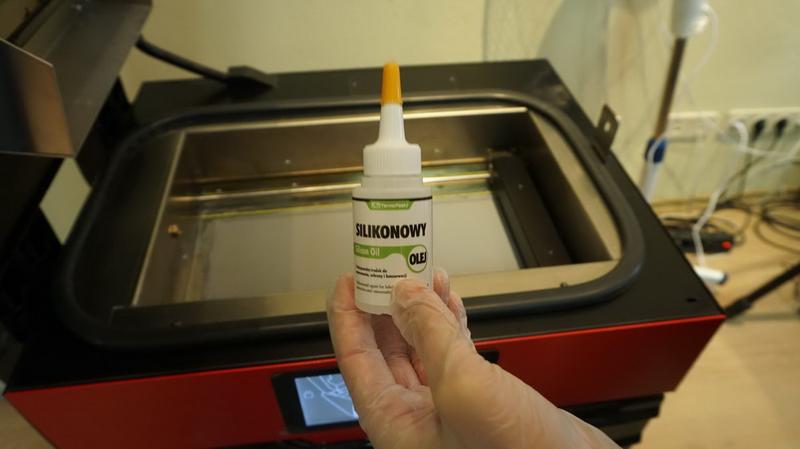
Grease the top and bottom guides with silicone, using a clean glove. Try not to touch the upper layer of the material.

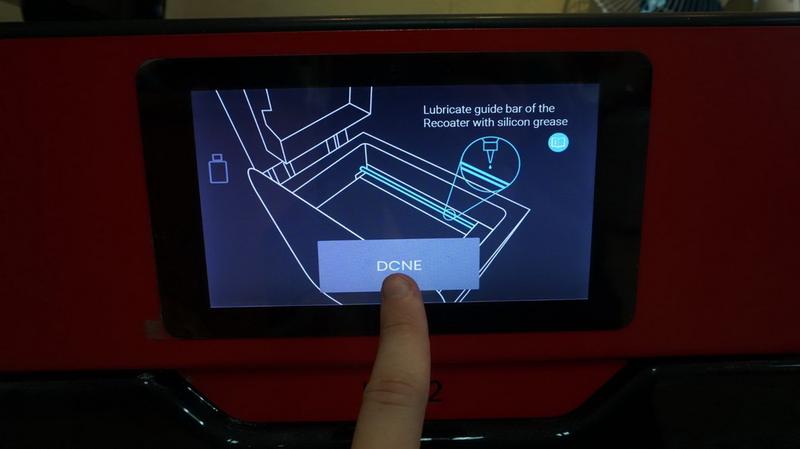
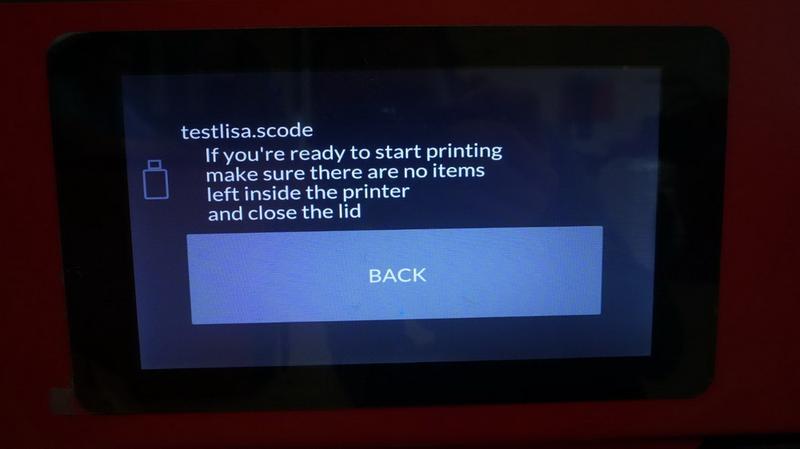
Finally, make sure you didn’t leave anything inside the printer and close the casing.
Looks great.
Close the cover.
Press lightly until it clicks.
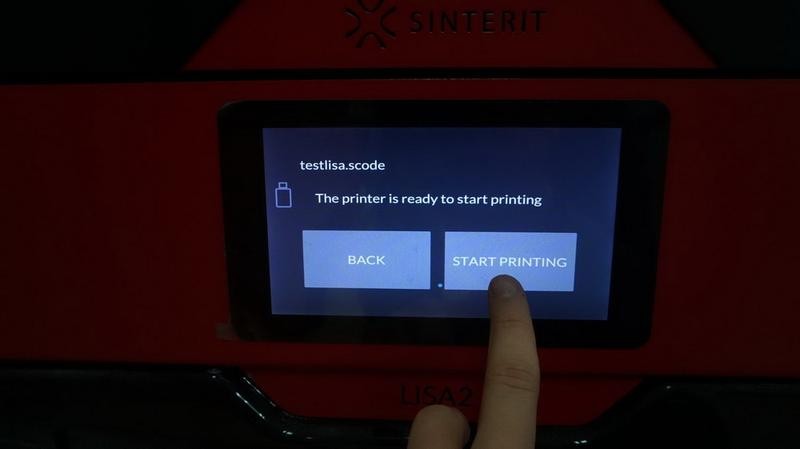
The “Start Printing” button will appear automatically.
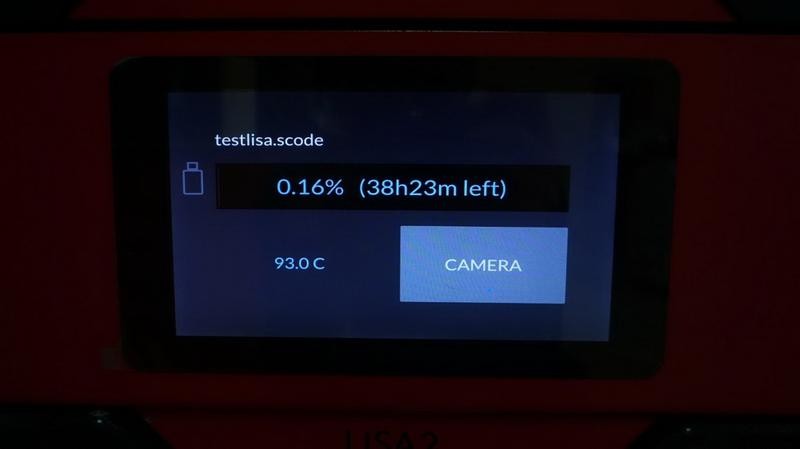
The printing process has begun. On the screen you can see the progress (%) and the remaining time.
The printer is warming up the chamber, it can last for 1.5 hours.
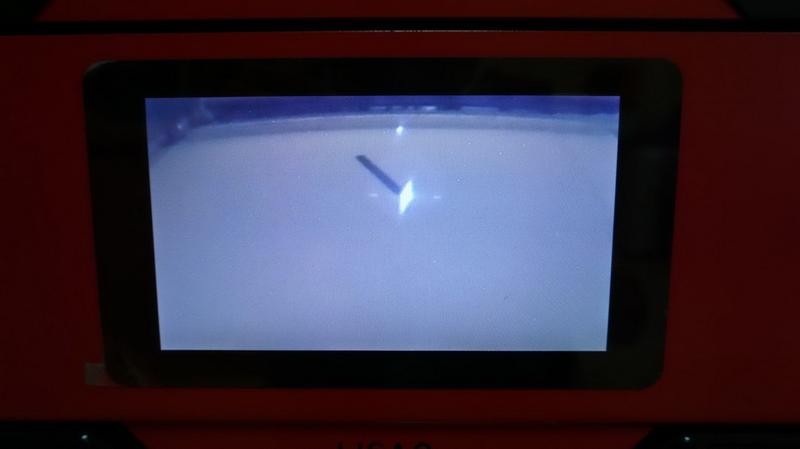
This is how the printing process is displayed on the screen.
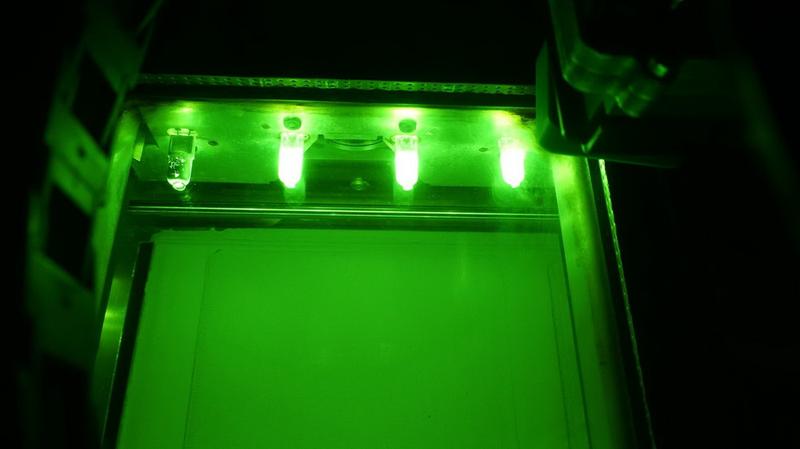
And this is how it looks through the window in the cover.
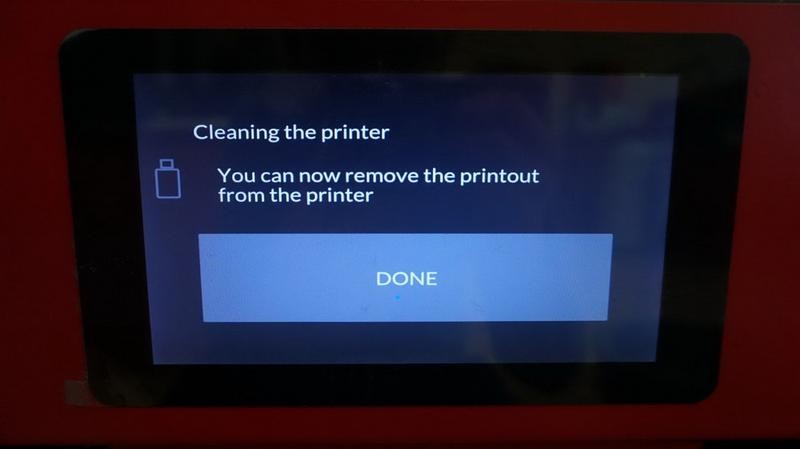
Once the printing process is done you will see the following:
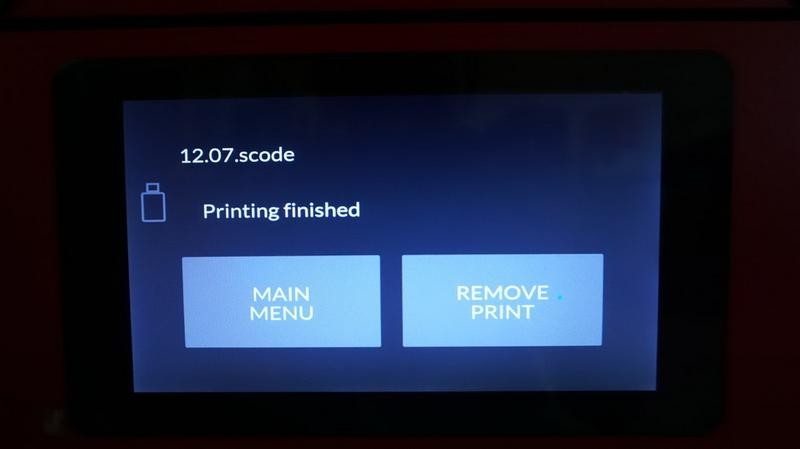
Press “Remove Print”
If you didn’t have time to remove the print and you left for some time, turning off the machine, you need to press the power button, turn the safety key and wait for the printer to turn on.
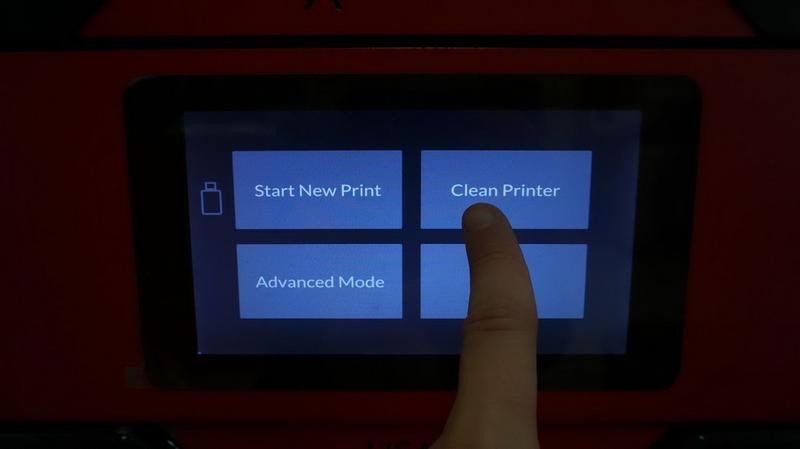
Start the cleaning process.
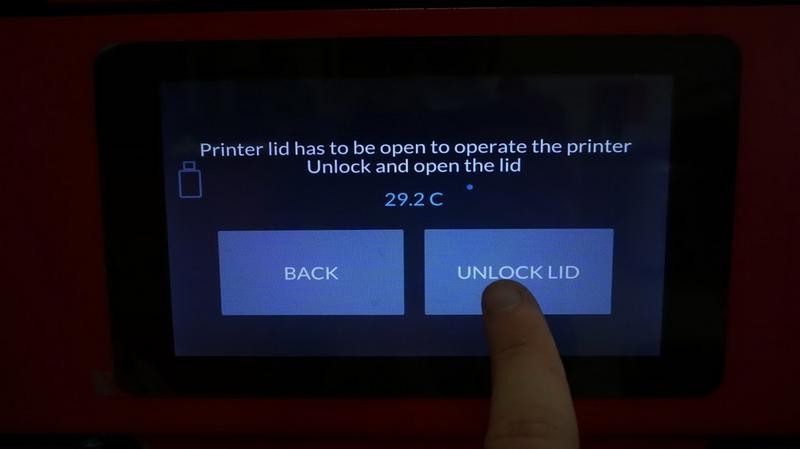
Unlock the lid.
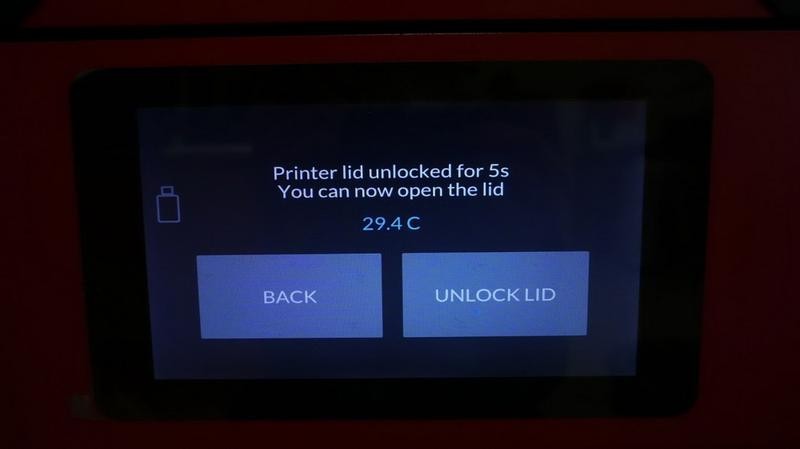
Press slightly on the lid.
Raise the lid.
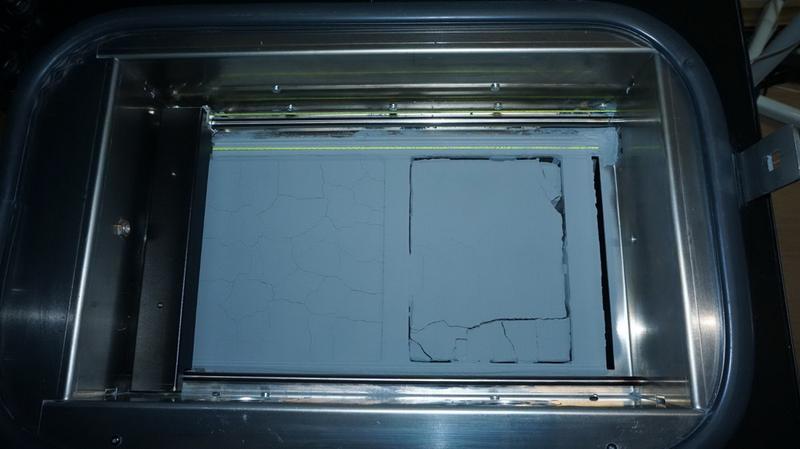
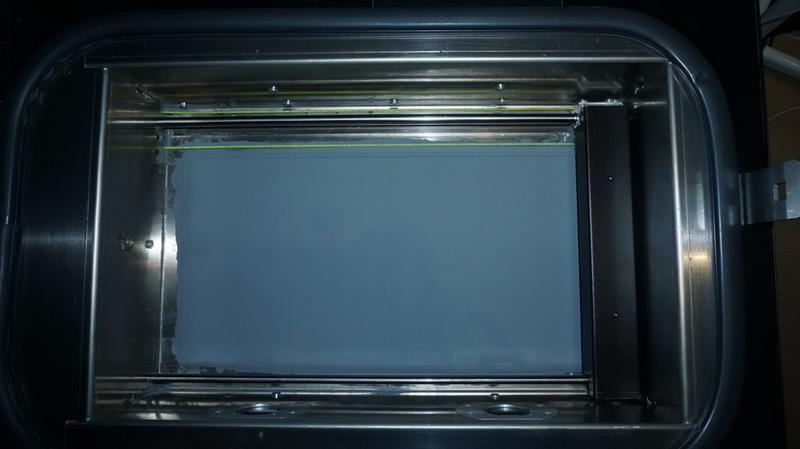
This is how material looks after the printing is done.
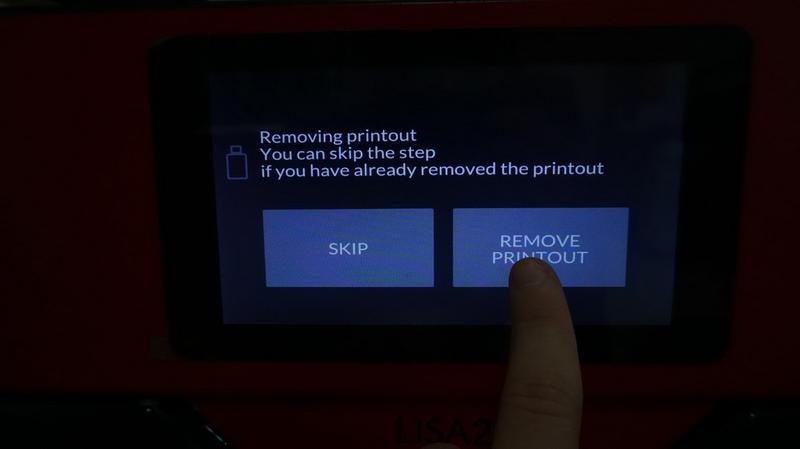
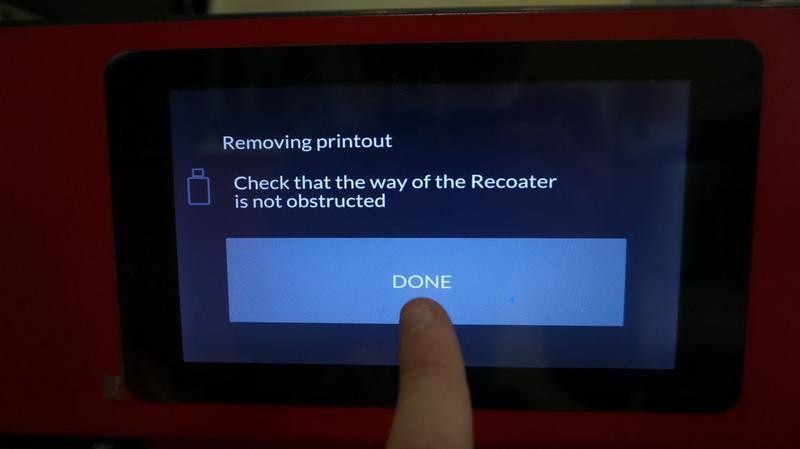
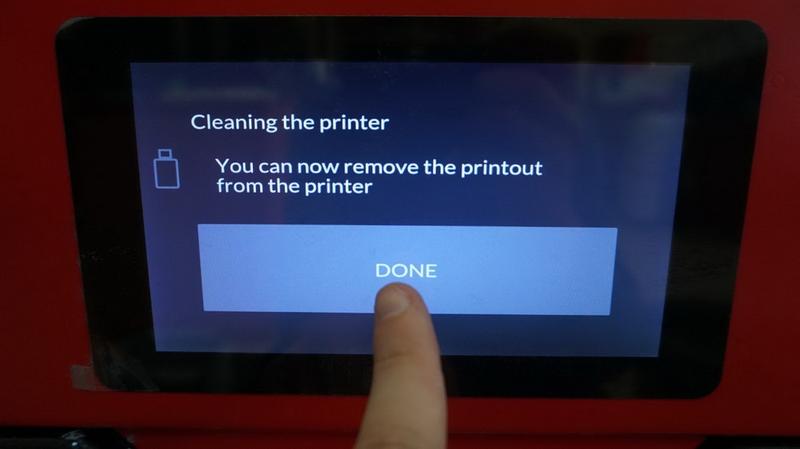
Press the “Remove Printout” button.
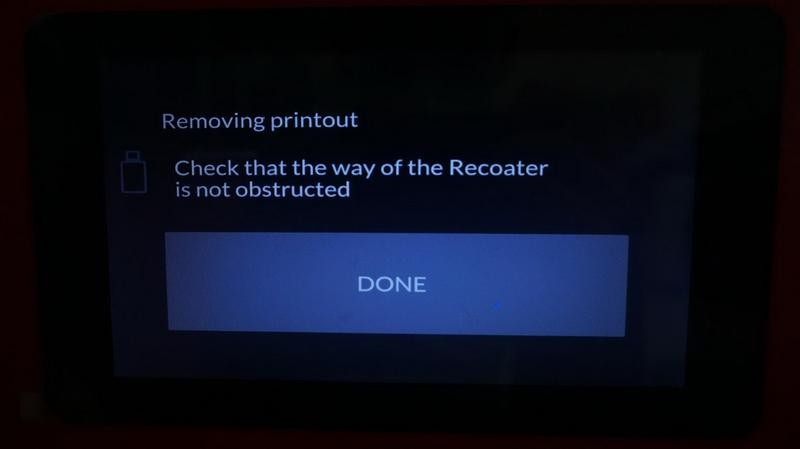
Check if the way of the recoater is not obstructed and the guides are clean.
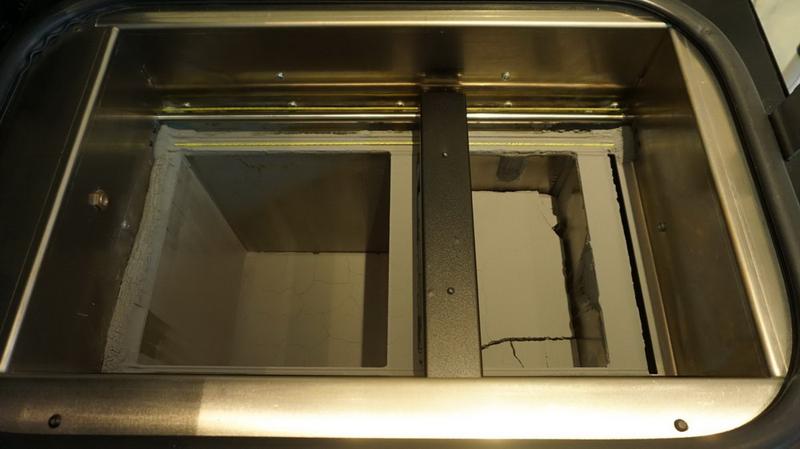
At first, both platforms will go down. The recoater will first move to the right, then to its initial position. After that the print bed will start rising.
Wait for the platform to stop moving.
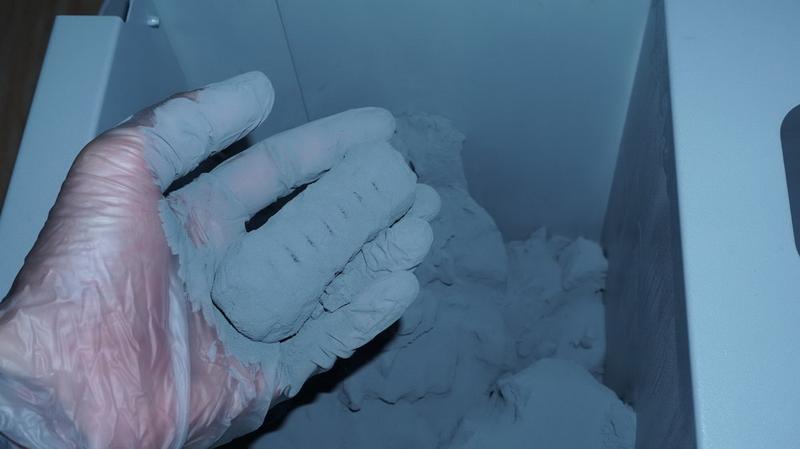
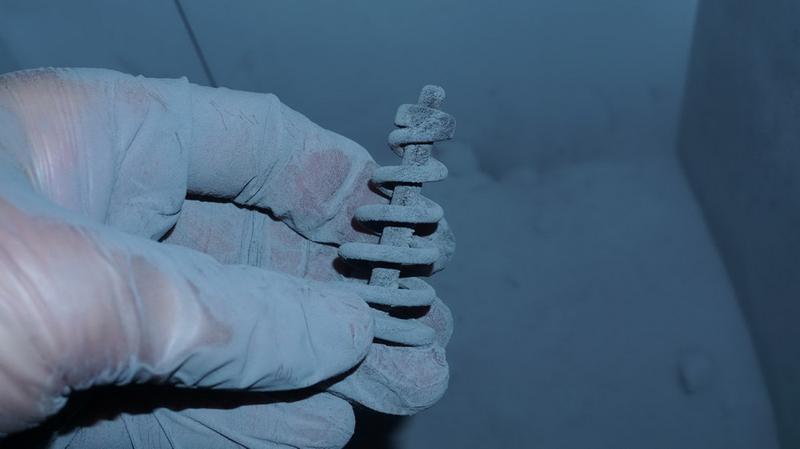
Now you can remove the print. Don’t forget about gloves and respirator.
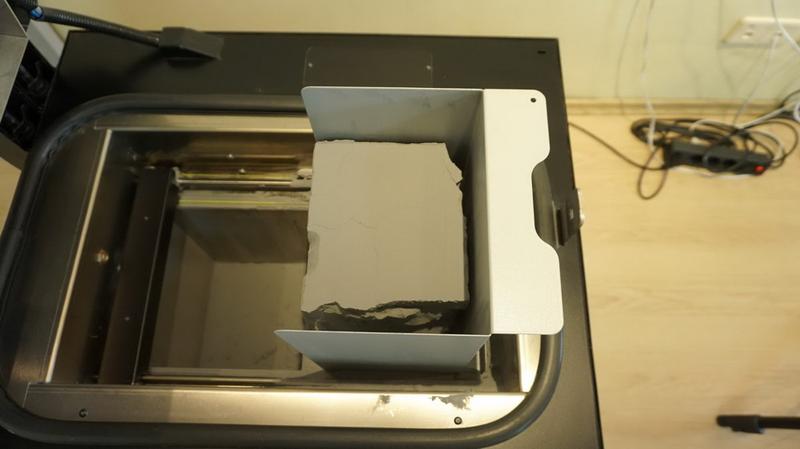
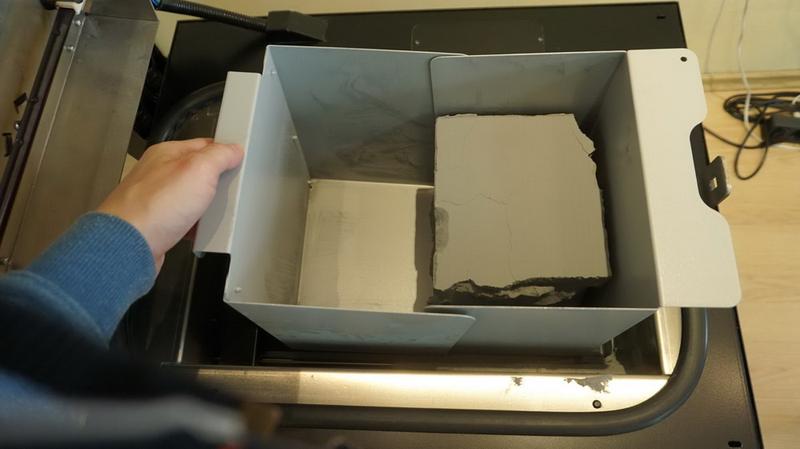

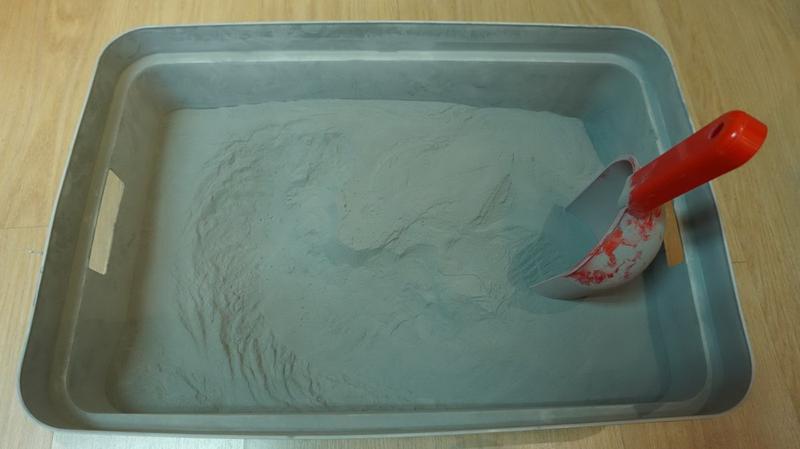
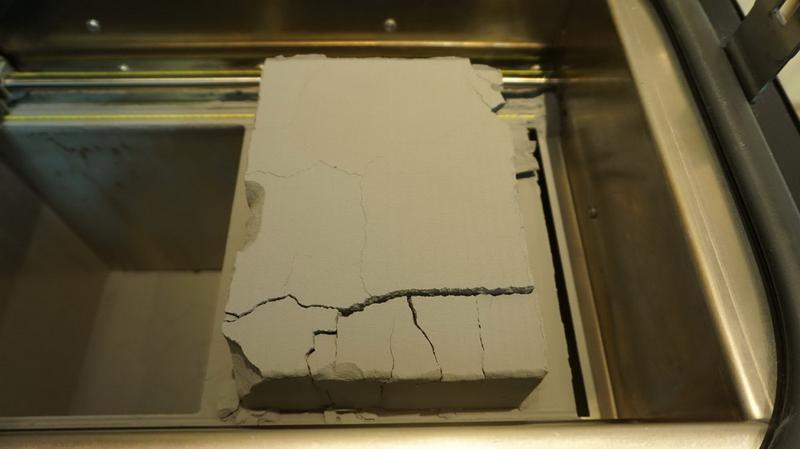
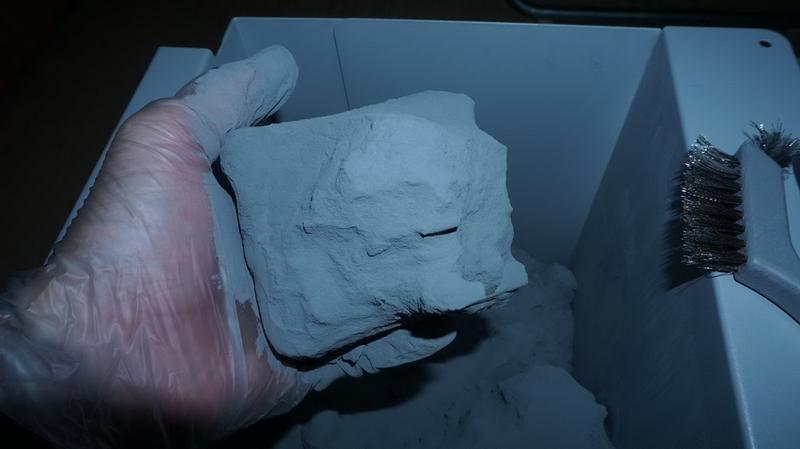
Here, we take the tool for removing prints and pick up this cube.
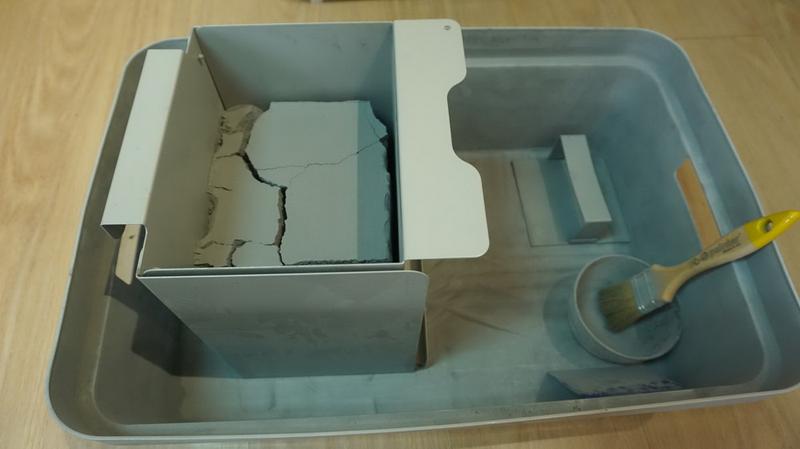
Then we move it to a special container that comes with the printer. We’ll get back to it later.
Keep going.
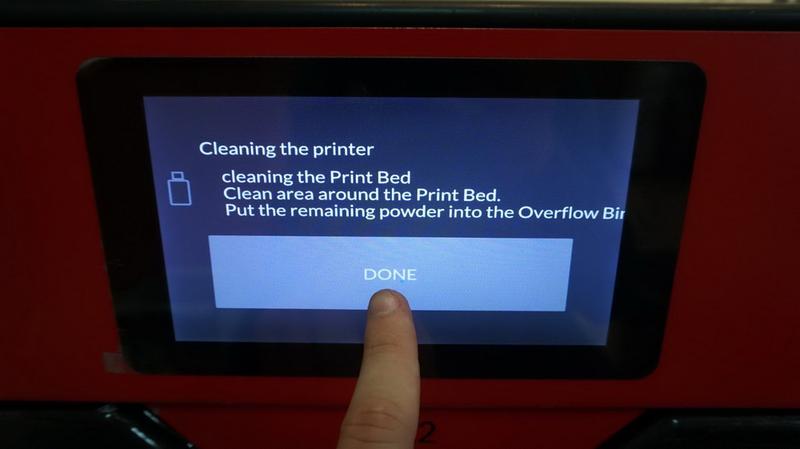
It is necessary to clean the dirty places where pieces of material have fallen off, remove the piles of material and clean the guides.
Once everything is clean, you can move to another step.

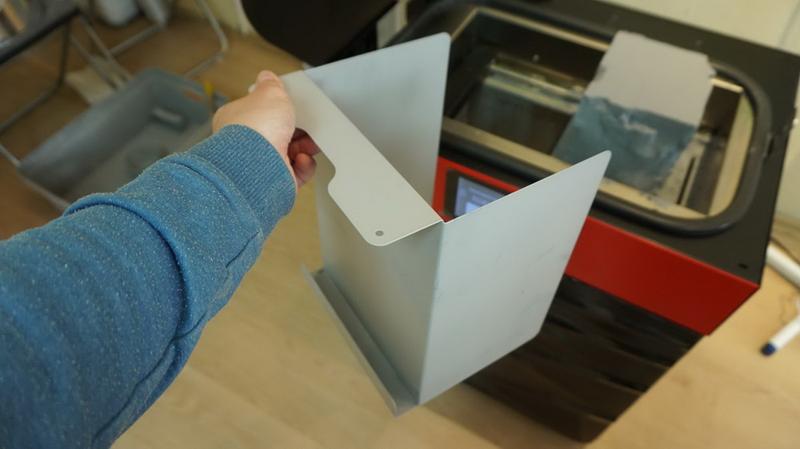
The Overflow Bin is a special tank where the remaining material is dumped after the cleaning is done.
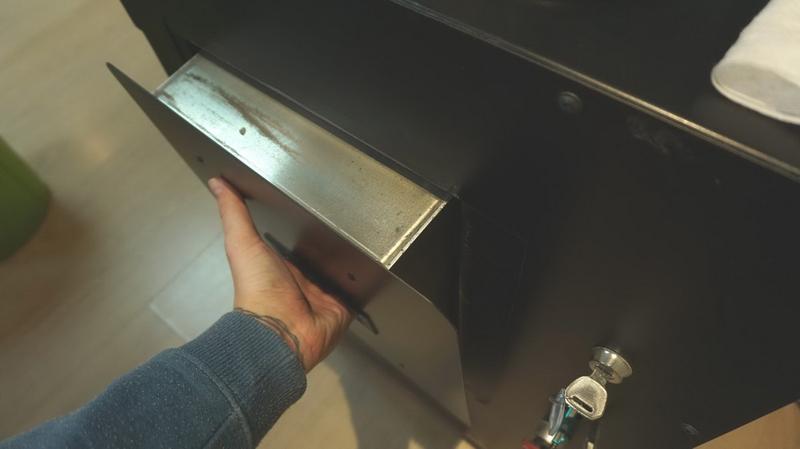
Take it out of the printer and pour the material into the container. We’ll get back to it later.
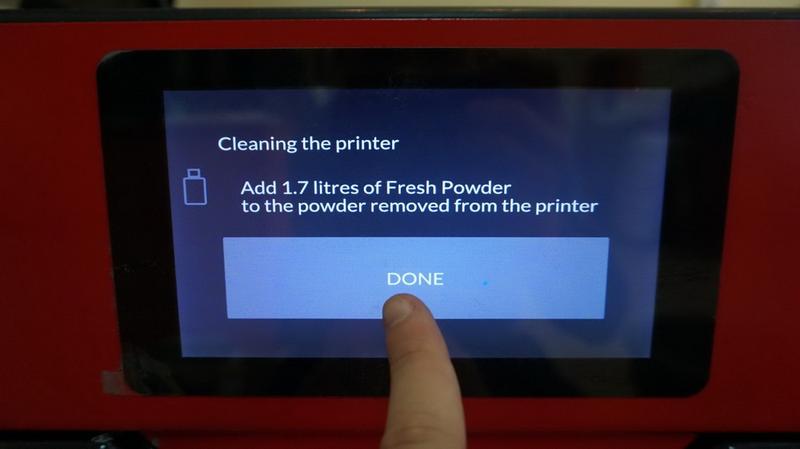
Now the printer suggests us to add 1.7 liters of Fresh material.
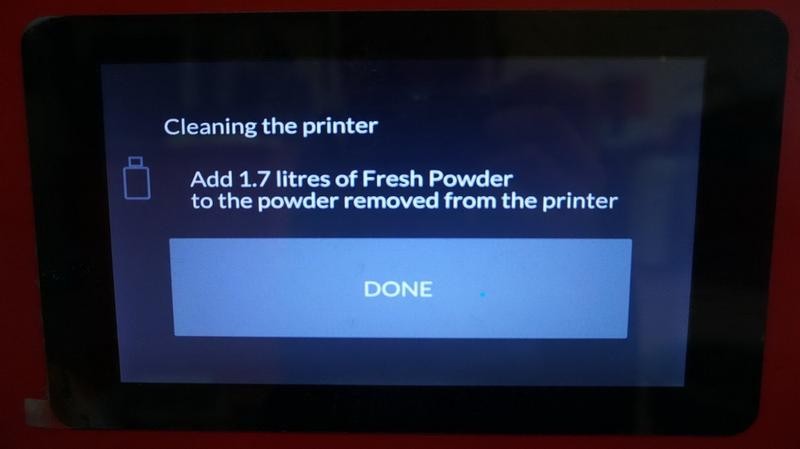
Pour everything into the same container.

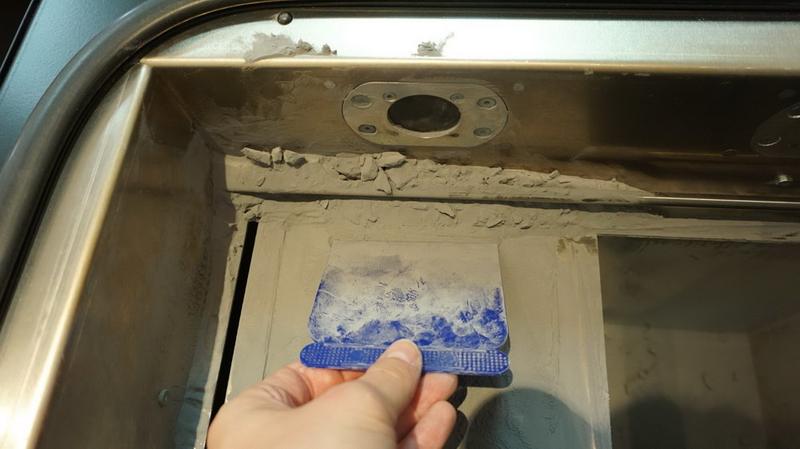
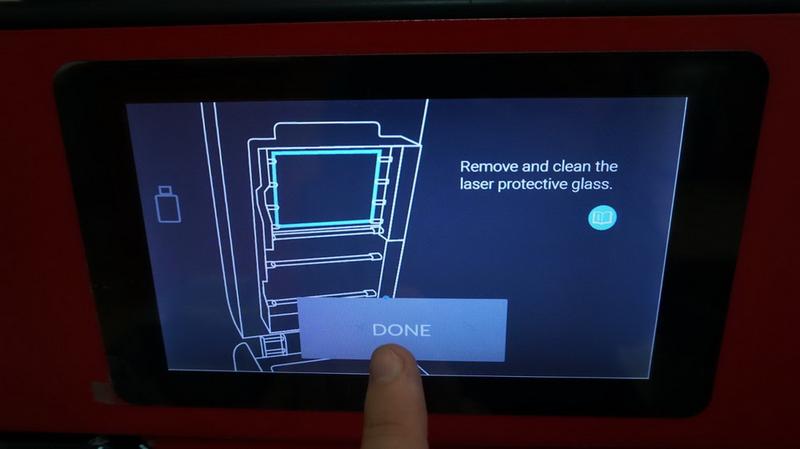
Now you need to clean the laser protective glass. The most important thing here is to do everything while wearing gloves, since these parts are very hot, they should not be allowed to become contaminated with skin secretions.
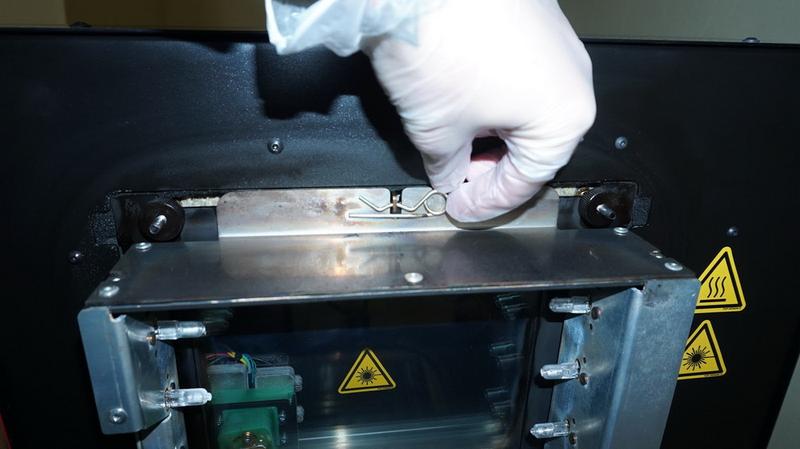
Remove the latch.
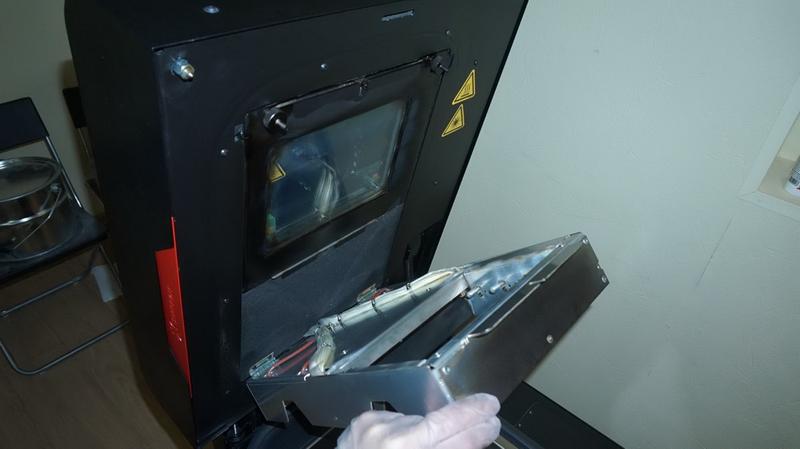
Gently fold back the block with the heaters.

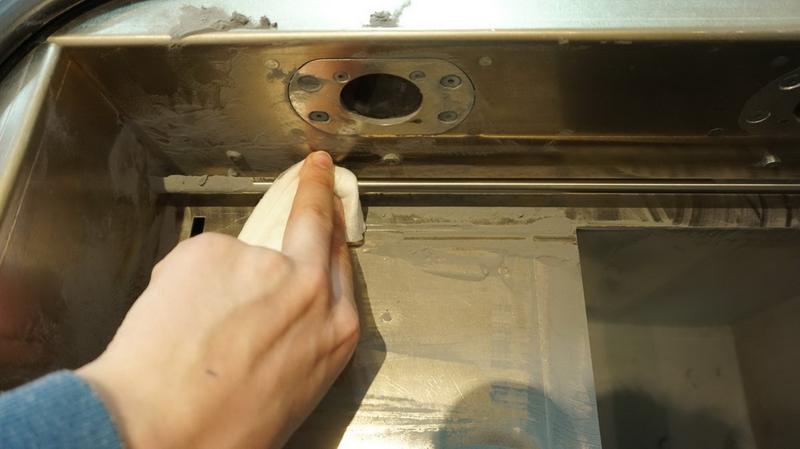
Clean the glass and the frame around it with a napkin and salicylic alcohol.
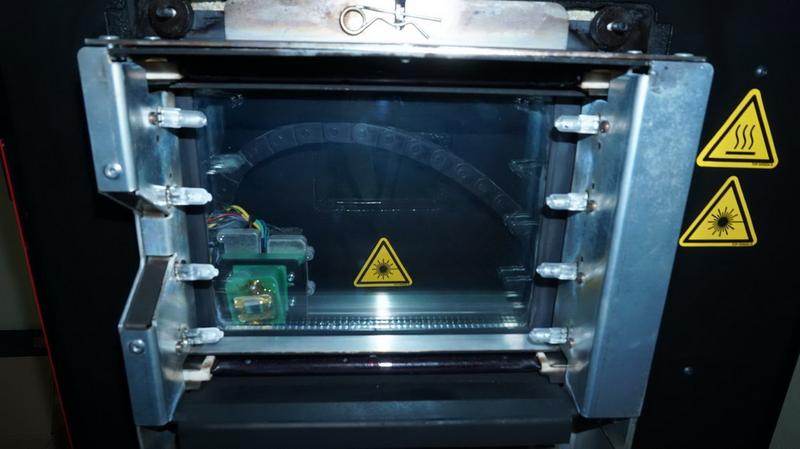
Assemble everything back and press “Done”.

Now start the Feed Bed cleaning process.
The Feed Bed will lower and the Print Bed will rise. Pour everything into the adjacent chamber.
You don’t have to remove everything completely, just make sure that the leftmost position of the recoater is clean, since it will be getting back there soon.
Start the Feed Bed cleaning process.
The bed is rising.
Dump the remaining material into the hole above the tank.
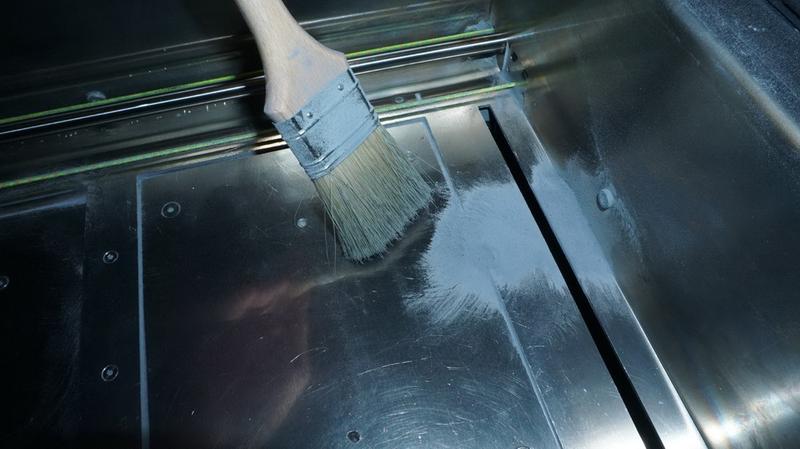
Use a brush to clean the remains.
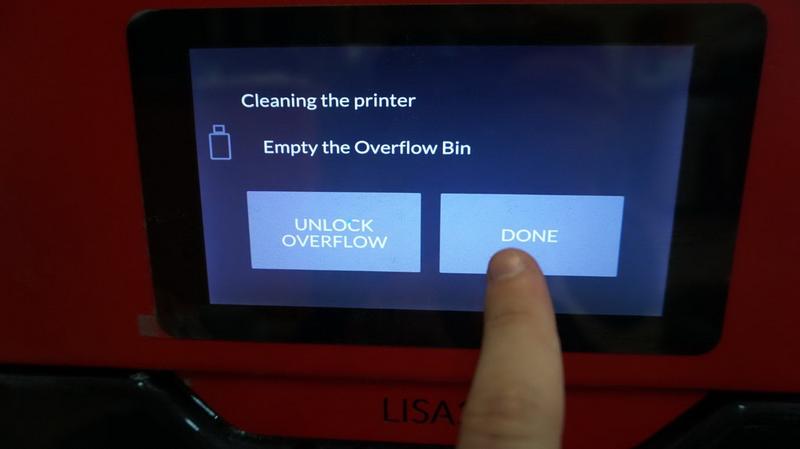
Finish the cleaning process. You will be asked to unlock the tank again and empty it. Then return everything to its place. The printer is clean.
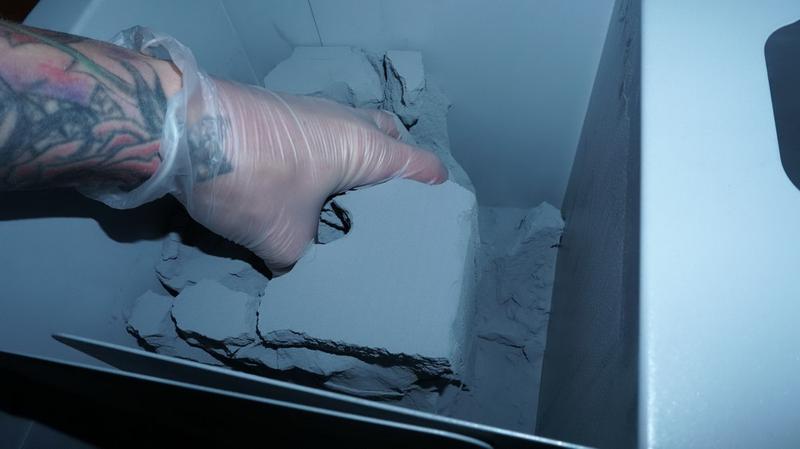
Carefully break the piece removed from the Print Bed. Find the parts by touch and loosen the polyamide around them.
There they are. Take them out.
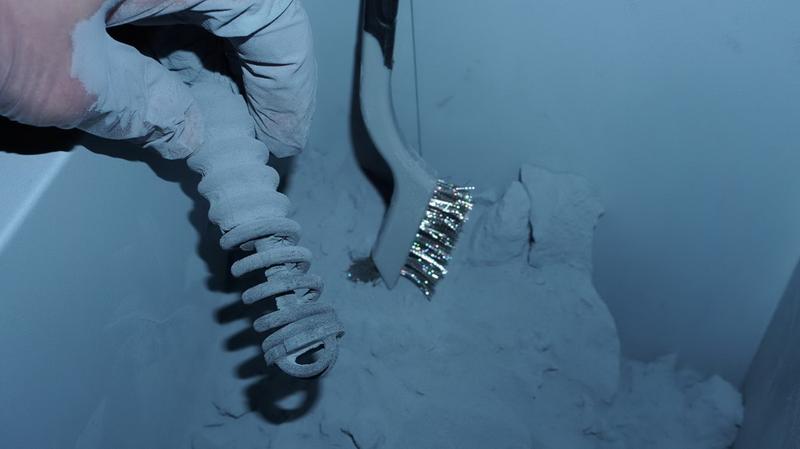
Use the metal brushes to clean the parts. You don’t have to clean them completely.
Take the prints out one by one.
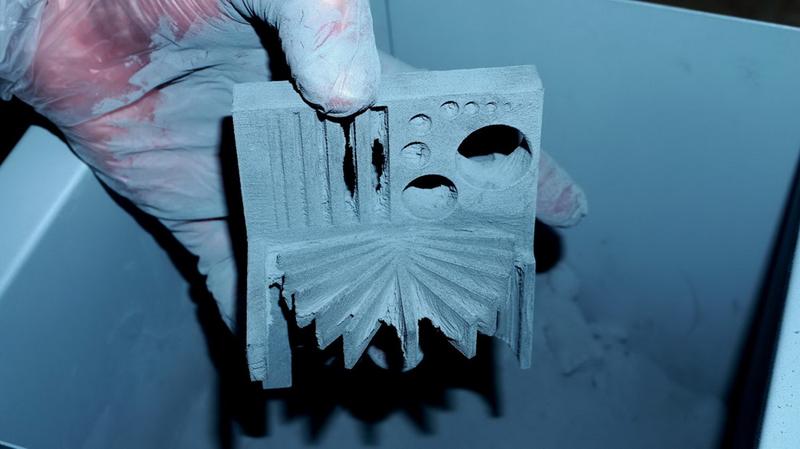
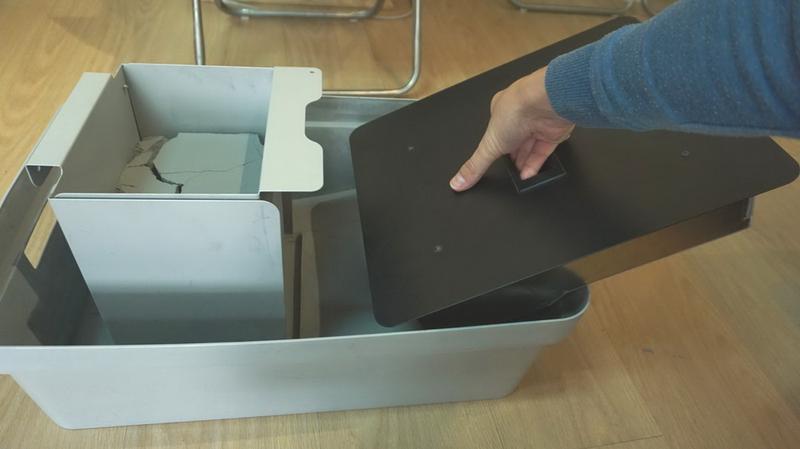
You’re done extracting the prints. Set them aside for now. Take everything but the material out of the container.
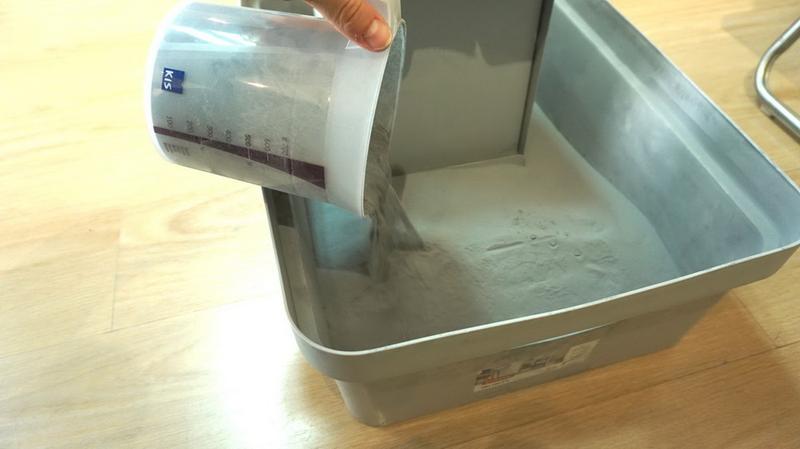
Use your hands to mix the remaining material with Fresh Powder.
The next step is to sieve the powder using Sinterit Sieve. You can purchase it separately or with the printer.
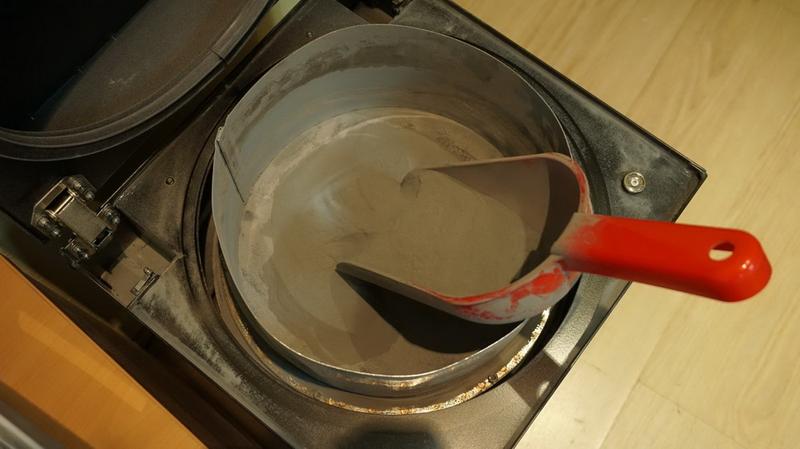
Open the lid of the device and pour the polyamide inside using spatula.
Check if there’s a container for sieved powder below.
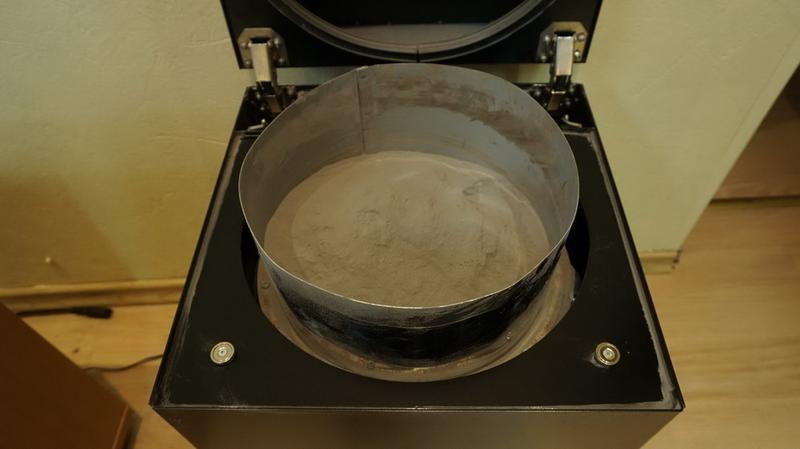
Push the button to start the process. The button will light up.
You can monitor the progress through the top window on the cover. Repeat the process until you go through all the material. The process is fast, but just in case, this device shuts down automatically after 18 minutes.
Next, you need to purge parts from dust and powder in a sandblasting station, also supplied by Sinterit. If already have such a station you can use it instead. To use the station you will need an air compressor, which is not supplied by Sinterit.
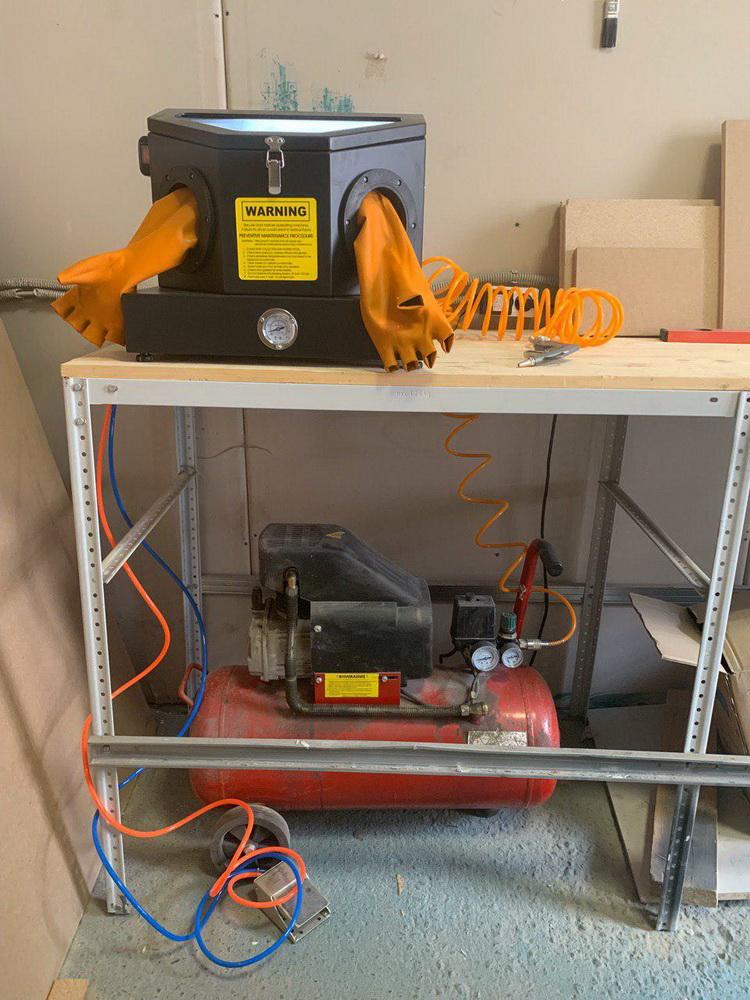
The air compressor (under the table in the photo) serves to create air pressure. Air is supplied to the chamber through tubes, the pedal serves to conveniently control the airflow.
The chamber itself is filled with a sandy mass, consisting of soda and special glass. It circulares across the chamber until it reaches the nozzle. The print itself is held under the nozzle to let air mixed with sand clean all the remaining polyamide. All you have to do is brush away the magnetized dust and the prints are completely clean.
You’ve just read a detailed description of the Sinterit Lisa Pro printing process. The objects that we printed on it can be seen in the pictures in the “Print comparison” section. A couple more photos you can find in the section below.
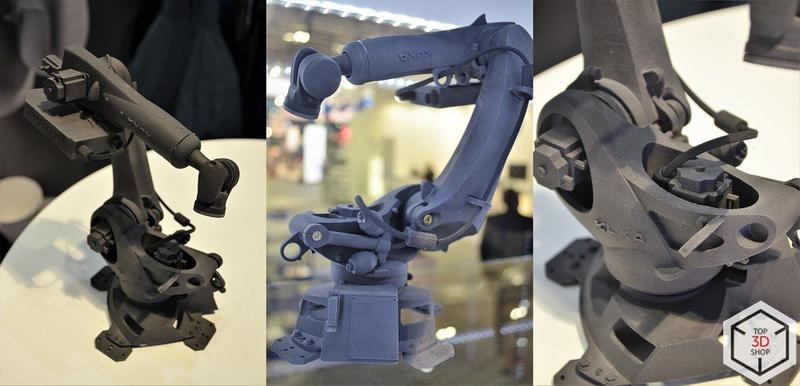
SLS 3D printing is becoming an important production tool in the car manufacturing, electronics, robotics, plastics, healthcare and other areas.
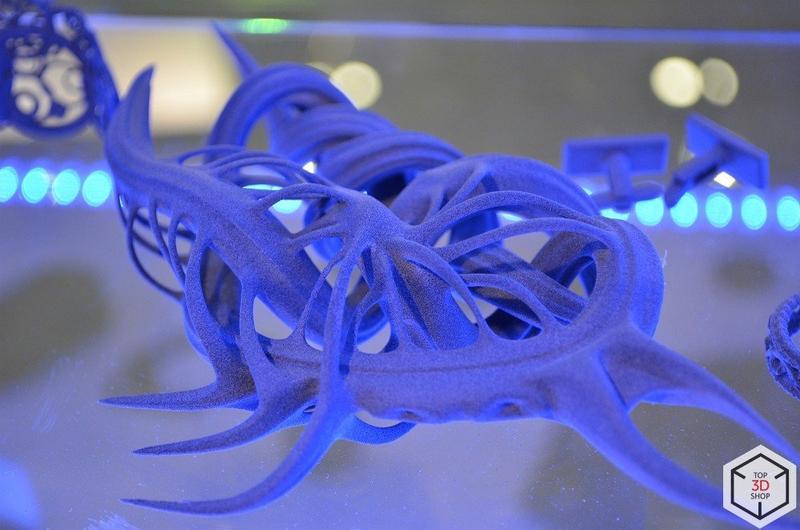
You can use the Lisa Pro printer to print both functional parts and prototypes, various types of models of both rigid and flexible designs. This feature allows the printer to find more and more unexpected applications.
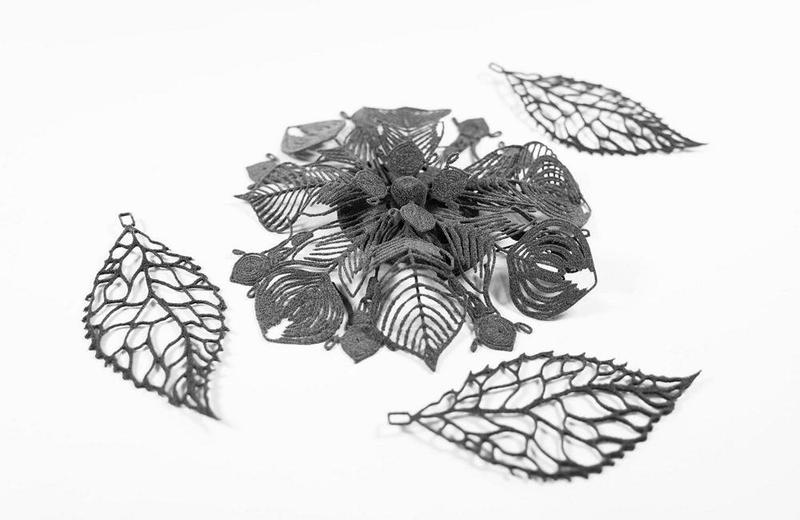
In the photo above, you see a swimsuit decoration for the Afrocentric Beauty collection, created by Bambshell on the Sinterit Lisa 3D printer.
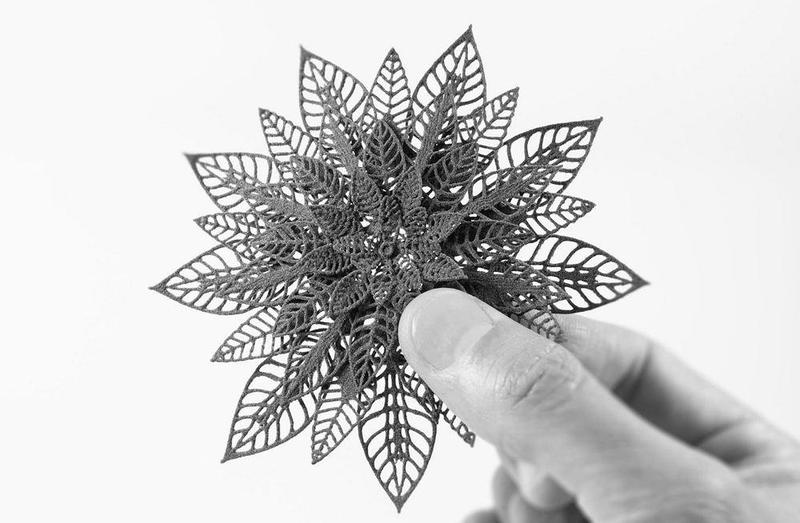
Recently, SLS-printing has been often used in design collections of clothes - for creating decorative elements, accessories and other parts. It is also used in scale modeling, shoes production, creating elastic gaskets, seals and flexible joints, as well as many other details.
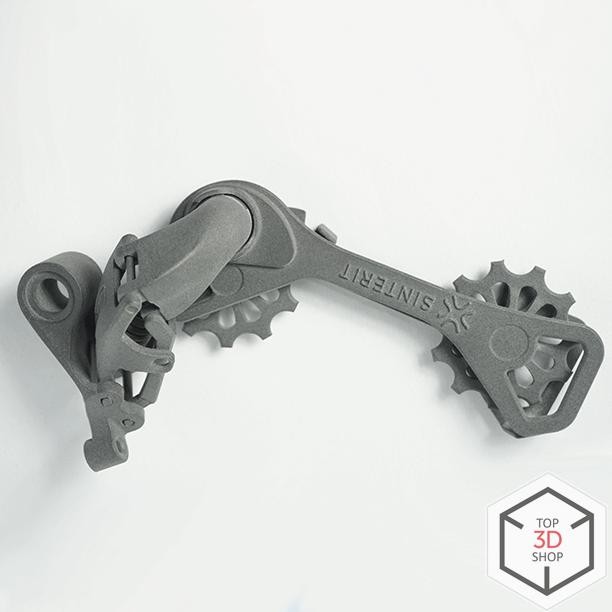
Products printed on SLS printers are fully functional, can withstand high temperatures and mechanical stress, and are also able to work in aggressive chemical environments such as gasoline, oils and acids. This ability further increases the number of applications.
Sinterit Lisa Pro offers designers, engineers, small and mid-sized businesses an affordable opportunity to take full advantage of 3D printing SLS technology without buying full-size industrial equipment.
Summarizing the above: Sinterit Lisa Pro can find application in almost any production, of any size and field, but most of all where small-scale production of parts from thermoplastic polymers is necessary.
Want to find out more about the SLS technology or even get an SLS 3D printer? Our staff can help you choose the machine that's best for you! We'll also help you choose proper materials for printing. The company will deliver the printer, set it up, train your staff to use the equipment and provide technical support during operation.

Update your browser to view this website correctly. Update my browser now
Write a comment