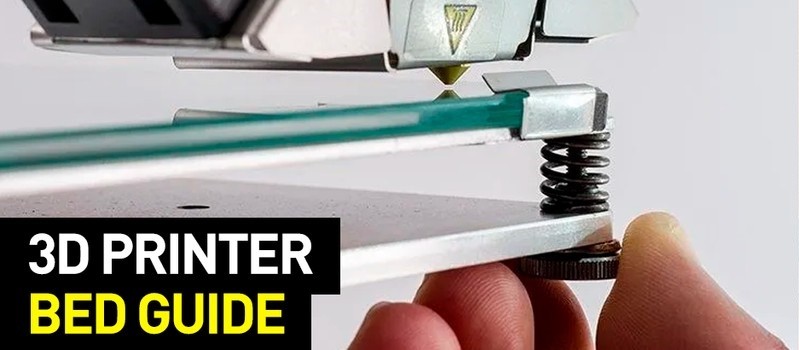
Correct calibration of a 3D printer bed is extremely important. The first layer of a model is like a foundation for a house: if it is fragile, the object will not hold up for a long time. If the plane of the print surface is uneven, the model may partly come unstuck or deform. The first layer may not stick to the platform at all, and the result of hours of printing will be plastic "spaghetti" instead of a neat model.
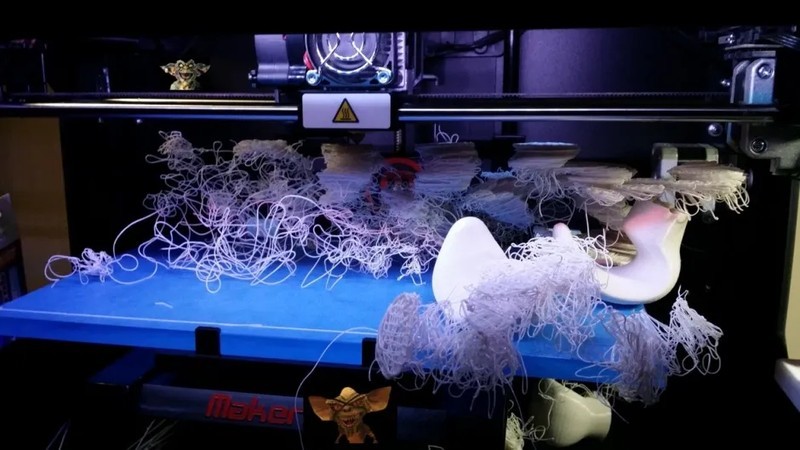
An example of a failed print
Read the article to get to know the peculiarities of different types of 3D printer beds and learn how to calibrate them properly.
Build plates can be divided into two types — adjustable and fixed. The adjustable platform is attached to the printer with spring-loaded screws. It is not fixed rigidly in height, and the screws allow calibrating the plane and the gap between the print bed and the nozzle.
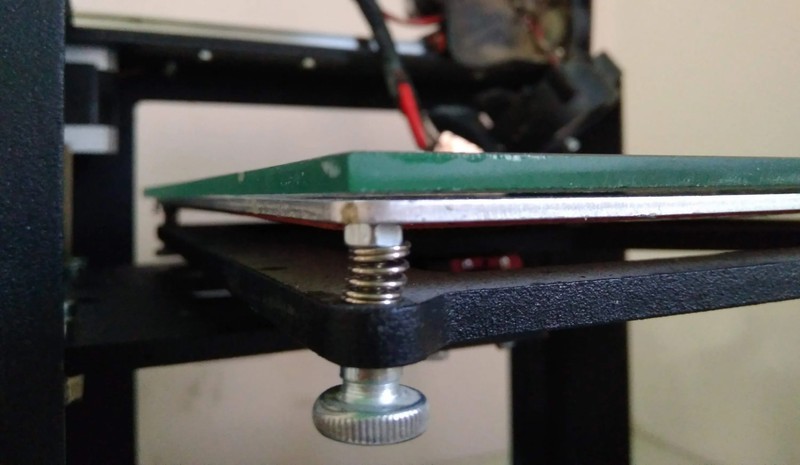
Adjusting screw
The non-adjustable plate is firmly attached to the printer body. This solution is used in delta printers. The bed can be leveled only by means of special programs.

Fixed delta printer platform
The material from which the print bed is made may differ depending on whether it is a heated one or not.
There are several types of heating elements for the 3D printer platform — they can be made of aluminum, textolite, silicone, and Kapton. Each of them has its own pros and cons.
Textolite heaters are inexpensive but fragile. Besides, they can strongly bend when heated.
A silicone heater cannot be employed on its own. It is usually used in combination with a metal base.
Print beds made of aluminum are quite expensive but heat up more evenly and are less prone to thermal deformation than other platforms.
Kapton heaters are very expensive and cannot be used on their own. They are usually glued to a metal base. Such elements can heat up to 200 degrees.
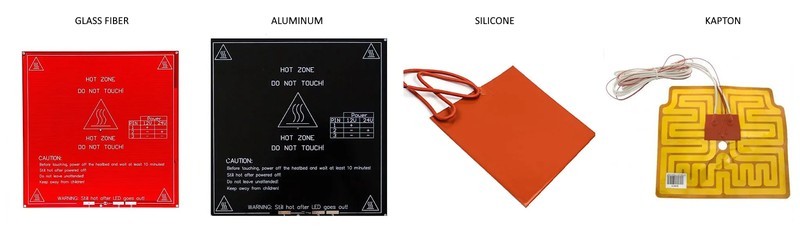
Types of heating print surfaces
Most often, users of 3D printers employ an aluminum heated bed or a silicone heating pad in conjunction with an aluminum plate. Affordability, ease of processing, and high thermal conductivity make aluminum the most popular material for heated beds.
The main advantage of heating the print surface is an increase in the adhesion of the first layer of plastic. If the printer is enclosed and has a heated platform, a "passive thermal chamber" is created inside. Thus, plastics with high shrinkage do not crack in layers during printing, the interlayer adhesion increases, and the internal stress during cooling is distributed more evenly.
But, there are some disadvantages as well — when heated, a metal bed expands, and since it has nowhere to expand, it begins to bend. For a platform of up to 200 x 200 mm, deformation will not be critical, but for larger beds, it becomes a tangible problem.
Each manufacturer of 3D printers with a large print area solves the problem of deformation in its own way. For example, Raise 3D printers have the bed fixed over the entire plane with studs at 13 points.
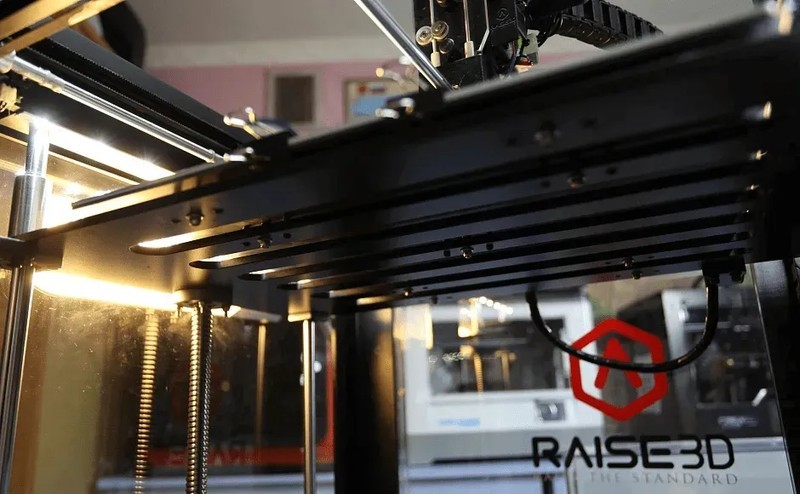
Fixation of a Raise 3D heated bed
A non-heated print surface is often used in 3D printers designed to work only with PLA and other low-temperature filaments. For example, printers for children or large open-frame devices.
An acrylic bed in a printer for children
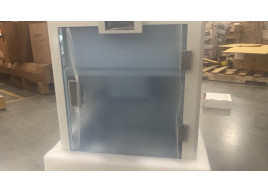
Non-heating beds are made of aluminum or acrylic. If the bed is of aluminum, it requires glass or any other surface on top. Aluminum is a soft metal, and even a brass nozzle can scratch or ruin it.

Heating bed with aluminum base and mirror
Acrylic beds are often used in affordable 3D printers for children. Acrylic is difficult to ruin or break. Glass or another surface is not required.
Different surfaces are used to ensure that the first layer adheres firmly to the bed. It is more convenient to remove a model from a replaceable surface. If you need to start printing another model right away, you can simply replace one surface with another.
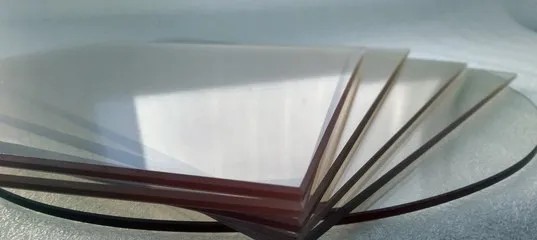
The most popular bed surface is regular tempered glass or mirror, partly owing to its affordability. It is believed that mirror provides higher accuracy, but ordinary tempered glass is enough for small printing areas (up to 200 x 200 mm).
Glass itself does not hold the first layer well, so various glues or stickers are used to increase adhesion. The material can burst or crumble due to temperature changes, then the model comes off along with pieces of glass. On the other hand, this surface is easy to replace.
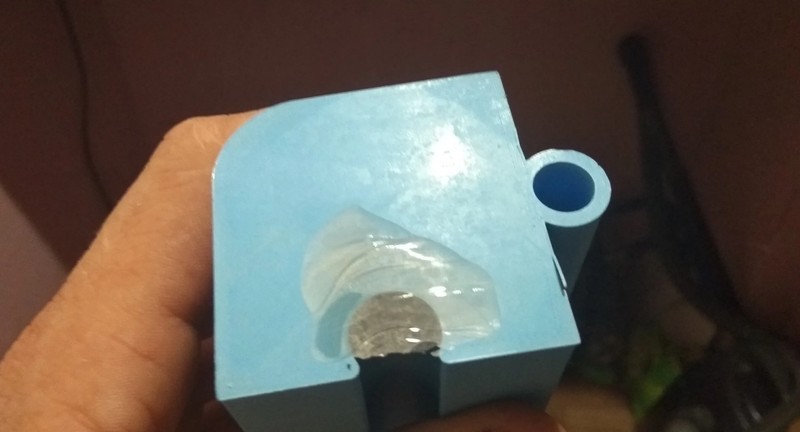
A piece of glass came off with the model
Sitall glass contains boron oxide. This makes it stronger than regular glass and resistant to temperature changes. But the cost of this material is much higher than that of ordinary or tempered glass.
Sitall glass
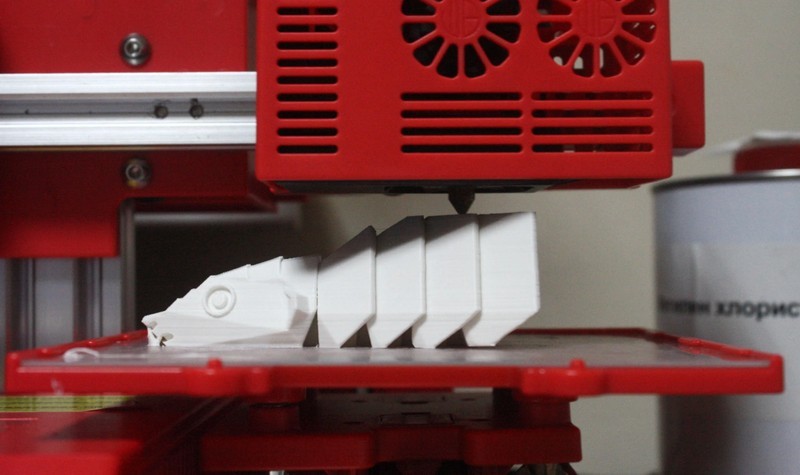
A perforated bed is mainly used for printing ABS. The perforation ensures that the plastic adheres firmly to the print bed. In order for the bottom of a model to turn out even, you need to enable printing on a raft in the settings of the slicer.
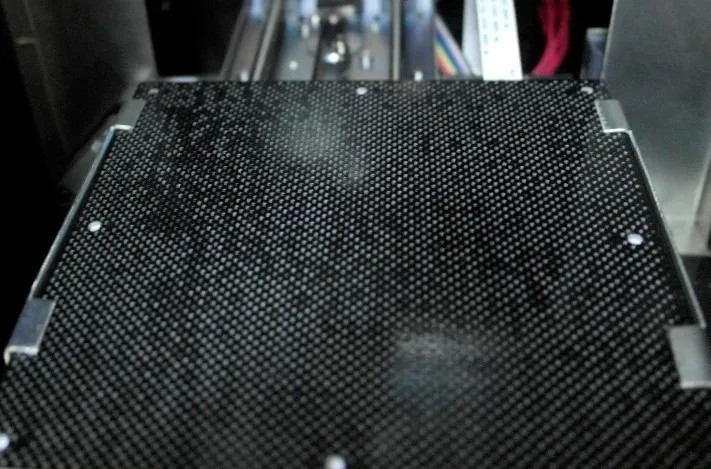
A perforated bed is used in UP! printers
There is also a huge variety of print bed stickers. It can be either ordinary masking tape or a specialized rough adhesive surface.
A finished model is easier to remove from a flexible substrate than, for example, from glass. On some substrates, the model can be easily removed after the build plate has cooled. For other ones, you need to heat the bed and only then remove the model.
In addition, there is a variety of compositions that are applied to the surface of the printing platform to increase the adhesion of the first layers — 3D varnishes, 3D adhesives, etc. Many makers have their own special recipes for compositions. It can be polyvinyl butyral phenolic glue mixed with a solvent or alcohol, ABS diluted in acetone, glue stick, etc.
It is noteworthy that you shouldn't spray varnish or other spray compounds inside the printer. Particles of glue can settle on mechanisms, fans, and even get onto electronics. This can lead to damage to the printer. Simply remove the print surface from the device and apply the glue.
Apart from choosing the surface for the build plate, it is important to properly level the plane of the bed and set the correct clearance between the bed and the nozzle. Calibration can be automatic or manual.
Printers with large print areas, such as the Raise 3D Pro 2 and Pro 2 Plus, are factory-calibrated. The user only needs to check the gap between the bed and the nozzle, because during transportation it can go astray.
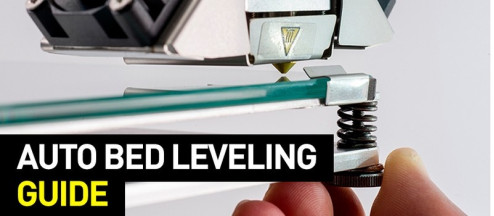
Automatic calibration is performed using a sensor (optical or contact), which is attached next to the extruder. The printer checks several points on the print bed and memorizes the values. The first layer will be printed with the bed position in mind.
There is also calibration using a conductive substrate that is put in place of the print surface. This method is rare, but it still takes place. It is normally used to calibrate delta 3D printers.
Auto calibration allows you to quickly level the bed without effort. It becomes especially indispensable for printers with delta or delta robot kinematics. Optical sensors do not recognize glass, so in this case, it is better to use other bed surfaces.
Some printer models have a detailed menu with prompts to help you set the platform plane and clearance correctly. It is enough to follow the instructions on the screen. This is not automatic leveling, but it makes it much easier for a beginner to calibrate the bed properly.
An example of a 3D printer with auto bed leveling is the Raise E2. The Raise E2 extruder has a contact sensor to determine the distance between the nozzle and the print surface. These values help adjust the print height of the first layer. You can also calibrate not the entire bed but only the area on which the model will be located.
Manual calibration requires the user to set the plane of the bed and the gap between the bed and the nozzle on their own. To do this, there are screws and thumb nuts under the build plate with which the height of the platform can be adjusted.
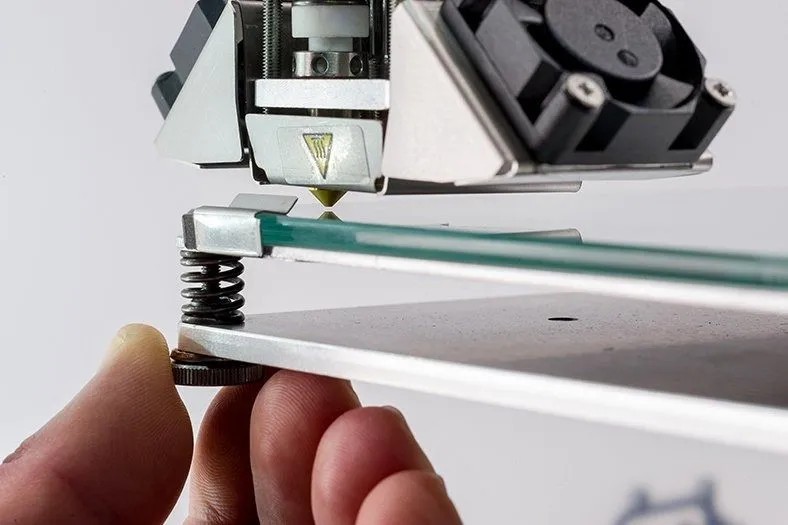
Leveling screws
For most printers, the standard gap between the platform and the nozzle should be 0.1–0.2 mm. If there is no feeler gauge set at hand, a standard A4 sheet folded in half can be used. Before calibrating, the print bed (if heating) and nozzle must be heated up.
Sometimes manufacturers of 3D printers recommend a zero gap between the bed and the nozzle. Therefore, read the instructions before leveling.
The two most common kinematics in 3D printers are Cartesian and delta. Cartesian kinematics is based on the Cartesian coordinate system and the movement of the print head along the x, y, z axes.
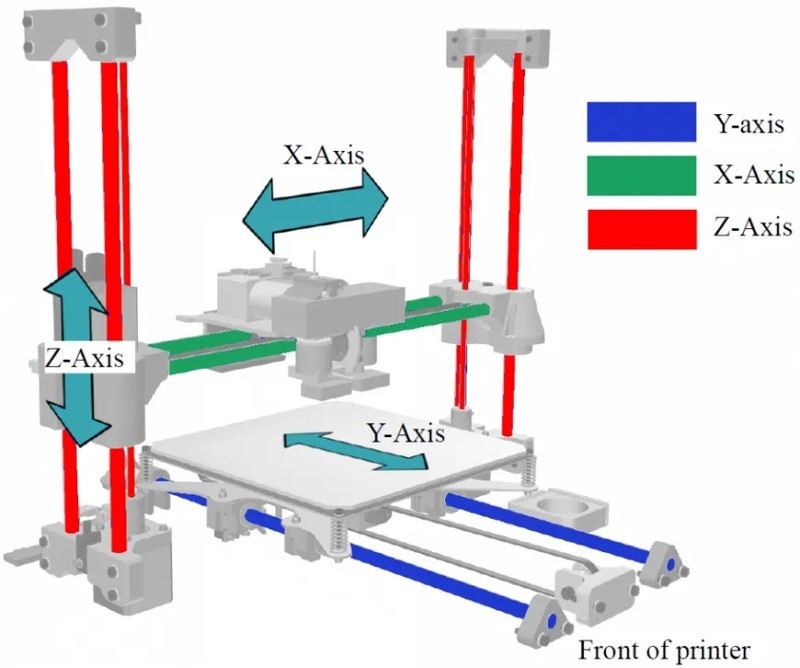
Cartesian 3D printer
In delta printers, the extruder moves along 3 identical axes using carriages that move along vertical guides. A delta printer can be regarded as a simplified delta robot, but these are still two different kinematics.
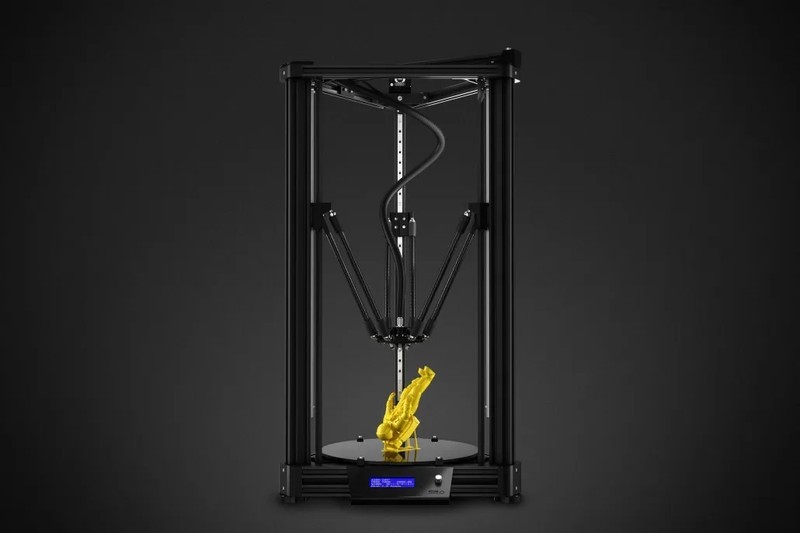
A printer with delta kinematics
Different manufacturers have different bed leveling instructions. We are going to discuss the calibration of a printer with standard kinematics.
1. Heat the bed and the nozzle. When heated, the metal slightly expands, so the gap between the print bed and the nozzle may differ for hot and cold surfaces.
2. Using the printer menu, send the bed and the extruder to Home or zero position in all axes. Typically, the zero point is the near left corner of the extruder and the top of the print bed. It is imperative to make sure that the nozzle does not rest on the bed to avoid damage. If this is the first calibration, use the nuts to place the bed in the lowest position.
3. Through the printer menu or manually (for this, you need to turn off the motors using the menu), move the extruder so that the nozzle is over the adjusting screw.
4. Use the feeler gauge and adjusting screw to set the clearance between the print bed and the nozzle.
5. Repeat all the steps for the remaining calibration screws. There are usually 3 or 4 screws.
6. After leveling the plane over the screws, move the extruder to the center and check the clearance. If the clearance matches the feeler gauge indicators, the bed plane and distance to the platform are calibrated correctly.
Calibrating a delta printer is a very voluminous topic, so we will describe only the general principles.
The delta printer does not have the x, y, z axes. Instead, it has 3 towers — A, B, C, along which the carriages move.
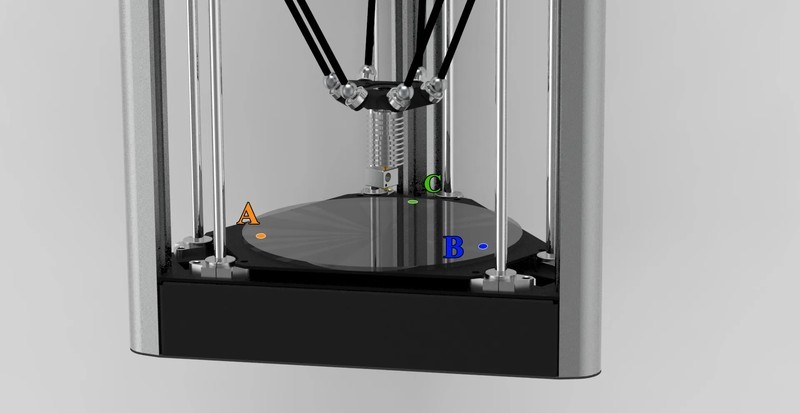
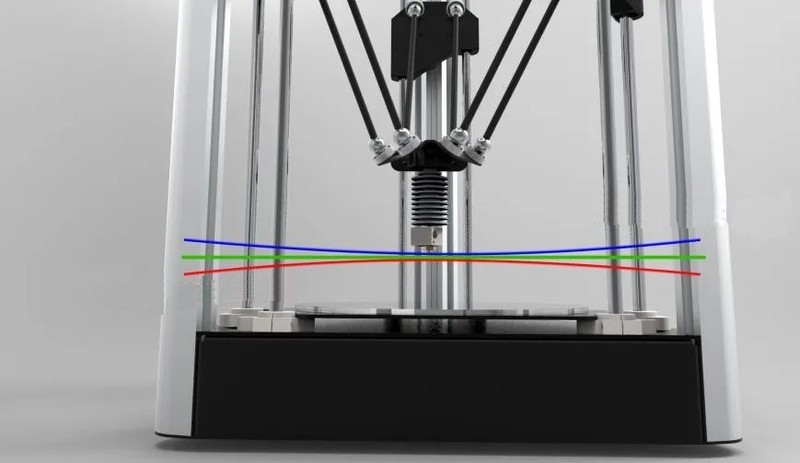
Since the delta bed is static, it is leveled programmatically. The gap is calibrated by 3 points (at the columns) and the lens (center) of the bed. The lens can be concave or convex.
Before calibration, check the mechanics of the printer — the belts should be evenly tensioned, there must be no play in the carriages and the effector (the plate to which the extruder is attached). If the belts are loose or uneven, it will be difficult to calibrate the printer.
Some 3D makers check the belt tension using a tuner. Evenly stretched belts will sound the same. The correct "note" is found empirically.
There are a huge number of programs for calibrating a delta printer bed, the most popular being Pronterface and Repetier-Host. They allow directly accessing the printer using special commands and changing the values in the firmware.
As auxiliary software, you can use a virtual calculator and from there transfer values to the firmware or download a ready-made G-code. You need to specify the parameters of your printer — the firmware (usually Marlin or Repetier), the length of the diagonals, the circumference, etc. These parameters can be taken from the firmware or measured with a caliper. It is important to accurately specify all the parameters — otherwise, the printer cannot be calibrated.
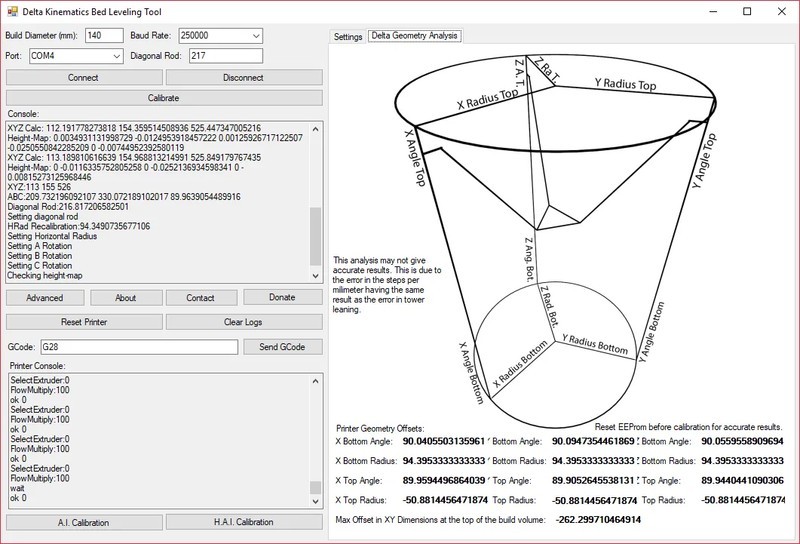
First, 3 points are leveled at towers A, B, C, and only then the lens in the center of the bed is corrected.
Manual delta calibration is difficult, but it doesn't have to be repeated often. Typically, recalibrating the printer is required only after the replacement of some mechanical units, belts, or the print platform.
Bed calibration may seem confusing and complicated, but after you perform it yourself at least once, the process becomes much simpler. In addition, most manufacturers try to help novice users and equip their printers with auto-leveling sensors or simplify the process with detailed menu prompts.
A variety of print bed surfaces enable you to find the one that suits your needs. As practice shows, every 3D maker — novice or experienced — has their own proven method for the first layer to stick tightly.

Update your browser to view this website correctly. Update my browser now


Write a comment