Cleaning a clogged 3D printer nozzle is a relatively simple task that can be done using the tools in hand. In this article, we will talk about the main causes of clogging and how to eliminate it.
Source: simplify3d.com
Read the article to learn how to quickly deal with this issue.
Source: hackaday.com
Printing accuracy and surface finishes are directly dependent on the material quality and the condition of a nozzle. A user needs to keep the latter in check to avoid clogging. If the issue happens during printing, it will cause a variety of problems. Extruder disassembling will be likely needed in order to clean a hot end, while a model will need to be printed again if clogging happened during the printing process.
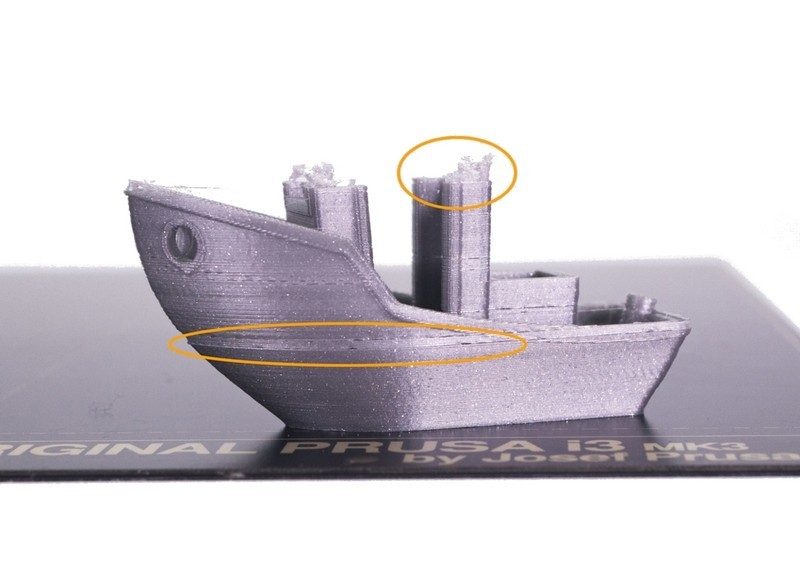
Selecting the correct printer settings (meaning temperature and printing speed matching filament properties) is considered to be the main method of preventing clogging. A user should especially pay attention when working with materials with high melting point and high viscosity. It’s also important to control the extrusion speed at the early printing stages. Uneven first layers indicate that the filament pathway inside the extruder lays incorrectly.
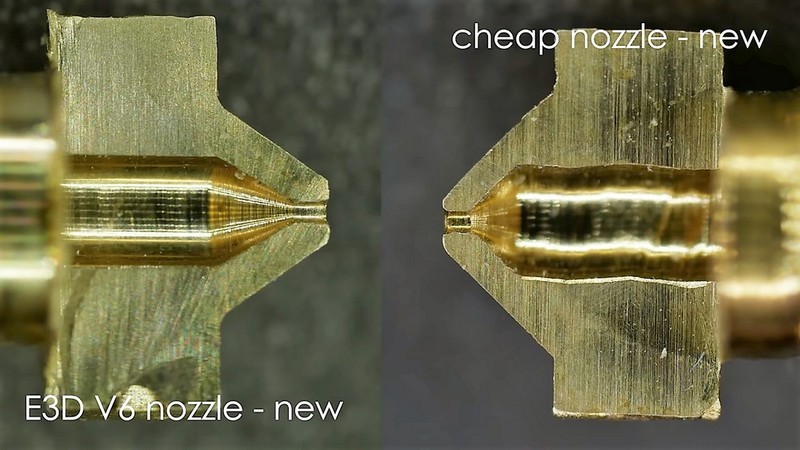
Another important thing is to check the condition of a printed part, especially when using a brass nozzle. This material tends to deform with time due to its low abrasion resistance. Artifacts could appear at the nozzle exit after a long-term operation, while highly abrasive materials can damage a brass nozzle within minutes.
The clogging can also be caused by the extruder not cooling down before filament change. Before continuing to print one needs to check if the extruder temperature matches printing parameters. Finally, if extrusion speed slows down we recommend stopping the process and checking the printer’s condition. Don’t push the filament through manually — applying an external force could clog the nozzle even faster, compressing the plastic.
Before cleaning a nozzle one needs to check if the problem is definitely related to that part. Sometimes filament can break at the print head opening, due to drying out or prolonged UV light exposure. Sometimes the problem lies in a heater block.
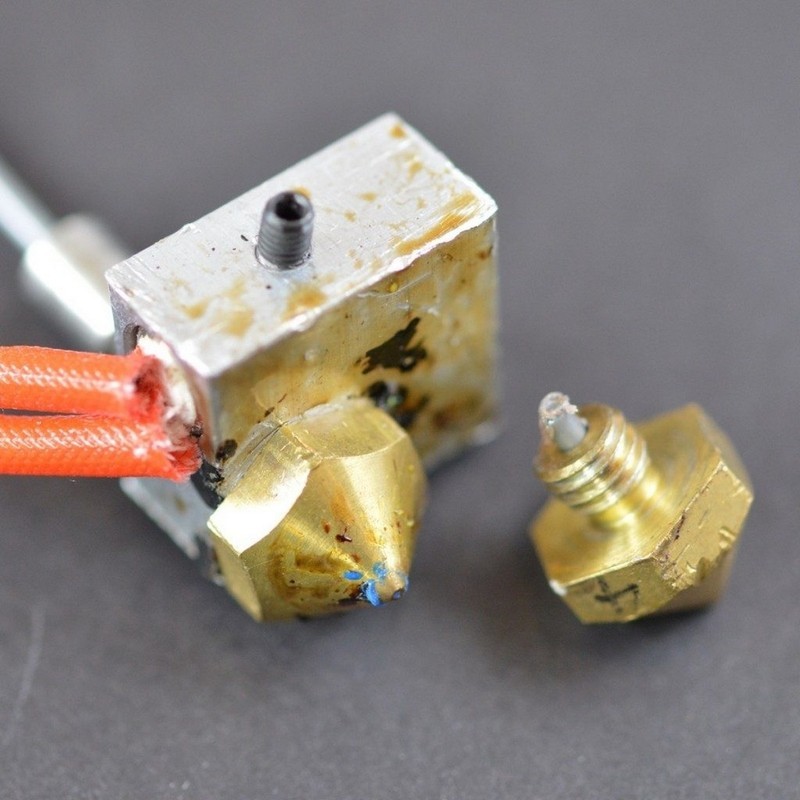
Cleaning should start at the area surrounding an extruder heater black. To do so we recommend cleaning a hot end from all sides with a metal brush until the traces of dried or burnt filament are gone. It’s recommended to use a wire brush to make sure that there will be no filament leftovers on an outer part of a nozzle.
Source: help.prusa3d.com
The main cause of nozzle clogging is charred leftover material in the inner part of the nozzle, dust, and other types of pollution. It prevents extruding new material. Thus the first thing to do after cleaning outer parts is to heat the extruder. This will melt the material left inside the nozzle. The stuck filament can be pushed out with a needle.
The alternate way would be to disconnect the nozzle. The part will be then put on a heat-resistant surface or put into a metal vice and then heated up using an industrial dryer. The leftovers should be cleaned out with a needle.
If the nozzle is still blocked after all of the aforementioned procedures, then there’s another method that can work in the majority of cases, for example, when the clogging happened while printing with ABS plastic. The method consists of cleaning a 3D printer nozzle using acetone or other solution, for example, dichloroethane. The choice of solvent depends on a filament chemical composition.
A nozzle should be disconnected from a hot end, placed in solution, and left there for several hours. The liquid will dissolve the plastic partially or completely and will allow you to clean the rest using a needle.
We recommend keeping spare nozzles that aren’t currently utilized inside a reagent glass bottle filled with solvent, thus freeing you from worrying about them being ready to work.
Source: support.ultimaker.com
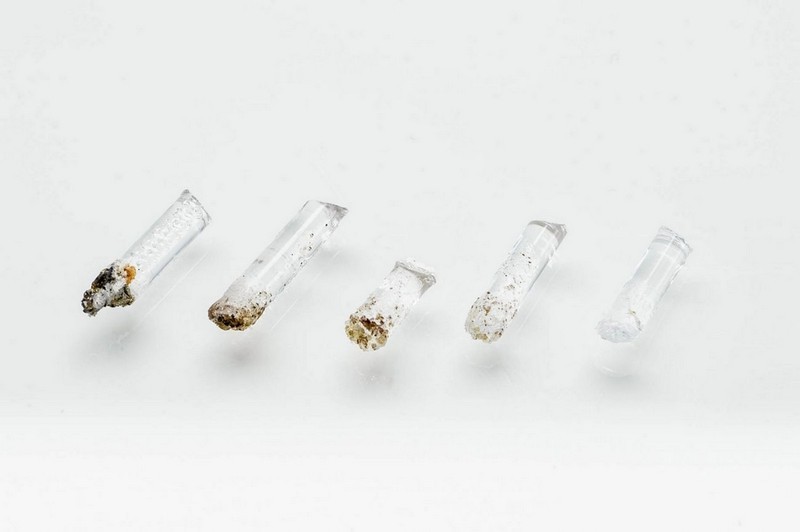
Cleaning a nozzle with a filament literally means pushing out some stuck material using another material. Similar or higher-temperature plastic can be used for this purpose but we recommend utilizing a special cleaning filament.
Cleaning filament is a material sold in the shape of short sticks or spools. At first, the fibers will remind you of nylon. But in reality, cleaning filament is a material used for cleaning industrial equipment for casting under pressure. This filament allows you to neatly push out stuck elements and carbonized plastic without damaging a nozzle. In many cases, a cleaning filament will be a more effective solution than a traditional hot or cold cleaning of a 3D printer nozzle.
Source: support.ultimaker.com
The main advantage of this method is its high efficiency combined with a minimum mechanical load on the printer’s parts. The cons include spending more resources and being limited only for partial blockage — cleaning filament should be able to go through at least partially.
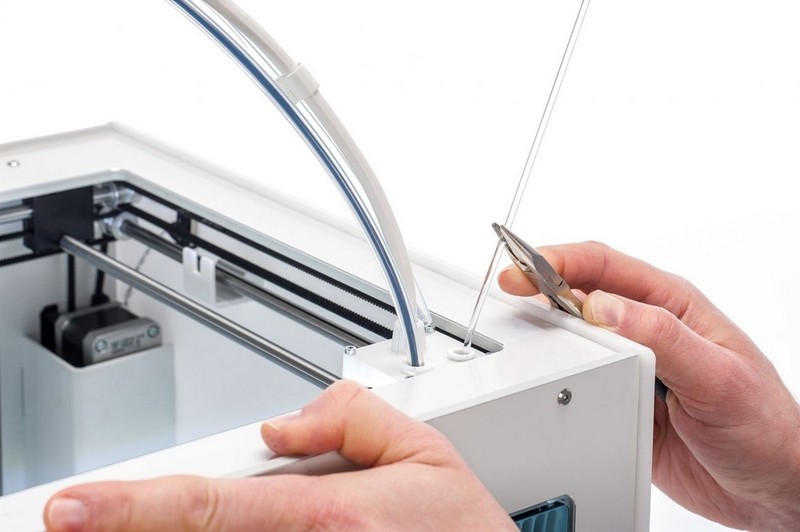
Before using a cleaning filament you will need to extract the remaining filament and clear the pathway for the plastic load. Then heat the extruder to the last printing temperature. Cleaning filament should be pushed through either manually or automatically (in direct drive systems). Once the printing process begins, the nozzle should extract cleaning filament with leftovers of older filament. You can stop the extrusion when the cleaning filament starts coming out with no leftover material.
Timely nozzle cleaning is a procedure required for keeping quality of printing and allowing to get quality and uniform parts with smooth surfaces, without cavities and bumps. Regularly service your equipment or ask professionals for help.
Update your browser to view this website correctly. Update my browser now

Write a comment