Hey everyone! This is Top 3D Blog with a very special addition that will be focusing on dental 3D printing and the production of dental aligners inside our own dental lab.
\n \nWe are going to tell you everything there is to know about the production of dental aligners, specify the manufacturing costs and highlight the total profit you can make by making aligners for a standard bite correction course. Besides, we will provide you with a brief overview of the equipment required to start the production of accurate and biocompatible aligners from scratch. Let’s get started.
\n \n\n \n
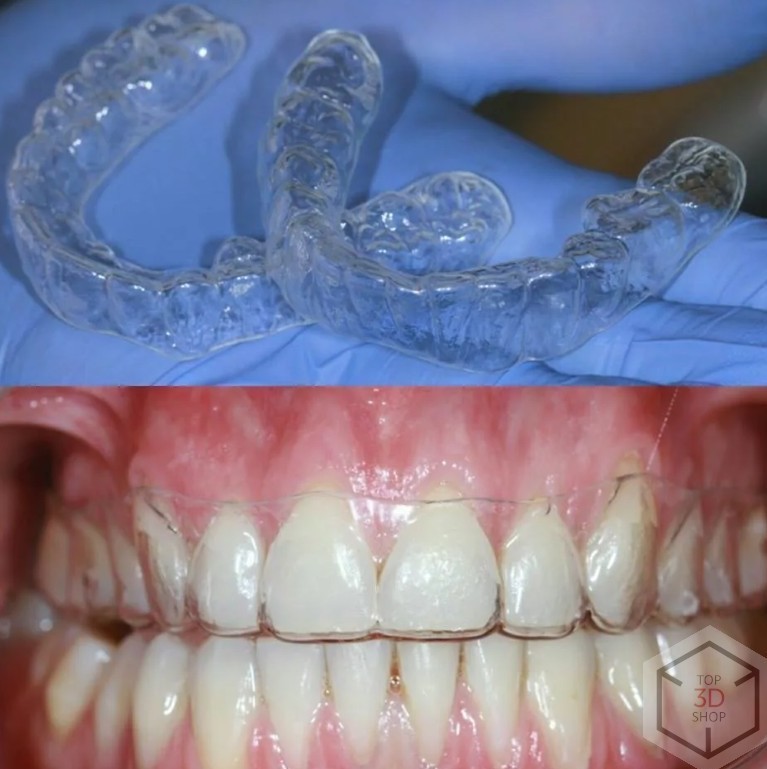
Dental aligners are removable transparent devices that are used for teeth positioning correction. A patient receives an individually developed aligner that should be worn for two weeks so it can begin moving the teeth in the desired position. After wearing the first aligner for two weeks, it should be replaced with another one that too should be replaced in two weeks, ultimately leading to correct teeth positioning. The total amount of aligners required to complete a single bite correction course is usually 30 or 40 pieces, but the treatment plan can be modified by the attending dentist depending on each particular case.
\n \nThe first aligners were created in Japan back in 1990 as an alternative to classic dental braces. Then, Invisalign, a US-based company, had adopted the technology and improved it, receiving a grant to promote the business outside the USA. Having patented the technology of creating almost invisible dental aligners, the company started mass production and entered the global orthodontic market with a bang.
\n \n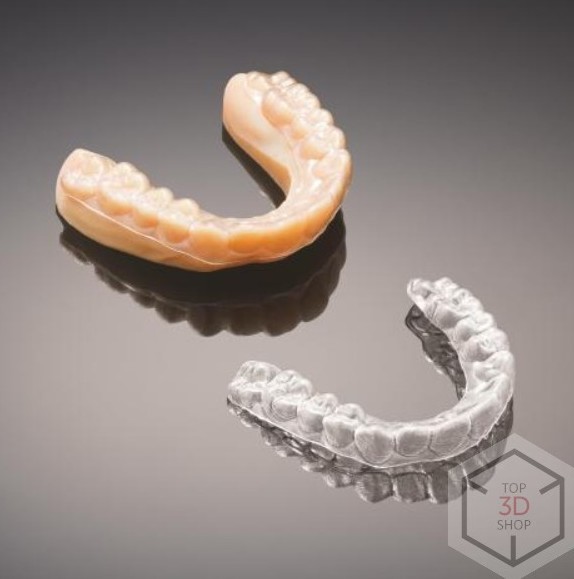
Due to the various patents Invisalign had obtained, the company monopolized the production and realization of dental aligners, having complete control over the industry up until 2010, when other related companies started to emerge.
\n \nWith a healthy competition came in the price reduction, which made dental aligners much more available to a wider audience. Besides, the aligner manufacturers were now located all around the world, which eliminated the need to send scan results and wait for the shipment of finished parts from the USA.
\n \n\n \n
Compared with traditional dental braces, the treatment courses that employ dental aligners offer a plethora of advantages such as:
\n \n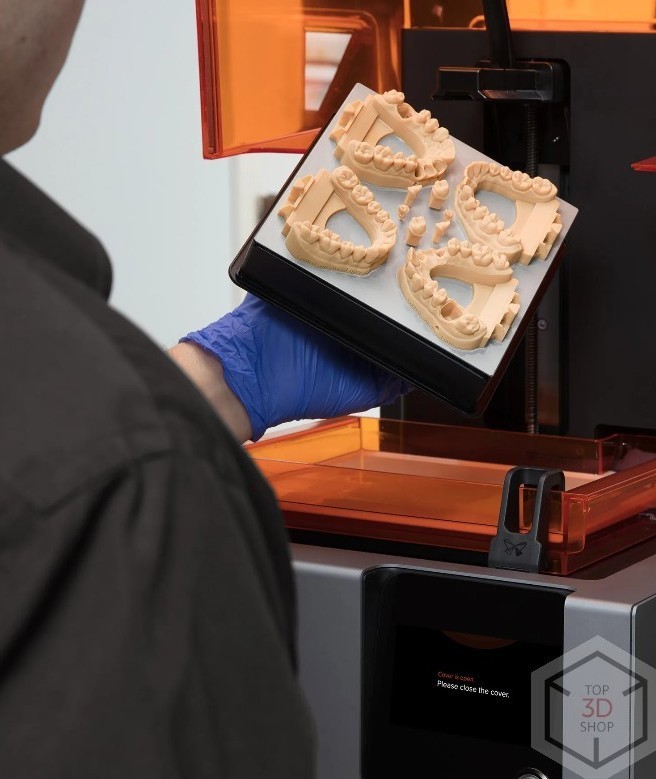
Aligners have been widely recognized by the majority of dental craft specialists since their employment brings the following advantages:
\n \n\n \n
Step 1: Obtain a dental impression or its 3D model
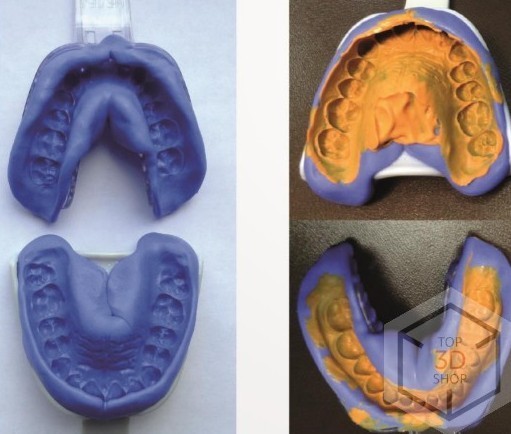
\n \nBefore proceeding to the production of an actual aligner, you have to make the patient’s dental impression and scan it on a laboratory scanner. You can also obtain a three-dimensional model of an oral cavity by using intraoral 3D scanners which tend to be incredibly fast and precise. In this case, you won’t even have to make a dental impression in the first place.
\n \nEugene Habibi, the CEO of ActiveKap Russia recommends using a-silicones to create accurate dental impressions since these tend to provide the utmost degree of precision as compared with other materials.
\n \n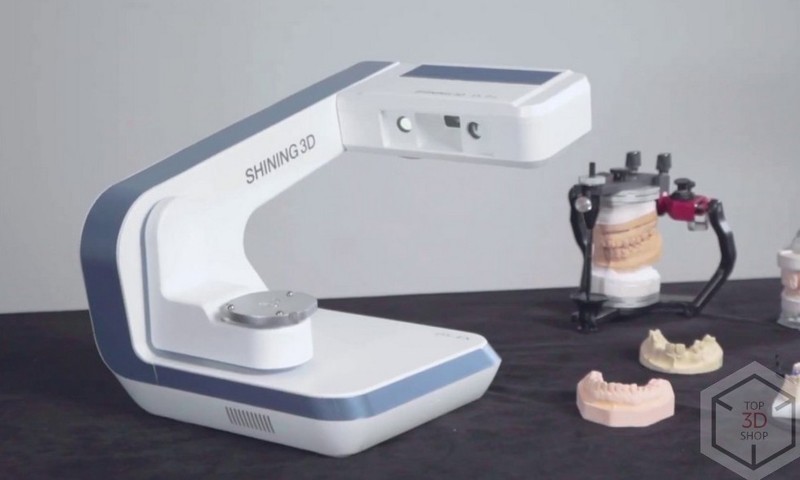
In case your lab is well-equipped, you can use an intraoral scanner to obtain a 3D model of an oral cavity without having to make a dental impression. This is a faster and neater way of doing things since doctors will have the access to all the required information immediately. Besides, taking a dental impression might be uncomfortable for some patients.
\n \nStep 2: Perform or ask the patient for an OPG (orthopantomogram) or CT scan (computed tomography)
\n \n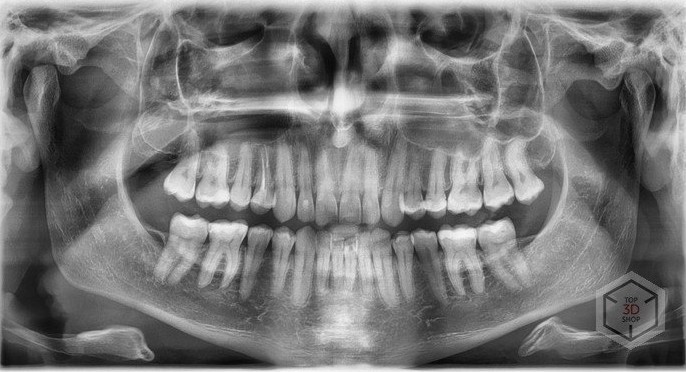
To assess the condition of the roots, a dentist would need an OPG or a CT scan. OPG is recommended for experienced doctors that can accurately predict the root movement patterns with the framework of the simulation program. The thing is that the program can give wrong predictions too, so there must be a supervising link — an experienced dentist that can oversee the adjustment process and give correct predictions. In case the doctor is not very experienced, simply ask your patient for a CT scan.
\n \nAny CT scan with a DICOM file format can be converted into an .STL file, which can then be accessed via a CAD program. From there, a dentist will have access to all the required information such as the anatomical landmarks of the roots and the position of maxillary sinuses, which will allow for accurate and precise predictions. Another important point is to make sure that the root won’t collapse or perforate the maxillary sinus when it grows. Luckily, such situations can be prevented by thoroughly reviewing a CT scan.
\n \nStep 3: Take photos of a patient's smile according to a specific protocol
\n \n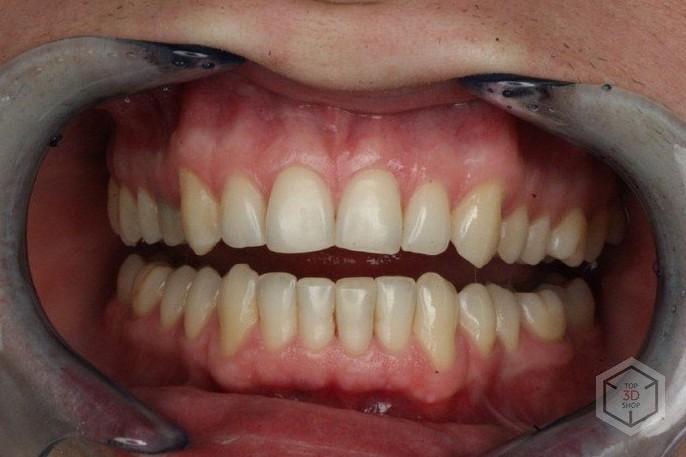
The patient's smile has to be photographed in frontal and profile views. It is very important to have such photos in the production stage when your models get cast or scanned. Obviously, the photos will help check if the .STL model corresponds to the patient’s oral cavity. Dentists and dental technicians examine the digital model and compare it with the photos, completing the first stage of quality control. If the model doesn’t match the photos, the specialists will have to find out if the reviewed photos and 3D model belong to the same patient, if the bite was performed correctly, or if the dental impression came out wrong. In case an error emerges, it gets fixed right away at an early production stage, which helps to avoid unnecessary production costs.
\n \nStep 4: Model a treatment plan in the “Maestro Ortho Studio'' CAD program. Establish a “doctor—manufacturer” communication link using the "Orthoconnect" virtual space.
\n \n
After a 3D model has been created and verified, there is a need to gather all the necessary information about the treatment plan in a quickly accessible place. The Orthoconnect virtual space can serve as a perfect communication link between the doctor and the production facility. The doctor uploads photos and provides comments for each patient’s case, for instance, to specify if a tooth should be removed or if it’s an implant.
\n \nThen, a modeling part comes in. One of the most convenient and popular dental modeling studios is the Maestro Ortho Studio. This is a powerful software solution that lets you pinpoint the position of roots from a CT scan and edit the dental model by moving the teeth using a mouse or by entering numbers with precision up to the last micron, hereby simulating the development.
\n \nTo see whether all is correct, the created model has to be checked by a competent orthodontist.
\n \nStep 5: Create and verify a series of digital models
\n \n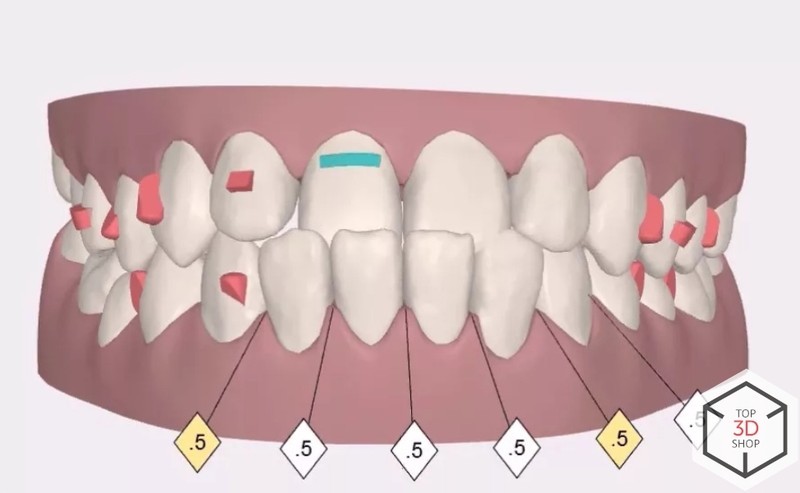
From there, the treatment is broken down into intermediate stages. The dentist checks digital models and edits them if necessary. After all the models are approved, it is the production time.
\n \nStep 6: 3D printing dental models for subsequent molding
\n \n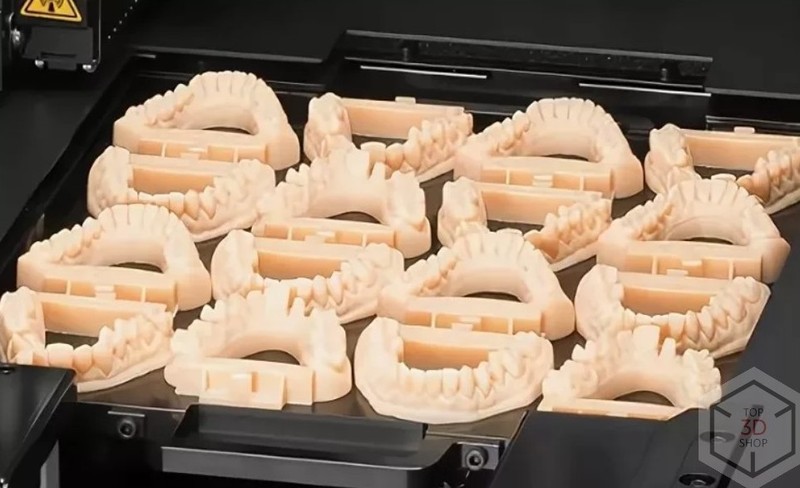
As we have already mentioned, you’ll have to make at least 30 aligners for an average bite correction course. Therefore, the most important qualities to find in a 3D printer for your application are fast printing speed and large build volume.
\n \nThe Uniz SLASH 2, for instance, boasts its lightning-fast printing speed of 200 mm/h and a minimum layer thickness of just 10 microns. By the way, there’s no need to print at 10 or 20 microns layer height since 50 or even 100 microns would be more than enough to produce a millimeter-precise aligner. That’s why we recommend opting for fast printing speed and large build volume instead.
\n \nStep 7: Post-Processing
\n \n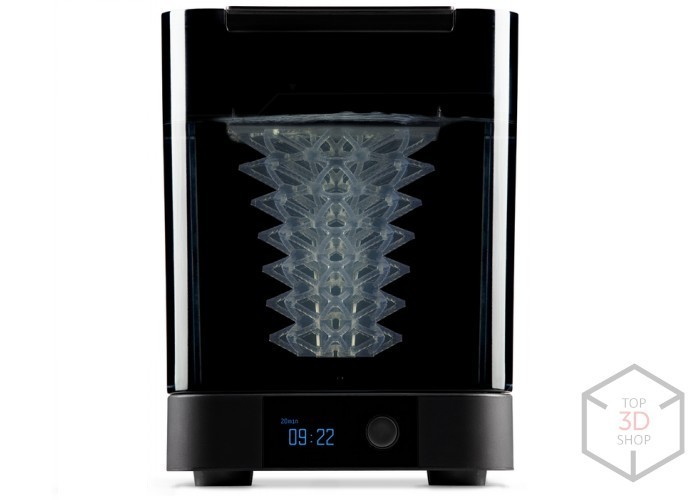
After the models are ready, it’s time to post-process them. The first step is rinsing the models in isopropyl alcohol solution inside an ultrasonic cleaner to free them from residues. Then, expose the models to a UV curing apparatus to make them harden.
\n \nStep 8: Thermoform the aligners
\n \n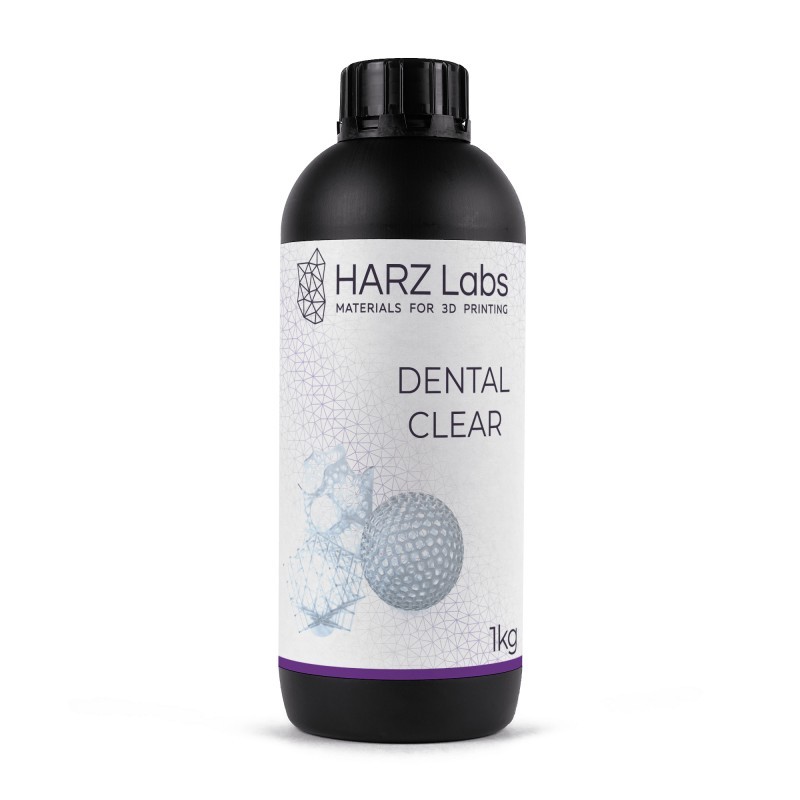
There are many manufacturers of aligner materials on the market, such as HARZ Labs and NextDent.
\n \nMany companies are reluctant to use TPU to make dental aligners even though it is a much softer material. Indeed, the TPU-made aligners are a lot more comfortable to wear, but their appearance leaves much to be desired. As a rule, successful Russian-based manufacturers use PG, a transparent material that is 2.5 times harder than TPU. The feedback shows that an overwhelming amount of clients chooses appearance over comfort.
\n \n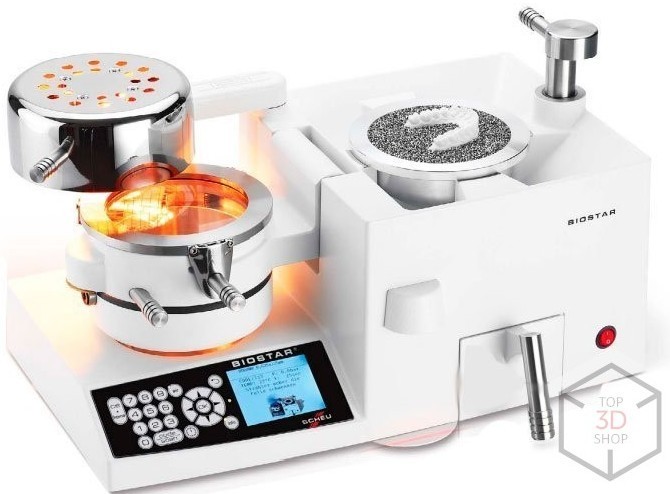
The molding process itself is quite simple. Insert a heatable plate in a pressure molding unit, and wait until the process is completed. Each molder offers different operating modes depending on the plate thicknesses.
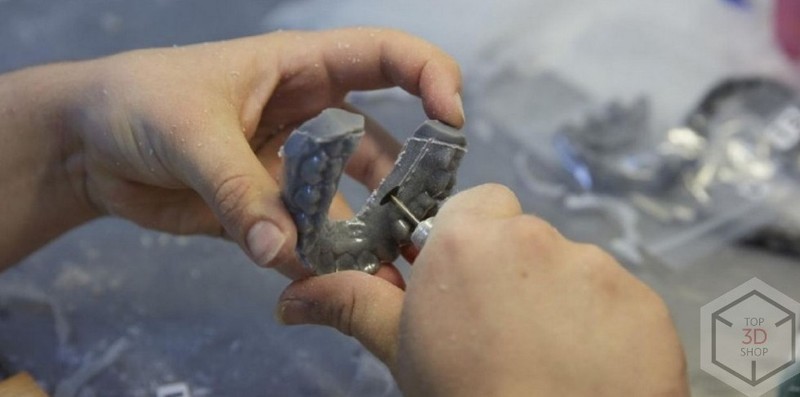
\n \nStep 9: Polish the aligners and post-process them once more
\n \n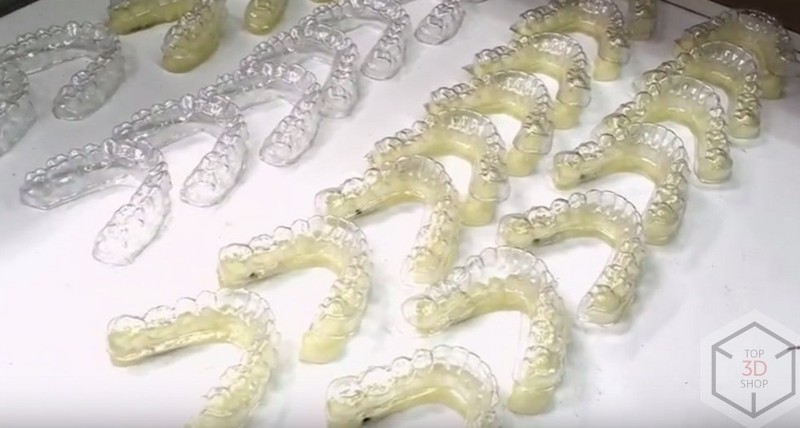
After completing the molding, it’s time to proceed to the trimming, polishing, and washing of the aligners. It is recommended to cut them one millimeter below the dental cervix. However, if the jaws are small, it is recommended to trim 2 mm below the cervix for better grip and movement.
\n \nIt is important to keep in mind that the quality of trimming and polishing performed determines the quality, comfort, and appearance of the aligner.
\n \nFor quality polishing, we recommend choosing a micromotor with a rotation speed of at least 45,000 revolutions per minute. The market is full of minimalistic budget-friendly machines (starting from $132.00) and more expensive devices that offer advanced functionality (starting from $530.00).
\n \nStep 10: Final quality control
\n \n \n \nObviously, the full-scale quality control that began at the modeling stage must also be performed at the post-processing stage. To carry out quality control, the clinic must have a competent employee that can oversee each step and make the necessary adjustments if needed.
\n \nDental aligners can’t be mass-produced by making one simple adjustment to an industrial machine parameter or by changing some of its settings. This is meticulous work, an art that requires the utmost degree of precision and quality control in order to achieve the mass production scales.
\n \nNeedless to say, low-quality aligners won’t work: not only they don't move the teeth in the desired position, they can even harm the patient. In its turn, the negative experience from using low-quality aligners makes unlucky patients disbelieve the effectiveness of treatment, although, according to experts, the aligners can help in eight or even nine times out of ten.
\n \nStep 11: Packaging and branding
\n \n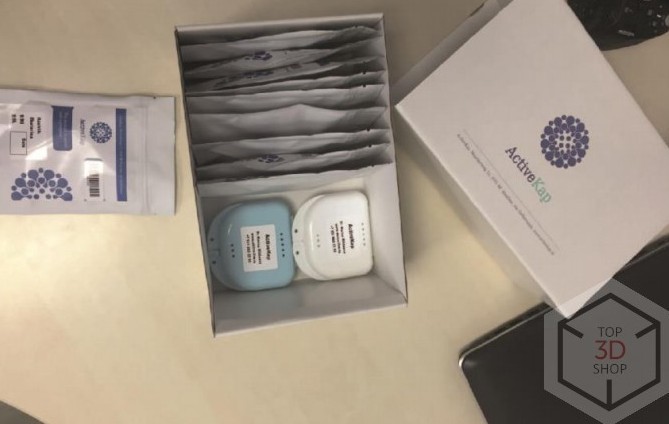
A ready-made batch of aligners should be styled according to the visual design of specific dentistry. Depending on the number of required aligners, the average production time may take from 7 to 14 working days.
\n \n\n \n
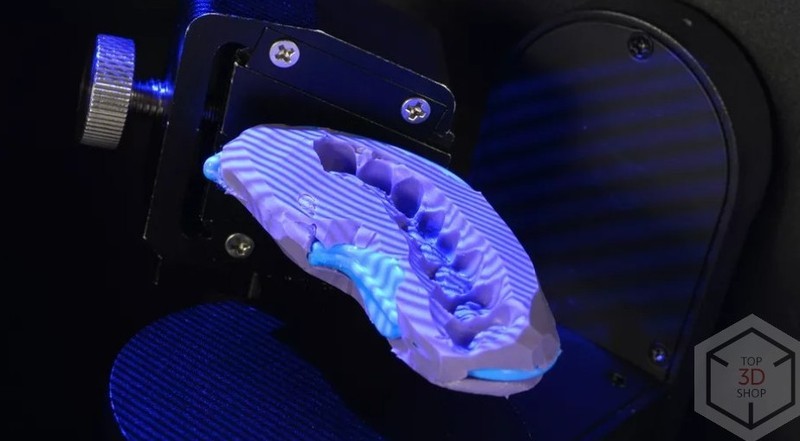
Dental 3D scanners are used to create three-dimensional dental models. For this, you should 3D scan a set of premade dental impressions. Aside from scanning dental impressions, dental 3D scanners can be used to create a representation of collapsible dental models or even aligners themselves. The most important parameters for dental applications are the scanner’s capturing speed and accuracy. Let’s quickly compare the features of three dental 3D scanners that we used in our own lab. We used the Shining 3D, Medit, and CADstar dental 3D scanners that can also be used as articulators. Besides, they come with a set of interchangeable nozzles that can help you solve most of the orthopedics, orthodontics, and surgery-related problems. The main difference between the models is their scanning accuracy: Shining 3D Auto Scan offers an accuracy of 10 microns, the Medit Identica T500 — 7 microns, and, the most precise of them all, the CS Neo can scan with 5-microns accuracy.
\n \n\n \n
With the Shining 3D AutoScan DS-EX Pro, it takes less than 12 seconds to make a full-fledged dental scan with an accuracy of just 10 microns. Moreover, this scanner allows you to scan swaged crowns and quadrants at the same time. Thanks to its modular design, the scanner is easy to upgrade and use. It is powered by open-source software that lets you effortlessly save the scan results in STL format.
\n \nSpecifications
\n \n\n \n
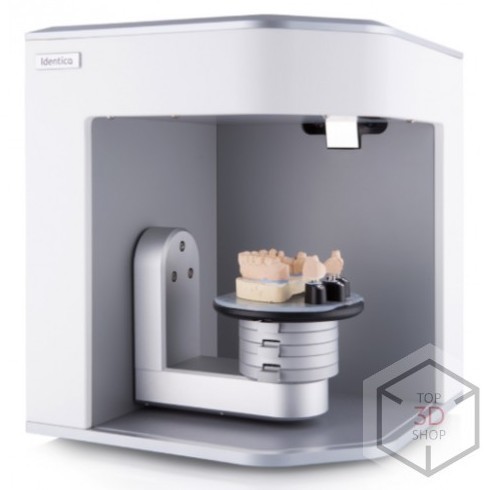
Offering a scanning accuracy of just 7 microns, the Medit Identica T500 can even scan complex dental bridges, implant bars, and implants. The machine offers an outstanding speed too — it would take only 12 seconds to perform a complete dental arch scan. Besides, a one-step duplex scanning of dental impressions considerably speeds up the production without losing the quality.
\n \nSpecifications
\n \n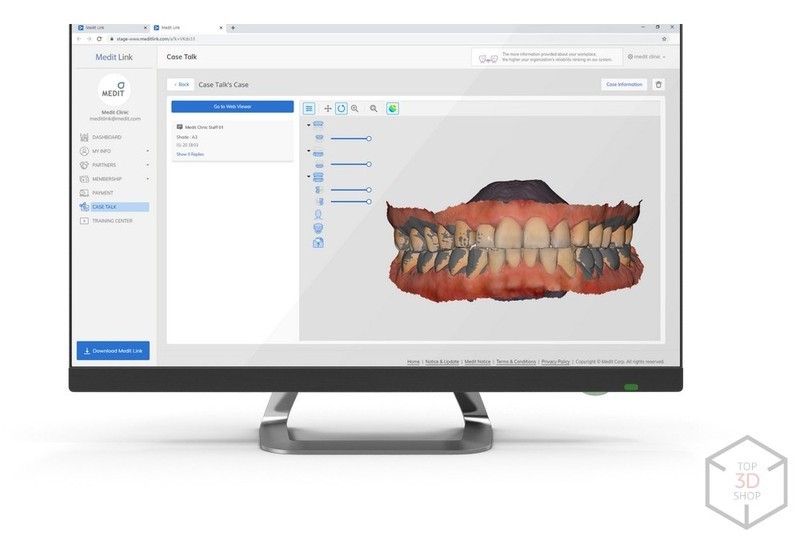
\n \n
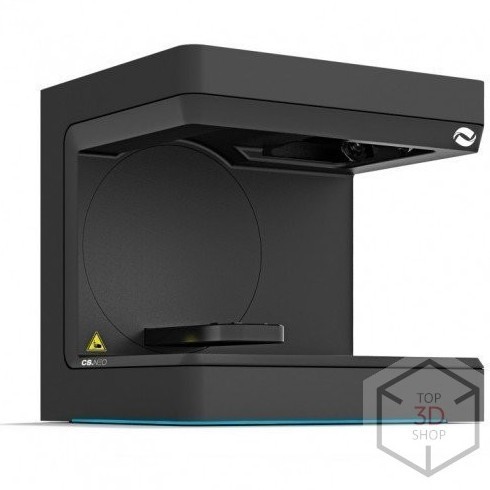
The CS Neo 3D scanner boasts its accurate 3D renders and precise scanning capabilities. It is an easy-to-use device that can be controlled with a touchpad or a 3D mouse. It features a color rendering that facilitates the production of removable dentures and clasps. The scanner has been equipped with feedback sensors that warn the user if the device is not calibrated properly.
\n \nSpecifications
\n \n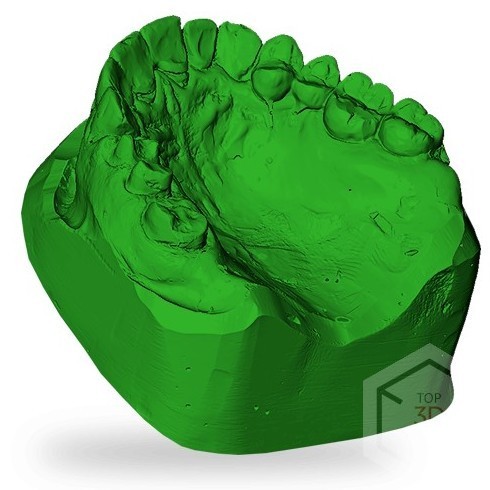
\n \n
Intraoral 3D scanners are employed to create three-dimensional dental representations right away without having to create dental impressions in the first place. When choosing an intraoral 3D scanner, you should consider not only its scanning speed and accuracy but also the level of convenience it provides, meaning that it must not be uncomfortable for both doctor and patient to use the scanner. The higher the capturing speed, the faster the scanning procedure is performed.
\n \nMedit provides open source-powered 3D scanners with no monthly fees. The software is updated on a regular basis.
\n \nThe 3Shape TRIOS Color Pod and Medit i500 3D scanners are almost identical in terms of accuracy, but the 3Shape scanner is faster and has powerful orthodontics, orthopedics, and surgery software that is considered one of the best in the world. On the downside, the 3Shape software requires a monthly subscription fee.
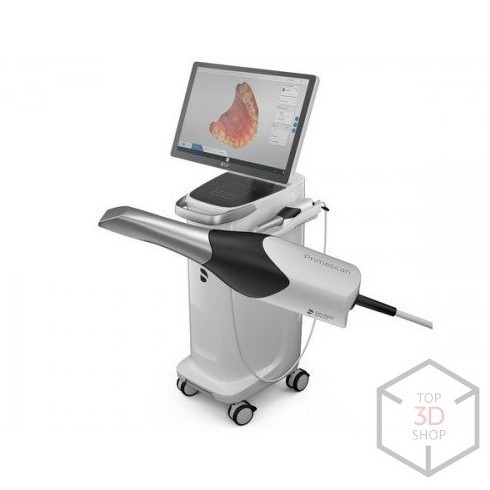
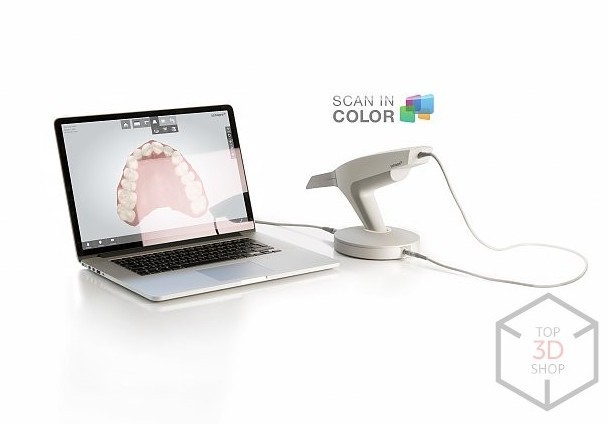
\n \nThen, there is the Sirona Primescan 3D scanner that, unlike the above-mentioned counterparts, can perform a full-color scan that proves to be particularly helpful when diagnosing tooth decay and periodontitis cases. Besides, this model comes with an additional unit with a touch screen, so you do not need to purchase an additional desktop computer or laptop to work with this scanner. Another advantage of the Sirona Primescan is a stand with a built-in battery, allowing for effortless standalone operation. The only disadvantage of the model is its hefty price tag.
\n \n\n \n
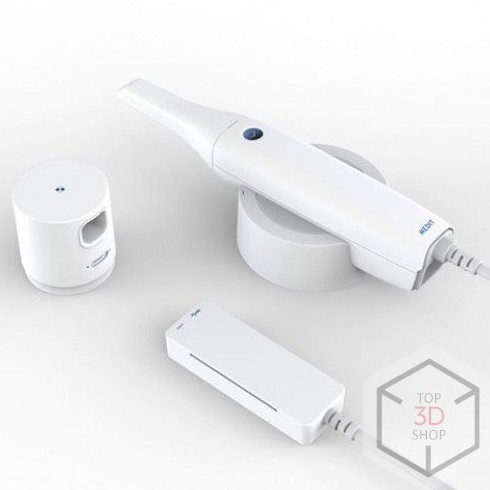
The Medit i500 works in a quick and smooth fashion, capturing precise and well-detailed dental 3D models in the blink of an eye. This is a lightweight and convenient scanner that lets you perform even the longest scans with minimal discomfort.
\n \nSpecifications
\n \n\n \n
The TRIOS Color Pod is a handheld standalone 3D scanner that adopts the in vivo tooth-color measurement scanning technology. It doesn’t require any powders or sprays to create a millimeter-precise scan, so it’s really convenient to use. Additionally, it offers the teeth color detection function and features the function of adding HD photos to the 3D model.
\n \nSpecifications
\n \n\n \n
The main advantage of the Sirona Primescan 3D scanner is that it is equipped with a built-in screen that displays a high-resolution image during the scanning of an oral cavity in real time. This scanner also offers an incredibly fast scanning mode and optimized data processing algorithms, allowing it to consolidate more than 50,000 images per second. The Sirona Primescan is quick and easy to disinfect, and it can operate for more than an hour in a standalone mode.
\n \nSpecifications
\n \n\n \n
Source: formlabs.com
\n \nYou should proceed to the actual production of aligners only after the patient's treatment plan, including all the 3D models of aligners, has been approved by a competent doctor. The printing accuracy should be no less than 50 microns since printing at 100 microns or higher would cause the appearance of an uneven surface — the so-called “seabed” effect.
\n \nAnother vital parameter is the printer’s build volume. The more the volume, the more aligners you can print in one go.
\n \nLet’s start with the Anycubic Photon S — a budget-friendly LCD-powered workhorse that comes at a sub-$300 price. It is a perfect 3D printer for those who want to try out the process. All in all, the Photon S may take some time to set up, but when it is, you’ll be surprised by how much it is capable of. We recommend it as your go-to device in case you are yet to decide whether to implement the wonders of additive manufacturing technologies in your application or not.
\n \nNext up is the Uniz SLASH 2, a professional 3D printer that is suitable for continuous batch production of dental aligners. The machine can print at a minimum layer height of 10 microns and offers a maximum printing speed of 200 mm/h, which is astounding.
\n \nLast but not least, there is the Phrozen Sonic XL 4K, a mid-priced LCD 3D printer that features a build volume of 190 x 120 x 200 mm and can print at 200 mm/h.
\n \n\n \n
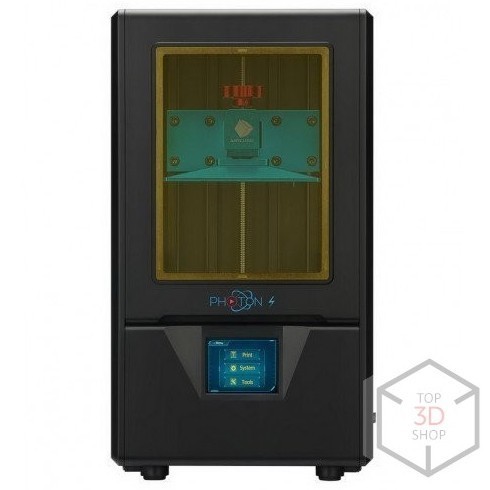
The Photon S is equipped with an improved UV module that greatly increases the printing accuracy. It features dual Z-axis guides that let you create well-detailed outputs with a nice and smooth surface finish. The device is capable of printing astonishingly precise models, however, there are some volume limitations, so you won’t be able to produce a lot of aligners at once.
\n \nSpecifications
\n \nThe Phrozen Sonic Mini is worth checking out as well since these affordable LCD 3D printers have a lot in common. Besides, they both feature a very compact footprint.
\n \n\n \n
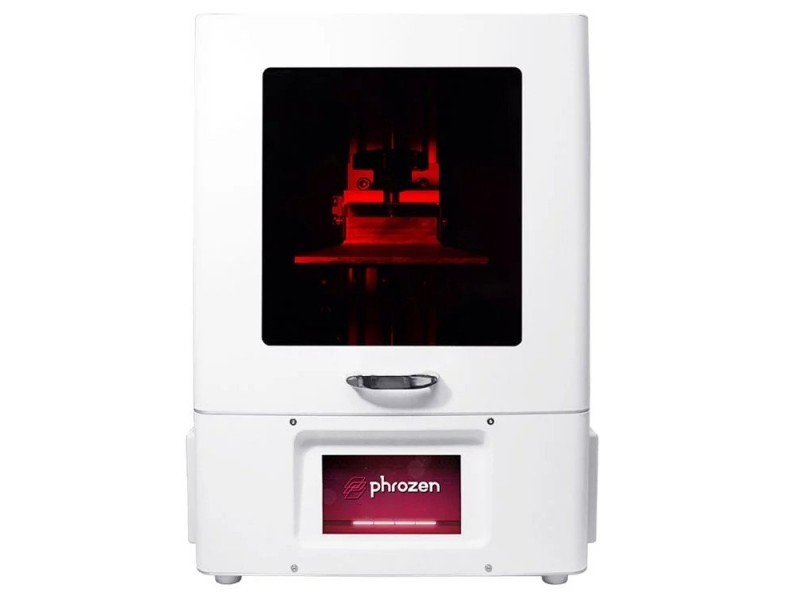
The Phrozen Sonic XL 4K is a professional LCD-based MSLA 3D printer. It is equipped with a custom-made monochrome LCD screen with 4K resolution, which makes it capable of producing accurate prints in a lightning-fast fashion. Its large build area and extreme precision make it ideal for dental applications.
\n \nSpecifications
\n \n\n \n
The Uniz SLASH 2 is an industry-grade desktop SLA 3D printer powered by an 8.9-inch 4K ultra HD LCD light engine so it’s more than capable of producing a bunch of dimensionally accurate parts on a daily basis. Its extended build volume of 192 x 120 x 200 mm lets you produce a mini-batch of dental aligners in one go.
\n \n \n \nSpecifications
\n \n\n \n
The pressure molding of dental aligners is carried out solely by a pressure molding unit, which heats and hereby softens the thermoplastic, which, in its turn, gets drawn into the matrix. Thanks to the vacuum, the final product takes the form of the matrix and solidifies after cooling, retaining the desired structure.
\n \nAfter the aligners are formed, the final step would be polishing and sanding them.
\n \n\n \n
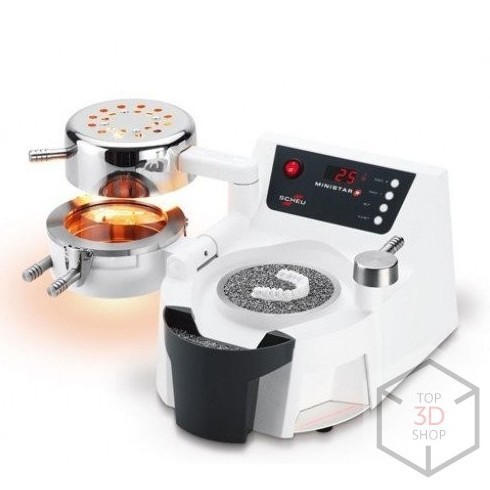
The Scheu Dental Ministar is a compact desktop pressure molding unit developed specifically for dental labs. The machine is usually applied during the creation of dental aligners and impressions.
\n \n \n \n\n \n
The Saeshin STRONG 207S S106 is a micromotor handpiece set that is intended for aligners polishing. In addition to manual control, it can be controlled with a foot using a pedal.
\n \n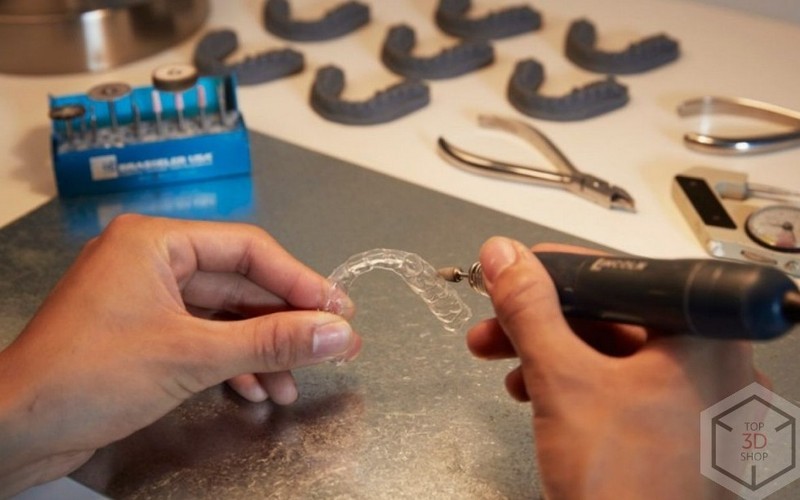
\n \n
Let’s sum up the data we have acquired after producing a batch of dental aligners on the Uniz SLASH 2:
\n \nThe cost of a specialist's working time is calculated on an individual basis and is summed up with the cost of materials.
\n \n\n \n
\n \n
After obtaining all the necessary equipment required to run your own dental lab, you will reap the benefits of improved employee communication and decreased patient care time. Besides, if the lab is located close to your clinic, it will enhance the production quality control and drastically decrease the logistics costs.
\n \nDental aligners must be made with the utmost precision and accuracy, since wearing low-quality aligners will not only not correct the position of the teeth, but it can also harm the patient. The reputation and income of each dental clinic depend on the number of successful treatment outcomes — this is the main reason why it is better not to outsource the production of dental aligners, but to control their quality personally.
\n \nTo start the production of dental aligners, you will need dental or intraoral 3D scanners, dental 3D printers, dental resins, a pressure molding unit, and a micromotor handset.
\n \nYou can order all the necessary equipment at Top 3D Shop and get it with the manufacturer’s warranty, alongside the best service and professional technical support.
\n \n\n
Update your browser to view this website correctly. Update my browser now

Write a comment