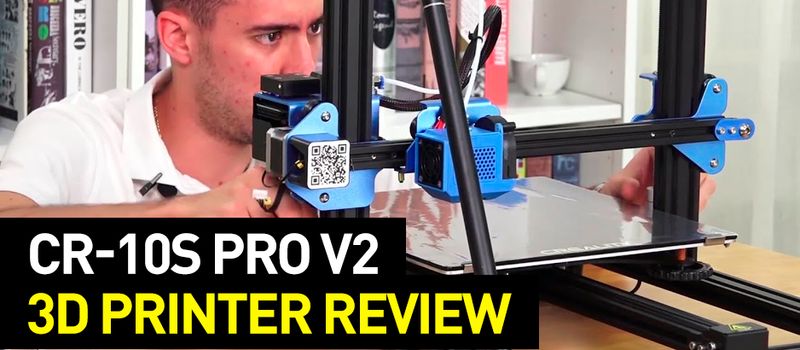
Versatile FFF/FDM printers with a rather large build volume are not common among the lower-priced ones. The Creality CR-10S Pro was one of the exceptions, and its upgraded version — The Creality CR-10S Pro V2 combines the strongest points of the predecessor together: several high-tech features, decently sized build volume, and an affordable price.
Source: creality.com

Source: creality.com
Creality 3D Technology Co., Ltd is a 3D printer and scanner manufacturer. It’s based in Shenzhen, China and was founded in 2014. Their first success came after the release of the Ender 3 in March of 2018. The Ender series was overall very popular. The vast majority of the company’s 3D printers come as the DIY kits that need to be assembled.
Another popular series of the devices by Creality is the CR-10. These machines are mostly partially assembled and offer bigger build volumes. The CR-10S Pro V2 is another addition to the family bringing the latest features at an affordable price.
Source: creality.com
The CR-10S Pro V2 is an update to the regular CR-10S Pro. The latter was already a rather neat combination of the powerful features, general versatility, relatively large build volume and an affordable price, but the successor aims to improve its strongest points while eliminating the weaknesses.
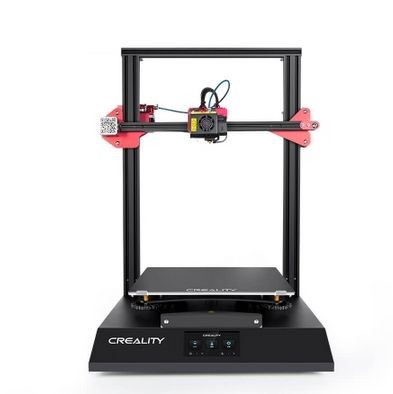
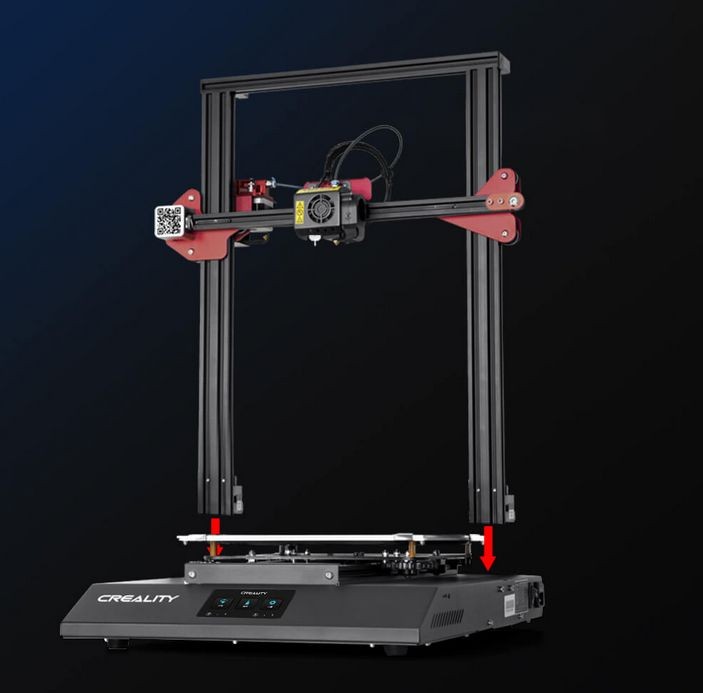
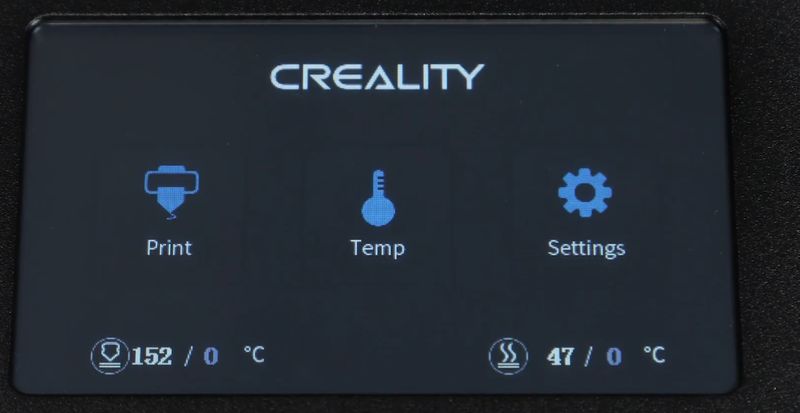
The main design is essentially the same: it’s a cartesian printer that comes partially assembled, lacks any enclosure and its control board and display are located at the base of the device. The build volume has not changed and is at 300 x 300 x 400 mm. There’s a new HD touchscreen with improved viewing angles and the same minimalistic UI with the big icons that was implemented in the original version. The device still uses an old control chip, but it has an updated motor driver which makes the device even quieter (the original wasn’t noisy as well).
Bed leveling is also improved. The original CR-10S Pro had the closest thing to an automatic bed leveling among Creality’s 3D printers at the time of its release but the V2 takes it even further: it implements a BL-Touch sensor instead of an inductive proximity one, so the measurements are now more accurate. The machine finally provides a fully automatic bed leveling, although the users of course can also use an assisted manual and fully manual leveling options.
The machine still uses a dual-gear extrusion in a Bowden style system. The tube is now provided by Capricorn, it’s even of higher quality, is temperature resistant and the whole system delivers the filament smoothly. As was the case with the predecessor, the machine supports a wide variety of the materials, including even demanding high-performance ones. The filament runout sensor was also improved.
Other features include a useful cooling system, the ability to resume printing and a print bed with a high level of adhesion (which sometimes even might be a problem)
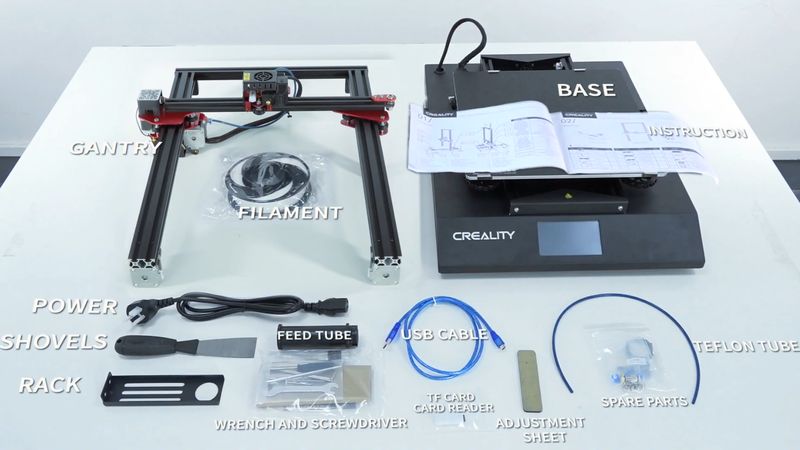
The CR-10S Pro comes as a DIY kit in a large box. Everything is safely packaged.
The contents include an upper frame part, the base of the device, a toolbox (with cutters, cables, and other stuff), filament and an instruction. Everything (including the contents of the toolbox) can be seen in the picture below:
Source: youtube.com
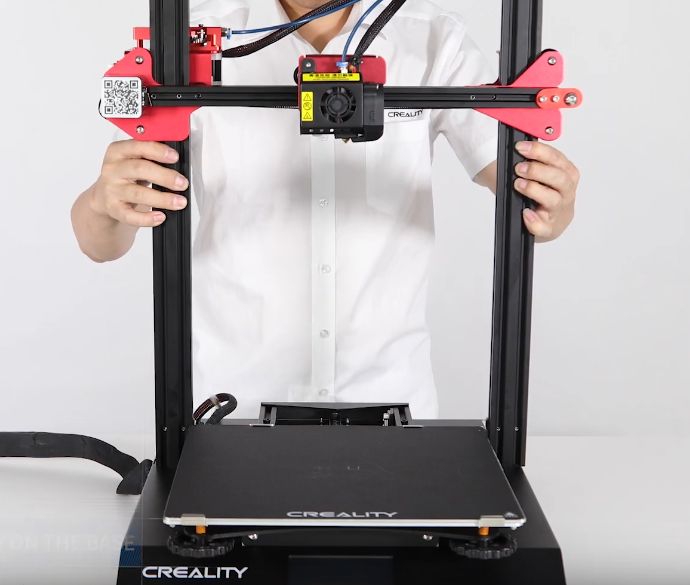
The device comes mostly pre-assembled. Connecting the parts together and placing everything correctly requires around 10-15 minutes.
Assembling the machine is easy and doesn’t take a lot of time.
The first step would be to place the upper part on the base of the device.
Source: youtube.com
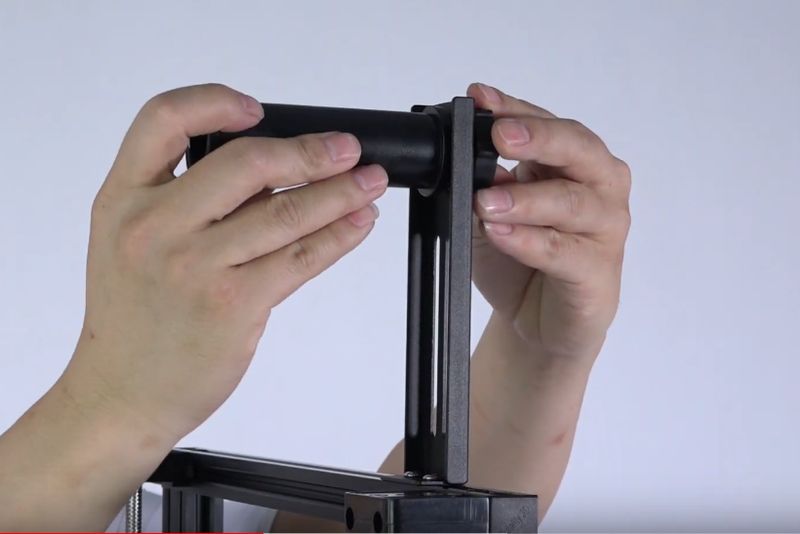
Tighten the screws on the bottom (there are two on each side) to keep it in place.

Source: youtube.com
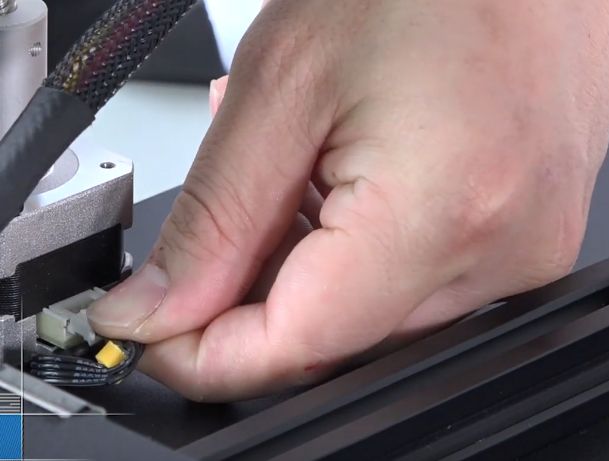
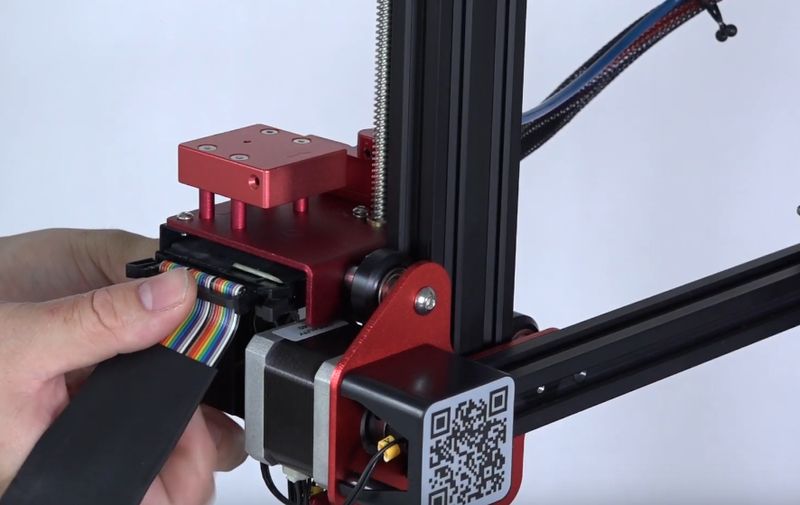
Then insert the ribbon cable and the Z motor cable.
Source: youtube.com
Source: youtube.com
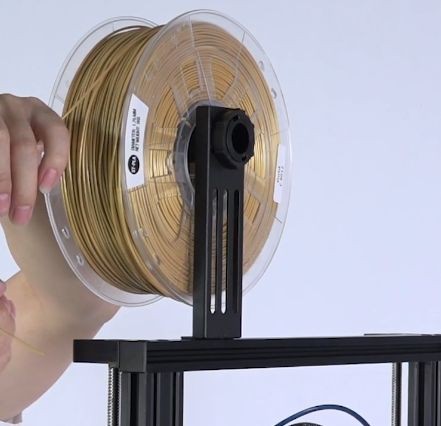
After that, you can install the filament holder.
Source: youtube.com
Source: youtube.com
Plug in the power cord and turn on the printer. The device is ready to work.
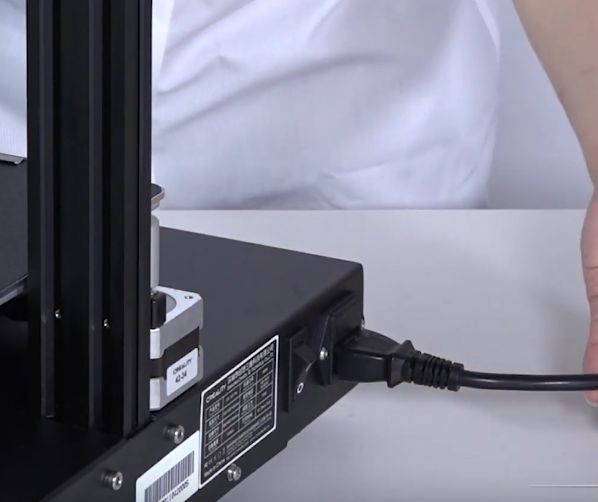
Source: youtube.com
Now that the machine is assembled and switched on, you can load the filament.
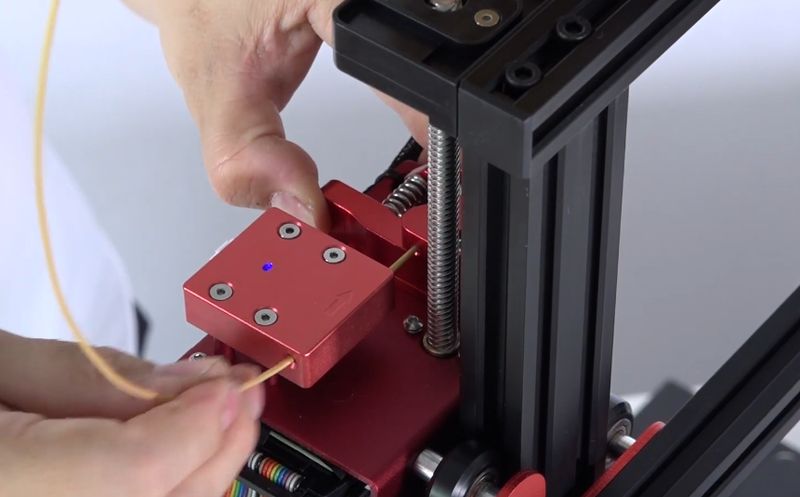
Source: youtube.com
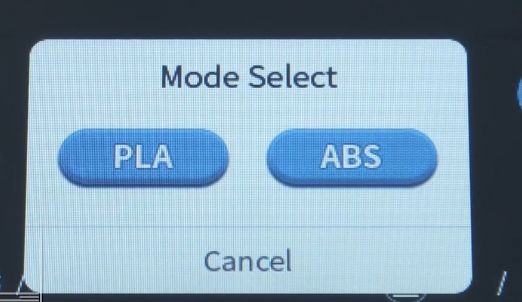
Then go to the ‘Temp’ and choose ‘Automatic’ temperature settings. Select the ‘PLA’ mode.
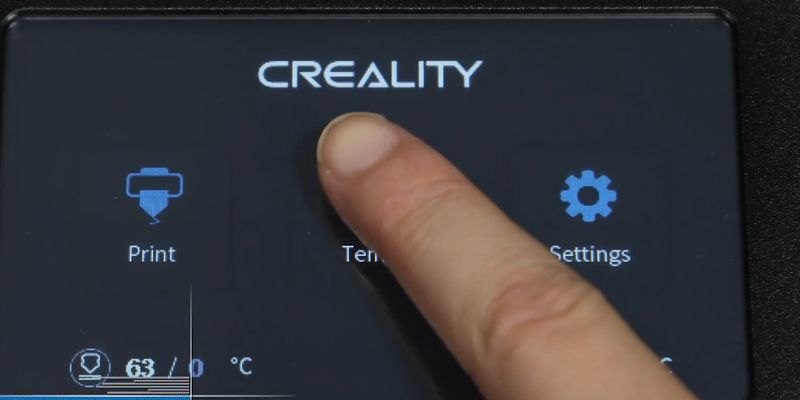
Source: youtube.com
Source: youtube.com
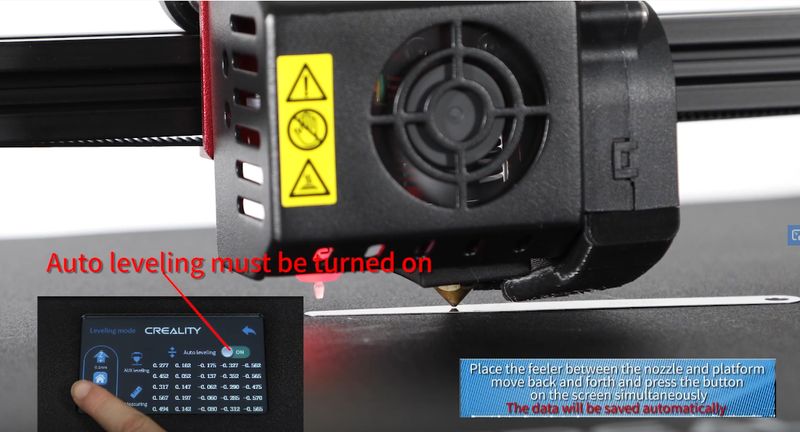
Leveling the bed would be the next step. The best way would be to help the machine to handle the process. Go to ‘Settings’, choose ‘Leveling’, then place the feeler between the platform and the nozzle while pressing the button.

Source: youtube.com
Source: youtube.com
Then you can feed the filament through.

Source: youtube.com
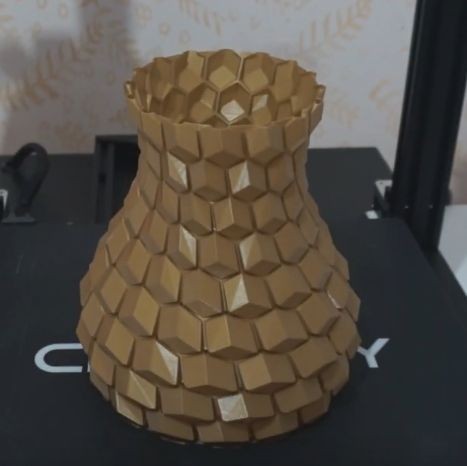
The final step would be to test print a model. If you have an SD card inserted, go to ‘Print’ and choose a model.
Source: youtube.com
The printer is compatible with the most common of slicing and host software, including Cura, Simplify3D and Repetier-Host. Some programs already have pre-installed profiles for the device. There’s also the version of Cura called ‘Creality Slicer’ that is recommended by the manufacturer for use with their devices.
Source: youtube.com
Pros
Cons
The Creality CR-10S Pro V2 is a great upgrade that takes everything that was good about the CR-10S Pro to the next level. Now the device is even quieter, supports fully automatic bed leveling thanks to the BL-Touch sensor, has an improved manual bed leveling (due to better assistance and a more accessible larger screw). Even the touchscreen now has a higher resolution and the UI looks even more stylish, while maintaining the minimalistic approach that worked for the predecessor. The device has kept all of the necessary safety features from the original one, including a filament runout sensor (now it’s a better one) and the ability to resume printing after power failure. The Bowden tube is now even more durable, so the feeding is still smooth and high temperatures are still achievable. The list of the supported filaments is impressive.
Some of the device’s shortcomings are directly related to its strong points: for example, the print plate has the levels of adhesion so great that sometimes the prints stick to the platform way too much and it’s hard to pop them off. While the bed leveling is now fully automatic, it still has some issues.
All in all, the CR-10S Pro V2 is a great affordable device that brings useful features to the table, improves on the best things about its predecessor, and gets rid of some of the issues that were present in the original machine. The great thing is that the versatility and a relatively large build volume are still there.
Update your browser to view this website correctly. Update my browser now
Write a comment