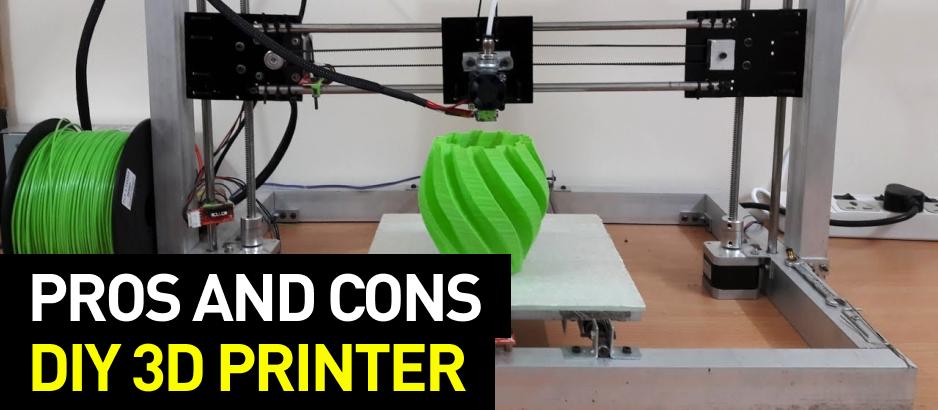
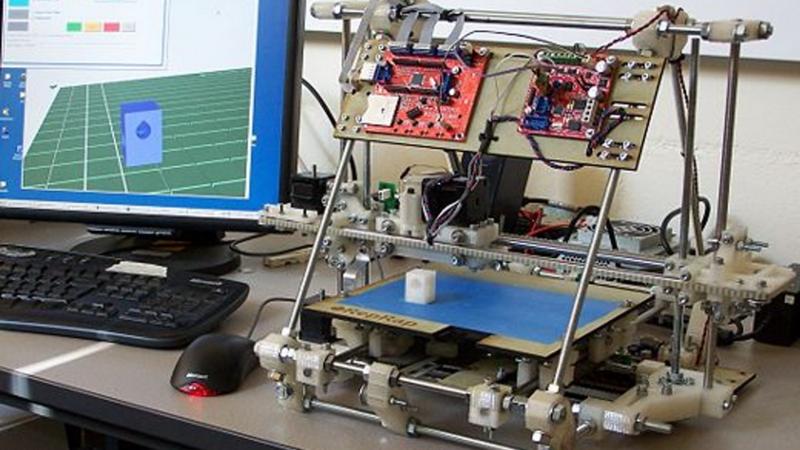
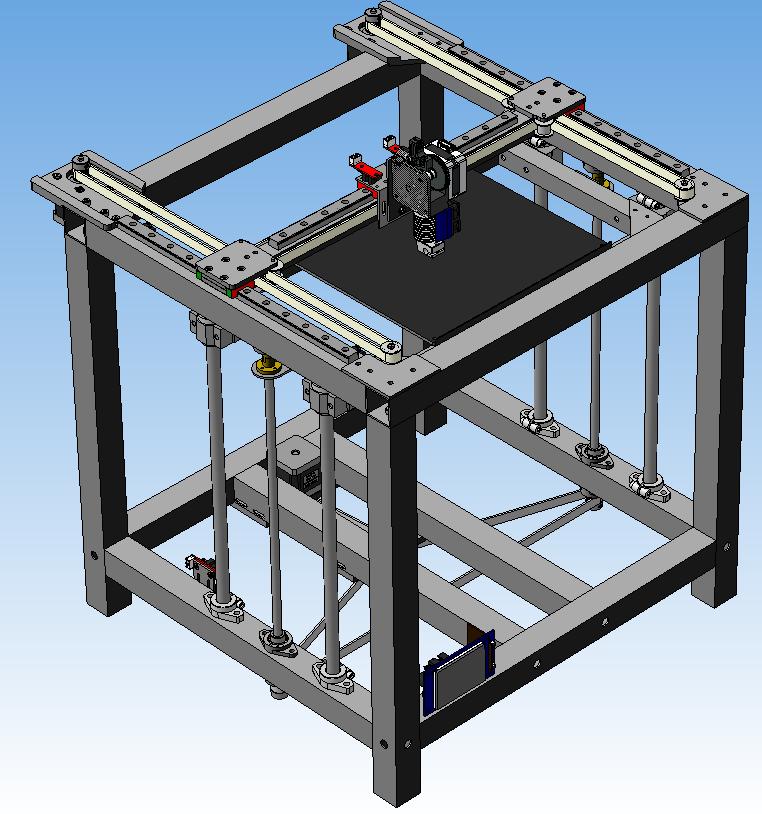
Despite the fact that the fuss around 3D printing is calming down, this sector is still growing and developing. More and more new models of 3D printers emerge on the market. They feature new functions and possibilities for users, but some people say that's not enough. In an attempt to construct something unique, save money, and demonstrate their individual creativity, many technology geeks design and construct their own 3D printers using different materials – from ABS and plexiglass to plywood and steel.
In this article, we tell about construction of DIY 3D printers with an aluminum extrusion frame and consider the advantages and peculiarities of this approach.
Supposedly, it was only recently that the Internet became open to public use, computers got rid of tons of bulky equipment, and printers went down in price. Today, they are affordable to most of the population. An average user has barely managed to get the feel of all this variety, when 3D printing and all that goes with it, formed the notion of ‘additive process’. And where there is an additive process there is a geek.
In an attempt to employ the newest and time-proven solutions for the construction of the unique 3D printer people started developing individual projects.
Source: https://www.pinterest.com
The major goals motivating people to the creation of their own 3D printer are as follows:
Cost saving. Homemade devices are cheaper than commercial ones.
Creation of higher-end equipment. Customized printers are more advanced than the ones offered on the market, in terms of both general construction and their components.
Customization of the device. People can design and construct the system, which meets their unique technical requirements and quality expectations. The printer will be initially optimized for specific tasks.
Drive to self-expression. People whose hobby is creation of high-tech devices, construct dozens of them. The process of engineering and its results are demonstrated to the general public. Most frequently, such devices are never used anywhere except performance evaluation tests.
Meantime, do-it-yourself construction of 3D printers requires deep understanding of their principles of operation and corresponding operating skills.
Source: https://kalaakaar.in
DIY-kits — ready-to-use sets of disassembled 3D printer parts. Most frequently, such kits are provided by 3D printer manufacturers and they include the complete list of necessary parts and fasteners. Kits from independent companies can contain the elements of printer frame or body or, alternatively, only under-the-hood parts with no frame. The latter are cheaper and they provide users with more creative freedom.
Totally independent projects. This way is more complicated, as it requires serious calculation and proper analysis of each element’s technical characteristics.
For the above-mentioned reasons, do-it-yourselfers use hand-made frames. Such an approach requires well-developed engineering skills, as the frame construction is the most laborious and difficult step of DIY printer construction. All the other parts of the device are industrially produced and their quality doesn’t depend on users’ skills. All they have to do is select and order all these details. The frame, in its turn, is totally handmade.
Source: https://www.kickstarter.com
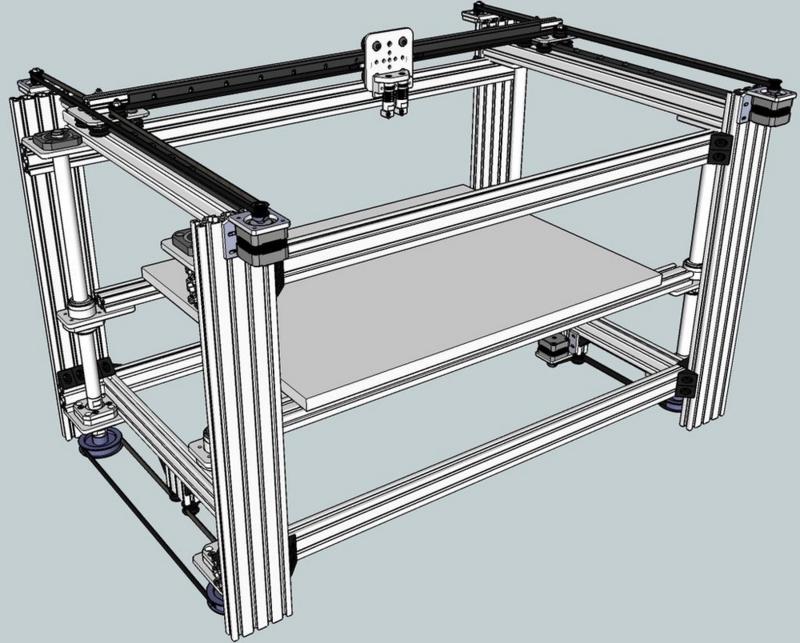
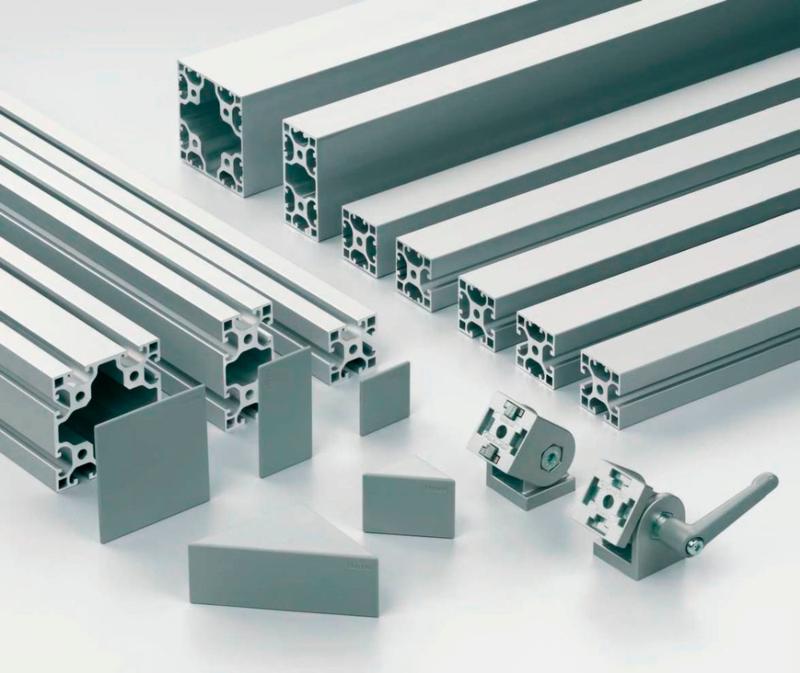
The most widespread materials for DIY 3D printer frames are aluminum and steel profiles. Profiled metal sheets are most consistent with durability and vibration resistance requirements.
The advantages of self-assembly of a 3D printer are:
Complete discretion. There is a wide range of constitutive elements on the market nowadays, so that a ready-made device can have an endless number of configurations.
Excellent flexibility of the budget. In the process of designing and constructing your 3D printer, users can strategically change its configuration based on their financial opportunities.
Broader customization of the device. Users can adjust the system for specific purposes, which will increase its ultimate productivity and the quality of printed products.
Opportunity to create the device with the technical characteristics superior to those of factory-supplied models.
Possibility of bringing out the full potential of RepRap (Replicating Rapid Prototyper). This strategy involves manufacturing 3D printer parts via a 3D printer.
Source: https://www.kickstarter.com
And again, we come back to the printer frame as the element requiring creative approach more than anything else.
The point is all the advantages of DIY printer manufacturing are easily leveled out by the slightest errors in frame construction. For this very reason one should pay special attention not only to its design, but also to the materials used.

Source: https://www.youtube.com
When building a DIY 3D printer people typically use aluminum, steel, plywood, and wood chipboard. In fact, they use all available materials.
Metal profiles provide maximum stiffness of the construction; the frame's fixed geometry is an essential condition for high-quality printing, as all the equipment is retained firmly in the frame and its slightest offset will result in defects in production.
Among the advantages of steel are its bigger weight, which provides stability of the construction, and strength far exceeding required levels. Aluminum has other benefits: its smaller weight makes a printer frame easier to move, a higher tenacity provides vibration absorption, and aluminum’s processing friendliness is by all means beyond competition.
Source: https://www.3dprinterreviewsite.com
Many 3D printer builders select aluminum extrusion profiles due to their following advantages:
High strength along with comparatively small weight;
Even though the profiles are comparatively lightweight, they are strong enough to absorb vibrations; besides, aluminum’s ductility is higher than that of steel;
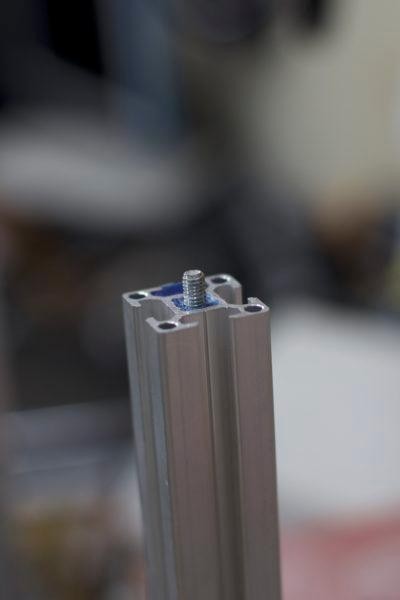
Aluminum extrusion profiles have assembly-friendly format, as there are standard fastenings with only screws and T-nuts (which is also great due to the absence of protruding elements);
Operational flexibility — before intended usage profiles are cut into necessary lengths, that's all it takes to prepare the material;
They are easily cut and drilled, quickly mounted, demounted, and redesigned;
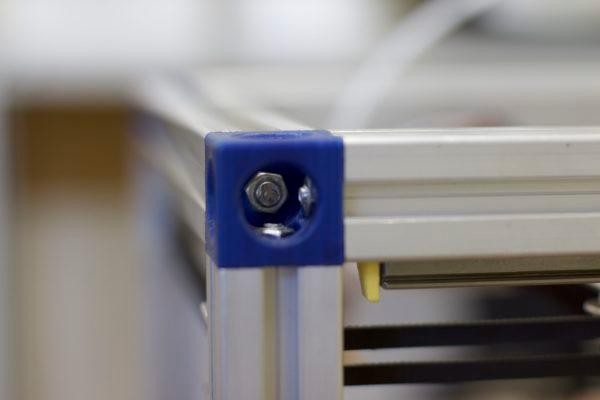
Builders can easily give aluminum profiles an aesthetic appearance with the help of plastic end caps, which can be bought or 3D printed;
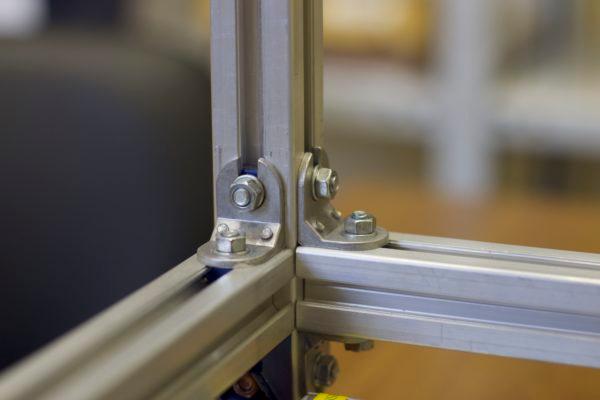
The geometry of the profiles allows builders to achieve the highest stiffness of the construction.
Source: https://www.alibaba.com
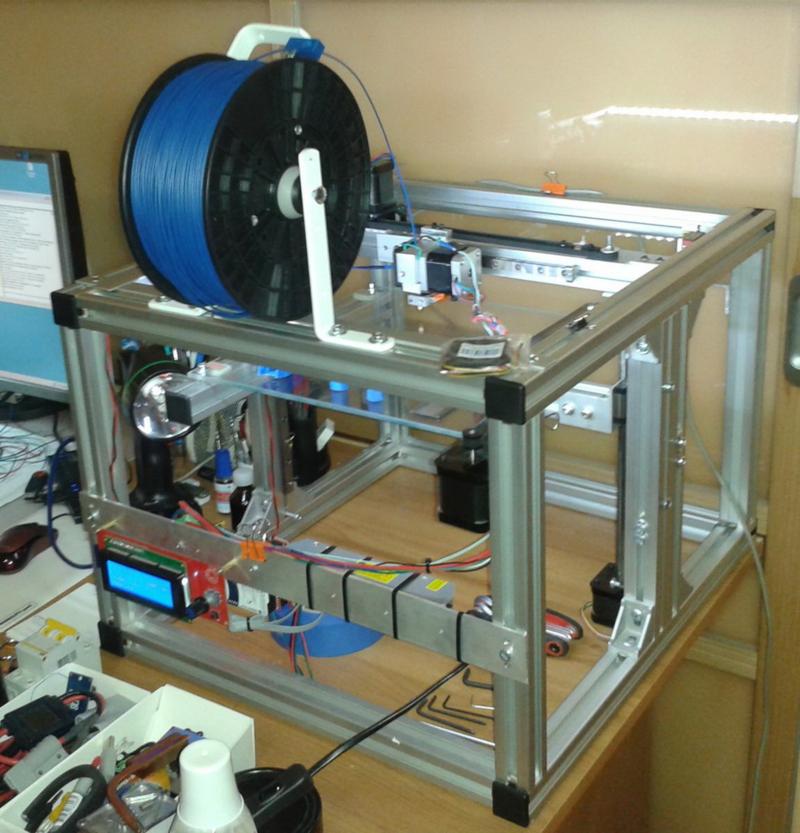
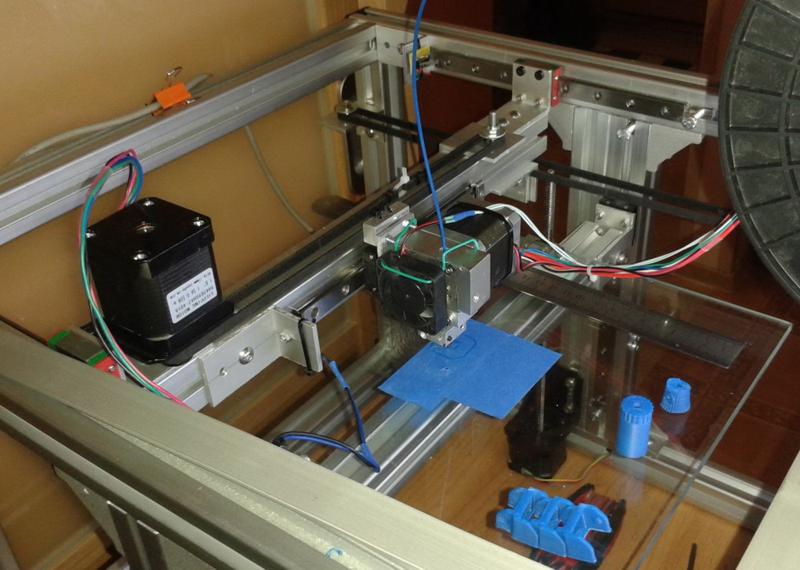
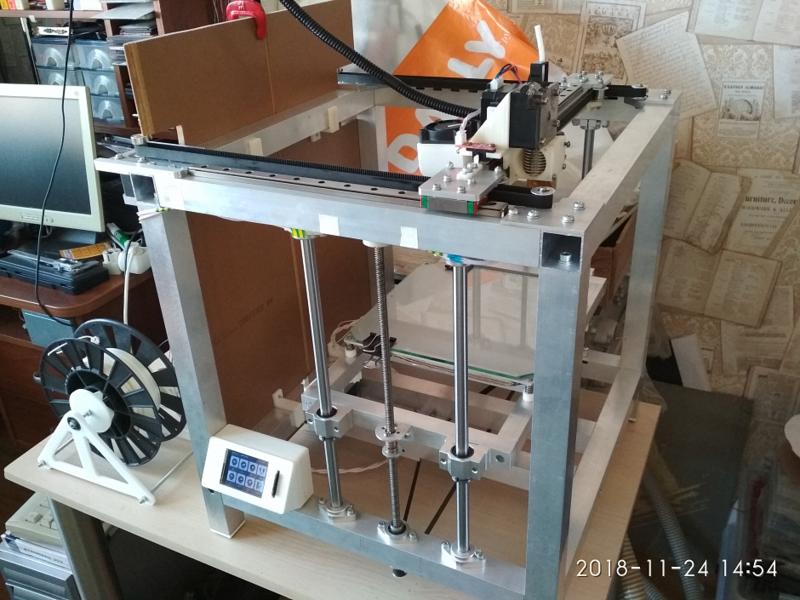
Description
This device was constructed for the purpose of printing of designer 3D models and prototyping. There was a necessity for a large print area. Factory-supplied models didn’t meet the user’s requirements for both the parameters and the price.
All he had to buy was electronics, chocks, and railing. Engines, shafts, belting, and other elements of the system were taken from old printers.
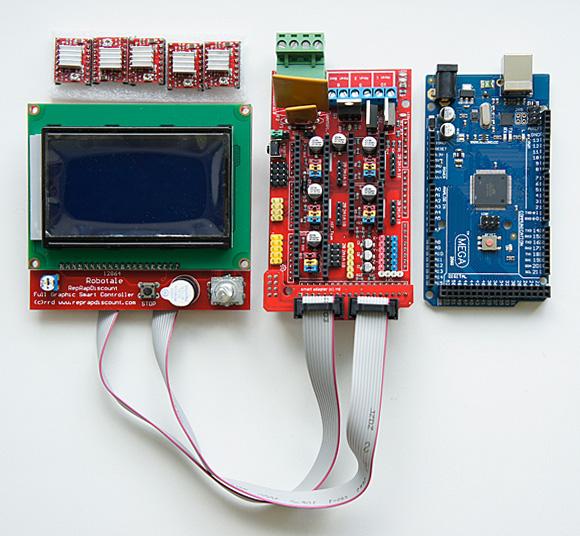
Besides, the author used:
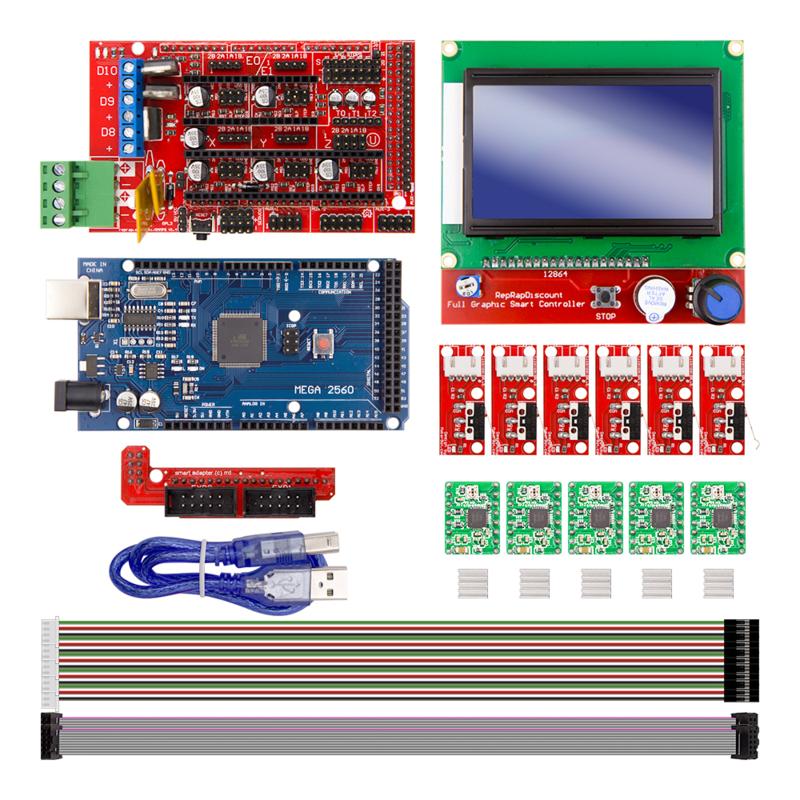
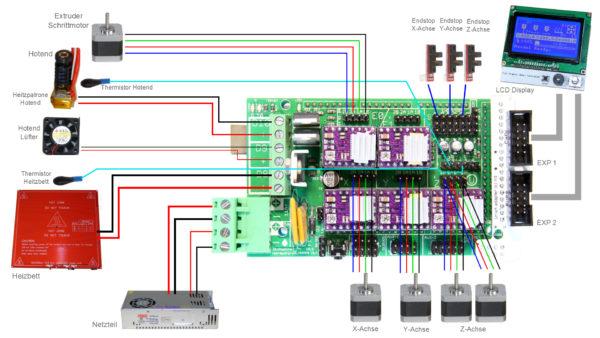
Arduino Mega 2560;
Ramps 1.4;
Graphic LCD Controller;
Stepper Motor Drivers A4988 (5 pcs);
Extruder Clone MK7.
How it was done
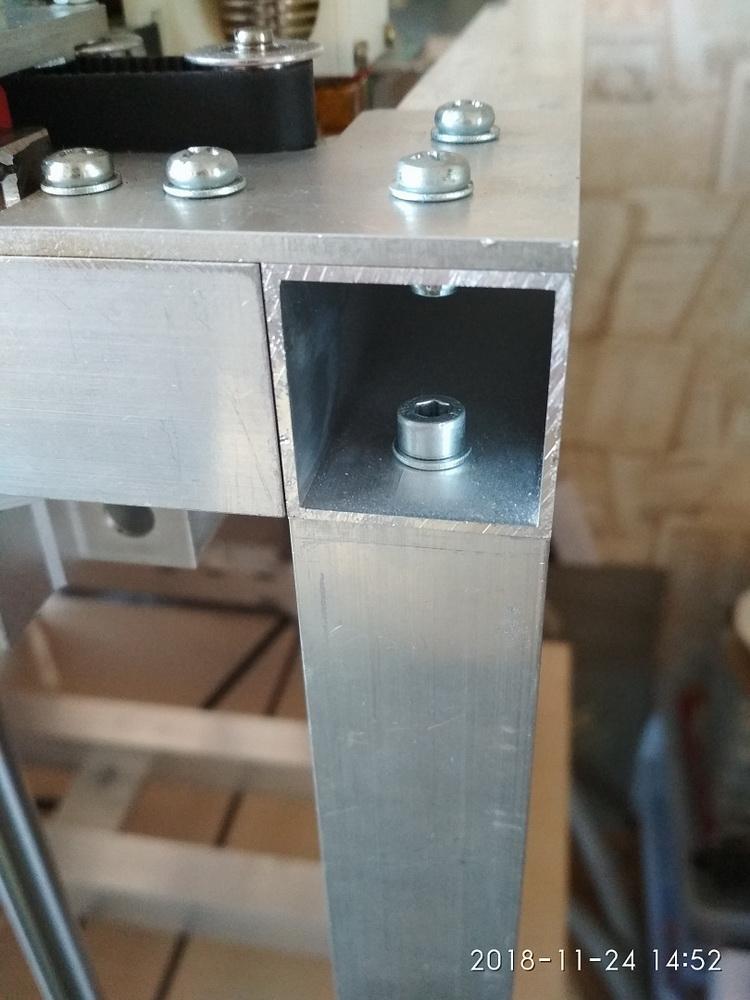
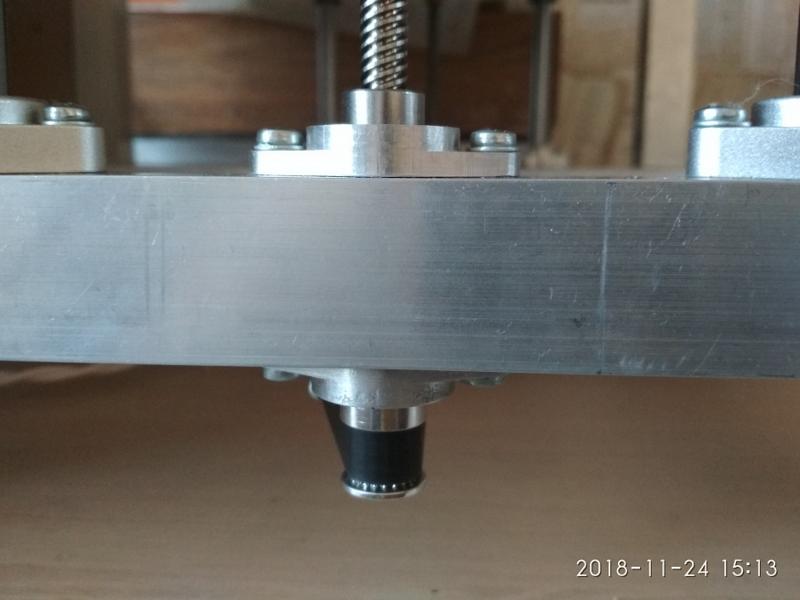
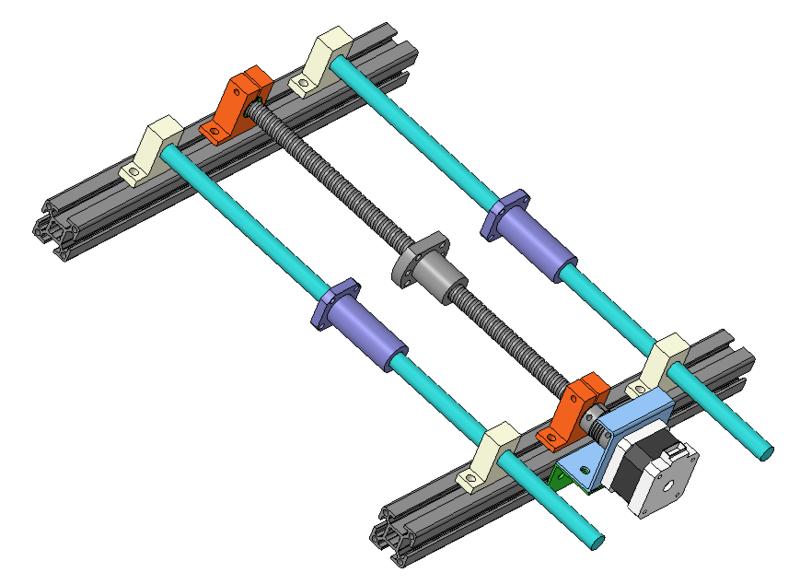
The frame was constructed from aluminum extrusion profiles 40x40x3 mm, 50x50x3 mm, 50x20x2 mm, and 31х30х3 mm (for pocket door installation).
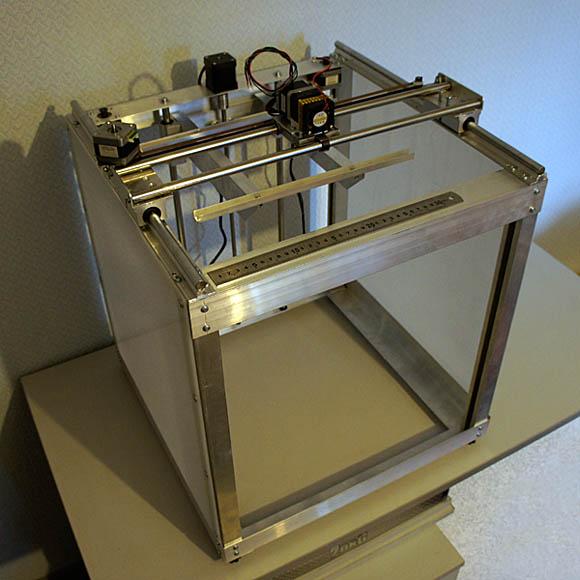
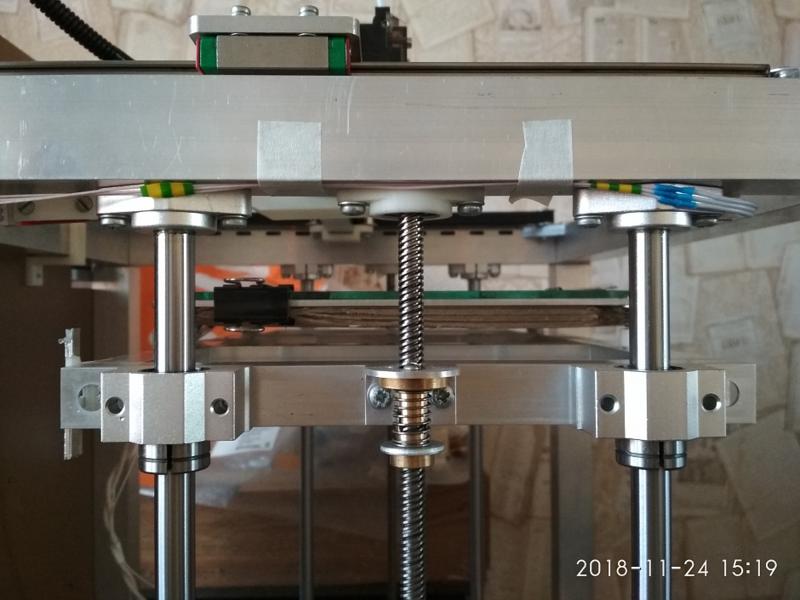
12 mm shafts were taken from an old printer; they were aligned as the X and Z axes. Linear guide rail SBR12 from China was used as the Y axis.
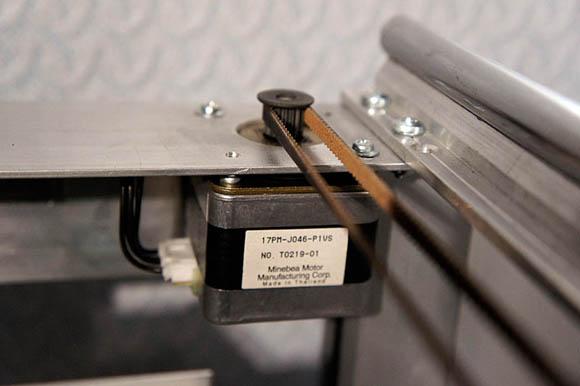
Three engines were taken from an old Multifunction Printer (two of them were mounted on the Y axis, one on the Х axis); one new motor was purchased from China (for the Z axis).
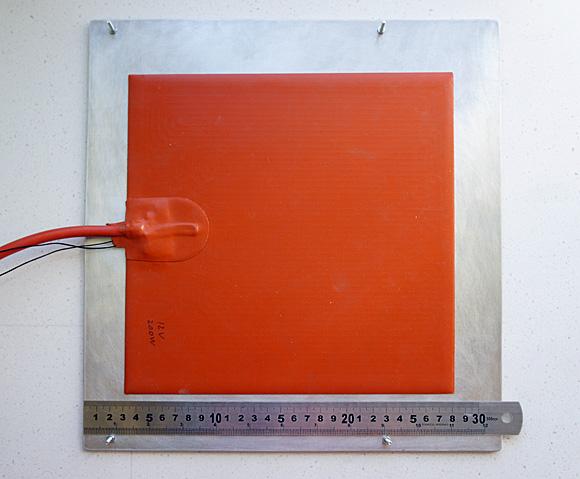
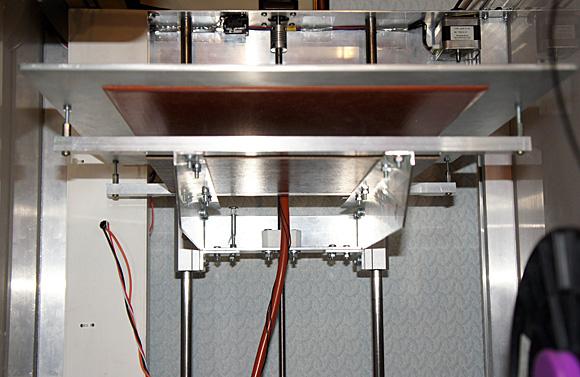
The printer bed was made from aluminum sheet 340х320х4 mm in conjunction with a silicone heater 250х250 mm (200W, 12V).
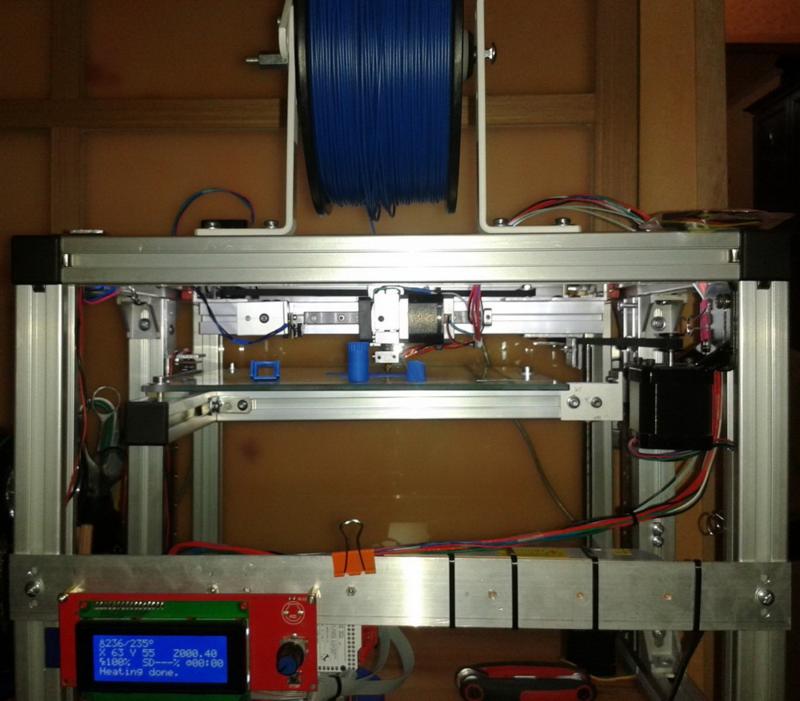
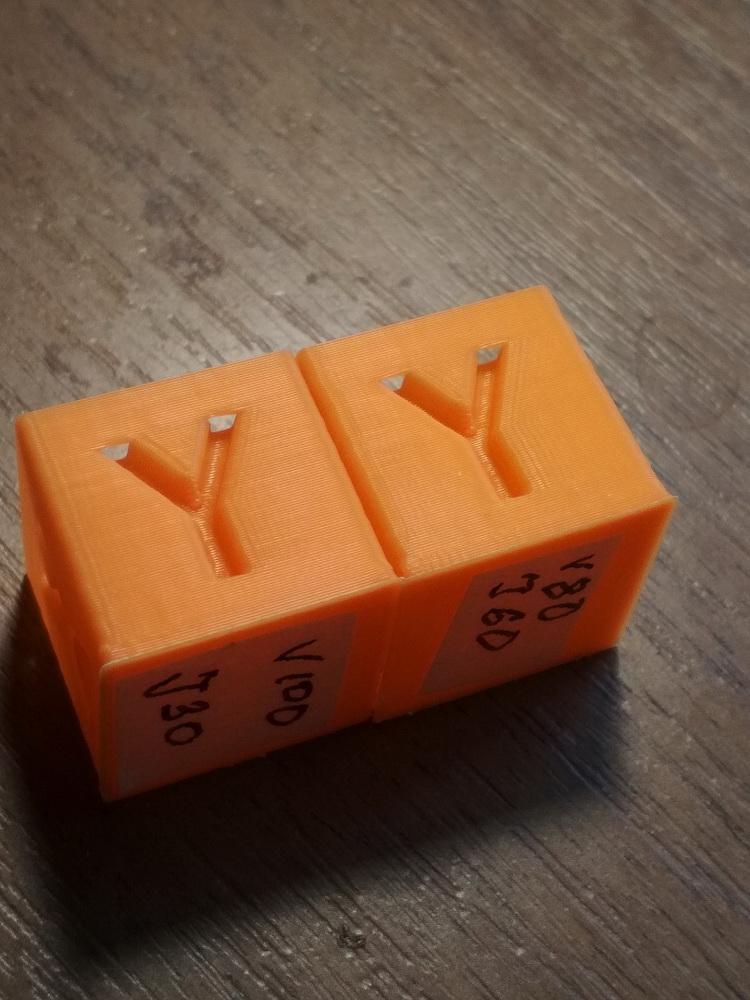
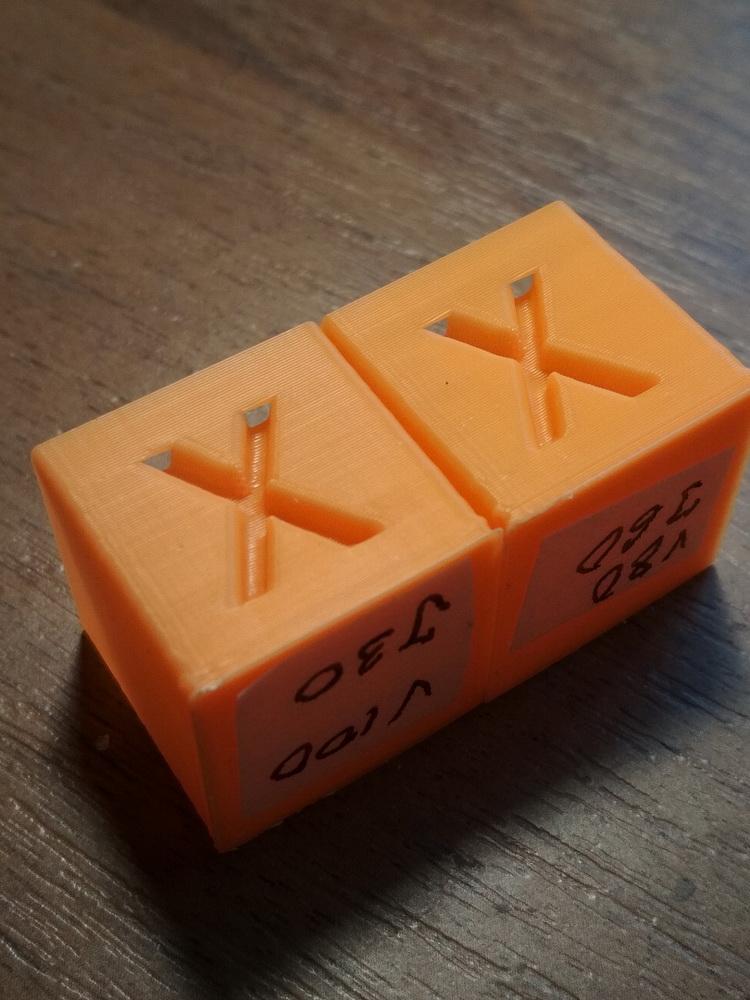
The Marlin firmware was installed, at which point the builder performed a printing test.

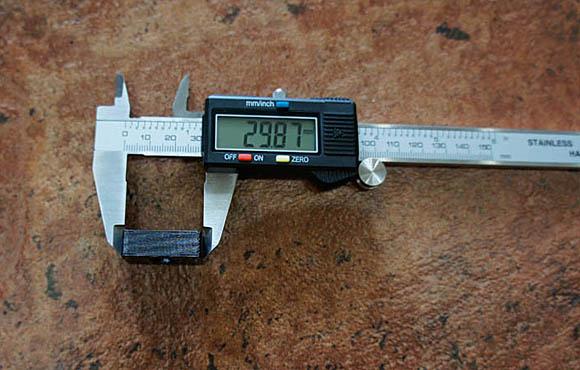
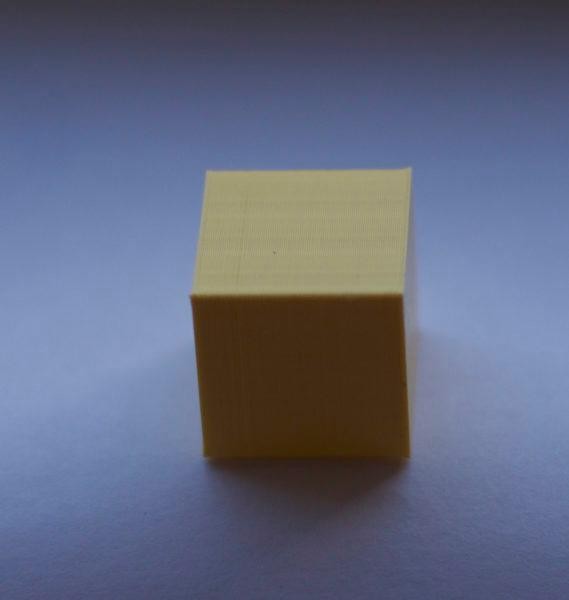
The printed object is a 3D box 3х2х1cm.
Quality control test.
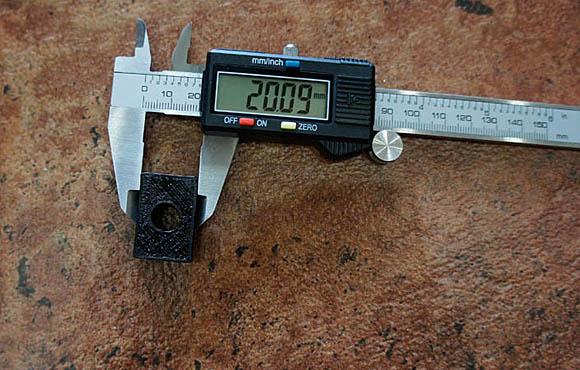
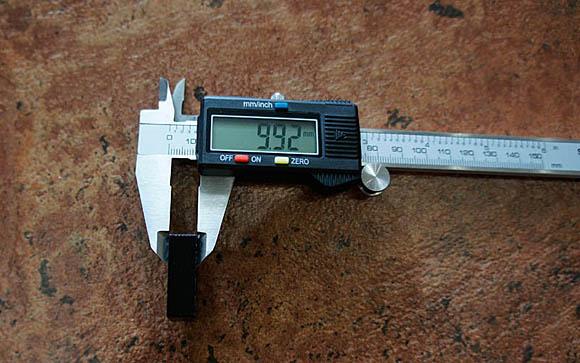
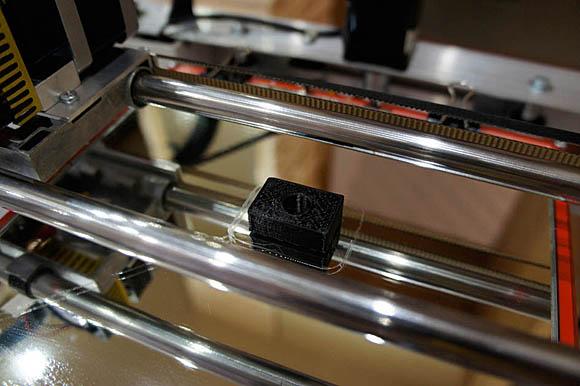
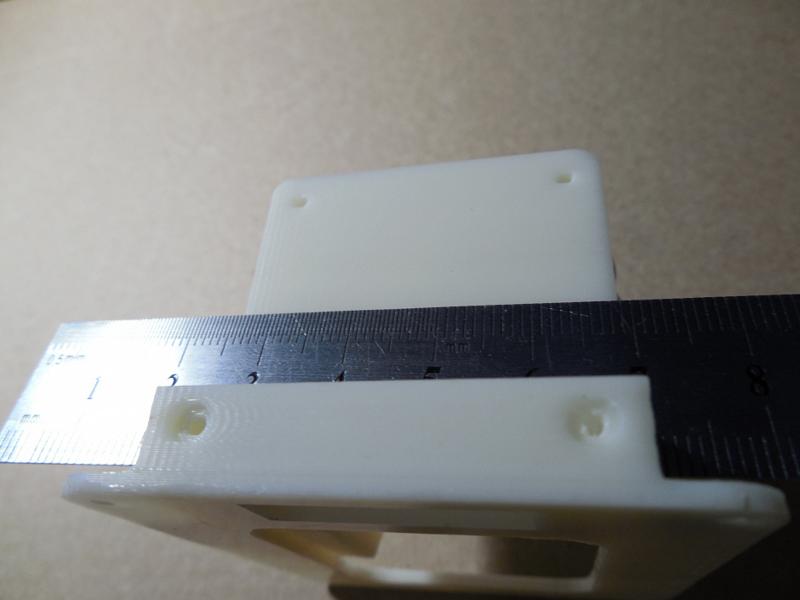
Once the printer was configured, the user printed limit switch holders.
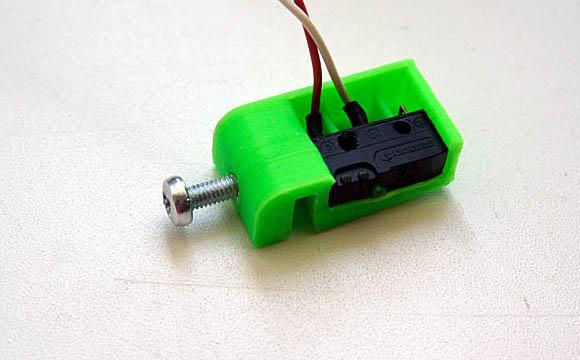

And one more element.
Pros and Cons
Pros: safe, user-friendly, and budget friendly.
Cons: none, as the device performs all its functions in full.
Description
The project is a mixture of interesting ideas and solutions found on the Internet.
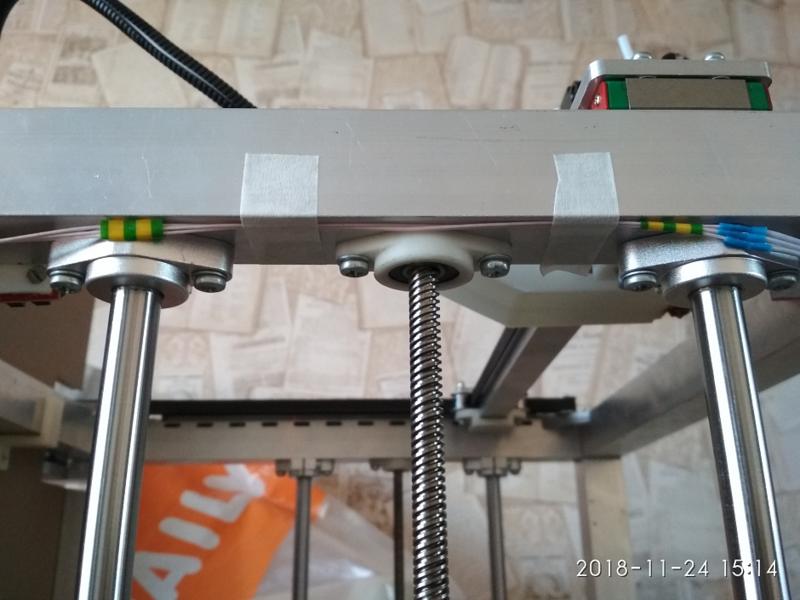
One of the criteria was the use of THK and HIWIN guide rails with diameter of 12 mm, which had been purchased by mistake.
Aluminum structural shape 30х30 mm was bought from China. The builder selected it, because the construction was expected to be firm, yet adjustable.
How it was done
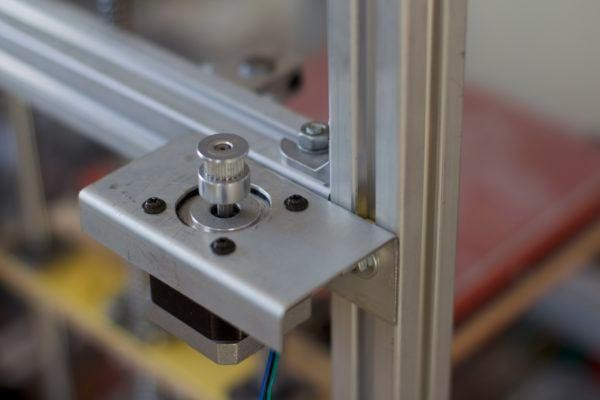
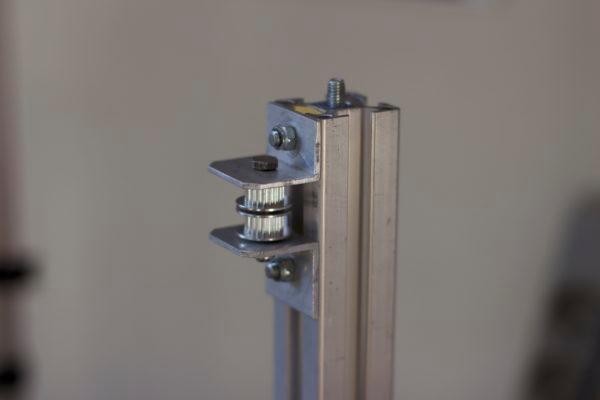
In this 3D printer, stepper motors 42BYGH47-401A were used, one for the X and Y axes. A stepper motor with a multiple-thread screw М8 was mounted on the Z axis.
The electronics used:
Arduino 2560 with Ramps 1.4;
LCD screen;
Cardreader;
Power supply unit 12V, 5А;
Extruder with a 0.4 mm nozzle (from China).
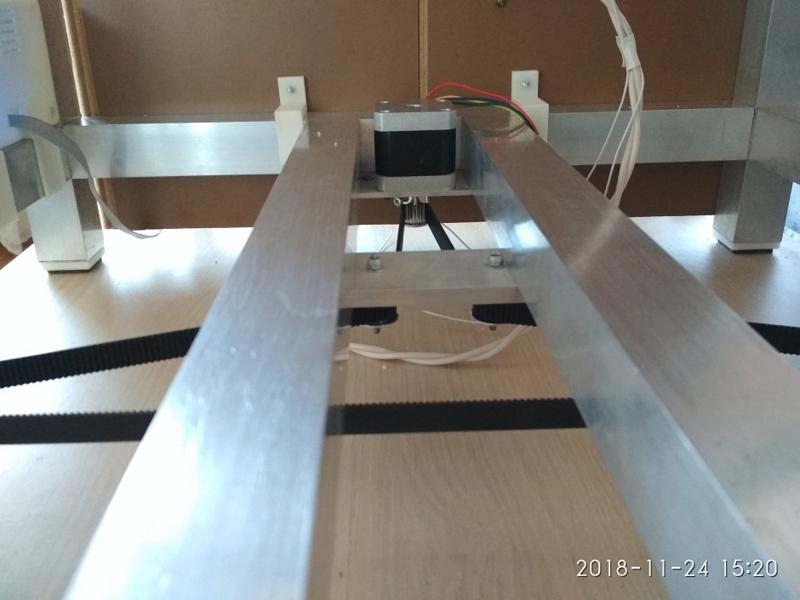
Movements along the X and Y axes are performed via a timing belt GT2.
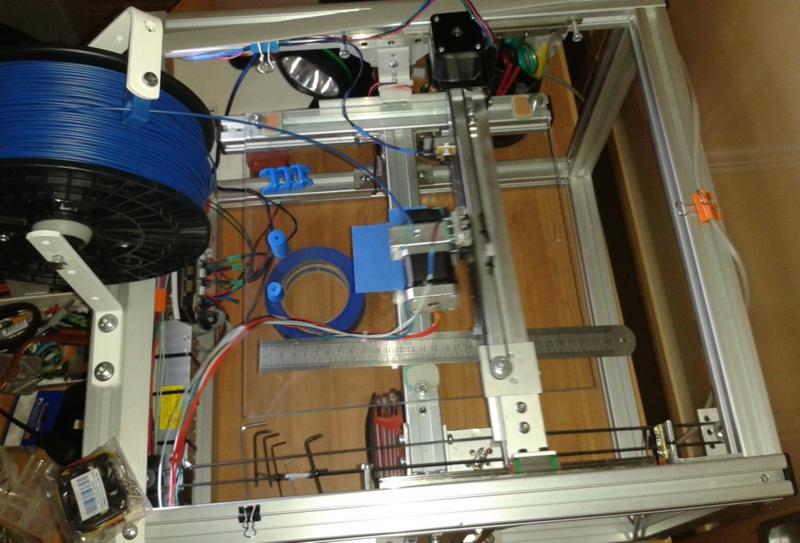
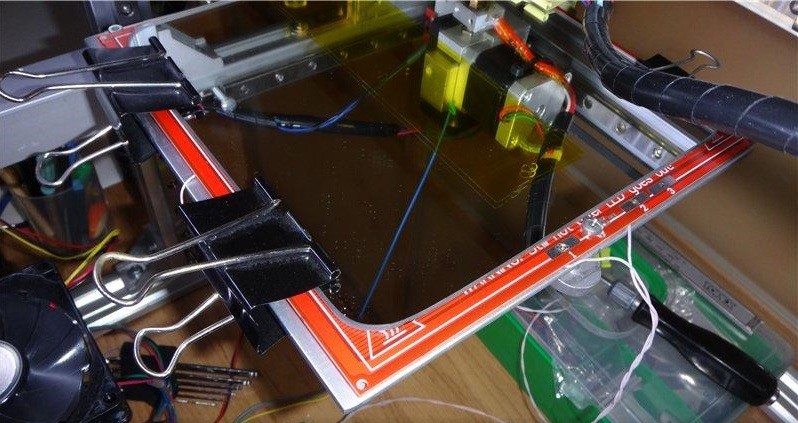
The printer features a heated bed. It was constructed with the use of Heatbed MK2 Hot Plate. Besides, the builder mounted an old 100 kOhm heating resistor.
Pros and Cons
Pros: the printer is easy to build and operate; it’s fast, cost-effective, and user-friendly.
Cons: there are no cons, as such. Given that it is half a workhorse and half a toy, the project is constantly being improved and packed with new features.
Description
The process of building this 3D printer was more interesting than its direct result and usefulness. Currently, the device sits unused.
When the builder decided to construct this printer, he already had experience as a CNC milling cutter operator. It wasn’t the best experience, actually, as he had to realize how important it was to make the construction more firm.
How it was done
Based on the previous experience, the author decided to mount the H-Bot style printer with a firm cubic construction. He used aluminum shaped tube 30х30х1.5 mm (for the frame) and 20х20х1.5 mm (for the printer bed and the mount). Surely it would be better and safer to use structural shape, but it is much more expensive.
The printer bed is mounted on four slider rails, with two height adjustment screws. For this purpose, the author used 12 mm cylindrical shafts and linear bearings.
In keeping with the best traditions of cheap Chinese production, the shafts and bearings of the same identity had different diameters. By way of long-term comparison, the author selected the pairs with the lowest slack values.
The builder used cardboard as the heat-insulating material for the printer bed. It is a temporary solution, later the cardboard will be replaced by the layer of mineral cotton, pressed underneath to the printer bed by an aluminum sheet.
The drive of both lead screws was based on a one stepper motor and belt-drive mechanism. This choice was due to higher consistency of operation, easier synchronization of screws’ movement, less risk of unsynchronization, and comparative cheapness of the tooth belt as compared to the stepper motor.
As the lead screws, the author used quadruple threaded screws with diameter of 8 mm, in increments of 8 mm per a revolution.
In order to prevent the axial play of lead screws, the builder fixed bearings above and below the mount and strapped down their inner races between the mounting bracket and the teeth pulley.
The upper bearing flanges of the lead screws were printed on the same 3D printer.
The author bought and mounted the printer heated table PCB MKS MK3-220, made from an aluminum sheet of 3 mm thickness and designed to operate with a power of 12/24V.
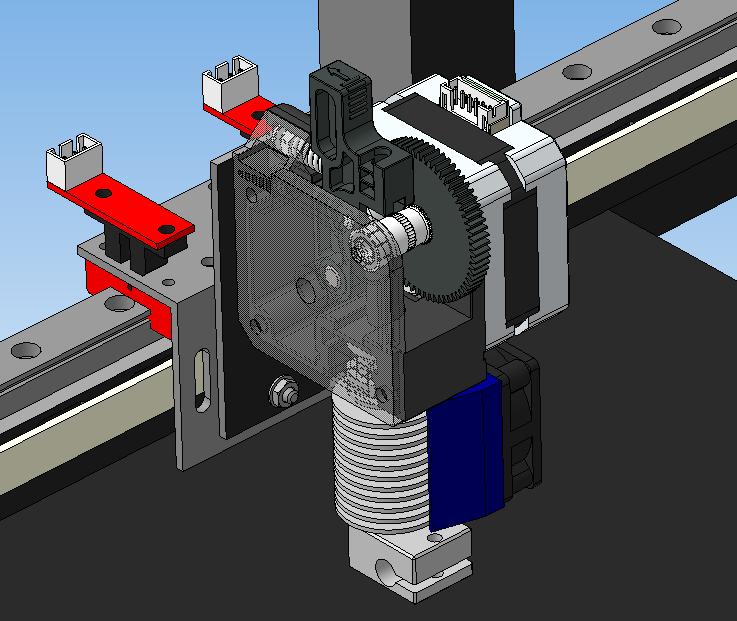
The extruder is direct: Titan feeder + clone of E3D V6.
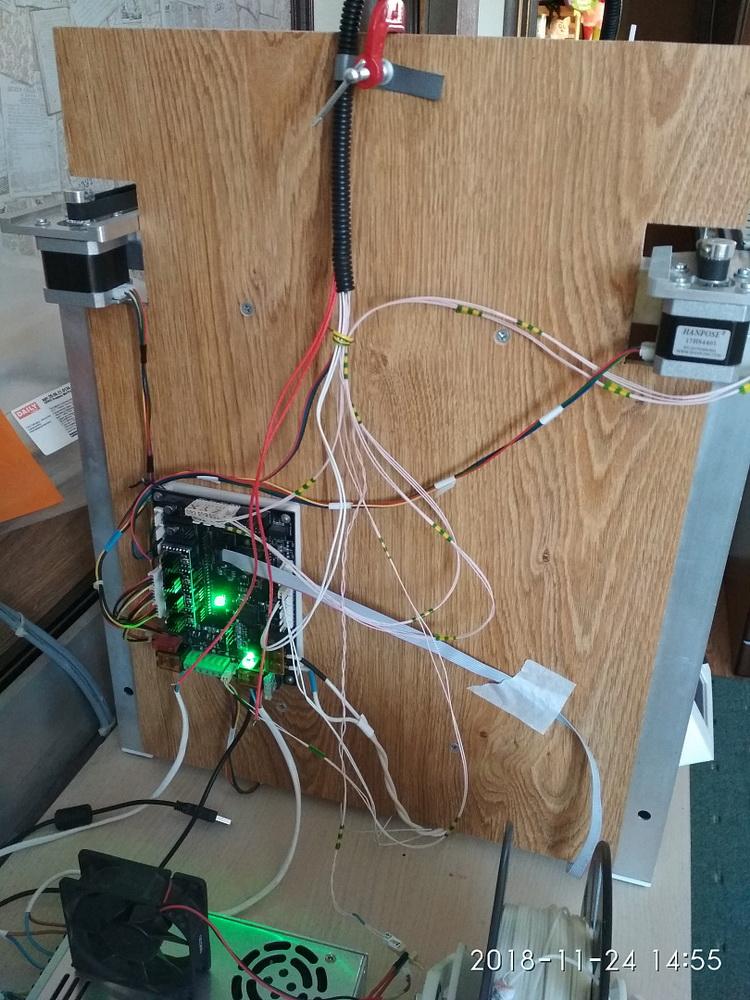
The following electronics was purchased and mounted:
Arduino Due;
RURAMPS4D;
Screen MKS TFT 2.4 with a cardreader.
Pros and Cons
The pictures below illustrate the printing test with ABS Greg plastic at a temperature of 240°C (in output) and 80°C (bed). The nozzle diameter is 0.4 mm; the layer resolution is 0.2 mm. The speeds are 80 and 100 mm/sec; the jerk speeds are 30 and 60 mm/sec.
With the jerk rate of 60 mm/sec, there is an evident vibration along the X axis. With the jerk rate of 30 mm/sec, it becomes significantly lower, and with 10 mm/sec it almost disappears. There is, besides, one more disturbing fact: in order to increase the speed of printing with no loss in quality, a user has to fall back on serious constructional modifications.
Description
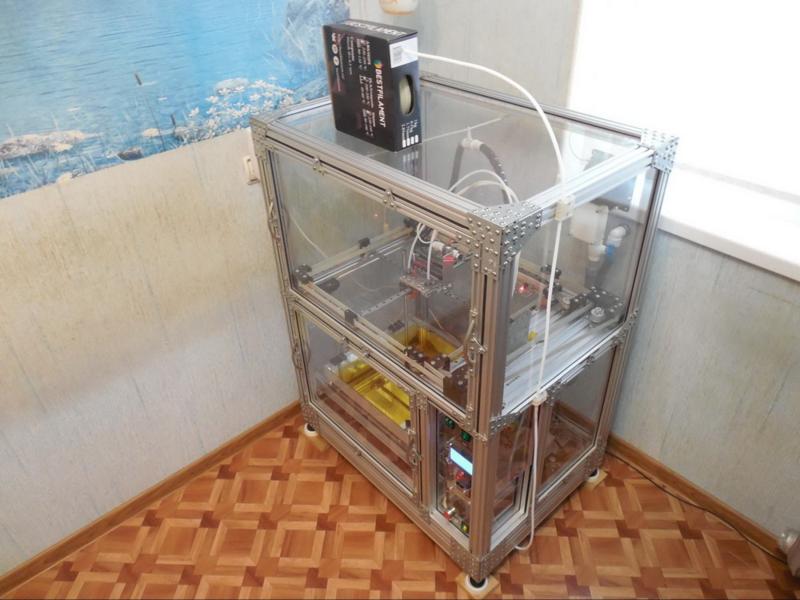
Initially, this printer was intended as a simple homemade device. Only several instruments were available: a soldering-copper, an electric drill, an angle grinder, a riveting hammer, screwdrivers, and swiss files.
In the planning process, the author came to a conclusion that it is wiser to use custom-tailored details. It was a great benefit that there was no need to minimize the cost of the device.
Purchased materials:
Aluminum structural shape;
Glass-like polycarbonate 4 mm;
Rolls, pulleys, and belts (15 mm of width) GT2.
Other nonstandard details were manufactured with the use of the electric drill, angle grinder, and swiss files.
How it was done
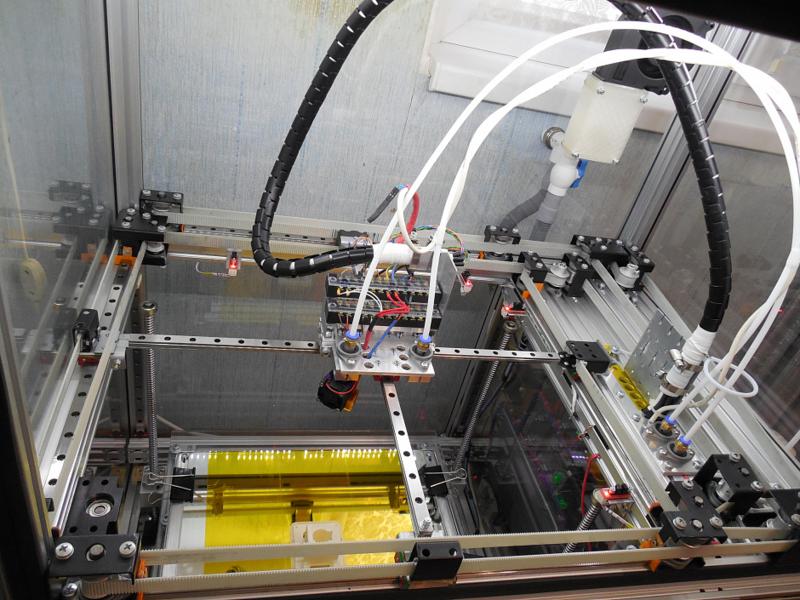
The extruder was mounted so that it could move along the X and Y axes. The author used 3 rails and a stepper motor for each axis.
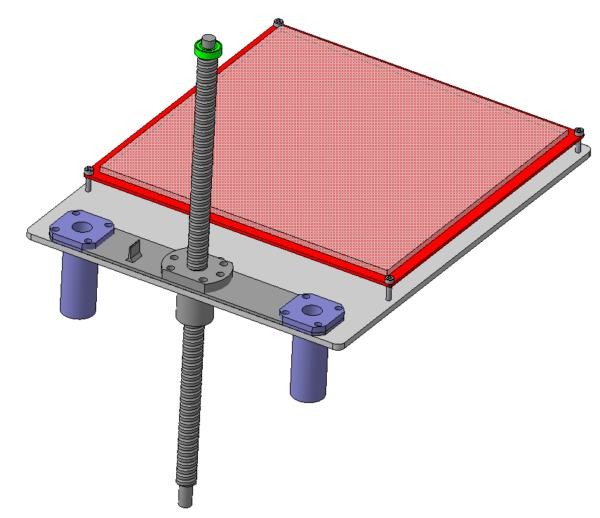
The heated table moves along the Z axis on 4 rails. It is put in motion by an engine via a lead screw.
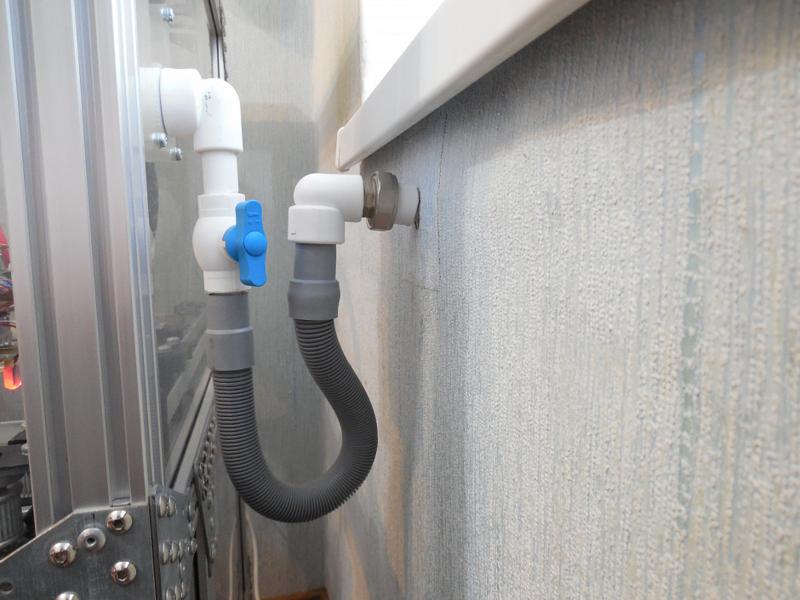
The builder mounted a replacement exhaust system. It was constructed from plumbing elements and water cooler. The “exhaust” is directed outdoors through a hole in the wall.
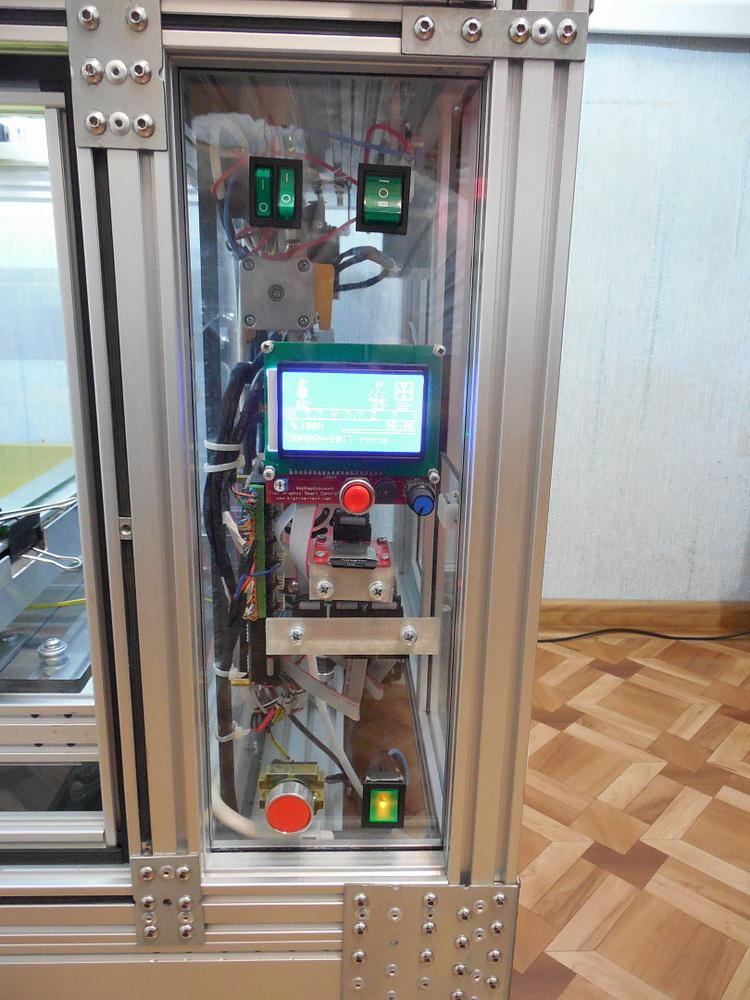
The pictures above and below show the mounted switching on and off elements, as well as the indicated input sections, such as:
Graphic LCD Controller;
Two-point keys: common power supply, highlighting, extract ventilation;
The “Reset” button, big and red.
In the left-hand corner there is a temperature-sensitive element for the printer’s heated bed.
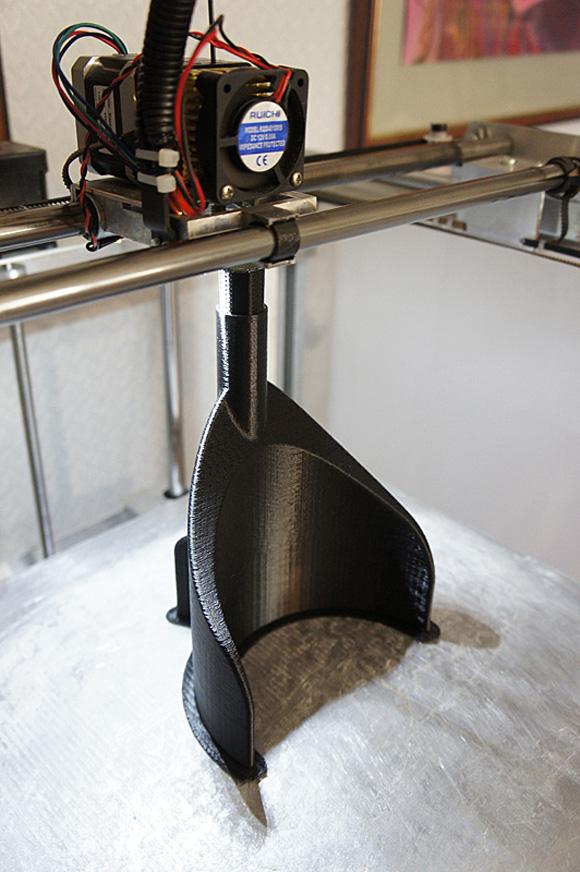
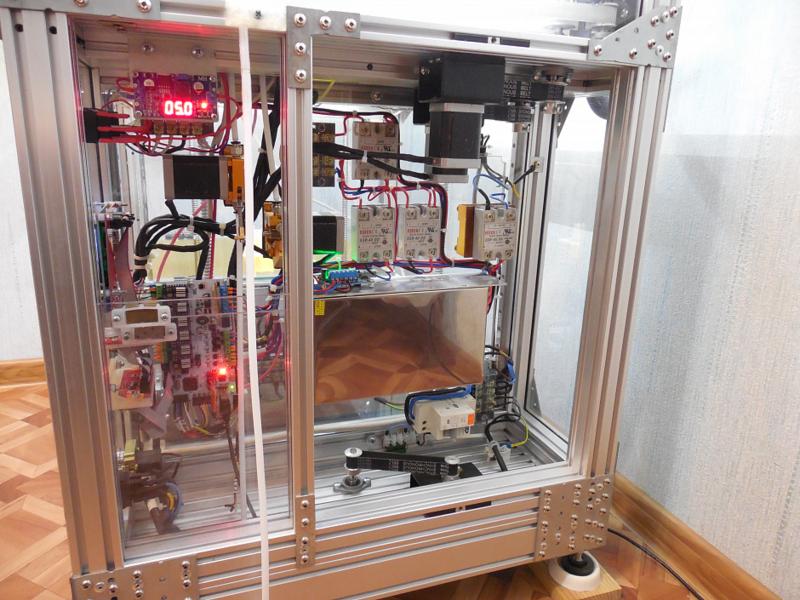
Printing example:
Pros and Cons
The key advantage of the device is that the author has implemented 100% of the ideas he had. More precisely, he has successfully mounted:
Enclosed casing;
Extract ventilation;
Utilization of FDM technology;
Printer bed heat 220V;
Lead screws and rails;
The build volume is 250-300 mm (cube);
Bed with automatic leveling;
Highlighting of the print area;
Ease of operation and tuning.
From the author’s viewpoint, the system has the following weak sides:
Weight over 60 kg;
Even with an extract ventilation system, there is a strong smell of plastic in the course of printing;
There is a vibration at a printing speed of 50 mm/sec;
No ground connection system.
Description
The new printer was built after the author had become totally disenchanted with the old one. To be more precise, it’s not a matter of the device, but the abundance of plastic elements in its construction. The essence lies in the relative softness of the material, low resistance to load, sensibility to high temperatures and poor durability of threaded joints.
The new 3D printer was to become an example of reliability and functionality, since it was made up of metal elements only.
How it was done
For the construction of the frame, the builder bought:
Aluminum structural shape 30х30х320 mm and 30х30х500 mm;
Threaded rods M6 330 mm and 520 mm;
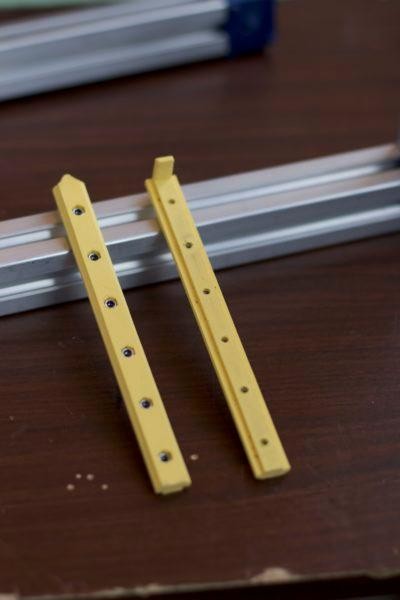
Structural shape collets M6;
Screws M6 with a plastic spacer plate;
Silumin angles.
Besides, the builder used home-made plastic cubes.

The frame was mounted with the use of a tri-square for the most precise and accurate angle construction.
In order to make joints more stable, the author passed the threaded rods inside the profile.
All the corners of the construction are fastened by angles and collets.
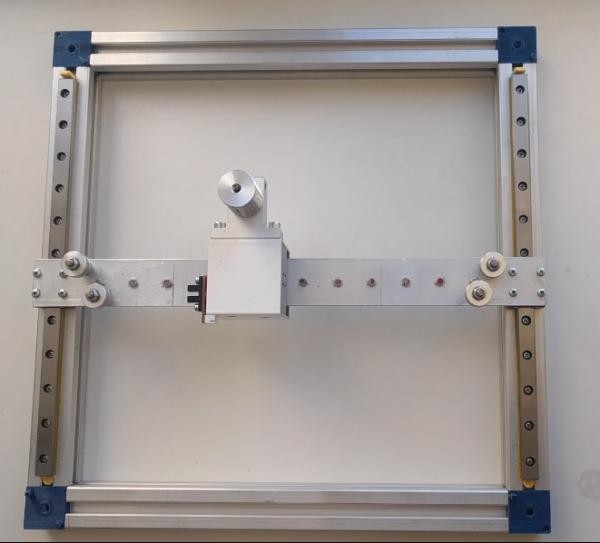
The printer kinematics was CoreXY:
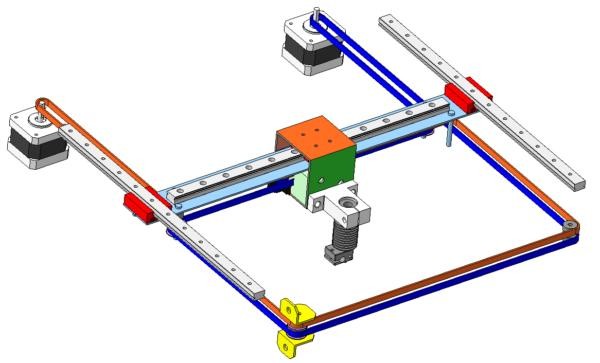
The rails were connected to the profiles by DIY collets.
Then the printer head was mounted.
The gantry was mounted to the X axis carriages.
Attaching the stepper motors.
The author made anchors from holding angles and mounted the tooth wheels.
Then, the builder stretched the belt and fixed it in the printer head, based on the following scheme.
Later, the author proceeded to the Z axis. He mounted the lead screw with the collars to the table.
He assembled and mounted all the details on the aluminum profiles.

When the author had finished with the mechanics, he came over to the electronics.
This CoreXY printer functions through the following systems:
Arduino MEGA 2560;
Ramps 1.4;
LCD screen 2004;
Cardreader;
Drivers DRV8825;
Engines Nema17;
Heated table MK2;
Power supply unit 12V, 30А;
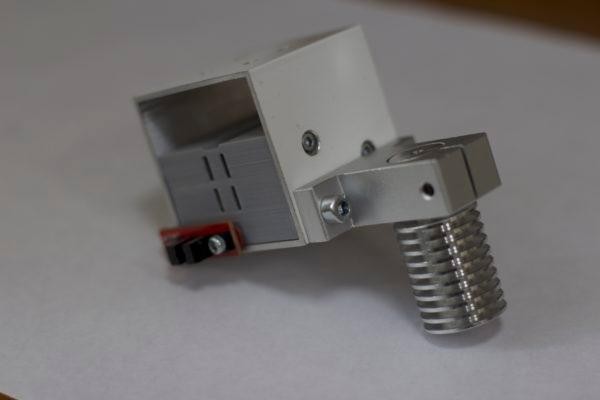
Extruder MK8;
Hot End E3D V6;
Limit switches.
Then he downloaded the firmware Marlin 1.0.2 with factory-supplied settings.
A printing test was performed.
Pros and Cons
Pros:
High strength;
High printing speed;
Protection against noise due to comparatively short belts;
The rails support the shafts and prevent their deflection;
The lead screw prevents the deformation of materials during the printing process.
Cons:
When the carriages move along the rails too fast, the latter produce loud noise;
Due to the heavy gauge of profiles, the printer is weighty and bulky;
Collets are needed for the construction of the device.
It is clear from all the above that the process of DIY 3D printer manufacture is difficult, yet distinctly possible.
Initially, the idea of 3D modeling and printing was promoted only by enthusiasts. It were them, who brought the concept of additive technologies to the society's attention.
If you want to join the hi-tech world and construct something with your hands, Top 3D Shop invites you to get acquainted with its broad assortment of components for building a DIY 3D printer and even a wider choice of off-the-shelf printers, many of which can be upgraded and customized to fit perfectly with your personal preferences.
Update your browser to view this website correctly. Update my browser now

Write a comment