The design brief was to create an architectural model of an aircraft hangar from scratch, with no existing construction or plans to use as a reference. So before we could build it, we had to design it.
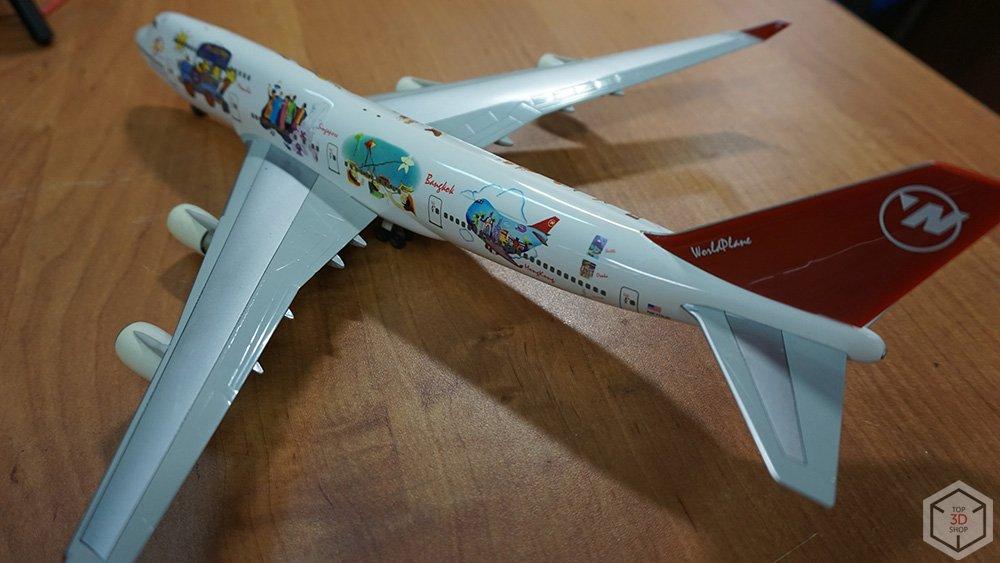
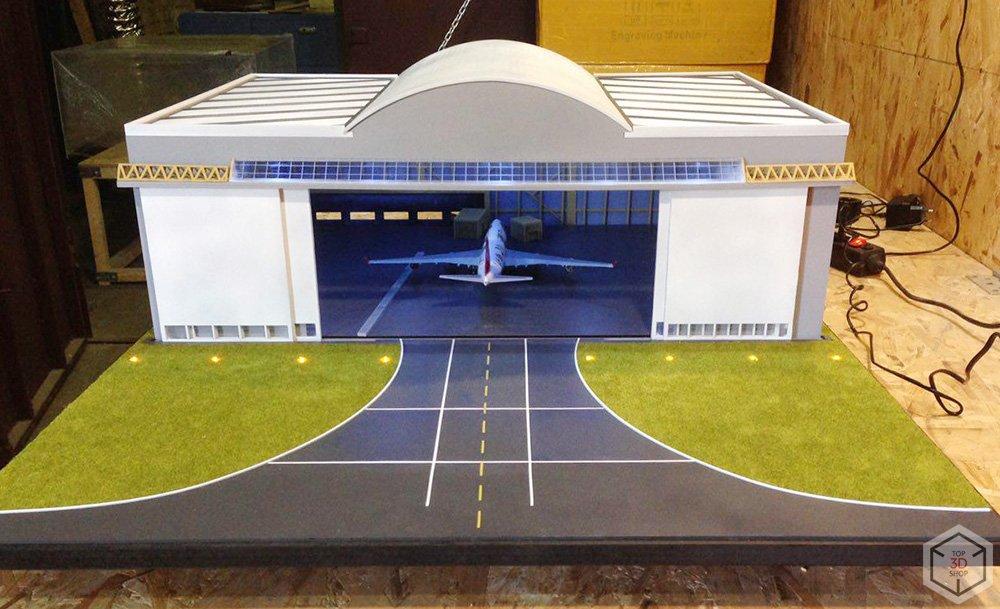
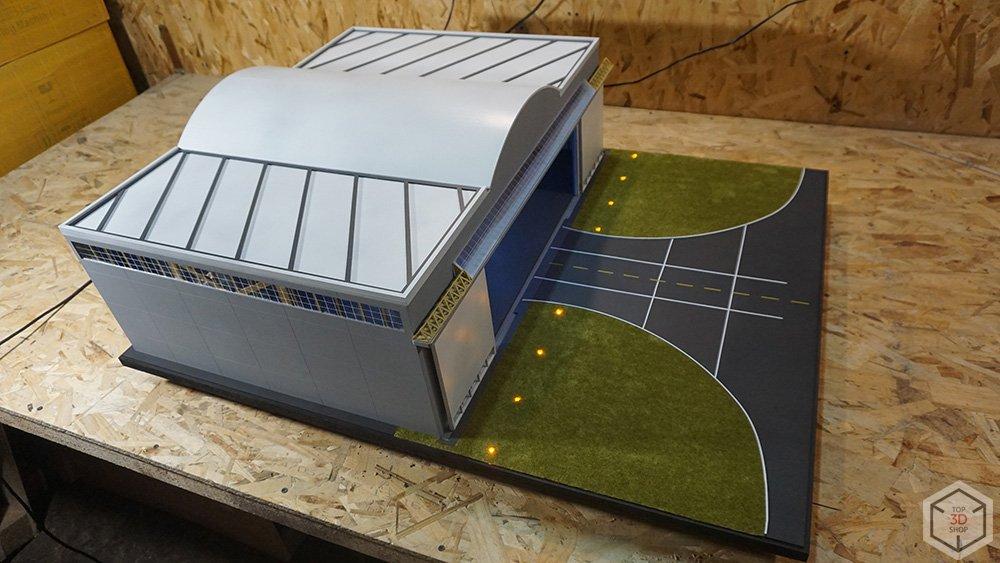
We started with a 1:200 scale model of a Boeing 747 and some photographs of various aircraft hangars. With the plane measuring 350mm in length and with a wingspan of 320mm, we calculated that the overall footprint of our model hangar and its surroundings would need to be 1000mm by 800mm.
Hangars are not usually designed with aesthetics in mind. They are designed to be erected quickly and to serve a purely utilitarian purpose. Our brief, however, was to model a hangar that would not be just another eyesore on the landscape. This required a thorough analysis of real-life constructions and a liberal sprinkling of fantasy.
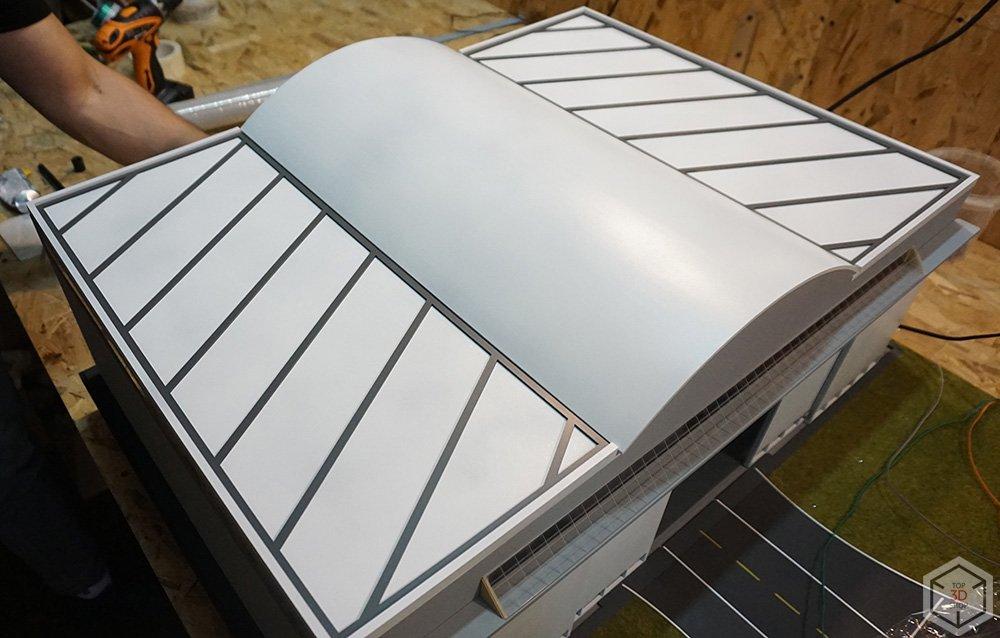
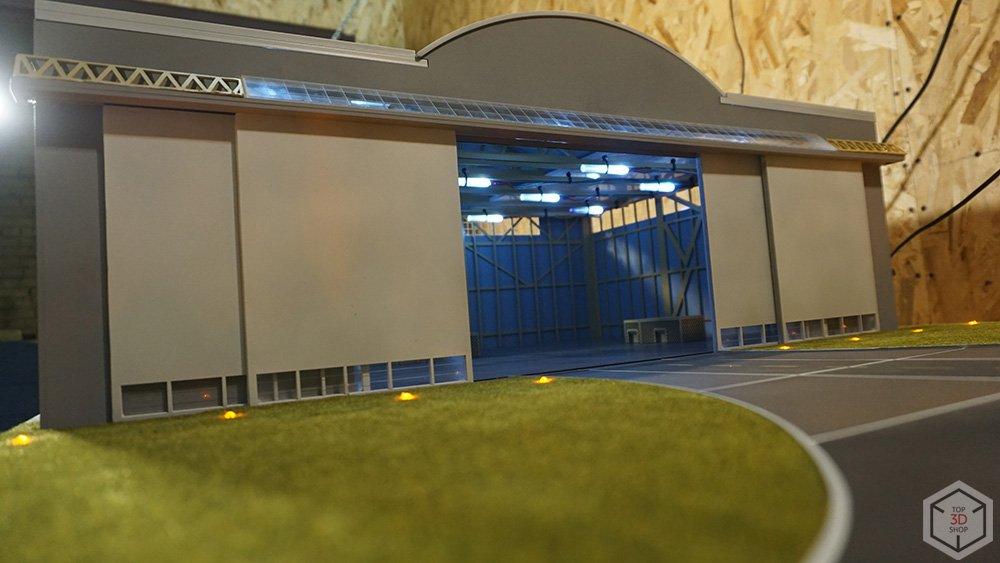
Our first design iteration featured a completely arched roof. While this is a perfectly sensible solution for a wide unsupported span, it doesn’t make for a pretty building. After some feedback from the customer, our subsequent designs had a flat roof with an arched central section. We incorporated a simple geometric pattern to break up the otherwise monotonous flat expanses.
Traditional methods of constructing architectural models involve a tremendous amount of painstaking manual labor. Crafting every detail by hand from wood, cardboard and papier-mâché is a time-consuming and expensive process.
Computer modeling streamlines the design process, making it easy to confirm details with the customer and introduce corrections at any stage before starting production. Using CNC-milled sheet plastic as the main construction material significantly speeds up the building process, leaving only assembly and painting to be completed by hand.
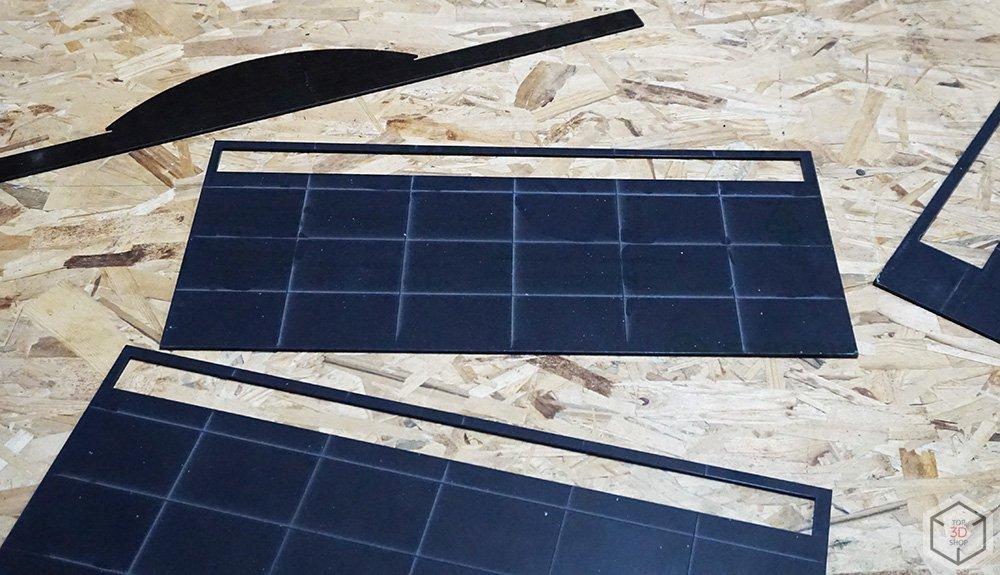
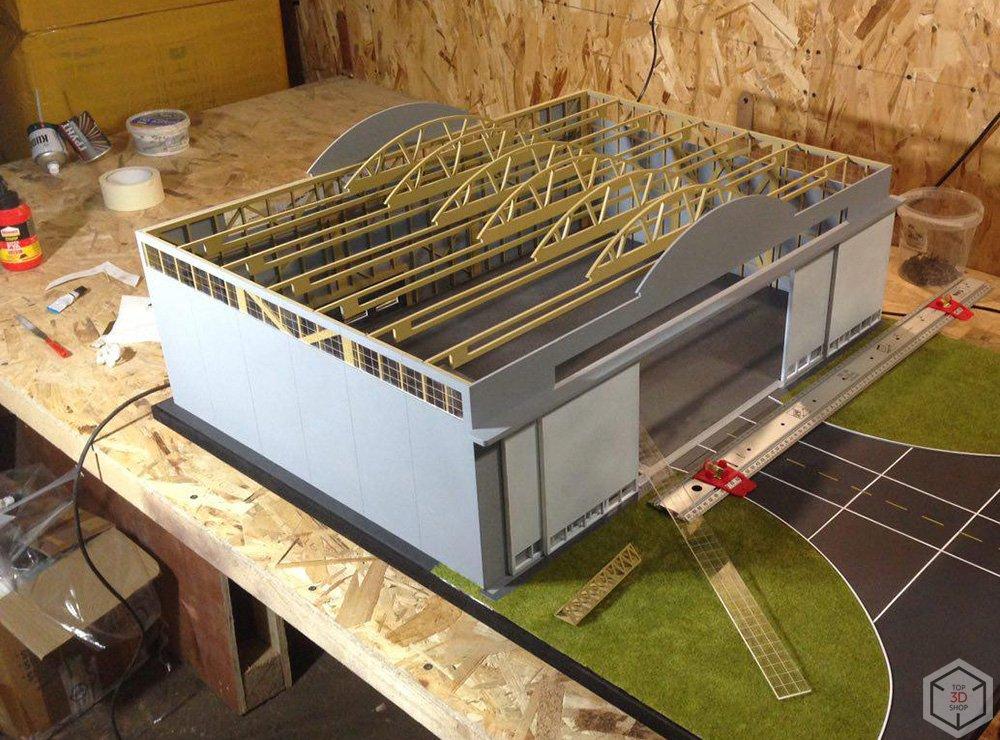
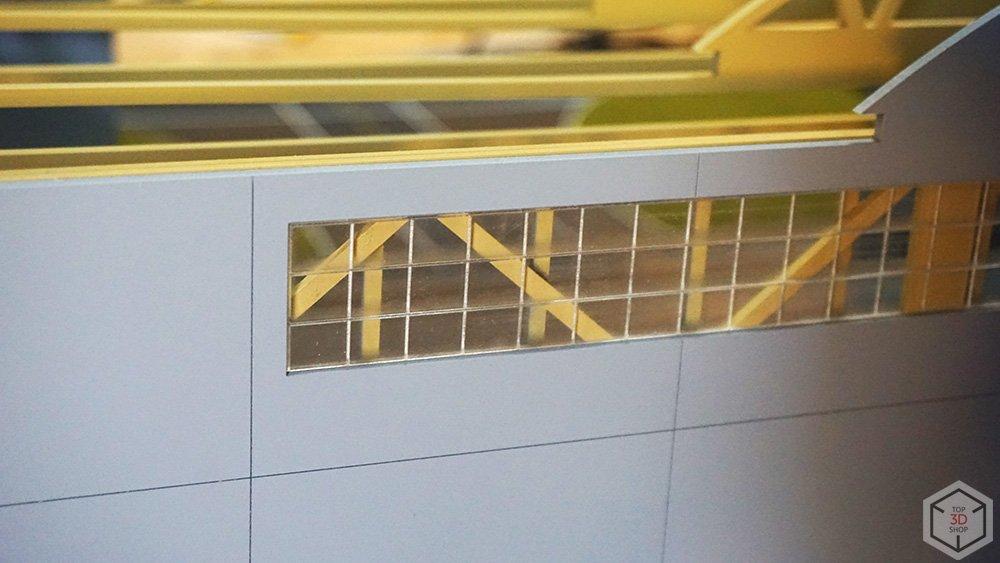
With the design approved by the customer, we were ready to begin construction of the model. The hangar walls were made as solid panels with details imitating structural framing on the inside and cladding on the outside. Cutouts for windows were made along the tops of the panels.
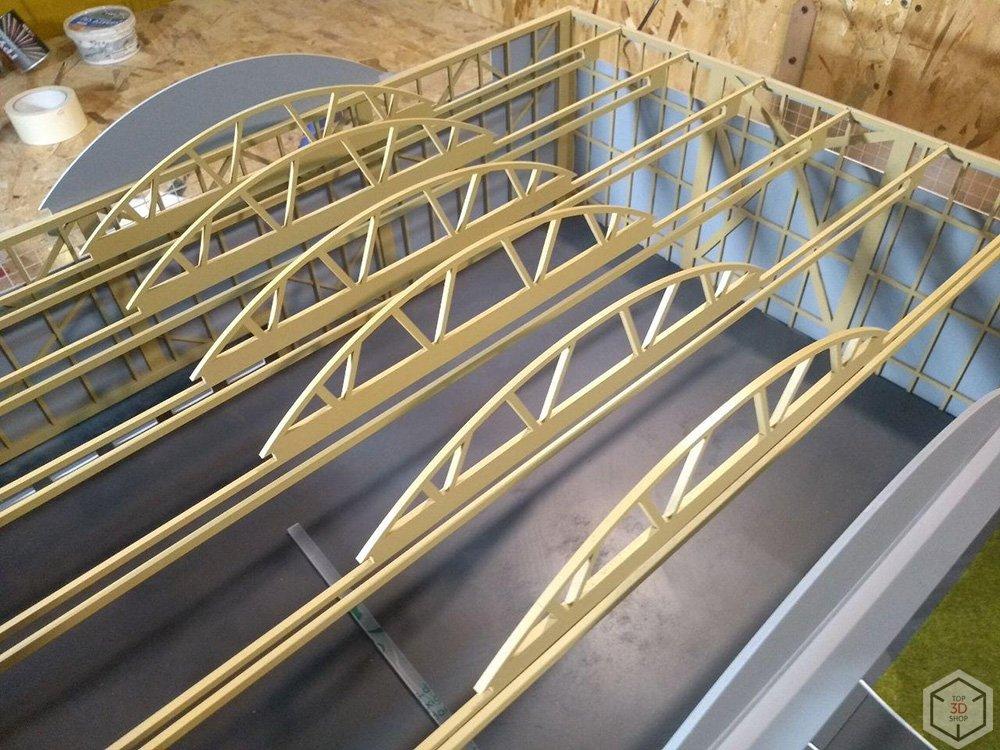
After attaching roof trusses to the walls, our next step was to cover the horizontal and arched roof sections with cladding. At this point we discovered that having the roof framing permanently fixed in place was going to complicate subsequent operations.
The problem was that our design featured LED lamps attached below the trusses to imitate the lighting used in real hangars. With the roof partially assembled, routing the wiring proved quite a challenge. Had the model been much smaller it would have been outright impossible. Lesson learned: make roofs on models like this removable, and route any wiring before attaching the roof structure.
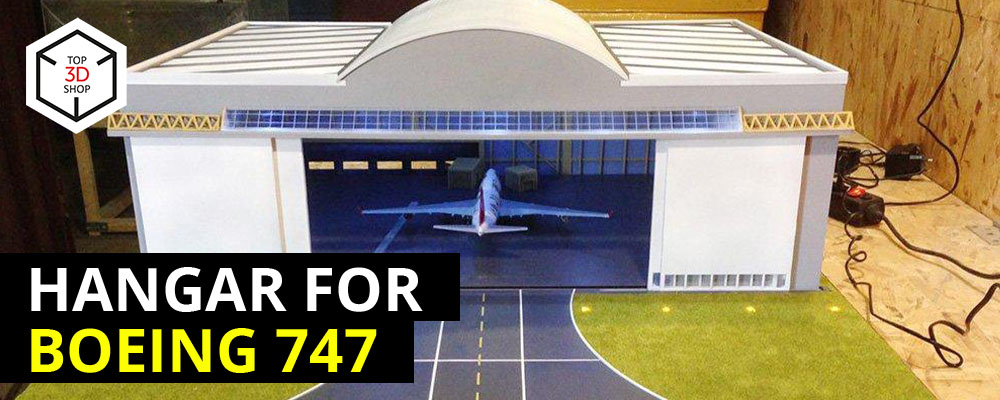
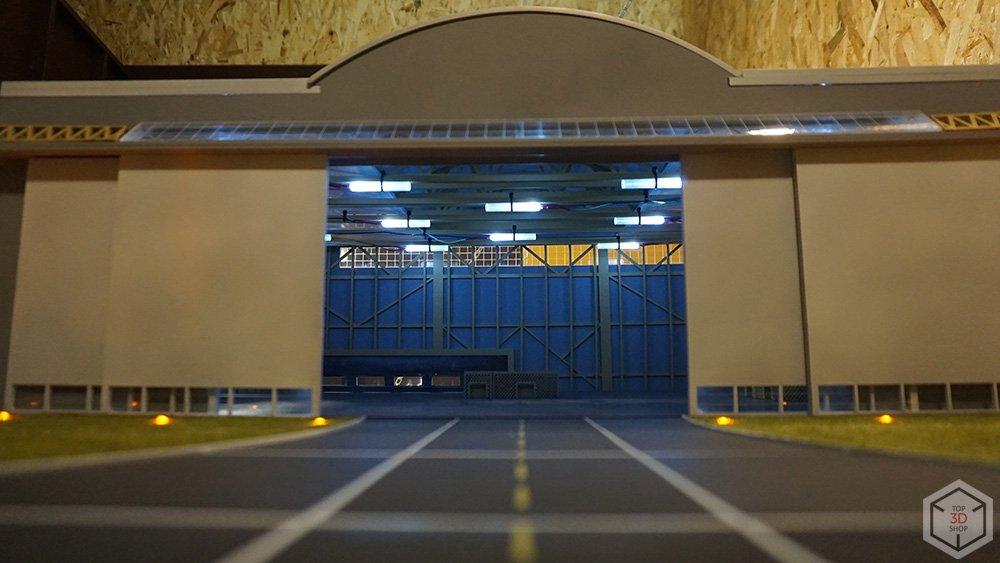
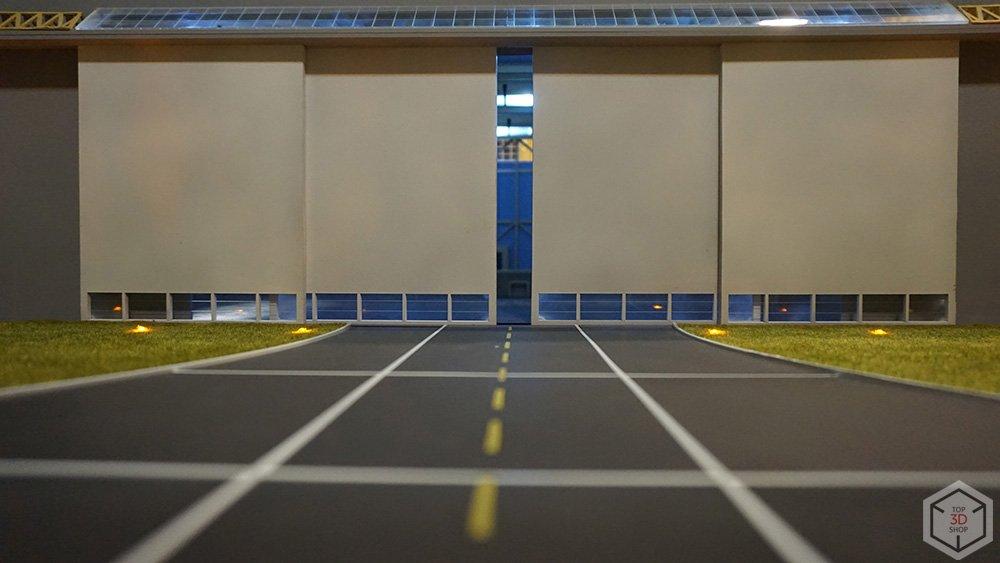
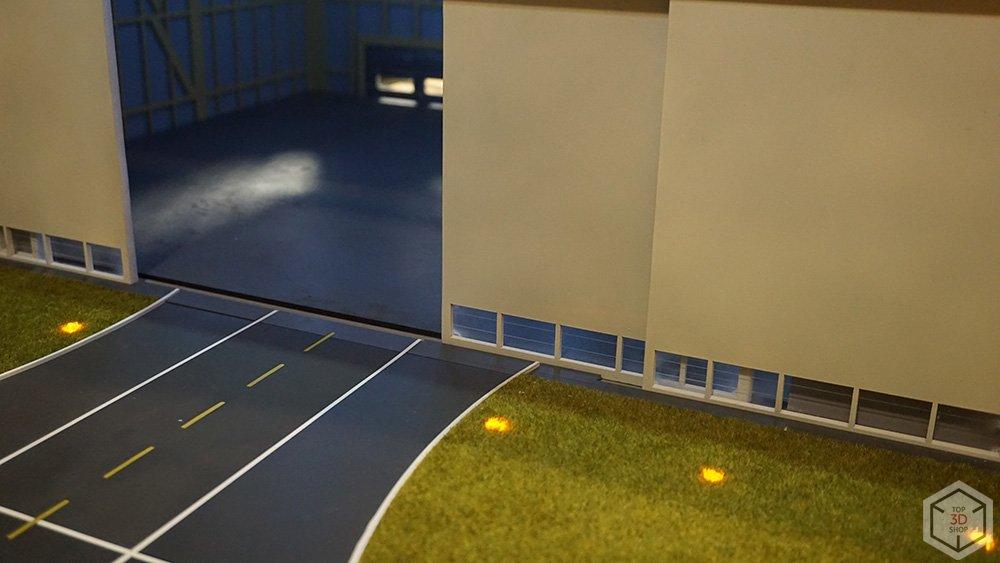
The plane should be able to occupy any natural position within the model’s footprint, be it inside the hangar, in the doorway or completely outside the hangar. A section of taxiway leading up to the hangar door provides an authentic outdoor scene.
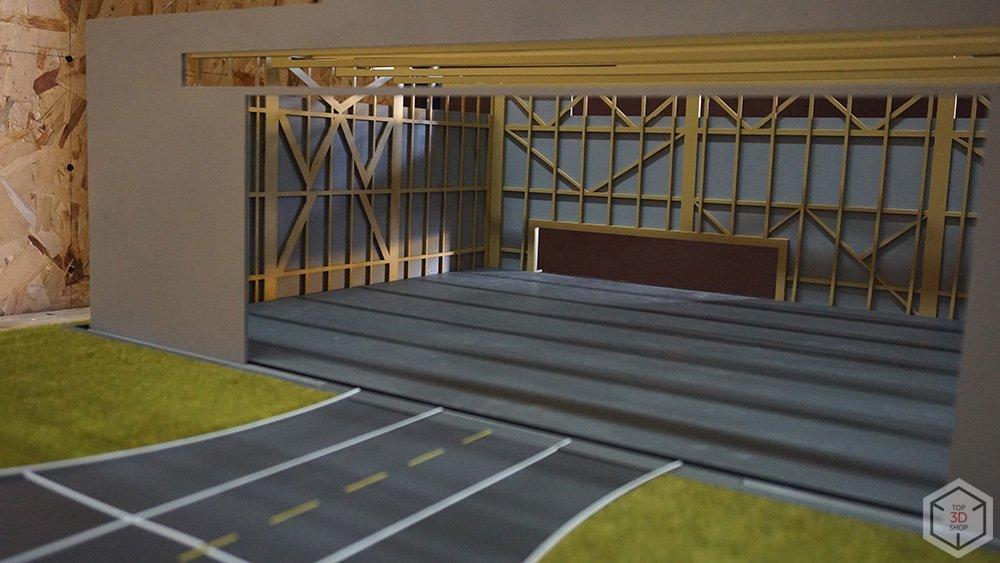
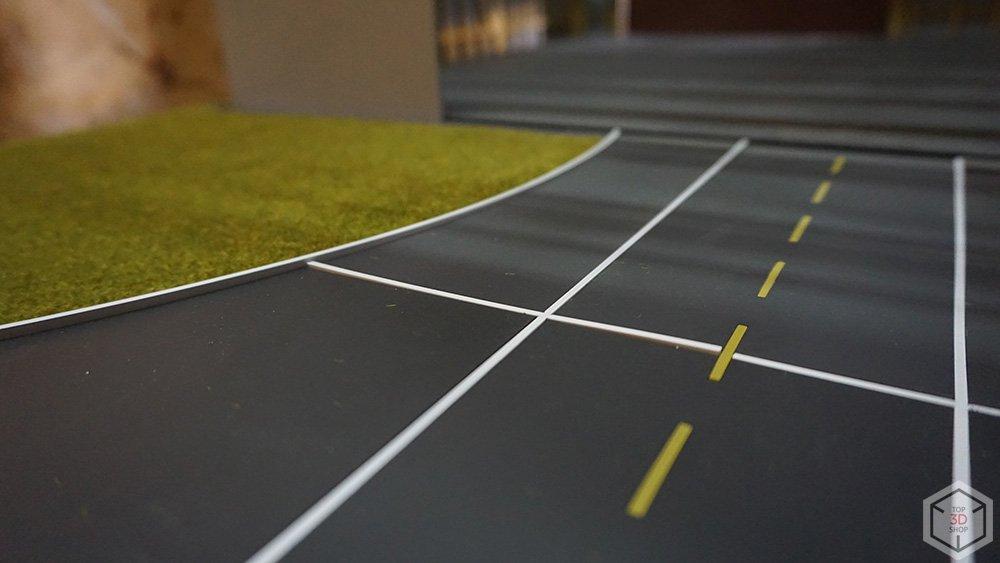
A host of fine details brings the model to life. Seams between the outer cladding sheets were engraved into the base material, as was the framing between window panes. We lined the taxiway with raised curbs, added metalwork above the sliding doors and positioned a number of small utility buildings inside the hangar itself.
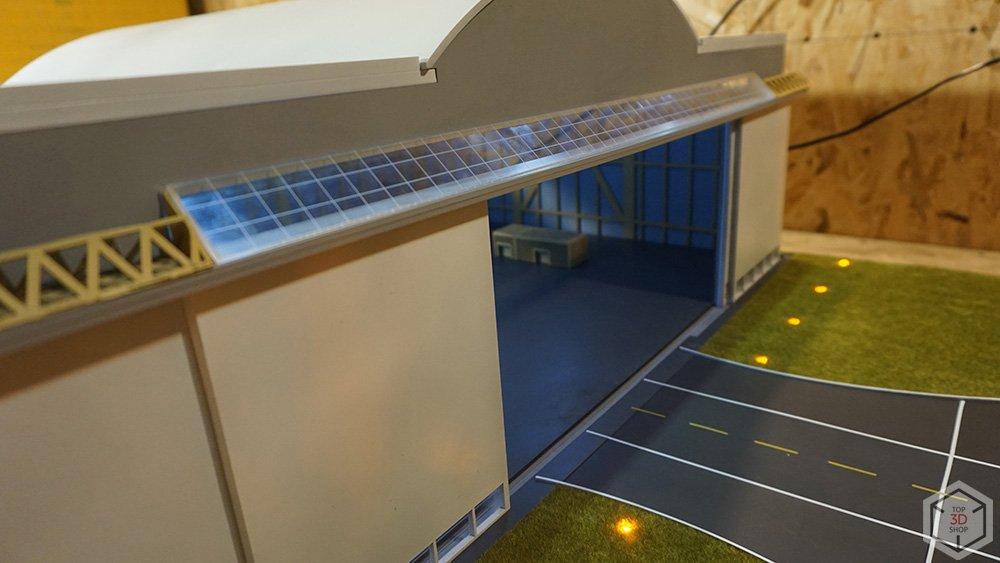
To imitate the polymer coating found on real hangar floors we applied a liquid rubber compound over an acrylic base. The result was a matte surface that feels like commercial linoleum to the touch. A set of LED uplights illuminate the front façade, completing the scene.
In the end the customer took delivery of a handsome model hangar (albeit with no real-world counterpart) and we added another success story to our portfolio of turnkey architectural model builds.
Top3DShop builds architectural models of any degree of complexity and detail. The cost for a model like the one featured here starts from $3000. The final price depends on project requirements, data provided by the customer, and deadlines.
If you’re a model maker we can provide all the equipment you need, including laser cutters and engravers, 3D printers and consumables.
Update your browser to view this website correctly. Update my browser now
Write a comment