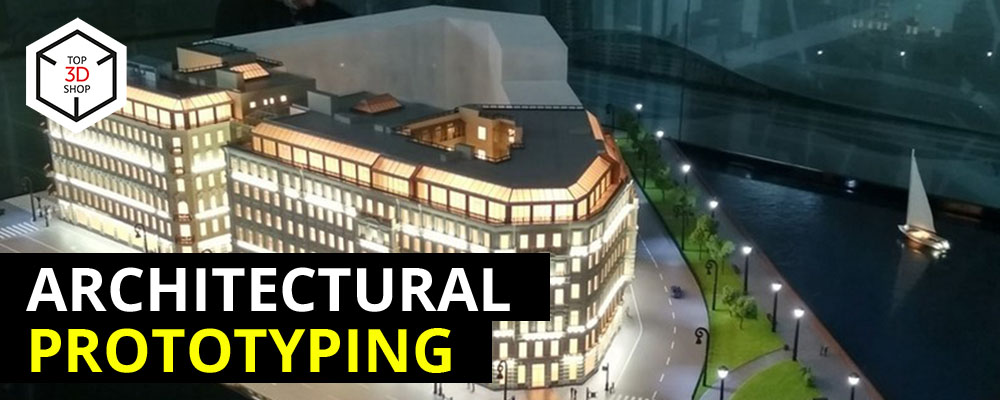
In this article, we show how we use 3D technologies to turn architectural projects into accurate physical scale models and share several real case studies.
Architectural prototyping with 3D technologies
Any construction project — from a large complex to a small country house — starts with drawings and a design concept. Even with full documentation, it’s not always easy to visualize the final result.
Architectural prototyping acts as project research in physical form. A scale model shows:
A physical model helps the project team quickly spot design flaws and weaknesses at an early stage.
How 3D technologies change architectural modeling
3D technologies have transformed architectural model-making. They make the process:
-
Faster
-
More convenient
-
More cost-effective
-
More accurate
Using CAD and 3D printing, we can:
-
Design a detailed digital model
-
Produce a precise physical prototype
-
Transfer those forms into full-size construction more easily
With 3D scanning, we work from existing buildings and elements:
-
Capture their geometry
-
Create accurate digital models
-
Build physical models at any scale
-
Combine existing structures with new design elements
Advantages over hand-made production
Time savings
The full technological cycle — concept, development, 3D printing, milling, engraving, painting, assembly, packaging — takes far fewer man-hours than manual model-building.
High quality and detail
Manual model-making is complex and slow. 3D technologies:
-
Replace much of the painstaking manual work with fast, precise digital production
-
Allow simultaneous production of many parts
-
Provide very high detail for small, complex elements
-
Improve dimensional accuracy and proportions between parts
Cost savings
3D printing reduces the amount of expensive manual labor, even for complex parts, and lowers the overall cost of the finished model.
Benefits of working with Top3DShop
|
Benefit
|
Example
|
|
Precision in replicating the original
Our engineers can:
-
Digitize an object with a 3D scanner
-
Create a 3D model that fully matches the original
-
Manufacture an accurate copy using high-precision technologies:
-
3D printing
-
CNC machining
We then paint and finish even the smallest details, so the model closely matches the real object.
|
|
|
Aesthetics and realism
We care not only about accuracy but also about how the model looks. Our artists:
-
Work on textures, colors, and finishes
-
Make sure the model looks realistic and visually appealing
You receive a technically precise and visually impressive result.
|
|
|
Consistent quality
High-quality work requires:
We stock European-made consumables that complement the work of our engineers, artists, and model-makers and help maintain a stable level of quality.
|
|
|
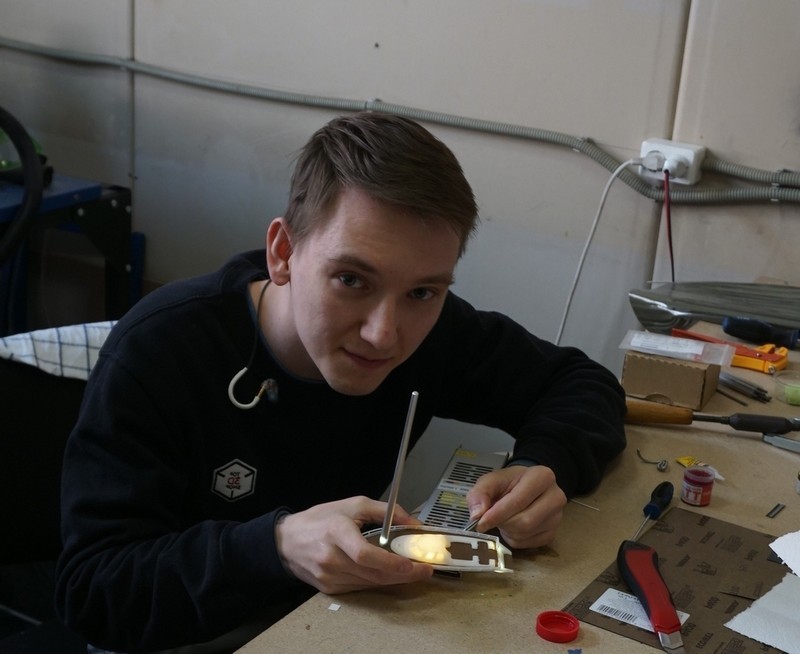
Interactive Effects: Motion and Lighting
Our electrical engineers can add:
Motion shows how elements work in reality. Lighting and interactive features:
|
|
|
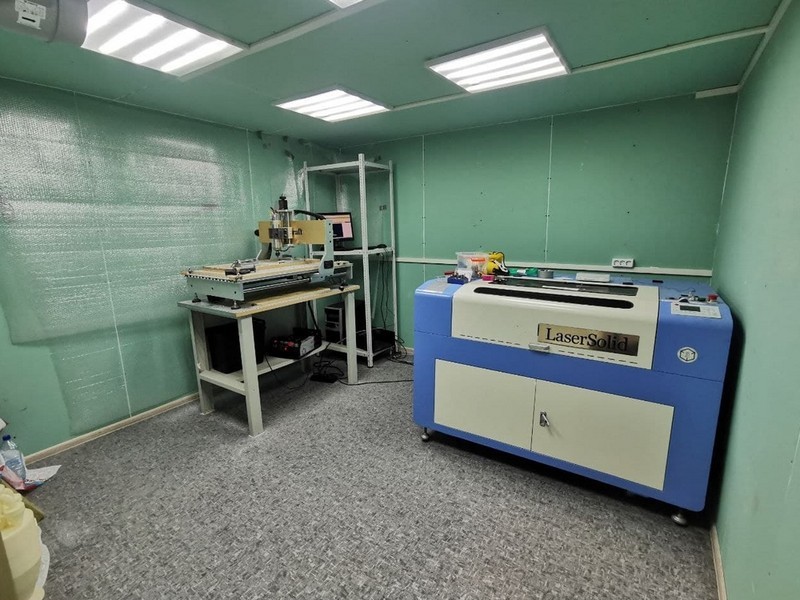
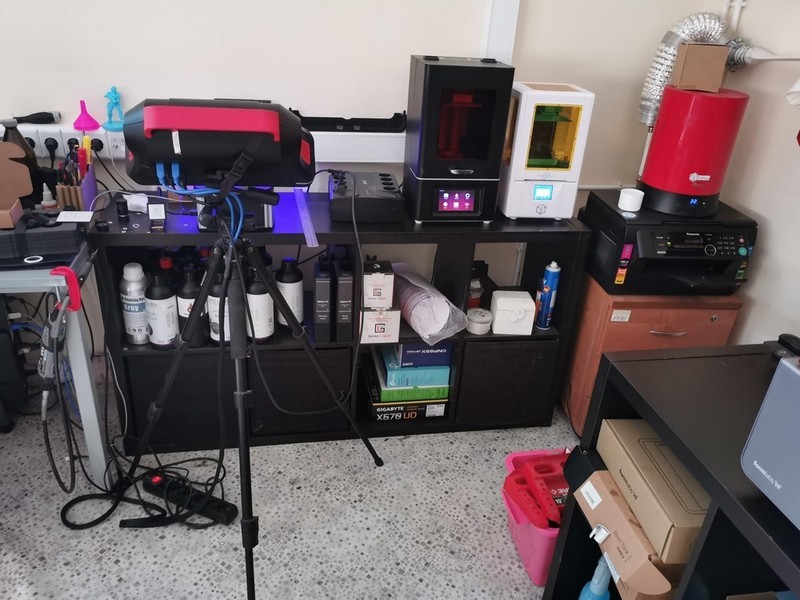
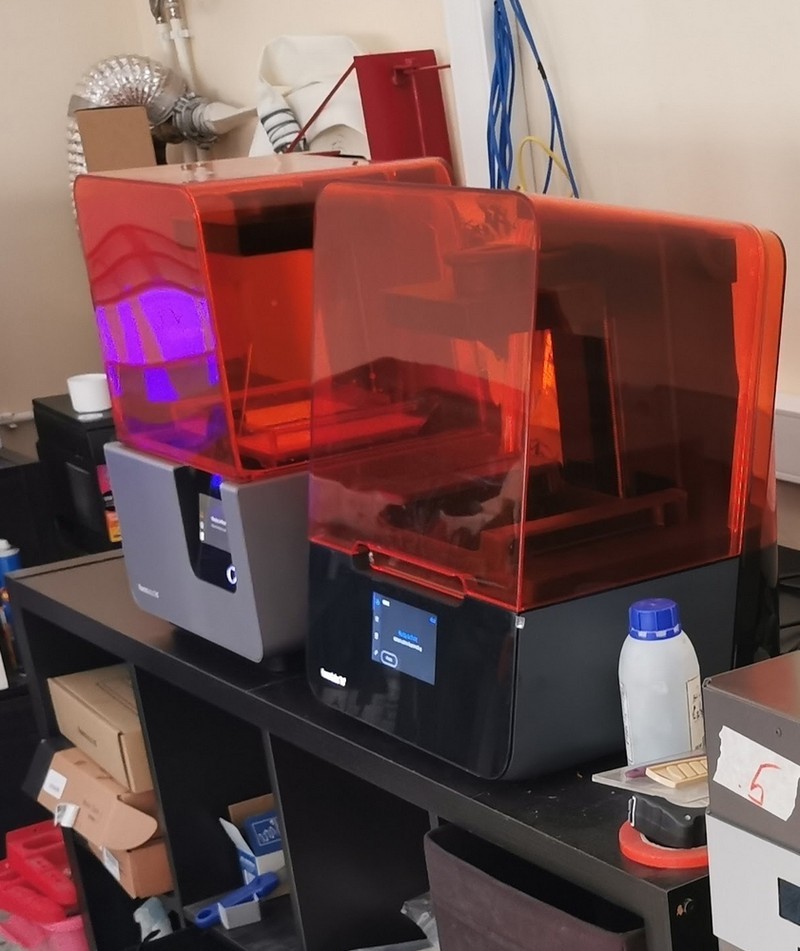
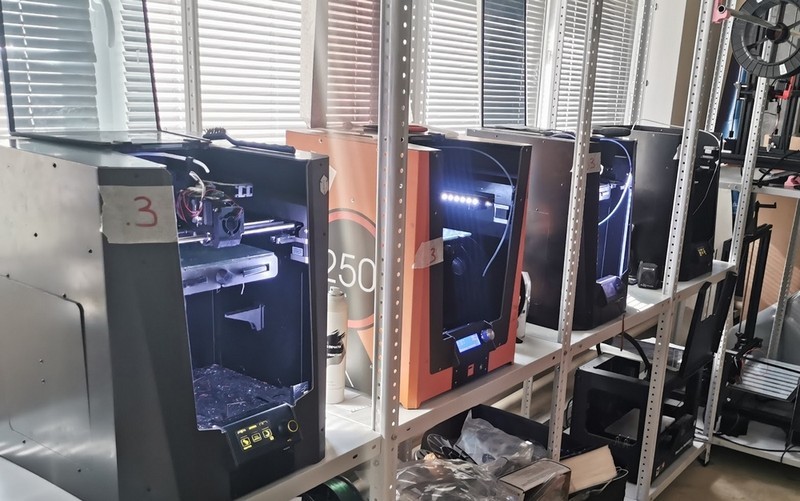
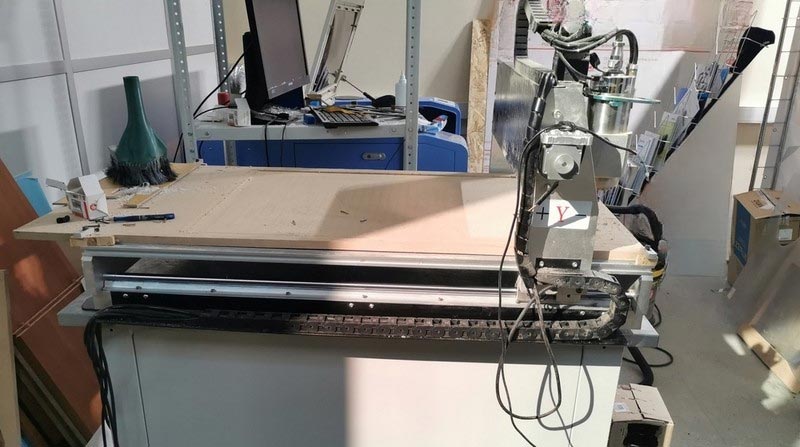
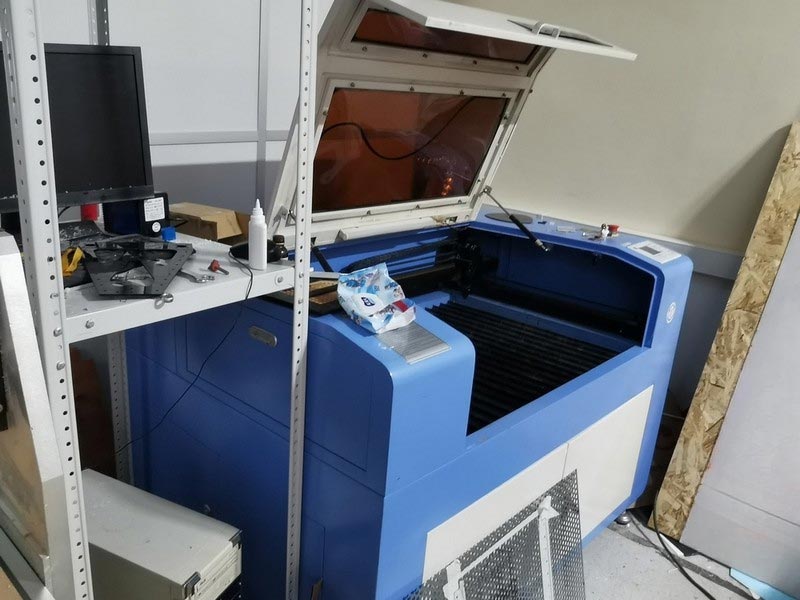
Full production cycle in our workshop
Our workshop includes:
-
3D scanners
-
3D printers
-
Laser machines
-
CNC machines
We handle the entire production cycle in-house. This reduces risks, shortens lead times, and gives better process control without depending on external contractors.
|
|
|
Personal project manager
For each project, we assign a dedicated specialist who:
-
Manages all stages of production
-
Coordinates communication
-
Answers questions
-
Keeps you informed on progress
|
|
How long does an architectural model project take?
Depending on complexity, production takes from a few days to several weeks. For urgent projects, our team can work around the clock to meet agreed deadlines.
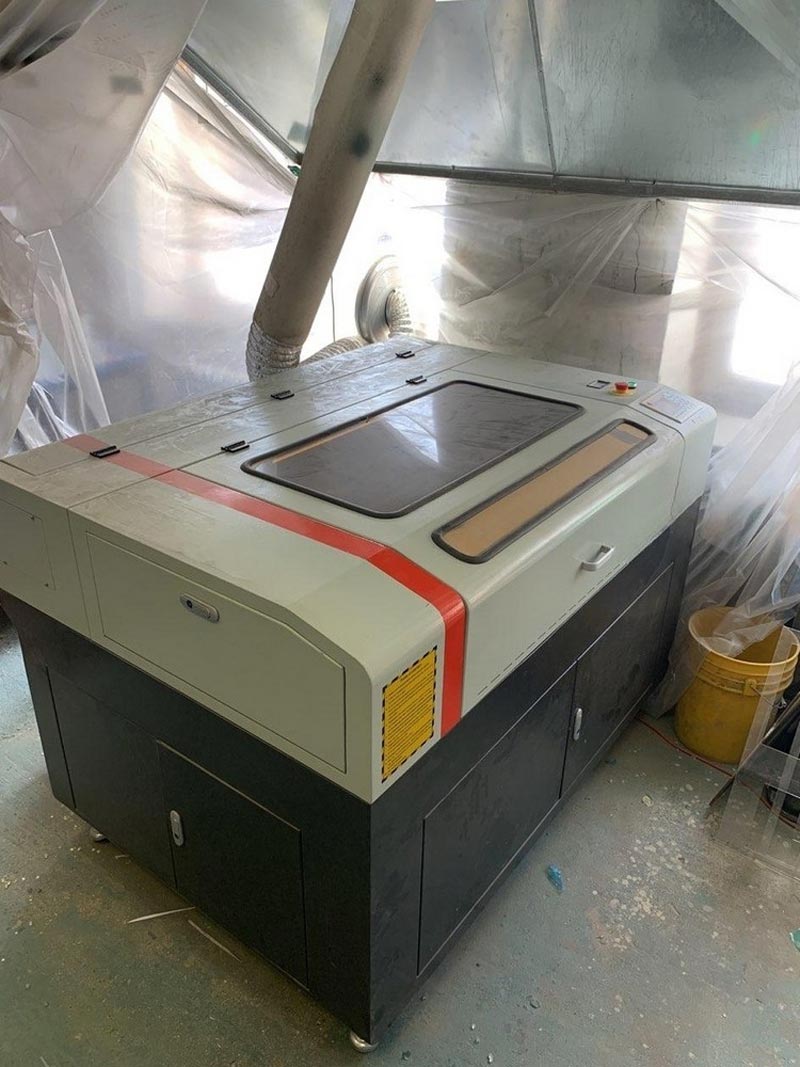
What equipment do we use to build scale models?
We use 3D scanners, 3D printers, CNC machines, and laser cutters.
3D scanners
-
Artec Eva;
-
Shining Einscan Pro HD;
-
Shining 3D Einscan HX;
-
ScanTech KSCAN20.
3D printers
-
Epitum 3D Printers;
-
Wanhao Duplicator 6 Plus;
-
Sinterit Lisa Pro;
-
Phrozen Shuffle;
-
Anycubic Photon S;
-
Formlabs Form 3;
-
Formlabs Form 2;
-
EOS M 280;
-
Concept Laser M2 Cusing;
-
Voxeljet VX 200;
-
Intamsys FUNMAT PRO;
-
3D Systems Projet 3500 HDMax;
-
Stratasys Fortus 450mc;
-
Stratasys Fortus 900mc;
-
Shining3D EP-P3850;
-
ZPrinter 510 Spectrum;
-
ProJet 3500 HD MAX;
-
Stratasys Objet 500 Connex 3;
-
EnvisionTEC Ultra 3SP;
-
AM3D 3D Printers.

CNC machines
We use CNC equipment for precise cutting and milling of plastics, metals, plywood, and other sheet materials.

Laser systems
Laser cutters, engravers, and markers handle:
Which technologies do we use in production?
We choose technologies based on scale, required detail, materials, and budget. Typical processes include:
-
Digitization — 3D scanning of physical objects
-
3D model development from drawings and documentation
-
Full project creation from the customer’s design concept
-
Model preparation and optimization for 3D printing
-
3D printing using:
-
FDM/FFF (filament) — Fused Deposition Modeling / Fused Filament Fabrication
-
SLS (polyamide) — Selective Laser Sintering
-
SLA/DLP/LCD (high-precision photopolymer) — Stereolithography / Digital Light Processing / Liquid Crystal Display (masked resin printing)
-
POLYJET (photopolymer) — PolyJet (photopolymer jetting technology)
-
MJM (multijet modeling) — MultiJet Modeling
-
CJP (full-color gypsum polymer) — ColorJet Printing
-
SLM (metal) — Selective Laser Melting
-
Engraving
-
CNC milling
What materials do we use for architectural models?
For architectural models we combine different materials:
-
3D printing filaments
-
Photopolymer resins
-
Wood and plywood
-
Paper and cardboard
-
Special composites
-
Metals
When needed, we add electrical and lighting components for interactivity and backlighting.
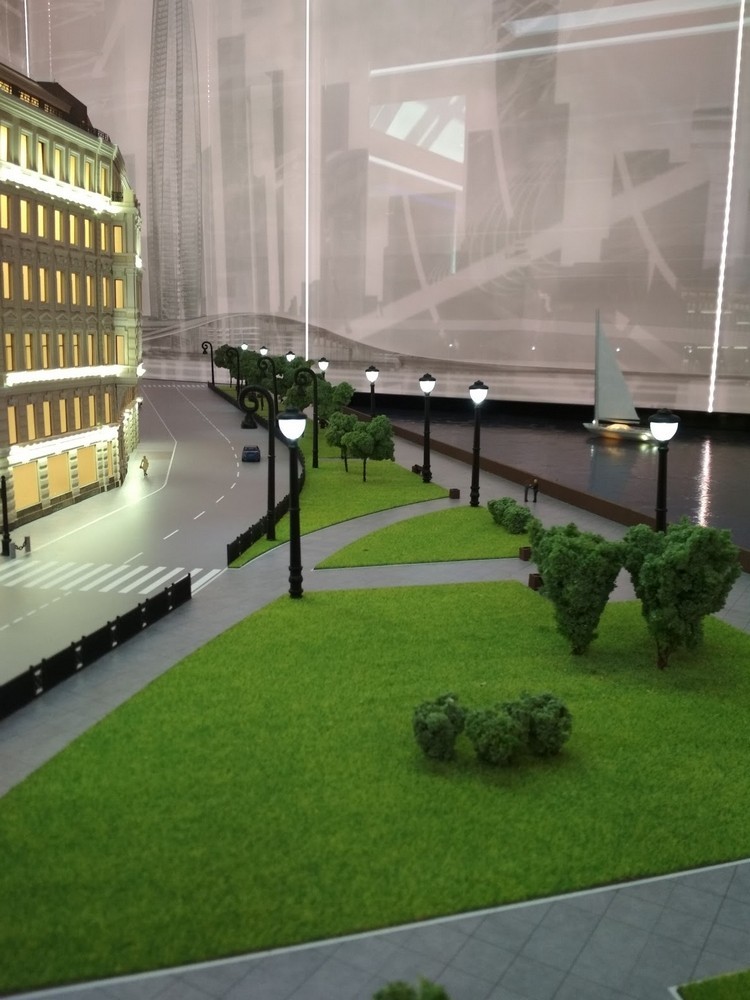
Top 3D Shop case studies
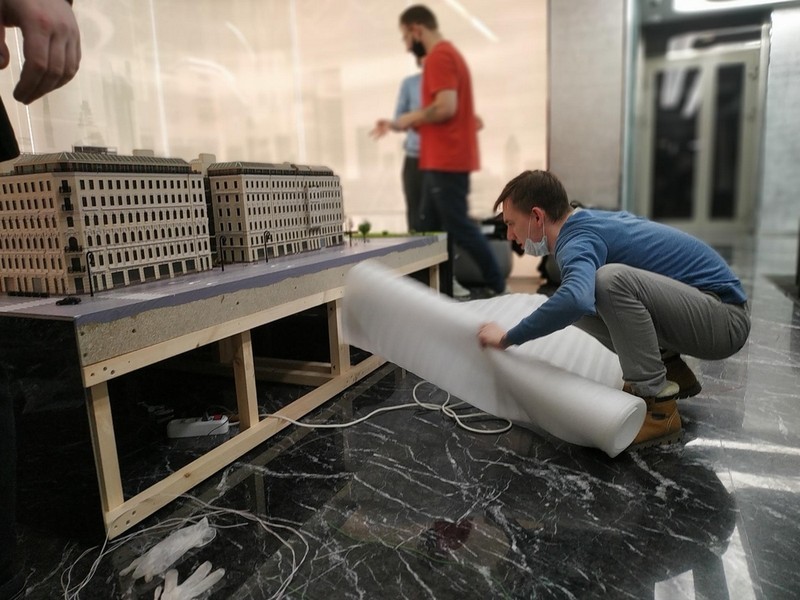
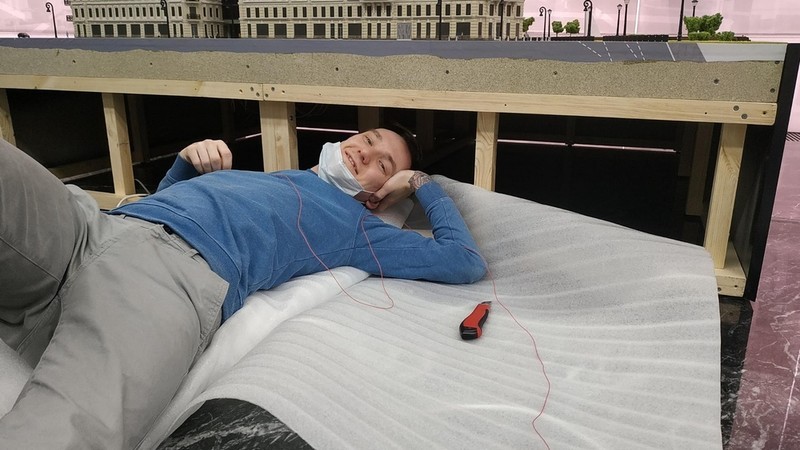
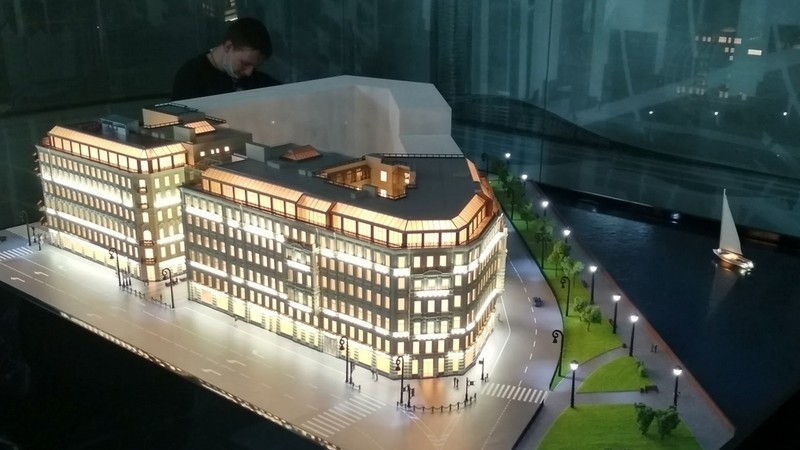
Model of a commercial building
Task
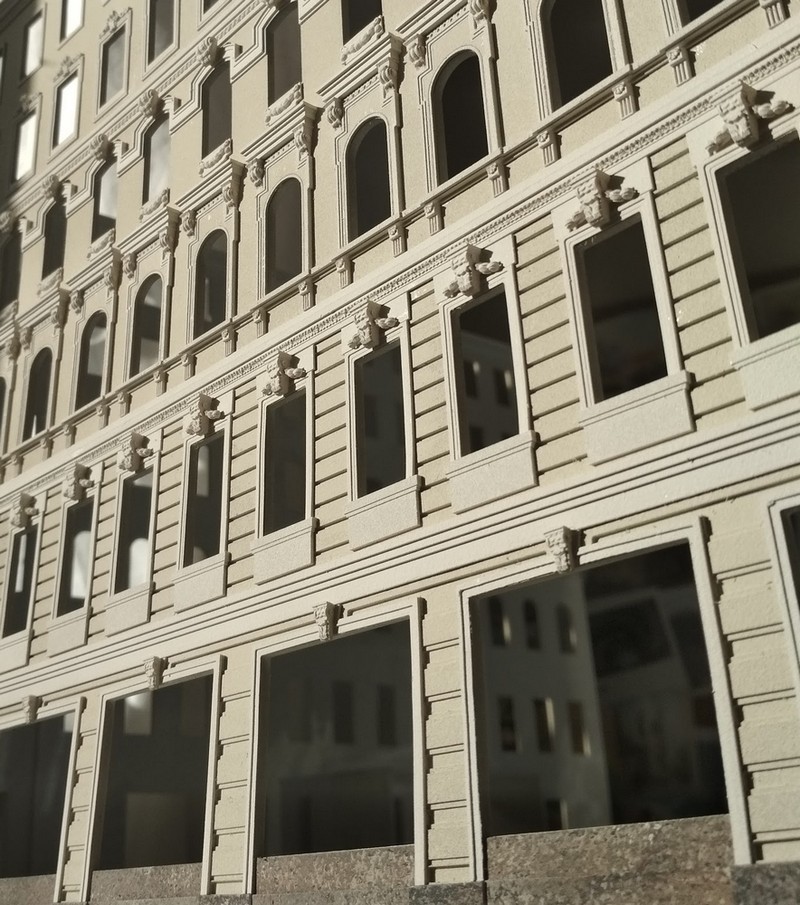
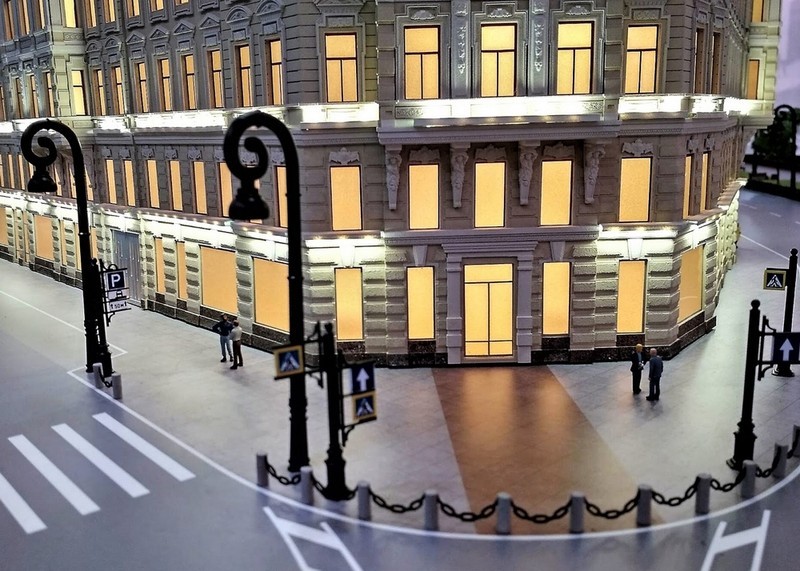
We needed to build an architectural model of a commercial building located in a complex of restored historic buildings. The facades featured:
-
Stucco decoration
-
Balconies
-
Bay windows
Several additional structures adjoined the main buildings, and we needed to show them too.
Solution
We first created conceptual models at different scales in SketchUp. Based on these, we:
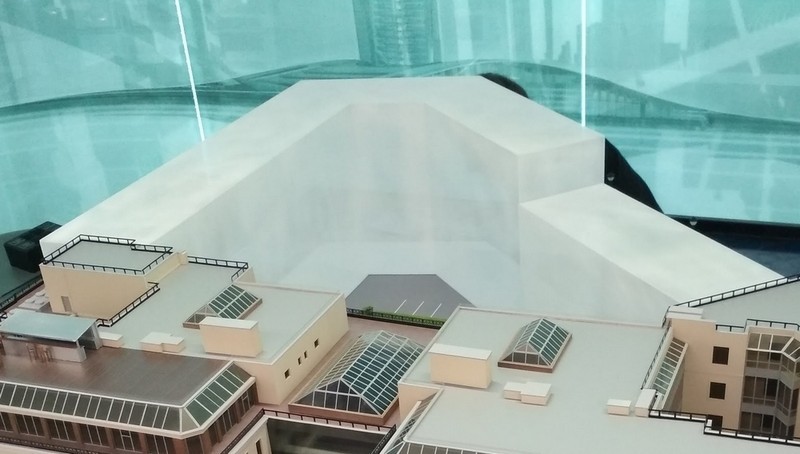
To focus attention on the main building, we showed adjacent buildings as simplified volumes without detailed facades.
After we agreed on the technical specification and studied the client’s documents, we found the first serious problem: missing information. The client had:
But we lacked:
To close these gaps, our team visited the site. We:
After that, we could proceed to production.
We decided to use 3D printing for elements requiring especially accurate sculptural detail:
-
Bas-reliefs
-
Mascarons
-
Volute brackets
-
Caryatids
There were about twenty such unique objects. Using photos and drawings, we built a 3D model for each of them.
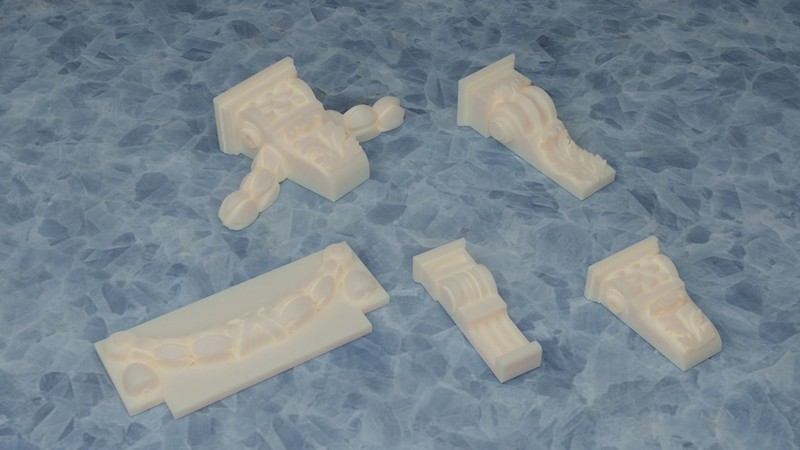
For other decorative details, we used CNC machining with small cutters (0.5 and 0.3 mm). Cutter/engravers allowed us to reproduce:
-
Fine patterns and ornaments on parts and cornices
-
Over 1000 decorative elements, not counting the cornices
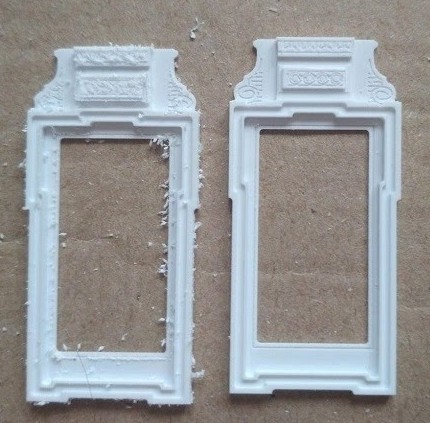
We cut and cleaned the wall bases and parts, then glued them with toluene, forming two main structures for the future model. The building has a complex shape with walls joined at different angles, so we:
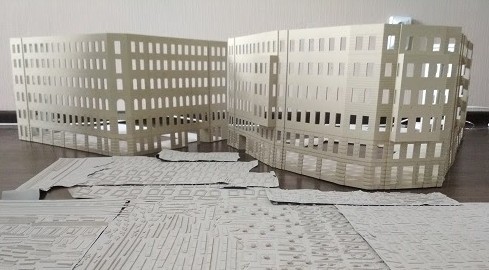
After assembly, we primed and painted the structures in the customer’s specified colors. Then we glued about 1500 decorative elements onto the facades.
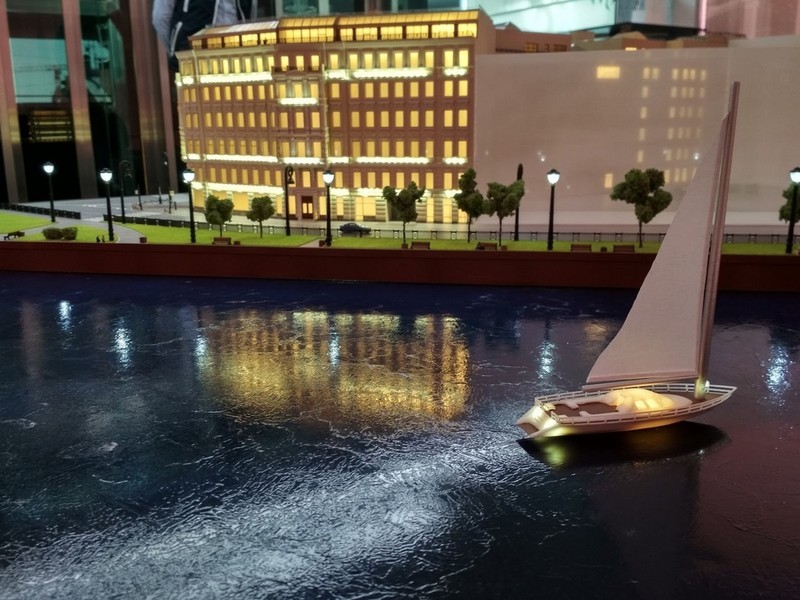
Historic city-center buildings usually have facade lighting, and this one was no exception. The real building has three rows of cornice lighting that we recreated on the model. We developed a system of enclosed bracket boxes and placed segments of LED strip inside — more than eighty segments in total. We closed the boxes with thin translucent plastic, which diffused the LEDs and produced uniform lighting.
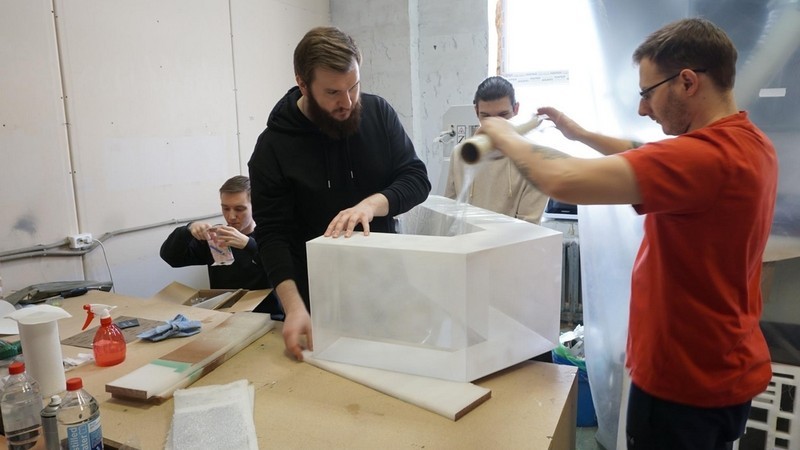
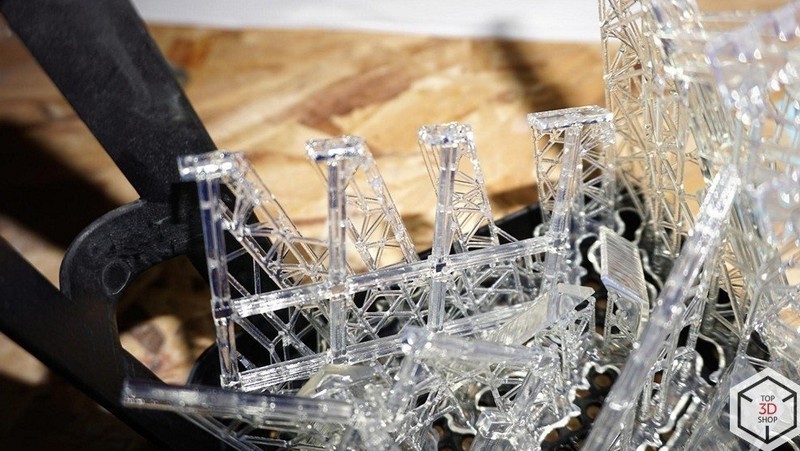
Equipment used
-
Formlabs Form 2 and Formlabs Form 3 SLA printers with Formlabs White Resin
-
Over 500 printed parts
-
CNC machines for most plastic decorative elements
-
Epitum 3D printer for mounts and housing of electronic components and the control box
-
Laser engraver for flat parts
Dimensions
Total size of the model (building plus adjacent territory): 1800 × 2200 × 1300 mm
Production time
We planned up to two months for manufacturing and installation and reserved a three-month deadline as a buffer.
Restrictions related to the coronavirus epidemic slowed production, so the project finished exactly on the full three-month schedule, without the early completion we initially expected.
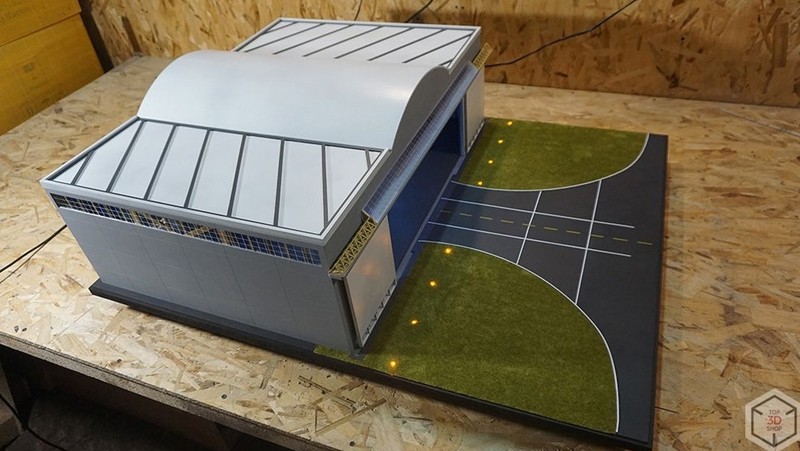
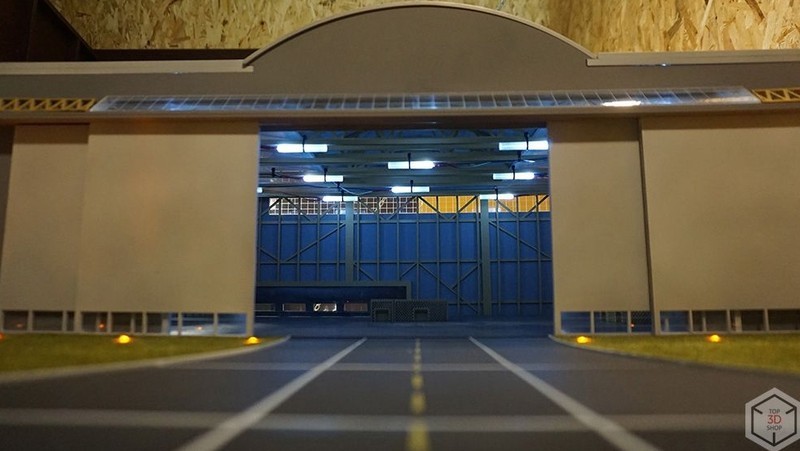
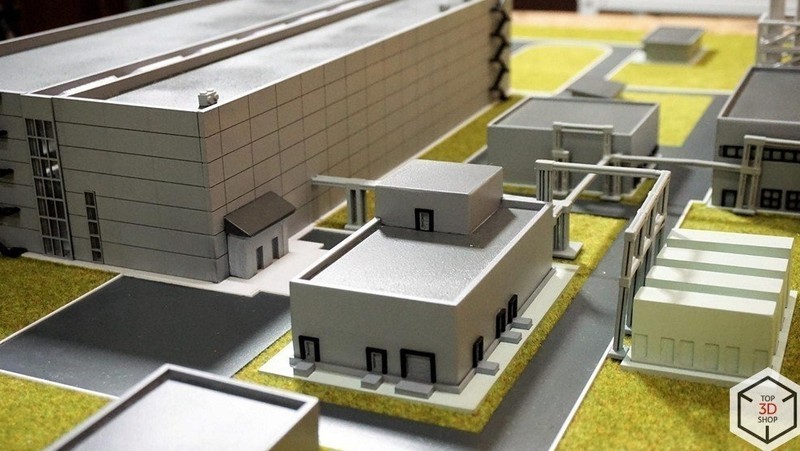
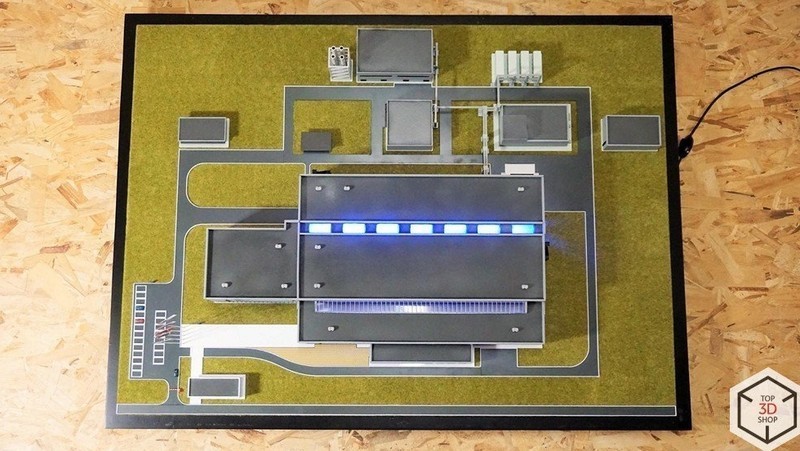
Scale Model of a Boeing 747 Hangar
Task
The client requested a model of an aircraft hangar from scratch — without a real prototype or technical documentation. We needed to design the hangar first and then build the model.
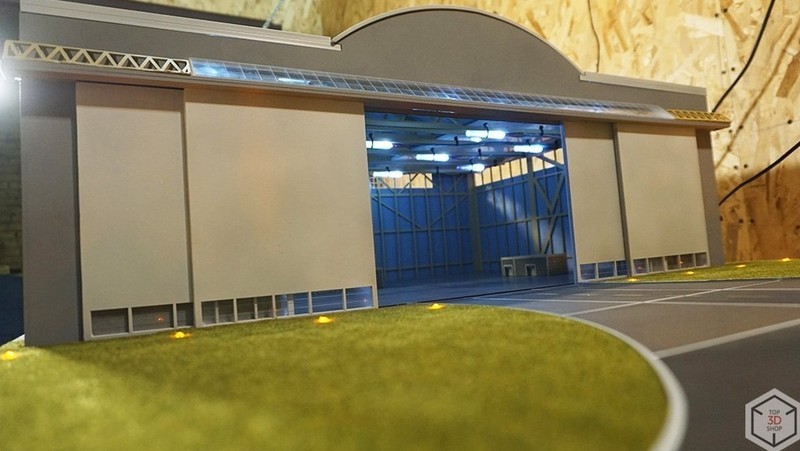
Solution
While real hangars are usually simple frame structures, we created a more visually interesting design using:
-
A flat roof with a central arched insert
-
Geometric surface patterns and panel seams
-
Engraved window sashes
-
Embossed taxiway curbs
-
Detailed metal structures and small technical buildings
We used liquid rubber for the hangar floor to imitate a real polymer coating.
The main building unit is a plate with slots for glazing. We installed LED lighting to replicate typical hangar lighting schemes. The model allows the client to place an aircraft model:
-
Inside the hangar
-
In the gate opening
-
Outside on the apron
Dimensions
Equipment used
We used:
-
FDM 3D printers
-
Resin 3D printers
-
CNC machines
Production time
Total production time: about 1.5 months.
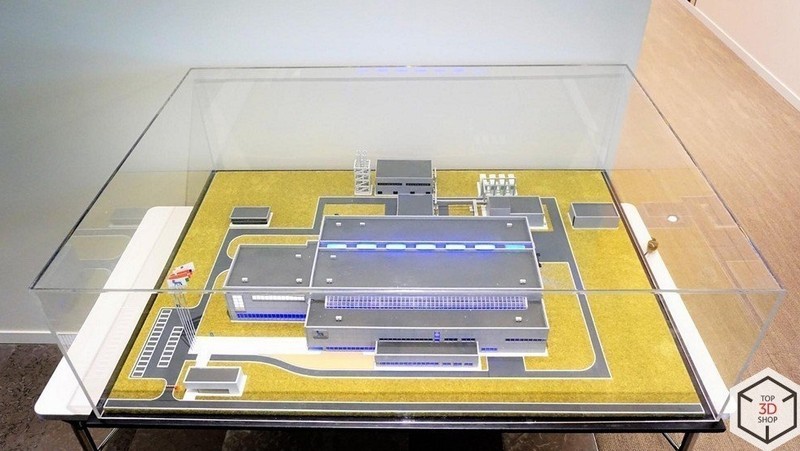
Scale Model of the Novo Nordisk building
Task
The client provided:
-
Renders of buildings, structures, and frameworks
-
General territory plan
-
Several photos of the real site
We could not obtain the original 3D models used to create the renders. This did not cause problems, because for physical mockups it’s often easier to build our own digital models from scratch.
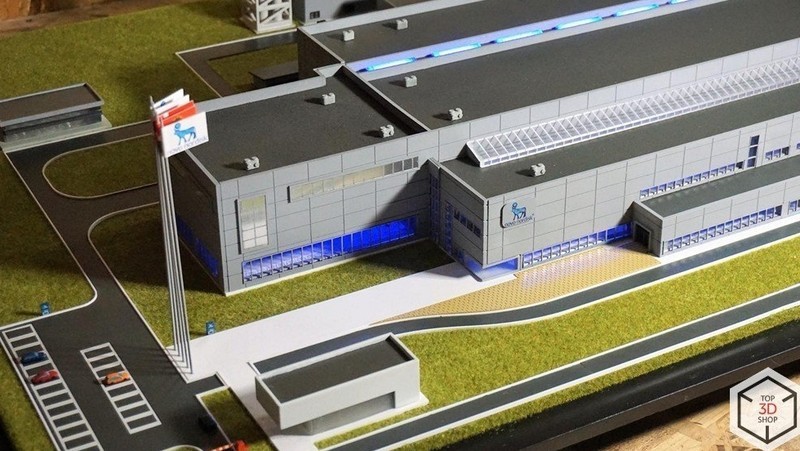
Solution
We:
We worked with:
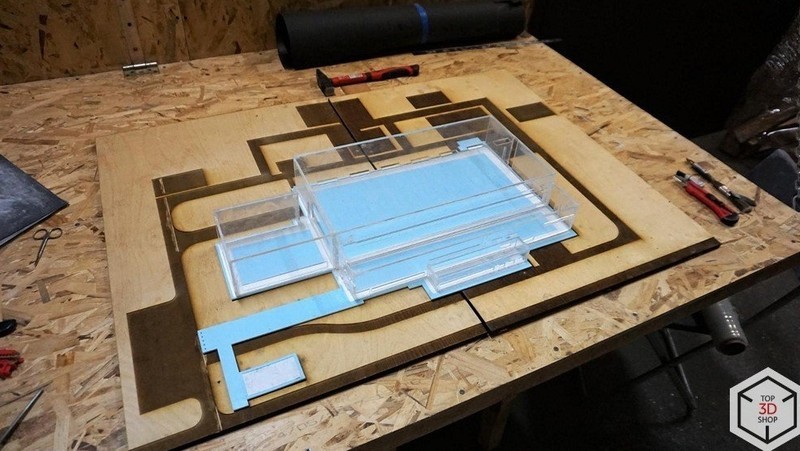
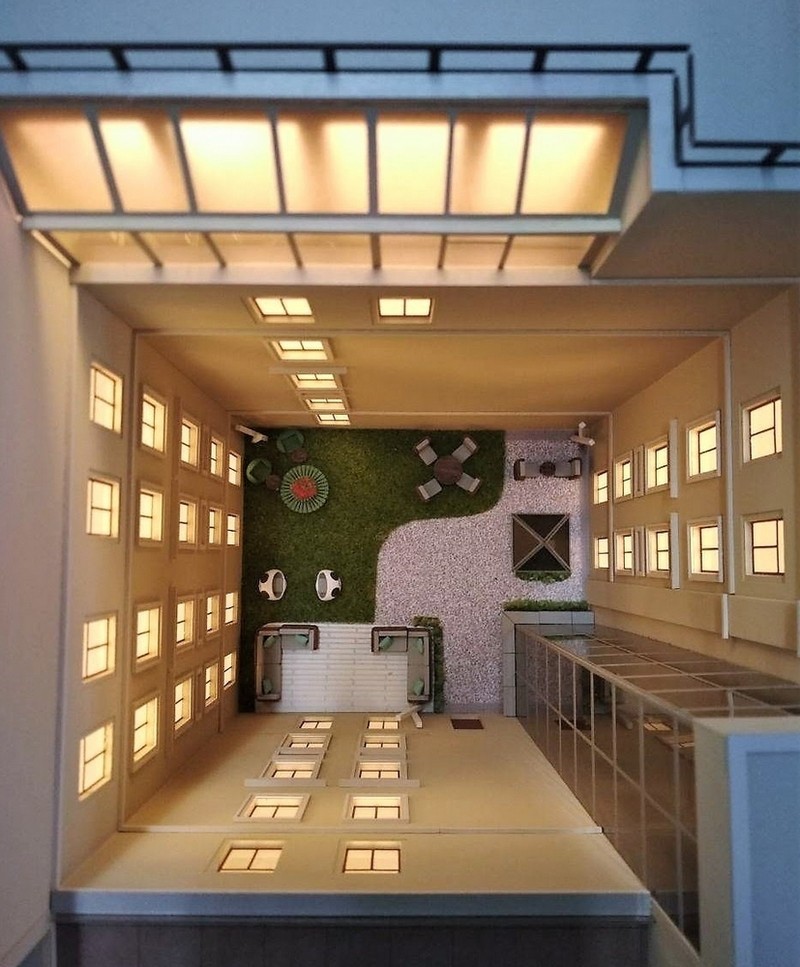
Next, we created the territory model, including:
-
Pathways
-
Building foundations
-
Parking lots
-
Curbs
We engraved these elements 1 mm deep into 9 mm plywood.
We printed the remaining parts using FDM and SLA technologies. For cladding, we used 3 mm acrylic.
After assembly, we:
-
Putty-filled and primed the model
-
Painted it in the specified colors
-
Applied a matte varnish
-
Routed lighting wires through the base
Dimensions
One of the client’s requirements: the model had to fit within 1 m².
Equipment used
Summary
Fast, cost-effective visualization gives construction companies a powerful tool: you can prototype almost any object — from small architectural forms or individual structures to large buildings and full site developments. We create accurate, detailed models of architectural projects for:
- Design and planning
- Presentations to investors and customers
- Display in lobbies and conference rooms
- Marketing materials, photo and video shoots
- Exhibitions and conferences
If you want to build such physical models in-house at any stage — from concept to ready-to-build documentation — buy 3D printers, buy 3D scanners, and buy laser engravers from Top3DShop; our team of experts will help you choose the right equipment, configure a complete workflow, and support you from setup to production.

Write a comment