[CASE STUDY] 3D printing in Erarta museum of contemporary art
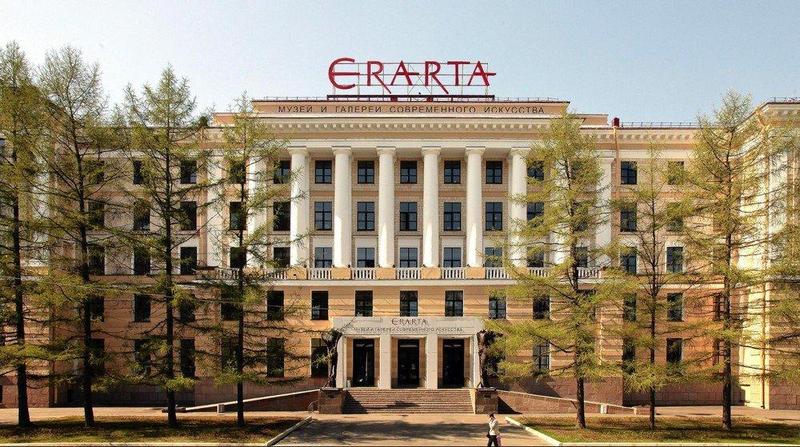
Located on Vasilevskiy Island in St. Petersburg, Russia, Erarta is one of the most famous museums of contemporary art in the country..jpg)
Welcome to another installment in a series of articles exploring how our customers are using 3D printing technology. Previously we shared the story about how we created a replica of the Worker and Kolkhoz Woman for the European Parliament history museum and an enormous Martian machine gun for an exhibition in Los Angeles, as well as how sculptor Dmitry Kavarga put 3D printing to work at the cutting edge of contemporary art.
In this issue we share the story of how 3D printing is employed in the Erarta museum of contemporary art. We interview Alexander Arkhipenko, manager of the Erarta design workshop, and Yan Dubravtsev, architect and design workshop employee.
What this is all about
Located on Vasilevskiy Island in St. Petersburg, Russia, Erarta is one of the most famous museums of contemporary art in the country.
This is the story of how the museum got involved in the world of 3D printing.
How they chose their printer
The museum workshop needed a printer produced by a recognized European manufacturer with a proven reputation for quality. A key requirement was that it should be able to print with two materials simultaneously, since the intricate models they were planning to build would require soluble support structures.
After a brief search and some consultation with our team, they decided on the Dutch-made Ultimaker 3 Extended.
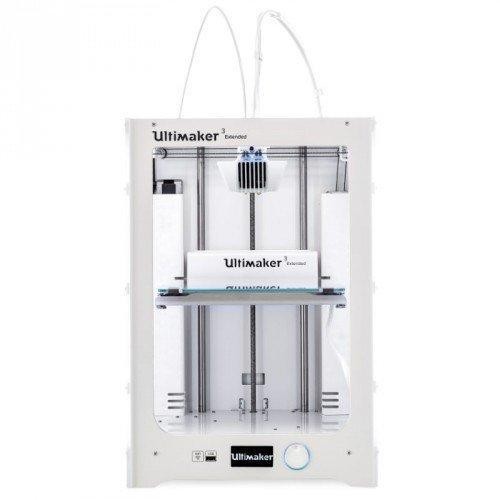
- Print technology: FDM
- Extrusion: dual extrusion
- Build plate leveling: automatic
- Weight: 11.3 kg
- Dimensions: 342mm x 505mm x 688mm
- Build volume: 215mm x 215mm x 300mm in single extruder mode, 197mm x 215mm x 300mm in twin extrusion mode.
- Nozzle: 0.4 mm standard, 0.8 mm optional.
- Layer resolution: 200 - 20 μm
- Build plate temperature: up to 100 ˚C, 4 minute warm-up time
- Nozzle temperature: 180-280 ˚C, 2 minute warm-up time
- Print head travel speed: 30-300 mm/s
- Build speed: up to 16 mm³/s (with 0.4 mm nozzle)
- XYZ: 12.5 - 12.5 - 2.5 μm
- Noise level: 50 dB
- Filament diameter: 2.85 mm
- Print materials: Nylon, PLA, ABS, CPE, CPE+, PVA, PC, TPU 95A, PP
- Price: 349 000 rubles
The Ultimaker 3 Extended is essentially the same as the Ultimaker 3 but with a larger build volume of 215mm x 215mm x 300mm when printing with one nozzle and 197mm x 215mm x 300mm with both nozzles in operation.
Incidentally, we’re currently offering a gift package comprising eight spools of REC plastic modeling filament, two spools of support filament and a can of print platform adhesive spray in addition to the usual free delivery and training for all customers purchasing the Ultimaker 3 Extended from Top 3D Shop.
What they’re using it for
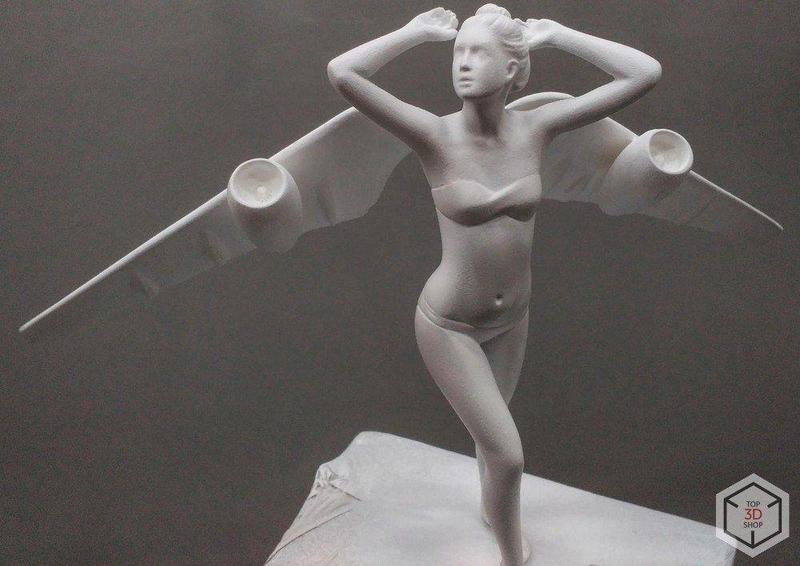
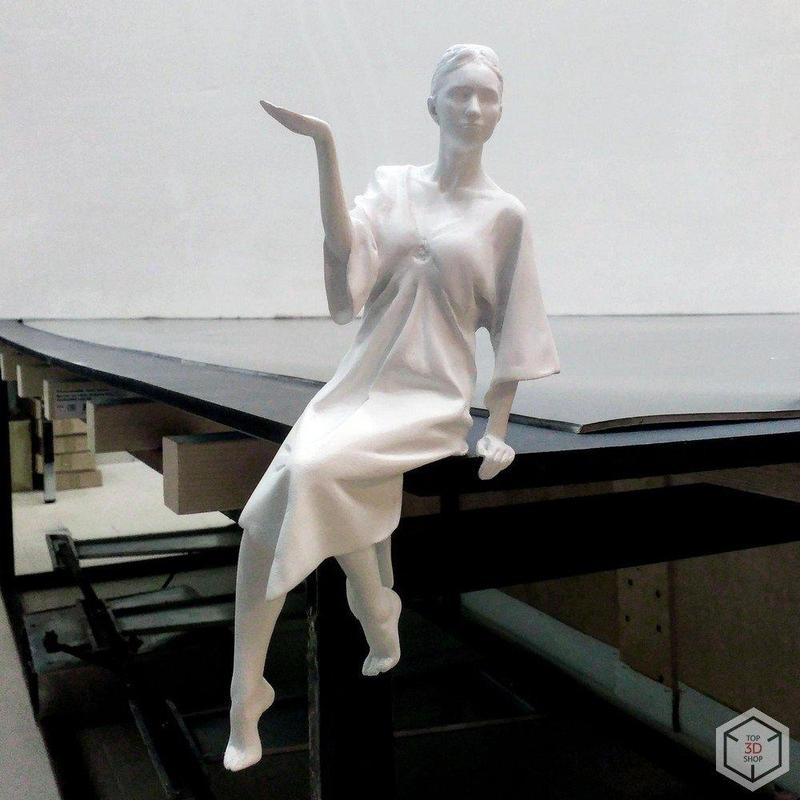
Erarta acquired their printer for manufacturing miniature souvenir copies of sculptures on display in the museum.
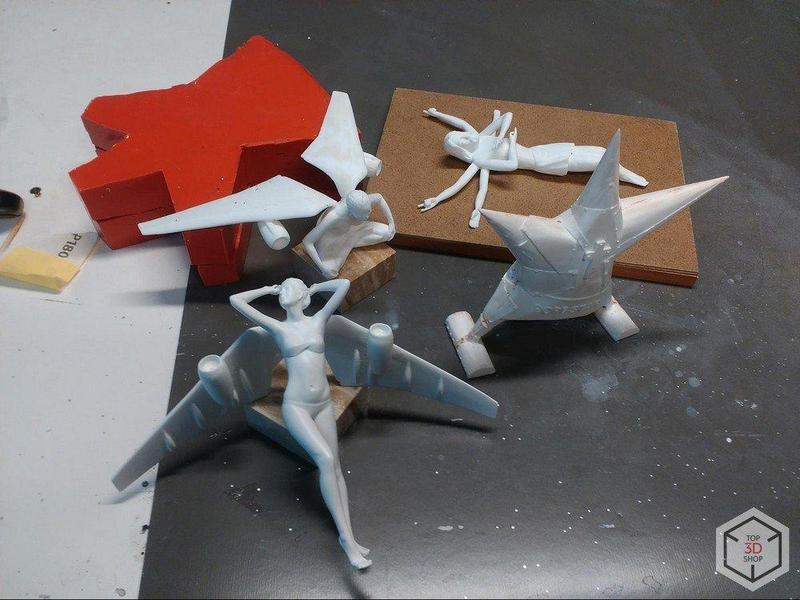
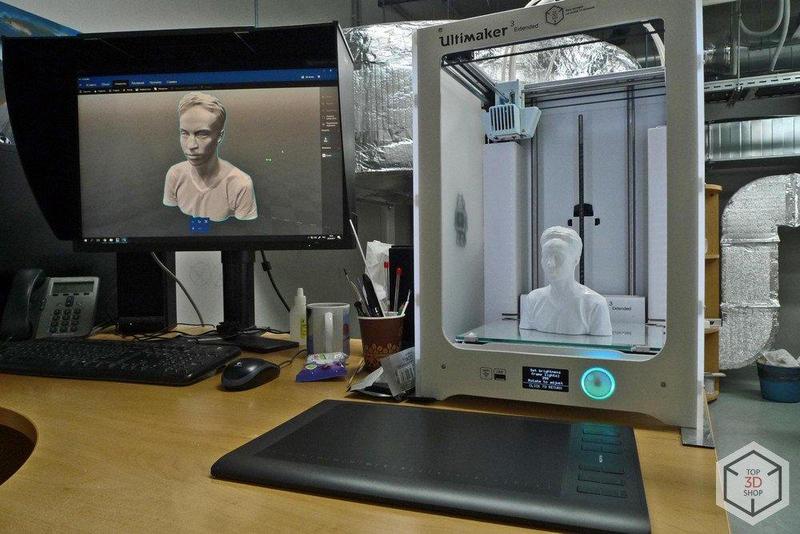
“We bought the printer so that we could set up our own souvenir production in the Erarta design workshop. Our first test pieces were scale models of sculptures in the museum collection. First we digitized the original pieces with a handheld scanner and used the resulting 3D models to print master copies. We then used those masters to create molds from which we cast a series of souvenir models in polymer. We can also produce portrait sculptures to order. We hope the printer will last us a long time.”
How it used to be done
Before 3D scanning and printing, master copies for casting had to be hand-modeled by a sculptor, with absolutely no guarantee that the copy would accurately match the proportions and details of the original.
How things have changed
Creating scale copies of sculptures with a 3D printer is a breeze, and, most importantly, the resulting models are guaranteed to precisely match the proportions of the original. You can scan and print a modest-sized collection in the time it would previously have taken to create a single copy by hand.
The user experience:
“This is our first time working with this kind of technology. We never had a 3D printer before so we can’t draw any informed comparisons, but we’ll gladly share our overall impressions.”
The good bits
- We like the self-leveling print platform a lot.
- The Cura printing software works great with the printer.
- Easy to change filaments and clean extruders.
- No reliability issues in 8 months of constant use.
- Biggest plus of all - it’s economical on filament while maintaining high print quality.
- The printing filament is inexpensive, and easy and safe to use.
“We were really pleased with how easy it was to master the settings, and the print quality is good for the price. Despite no prior experience, we were able to figure everything out for ourselves.”
The bad bits
- We couldn’t get the automatic platform leveling to work right away, and we had to do the first leveling manually.
- Filaments from different manufacturers all have different properties and there isn’t always a suitable preset in Cura, so we lose time and materials doing test prints.
- Good quality prints take a lot of time, the models pictured here took from 8 to 16 hours to print.
- Temperature fluctuations from changes in ambient temperature in the room or from drafts can result in poor support adhesion and lead to a ruined print. For best results the printer needs to be in a room with constant temperature and no airflow.
- The points where the support material attaches to the printed model have to be cleaned up after printing.

![[CASE]: How We Created the Model of Novo Nordisk Building](https://top3dshop.com/image/cache/catalog/blog/how_we_3d_printing_a_model_building/04-494x216.jpg)
![[CASE] 3D Printing in Architecture by the Example of Setl-City](https://top3dshop.com/image/cache/catalog/blog/3d_printing_in_architecture/05-494x216.jpg)

![[CASE STUDY] Kreotech: Robots, 3D Printers and CNC Centers in Electronics Production](https://top3dshop.com/image/cache/catalog/blog/review_1/kreotech_production_case_study/image_12-494x216.jpg)
![[CASE STUDY] 3D Tech in Architectural Prototyping](https://top3dshop.com/image/cache/catalog/blog/review_2/3d_tech_in_architectural_prototyping/image_39-494x216.jpg)
![[CASE STUDY] Agricultural 3D Printing, VIM Center](https://top3dshop.com/image/cache/catalog/blog/review_2/agricultural_3d_printing/image_37-494x216.jpg)
![[CASE STUDY] Metal 3D Printing in Dental Industry: HBD SLM 3D Printers](https://top3dshop.com/image/cache/catalog/blog/review_3/hbd_dental_case_study/image_01-494x216.jpg)
Write a comment