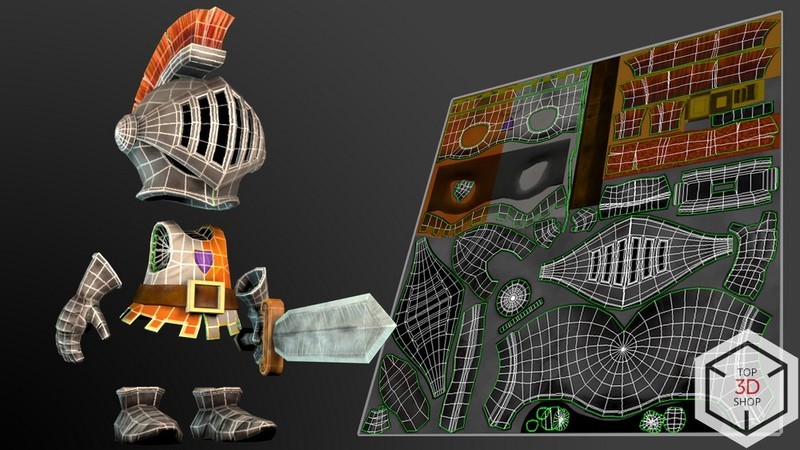
In this article, we describe how we digitized original masks for the Art of the Mask virtual exhibition, which equipment we used, which difficulties we faced, and how we solved them.
The Art of the Mask is a virtual exhibition launched during an international book culture fair.
The event description says: “The mask is one of the most mysterious cultural phenomena and an immensely appealing garment, partly due to its playful potential. Dealing predominantly with the upper half of a face, a mask comes into play with identity, making it invariably attractive for experimentation among artists and designers."
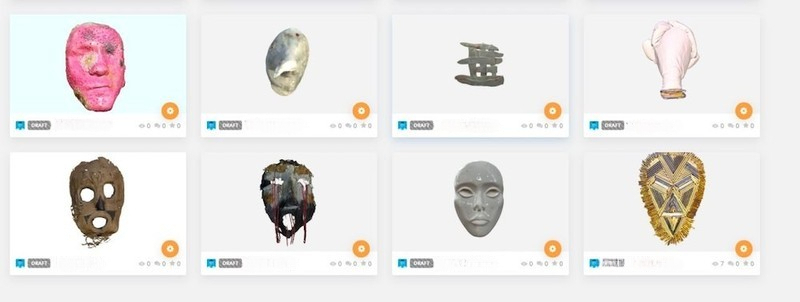
For the online exhibition, the organizers collected and scanned 34 masks created in very different materials and techniques. The project offers a unique immersive experience: users interact with 3D models of the masks in a special virtual environment, accompanied by atmospheric music.
The exhibition organizers came to us with an unusual request. They did not want to show only photos of the masks. Their concept required full 3D models on the website so that users could:
Rotate each mask
Examine it from different angles
Zoom in on details
View the overall shape and silhouette
Only this approach could fully reveal each unique work.
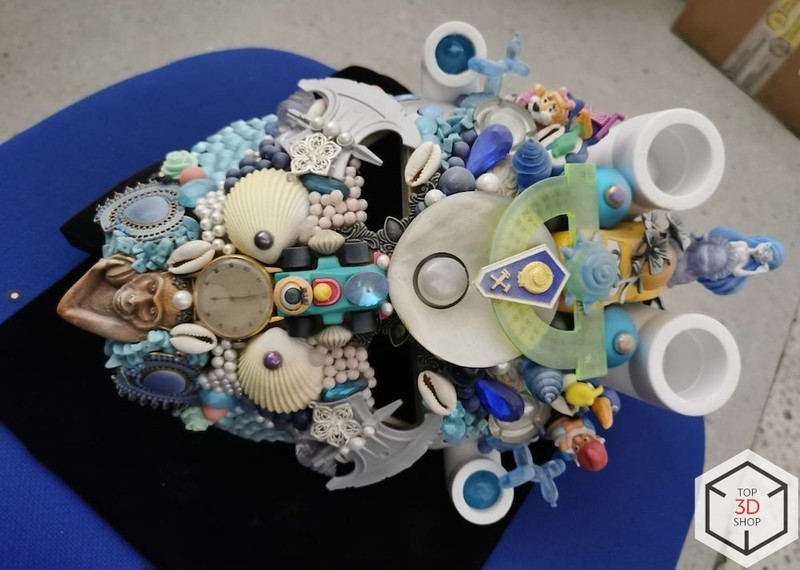
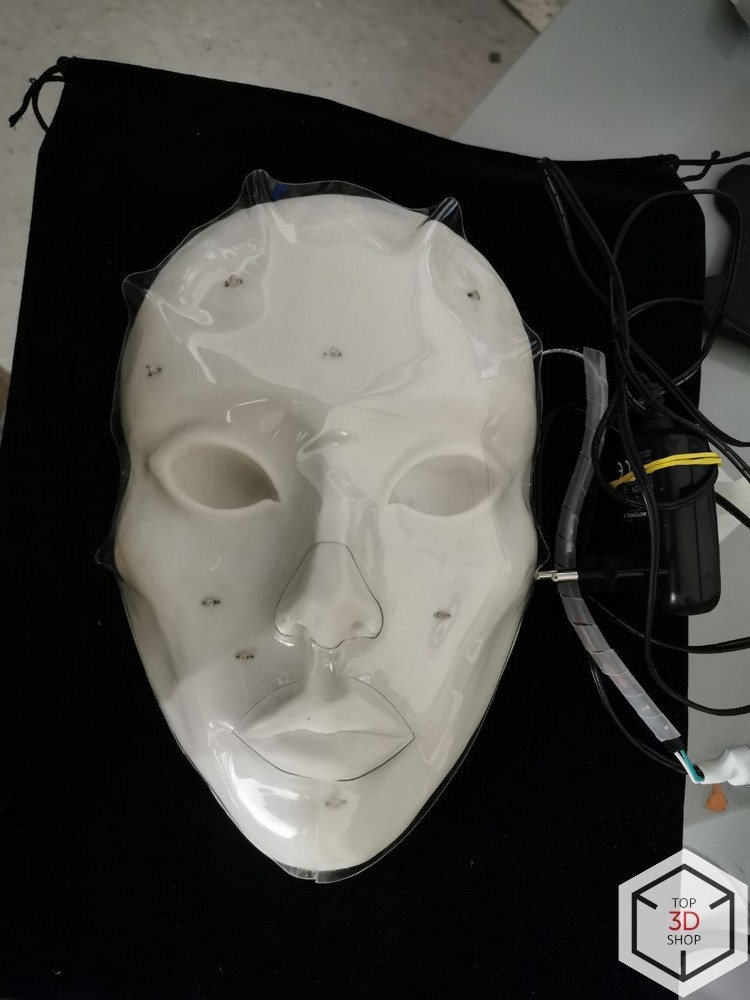
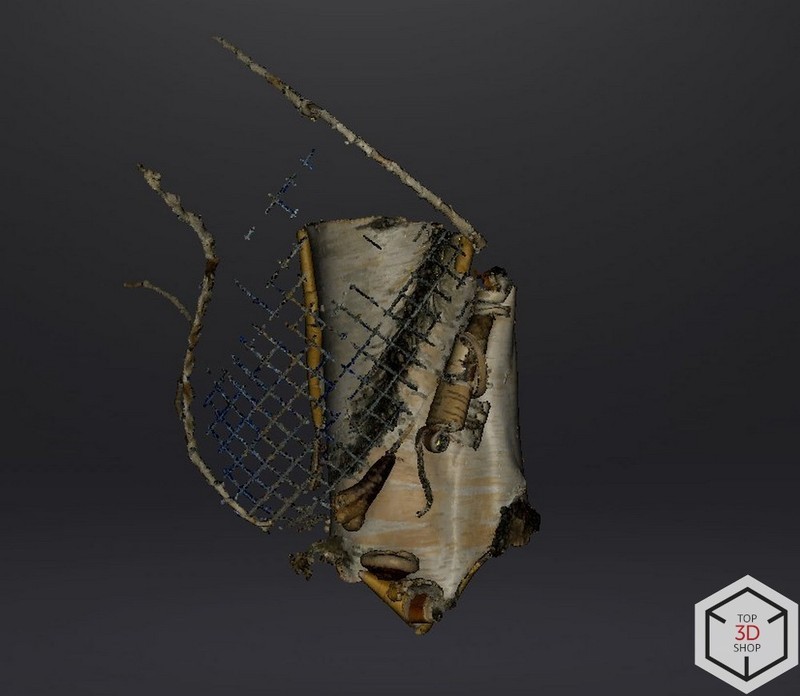
Below is the "Ocean" mask before 3D scanning
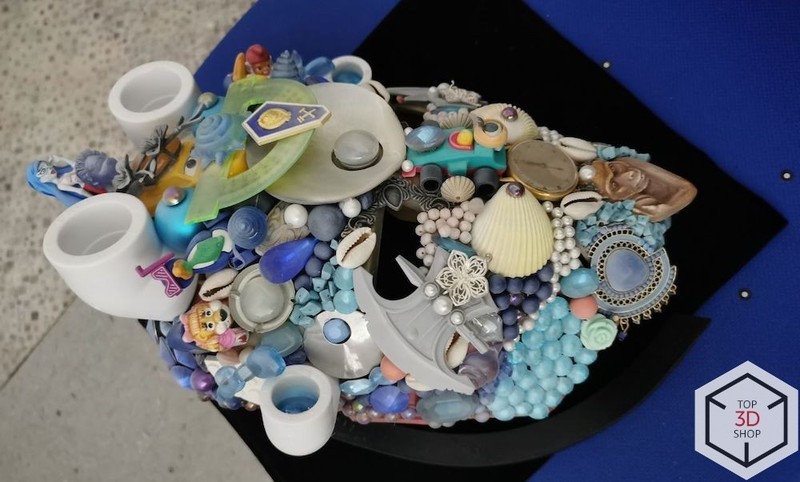
According to the client, this project was unique for them. Previously, all exhibitions took place offline. Because of the pandemic and closure of exhibition spaces, the team decided to move the event online. At the same time, they wanted to preserve the feeling of a 360° view, as if a visitor walked around each exhibit in person.
The customer considered two options:
Shoot 360° videos
Create interactive 3D models
3D models looked more difficult and time-consuming, but also more effective and flexible for the exhibition.
From a technical point of view, the client needed:
3D models with full textures and materials
A format that allows upload to an online 3D viewing server
Real-time viewing in a browser without special software installation
At first, Top3DShop specialists planned to model most of the masks manually and use 3D scanning only for objects with the most complex geometry.
However, our existing 3D scanners allowed us to capture about 80% of the geometry directly by scanning, which was enough to build the final 3D models with much less manual work.
The project started with several challenges:
Tight deadlines. Masks arrived in batches from different locations. We had one week for the first set of ten masks. During this time, we needed to scan, process, and prepare models for upload to the viewing platform.
The customer mentioned that many service providers declined the project because of the deadlines and overall complexity.
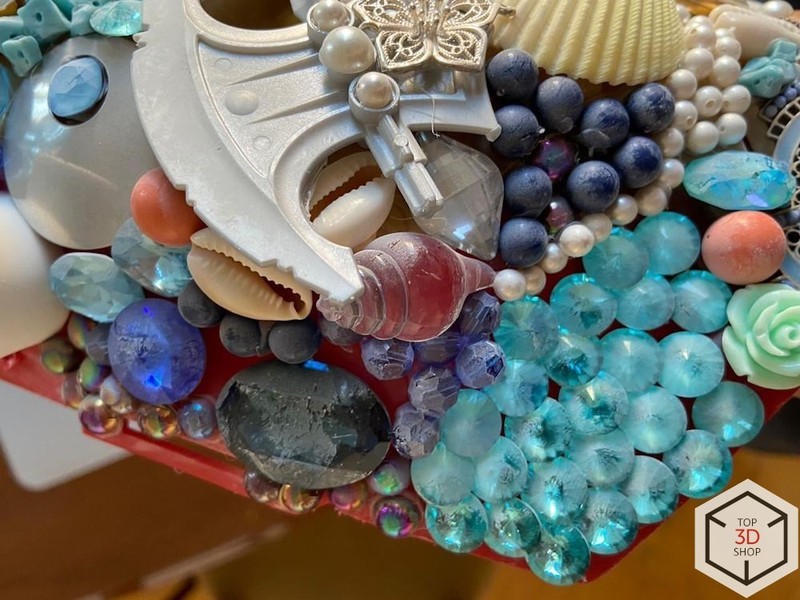
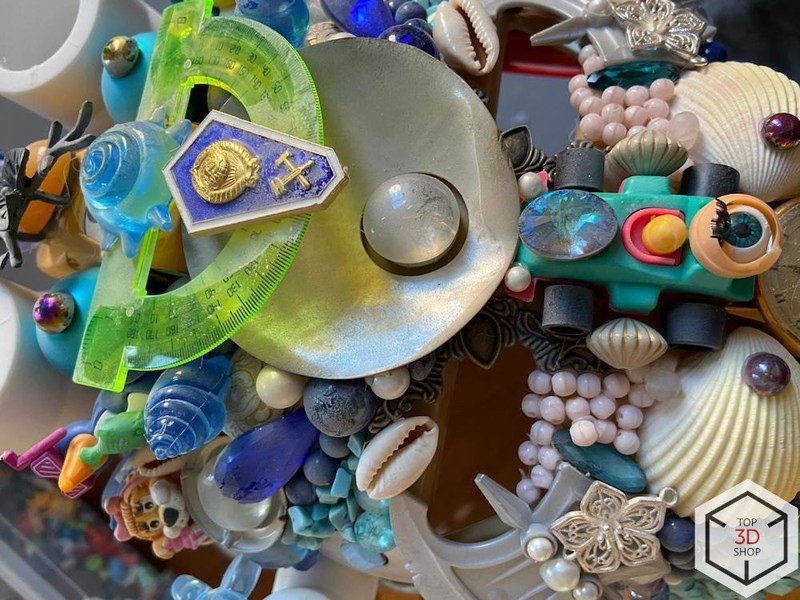
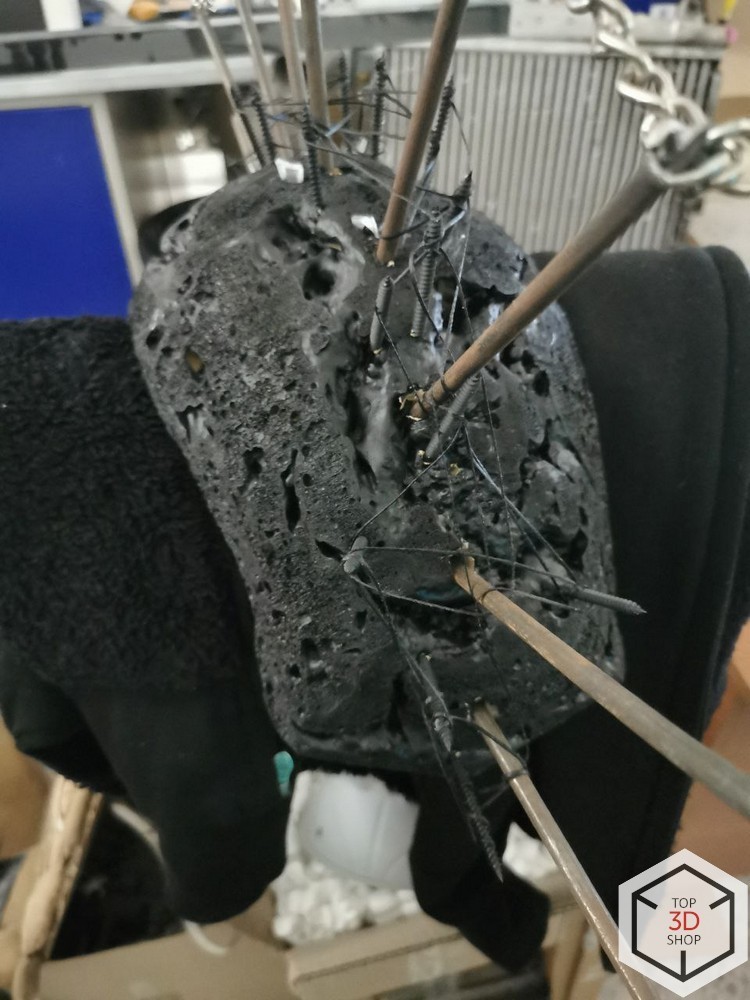
The masks themselves created additional difficulties:
Some masks changed shape slightly when you moved them.
Some had deep recesses and hollows that were hard to scan.
Materials varied widely:
Transparent glass
Deep black surfaces
Reflective and glossy finishes
Example: "Red Pixel" mask
Example: "Soul Reflection" mask
We also had to capture textures as close to the originals as possible, not just geometry. This required careful work with:
Color accuracy
Lighting conditions
Reflections
Brightness and contrast
Colors also change between:
The real object
The monitor
The finished online viewer, which renders models in real time
We kept these factors in mind at every step of the process.
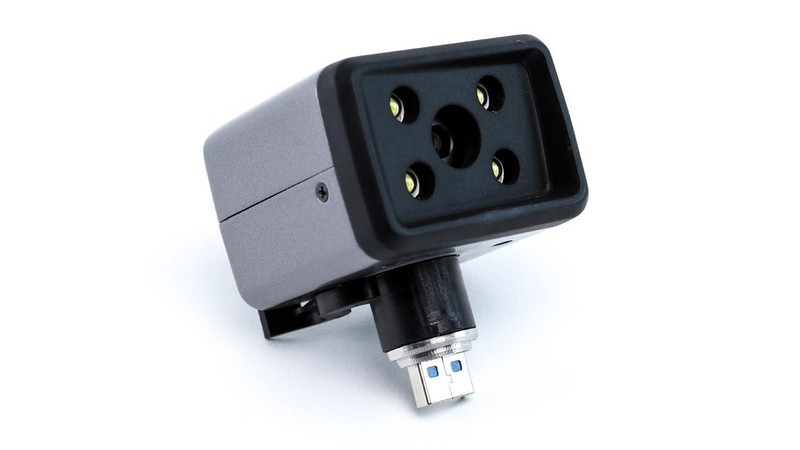
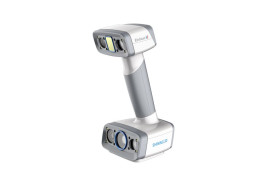
During the 3D scanning of the 34 masks, Top3DShop specialists used two Shining 3D scanners:
EinScan Pro 2X Plus
EinScan Pro HD
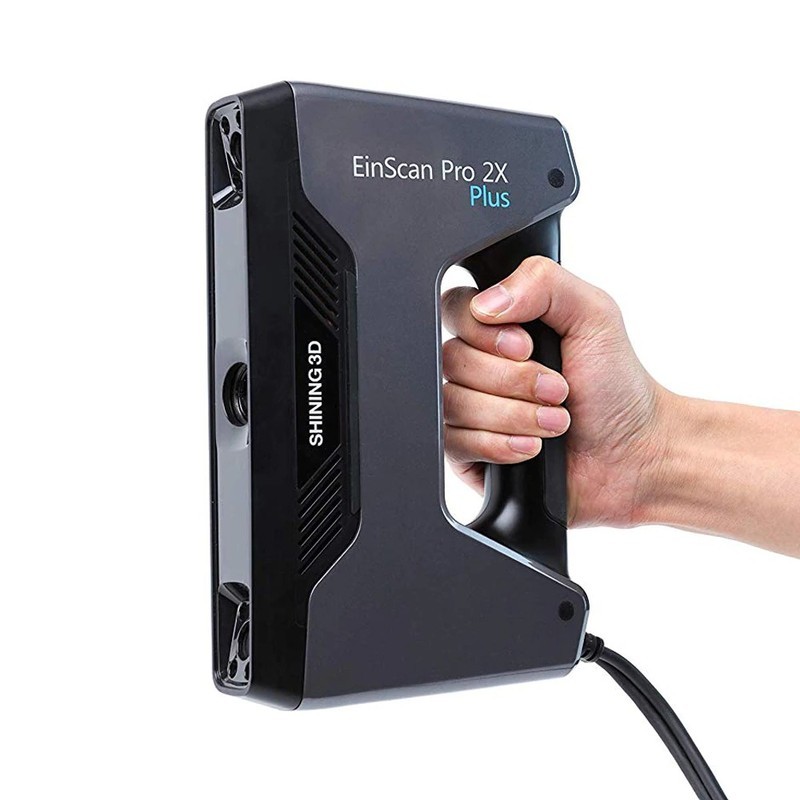
Shining 3D EinScan Pro 2X Plus 3D scanner
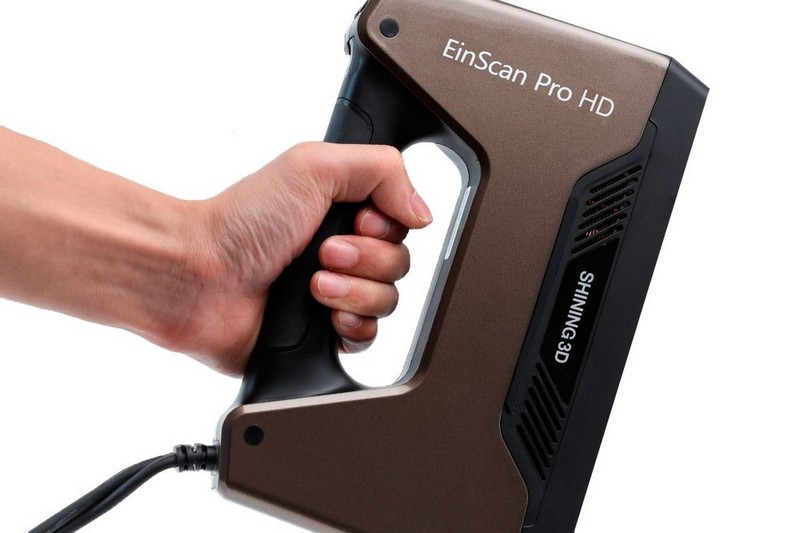
Shining 3D EinScan Pro HD 3D scanner
At the start, we planned to use mainly the EinScan Pro 2X Plus. It is a proven high-precision scanner well suited for manual digitization of complex objects. For the masks, handheld scanning was essential because of their curved and irregular geometry.
We also used a color camera add-on to:
Capture textures
Build realistic, textured digital models
Color camera for the Shining 3D EinScan Pro 3D scanners is shown below.
Later, we tested the newer EinScan Pro HD. It offered better:
Accuracy
Resolution
Scanning speed
Its ability to scan dark objects reliably became a key advantage, so we switched fully to the Pro HD for most of the work.
Example: "Mohawk" mask
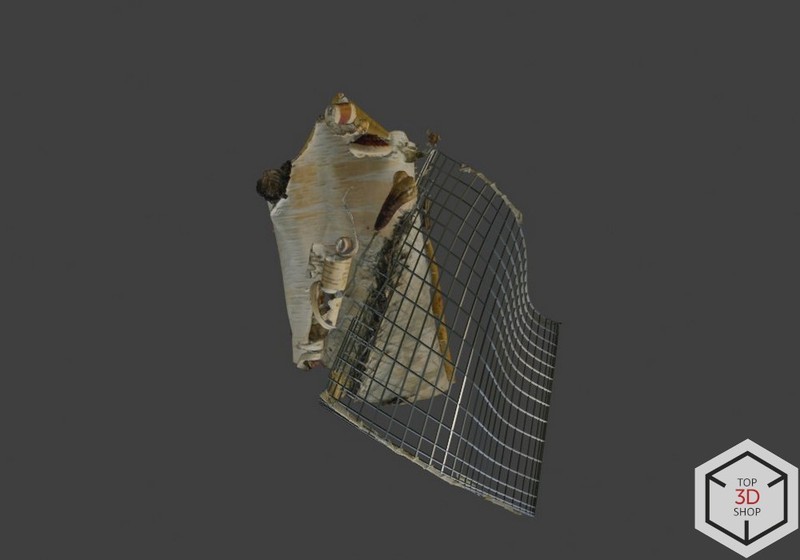
Some elements, such as mirror surfaces and fine mesh, could not be scanned accurately. However, the scanners still captured enough geometry for us to reconstruct missing areas with manual modeling.
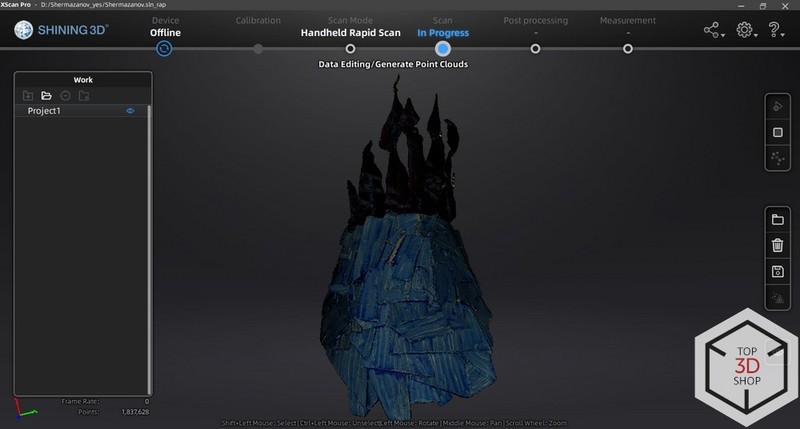
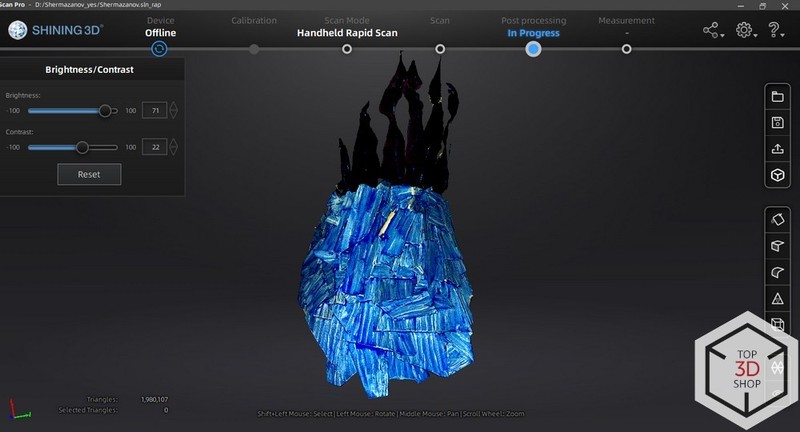
After scanning, we moved to data processing. This stage included:
Cleaning the scan
Aligning and merging separate scans
Filling mesh holes
Adjusting texture brightness and contrast
Optimizing the model for upload to the 3D server
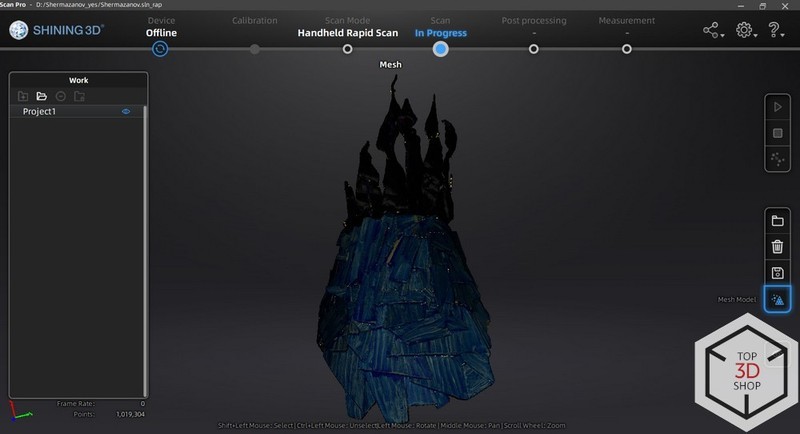
The scan produced:
A point cloud
A texture for the object
Together, these form the full 3D model.
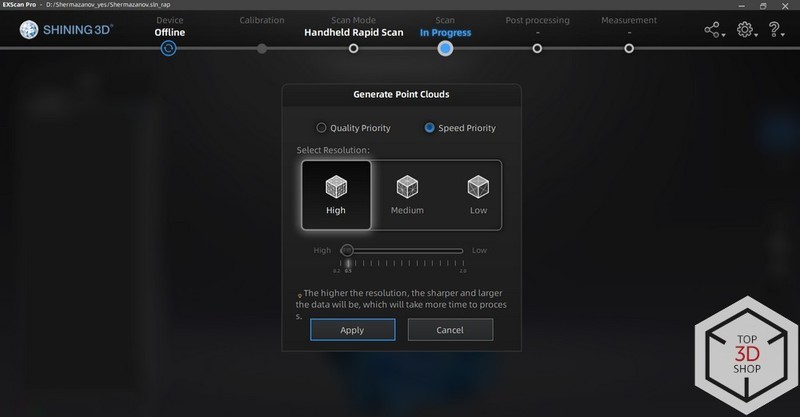
Next, we selected the model’s resolution:
Low poly
Medium poly
High poly
We chose based on how the model would be used. When a mask has many small details, you must decide whether all of them are critical before choosing a low-poly mesh.
For this project, we selected high poly models and simplified them later if needed. Point density and processing speed were not critical for us here, although in other projects we often adjust these parameters to balance quality and efficiency.
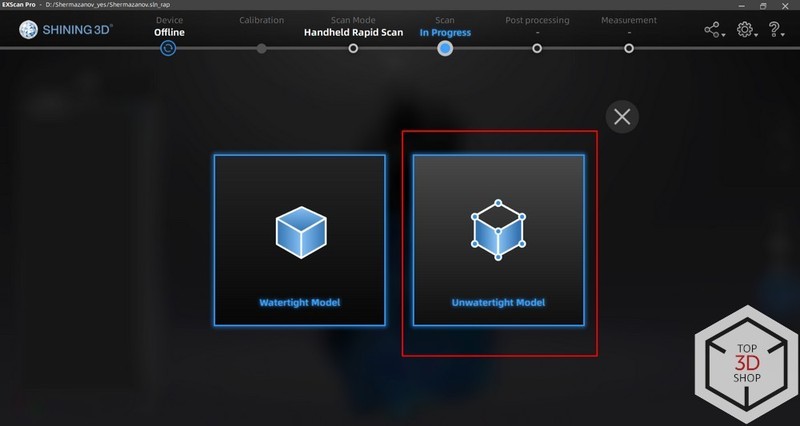
We then switched to editing the polygonal mesh by selecting the Mesh Model option.
We had to choose between two model types:
Watertight – fills all holes and closes the mesh
Unwatertight – keeps openings and holes
Watertight mode suits almost closed scans where:
All necessary surfaces are present
Minor gaps can be closed without distorting the geometry
For scans with:
Large missing areas
Important open geometry (for example, reverse engineering)
Watertight mode often changes shapes too much and becomes unsuitable.
In our case:
The masks were open (no back wall)
Preserving the original geometry was very important
Watertight mode closed large gaps too roughly
We chose the Unwatertight option to keep the geometry accurate.
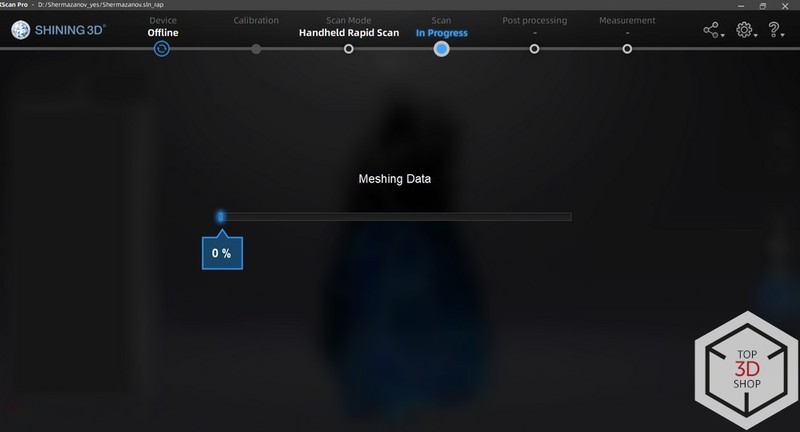
Mesh transformation starts after you confirm the settings. It can take:
Several seconds
Several minutes
In our case, around 15 minutes
The time depends on:
Project size
Available RAM
Overall system performance
On low-performance machines, this step can take hours or even fail. To avoid losing work, we always:
Save the project regularly
Keep backup copies of important stages
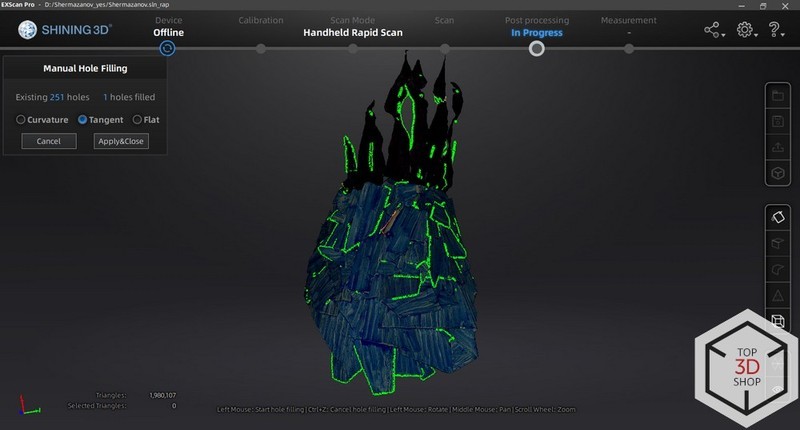
After automatic processing, small tears and holes often remain in the mesh. We fix them using the Manual Hole Filling tool, which offers three algorithms:
Tangent – recommended for most cases, avoids bulges and gives smooth transitions
Flat – closes holes with flat patches
Curvature – follows the surrounding curvature more closely
You can:
Fill all holes automatically
Or select specific holes, highlighted in green, and process them one by one
After we closed all necessary holes, we moved to texture editing.
Shining3D software provides only basic texture tools:
Brightness adjustment
Contrast adjustment
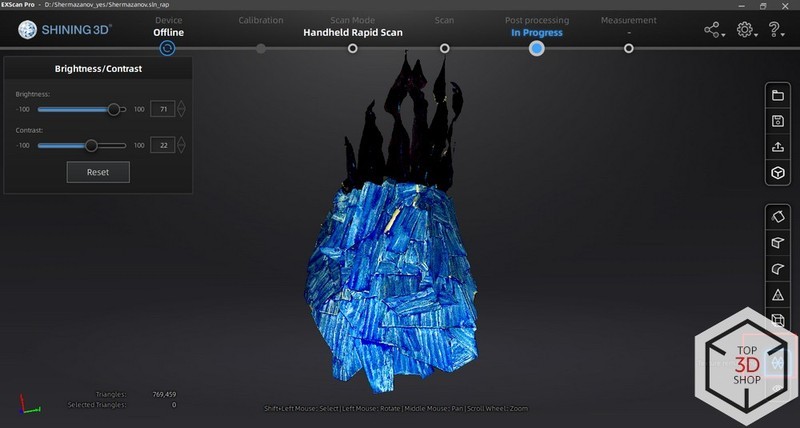
We perform full color correction later in external software after exporting the texture.
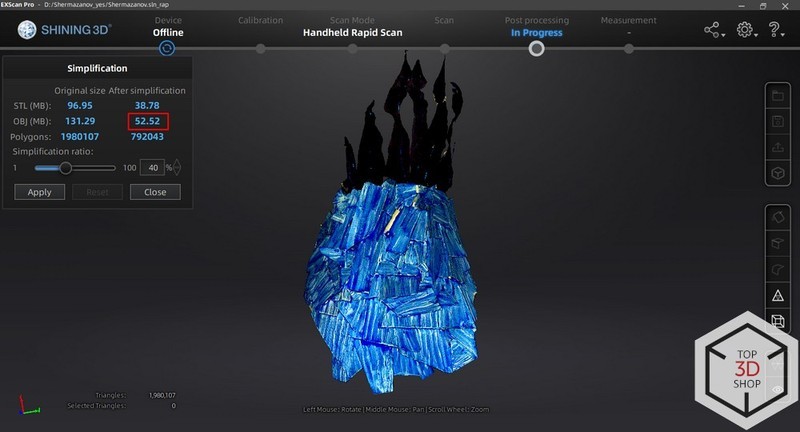
After brightness and contrast adjustments, we simplified the geometry to reduce file size. Simplification always removes some small details, so we looked for a balance between:
File size
Display speed online
Preservation of important features
Before saving, the software shows approximate file sizes for different formats. We chose OBJ, because it supports textured models, unlike STL.
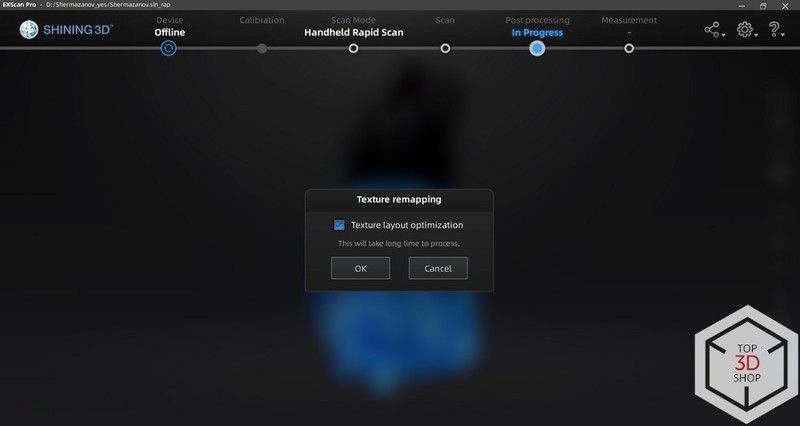
The final stage in this workflow is Texture Remapping. It prepares a usable texture map for further editing.
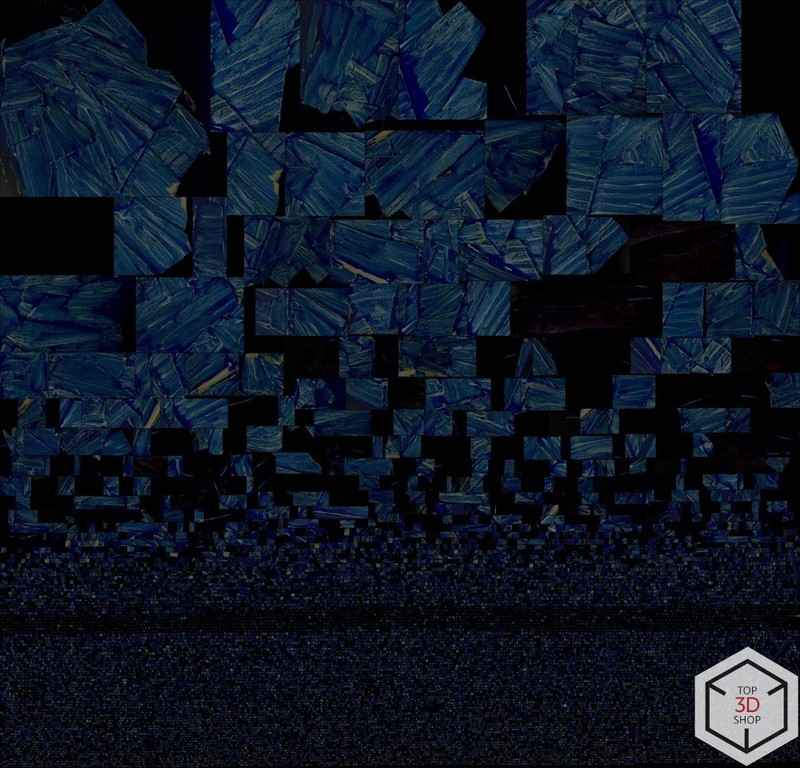
Raw post-scan textures:
Are fragmented
Have many small separate islands
Are difficult to edit manually
Examples below show the difference.
Texture without optimization (retopology)
Texture after optimization
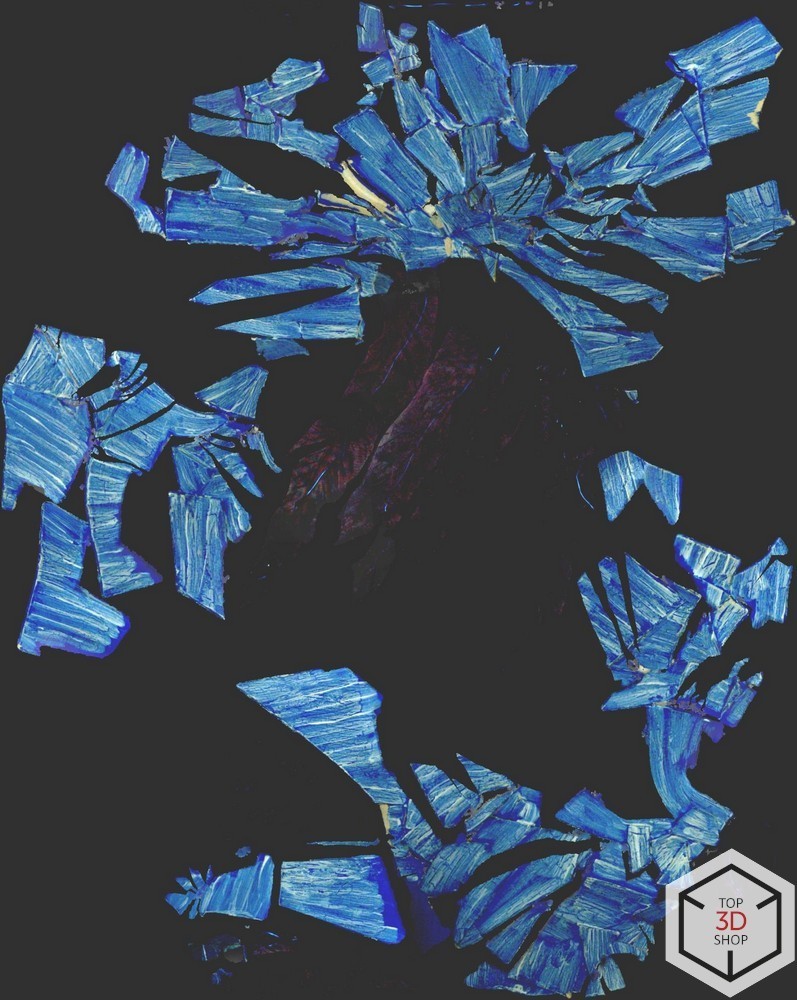
Handmade texture made by a 3D modeler from scratch (for comparison):
Remapping at this stage:
Corrects texture errors and gaps
Organizes the UV layout into a form suitable for manual editing
You can skip remapping and only fix errors, but then manual texture editing later becomes almost impossible.
To get the best result, we enabled Texture Optimization, which:
Fixes errors
Performs remapping in one step
This takes more time but saves us from repeating the process later. After you leave the project and export the files, you cannot run remapping again because the link between the original scan, textures, and mesh is lost.
The process of remapping with regular retopology took about 3 minutes on our system.

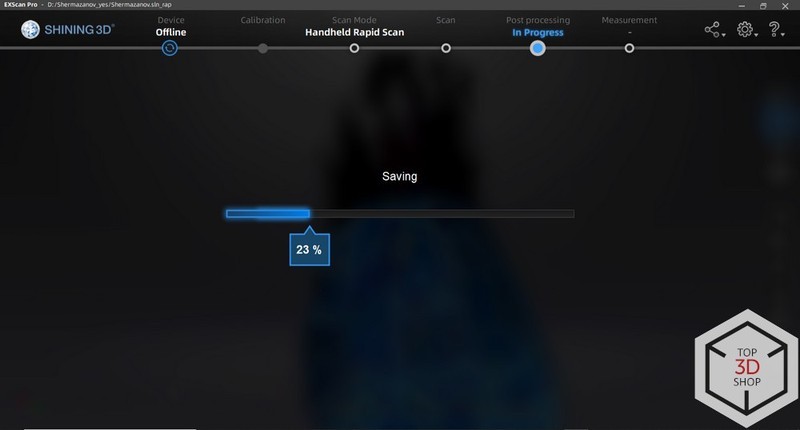
We saved the project regularly to avoid losing changes. After all processing steps, we could:
Edit textures separately in external software
Upload the final 3D models to the exhibition website
The final stage is Texture Remapping, which prepares a usable texture map. Post-scan textures are raw and scattered, making manual editing impractical. See examples below.
At this stage, texture errors and gaps are corrected. While you can skip remapping and only fix errors, this prevents manual texture editing later.
Enabling Texture Optimization performs both error correction and remapping. It takes more time but avoids the need to revisit this step, which can't be repeated outside the project due to lost links between scan, textures, and mesh.
The process of remapping with regular retopology takes about 3 minutes
To avoid losing changes, save the project regularly. Once processing is complete, you can edit the texture separately and upload the final model to the site.
"Wind of Change" mask, draft 3D model
"Wind of Change" mask, final 3D model
Wind of Change mask, the final 3D model
On the client’s Sketchfab account, we additionally configured:
Lighting
Rotation limits
Material properties
Rendering camera parameters
Example: 3D models of masks on the SketchFab website
The total data volume reached about 200 GB. This included:
Point cloud sources
Textures and materials
Final ready-to-use 3D models
At the start, we expected 3D scanners to struggle with transparent, shiny, and black surfaces. In practice, a thin layer of matting spray allowed us to capture even specular and transparent textures successfully. Built-in scanner lighting also turned out to be sufficient for many black materials.
The client was satisfied with both the results and the schedule. Some masks had such complex geometry and textures that we still had to model parts from scratch, but scanning dramatically reduced total manual work.
Both the EinScan Pro 2X Plus and EinScan Pro HD worked reliably and accurately throughout the project. The Pro HD confirmed its advertised advantages:
Higher accuracy
Better resolution
Faster scanning
Strong performance on dark surfaces
This project shows that, with carefully chosen equipment and a well-planned workflow, you can digitize complex art objects for online exhibitions and give viewers a high-quality, interactive 3D experience. Buy 3D scanners from Top3DShop to get expert training, technical support, and reliable after-sales service.
Update your browser to view this website correctly. Update my browser now
![Einscan Pro 2X 2020 / V2 3D Scanner [1 x Aesub Spray for Free]](https://top3dshop.com/image/cache/catalog/products/3d_scanners/shining_3d/einscan_pro_2x/einscan_pro_2x_4734d382-268x192.jpg)
![Einscan HX 3D Scanner [1 x Aesub Spray for Free]](https://top3dshop.com/image/cache/catalog/products/3d_scanners/shining_3d/einscan_hx/einscan_hx_image6-268x192.jpg)
Write a comment