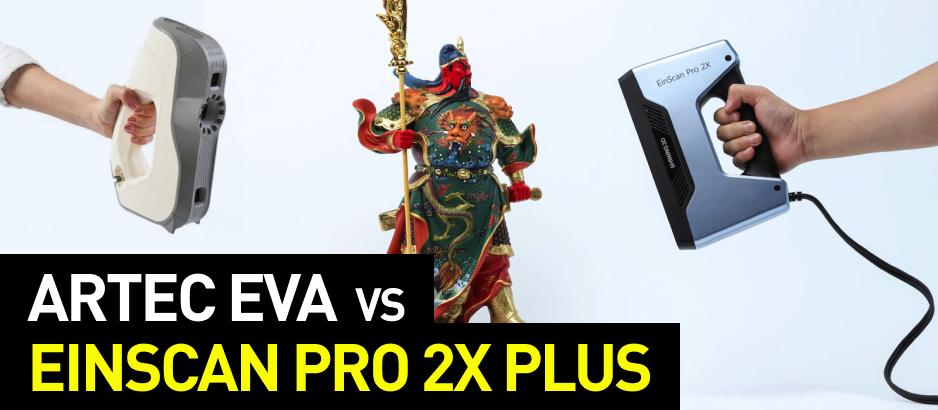
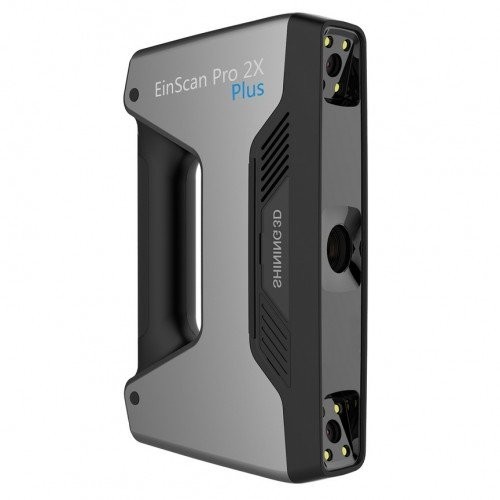
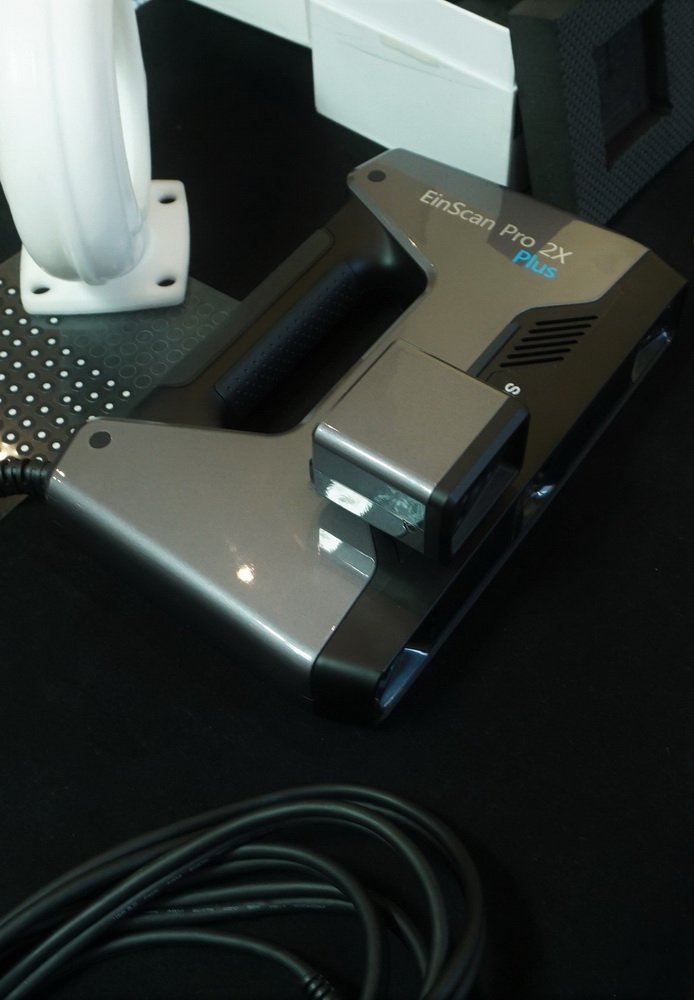
Hello everyone! This is Top 3D Shop, and today we will be reviewing the Einscan Pro 2X Plus 3D scanner by Shining, a well-known Chinese manufacturer. The scanner is brand-new; this version has been launched just a couple of months ago. Einscan’s software is still being actively updated.
Sidenote: A handheld scanner is a portable version of a 3D scanner designed to quickly capture large objects.
Sidenote: Structured light scanning is a scanning process that took after laser ray scan technology. The source of illumination is a projector that casts a light ray on the scanned object and captures the surface by moving the ray at a calculated pace. The result is a 3D point cloud based on the analysis of captured heights that mimics the object's surface. As of today, this is the most popular scanning technology.
|
Shining Einscan Pro 2X Plus |
Artec Eva |
|
|
OS |
Win 7, Win 8, Win 10, 64 bit |
Win 7, Win 8, Win 10, 64 bit |
|
Weight |
0.8 kg |
0.85 kg |
|
Output formats |
OBJ, STL, ASC, PLY, P3, 3MF |
OBJ, PLY, WRL, STL, AOP, ASCII, Disney PTEX, E57, XYZRGB |
|
Texture capture option |
yes (with Add-on: color pack) |
Yes |
|
Single scan time |
0.03 / 0.05 / 0.5 (depending on the mode) |
0.06 |
|
Single scan range |
208х136 mm — 312х204 mm |
214×148 — 536×371 mm |
|
Interface |
USB 2.0, USB 3.0 |
USB 2.0, USB 3.0 |
|
Minimum system requirements |
Video: NVIDIA GTX660 or better; video memory >2G; CPU: i5 or more; RAM: 8G or more |
Video: NVIDIA GeForce 400 Series or better; video memory >2G; CPU: i5 or more; RAM: 12G or more |
|
Working distance |
400-500 mm |
400-1000 mm |
|
Scanning speed |
20-30 fps, up to 1 500,000 points/sec |
12-16 fps, up to 2 000,000 points/sec |
|
Applications |
Education & training; reverse-engineering; metrological control, energy industry, health care, architecture |
Education & training; reverse-engineering; prosthetics; body scanning; architecture |
|
Scan accuracy |
from 50/100/200 µm (depending on the mode) |
from 100 µm |
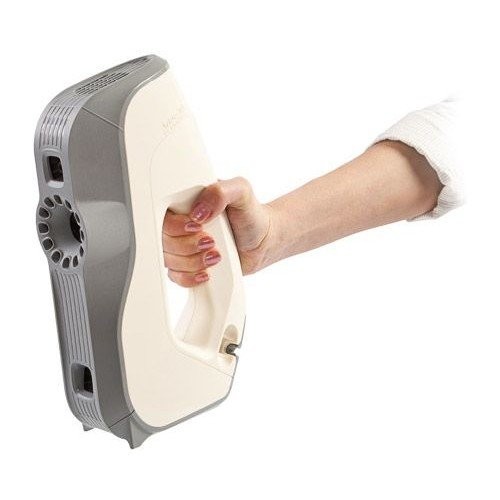
The two scanners have rather similar features, despite having been put on the market with a gap of 5 years. These are handheld scanners, both based on the structured light technology; both come with a built-in projector and an LED flash. Their weight and dimensions are quite similar as well.
However, there are some specific features that they do not share, and that you might want to consider before making a choice. Despite being almost identical in many ways, they have different fields of view and scanning areas, which means that scanning with Shining takes longer. Eva is able to capture the texture on its own, while Shining requires an add-on color pack. Unlike Shining, Eva can use texture of the object when stitching the scans together. Shining functions both as a handheld and stationary scanner, and the use of reflective marker dots is highly recommended. The markers are absolutely necessary in HD mode, since without them, the scanner does not capture the geometry well enough. Eva operates in one mode only, the handheld scanning mode, and marker dots are needed only if the object’s texture and geometry don’t stand out enough. You can use any kind of marker dots in any quantities, the most important thing is to make the scan more detailed and precise.
Finally, the most significant difference is the price. Currently, Eva is priced at $19,800, and you can get Shining for $7000-$8000, depending on what model you want.
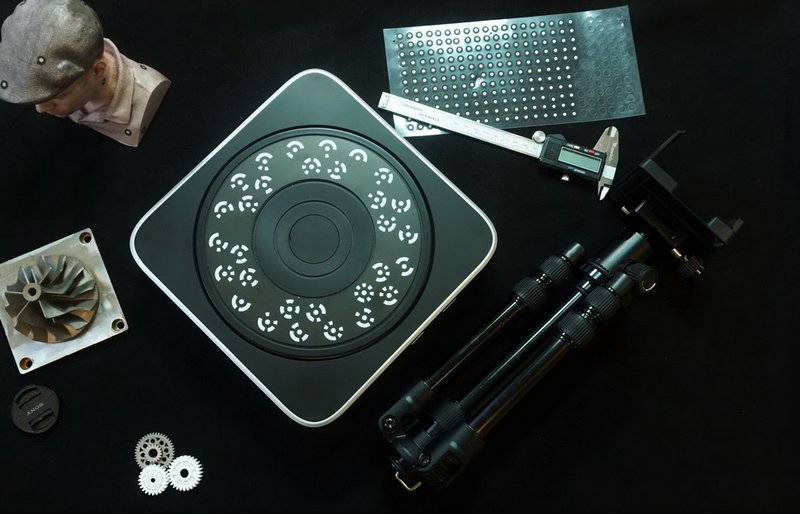
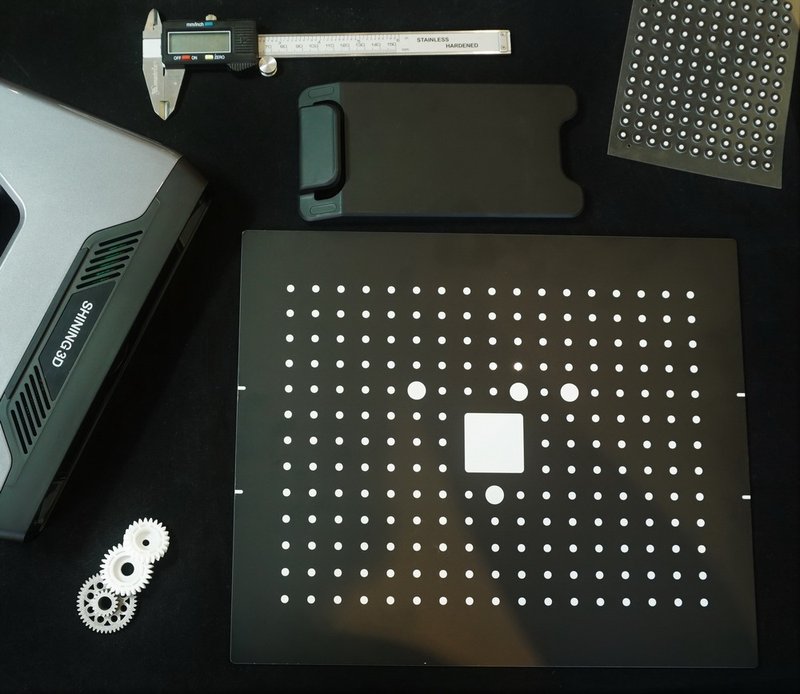
The scanner comes with a calibration board and board support, a pack of adhesive marker dots and a marker remover. There are also two USB drives, one carrying basic software and manuals, and the other serving as an electronic key.

There are some additional options available besides the standard pack. First, there is Industrial Pack that includes a tripod and a turntable, which ensure easy scanning in a fixed mode, without having to move the object manually.
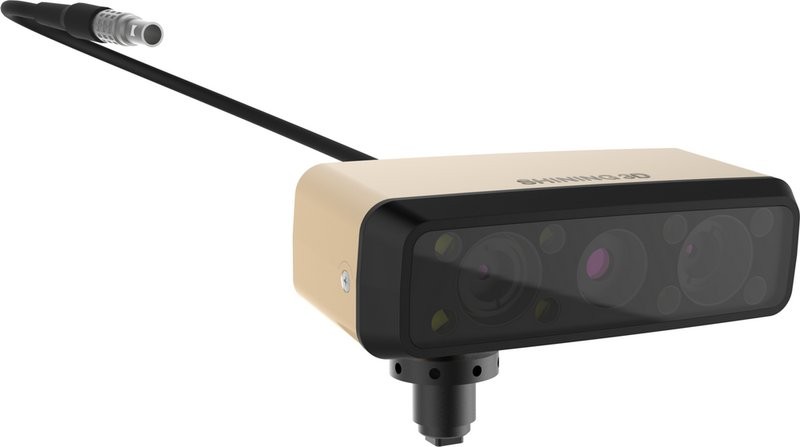
Another available option is Color Pack, an additional camera that can be attached to the side of the scanner body and capture the texture of the object.
Sidenote: Texture camera only works in Fixed and Rapid scan modes, and texture can get severely distorted in the last one.

The last option is HD Prime Pack, a single additional camera that provides more accurate scanning. This camera is attached to the scanner the same way as the texture camera (obviously, there is no way to combine these two options).
Shining scanners run on EXScan, a software with an easy interface and traditional Shining stylistics. Still, it is worth mentioning that EXScan 3 has a nicer look. This version only works with 2X Pro scanners; older devices are not supported.
Sidenote: pay close attention to the version of your software, it is preferable to use the latest one, since the system keeps receiving updates.
In the upper part of the interface you can see the scanner currently connected, how long has it been since the last calibration, what scan mode is on right now and whether you’re scanning the object or working on a model at the moment.
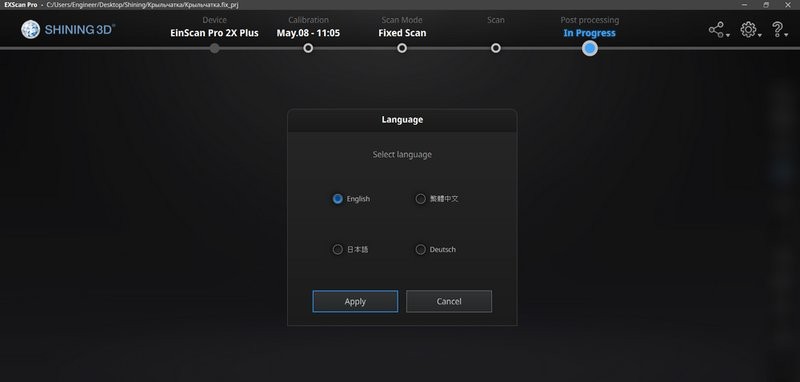
Available languages
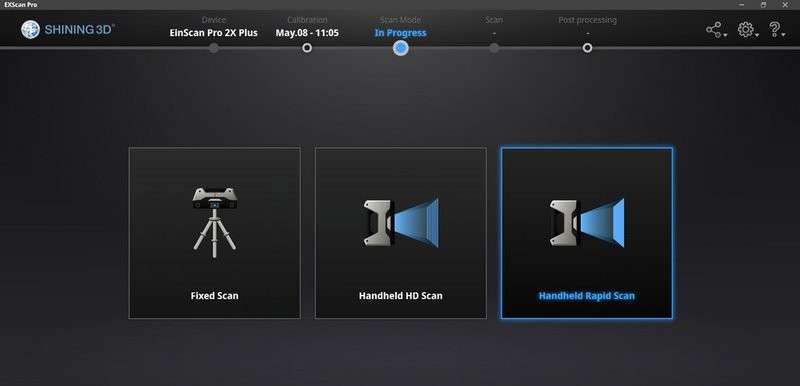
Scanning mode options
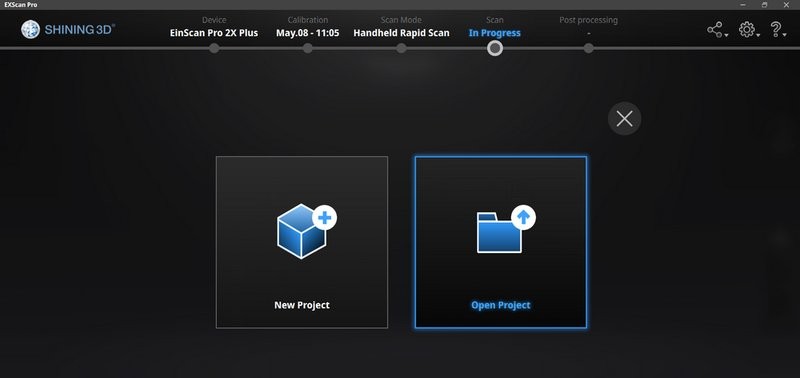
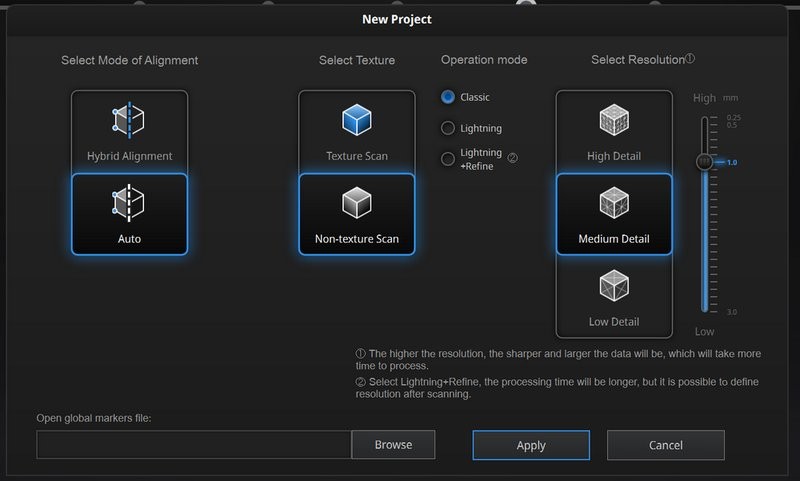
Creating a new project

Mode settings (different for every mode)
When you create a project and select a mode, you will be offered to modify the mode you’ve chosen. The above image shows the Rapid Scan mode settings. On the left, you can select the Mode of Alignment. In Auto mode, the scanner responds only to marker dots, if they are detected (same for HD mode), and to geometry when there are no dots. In the Hybrid Alignment mode, the device will try to calculate the geometry even if the markers are detected (the markers still have the higher priority).
In the center of the screen you can set up Texture and Operation (point processing) modes. Texture mode settings are available only if the texture camera is installed. In the Classic Mode, capturing process is rather slow and the scanner is likely to lose its track, but the accuracy is a bit better, probably because Lightning Mode generates more noise in the process. The final difference is insignificant. Lightning+Refine Mode allows you to alter scan accuracy even after the scanning is finished, which is obviously the best option, even with more time spent on subsequent processing.
Surface examples. Left to right: Lightning mode ON; Lightning mode OFF
Such a variety of settings is available only in the Rapid mode. In the Fixed mode your options are limited to texture or no-texture scanning, and the HD mode only allows you to select the accuracy.

HD mode settings
Scanners require regular calibration. Calibration is a process of adjusting the scanner to its working area; it can be compared to focusing a camera. It’s generally performed with special boards. Calibration frequency depends on the scanner; it might be required every time the device is moved (as it is with stationary scanners), or not required at all (if, for example, the scanner has been calibrated upon production, like Artec Eva).
You will be asked to calibrate the scanner every time the program is installed on a new OS and after the first few scans. We recommend calibrating your scanner after every 10 scans. You’ll need a calibration board and the support to calibrate your device.
First, turn the calibration mode on in EXScan. You will be asked to place the board in a certain way and point the scanner to it from above. Then you just have to move the device 10 cm up and down. This will focus the scanner on its working area. Then you have to rotate the board and repeat the same steps. All done! After 4 turns of the board you get a calibrated scanner.
In case you have a color module installed, you might have to calibrate the color. Simply placing a white sheet of paper or any other white matte surface under the scanner lens is enough to calibrate the module. This is required to make sure that the color recognition works as intended.
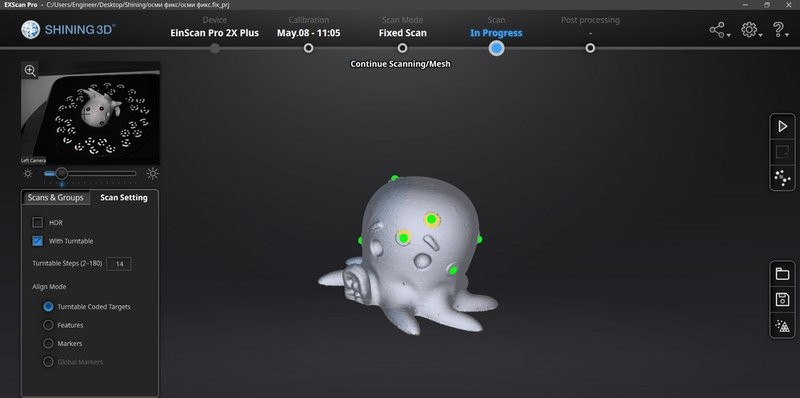
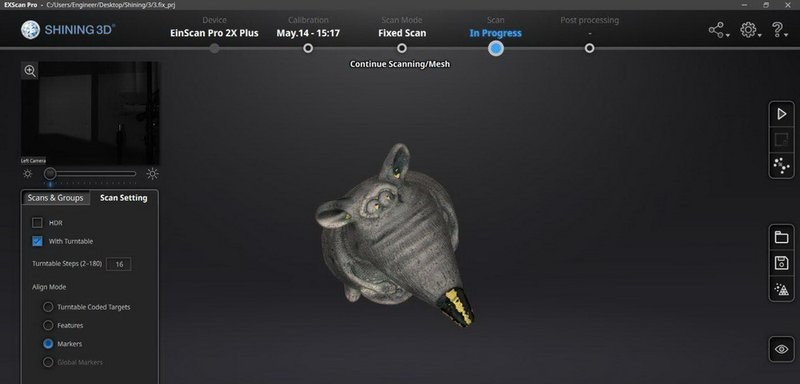
Overall there are 3 scan modes available, the first one being the Fixed Scan mode. This mode is the most accurate one, however, it is suitable for small and medium objects only. To use the Fixed Scan more efficiently, it is highly recommended to purchase the Industrial Pack that includes a tripod and a turntable with marker dots. You can do without the pack; just fix the scanner tight and rotate the object in front of it, pressing the Start button every time you have to make a shot. This, of course, takes much longer. Using a turntable is so much easier; it’s already synchronized with the software and automatically measures the rotation angle of the object.
The idea behind the mode is very clear. First, you take a detailed shot from one viewpoint, then rotate the object a bit and take one more shot. This sequence has to be repeated over and over until the entire object is properly scanned. Every succeeding shot has to partially overlap the previous one. You can always delete an inadequate shot and rotate the object at a better angle.
Scans are stored in a separate folder that contains the set of shots taken from a certain position. A new folder is created every time the object is rotated. These sets can later be merged through control points, as it is with the majority of stationary scanners.
Once all sides of the object have been scanned, you can proceed to alignment. Select the resolution and choose whether you want to cover up the “holes” in the future model. Holes are the areas with the markers attached to them that were not scanned. Anyway, you can always cover them up them afterwards.
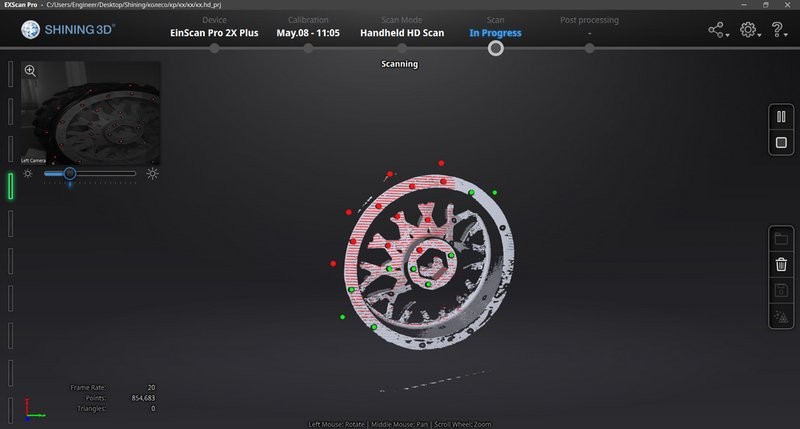
Handheld High Definition Scan is a manual high accuracy mode that requires precision and a lot of marker dots; it is also rather slow for a manual mode. First of all, you have to cover the entire object with markers, so that every time you take a shot the scanner is able to recognize at least 5 of them (let us remind you that its working area equals 208x136 to 312x204 mm, depending on how far the object is from the scanner.
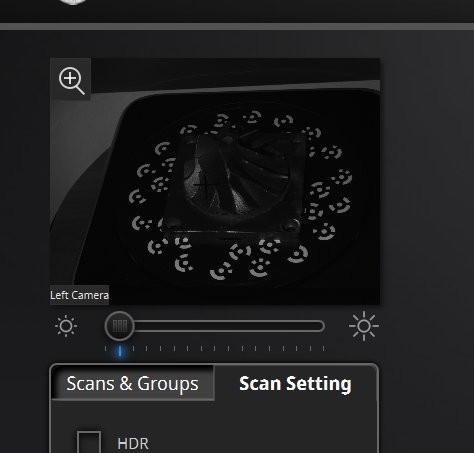
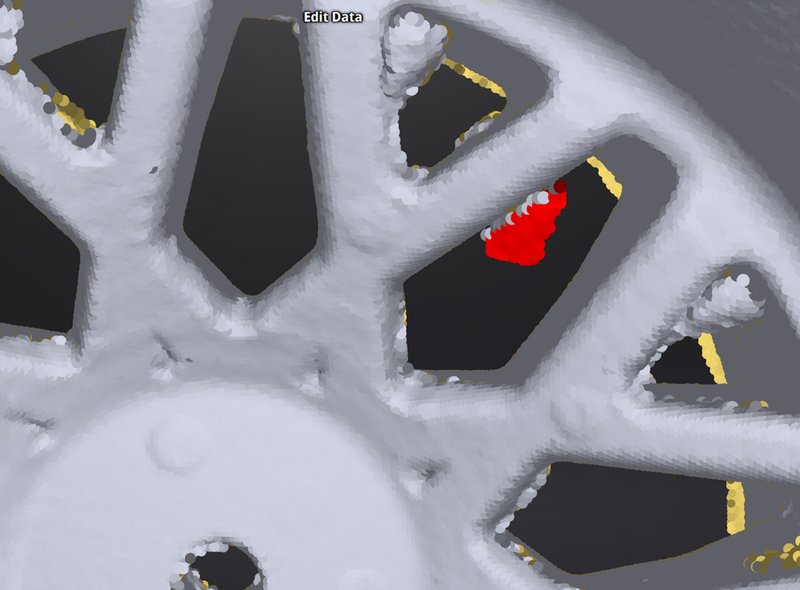
As usual, it is very important to make hard-to-capture surfaces fit for scanning, if there are some. Everything that is black, or shiny, or transparent has to be matted. After the preparations are finished, you can press the Start button. First, you’ll see the preview. In this mode, you can check if the exposure settings are correct. Bright red flares on the scanned image mean that the exposure is too high and has to be tuned down. When it’s impossible to lower it any further, you should dim the lights around the object.
When the brightness is adjusted, and the scanner is able to recognize the object adequately, you can press the Start button once again, and the scanning process will be initiated. Make sure to keep track of the distance scale on the left and keep the scanner in the “green” area. Another thing you have to do is to ensure that the scanner doesn’t miss any markers, by keeping the device close to the dots, especially if you haven’t captured all the markers yet.
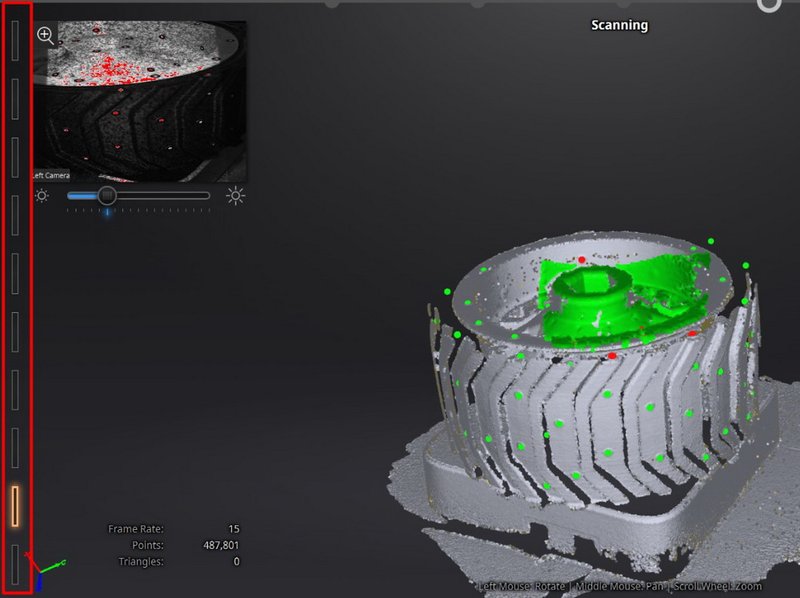
Distance scale
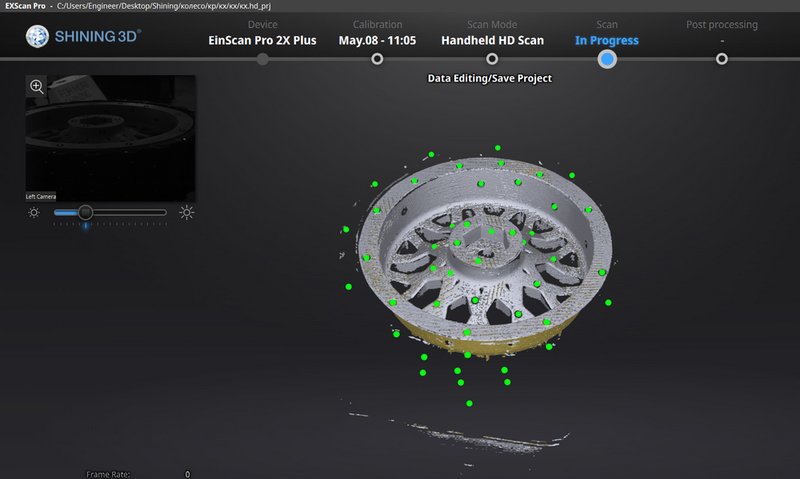
After you took a shot from an intended viewpoint, you have to remove unwanted points captured by the scanner, e.g. a scanned part of a table. Next, rotate the object and continue with the scanning. It is strongly recommended to start from the points that were already scanned in the previous session, not from those that were invisible. When the scanning is complete, the system will stitch parts of the model together according to those markers.
When you have the entire object scanned, it’s time to start merging the scans into a whole model.
Rapid scan mode is a lot like Handheld HD, but much faster and less precise. In the Rapid mode, you can scan the object with or without marker dots. If the markers are attached, this is a faster version of the HD mode. The same rules apply to their use; and the stitching will take the markers into account first, with geometry being the second. If there are no dots, geometry will be the device’s only reference. This is the least accurate mode, subject to many mistakes if several areas of the object are geometrically similar.
Take a look at the accuracy slider; the more accurate you want your scan to be, the longer scan processing will take, and the more points will be captured by the device. All of this means that you'll need more RAM, and that what you’ve got might not be enough to scan really large objects with maximum accuracy.
Here we have just one mode that is equivalent to marker-free handheld mode of Shining. We just move the scanner above the object at a suitable distance (there is a distance scale on the left as well), and the device fuses scans together according to the geometry. One of the key differences between the two scanners is the capture area, which is larger on Eva (larger field of view, larger depth of focus) and thus facilitates the process, since the scanner rarely loses its track. Another difference is that you don’t have to cut out the unwanted points right after the shot is taken. You can do it later, but this convenience is paid for with the loss of accuracy.
Let’s begin with little objects. We are going to scan them in the most appropriate mode with Shining, and with the only existing mode with Eva.
It’s worth noting that the objects of this kind are outside Eva’s target area, so it is pointless to expect stunning results from it here.
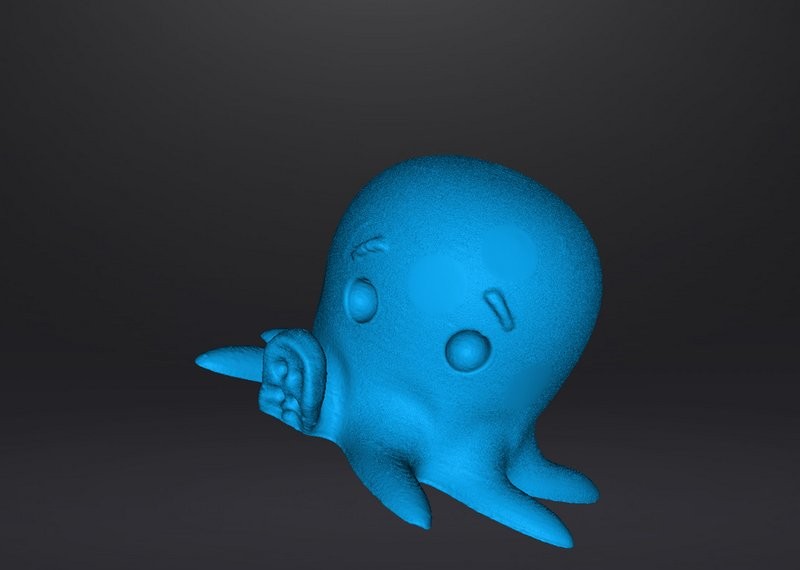
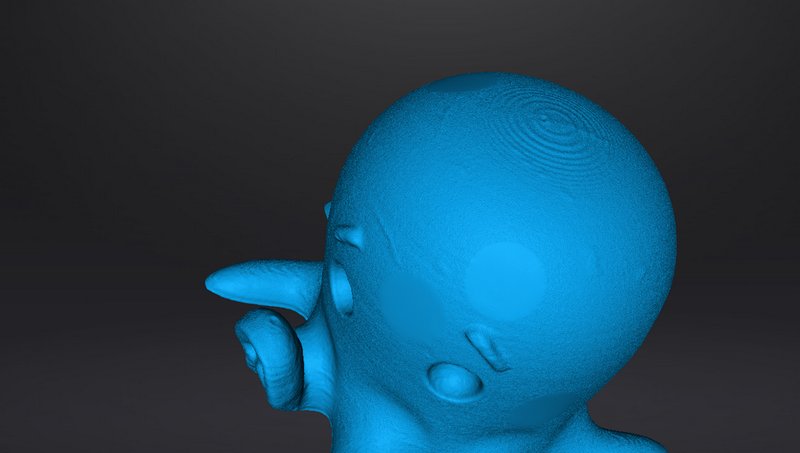
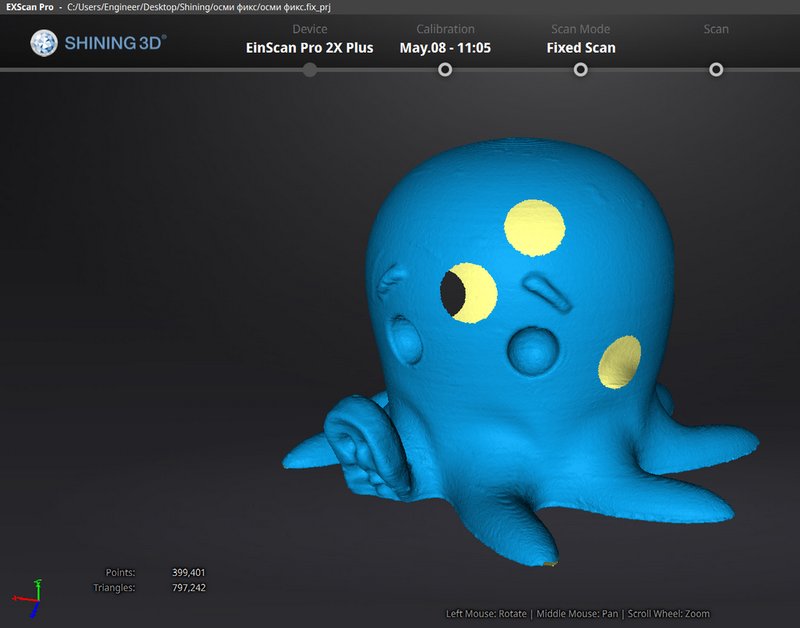
The first object is an artistic design. It’s a 3D-printed octopus figure about 12 cm in length and width. We will be scanning it with Shining in the Fixed mode with a turntable. Let’s imagine that we have to copy this figurine for further printing or replication.
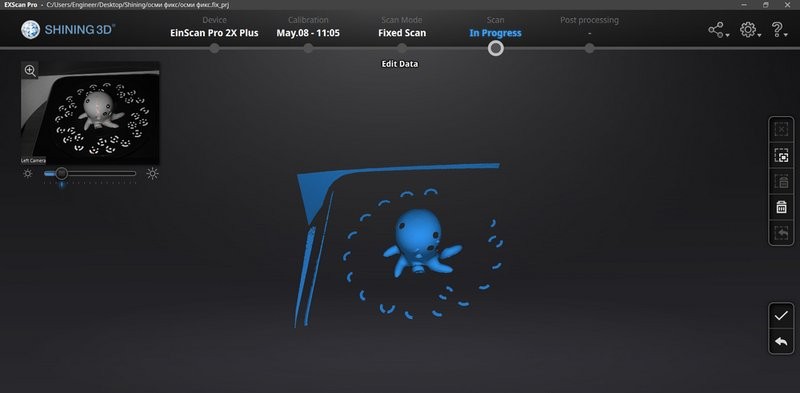
A single shot
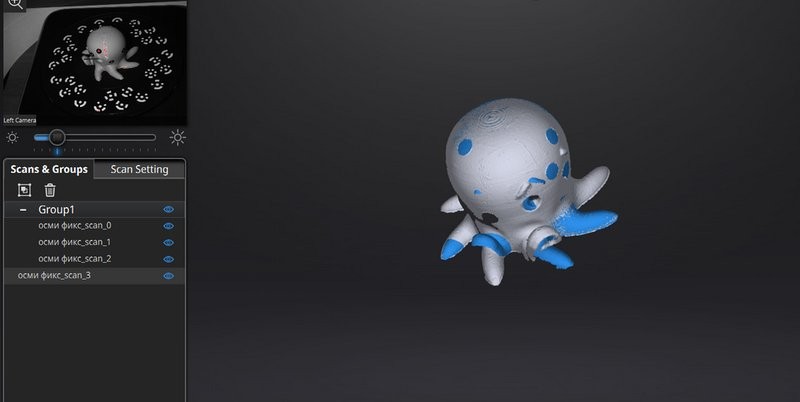
A couple of shots

A set of shots
Several sets of shots combined
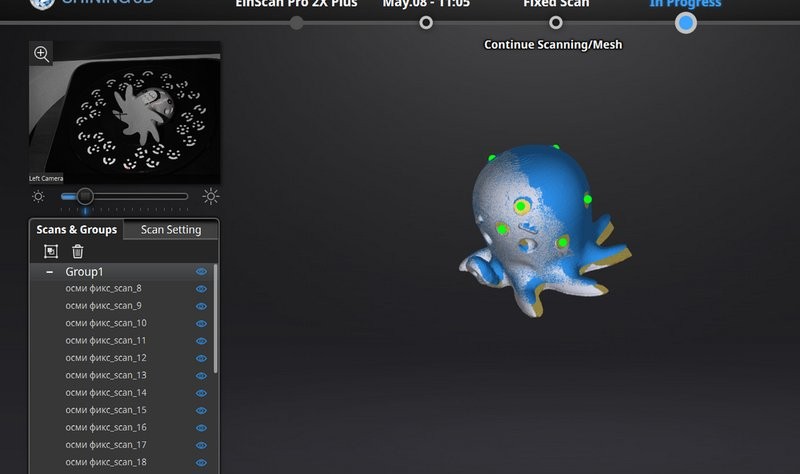
Merging
Merging with markers removed
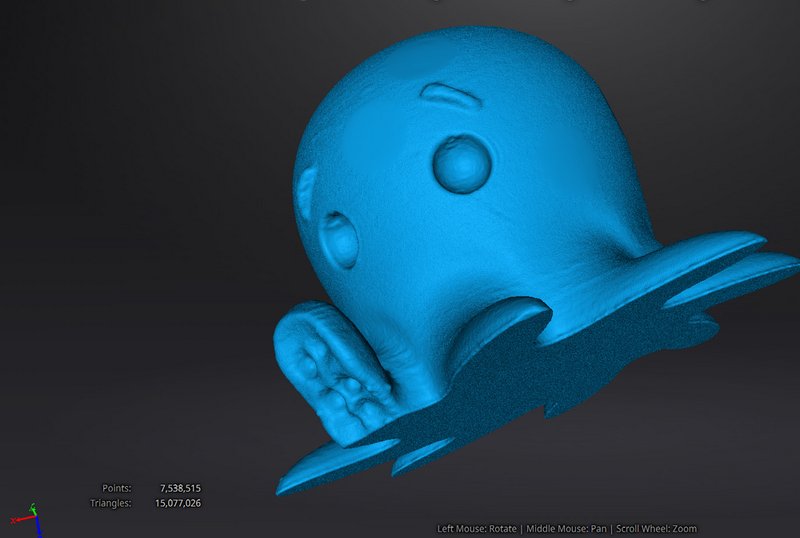
Marker “holes” left uncovered
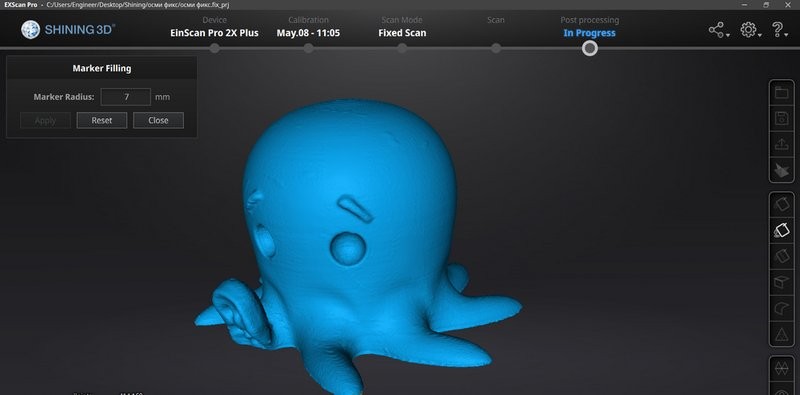
We have to say that it is better to stitch the object when it’s still ‘open’ and mask the holes manually later. This way the result is much more neat because you can cover them up with a curved, and not just flat layer.
The process is very simple, scanning and stitching combined took about 15 minutes. However, the accuracy was only about 200-300 µm, which might not be enough for more detailed objects.
Scanning with Artec Eva was less smooth. The object in focus was small, and a lot of noise was generated along the way. Scanning and processing took about 15 minutes as well, but with a noticeably worse accuracy.

A scan
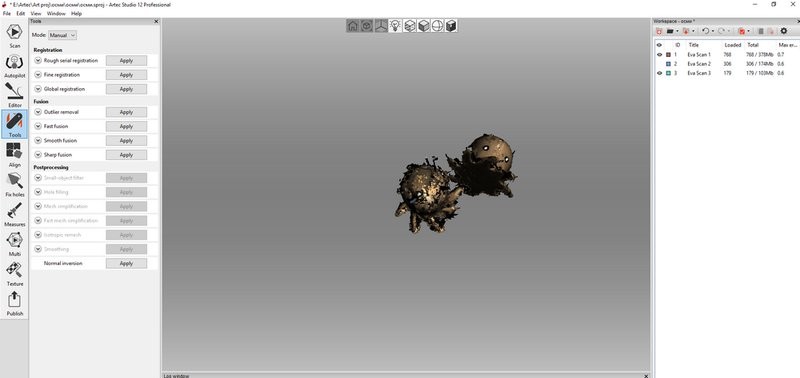
Processed shots with deleted background
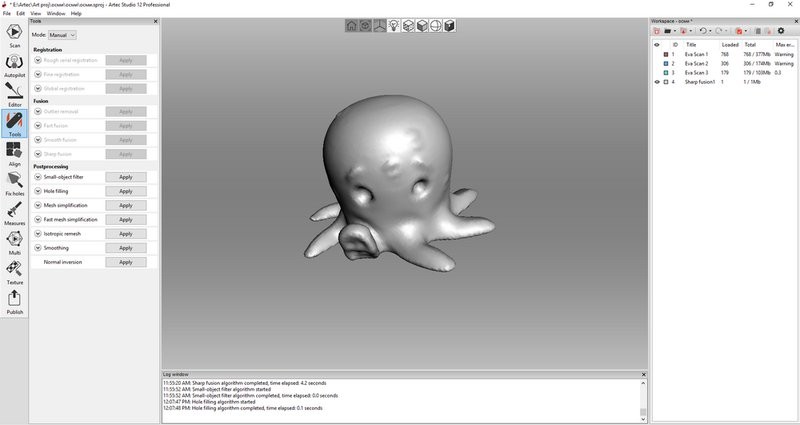
Final result
You can see that accuracy here is lower, it is about 500 µm, and the markers are not recognized by the scanner, which makes it harder to remove their traces.
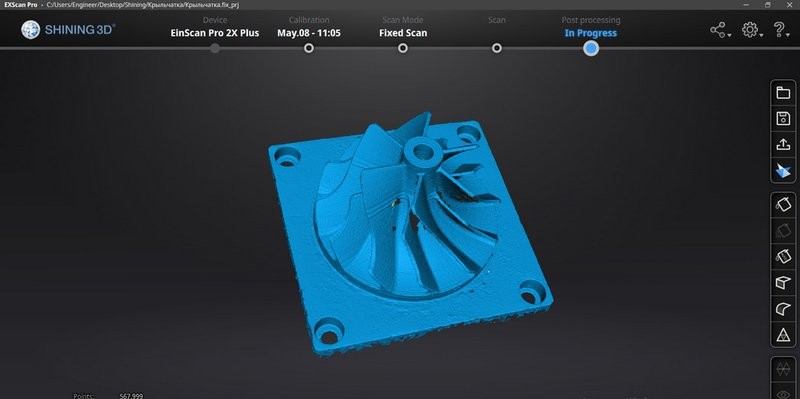
Our next object is a technical piece. It’s a small impeller. Let’s imagine that our goal is to scan the object in order to render it in CAD afterwards.
Technical objects are often scanned and used by engineers as a template for further rendering.
We are going to look closer at how the scans are being stitched into a single model and processed.
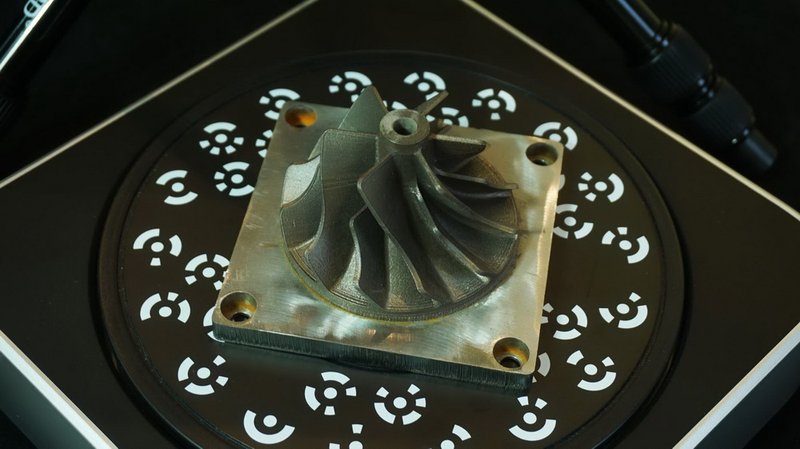
The object
The view through the scanner’s camera
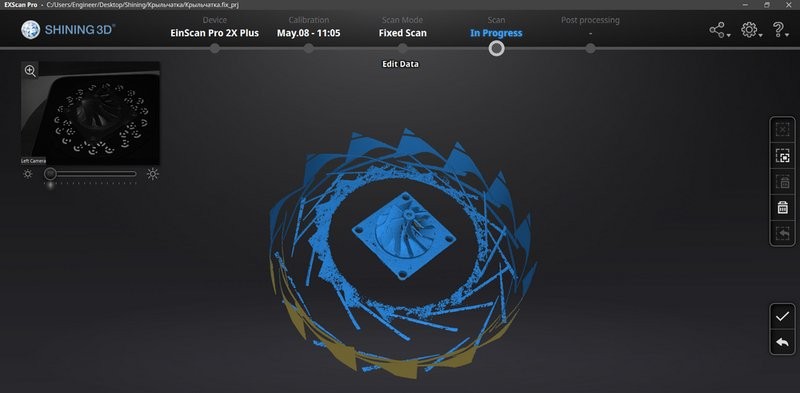
A set of shots
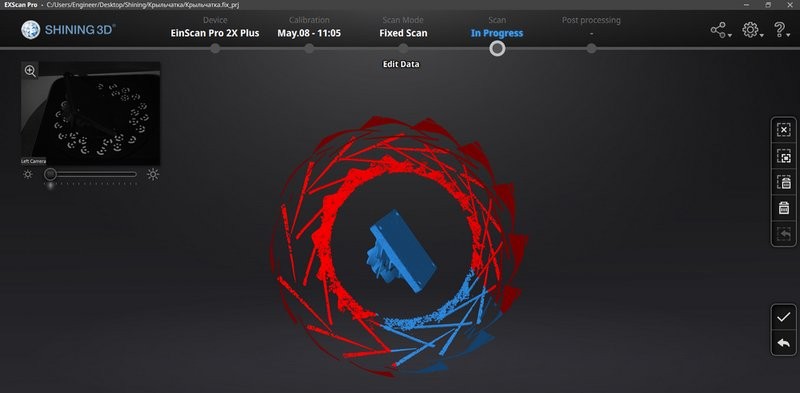
Deleting irrelevant pieces
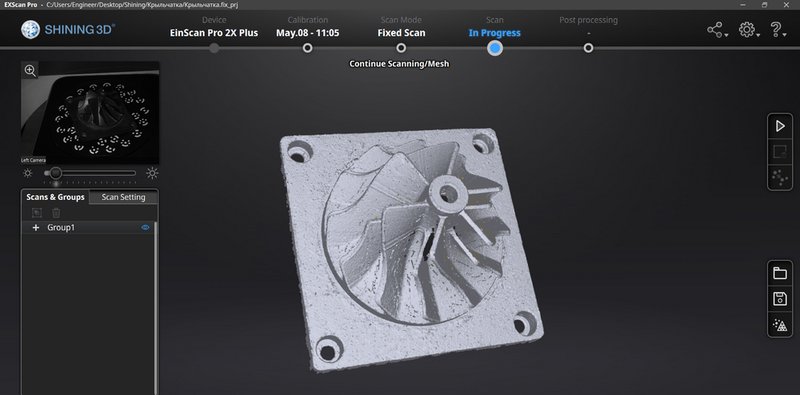
The final set
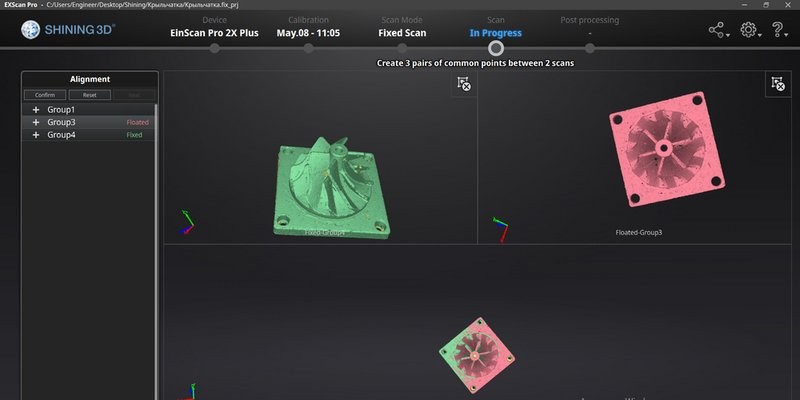
Several sets of shots in the alignment mode
The model is ready to be processed
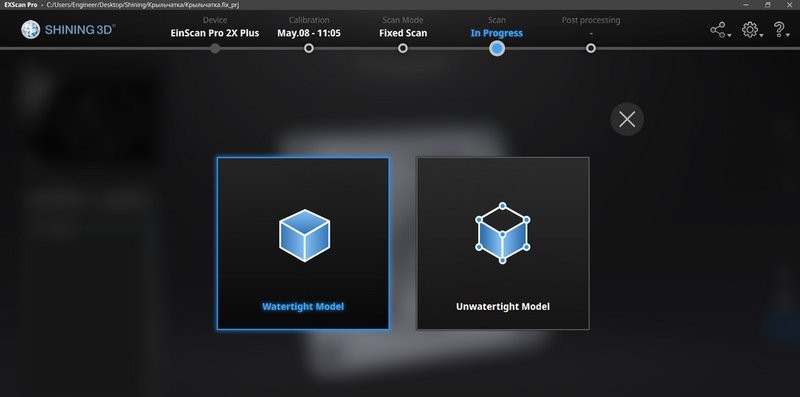
Select a watertight (closed) or an unwatertight (open) model
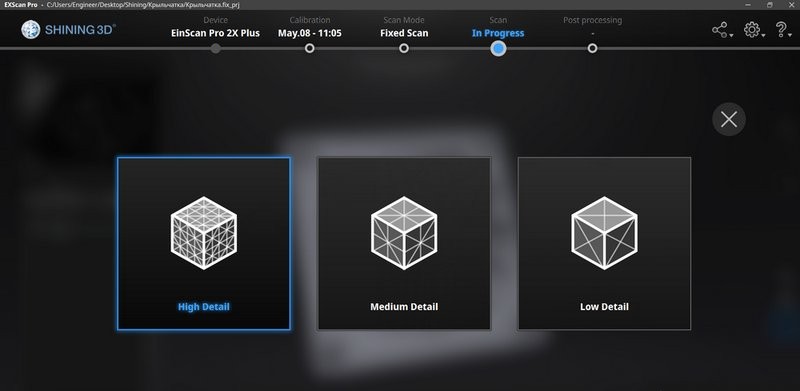
Alignment accuracy settings (affects stitching speed and accuracy)
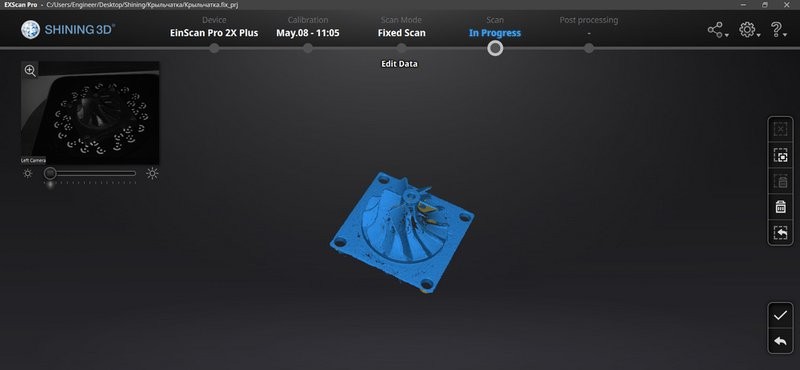
Assembled model
There is no need to scan missing parts because all we need is a template, and all the necessary pieces have already been captured. This model can be used in reverse engineering in SolidEdge or Geomagic Design.
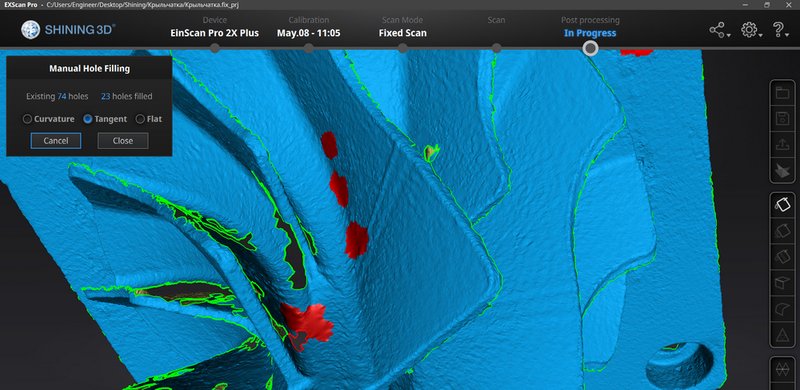
Manual Hole Filling mode. You only have to click on the hole you need to fill.
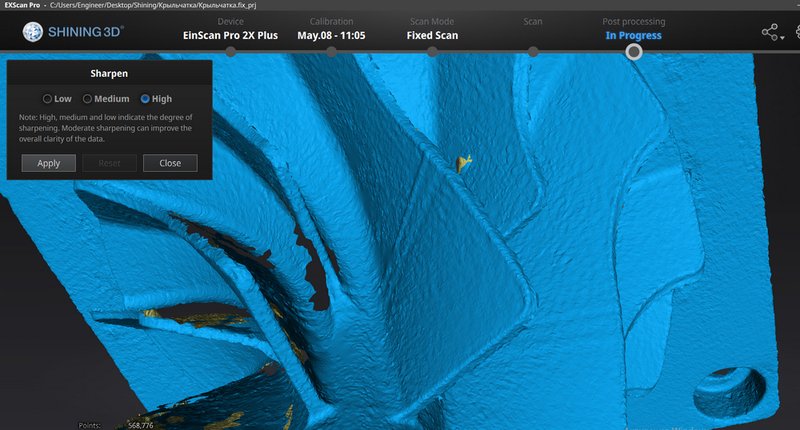
Edge Sharpening mode (before processing)
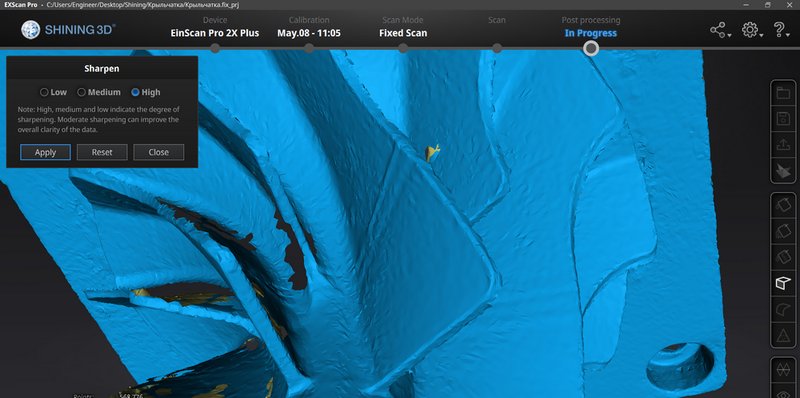
Edge Sharpening mode (after processing)
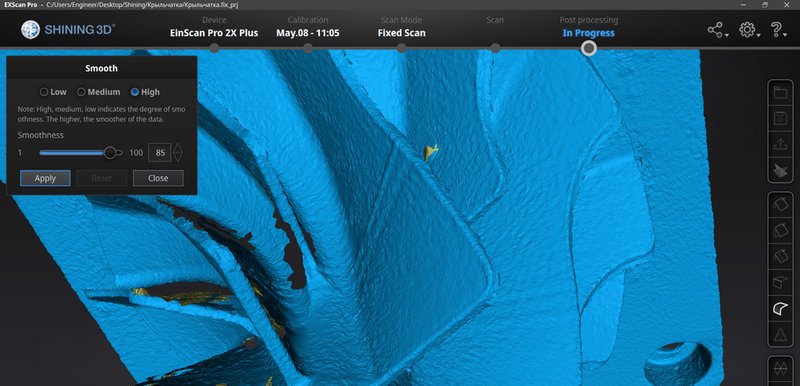
Image Smoothing mode (before processing)
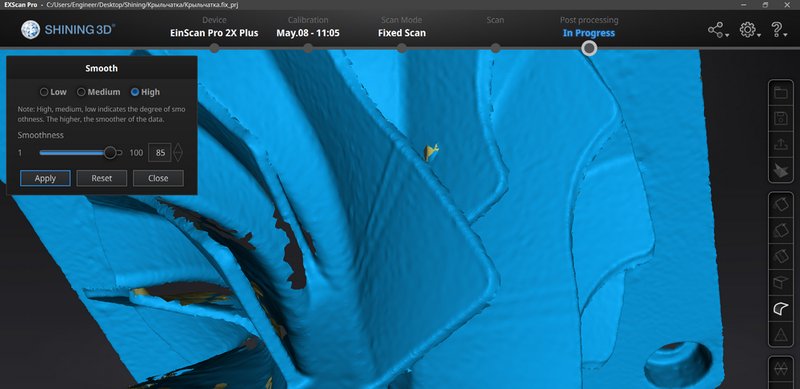
Image Smoothing mode (after processing)
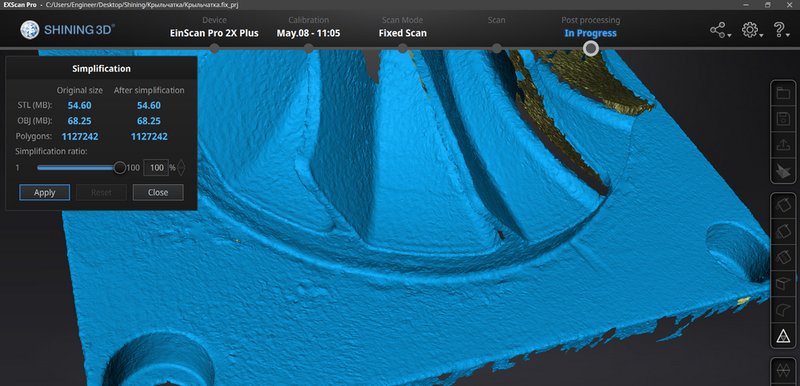
Polygon Simplification mode (before processing). Note the number of polygons.
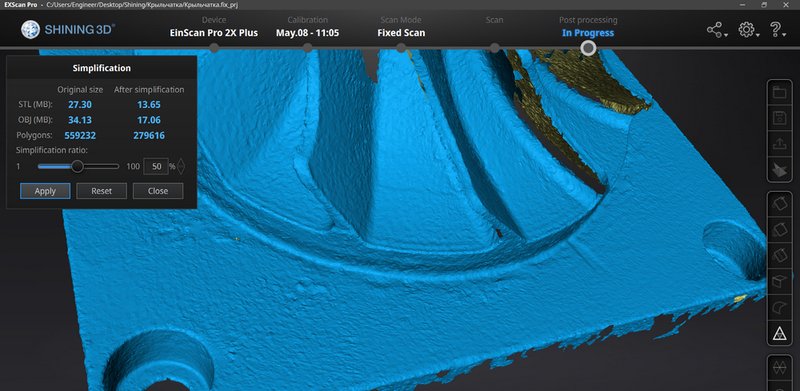
Polygon Simplification mode (simplified in half). Note the number of polygons.
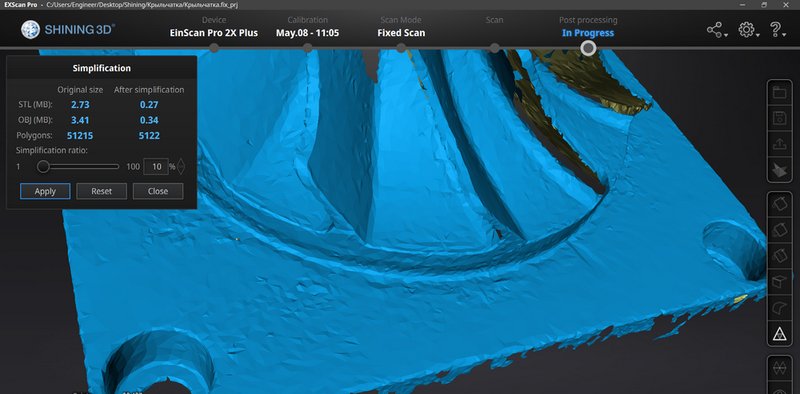
Polygon Simplification mode (simplified by 22 times). Note the number of polygons.
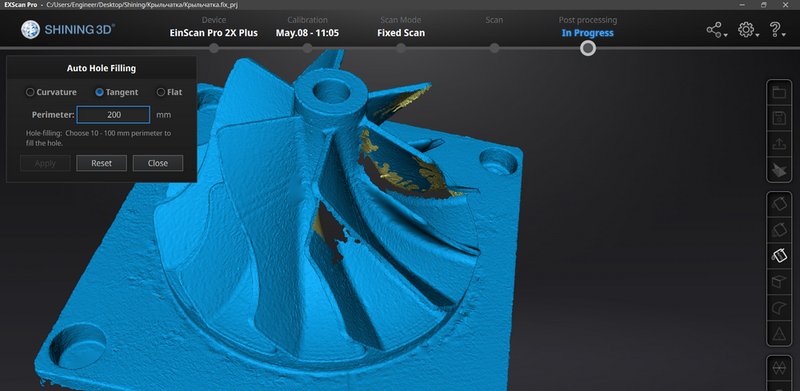
Auto Hole Filling mode.
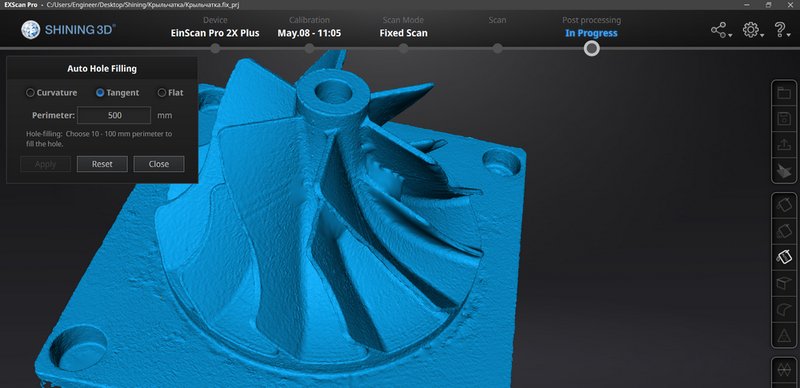
The result. Notice that all the holes were filled, including those that we didn’t intend to fill.
A similar processing mode applies to all Shining scanning modes. Scanning and processing combined took about 20 minutes.
We failed to properly scan the object with Eva, since the blades of the impeller are too thin and the size is too small.
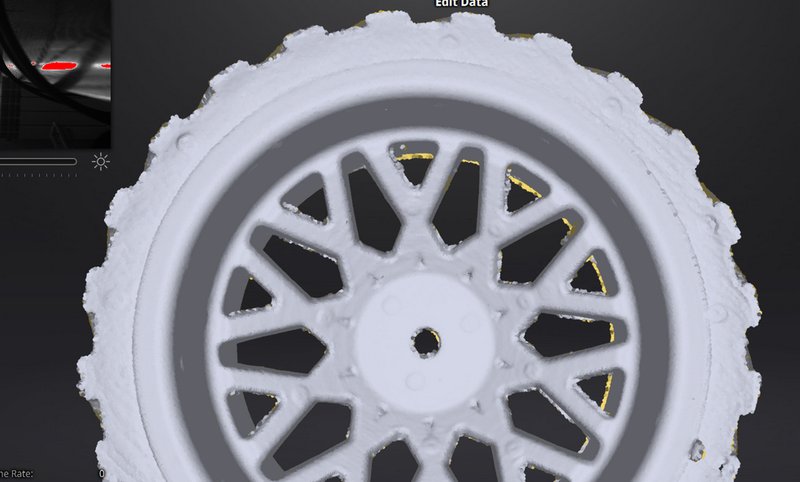
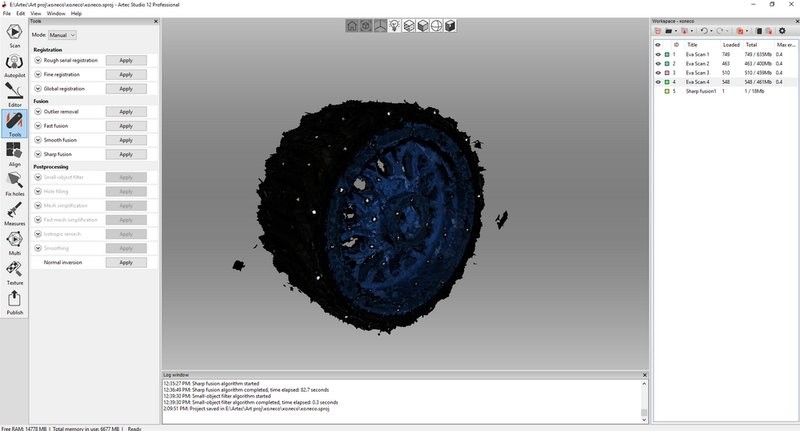
Let’s take larger objects now. We are going to scan this wheel in three Shining modes. We are not going to use the turntable in Fixed Scan because the object is too big, but the markers will be applied.
Such objects are tricky to scan because the tire pattern is repetitive, which means that geometry tracking can get wrong. What is more, it is going to be tough to distinguish the wheel from the tire, since the markers here are placed at right angles, and the scanner won’t capture them properly. We will be taking fewer screenshots this time, since you already know how everything works.
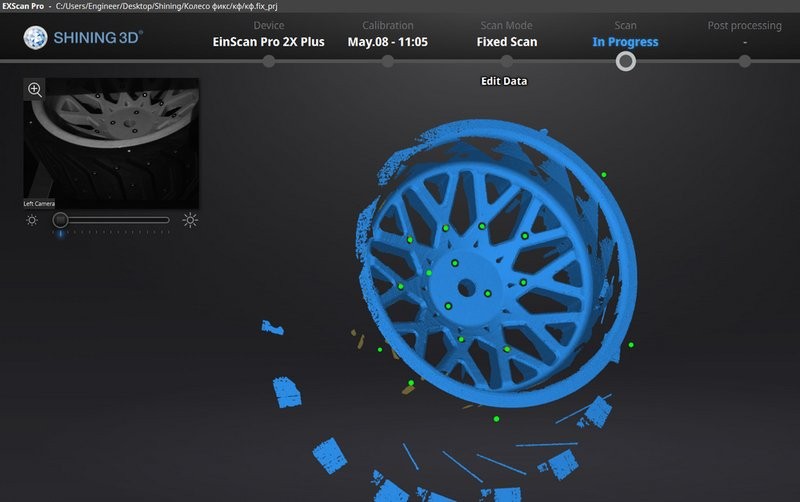
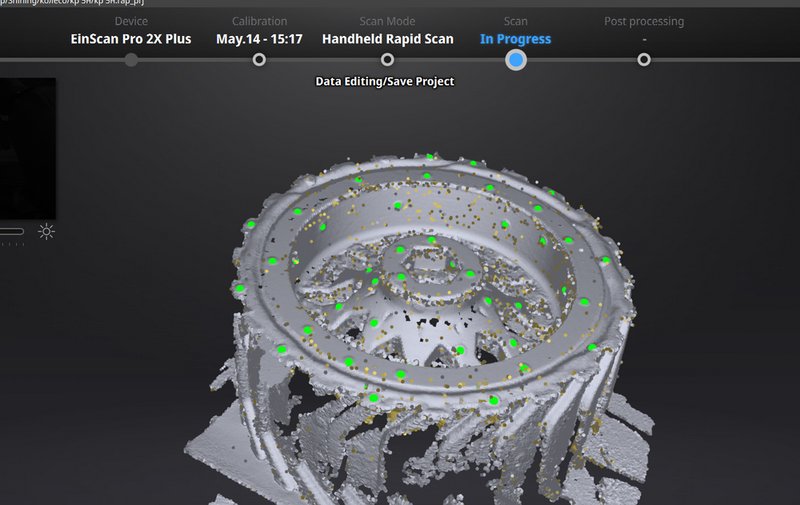
Rotating the object manually while scanning, marker stitching
Deleting artifacts
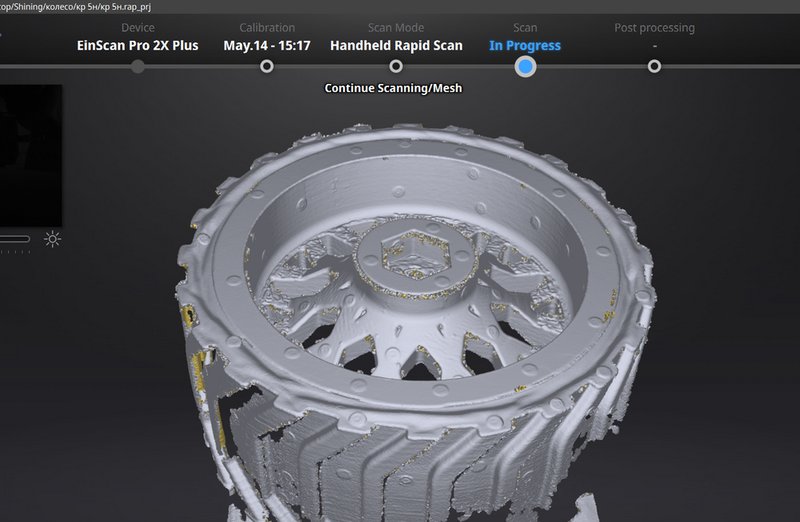
The shots are ready to be merged
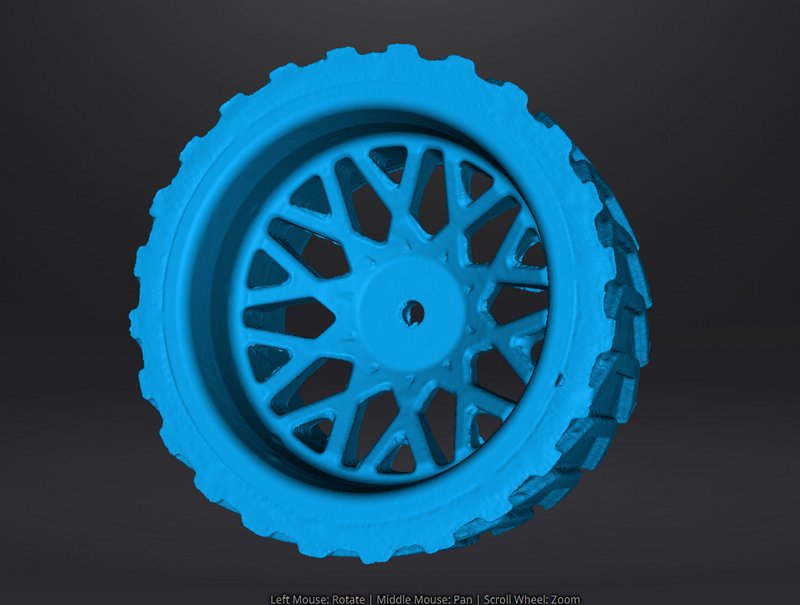
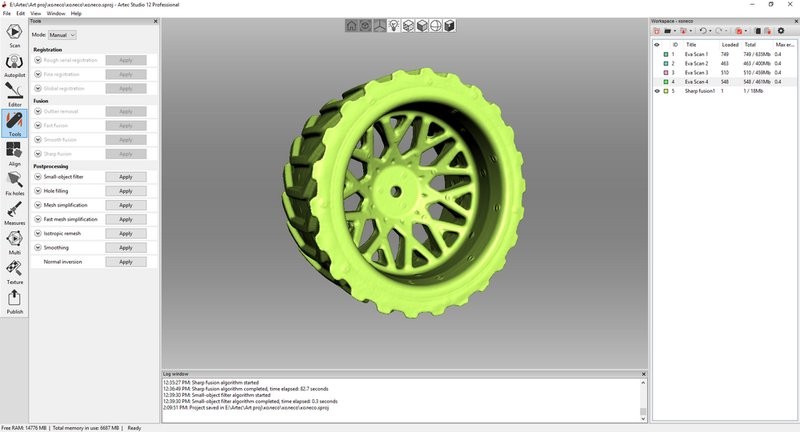
This side looks good, although several small holes got filled up
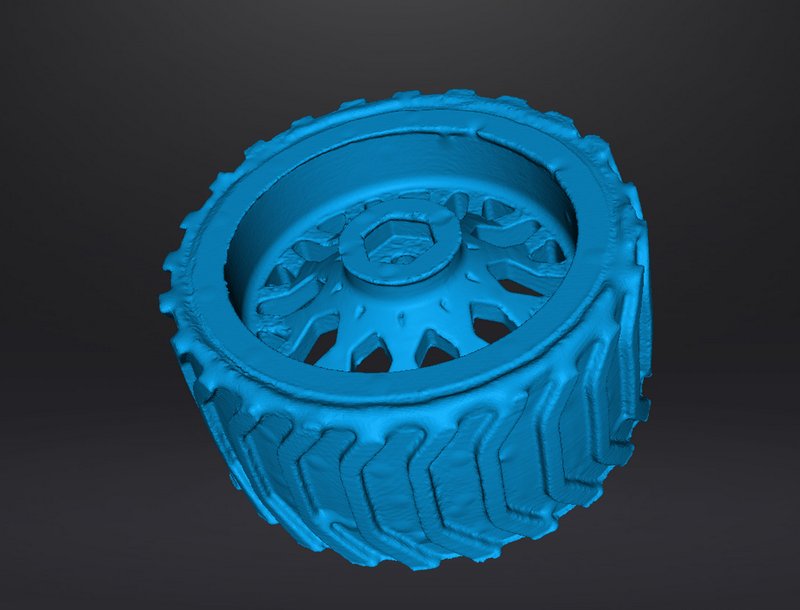
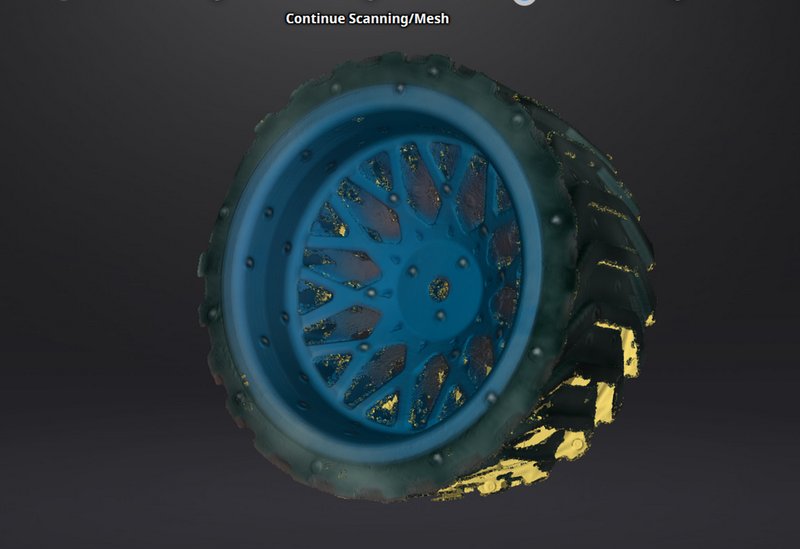
This one is not so good. There are some artifacts left after the markers had been removed, plus the scanner failed to properly capture the glossy black surface on the wheel rim and the program didn’t fill it up well enough.
Let’s treat the black part with a matting spray and try again in handheld mode.

Testing the hybrid mode
Unfortunately, exactly as we’ve expected, in the hybrid stitching mode the scanner loses its track as soon as it reaches the rim protector and fails to match the shots appropriately.
Everything is going well until at a certain point we get a total mess.
We turned on color scanning so that the shift that causes the scans to overlap could be easily seen.
This method is a bad fit in our case
Let’s try auto stitching and add some more markers
Once the scanner has recognized the markers, it automatically stopped tracking the geometry, using just the dots as a reference. Unfortunately, this also didn’t help escape the fact that the markers on the wheel and those on the tire are placed at right angles, and it is nearly impossible to switch to the “sides” after you’ve already scanned the “top”.
The result is a bit better though.
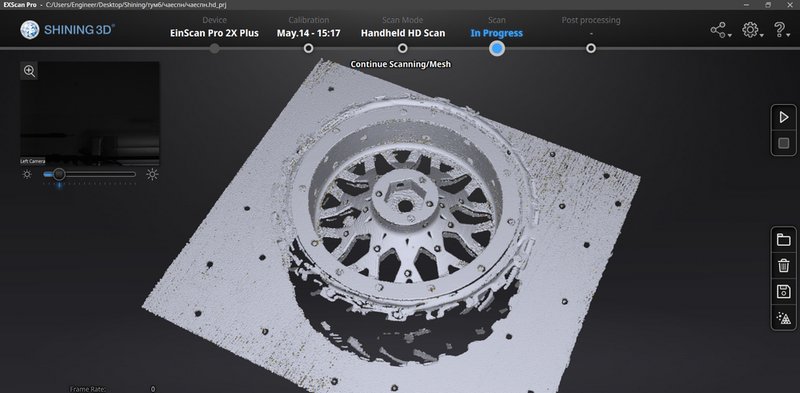
Let’s pull out the big guns and try the HD mode.
Scanning in this mode takes a lot longer than in the Rapid mode (although much faster than in the same mode on previous Einscan models).
And we keep getting the same wheel-tire problem.
Let’s also try to scan the object on a plate with markers attached.
Can’t say that what we got this time is somehow better.
After several attempts, we came to the conclusion that the most appropriate way to get around this would be to scan all sides of the object separately and match them manually in another program like Solid Edge or Geomagic Design. Like I said, the object is tricky to scan with the aid of the markers. Stationary mode proved to be the best for what we’ve been trying to achieve.
Eva, on the other hand, nailed the scanning in 15 minutes, and it took it 5 more to align the scans. The result is similar to the stationary mode on Shining. The accuracy is a bit lower, but there are fewer artifacts left on the surface.
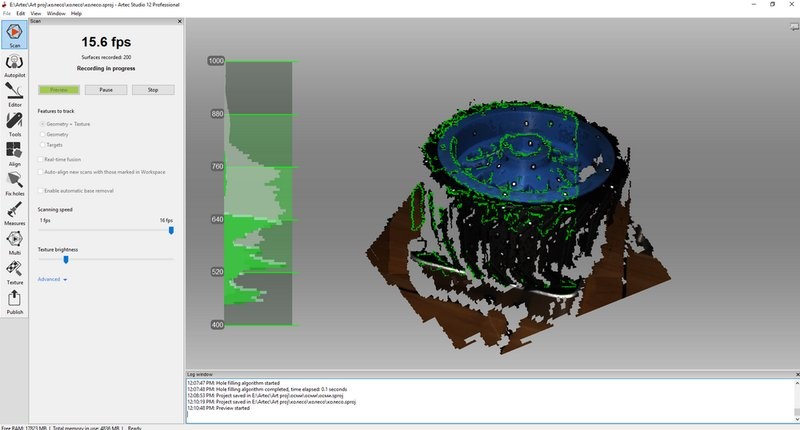
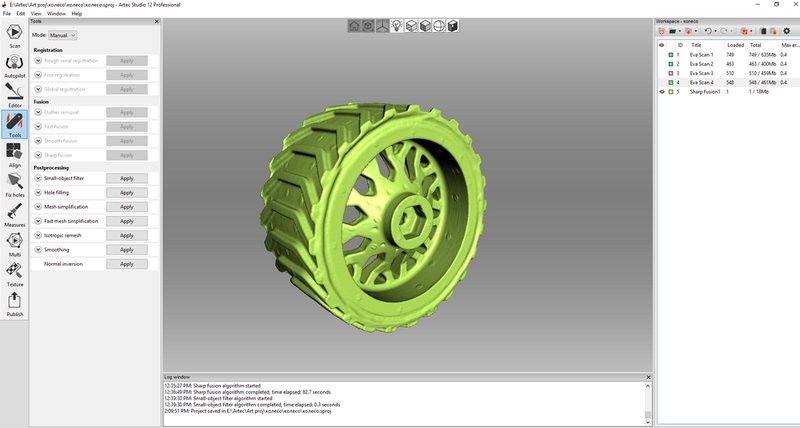
The issue with the markers is still present, and some small holes that were supposed to remain open got filled (like on Shining).
Since we have already touched upon the subject of textures when we were scanning this object, a couple of words should be said about how Shining handles them.
Tests showed that if a turntable is used, textures are captured and applied smoothly.
The object
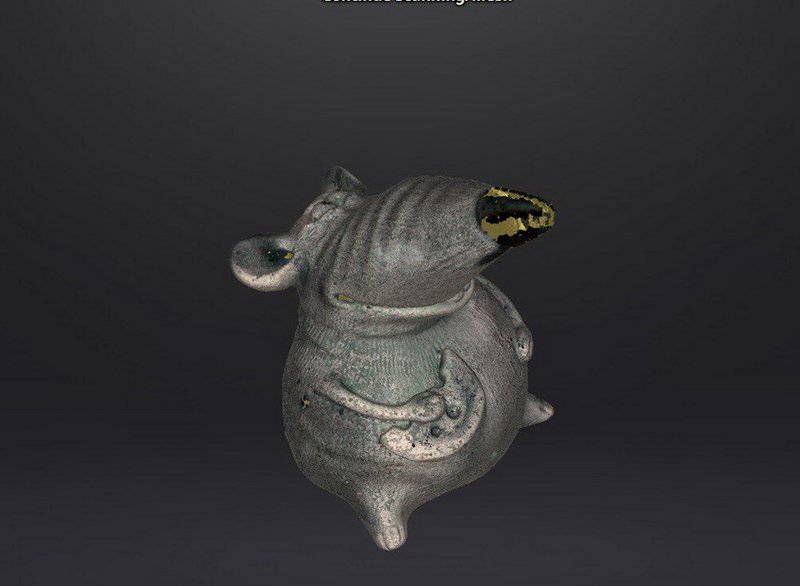
A sample
Texture mapping. It is possible to work out the UV map of the model.
The only thing is that black color cannot be captured correctly, since it’s a problematic surface, as well as transparent and mirror-like ones.
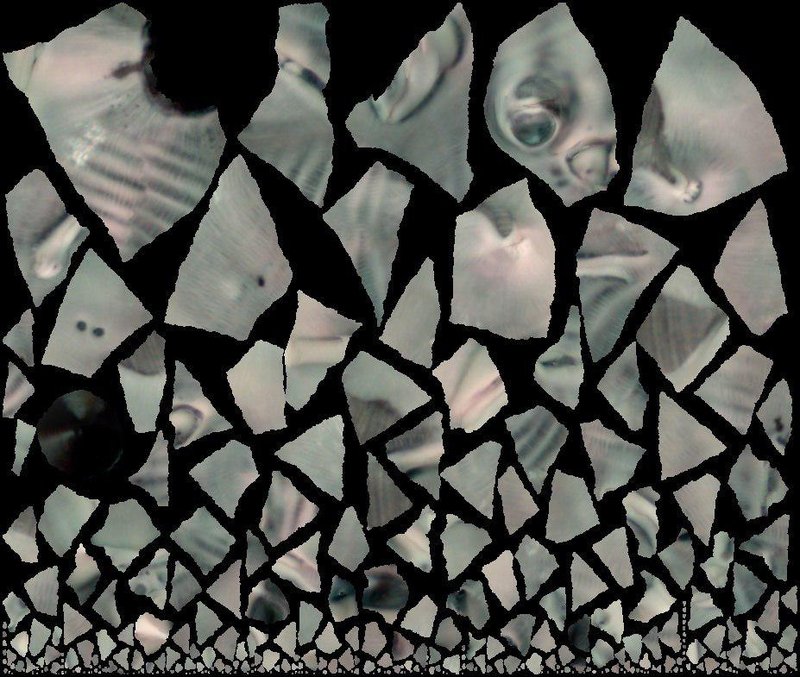
You can use a color module in stationary mode as well, although it can get troublesome in other modes. Firstly, the HD mode doesn’t capture the texture at all due to the fact that this mode is mainly designed for engineering purposes that do not require color texture in 99% of cases. Secondly, the Rapid mode is able to capture the texture but fails to properly apply it, which results in multiple distortions and low resolution. The reason behind this probably concerns alignment algorithms in the handheld mode, and also the fact that in this mode a single shot captures fewer points than in stationary mode.
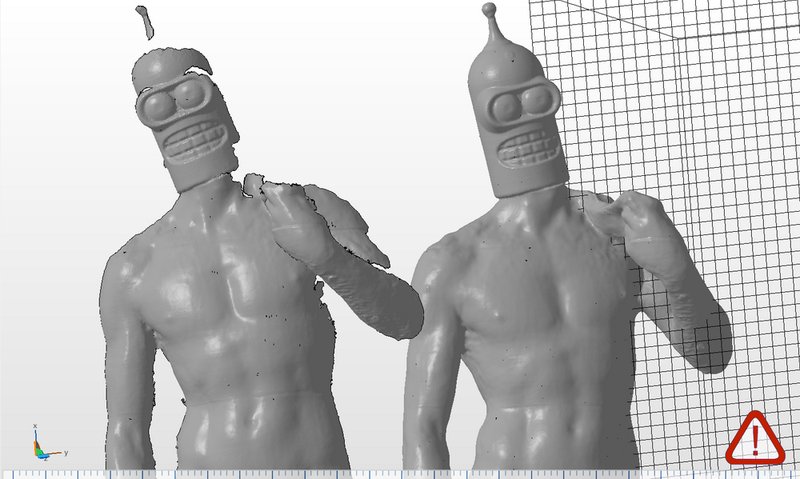
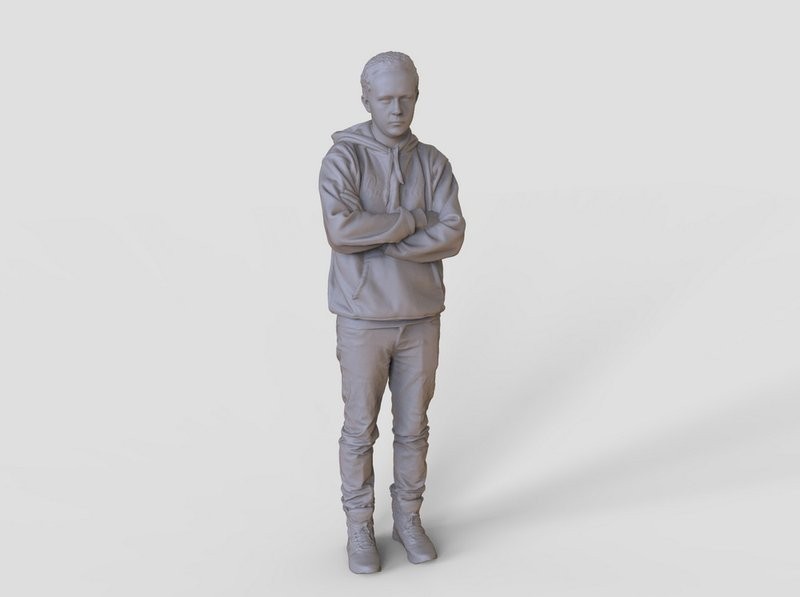
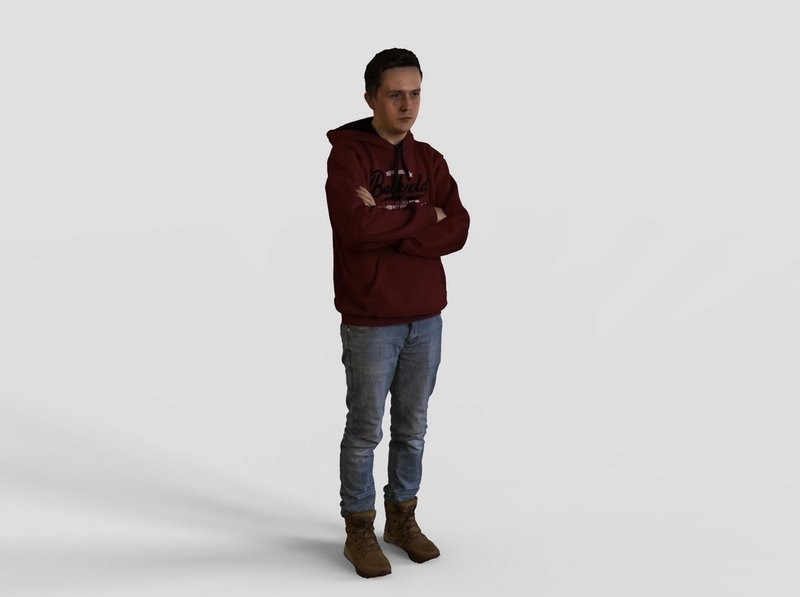
For our next object, we’ve chosen a 3D printed statue about 1 meter tall.
Stationary mode is not applicable in this case.
The scanner captured the object in the Rapid mode rather good with every set of settings. It seems that interesting and varied geometry together with the use of markers leads to a decent result.
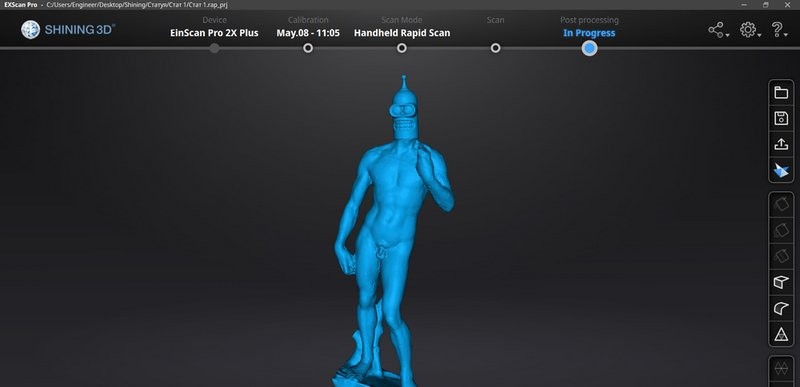
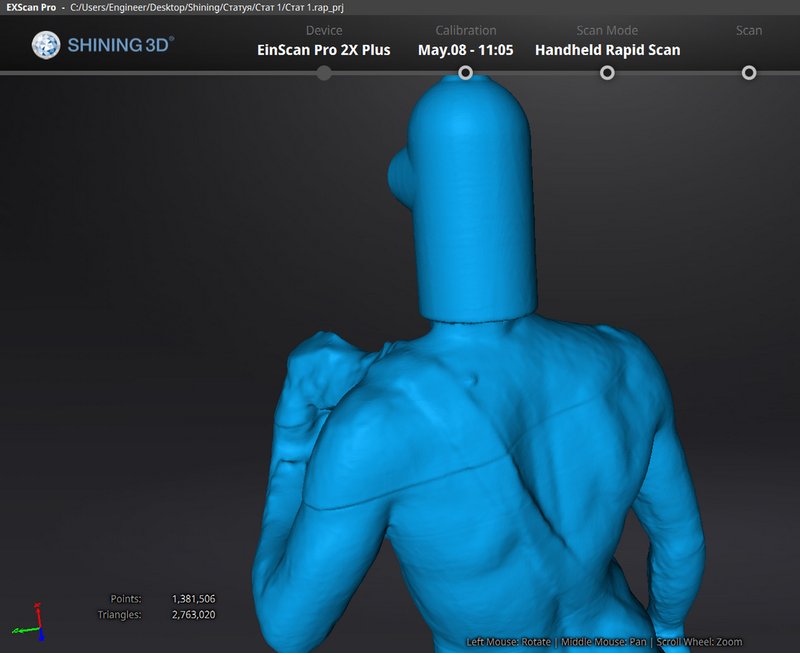
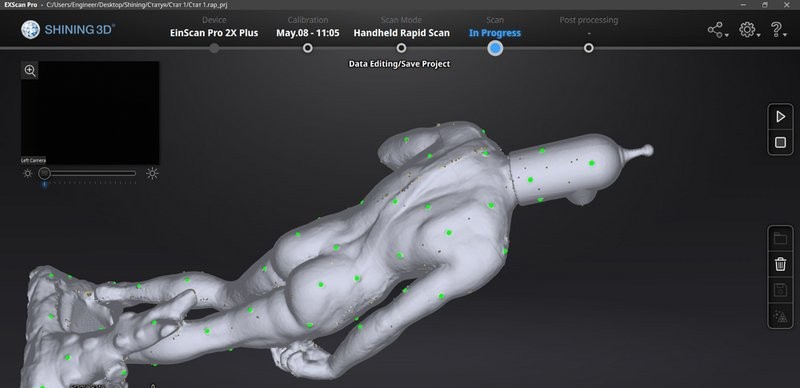
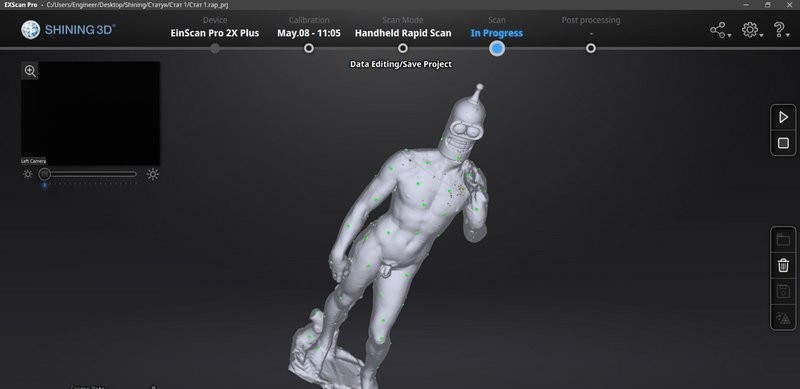
You can scan an object of this kind pretty fast with Refine option on, and then switch the accuracy to 250 µm; such a result will be great for a quick scan of a large object like this.
You could also scan it in HD, but we wouldn’t recommend it, since it will definitely take more markers, which will damage the surface of the model after you’ve removed them. Rapid mode is your best choice in this case.
Eva managed to smoothly scan the object as well.

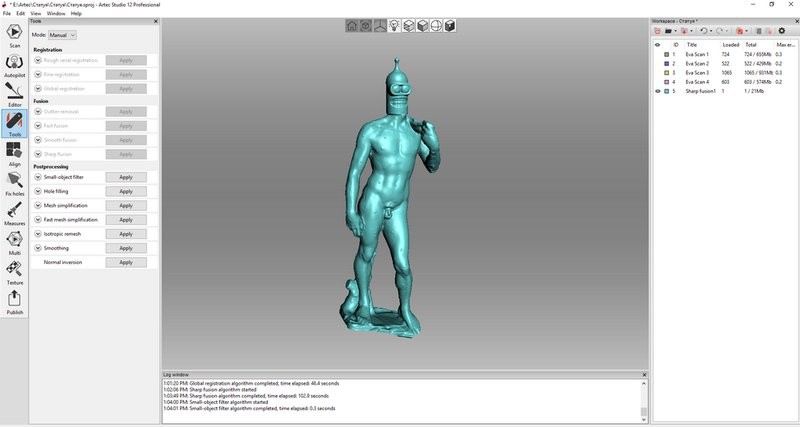
This object is almost perfect for a scanner of this kind. It fits the recommended size, and its convenient surface and varied geometry do not let the scanner lose its track.
If we take a similar object but this time about 1,5—2 meters high, the scanners will perform at their best as well. Artec will do it faster and Shining will provide more accuracy.
In the previous part we made it clear that the scanners are good with large objects. Let us now turn to the most difficult objects to scan - people.
People and their ‘surface’ are the most difficult objects to scan in 3D. They move, which alters the geometry and relative position of the markers (that are generally not attached to the human body, partly for this very reason, because it doesn’t make any sense).
Before we begin, it should be made clear that the human body falls short of Shining’s target area, but it is a part of Eva’s area of expertise, therefore the best result is obvious from the start. Artec Eva is a great choice for human body scan, it can even boast specially tailored settings that compensate for the object’s motion. Scan accuracy reaches about 0,5 to 1,5 mm.
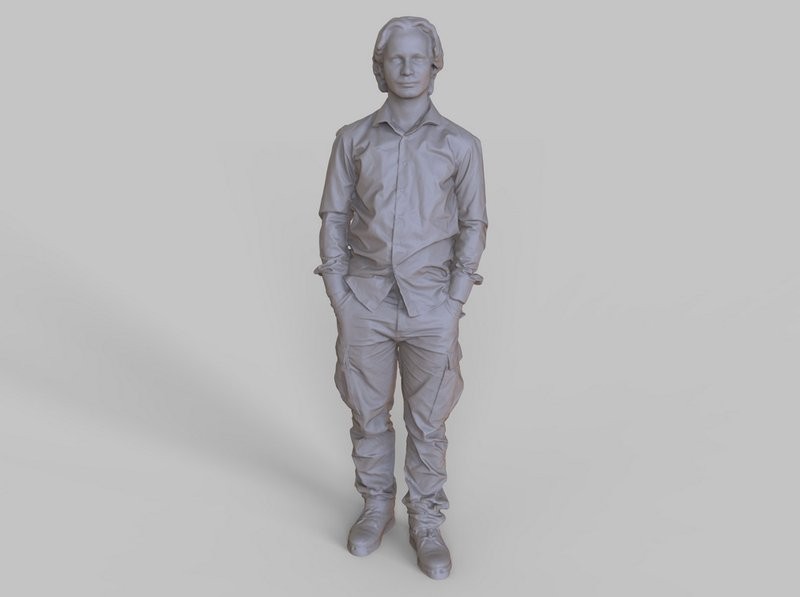
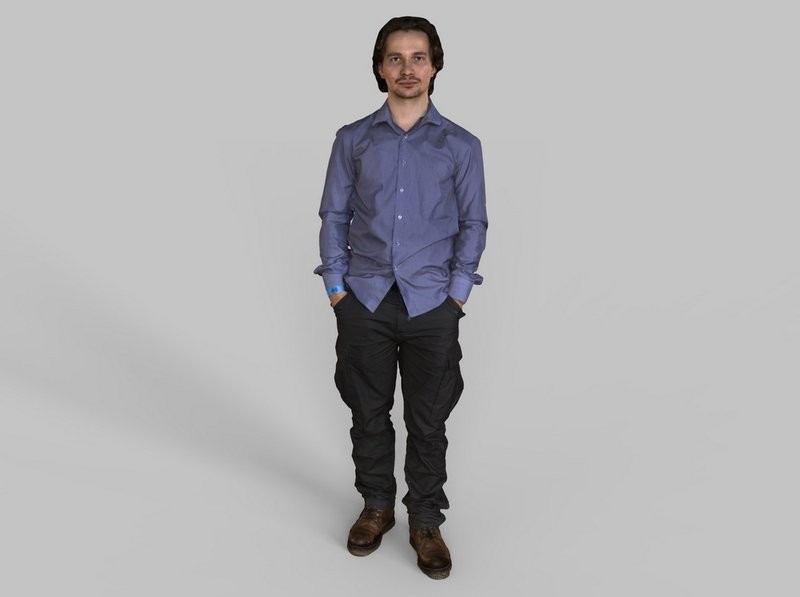
Artec Eva: sample scans
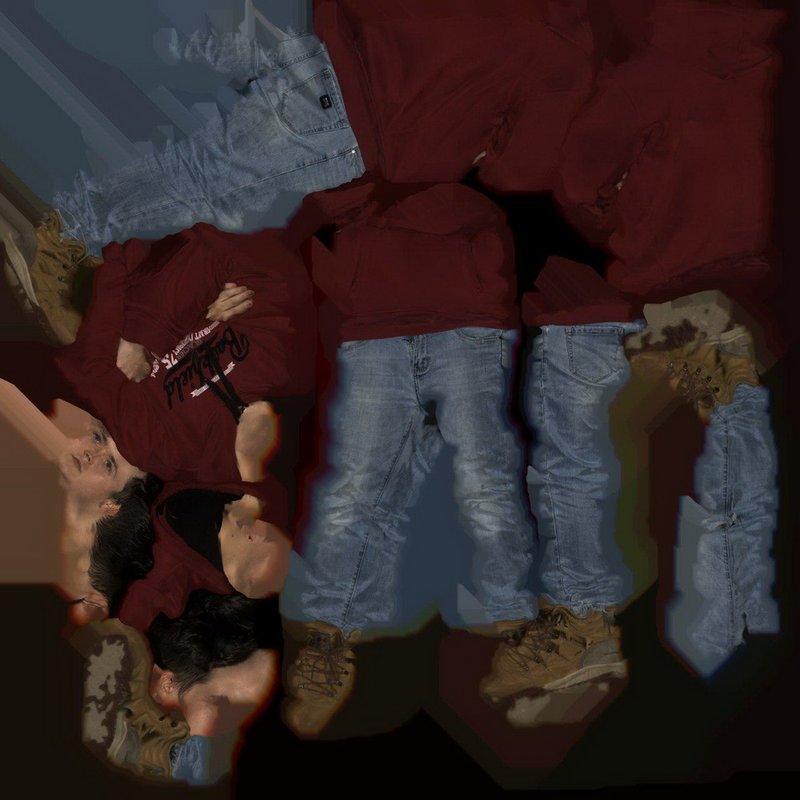
Texture mapping. The UV map of the model stands out.
Now let’s see what Shining has to offer. If it manages to produce a slightly similar result, it will definitely be a success.
The rapid hybrid mode is the only suitable option for this purpose.
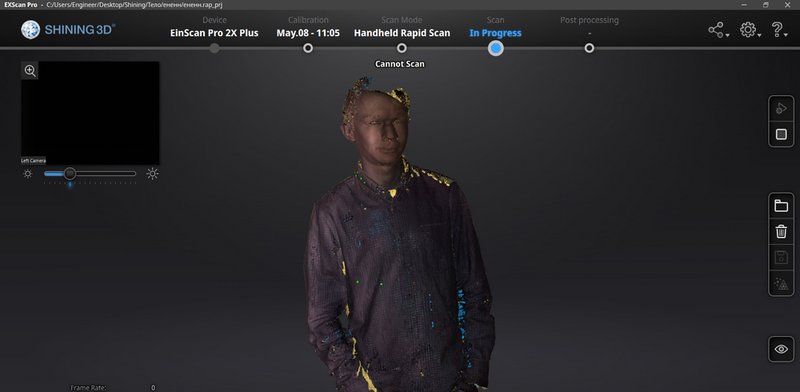
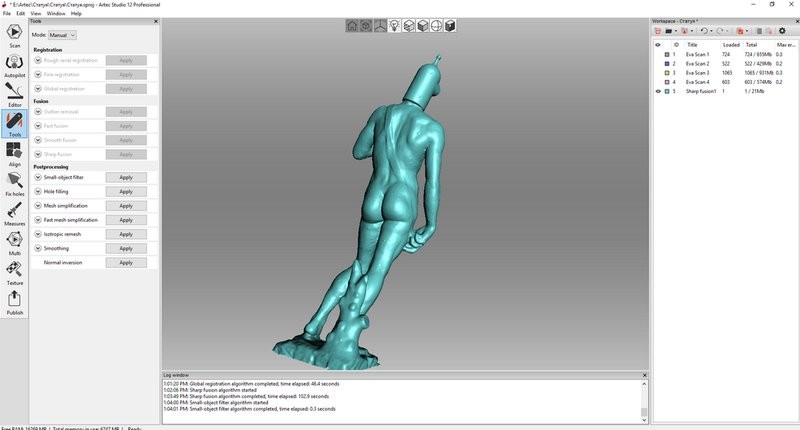
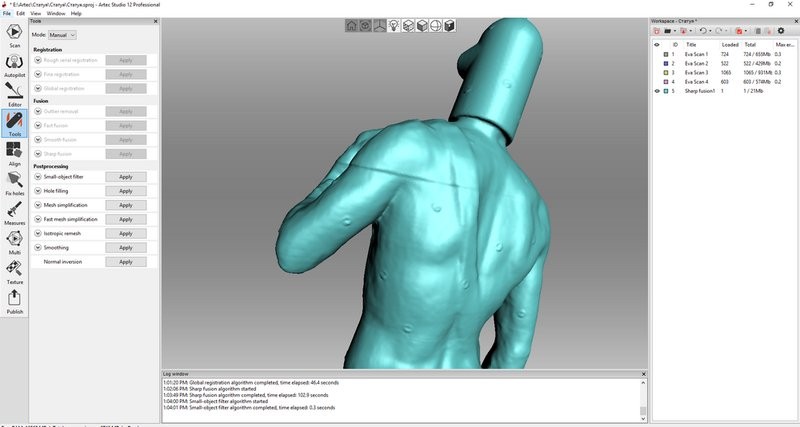
It definitely isn’t going smoothly.

The scanner gets lost every time it comes across any moving parts, and it leaves many holes in the process.
But the stitched result is not that bad after all.
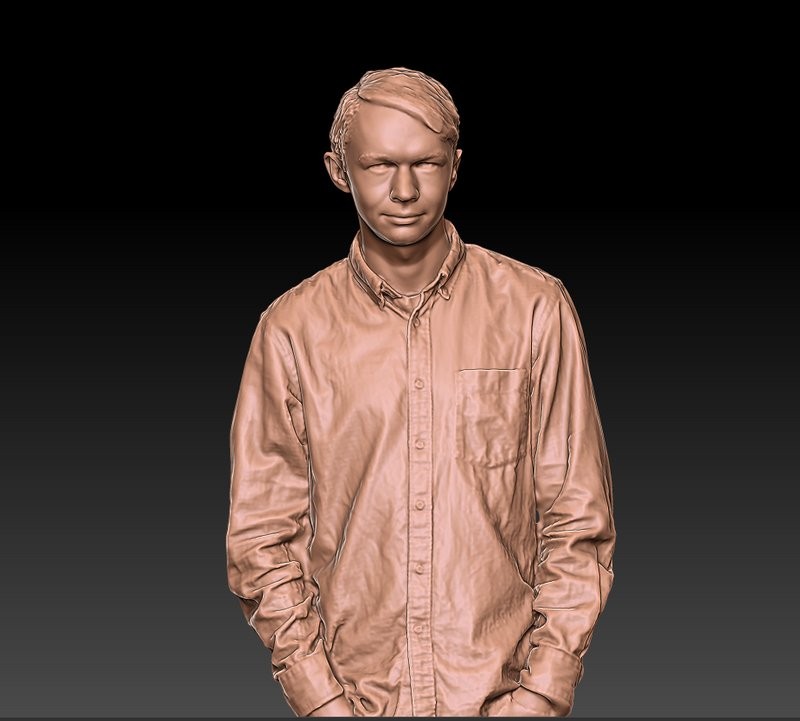
A bit of manual processing, and we’re done.
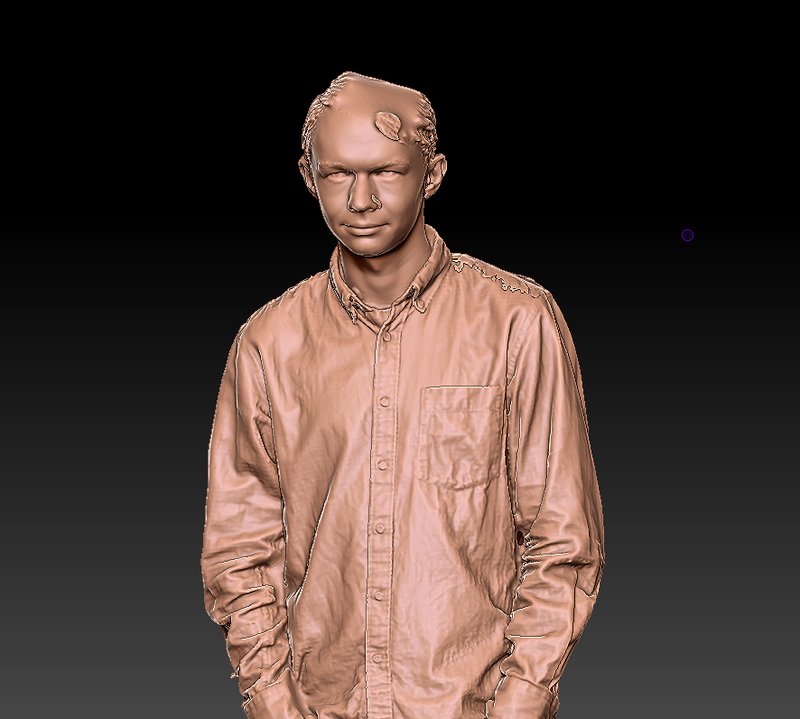
There are no scans of the lower part because Shining doesn’t capture black surfaces, including black pants. In fact, it has performed significantly better than we expected, especially considering that with its predecessor, we barely managed to somehow scan the head.
So what’s the bottom line here? Traditionally, Shining has launched a new scanner model with some improvements. The speed is a bit higher, the algorithms are a bit faster, the result contains more points per shot. There is a number of new options in the software, and it is a good thing that you can go to reverse engineering tools in one click. However, the issues with the device are still the same as they were. The camera’s angle of view is small, which causes poor geometry and marker capturing, the scanner frequently loses its track, especially when the object is “monotonous”; these failures are also prompted by a limited field of view. Handling colored textures remains problematic. Although you should take into account that the price for this scanner is almost two times lower than for its closest counterparts.
Overall, Shining is good for the following purposes:
Not recommended for:
|
Application area |
Shining Einscan Pro 2X Plus |
Artec Eva |
|
Reverse engineering |
Most suitable |
Moderately suitable (with lower accuracy) |
|
Metrological control |
Most suitable |
Moderately suitable (with lower accuracy) |
|
Body scanning |
Not suitable |
Most suitable |
|
Health care |
Moderately suitable (body parts are difficult to scan) |
Most suitable |
|
Art |
Moderately suitable (color texture capturing is problematic) |
Moderately suitable (except for small objects) |
|
Architecture |
Moderately suitable (requires a lot of markers; slow at large areas) |
Moderately suitable (with a chance of lower accuracy) |
|
Education |
Most suitable |
Moderately suitable (difficult to operate) |
Although Artec Eva is rightly praised and acknowledged by professionals, when it comes to the majority of engineering purposes Shining Einscan Pro 2X Plus, a newer and more affordable device, gets ahead. This comes as no surprise, considering their ‘age difference’.
It is advisable to always bear in mind that the choice of tools for any use should be individual, and it is best to seek professional assistance.
Looking for a 3D scanner? Contact us and get the best device for your project.
Update your browser to view this website correctly. Update my browser now

Write a comment