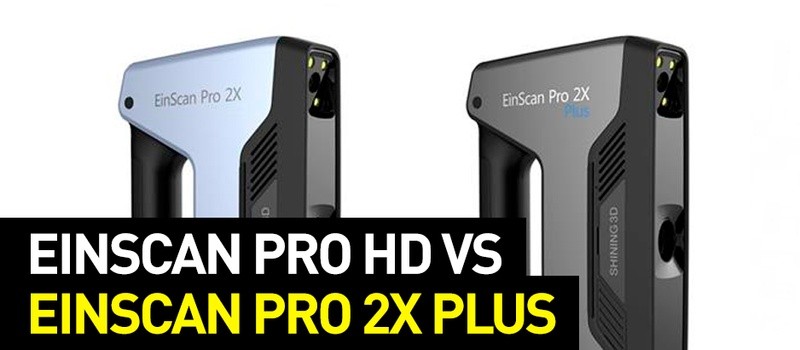
Hello! It’s Top 3D Blog and in this article, we are going to compare SHINING 3D EinScan Pro HD and SHINING 3D EinScan Pro 2X Plus 3D scanners by working with objects of various sizes and surfaces. We will also explore the build changes and differences in the results.
\n \nKeep reading to learn more.
\n \n\n \n

Source: shining3ddental.com
\n \nFounded in 2014, SHINING 3D is a company that develops 3D digitizing and printing technologies and has headquarters in Hangzhou, China. SHINING 3D manufactures and sells 3D scanners for various industries, as well as their additional modules, 3D printers, and 3D printing materials.
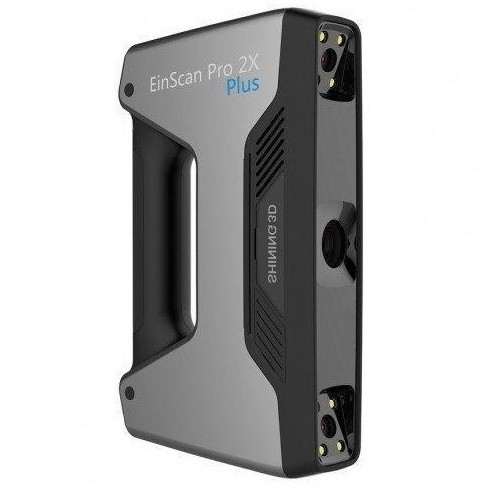
\n \nThe SHINING 3D EinScan Pro HD was launched in the summer of 2020. It has replaced a popular model SHINING 3D EinScan Pro 2X Plus.
\n \n \n \n\n \n
Multi-purpose portable 3D scanner EinScan Pro HD has several significant updates over the previous versions:
\n \nThe light module of the new system now utilizes the same line pattern in both the Handheld HD Scan Mode and the Fixed Scan mode. The minimum point distance of 0.2 mm and the optimized algorithm now allow the handheld mode to be as accurate and feature the same resolution as in the Fixed Scan mode.
\n \n\n \n

| \n\t\t\t | \n\t\t\t \n\t\t\t | \n\t\t\t\n\t\t\t \n\t\t\t | \n\t\t|
|
\n\t\t\t OS \n\t\t\t |
\n\t\t\t
\n\t\t\t Win 7, Win 8, Win 10, 64 bit \n\t\t\t |
\n\t\t\t
\n\t\t\t Win 10, 64 bit \n\t\t\t |
\n\t\t|
|
\n\t\t\t Weight \n\t\t\t |
\n\t\t\t
\n\t\t\t 0.8 kg \n\t\t\t |
\n\t\t\t
\n\t\t\t 1.13 kg \n\t\t\t |
\n\t\t|
|
\n\t\t\t Supported file formats (export) \n\t\t\t |
\n\t\t\t
\n\t\t\t OBJ; STL; ASC; PLY; P3 ; 3MF \n\t\t\t |
\n\t\t\t
\n\t\t\t OBJ; STL; ASC; PLY; P3 ; 3MF \n\t\t\t |
\n\t\t|
|
\n\t\t\t Texture scan \n\t\t\t |
\n\t\t\t
\n\t\t\t yes (with the color scan module) \n\t\t\t |
\n\t\t\t
\n\t\t\t yes (with the color scan module \n\t\t\t |
\n\t\t|
|
\n\t\t\t Scanning area \n\t\t\t |
\n\t\t\t
\n\t\t\t 208 x 136 mm — 312 x 204 mm \n\t\t\t |
\n\t\t\t
\n\t\t\t 209 x 160 mm – 310 x 240 mm \n\t\t\t |
\n\t\t|
|
\n\t\t\t Connectivity \n\t\t\t |
\n\t\t\t
\n\t\t\t USB 2.0, USB 3.0 \n\t\t\t |
\n\t\t\t
\n\t\t\t USB 3.0 \n\t\t\t |
\n\t\t|
|
\n\t\t\t Min. system requirements \n\t\t\t |
\n\t\t\t
\n\t\t\t Graphics card: NVIDIA GTX 660 and above, VRAM: >2GB, CPU: i5 and above, RAM: 8GB and more \n\t\t\t |
\n\t\t\t
\n\t\t\t Graphic card: Quadro card P1000 or NVIDIA GTX660 and higher; CPU: Intel (R) xeon E3-1230, Intel (R) I5-3470, Intel (R) I7-3770; VRAM: >4GB, CPU: I7-8700, RAM: 8GB and more \n\t\t\t |
\n\t\t|
|
\n\t\t\t Working distance \n\t\t\t |
\n\t\t\t
\n\t\t\t 400–500 mm \n\t\t\t |
\n\t\t\t
\n\t\t\t 510 mm \n\t\t\t |
\n\t\t|
|
\n\t\t\t Scanning speed \n\t\t\t |
\n\t\t\t
\n\t\t\t 20-30 fps, up to 1, 500,000 measurements per second \n\t\t\t |
\n\t\t\t
\n\t\t\t 10-30 fps, up to 1, 500,000 measurements per second \n\t\t\t |
\n\t\t|
|
\n\t\t\t Applications \n\t\t\t |
\n\t\t\t
\n\t\t\t Education; reverse engineering, metrology, energy field, medical sector; \n \n\t\t\tArchitecture; \n \n\t\t\tArts and design. \n\t\t\t |
\n\t\t\t
\n\t\t\t Education; \n \n\t\t\tManufacturing and reverse engineering; metrology; energy field; Medical sector; \n \n\t\t\tOrthopedics and prosthetics; Architecture; \n \n\t\t\tArts and design. \n\t\t\t |
\n\t\t|
|
\n\t\t\t Accuracy \n\t\t\t |
\n\t\t\t
\n\t\t\t up to 0.05/0.1/0.2 mm (depending on the mode) \n\t\t\t |
\n\t\t\t
\n\t\t\t up to 0.04 mm \n\t\t\t |
\n\t\t|
|
\n\t\t\t Price \n\t\t\t |
\n\t\t\t\n\t\t\t \n\t\t\t | \n\t\t\t\n\t\t\t \n\t\t\t | \n\t\t|
\n \n
\n \n
Source: youtube.com
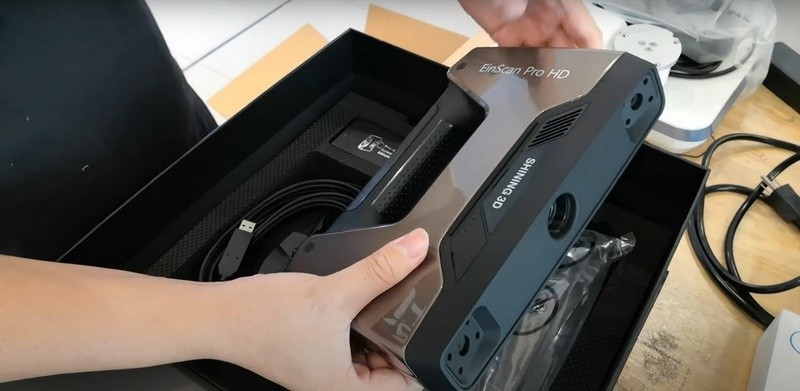
\n \nThe SHINING 3D EinScan Pro HD package includes:
\n \n\n \n
You can read about additional modules for the SHINING 3D EinScan scanners in our article about the previous model.
\n \nThe modules and packs for the Pro HD are similar to those of the previous models, but there are some changes:
\n \n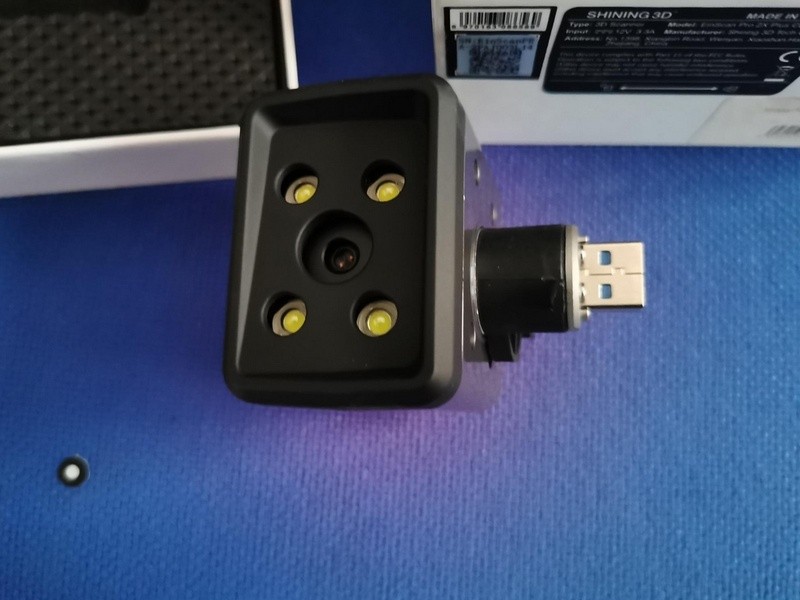
An additional camera for scanning the object’s color texture. It’s connected to the scanner using the USB 3.0 port with a special mount. The camera significantly increases the efficiency of the scan and collects color data.
\n \n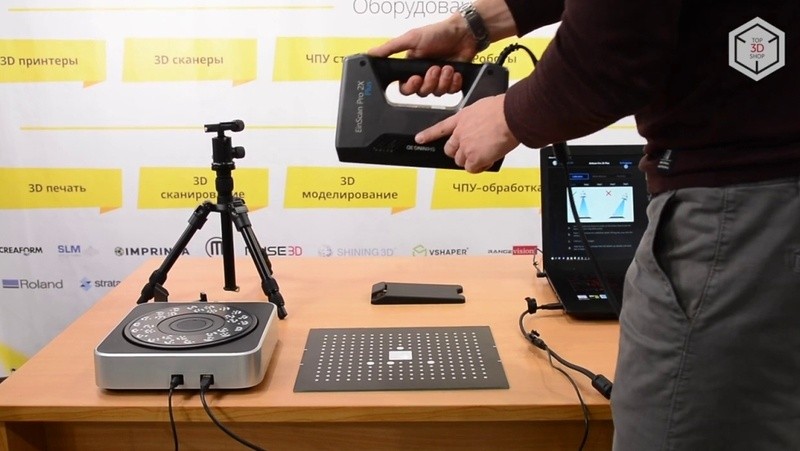
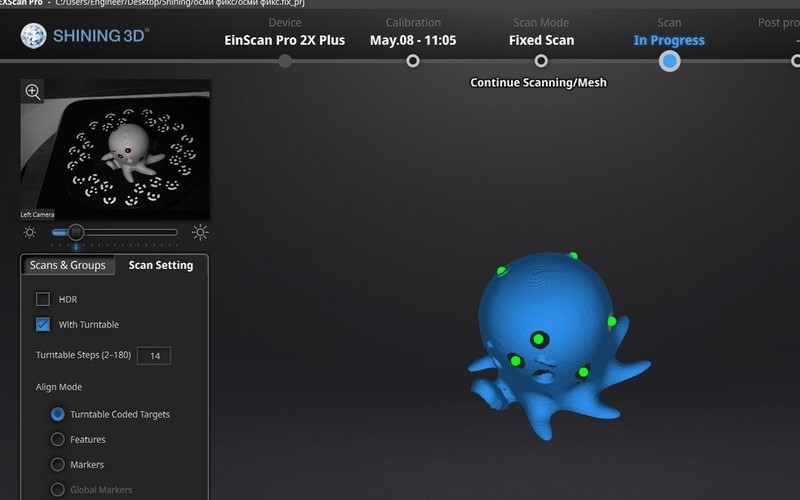
A tripod with a mount and an automatic turntable for scanning in the Fixed mode. The turntable simplifies the scanning process and helps to get higher resolution results.
\n \n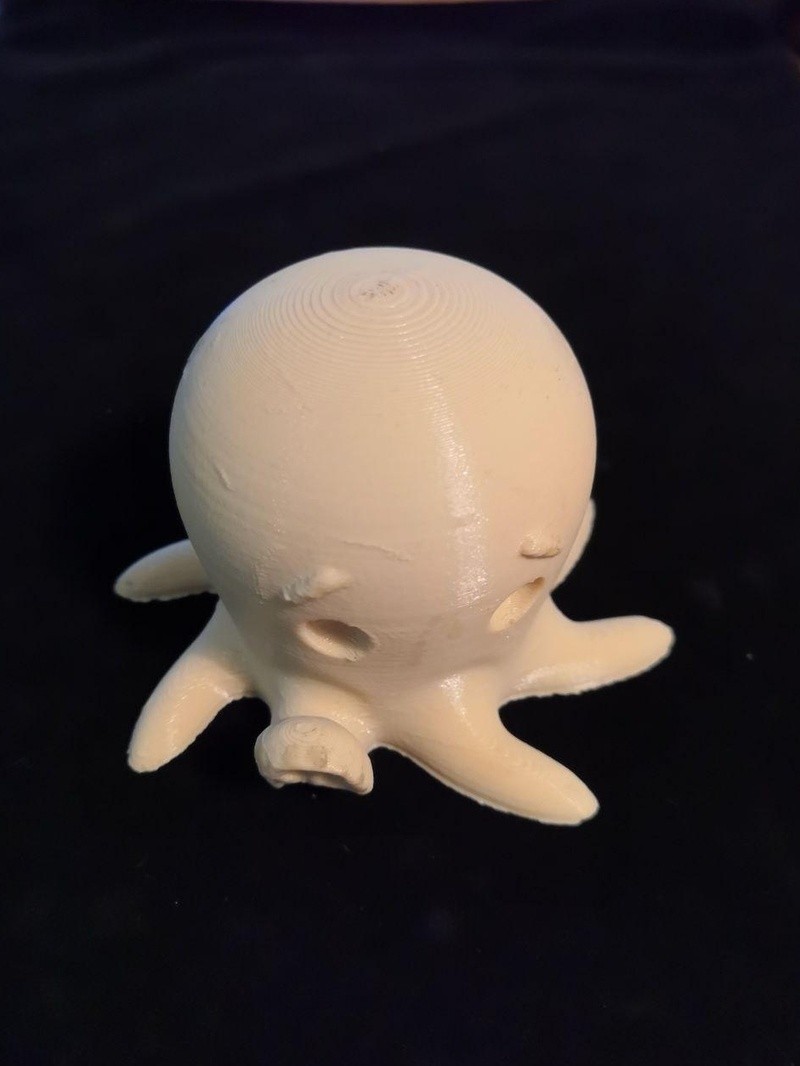
The Fixed mode was chosen since it allows better accuracy and level of detail. The first thing was to get several frames from different angles that were later aligned. Each alignment process in this review was done in a proprietary ‘native’ software of the scanner, named EXScan Pro, v3.5.0.6. The program is very easy to understand and use and features all of the basic tools for getting a 3D polygonal model that can be exported into asc, stl, ply, obj, 3mf file formats.
\n \n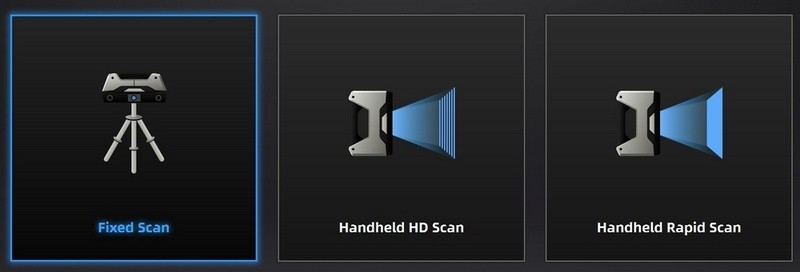
Choosing the Fixed Scan mode.
\n \n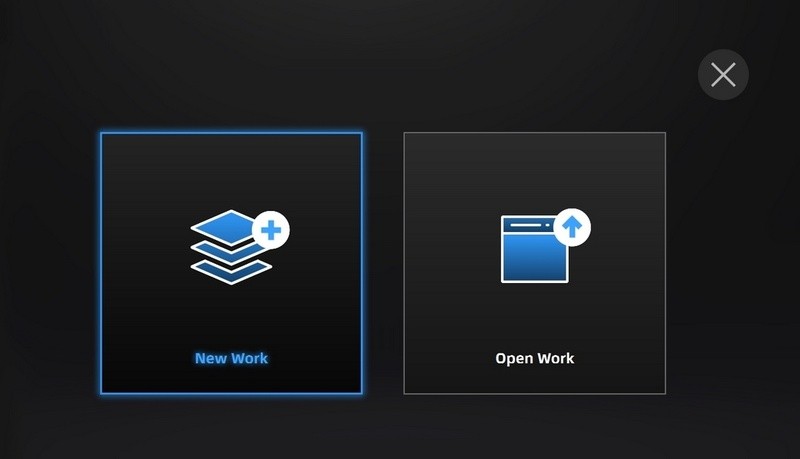
Making a new project.
\n \nThe scanning was done without the markers since the geometry of the object makes it easy to align the scans using proprietary software.
\n \nThe standard packaging lacks a turntable, so the object was turned manually before each scan.
\n \nA third-party turntable was used to simplify and speed up the process. It wasn’t connected to the EXScan Pro software. After each scan, the object was turned with proper angling, which would allow a part of the geometry that was scanned before to perfectly align with the following scan.
\n \n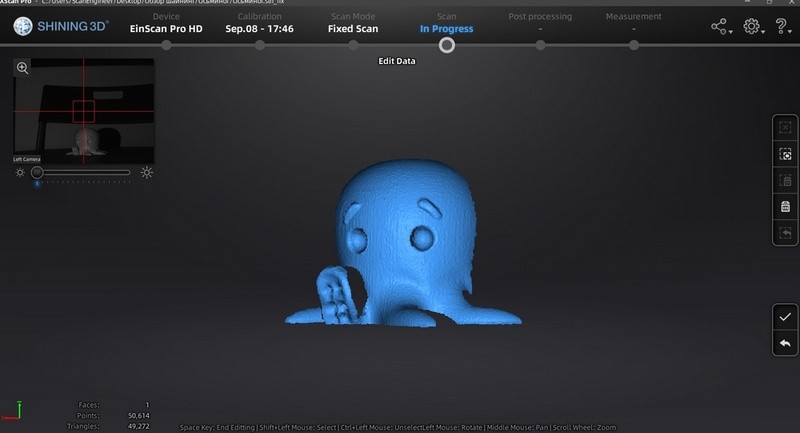
A single scan
\n \n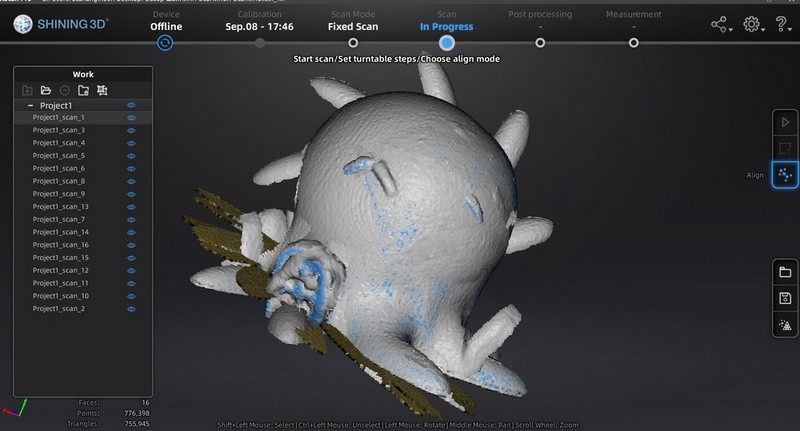
Several scans were obtained from different angles.
\n \n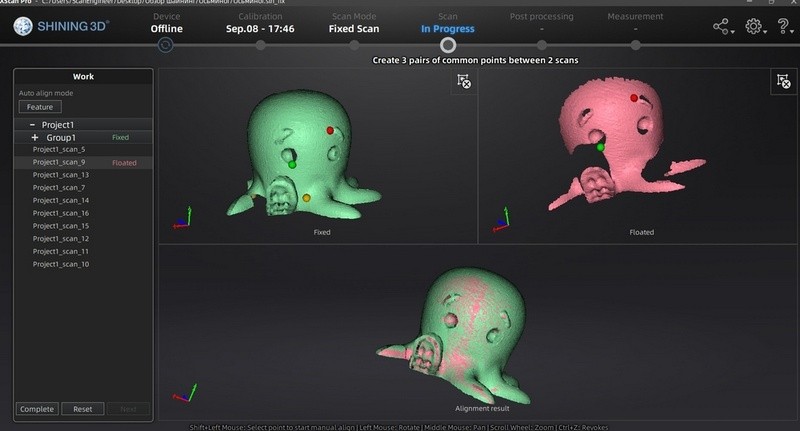
Manual alignment of different scans.
\n \n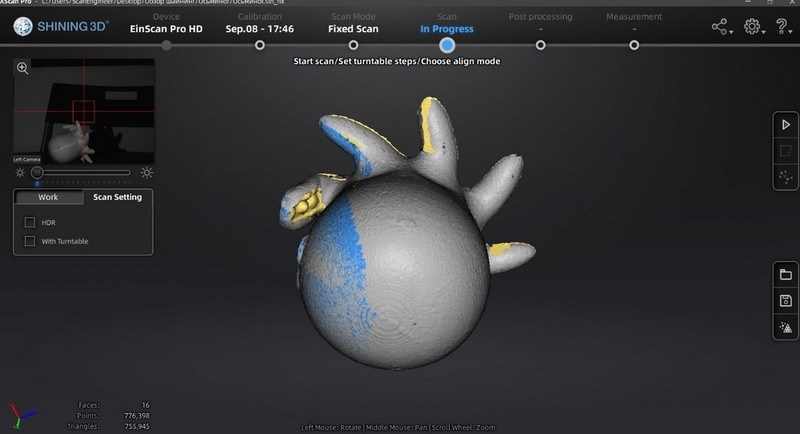
The elements that are difficult to scan are visible after aligning the scans. They weren’t captured by any of the scans. In this case, one can either make additional scans or fill the holes digitally when creating a model.
\n \n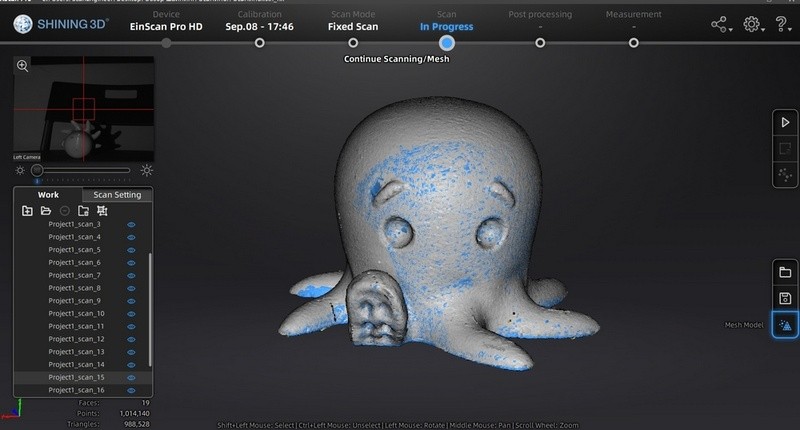
Aligned scans, the Mesh Model tool was chosen to create a model
\n \n
Choosing a watertight model (the one where the hard to scan elements are filled in automatically)
\n \n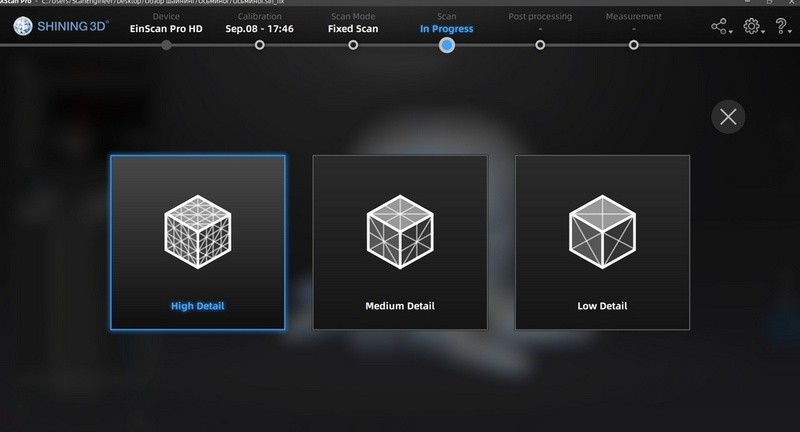
Aligning scans with the maximum possible level of detail (it affects both speed and accuracy of the process)
\n \n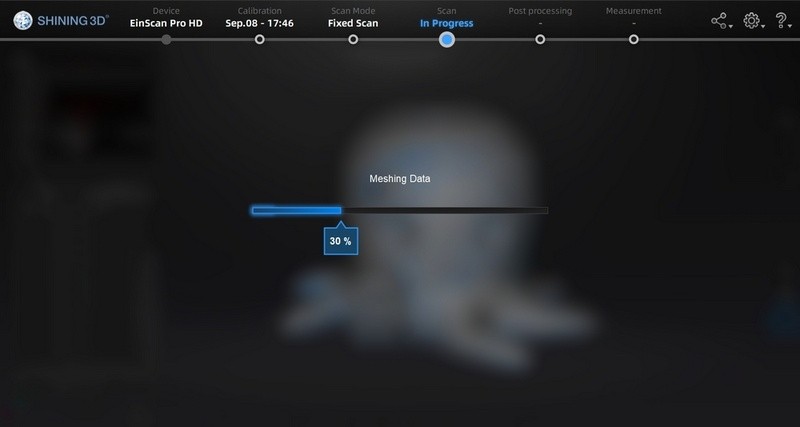
Creating a 3D polygonal model
\n \n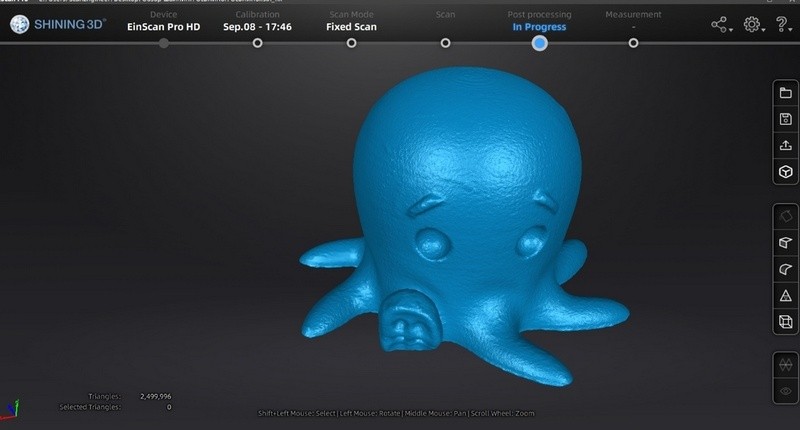
Resulting 3D model (without post-processing)
\n \n|
\n\t\t\t SHINING 3D EinScan Pro 2X Plus \n\t\t\t |
\n\t\t\t
\n\t\t\t SHINING 3D EinScan Pro HD \n\t\t\t |
\n\t\t
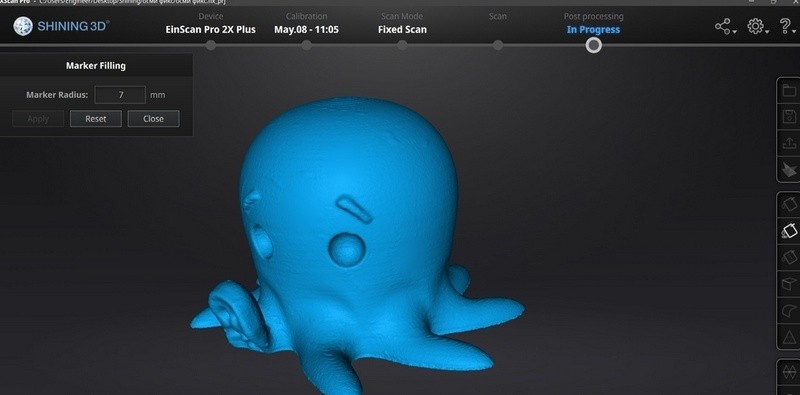
Both models managed to successfully scan a simple object. The SHINING 3D EinScan Pro HD was able to scan the object without using markers.
\n \n\n \n
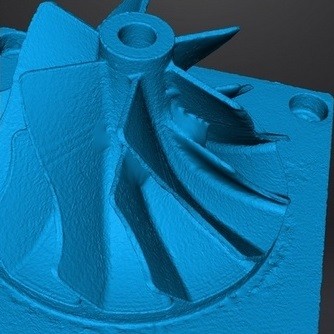
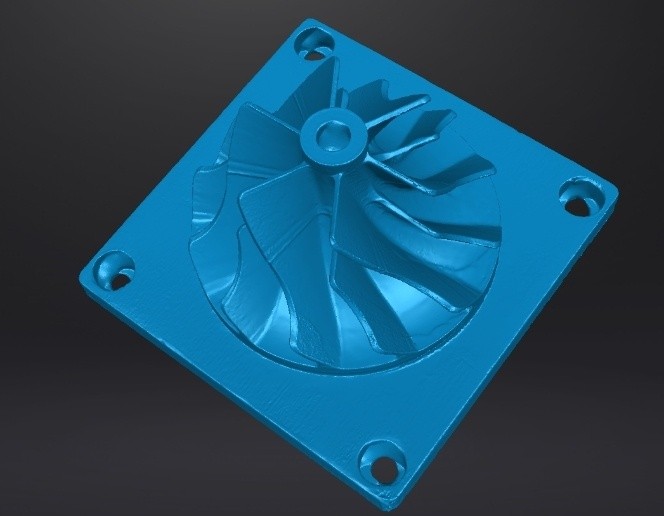
Let’s scan a technical object with the polygonal result that can be utilized for reverse-engineering purposes in Geomagic Design X, Geomagic for SolidWorks, Compass 3D, and other programs.
\n \n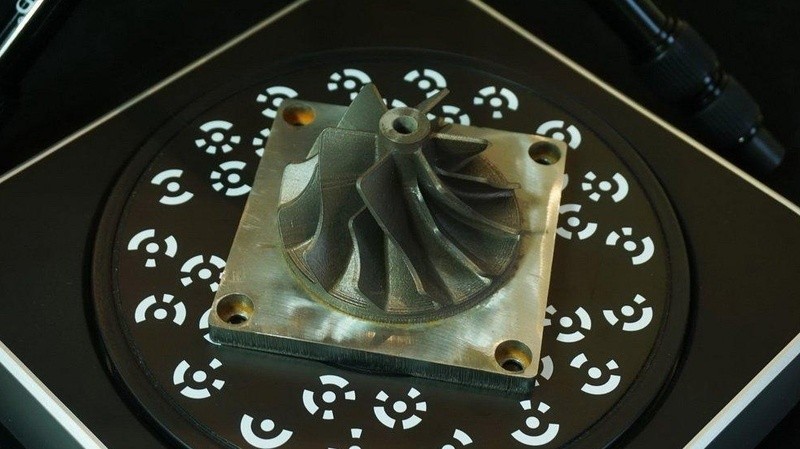
Scanning the impeller was also done in the Fixed Scan mode that would allow getting better accuracy of the result.
\n \n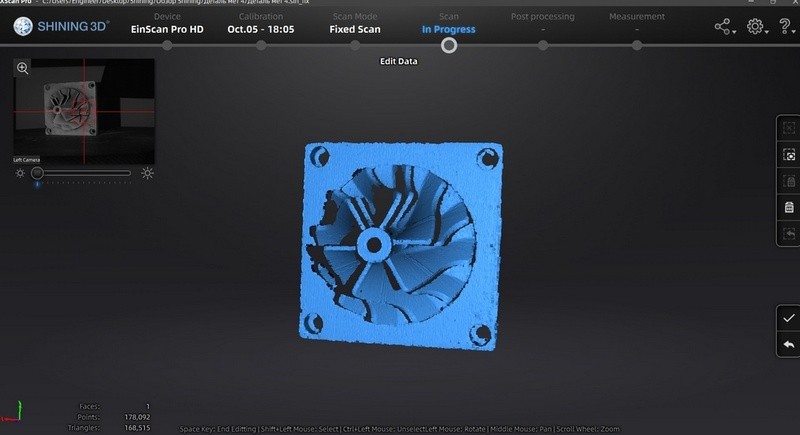
Single scans
\n \n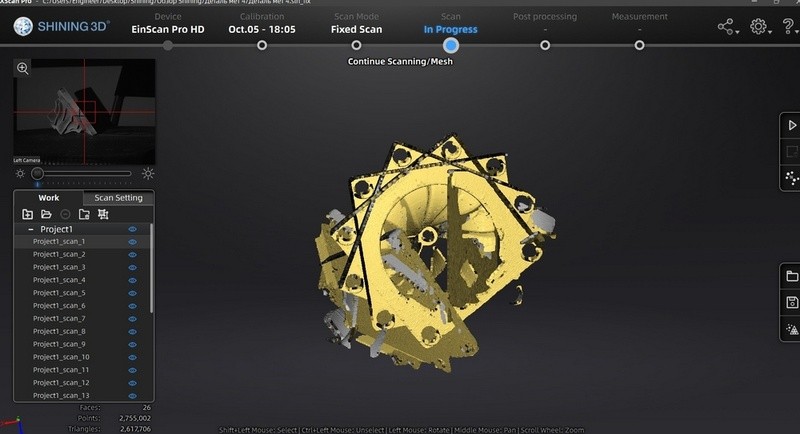
Resulting scans
\n \n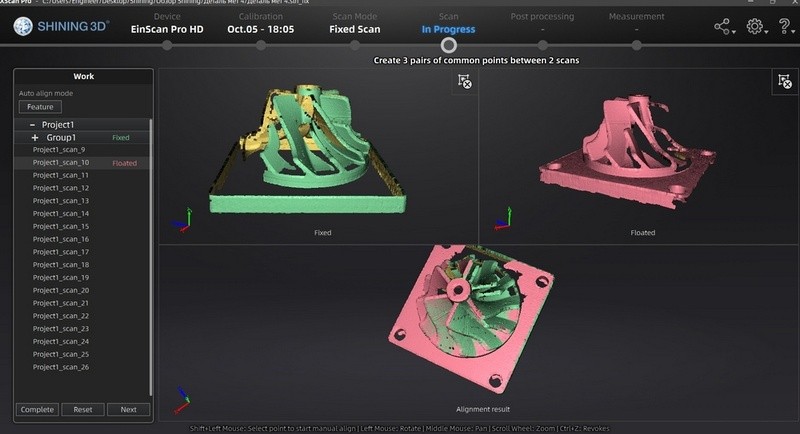
Aligning the scans by three points
\n \n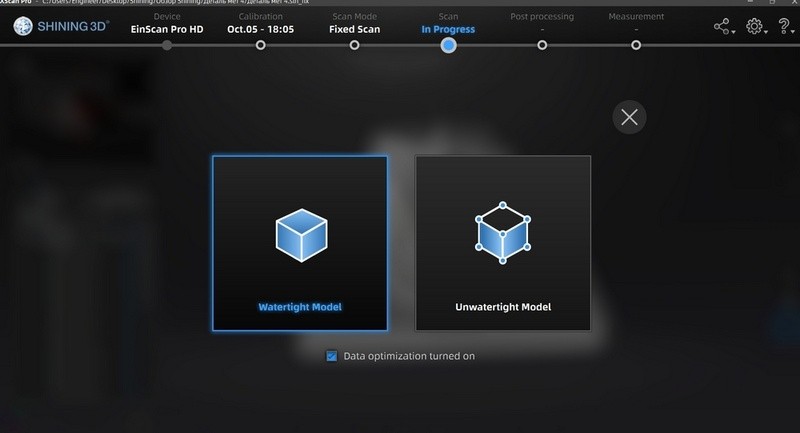
Creating a watertight model.
\n \n
Aligning scans with the maximum possible level of detail (it affects both speed and accuracy of the process)
\n \n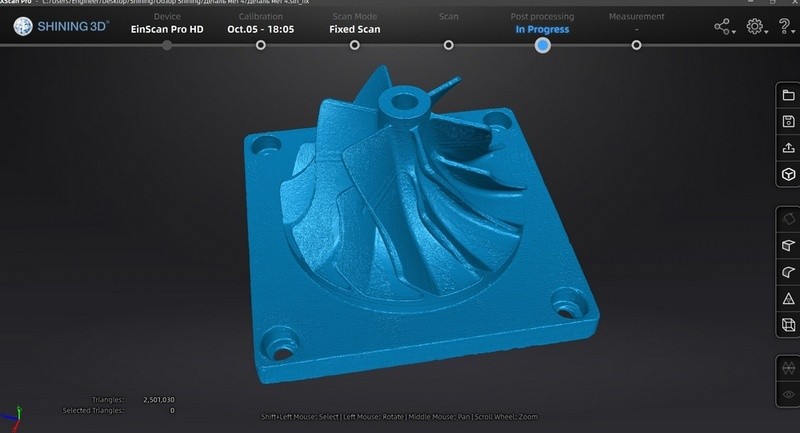
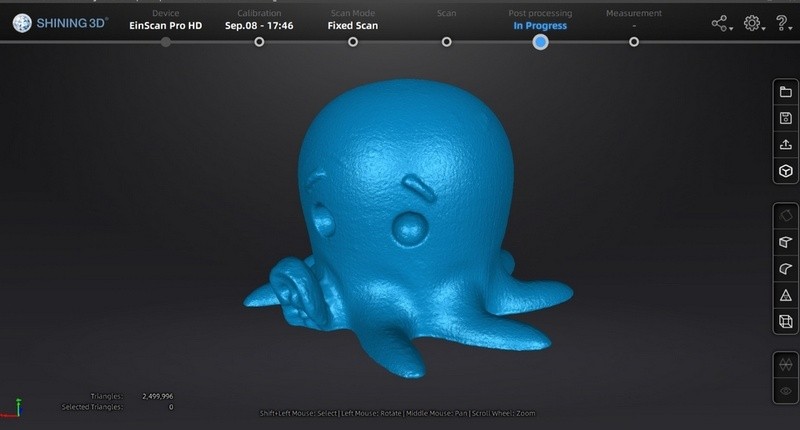
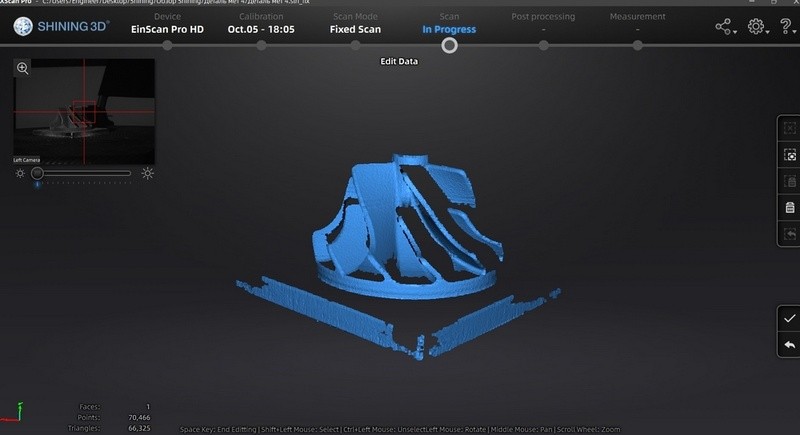
Resulting 3D model (without post-processing)
\n \n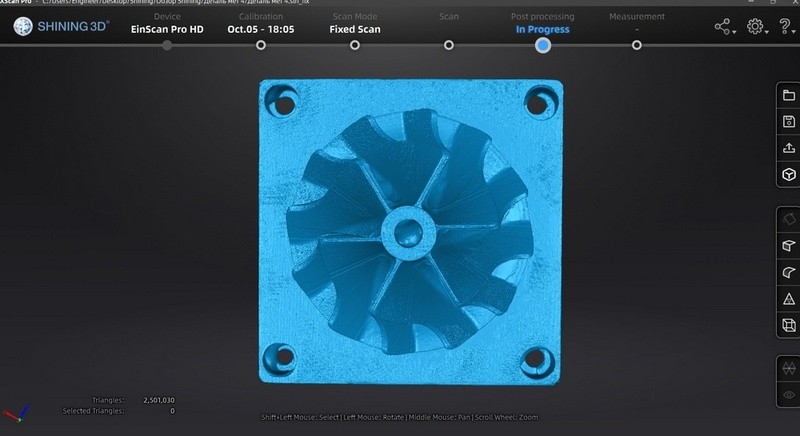
Resulting 3D model (without post-processing)
\n \n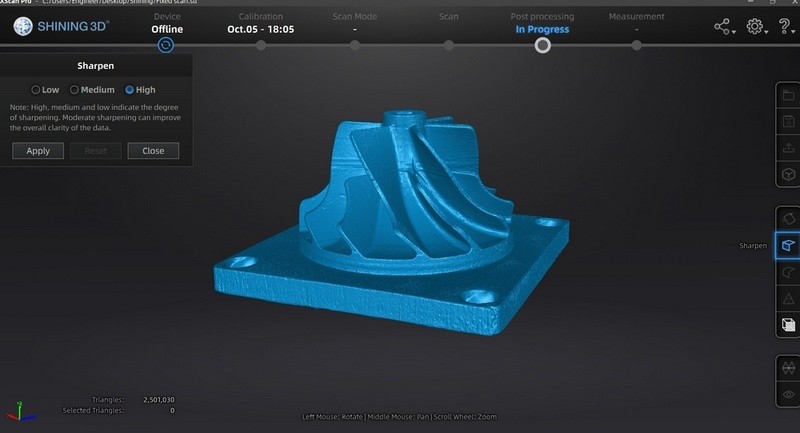
Using the Sharpen tool (makes angles sharper) (after post-processing)
\n \n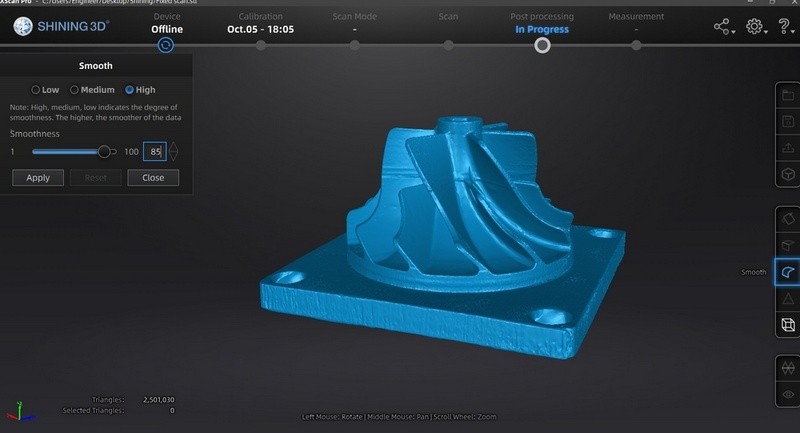
Smoothening the model (after post-processing)
\n \n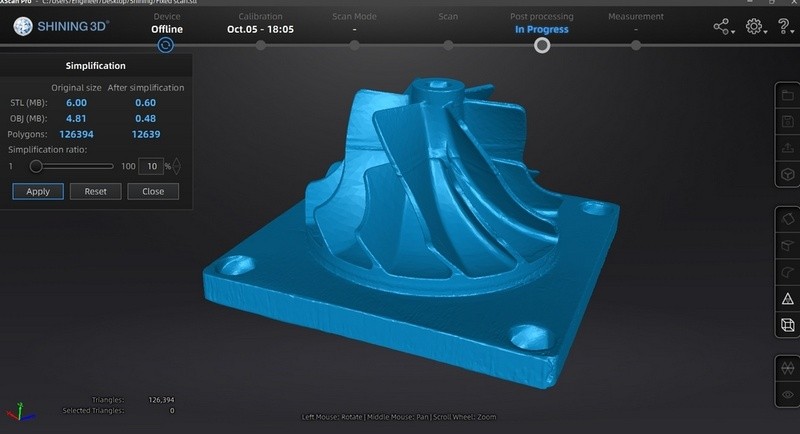
Simplification mode (reducing the number of polygons to 126,394)
\n \nThe Simplification mode makes it possible to reduce the number of polygons without negatively affecting the geometry while reducing the file size. This makes working with the model significantly faster.
\n \n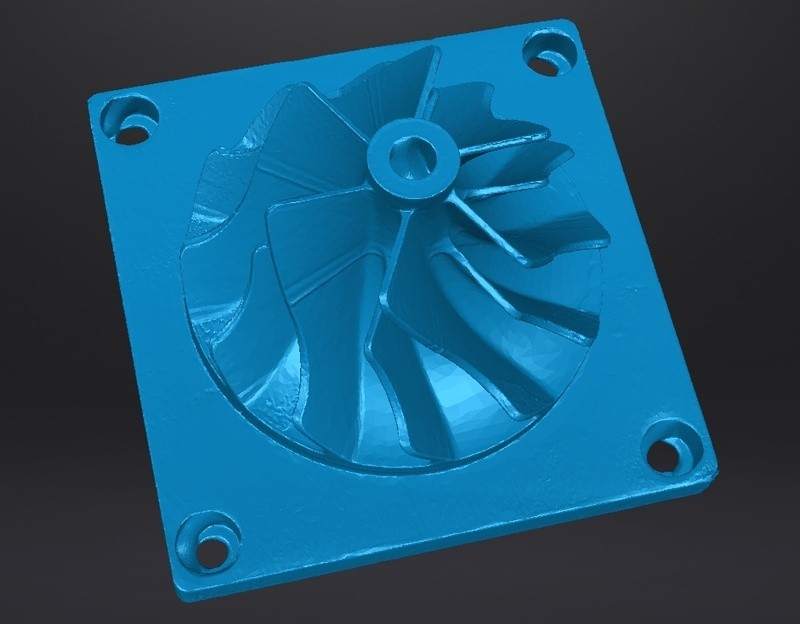
The model after Simplification.
\n \nThe image shows the overly simplified object, so the polygons are now quite large. But even in this case, the geometry of the device wasn’t affected, while the size of a file was just 6 MB.
\n \nIt was decided to use a less significant ratio of Simplification, so the object would keep a smooth surface. After exporting, the resulting STL file was 59.99 MB (compared to its original 119 MB), while the OBJ file was 48.12 MB.
\n \n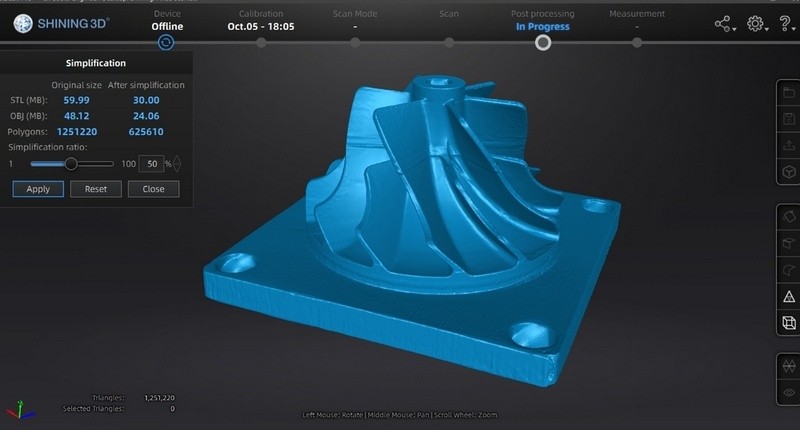
Simplification mode (the number of polygons was cut in half compared to the original model)
\n \n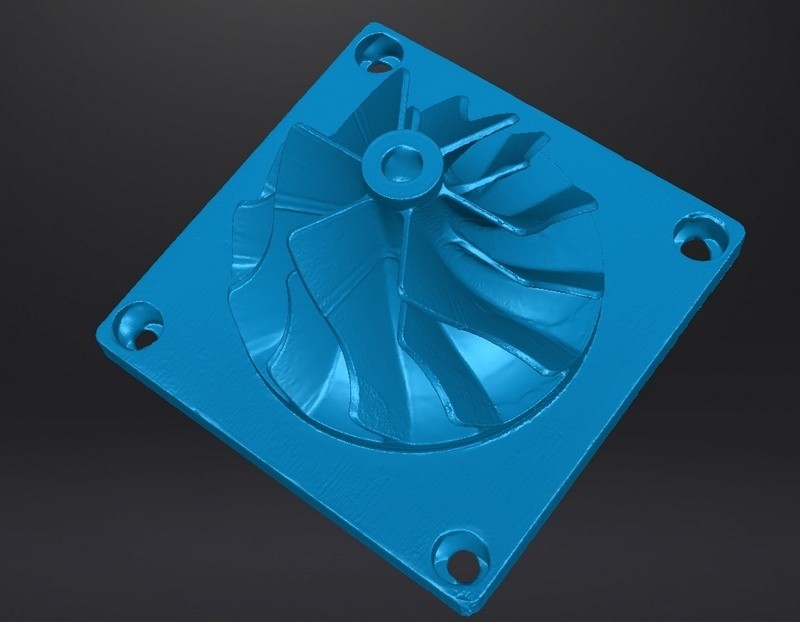
Resulting 3D polygonal model
\n \nScanning and post-processing took 20 minutes. It was difficult to scan some elements (for example, the holes, they were filled in automatically while creating a watertight model). It could be fixed by taking 2-3 additional scans from a certain angle, but it’s not required for reverse engineering purposes, since the resulting data is enough for creating holes of certain sizes and positions.
\n \n|
\n\t\t\t SHINING 3D EinScan Pro 2X Plus \n\t\t\t |
\n\t\t\t
\n\t\t\t SHINING 3D EinScan Pro HD \n\t\t\t |
\n\t\t
The SHINING 3D EinScan Pro HD (a newer model) was better at capturing difficult to scan elements. The surface quality was also better with less noise. Accuracy of Shining 3D EinScan Pro HD was 0.15 mm (including a layer of mating spray that adds 0.05 mm to every direction). A diameter of a larger circle is factually 80.25 mm, on the resulting model: 80.40 mm. The support width: factual – 103.5 mm, on the resulting model – 103.65 мм. The holes weren’t mat, the margin of error in their sizes was so small that the caliper's accuracy was not enough to find it out.
\n \n\n \n
Choosing the Fixed Scan mode
\n \n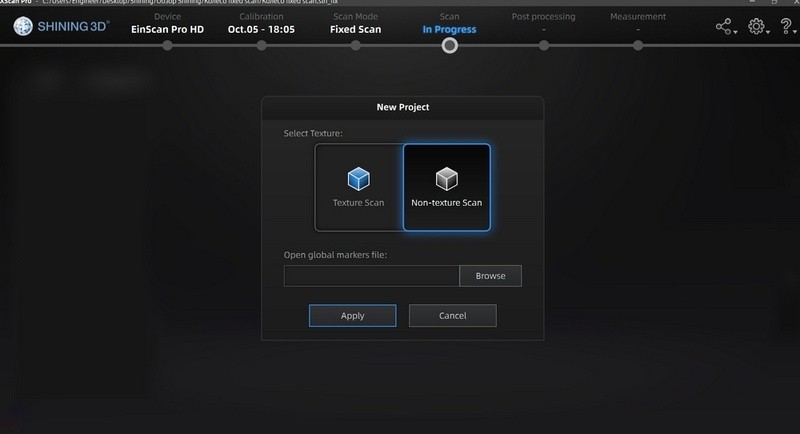
Selecting Non-texture Scan.
\n \n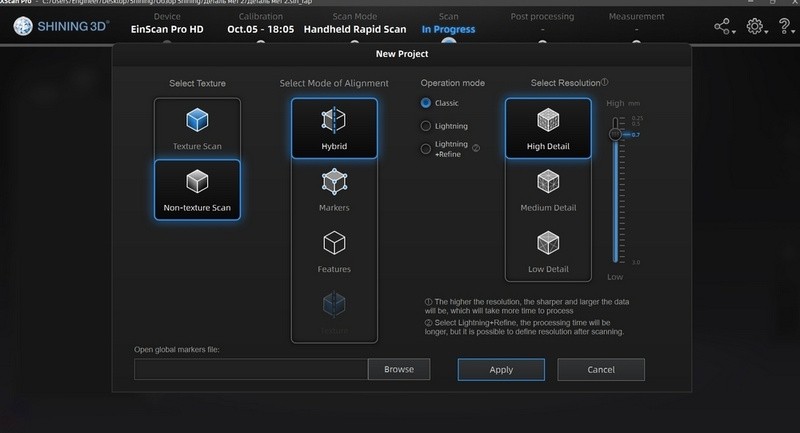
Choosing additional parameters
\n \nThe Hybrid mode of alignment was chosen. It utilizes both the markers and the object’s geometry since only the latter wouldn’t be sufficient for a proper alignment due to several similar elements. The markers are placed randomly since they can be correctly detected by a scanner. It’s recommended to cover flat surfaces with the markers since the elements covered by the markers will be removed and filled in automatically during the model creation process. The turntable without software connection was used so there would be no need to turn the object manually.
\n \n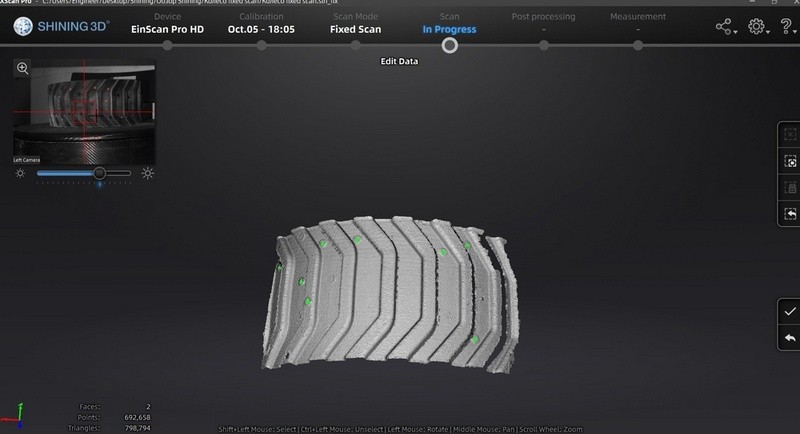
The first single scan.
\n \nThe scanner automatically detects the markers that covered the objects, registering the data about their position. This significantly simplifies the alignment process. EXScan Pro software does this automatically for each scan if there’s a sufficient number of registered markers.
\n \n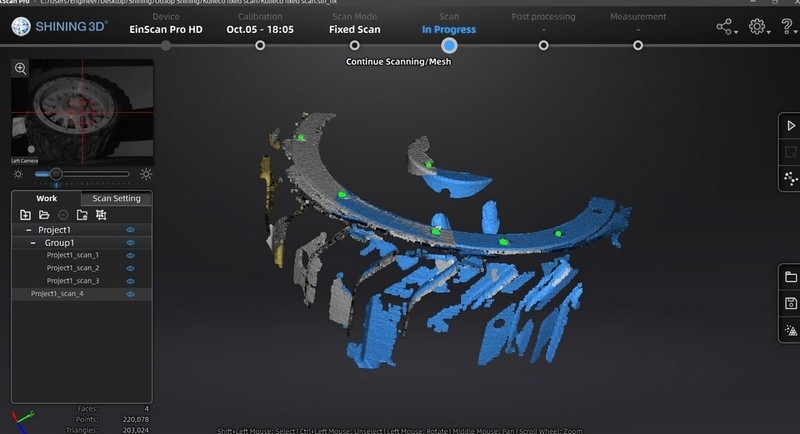
Automatic alignment of the most recent scan with a previous one.
\n \n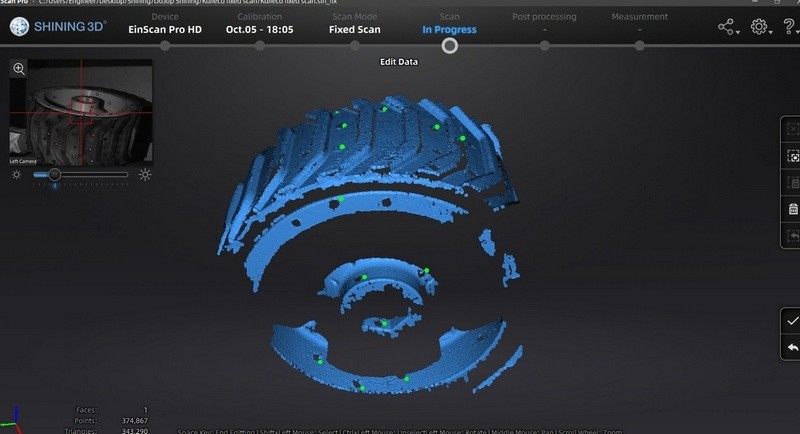
Scanning the upper part of the object.
\n \nBefore going from scanning sides to the scanning of the upper part of the object, you need to place the object a certain way, trying to get both already registered and other markers in the field of view of the scanner.
\n \n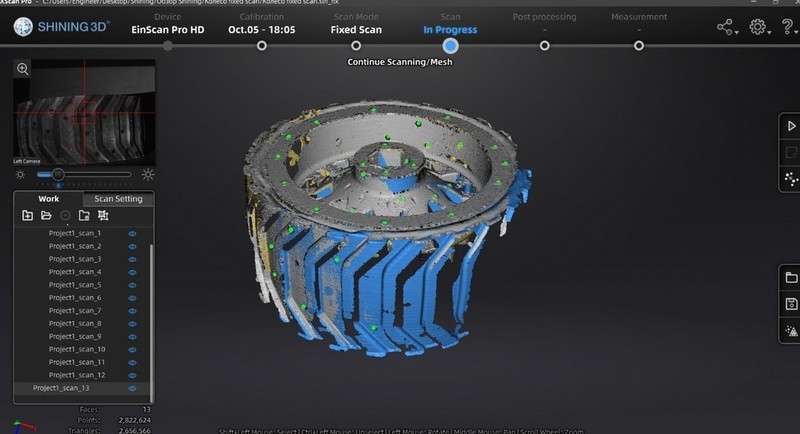
After detecting several markers on a side of the object, the other scans align significantly easier.
\n \n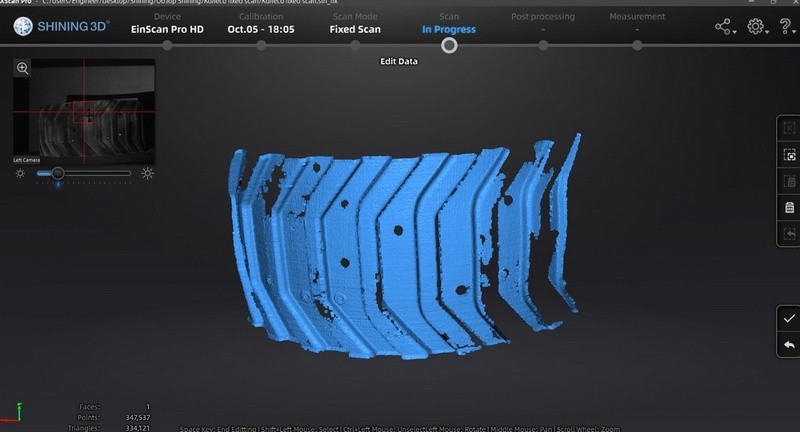
The scan doesn’t feature detected markers.
\n \n
The scans that weren’t aligned due to not featuring enough registered markers.
\n \nIf the scanner couldn’t detect the markers, it will cut them out of the resulting scan, without aligning with the previous one. It’s possible to manually align the scans, but it’s better to scan the object again, trying to get the markers that were detected in the previous one. (for example, turning the object at a lesser angle).
\n \n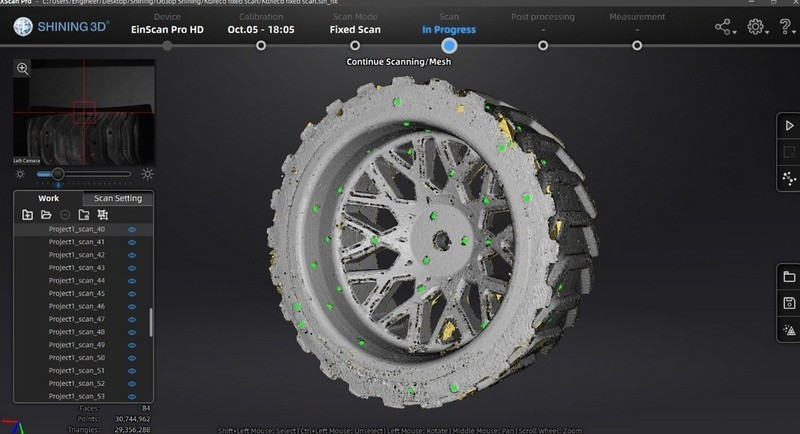
After finishing the scanning process, everything was aligned because of markers.
\n \n
Creating a Watertight model will fill the holes that appeared after cutting the markers.
\n \n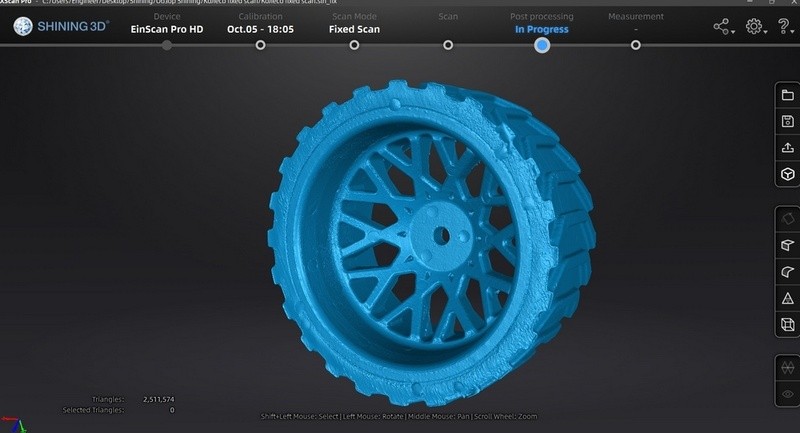
The resulting model
\n \n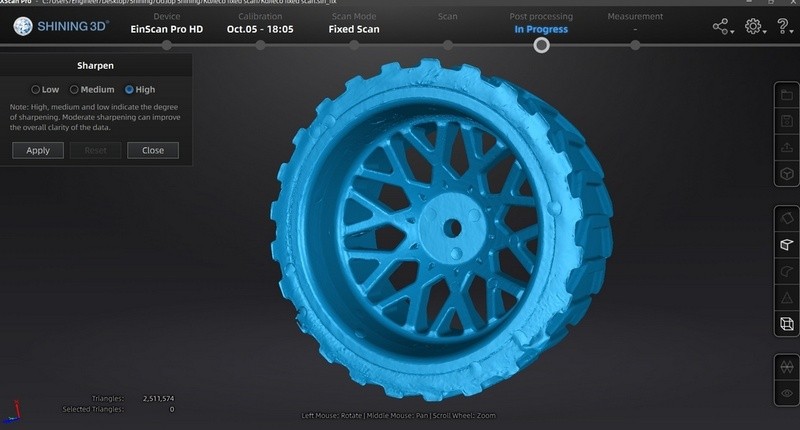
The resulting model after the use of the Sharpen tool
\n \n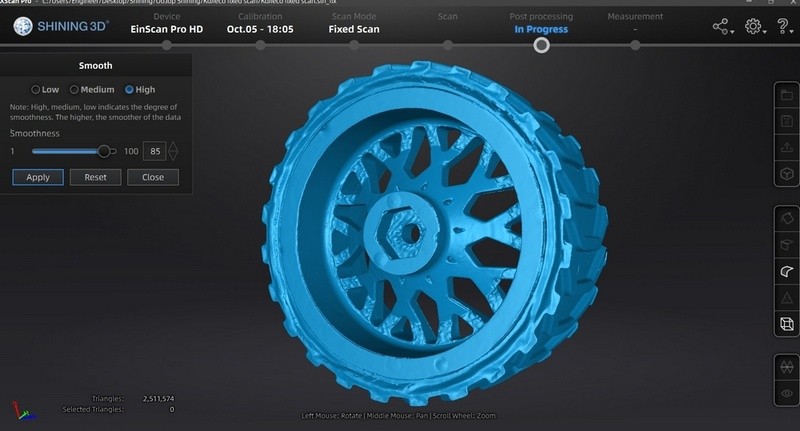
The model after smoothening.
\n \n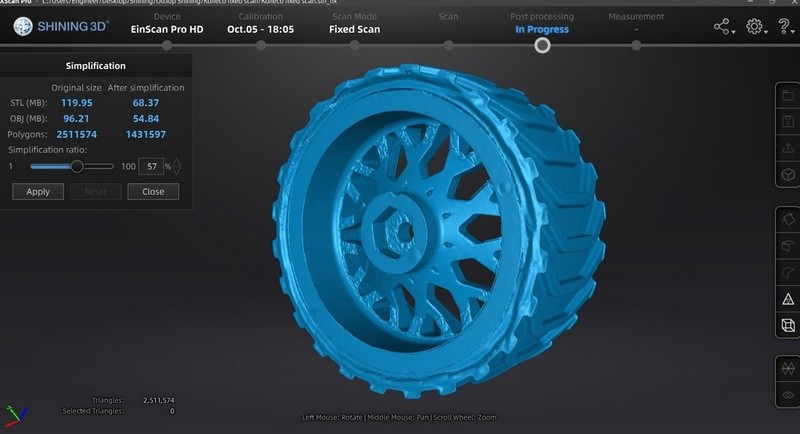
The model after the use of the Simplification mode with a ratio of 57%
\n \n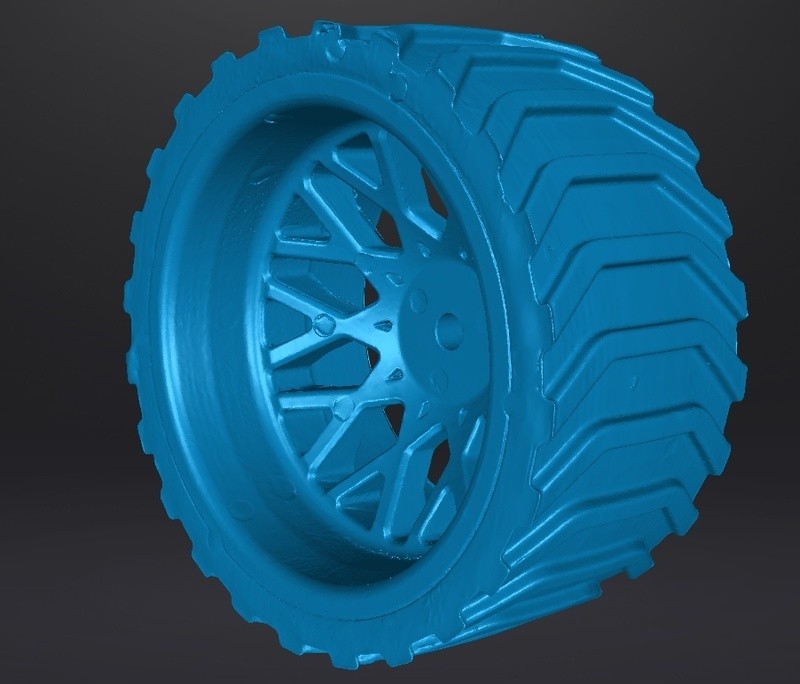
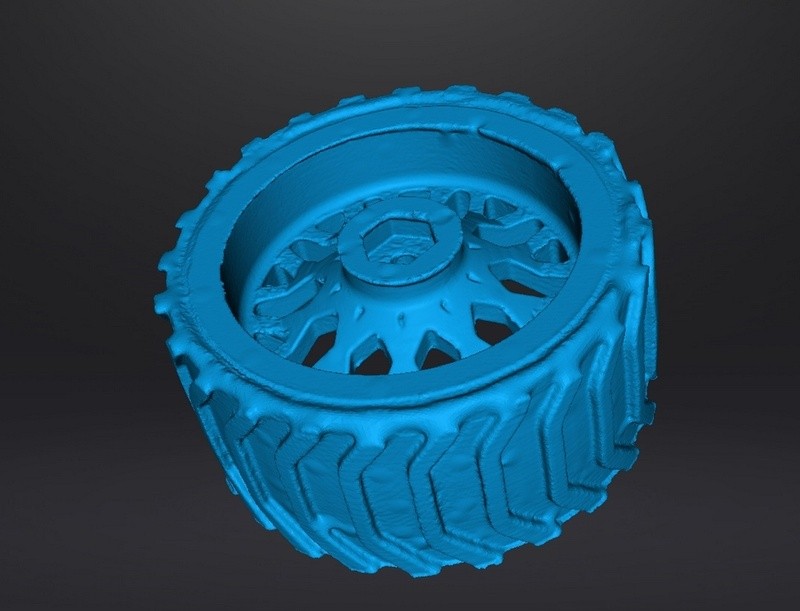
The EinScan Pro HD was better at scanning this object compared to the previous model: SHINING 3D EinScan Pro 2X Plus. The edges are sharper, the surfaces are smoother and there are fewer elements that weren’t detected by the scanner.The resulting model
\n \n\n \n
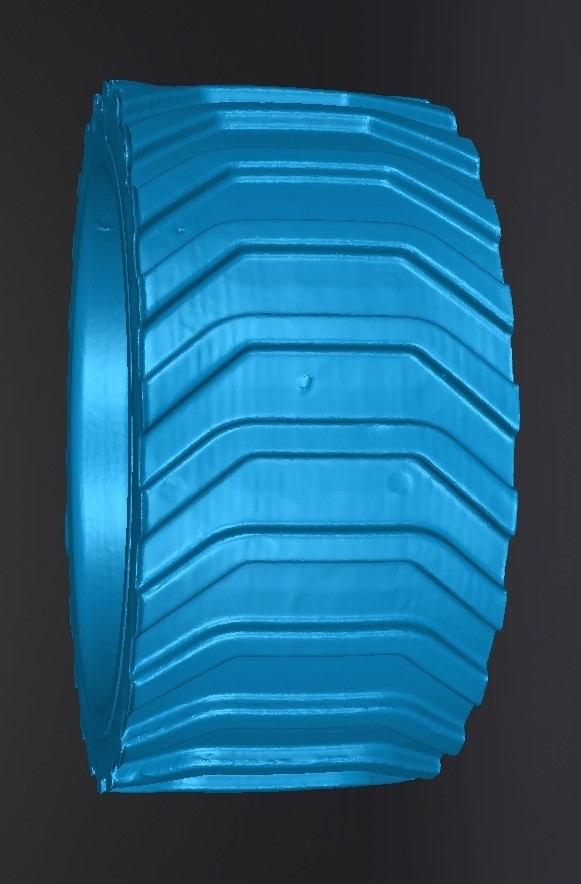
Let’s scan the same object in the Handheld Rapid Scan mode.
\n \n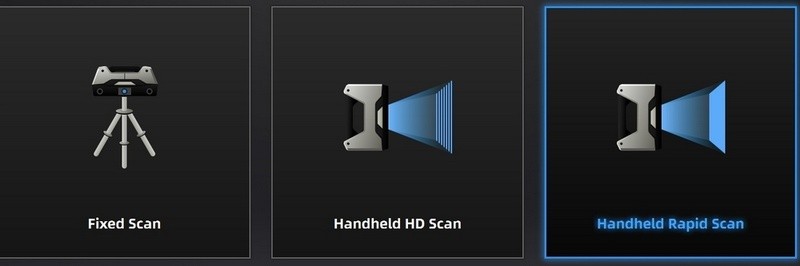
Choosing the Handheld Rapid Scan mode
\n \n
Selected parameters
\n \nWe chose the Hybrid mode of alignment. It utilizes both the geometry data and markers. The object was placed on a turntable to reduce the wobble and improve scanning convenience. The turntable allows for scanning the object without having to circle around it. Nevertheless, there were some issues: the scanner had problems trying to detect the position and continue scanning, incorrectly filled the scans, and created some non-existent geometry. It was especially difficult for the device to go from one surface to another.
\n \nScanning the object with repeating elements makes it more difficult for the device to detect its position. If it loses reference points, it could incorrectly detect its own position, continue scanning and incorrectly create the object’s geometry in a polygonal model. It can be avoided by using the markers or adding background geometry: for example, some additional objects that can be easily detected. A piece of crumpled paper can be a good choice. Objects like this can be easily cut out after scanning and before creating a model.
\n \n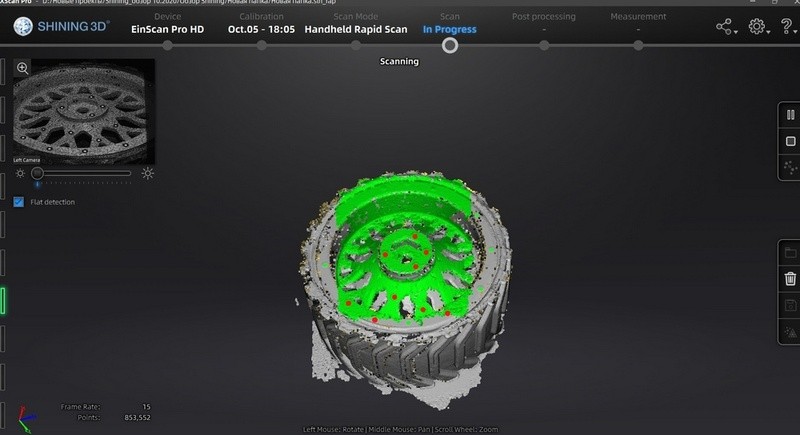
Scanning process.
\n \n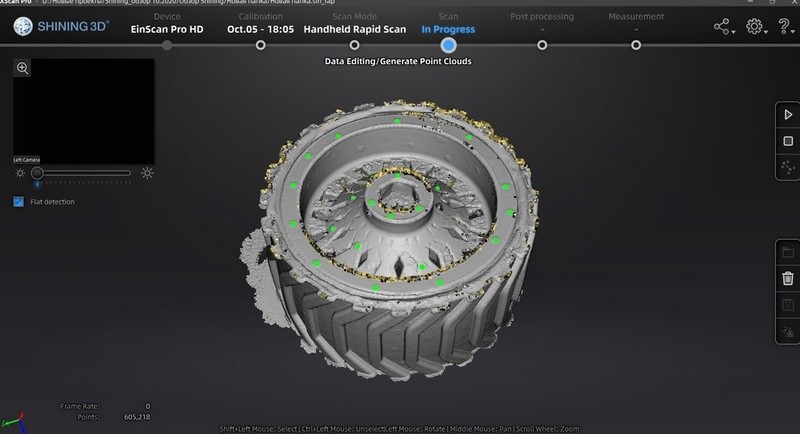
The scanner creating non-existent geometry after incorrectly detecting its own position.
\n \n \n \nThese elements were edited out and scanned again.
\n \n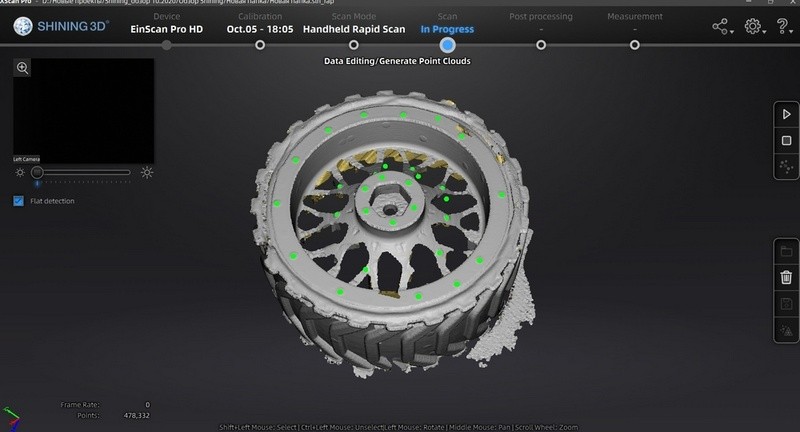
Cutting out additional elements.
\n \n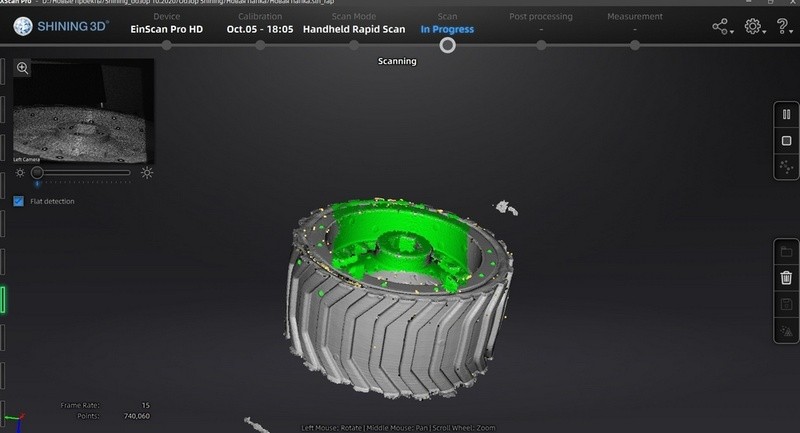
The same issues re-appeared after continuing the scanning process, so the aforementioned manipulations were done several times.
\n \n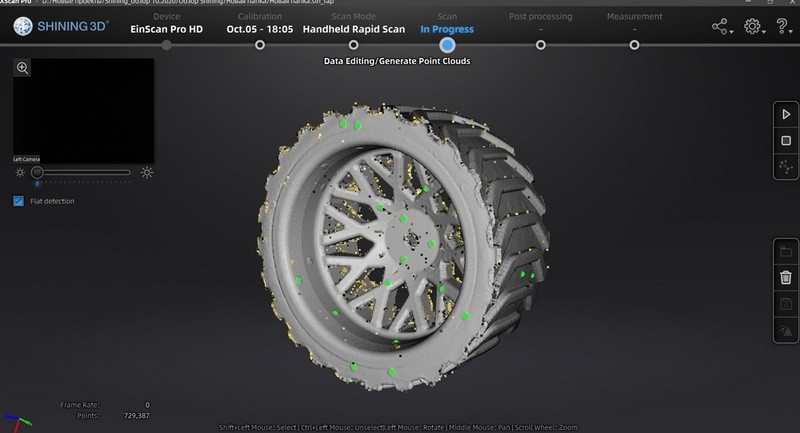
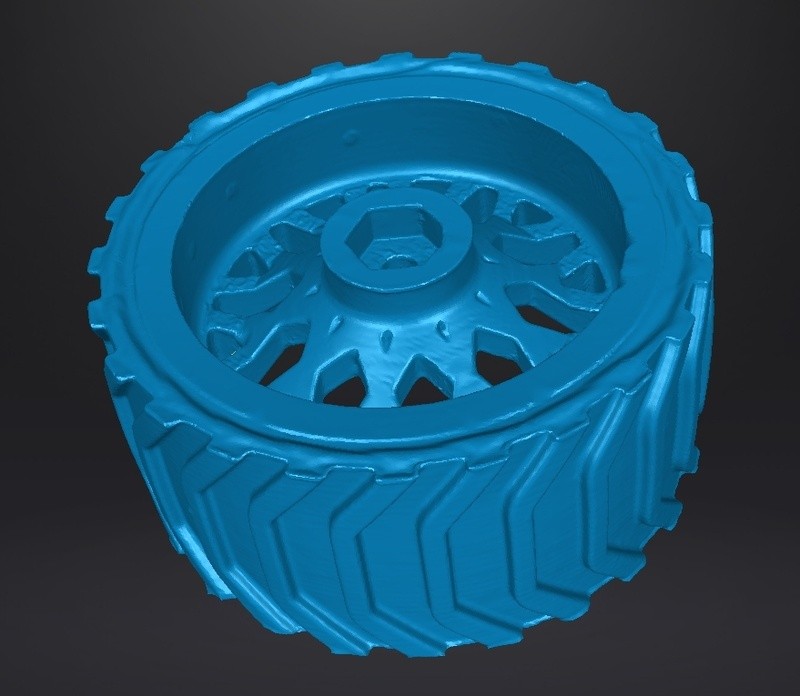
This positioning of the wheel provided the best results after scanning the side of the disc, selecting the low speed of the turntable, and getting to the other side of the disc after scanning the tire.
\n \n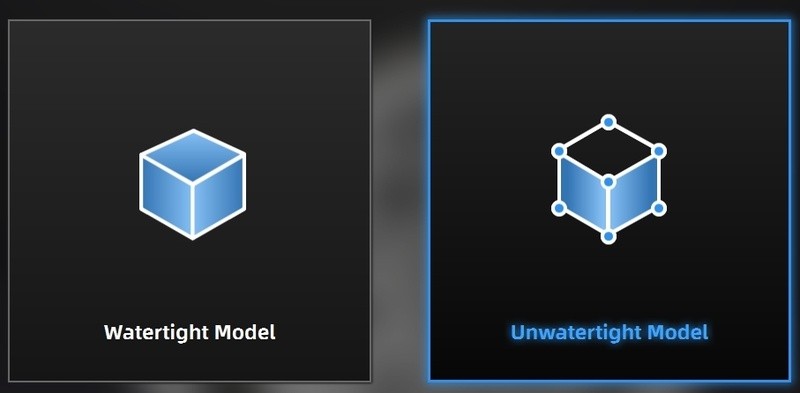
Creating a model
\n \n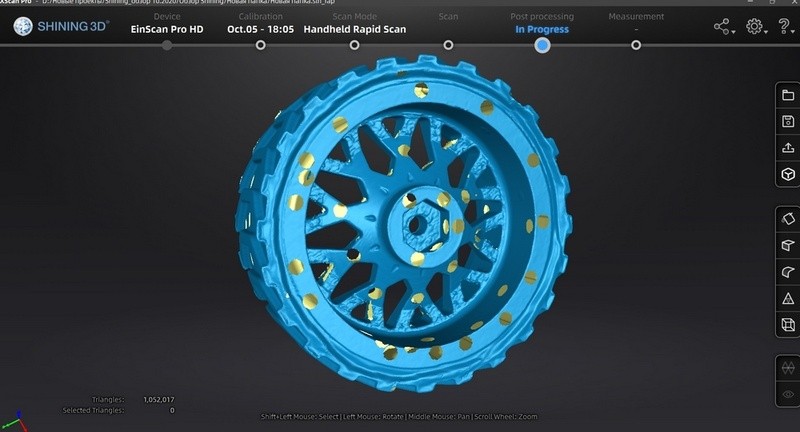
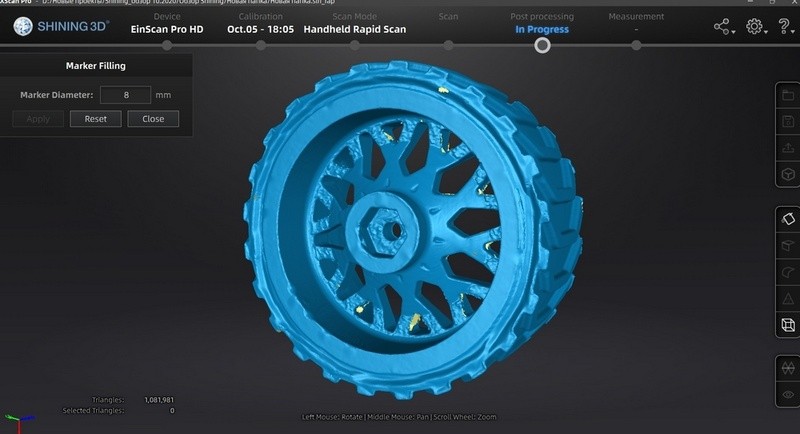
Filling in the holes left after markers.
\n \n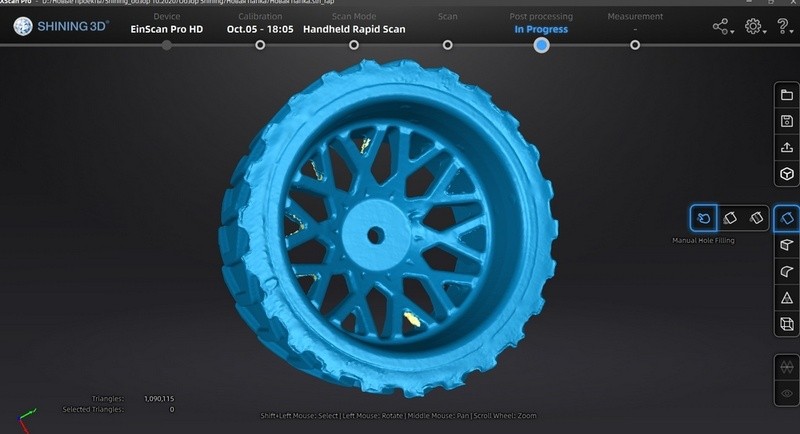
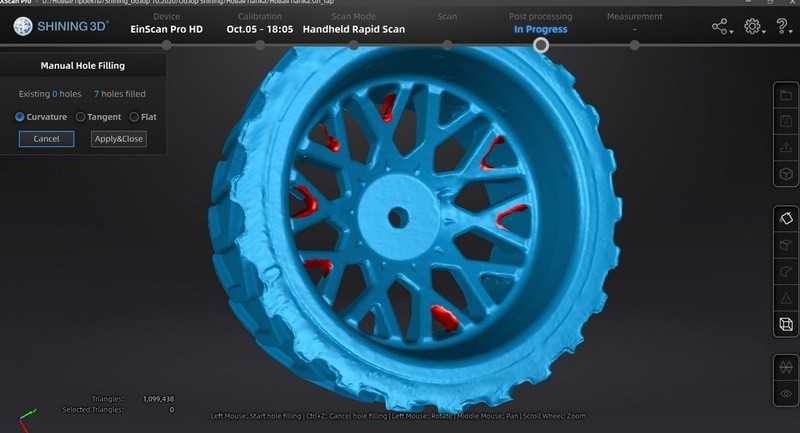
Filling the rest of the holes manually
\n \n|
\n\t\t\t SHINING 3D EinScan Pro 2X Plus \n\t\t\t |
\n\t\t\t
\n\t\t\t SHINING 3D EinScan Pro HD \n\t\t\t |
\n\t\t
Fixed Mode
\n \n 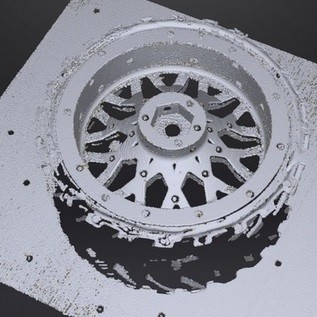
Handheld mode
\n \nThe comparison shows that the SHINING 3D EinScan Pro HD is better at capturing black objects with complex geometry with repeating elements than the previous models. In the Fixed Mode the quality of surface and accuracy of SHINING 3D EinScan Pro 2X Plus are worse. There are also more hard-to-scan elements and scanning defects. An attempt to scan the object in the Handheld Mode by an earlier model wasn’t successful.
\n \n\n \n
The next object is a 3D printed statue that is 73 cm tall.
\n \nThe Handheld Rapid Scan mode was selected since the object is too large for the fixed Scan mode.
\n \n
Mode selection: Handheld Rapid Scan
\n \n
Selected parameters
\n \n
Preview of the scanning area.
\n \n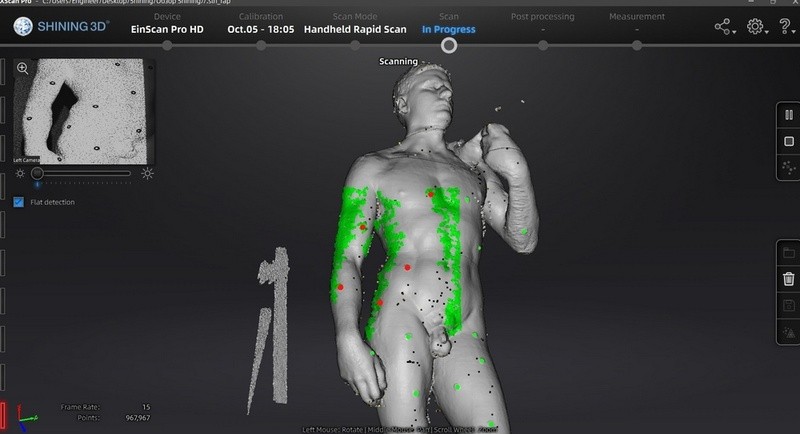
The scanning process
\n \nIn the Handheld Scan mode, the scan alignment is always automatic, no matter the preferences. Each following scan aligns with the existing geometry. If the scanner couldn’t detect the position, it stops until it can. In this case, white color, non-repeating geometry, and mat texture make the object perfect for scanning. The device doesn’t get ‘lost’ and easily captures the scanning area. Using markers allowed us to get good results within a few seconds without actively trying. An object with properties like that can be also scanned without markers but it will take more time.
\n \n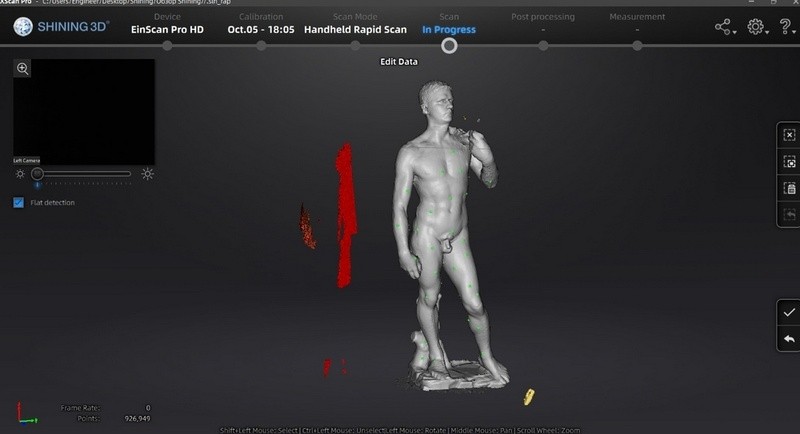
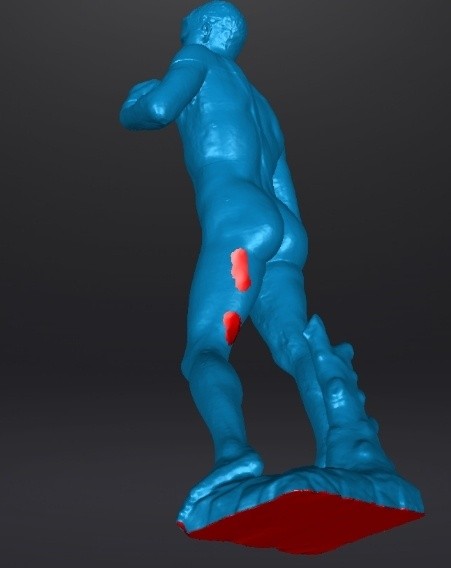
Cutting out additionally scanned objects.
\n \n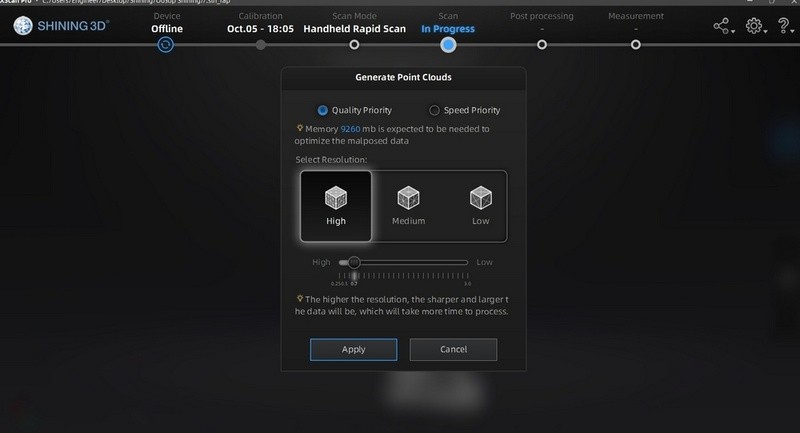
Generating point cloud.
\n \nThe bigger the resolution, the higher the accuracy and more data that will be processed, which in turn will take more time.
\n \n
Point cloud generated from single scans.
\n \n
Creating a model with the markers removed
\n \n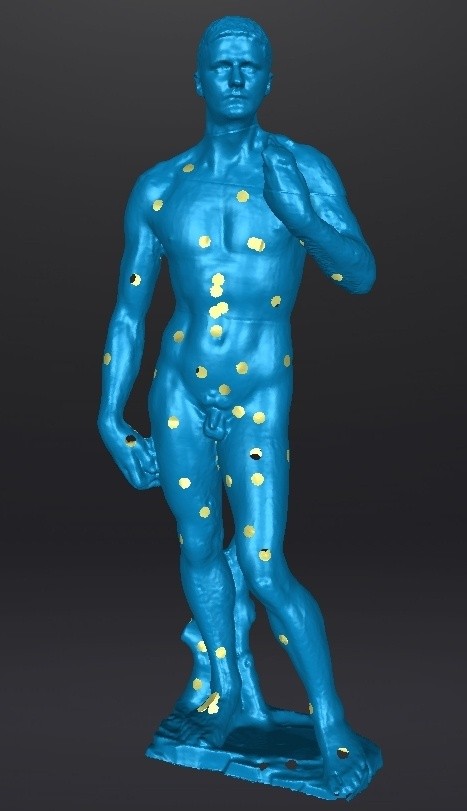
Creating a model with the markers removed
\n \n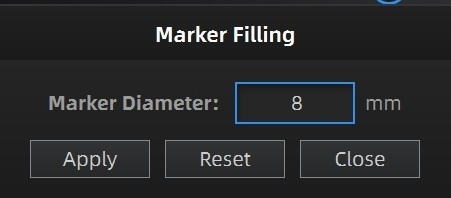
Automatically filling the holes left from the markers of a certain diameter.
\n \n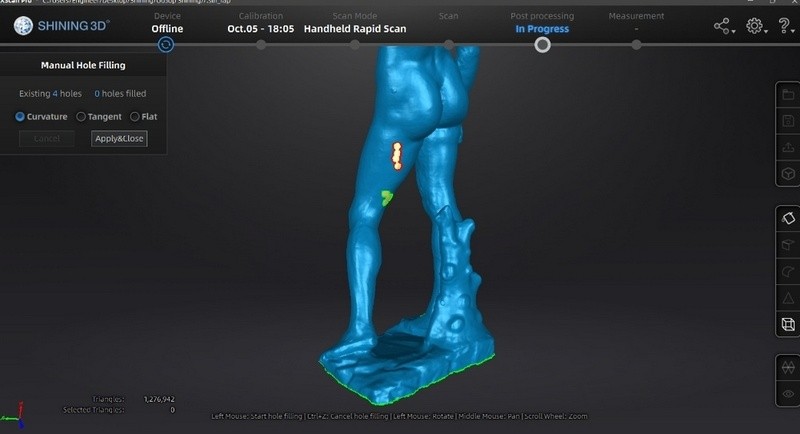
Manual filling the holes that are left
\n \n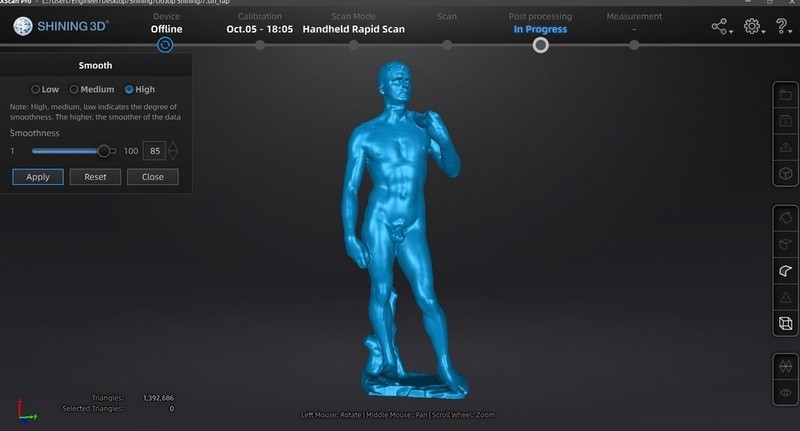
Smoothening the model
\n \n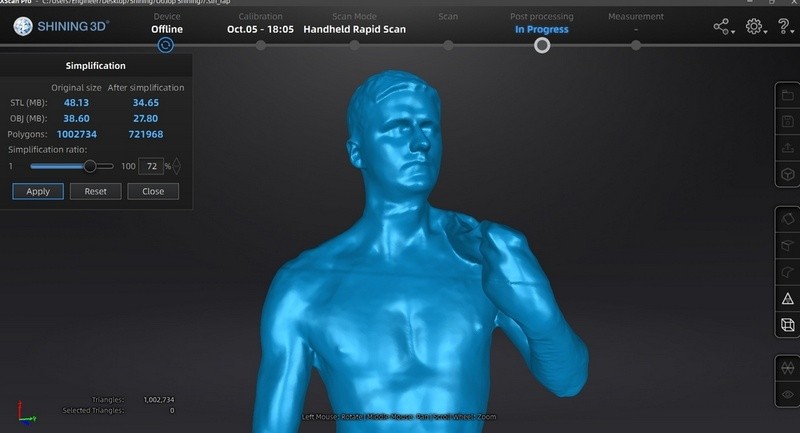
Simplification
\n \n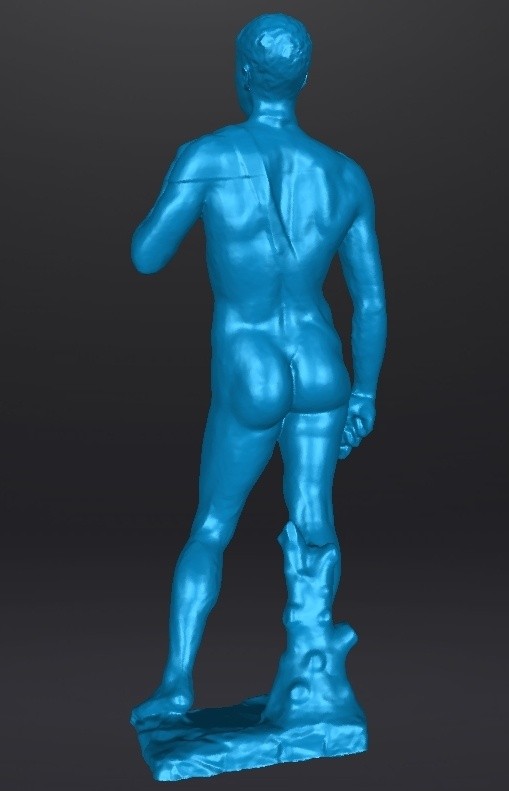
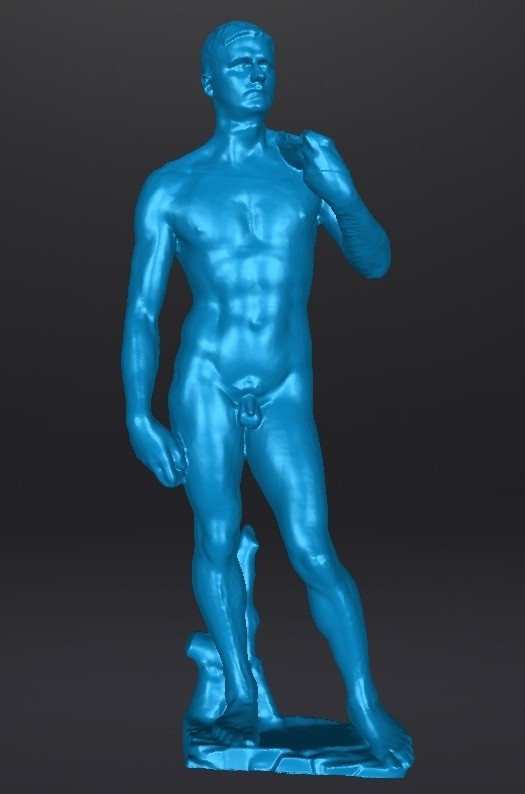
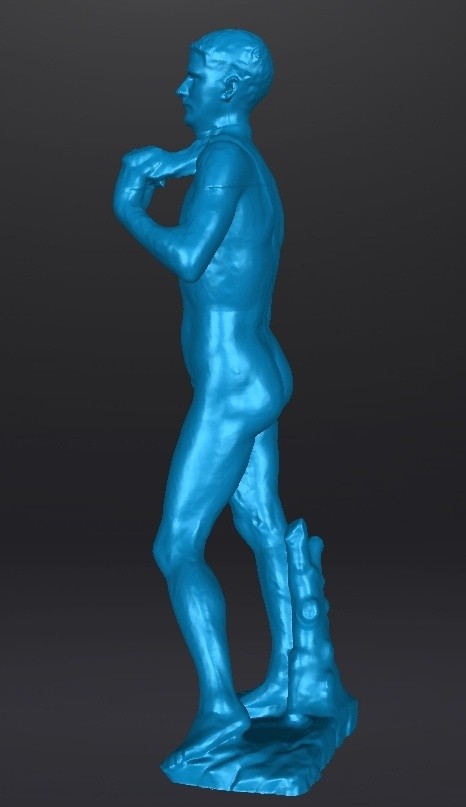
The model that is ready to be exported as a file
\n \n|
\n\t\t\t SHINING 3D EinScan Pro 2X Plus \n\t\t\t |
\n\t\t\t
\n\t\t\t SHINING 3D EinScan Pro HD \n\t\t\t |
\n\t\t
| \n\t\t\t | \n\t\t |
Both scanners did a good job scanning the statue in Handheld mode with Hybrid mode of alignment. There were no issues, since the object is perfect for scanning. The SHINING 3D EinScan Pro HD provided a better level of detail and surface quality. It has also managed to capture hard-to-scan areas.
\n \n\n \n
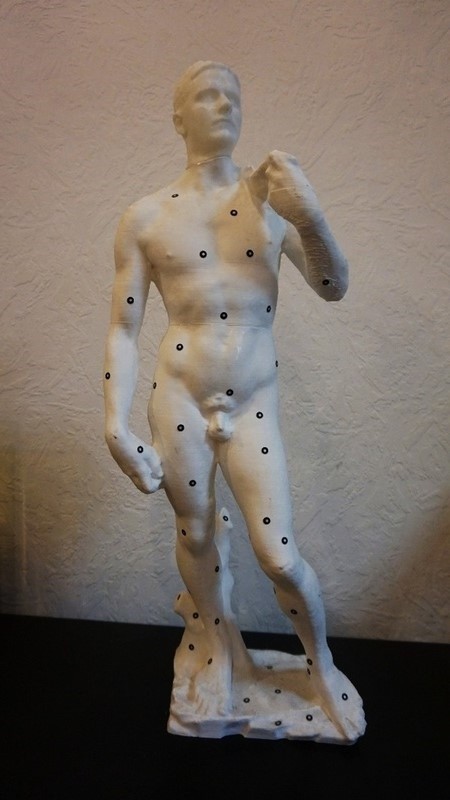
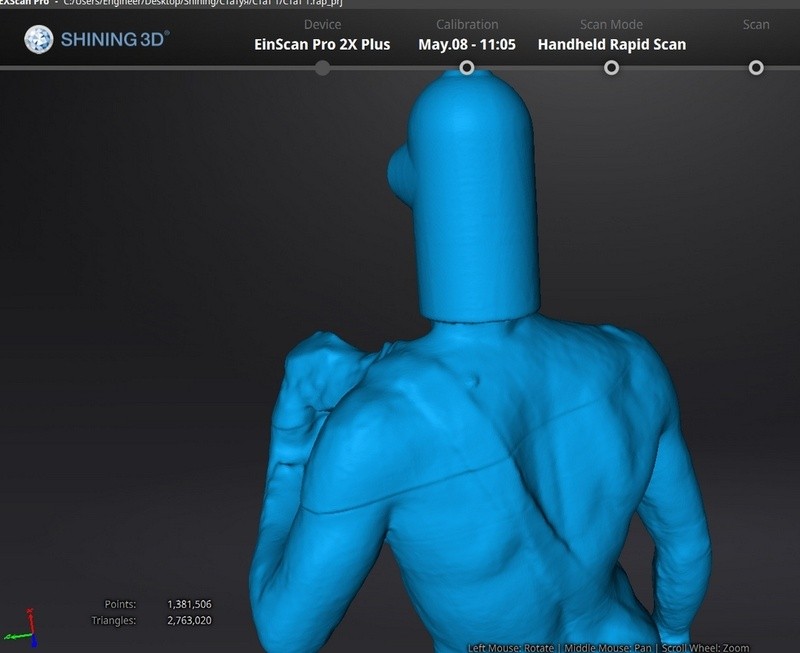
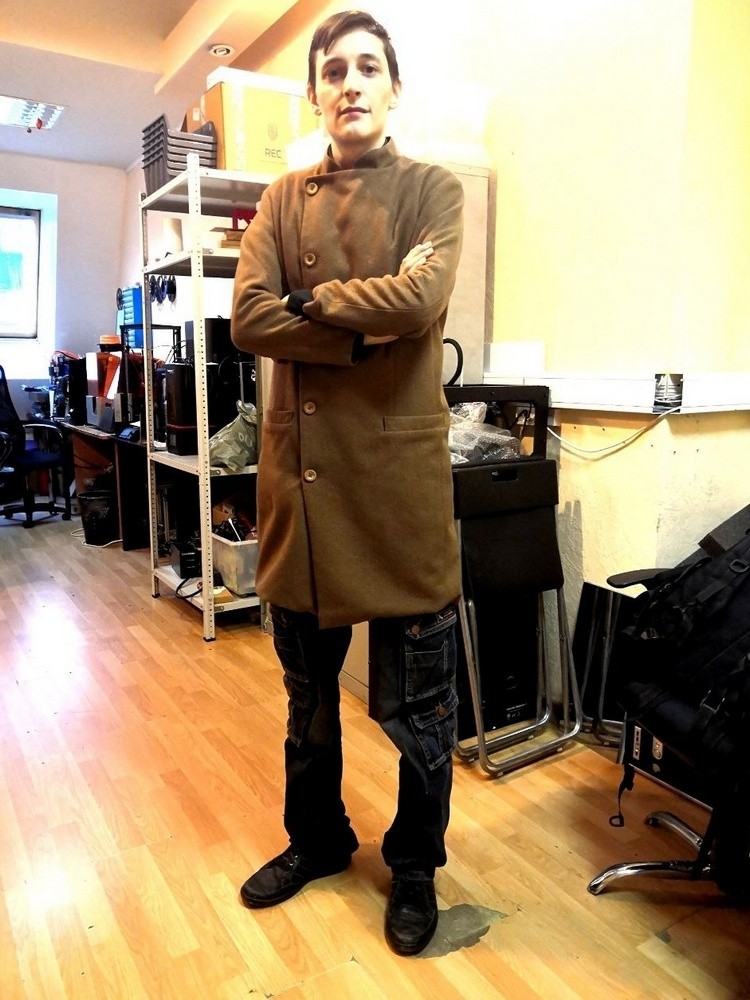
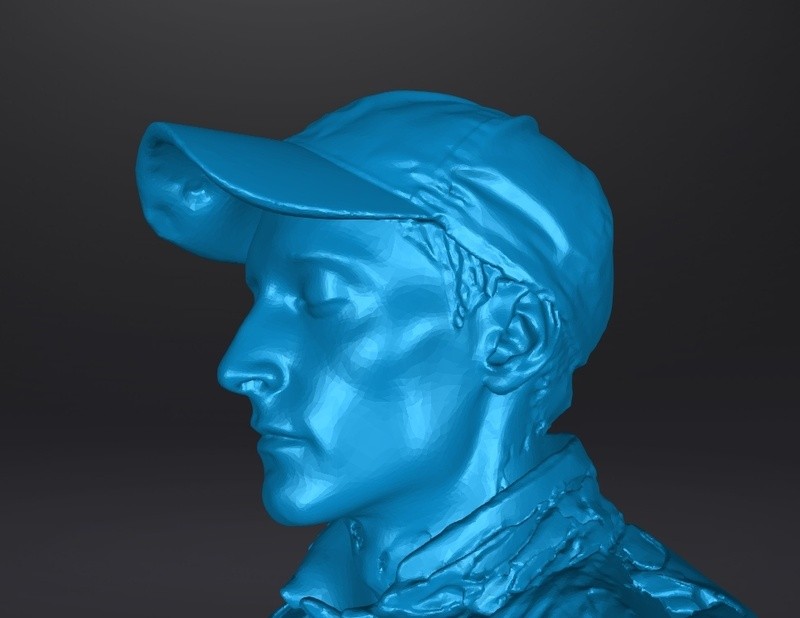
As an example, we can imagine scanning one of the most complex objects for scanning – a human. The most difficult thing is that a person can’t stand perfectly still. The result depends on clothes as well — black mat cloth and black hair aren’t usually captured by scanners. The examples below show scanning a human wearing a mat coat that the scanner has captured with ease and black slightly glossy clothes that were also captured, although imperfectly.
\n \n\n \n
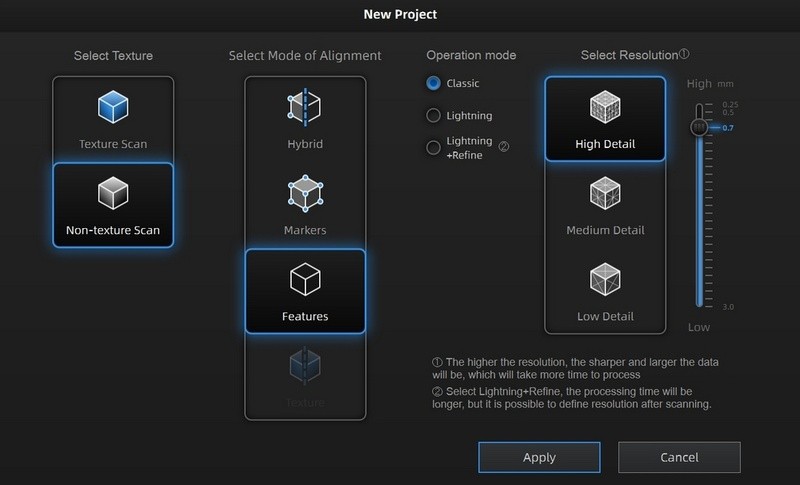
Selected parameters – non-texture scan, aligning by features and high detail.
\n \n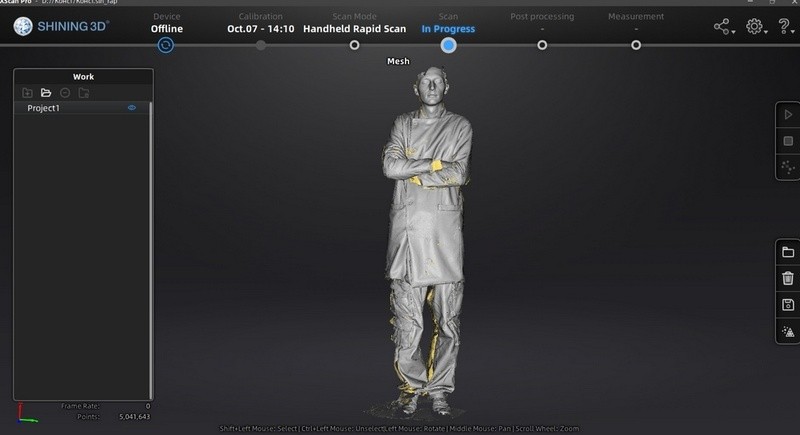
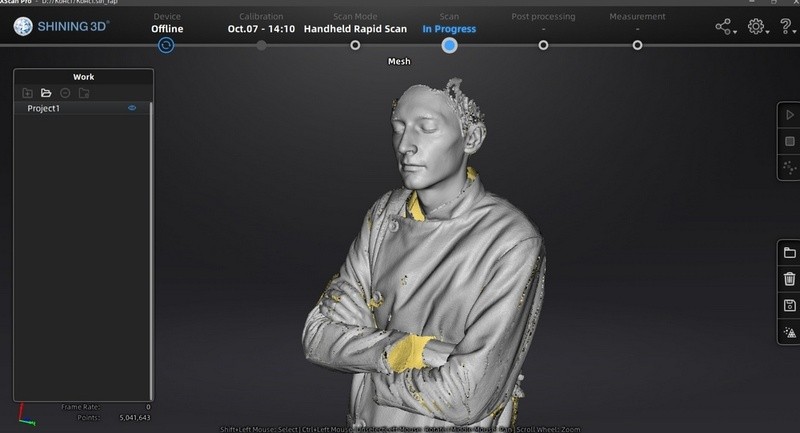
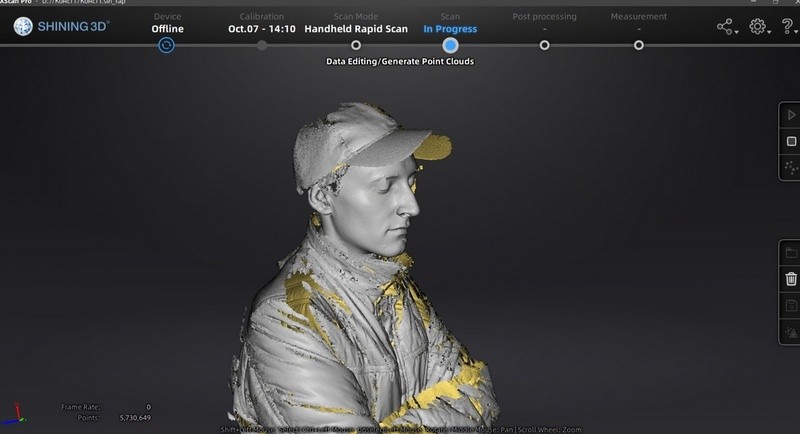
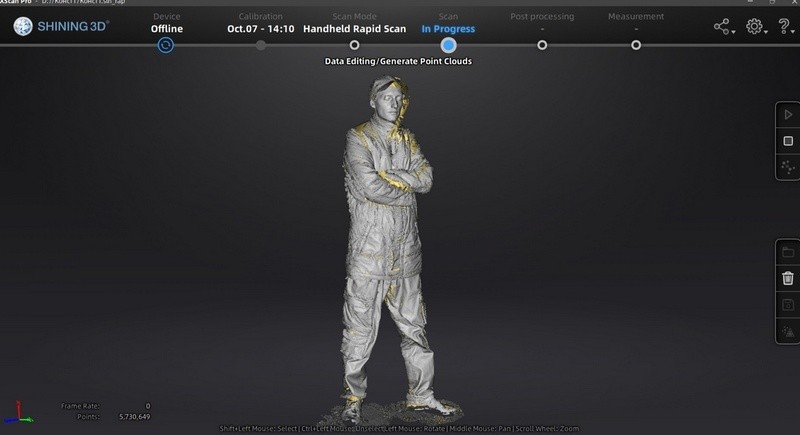
Black sleeves and hair aren’t captured
\n \n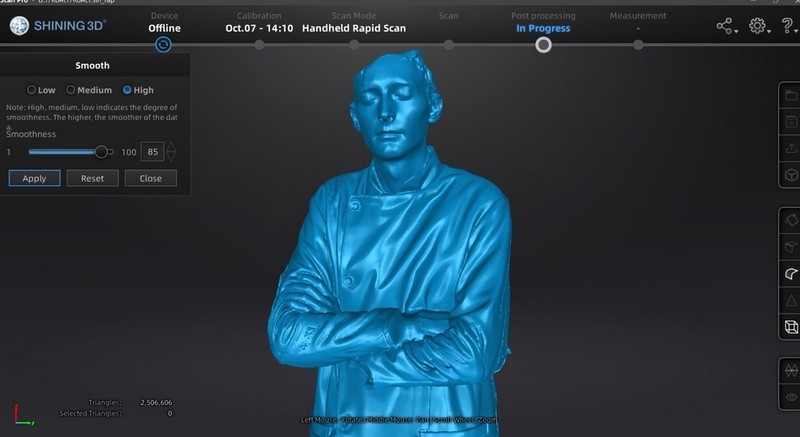
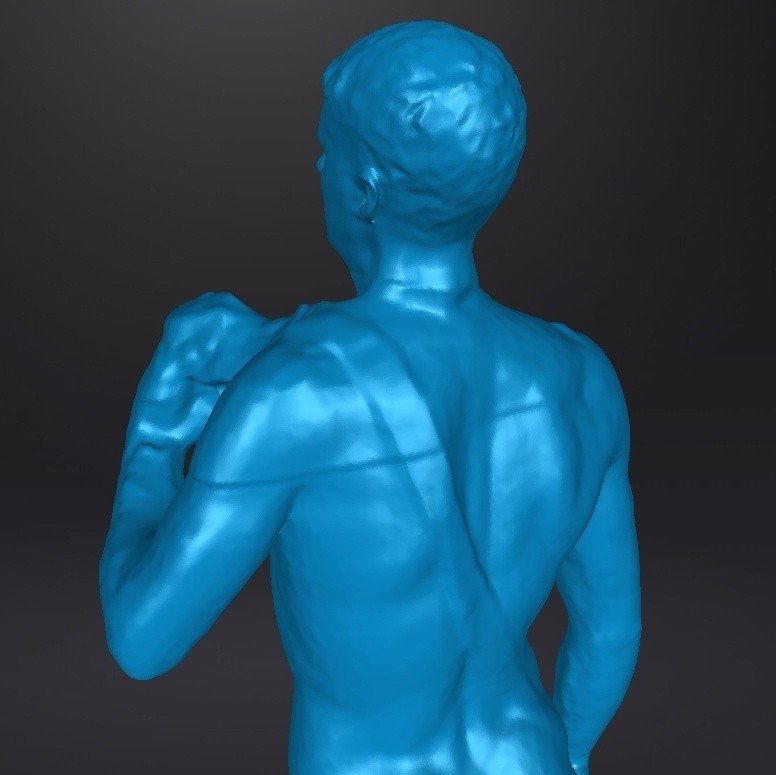
Smoothening
\n \n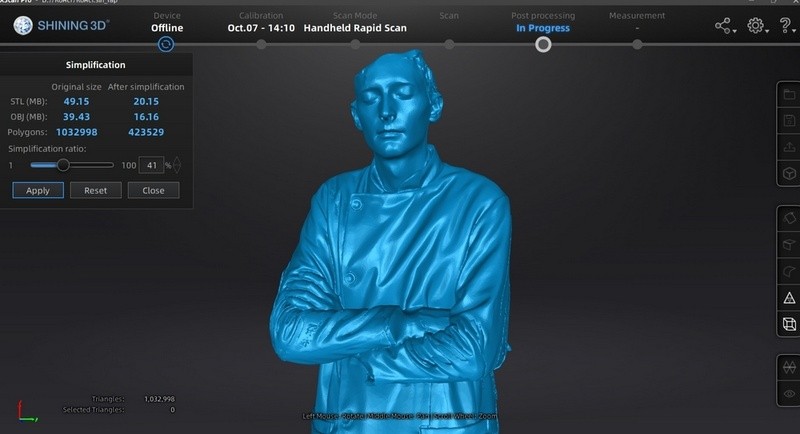
Simplification
\n \n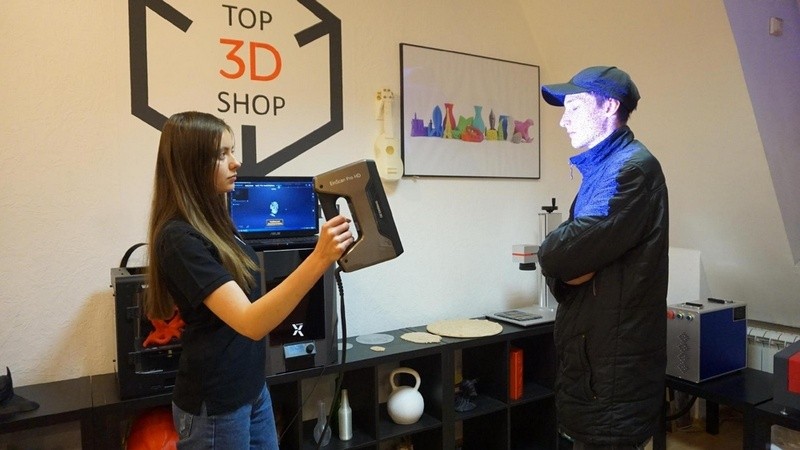

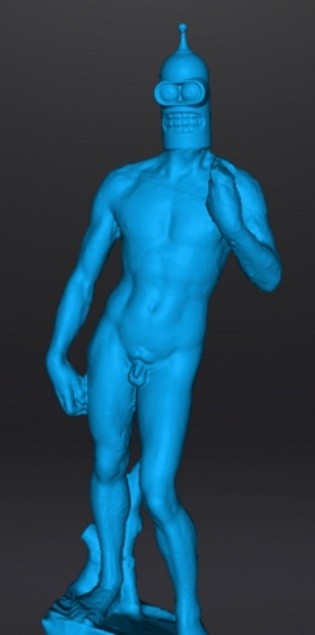
\n \n
|
\n\t\t\t SHINING 3D EinScan Pro 2X Plus \n\t\t\t |
\n\t\t\t
\n\t\t\t SHINING 3D EinScan Pro HD \n\t\t\t |
\n\t\t
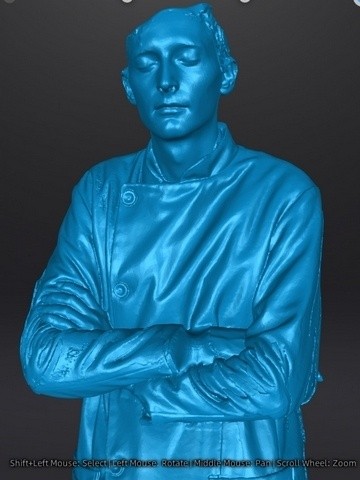
Colorful mat clothing
\n \n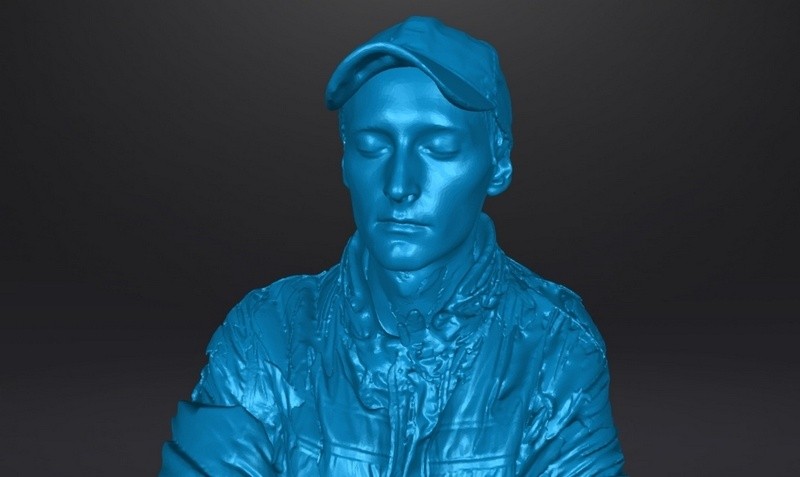
Black glossy clothing
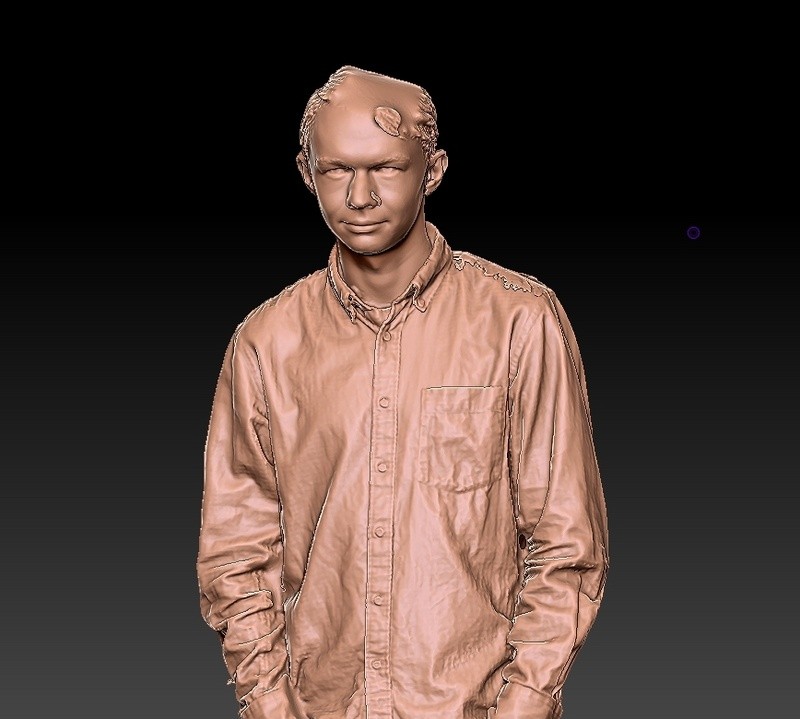
\n \nThe previous model — the SHINING 3D EinScan Pro 2X Plus — wasn’t able to capture black clothing (like black jeans). The SHINING 3D EinScan Pro HD has managed to successfully scan it since it utilizes improved algorithms for capturing dark objects and glossy surfaces. The face was perfectly scanned without noise and defects. Capturing hair is still a difficult thing to do, but the problem can be dealt with by using hats, mating or manually working with the model.
\n \n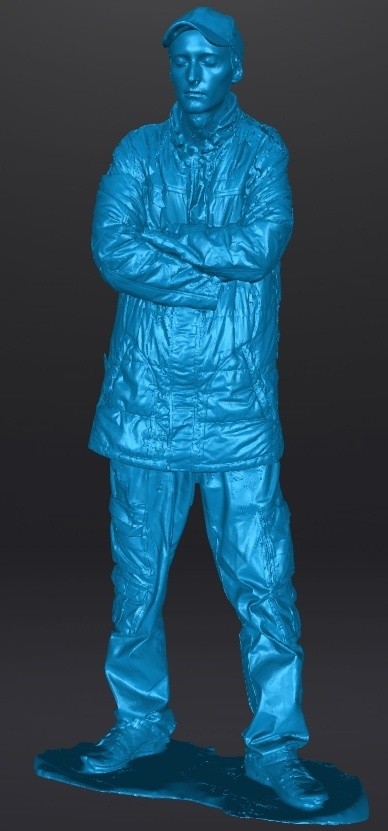
\n \n
EXScan — is software for working the EinScan Pro series of 3D scanners by SHINING 3D.
\n \n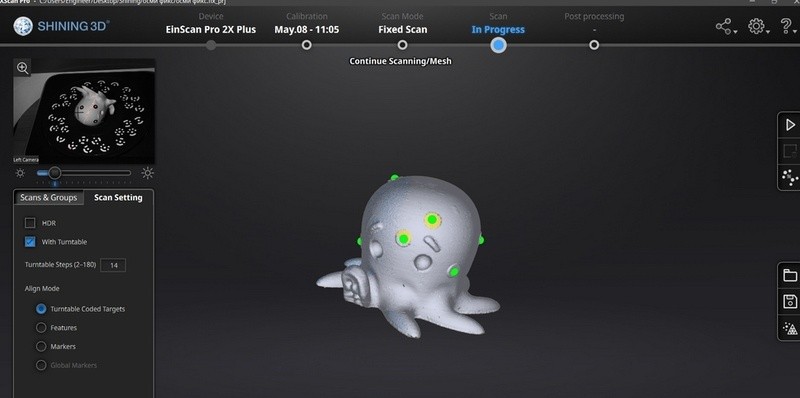
The 3D scanning process with EXScan PRO is simple enough for beginners to understand. Experienced users can utilize a wide range of needed features and functions.
\n \n\n \n
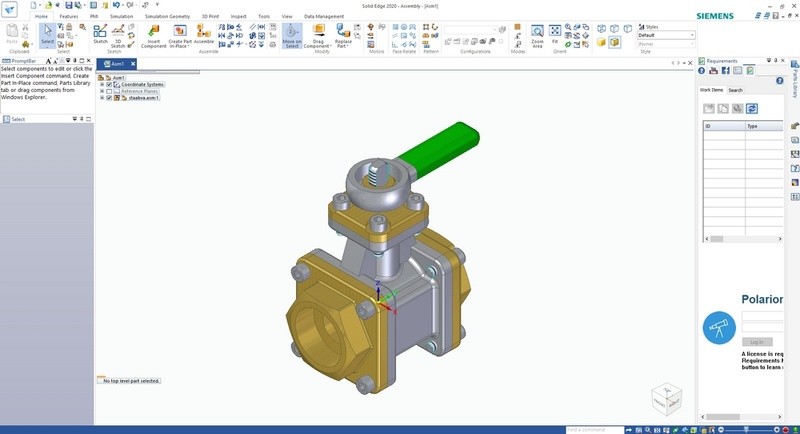
3D Scanner comes with the Solid Edge SHINING 3D Edition program – this practical CAD-tool features all of the most important 3D design functions.
\n \n
Applications:
\n \n
\n \n
The new projecting module allows the device to be used in the Handheld HD mode while utilizing the same lines pattern that was previously only used in the Fixed mode. The optimized algorithm provides a minimal point distance of 0.2 mm. The EinScan Pro HD provides the resolution and accuracy of Handheld Scan mode that are identical to those of the Fixed Scan mode.
\n \n\n \n
Color Pack and Industrial Pack widen the abilities of the EinScan Pro HD. Different modes of alignment – features, markers, turntable coded targets, manual, and texture (with the Color Pack) can significantly improve scanning efficiency.
\n \nThe Color Pack (the texture module) can scan the object in full color, as well as capture the texture and geometry. Scanning efficiency is improved by texture alignment.
\n \nThe Industrial Pack — includes a turntable and a tripod that makes automatic scanning possible with even higher resolution.
\n \n\n \n
New light source and algorithm allow the EinScan Pro HD to scan a wider range of objects with dark, black, and metallic surfaces.
\n \nUnlike its predecessor, the EinScan Pro HD is better suited for scanning humans, including full height scanning and people wearing dark clothing (with some limitations). The device is good at capturing face and mat clothing. It’s less than ideal for scanning dark clothing and black objects, but it’s still good enough for creating a model, while the Pro 2X Plus had more problems with that.
\n \nThe scanning area was increased to 310 x 240 mm. This simplifies the workflow since the scanner fails to detect its position less often and has a better time switching from one surface to another. Increased scan area and faster speed make it possible to scan the objects with a complex geometry in the Handheld Scan mode. Including those objects that couldn’t be scanned by SHINING 3D EinScan Pro 2X Plus in the same mode.
\n \n\n \n
The EinScan Pro HD has a significantly higher scanning speed than its predecessor. In the Handheld mode, the device can process up to 3, 000, 000 points per second. In the Fixed Scan mode, each frame takes less than 0.5 seconds to be scanned. The USB 3.0 interface makes higher data transfer speeds possible.
\n \n\n \n
In some modes, the scanner and the objects can be moved during the process. The accuracy of the Fixed Scan Mode is 0.04 mm. Volumetric accuracy is up to 0.045 mm + 0.3 mm/m when utilizing handheld mode with markers mode of alignment.
\n \n\n \n
A new modular 3D scanner by SHINING 3D provides high performance, resolution, and accuracy. Convenient software with efficient optimization algorithms makes it possible to get great results while scanning almost any object. The EinScan Pro HD can be of reliable assistance for designers and engineers that do 3D modeling and reverse engineering professionally.
\n \nPurchase the affordable high-quality EinScan Pro HD 3D scanner by SHINING 3D at Top3DShop and get an official warranty and best possible service.
\n \n\n
Update your browser to view this website correctly. Update my browser now


![Einscan Pro HD 3D Scanner [1 x Aesub Spray for Free]](https://top3dshop.com/image/cache/catalog/products/3d_scanners/shining_3d/einscan_pro_hd/shining_einscan_pro_hd_3d_scanner_3-268x192.jpg)
Write a comment