Nowadays, 3D scanning is proving to be more efficient and its field of application is growing rapidly. Digitizing of objects has proven successful in various industries: from civil engineering and law enforcement (for example, reconstruction of car accidents) to the entertainment industry (mainly digitizing for movies and video games) and medical field, especially orthotics and dentistry. The technology can also be applied in reverse engineering. Using a 3D scanner in conjunction with a 3D printer can help to copy a part remotely without the need to send it physically.
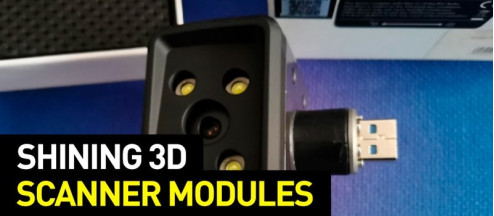
The recent developments have allowed the prices to become significantly lower, especially among the 3D scanners that use the structured light technology. These days, even the hobbyists without much experience can afford entry-level 3D scanners and get great results. In this article, we will talk about one of those affordable devices: the EinScan-SE by Shining 3D. Its functionality, applications and technical specifications will be covered and explained in depth.
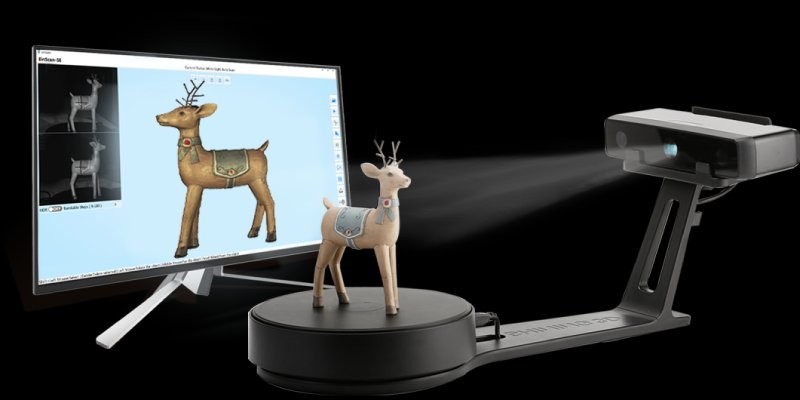
Source: www.einscan.com

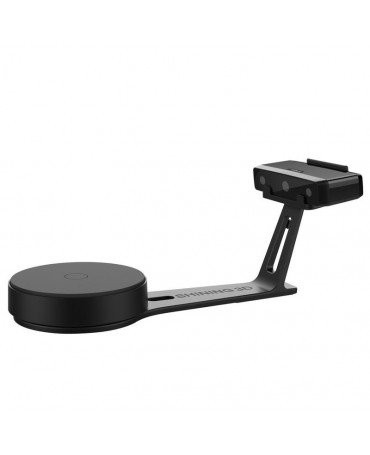
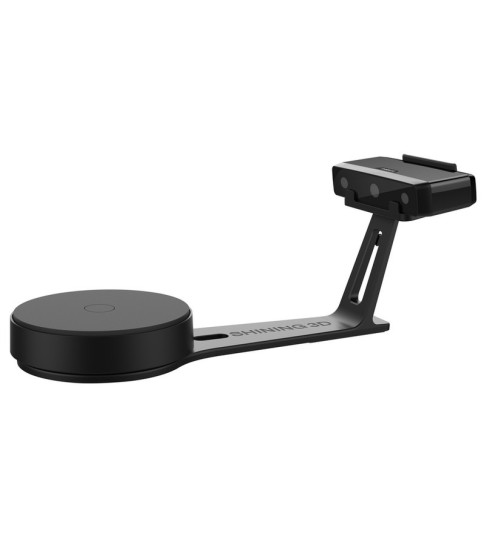
Source: www.shining3d.com
Shining 3D was founded in 2004 and since then has had a growing reputation and position in the market. The company has been working on 3D digitizing and additive manufacturing for more than a decade. Shining 3D is able to develop 3D products at a large scale, using and providing various technologies. The company offers both high-end and affordable 3D scanners that are meant to be accessible for all industries where 3D digitizing matters.
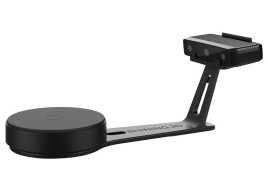
The EinScan-SE (the “E” stands for “Elite”) was released by Shining 3D in 2017. It’s an upgraded version of the EinScan-S, an older 3D scanner of the same family. The improvements include newer design and better overall performance, including faster scan speed and the support for more file formats. There also exists a much more expensive EinScan-SP (“P” for “Platinum”) version.
The feature set of the EinScan-SE is rather impressive. For a very affordable price, this 3D scanner boasts some high-end capabilities, such as scanning with color and texture and all with pretty good accuracy up to 0.1 mm, which is unparalleled for its price segment.
There are two modes of scanning: fixed and automatic. The former allows you to scan much larger objects, significantly increasing the maximum scan volume from 200 x 200 x 200 mm to 700 x 700 x 700 mm, which will prove rather convenient. The device is very fast, especially for its price. Scanning the mesh can be done in around 8-10 seconds, but capturing the texture and color will take more time, clocking at around 30 seconds. The time it takes to do an automatic scan of a full rotation of the object completely depends on the number of steps selected (you can choose between 8 and 180). The more steps it takes, the higher the quality of the detalization will be, but the longer the process will take. For example, the eight-step mesh-only scan will take a bit more than a minute. The proprietary software will help you ‘stitch’ the data of several different scans using automatic or manual alignment. You can even combine the information from different multi-step scans, changing the lighting and positioning in-between. Turning on the HDR option will also prolong the scanning process (due to longer light exposure), but will provide better quality.
System requirements (recommended):
Source: www.youtube.com
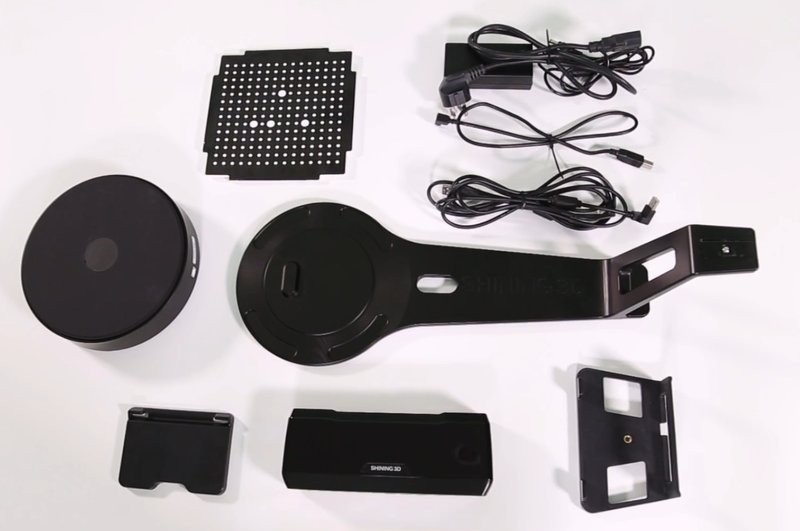
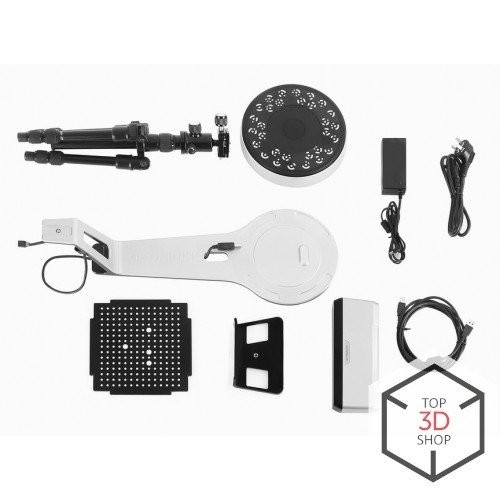
The box doesn’t take a lot of space and is easily transportable. The parts won’t break during the delivery or damage each other. The EinScan-SE comes with the turntable, a calibration board, and a stand that connects the turntable with the head of the scanner. The parts that need to be directly linked (the turntable and the head) use the USB connection. The head plugs into the power socket and can be connected to the PC with the USB cable.
All in all, the packaging is neat and the device takes around 2 minutes to assemble.
1. Go to the official website, choose support and click the “Download” button.

Source: www.einscan.com
2. Choose the EinScan-SE in the dropdown menu.
3. Choose the installation file compatible with your OS
4. Fill in the information, download, install and activate the software.
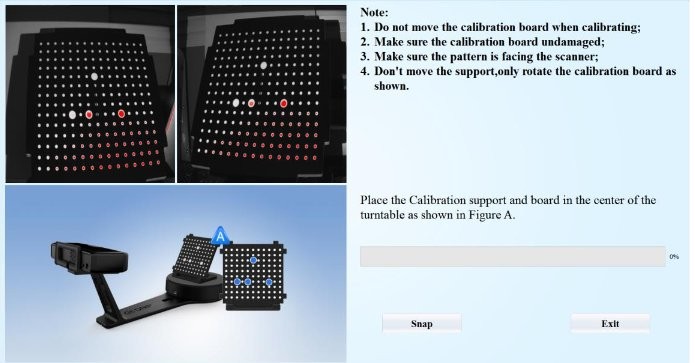
The EinScan software will not allow you to scan the object without calibrating the device first. The warning will appear. The calibration requires several steps but is overall a straightforward process.
1. Click the ‘Calibrate’ button at the bottom of the interface.

Source: www.einscan.com
2. Place the calibration board and support as shown in Figure A.
Source: www.einscan.com
3. Adjust the distance between the scanner head and the board (the software will guide you through this). Don’t move the support between the following steps, only manipulate the board when needed.
4. Click “Snap” and wait for the end of the first calibration sequence.
5. When the turntable stops turning, remove the board, rotate it 90 degrees counterclockwise and place it in the new positionthat will be shown. Don’t move the support.
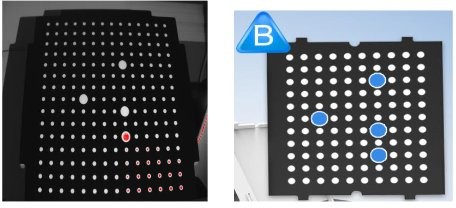
Source: www.einscan.com
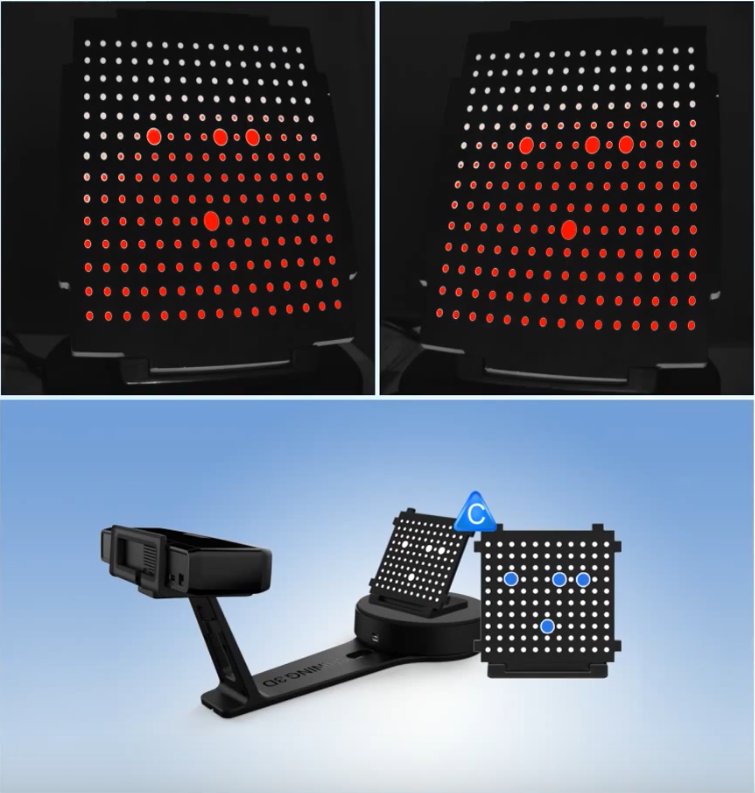
6. Go through another sequence.
7. Rotate the board by 90 degrees counterclockwise again when needed.
Source: www.youtube.com
8. After all of the three sequences, the software will need to calculate and save the data, it might take some time.
9. If the calibration was successful, the calibration interface will be closed and you might proceed with scanning. If it failed, then try again, following the same steps. If the failings continue, contact the manufacturer’s representatives.
The calibration is always required before using the scanner for the first time. The re-calibration is also strongly recommended after following conditions and situations:

Source: www.youtube.com
1. Choose the location where the project will be saved
2. Select either “Texture scan” (if you want to get color information) or “Non-texture scan”.

Source: www.youtube.com
3. If you’ve selected the “Texture scan” option, you will have to go through a white balance test, following the recommendations. You will need to get a piece of white paper.
4. Adjust brightness. There are automatic preset options that are shown below but you can use more precise manual settings if you’re working with the fixed scan.

Source: www.einscan.com
5. On the left part of the screen, you can also toggle the ‘HDR’ option on and off and select the number of steps for scanning if you want the turntable to rotate (unless, of course, a single piece of data from a certain angle will be enough for you), ranging from 8 to 180. The more steps you select, the longer the scan will take.

Source: www.youtube.com
6. After each scan, you can edit the models, align the results either automatically or use the manual align option.
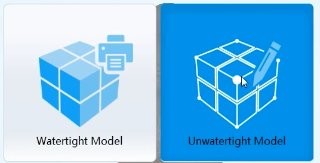
7. After the whole scan is complete, you can do some post-processing. The main options are “Watertight model” and “Unwatertight model”.
Source: www.youtube.com
EinScan Software is a free proprietary scanning solution available for Windows and macOS. The program doesn’t take much space, features a clean and minimalistic UI, but despite all of the simplicity, it boasts enough functionality to satisfy the users.
The EinScan Software is has a highly intuitive UI without cluttering the screen — there are only a few buttons ever present in a window at any given time. So the options are logical and not hard to follow. Before the first scan, the user will have to calibrate the scanner. The process is straightforward and the on-screen guides provide everything needed. After a successful calibration, the user can choose between the fixed scan and auto scan modes. Both are easy to do and the software will guide the users through the required steps. The program grants enough control over the quality and duration of the scan, and the results can be aligned either automatically or manually afterwards. Post-processing options are also comprehensive and easy to use.

Source: www.youtube.com
Another strong point of EinScan Software is compatibility with different CAD programs. You can export the result of your scan into most common formats: OBJ and STL. Other formats are also supported, such as ASC, PLY and even 3MF.
Impressive UI, great functionality and various export options make EinScan Software a great companion to the device.
The Einscan-SP (Platinum) is another structured-light desktop 3D scanner from Shining 3D. Similar to the Einscan-SE, the device offers functionality, lightweight design, and high speed of acquisition. What makes it different is an even higher level of detail.
Unlike its counterpart, the Einscan-SP is primarily intended for 3D designers in the digital environment. The device boasts advanced features for rapid capture of accurate data, which will come in handy in design, animation, archiving, heritage preservation, CG, and VR.
The Einscan-SP has one more advantage over the reviewed model. It is supplied with a tripod, which significantly expands the range of potential tasks. The tripod allows scanning large objects in stationary mode by manually moving the object.
The key technical differences between the Shining 3D Einscan-SP and the Shining 3D Einscan-SE are shown in the table below:
|
Accuracy |
0.05 mm |
Up to 0.1 mm |
|
Connectivity |
USB |
USB |
|
Display |
No |
No |
|
Outer dimensions (xyz) |
570 x 210 x 210 mm |
570 x 210 x 210 mm |
|
Weight |
4.2 kg |
2.5 kg |
|
Technology |
Structured light |
Structured light |
|
Camera resolution |
1.3 MP |
1.3 MP |
|
System requirements |
Nvidia GTX 660 or higher: Graphic memory > 2GB: RAM: 16GB |
Nvidia series; Graphics memory > 1GB |
|
Output formats |
ASC, OBJ, PLY, STL |
ASC, OBJ, PLY, STL |
|
Point distance |
0.17 mm–0.2 mm |
0.17 mm–0.2 mm |
|
Align Mode |
Fixed Scan without Turntable: Feature, Markers, Manual
Fixed Scan with Turntable: Turntable, Turntable Coded Targets, Markers, Manual |
Fixed Scan without Turntable: Feature, Manual
Fixed Scan with Turntable: Turntable, Manual |
|
Rotating table |
Yes |
Yes |
|
Working range |
0.29–0.48 m |
0.29–0.48 m |
|
Max. scan volume |
Up to 1200 x 1200 x 1200 mm (Fixed Scan); 200 x 200 x 200 mm (Auto Scan) |
700 x 700 x 700 mm (Fixed Scan); 200 x 200 x 200 mm (Auto Scan) |
|
Single scan capture |
4 seconds |
10 seconds |
|
Texture / Color |
Yes |
Yes |
|
Price |
$2,599.00 |
$1,399.00 |
As can be seen, with the Einscan-SP model, the frame capture time is reduced to 4 seconds, which significantly speeds up the work. Moreover, the Einscan SP offers more tools for automating the workflow: it supports markers alignment, allowing to automatically merge the scans. On the Einscan SE, one would need to manually merge the scans by selecting 3 common points on every single scan captured.
Moreover, the Einscan SP is much more capable at scanning objects lacking distinctive features/geometry as the best way for the scanner not to lose tracking when scanning such objects is the use of markers.
Now let’s compare the scanning results for different types of objects.
|
|
|
|
|
|
|
|
|
|
|
|
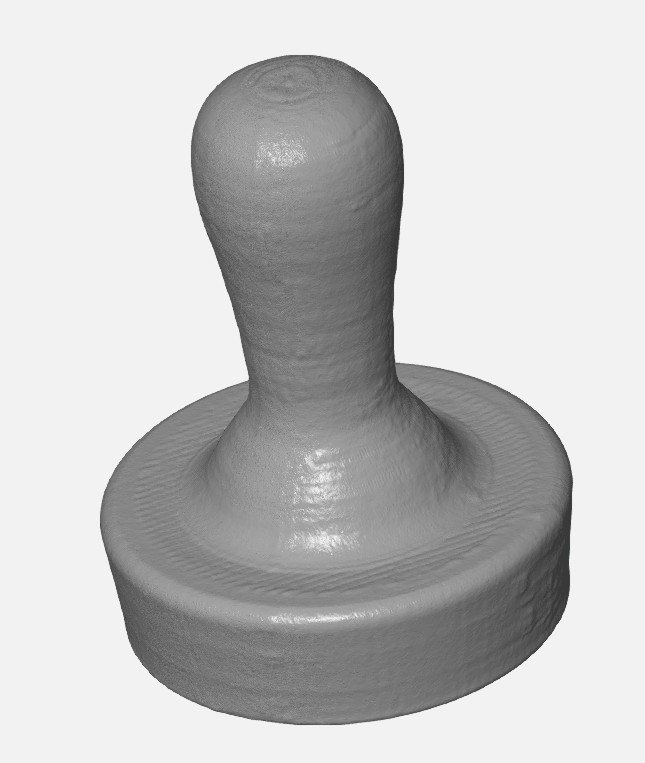
As the images show, the Einscan-SE has certain deviations, some of which might be considered significant — up to 0.5 mm. The reason for that is the repetitive geometry leading to incorrect stitching of the object during scanning.
The Einscan-SP 3D scanner demonstrated slightly better results compared to the Elite model. It coped with the geometry decently, with the maximum deviations of 0.2–0.3 mm.
Generally, both models are similar in design and operating principles, and each of them is good for a different range of tasks. So, when choosing between these devices, be guided by what parameters are more important to you.
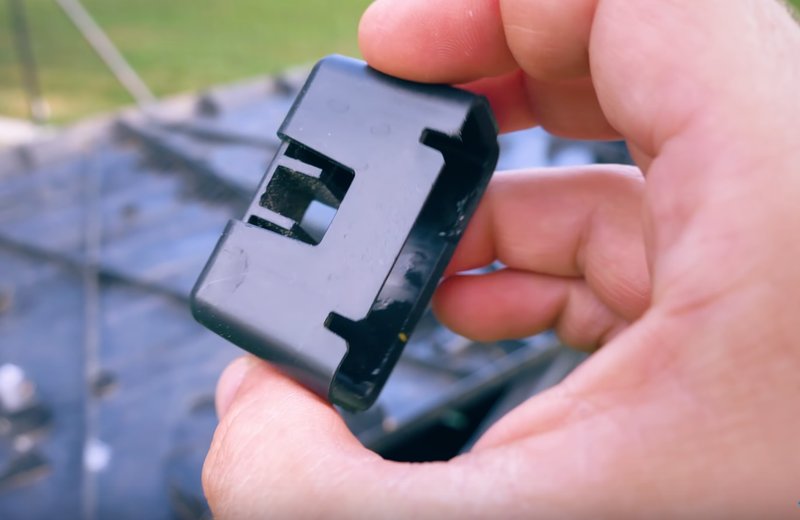
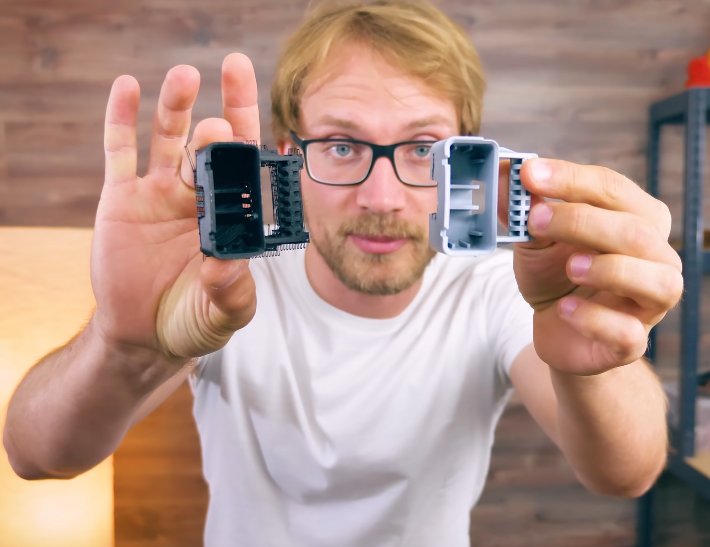
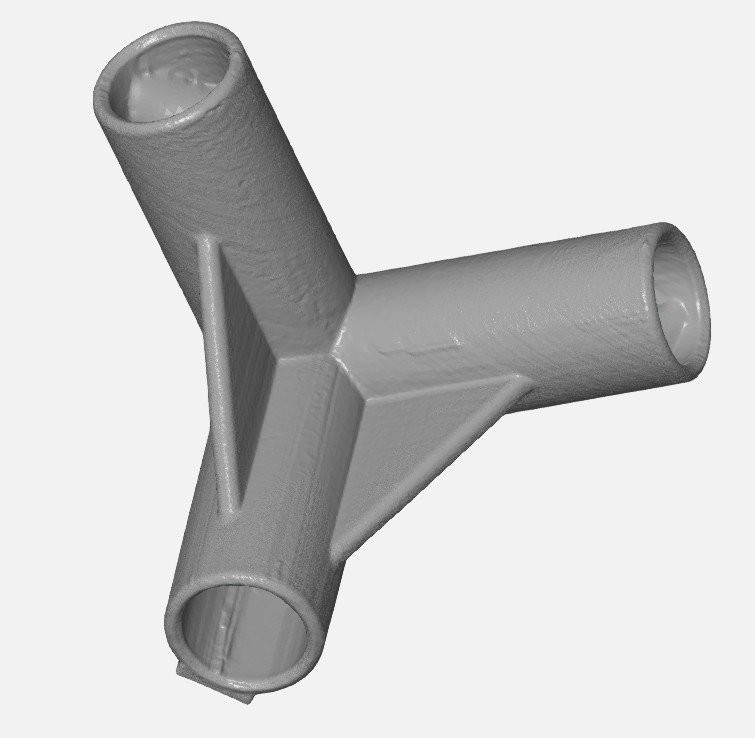
Let's start with the way a 3D printing enthusiast can use the Einscan SE. Here's a rather practical use of the scanner. Thomas Sanladerer had a problem with his compost bin. The part of its top lid was missing. Luckily, there was a similar part on the other side of the lid. Thomas scanned and printed it.
The part in question:
Source: www.youtube.com
Source: www.youtube.com

Source: www.youtube.com
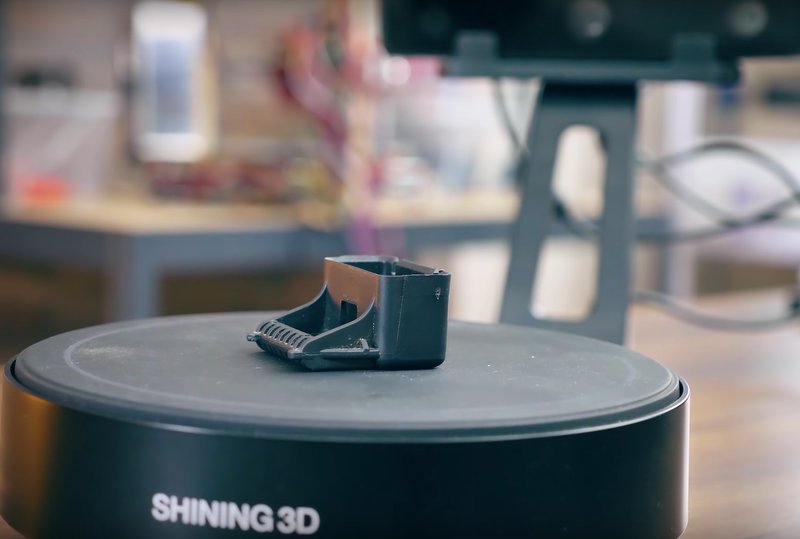
After 3 scans Thomas decided to angle the part slightly using a piece of gaffer tape as a support, so the final scan will get more data about the inside surface of the part.
Source: www.youtube.com
The support part was easily removed from the scan data using the editing tools. After merging the scan automatically, the part looked unusual, so using the manual aligning was much needed. The alignment went successfully.
The next step was to convert the cloud data of the scan into a printable mesh, using a “Watertight model” post-processing option with a “Medium detail” setting.
The result had almost 6 million vertices.
Source: www.youtube.com
Some parts of the inner side of the model weren’t perfect, so Thomas went for another scan, using another support structure.

Source: www.youtube.com
The result was successful, and Thomas went with “low detail” option while converting the scan to a mesh, getting around 2 million polygons, which was great but too much for a practical printable (by a desktop 3D printer) model, so he simplified the model to 1%. The model then was printed using the Prusa MK3 3D printer with an Aprintapro PC-ABS Filament.
The model on the left in the picture below is a freshly printed copy of the part.
Source: www.youtube.com
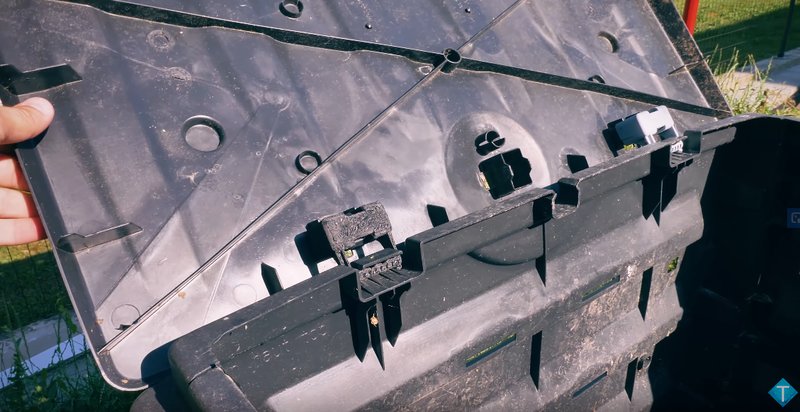
The final result was a perfect fit for the lid of the compost bin, so the project was deemed successful, while also showing the practical usage of 3D scanning.
Source: www.youtube.com
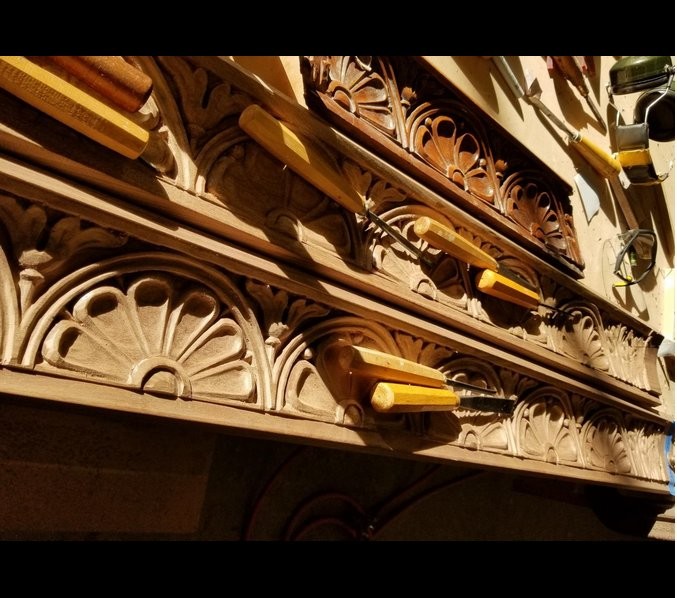
3D scanners can come in handy during the reproductions. Gary was contracted to do one of the carved piece of crown molding. The job proved to be excessively time-incentive, so he opted to buy a EinScan-SE and using CNC instead of hand carving several feet of material. He was satisfied with the quality and the fact that the whole job took just one week instead of several ones.
Gary writes:
“Impressive technology. I was contracted to reproduce a carved piece of crown moulding. When I took the job I didn't know how I was going to make it. Last resort, I could hand carve it. There was 30 feet and that would have taken me weeks to carve. I bought the EinScan and tried it for the first time. It was easy to set up. The software is incredible. After scanning, I wrote a program for my CNC. It did such a nice job that I only had to touch up each piece. The project only took one week. Can't wait to try my next project.”
Source: www.amazon.com
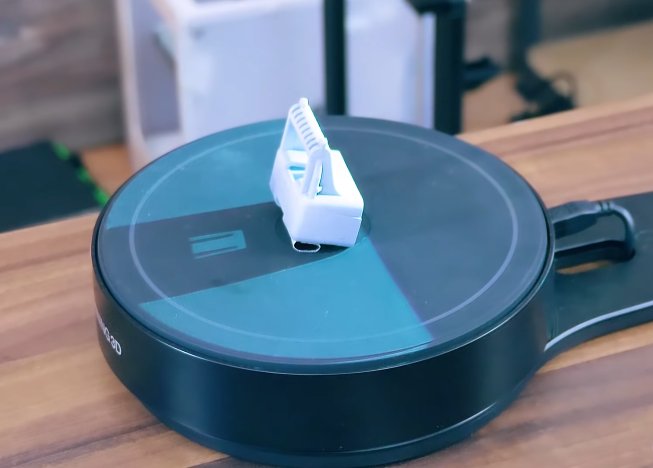
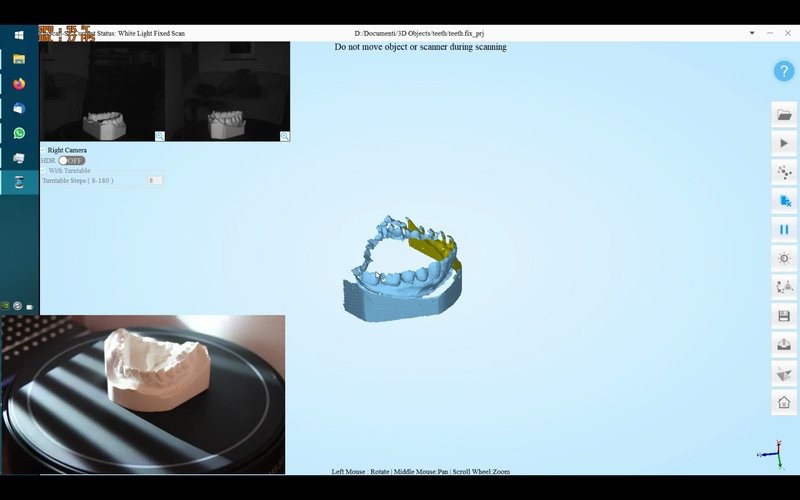
The EinScan-SE can be useful for dental purposes. Ephestione’s HQ decided to scan a plaster dental model with an incredibly high quality. His aim is to get an accurate printable 3D model to turn into gypsum dental casts.
Despite having no commentary, the video is pretty informative, since it shows the quality that the EinScan-SE can provide. It also proves that this 3D scanner is good for working with dental models, although according to the comments by the owner of the channel, “proper dental scanners” would be preferable if one plans doing crowns on the models.
The beginning of the video shows the early stages of scanning: the model is rather incomplete, but the process keeps going.
Source: www.youtube.com
The position of the model is occasionally changed for getting all of the angles.

Source: www.youtube.com

Source: www.youtube.com
As the end of the video approaches, the scan’s cloud point data starts to look impressive and complete.

Source: www.youtube.com
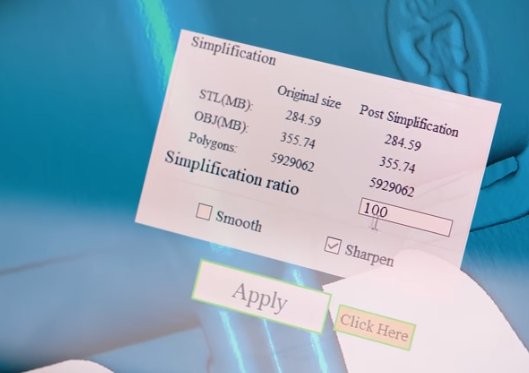
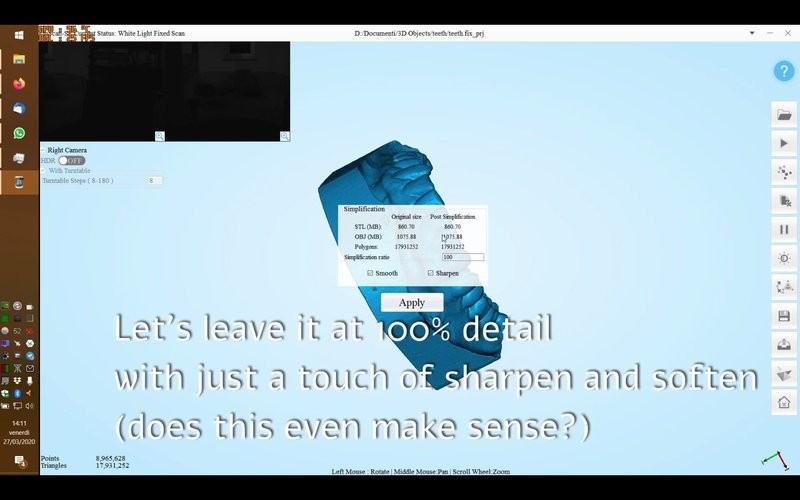
After converting the result into the mesh, the author ends up with nearly 18 million polygons and decides to leave at the 100% detail, while using the options to smoothen and sharpen the model.
Source: www.youtube.com
The level of detail is awe inspiring.
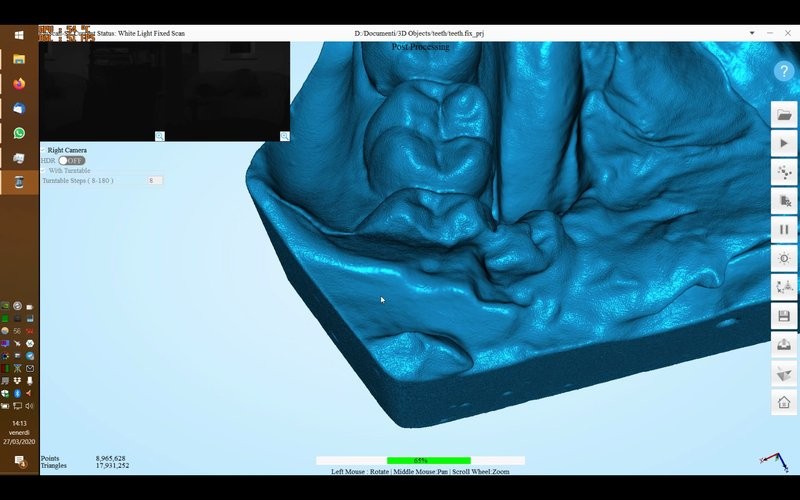
Source: www.youtube.com
And then the result (which was a huge STL file taking around 860MB) was imported into Blender.

Source: www.youtube.com
The Einscan-SE is a high-end 3D scanner sold at a very affordable price. It’s relatively fast, has great accuracy and a streamlined workflow achieved by a very intuitive proprietary software. The model can be easily assembled in a few minutes. The calibration process is very straightforward and scanning doesn’t take a lot of time. Aligning different results automatically and manually is pretty easy, thanks to the capabilities of the Einscan Software. Post-processing is also extremely simple.
The Einscan-SE has accuracy of 0.1 mm, so the device can be utilized for various purposes without breaking the bank. Various videos and consumer reviews have proved that the Einscan-SE can be used for copying (using together with a 3D printer) small and simple parts, digitizing figurines for video games, reproducing carved works, and even achieving high-quality scans of plaster dental models. The Einscan’s official website has other examples of how the device can be used, including customizing parts of a racing car and turning simple models into a pen holder.
Relatively low-price, impressive ease of use and extremely high quality make the Einscan-SE a great choice for reverse engineering, copying, and digitizing. The device can be useful for beginners, experienced hobbyists, and professionals alike, all without costing a fortune or requiring a lot of experience. Easy to assemble, calibrate and use, the Einscan-SE is one of the best budget structured-light desktop 3D scanners on the market.
Update your browser to view this website correctly. Update my browser now


Write a comment