When it comes to 3D printing, most people immediately think of the most interesting — physical stage of the process. However, while certainly spectacular, it is not the only important step in this multifaceted process. To print a model, you first need to create it, edit, and transfer the necessary data to your printer to determine what and how it should build. For this crucial and meticulous process called slicing, a special program is required.
Now, what makes a good slicer? Obviously, it must cover all essential aspects of model preparation, contain smart and easy-to-use tools, effectively communicate with the printer, and provide helpful resources to make the process easier. Simplify3D covers all these points with a lot of extra benefits, such as customizable supports, automated mesh repair, extensive previews, etc. Due to this, the program is widely used in engineering, design, prototyping, personal and professional 3D printing. Furthermore, it is widely regarded as one of the most accessible slicing solutions.
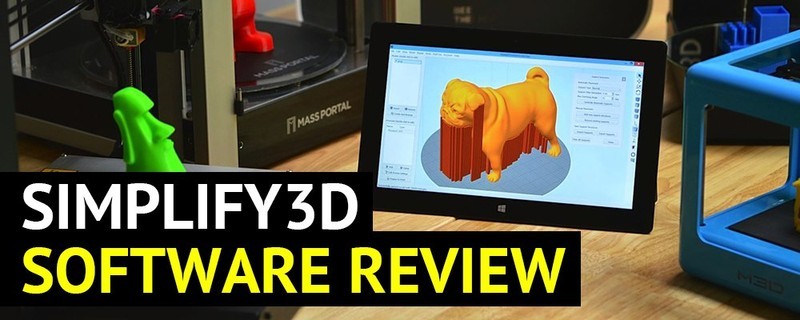
This is Top 3D Shop, and today we are going to tell you about one of the most popular 3D printing slicers — Simplify3D. Read on to find out all about the program’s pros, cons, system requirements, and major features that set it apart from free competitors.
Simplify3D has a number of advanced functions and tools that make it stand out against other slicing software. Let’s look at the most prominent of them to get closely acquainted with this professional solution.
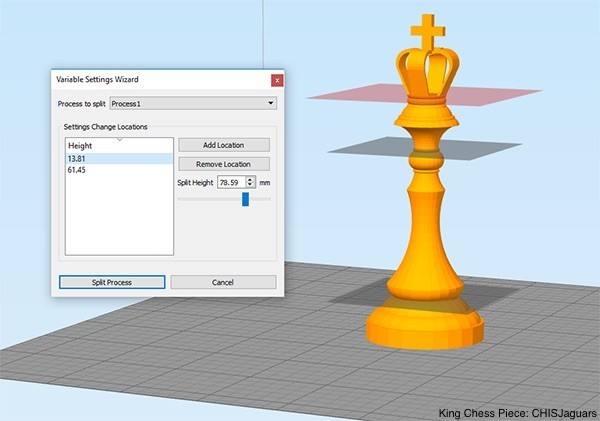
The software is designed with the advanced mode that allows tweaking every single aspect of your print within overall slicing capabilities. Since different sections of a model might require custom settings for better quality, Simplify3D offers easy and comprehensive optimization of desired sections through the Variable Settings Wizard module available since version 4.0 (you can get it from the Tools menu).
Now, with so many options, the user has full control over future outputs and can achieve maximum precision as well as choose individual mechanical properties for each part of the model throughout the build. Adjust height, strength, or weight of a chosen section to improve not only final quality, but also production time.
Moreover, Simplify3D has a dynamic system automatically adjusting material flow rate. The program masterfully regulates your extrusion settings to provide better results for sections requiring non-standard approach. This addition will be a huge favor for those who use FDM machines to print highly detailed models.
The important thing is the program’s intuitive interface with smart allocation of all its tools. Simplify3D is a user-friendly solution with thoughtful functions, which makes it perfect for learning 3D printing with professional scope.
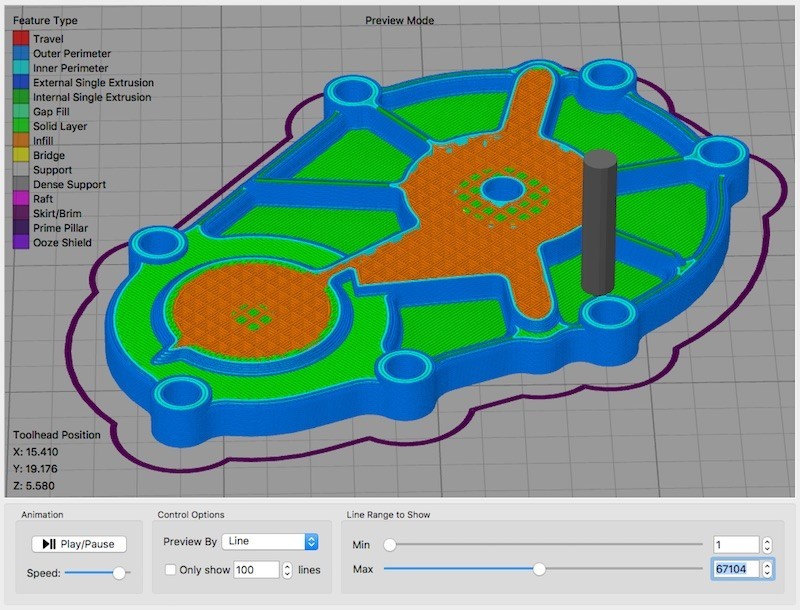
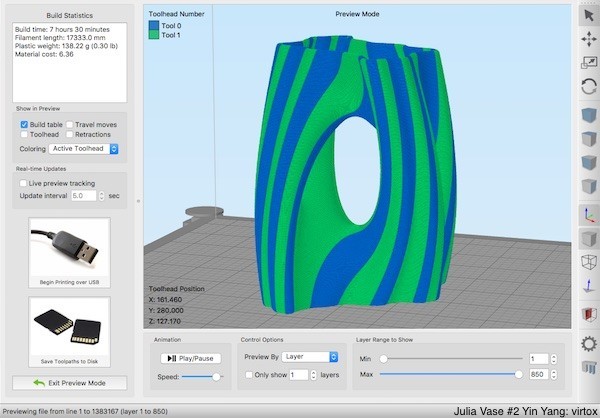
One of the most prominent features Simplify 3D boasts is the capability of accurately simulating the future printing process up to a single layer. These essentially realistic previews include every extruder move to ensure that all is in line with your plan. You are free to choose any stage separately or look through the whole process layer by layer to know there will be no issues encountered.
This feature is a powerful optimization and troubleshooting tool that allows you to save a great deal of time and costs by preventing potential failures. The realistic animations precisely reflect all your print settings in different colors, such as exact speed, extruder movement, and even retractions, which provides unprecedented insight into print preparation.
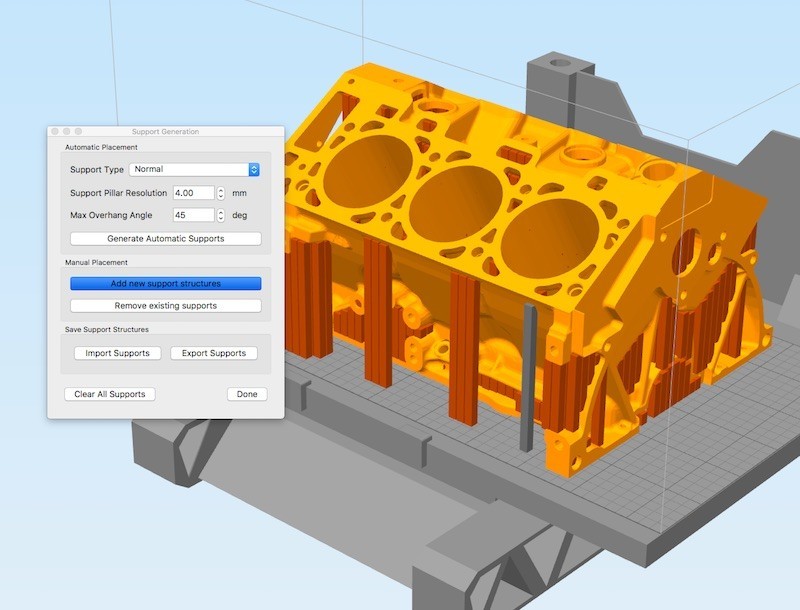
Simplify 3D is known for its award-winning customizable support structures. The software provides automated support generation as well as manual adjustment allowing you to add more support in areas requiring extra stability or remove unnecessary pillars to accelerate the printing process.
The program has a variety of functions that ensure easy support removal without damaging even complex models, no post-processing required. You can set an additional layer or even multiple layers between a part and supports to minimize the risk of faulty breakaway. If you deal with a dual extruder printer, one of the modules, Dual Extrusion Wizard, is going to streamline printing with soluble supports. And how about making support structures stronger by changing the layer direction? This ability will surely come in handy when printing large models with tall pillars, just to make sure they hold.
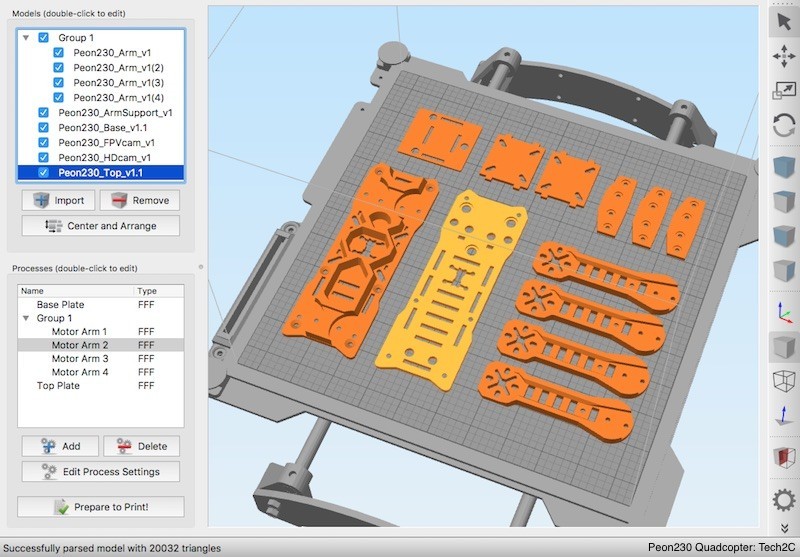
Sometimes you need to print several small-to-medium parts in a limited time. In contrast to other slicers, Simplify3D allows you to do this simultaneously, in keeping with individual settings for every single model on the print bed without the risk of getting low quality or less detailed outputs.
With the program, you can easily change the height or infill percentage of each separate model and generally print it in a completely unique way. In addition, it is possible to choose whether the selected parts should be printed all at once or in succession, which might help you avoid stringing. Among other things, a function like this is extremely handy when it comes to testing optimal settings for a new machine or material.
Overall, Simplify3D supports three modes for multi-part printing:
Unfortunately, the latter is supported by a limited number of 3D printers. The ability to enter this mode depends on the clearance of the print head and the distance between items being printed. For successful sequential printing, it should be large enough to let the print head move down without touching the models.
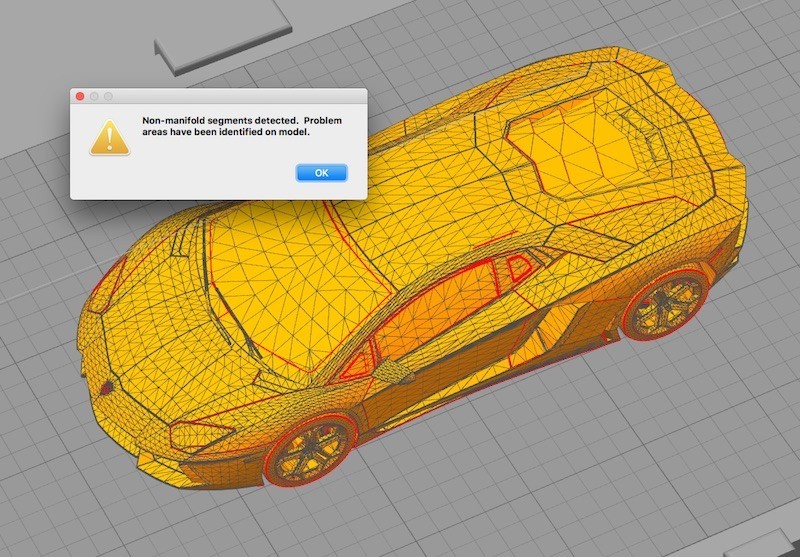
Dealing with broken and simply problematic meshes can be frustrating at times, but Simplify3D has it covered: the software generously supplies automated mesh analysis and repair tools. They are able to find and fix all the common mesh issues, so your working process from now on can be substantially reduced as well as the stress level.
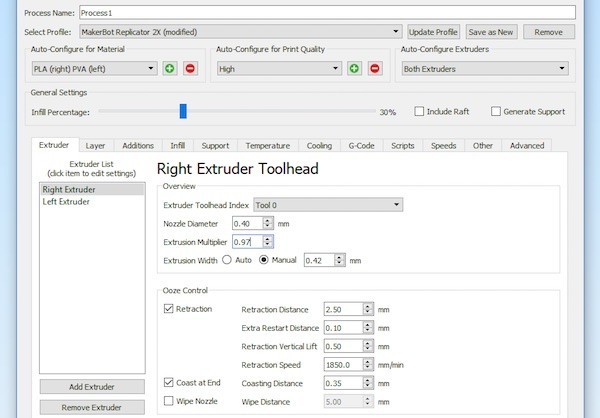
The Dual Extrusion Wizard is a blessing for the owners of dual extruder printers. This module was first introduced in version 3. Its primary task is to make configuration for machines with two extruders as easy as possible, whether it concerns multi-color printing or soluble supports. Default settings include creating an ooze shield, which should prevent any leaking or oozing issues. You can always change process parameters in the corresponding menu.
Those who are versed in G-code matters will appreciate a powerful built-in scripting engine. A feature like this is common for free open-source slicers, but with Simplify3D you can get so much more from it taking into account the extended algorithms and total number of existing options. The possibilities go far beyond regular text editing. With Notepad++ installed, you can even download an XML file to enable syntax highlighting in Simplify3D to make coding more convenient.
The Simplify3D slicer sports its outstanding accessibility as it has profiles for hundreds of various 3D printers. Currently, the official list of supported devices encompasses nearly 600 individual printers. Numerous manufacturer companies around the globe collaborate with the developer, so the program is compatible with virtually all the latest 3D printing technology.
Even better, you can connect all your machines to Simplify3D at once. The software easily switches between different devices and configurations and is ready to work right after connection, which makes for rapid and coordinated production.
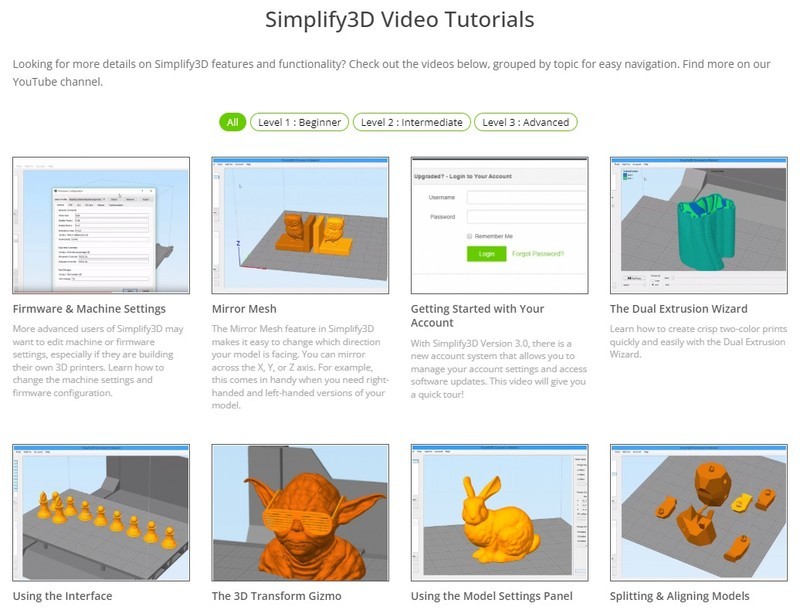
While the Simplify3D solution is generally clear and user-friendly, it requires a certain amount of knowledge to deal with it successfully. Besides, some printing issues might still occur at any time. That is when you would appreciate a piece of advice, especially from a 3D printing expert. Luckily, the user support team offers a helping hand to all their clients. The members are ready to share their vast experience in the form of online support and enlightening tutorials on model preparation, printing process, and material properties. These consultations, articles, and videos guarantee that over time you will achieve maximum print quality and acquire truly professional skills. While still in the process of becoming a pro, it is great to have your back covered.
One of the natural questions arising when you decide to try out a new program is what versions of it are available, especially if there are cost-free means to test the waters.
Unfortunately, there is no Simplify3D free trial. Instead, the developer provides a 100% risk-free option based on a satisfaction guarantee. That is, you still have to pay the full price and essentially buy the program, but there is a guarantee period. If you decide that Simplify3D is not your cup of tea, you can get your money back within two weeks from the date of purchase. Be sure to form a view within this time frame, otherwise there is no way to reimburse your costs. However, the upside of purchasing the Simplify3D full version is that you immediately gain access to all its smart features without limitation.
Those who decide to invest in Simplify3D will soon find out that the program is simple and user-friendly from the very start. Right after purchasing a license, you will immediately receive an email containing clear instructions as to the program download and installation. The whole process of initial setup for Simplify3D is quite easy and streamlined, including the printer connection phase.
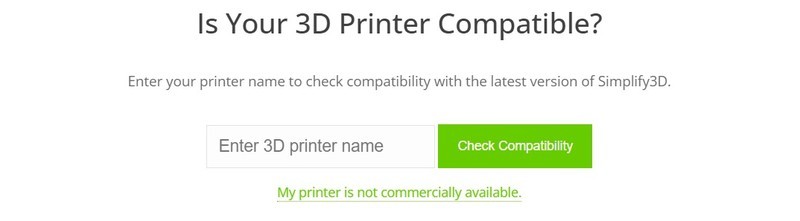
You can always make sure that your 3D printer is supported by the software before buying it. For this purpose, Simplify3D has an open compatibility list.
If you have any problems with settings, print quality, or materials, take a look at the Support section on the program’s official website: they have all kinds of tutorials provided on how to use Simplify3D and get maximum results. In fact, these quality resources might be useful for all users regardless of their proficiency. They teach newcomers everything starting from how to move a print model, how to scale it, change infill percentage, adjust speed settings, set a pause, control fans, and use multiple processes in Simplify3D.
Simplify3D has been widely lauded for a rational use of the computer resources. At the moment, the technical specifications for smooth running of Simplify3D 4.1 are as follows:
|
OS |
Windows Vista or later (both 32 and 64-bit) macOS 10.7 or later Ubuntu (14.04 LTS or later; both 32 and 64-bit), Debian, and Fedora-based distributions |
|
CPU |
Minimum: Intel® Pentium® 4 Recommended: Intel® Core i7 |
|
RAM |
Minimum: 4 GB Recommended: 8 GB or more |
|
GPU |
OpenGL 2.0 capable system |
|
Other |
Internet connection required for the installation and continued use of the software; 1GB of available hard-disk space |
|
Languages |
English, French, German, Italian, Japanese, Spanish, Portuguese |
|
Supported file formats |
Import: 3D Models: stl, obj, 3mf Image Conversion: jpg, png Application: fff, factory
Export: Toolpaths: gcode, x3g, makerbot, 3w, g3drem, bfb, hsv Application: fff, factory |
As we have already mentioned, Simplify3D has a number of free analogs with various functionality and accessibility. Let’s consider the most popular options: Cura, PrusaSlicer, and Kiri:Moto.
Credit: ultimaker.com
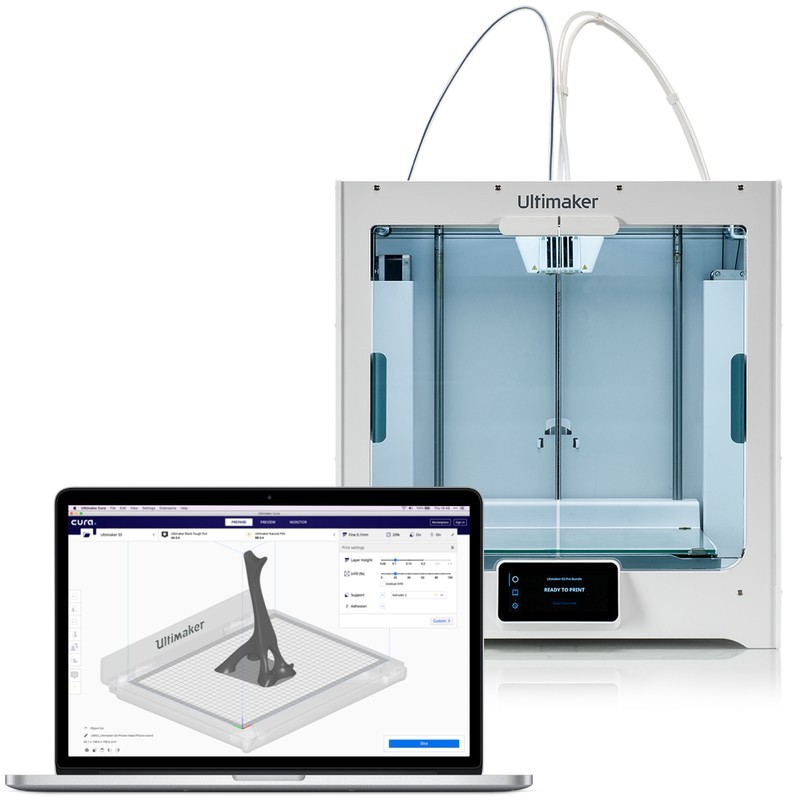
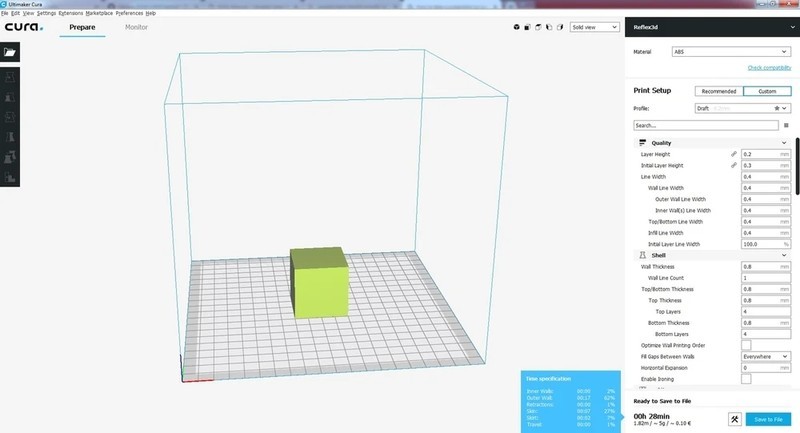
Cura from Ultimaker is definitely one of the best-known slicers in the industry. Being absolutely free, it nevertheless provides a wide range of possibilities that would meet numerous demands.
The ultimate Cura mode includes more than 400 various parameters for model editing and printer control. Due to its open-source nature, the program allows for continuous development and improvement. The marketplace contains handy add-ons that seem to make up for insufficient functions and introduce further convenience to some aspects. Some of them even enable integration with popular 3D design programs, like FreeCAD or Blender. Despite a vast number of profiles provided by the developer, it is also possible to add custom configuration packs.
Cura enjoys frequent updates, which nevertheless are quite small, especially compared to those of Simplify3D. Still, there is no doubt that Cura is a decent alternative to the reviewed product. Considering it is free, the Ultimaker’s slicer would be a good option for aspiring hobbyists.
Credit: all3dp.com

Credit: prusa3d.com
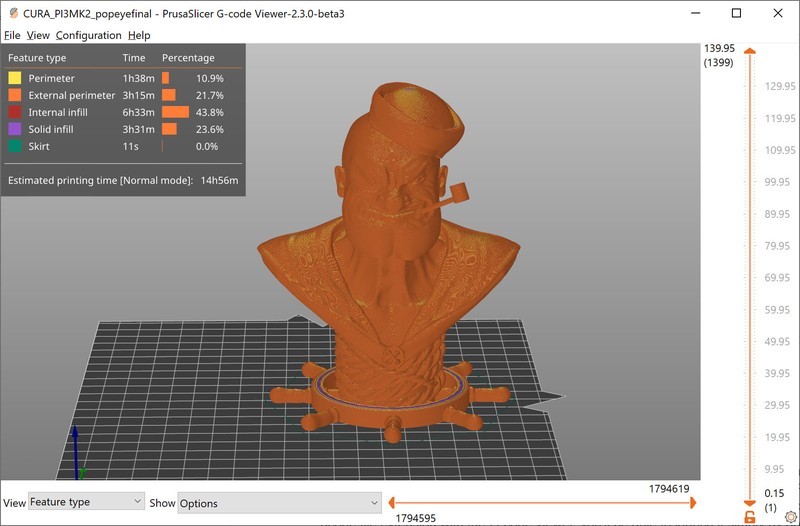
As the name suggests, this branch of another free slicing software, Slic3r, is optimized for Prusa technology and contains built-in parameters for all of the company’s printers and materials, which is no barrier for 3rd party devices as well.
Similar to the previous example, PrusaSlicer is open-source and offers plenty of tutorials to get a handle on numerous features. With a major company like Prusa in charge, the fork project is now doing better than the original community-developed version that received its latest update in 2018.
Credit: prusa3d.com
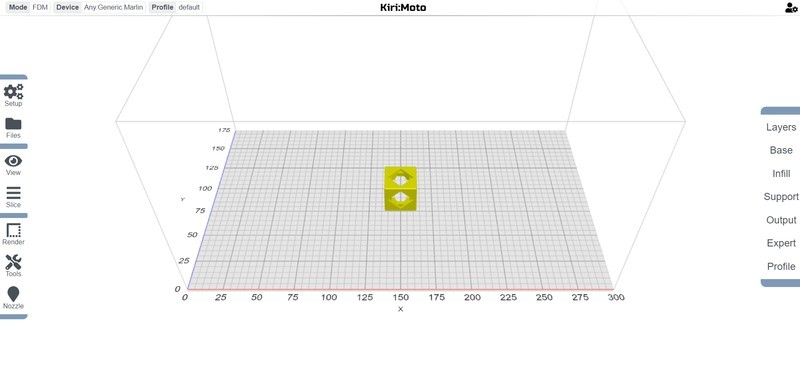
Kiri:Moto is entirely different compared to the aforementioned slicers. The main difference is its wider accessibility. Unlike locally-installed Cura, PrusaSlicer, and Simplify3D, this program is cloud-based, which means it can be used anywhere and anytime. Plus, it is simple enough to navigate through the functions from the start.
Kiri:Moto is developed, maintained, and hosted by Grid Space. Apart from basic features present in every similar software, there is nothing sophisticated about its tools and possibilities, yet still the slicer offers an unexpected amount of profiles including the ability to add settings for your own machine with custom G-codes. Moreover, the program supports not only FDM and resin 3D printers, but also CNC and laser machines.
Credit: grid.space
Both Simplify3D and Cura are extremely popular among 3D printing enthusiasts and seasoned professionals. They have similar functionalities and slicing capabilities, yet fit different requirements. Let’s compare the programs in several crucial aspects and see if there is a winner.
While Simplify3D has a premium price and extra upgrade charge, Cura is completely free, including updates as well as plug-ins and add-ons. Of course, there is an advanced mode of the latter, namely Cura Enterprise, which is rather expensive, but it is aimed at high-level users and probably is unnecessary for beginners. As for Simplify3D, it implies a one-time license purchase with some nice discounts on top of that.
Simplify3D pleases the eye with its pragmatic design: all the functions are smartly organized into 12 tabs, which makes for intuitive use. Still, some minor annoyances, such as the need to switch between different windows again and again, slightly spoils the impression.
Cura’s interface is really simple: the program screen includes only the basic elements carefully arranged without overflowing. It is clear and makes for smooth navigation between the software functions, some of which, nevertheless, are really hard to find.
The customization scale in both Simplify3D and Cura defies the imagination. The latter even has parameters no one ever has to change — this is how small they are. As a complement to smart in-built functions, like auto-slicing and print simulation, Cura offers tons of free add-ons from the marketplace to suit all tastes. When it comes to Simplify3D, the program is really obsessed with details to get every single parameter for printing just right.
To Simplify3D’s credit, many of its impressive features were eventually copied by Cura to achieve similar efficiency, which even countless plug-ins could not provide. Yet, it remains unparalleled so far.
The older Cura versions tended to cause RAM issues, while Simplify3D has been boasting an adequate use of resources all the way: it hardly ever uses more than 2 GB of your RAM. Currently, the situation has leveled out, but Simplify3D is still in the lead.
Both slicers support numerous 3D printers as well as common file formats. The only significant difference is the import and export features allowing you to add a new printer profile in Simplify3D, which is impossible for Cura.
In contrast to rarely improved Simplify3D, Cura gets consistent updates both from the developer and community due to its open-source nature. On the other hand, every upgrade package for Simplify3D is a real breakthrough for slicing.
Cura can be good at many things, but support settings is definitely not one of them. Simplify3D grants extremely easy and hassle-free support customization, which is another unique feature introduced by the program.
The variable settings for different layers is also an exclusive benefit for the owners of the Simplify3D license. It would be difficult for Cura to offer an equivalent.
Apparently, both Cura and Simplify3D are solid slicing software to get excellent 3D printing results. Still, they both have their pros and cons making each program great for certain circles of users with their individual purposes. Cura is a great application for beginners or those who are not ready to spend $150 on a slicer. It is so far the best variant among free programs of this kind. Simplify3D is a powerful solution with an immense support system, professional capabilities, and many unique features. So, the choice basically comes to your priorities.
Despite a number of currently available free slicers, Simplify3D is great software completely worth its price. In contrast to the program’s many competitors, Simplify3D does exactly what it says: it makes 3D printing easy and accessible to users of all levels as well as saves you a lot of time and money by preventing misprints. The manifold state-of-the-art features, like fully customizable supports, realistic simulations, automated mesh analysis and correction, fast processing of complex prints, and universal compatibility, motivate hobbyists and professionals alike to opt for rapid, efficient, and gratifying process of 3D model preparation.
Nevertheless, the software can be criticized for its prolonged and irregular update cycles. In the early days, Simplify3D was a one-of-a-kind solution head and shoulders above its rivals. However, since its founding in 2013, the program has evolved only to version 4.1 (launched on 5 November 2018), and it is still unclear when we will get another upgrade. Will it compensate for a long waiting period? Probably, yes: these packages usually come with a lot of useful content definitely making for new industry trends.
Now, let’s sum it up and assess the situation in objective terms:
Eventually, the decision is up to you. For professionals that appreciate their time and resources, Simplify3D is a valuable tool completely worth its money, especially considering all the handy features the program contains. However, if you deal with simple prints or still just learn the ropes of 3D printing, a free basic slicer might be able to satisfy your needs.
In the end, Simplify3D remains one of the best slicers currently available in the 3D printing sphere. You may not like its price or rare updates, but that doesn’t change the fact that the program offers extensive functionality worth every penny. Investing in Simplify3D, you get a comprehensive set of convenient, highly reliable tools that make your model preparation routine much easier, faster, and in the long run cheaper than most free slicers out there.
Even if you are new to 3D printing matters, the solution provides a trouble-free start, smooth learning curve, and bright prospects with all necessary help and support along the way.
If you are unsure, just try it out: with the two weeks return option, you can always get your money back and opt for a fitting free slicer. However, there is a reason the developer is so confident of its distribution policy.
You can purchase a full version of Simplify3D with all features included for a price of $149. This is a one-time cost; however, after a year of use, software upgrades will come for a surcharge.
Currently, the program supports the most common 3D printing file formats: STL, OBJ, and 3MF files. Since any major CAD software works with STL, this format is particularly recommended.
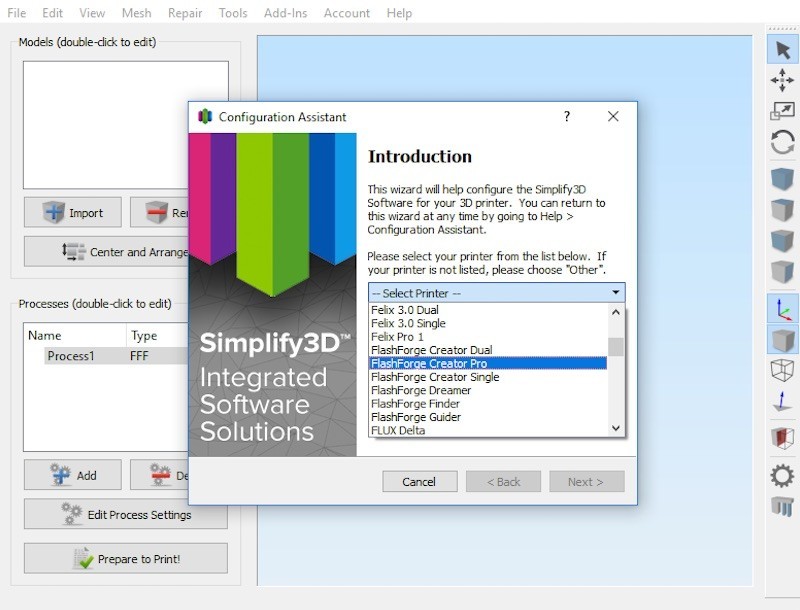
The program is still able to generate a custom profile, even if you have a DIY machine. To set it up, find the Configuration Assistant in the Help menu. After defining several basic printer parameters, Simplify3D will automatically create a new profile fitting your device.
To see the remaining print time in minutes on the Machine Control Panel while printing, you should use files containing the given information. Mind that x3g files do not support this function, so you will only see the progress in percentage terms.
You can edit this parameter in the “Edit Process Settings” menu. To remove unnecessary rafts, disable a checkmark beside the “Include Raft” option. Numerous extra settings are available to customize rafts, skirts, and brims for faster print times or improved adhesion. To see them, click the “Show Advanced” button in the lower left corner of the window and switch to the Additions tab.
To customize walls for your future print, go to the Layer tab and set necessary values for the top and bottom layers. Changing them to 0 will remove all roofs and floors, while the same for perimeter outlines will disable sidewalls.
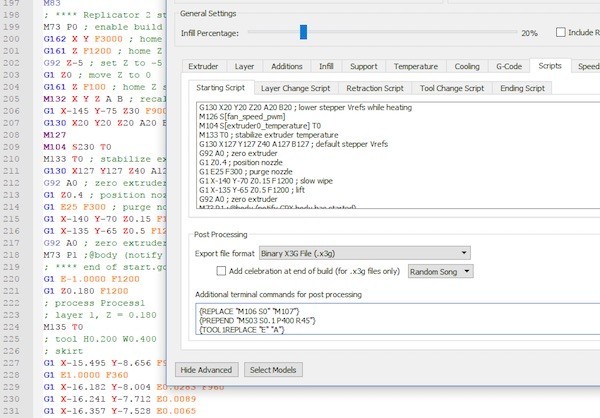
During model preparation, Simplify3D automatically generates the G-Code commands reflecting all the necessary actions to complete the print. These commands can be viewed by clicking “Save Toolpaths to Disk”, saving the file on your hard drive, and then opening it in a text editor, such as Notepad or TextEdit.
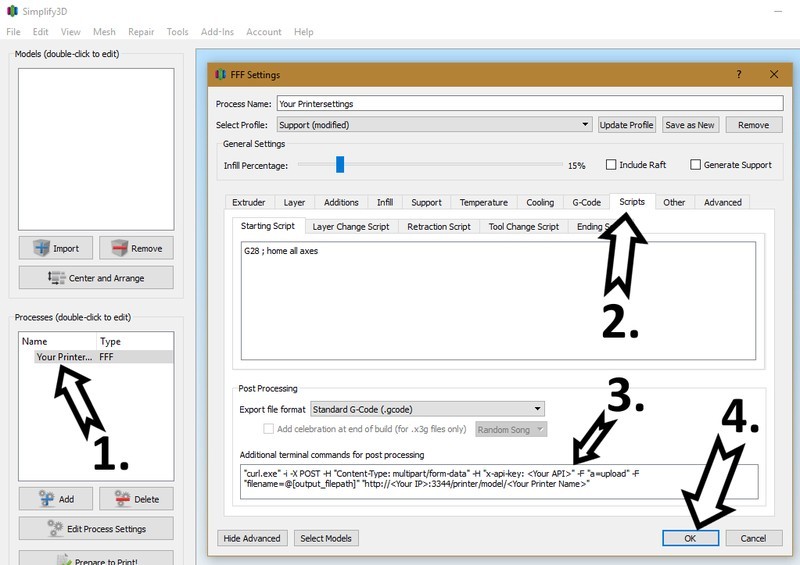
You can use Simplify3D with Repetier-Server and export your G-Code files directly to the latter. To get a necessary file, click the “Save Toolpaths to Disk” option. Next, the file transfer will require cURL and the Repetier-Server API.
To allow post-processing, you should add an additional terminal command in the program:
Credit: repetier-server.com
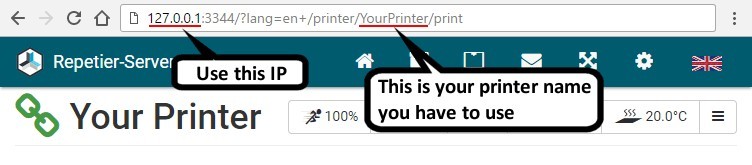
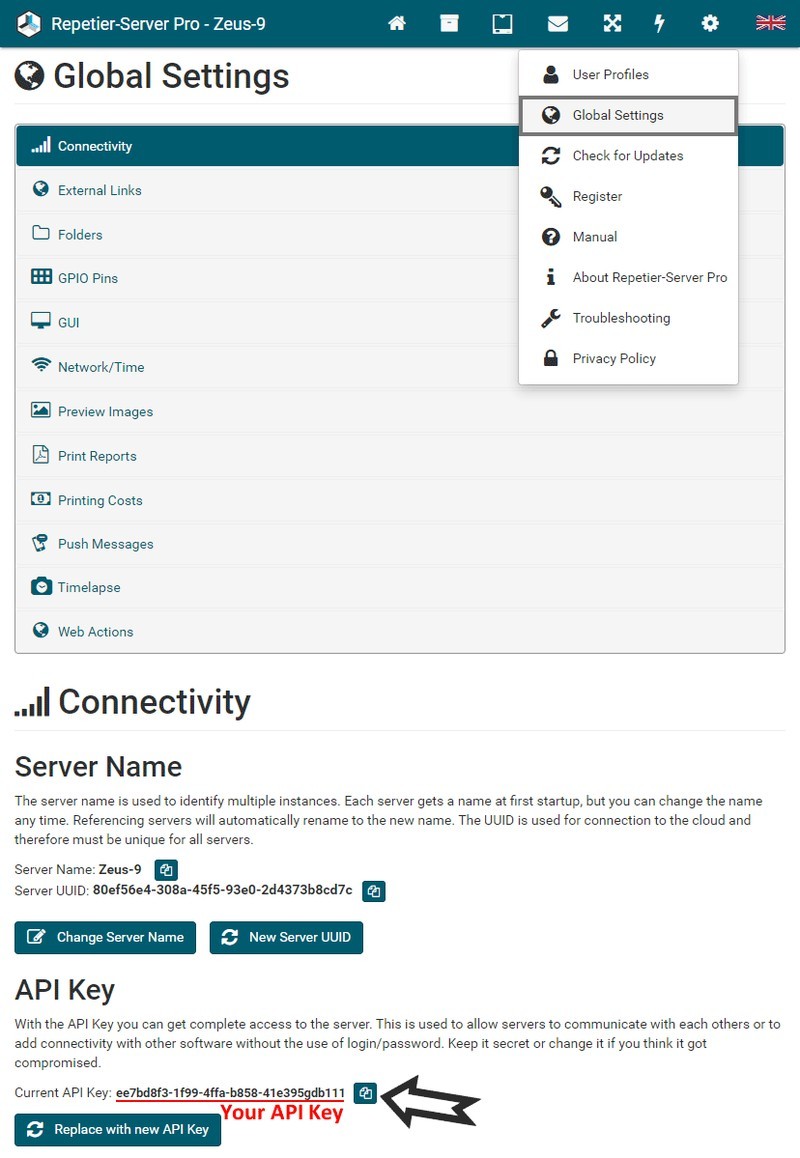
To get the required data, go to Repetier-Server in your browser:
Credit: repetier-server.com
Credit: repetier-server.com
Next, replace <Your API>, <Your IP>, and <Your Printer Name> in the provided commands with your data.
To save the sliced G-Code in the default group of your printer in Repetier-Server by clicking “Save Toolpath to Disk” in Simplify3D use:
|
"curl.exe" -i -X POST -H "Content-Type: multipart/form-data" -H "x-api-key: <Your API>" -F "a=upload" -F "filename=@[output_filepath]" "http://<Your IP>:3344/printer/model/<Your Printer Name>" |
|
"curl" -i -X POST -H "Content-Type: multipart/form-data" -H "x-api-key: <Your API>" -F "a=upload" -F "filename=@[output_filepath]" "http://<Your IP>:3344/printer/model/<Your Printer Name>" |
To start printing directly via Repetier-Server by clicking “Save Toolpath to Disk” in Simplify3D use:
|
"curl.exe" -i -X POST -H "Content-Type: multipart/form-data" -H "x-api-key: <Your API>" -F "a=upload" -F "filename=@[output_filepath]" -F "name=[output_filename]" "http://<Your IP>:3344/printer/job/<Your Printer Name>" |
|
"curl" -i -X POST -H "Content-Type: multipart/form-data" -H "x-api-key: <Your API>" -F "a=upload" -F "filename=@[output_filepath]" -F "name=[output_filename]" "http://<Your IP>:3344/printer/job/<Your Printer Name>"
|
To disable stepper motors, use one the following commands: M18 or M48. If one of them does not work, opt for the other. Moreover, you can specify the axis you want to deactivate, namely:
M18 — disables all engines
M18 X — deactivates only the X-axis motor
M18 X Y — stops the X-axis and Y-axis motors
For owners of dual extruder printers, it is desirable to have three profiles: one for each individual extruder and the other for both of them. That way, you can customize separate parameters for each extruder.
For example, all three profiles should have 2 extruders in the extruder list. If you make a profile for the right extruder, set the Extruder Toolhead Index for the left extruder to 1. The same applied vice versa.
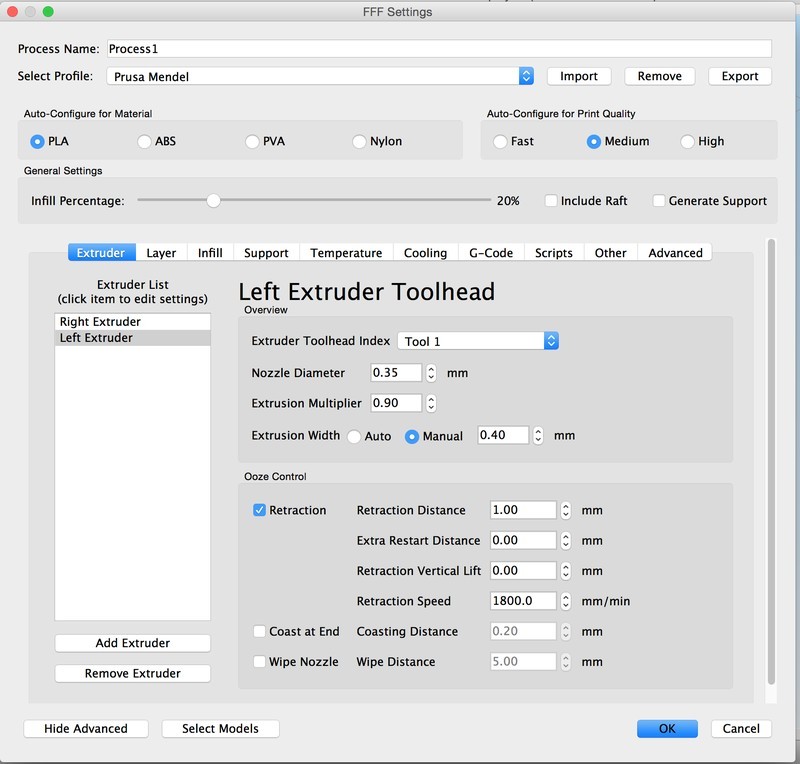
The temperature tab should contain three Temperature Controllers, one for each extruder and one for the heated bed. Once again, the identifier for the second extruder should be T1.
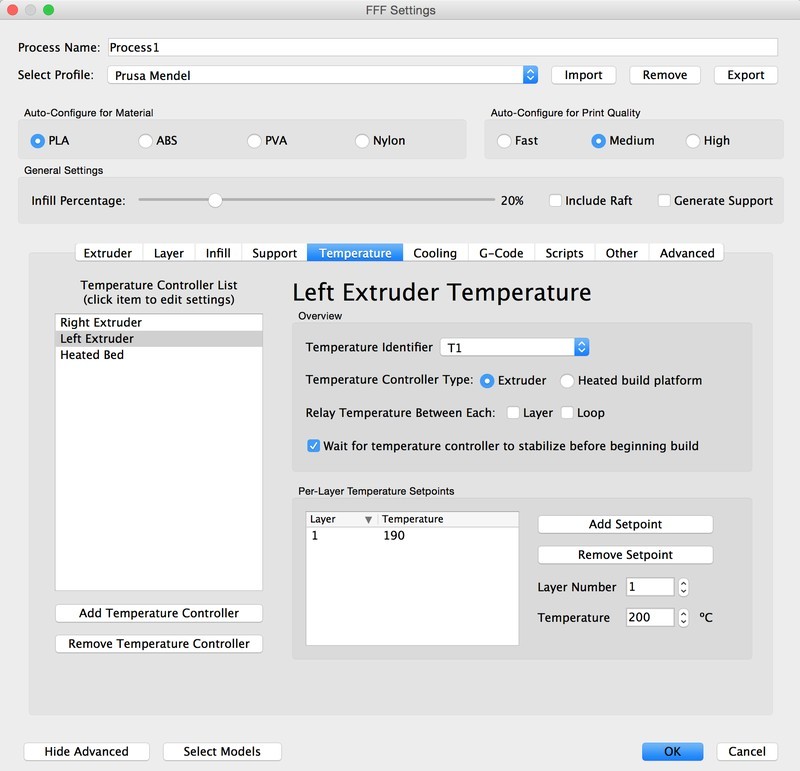
For the right extruder profile, select the corresponding extruder for the Layer, Infill, and Support tabs. In the Temperature tab, set the Left Extruder temperature to 0, and vice versa. With the dual extruder profile, you should check both tabs.
Update your browser to view this website correctly. Update my browser now
Write a comment