Dentistry is one of the most highly demanded services to date, so definitely it could use some innovations to satisfy all modern needs and demands. As a major supplier of state-of-the-art scanning technologies, Shining 3D introduced their new intraoral 3D scanner — Aoralscan 3, which boasts advanced AI algorithms, increased scan field, improved ergonomics, and other cutting-edge features.
This is Top 3D Shop, and today we are going to tell you about the main functions, technical characteristics, and scanning peculiarities of the Shining 3D recent product.

Credit: shining3ddental.com
Shining 3D is a China-based company headquartered in Hangzhou. Since 2004, it has been developing innovative technologies for additive manufacturing. Shining 3D is a large-scale producer that has offices in Stuttgart, Germany and San Francisco, USA. The company aims to make modern 3D technology accessible to all types of consumers. The factories in Hangzhou, Beijing, and Tianjin in China produce an extensive selection of modern, reliable, and versatile 3D devices.
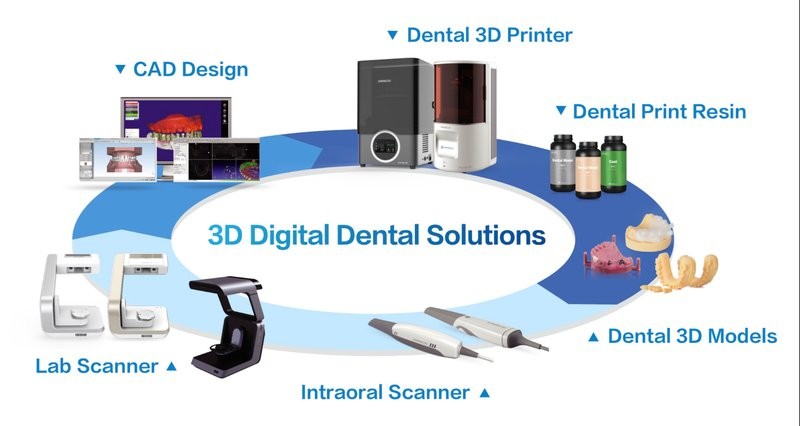
In particular, Shining 3D provides a comprehensive range of 3D digital dental solutions, from intraoral and lab 3D scanners for clinics to professional dental CAD software. Moreover, the company offers special printing products for DLP 3D printers.
Credit: shining3ddental.com
The primary goal of Shining 3D is the popularization and advanced development of 3D digital solutions for dental labs, clinics, hospitals, and other institutions to implement digitalization all over the world.
Credit: youtube.com
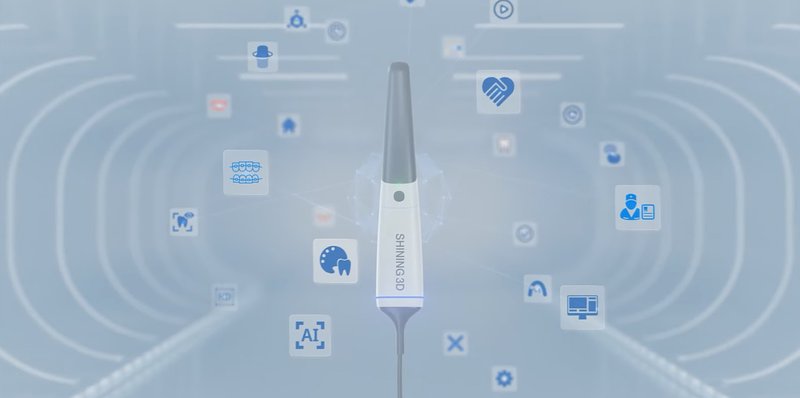
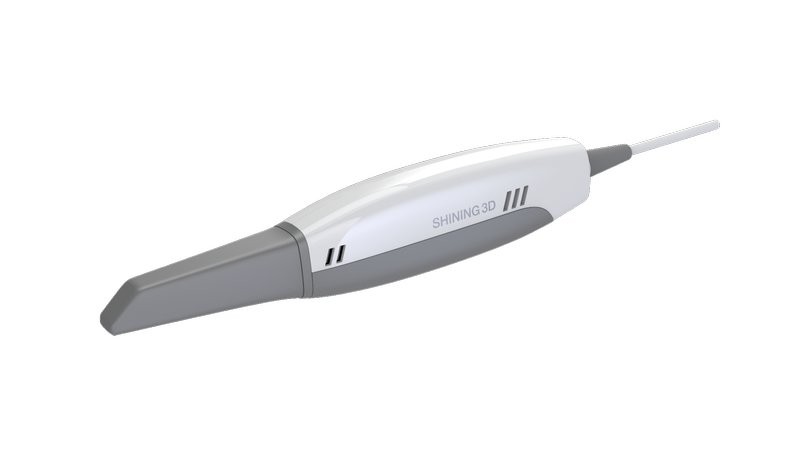
In September 2021, Shining 3D announced their new professional intraoral dental 3D scanner — the Aoralscan 3. Due to intellectual performance, high accuracy, and ergonomic design, the device is ideal for various clinical scenarios including general restorations, implants, and orthodontics.
Here is the list of the main features making the Aoralscan 3 noteworthy:
Credit: youtube.com
Credit: shining3ddental.com
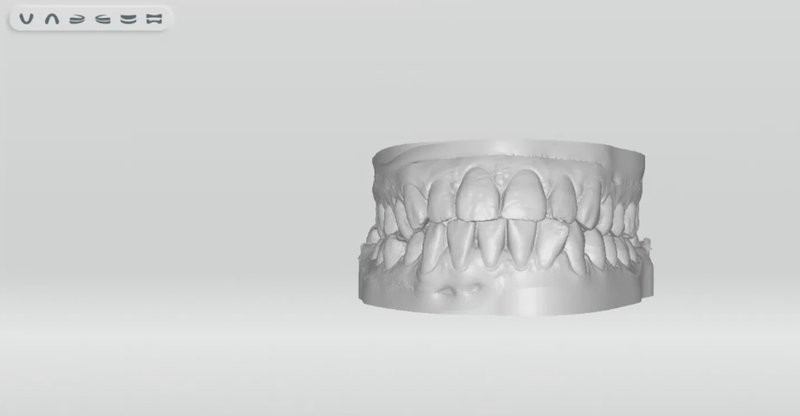
The renders below are a vivid demonstration of the scanner’s ample capabilities:
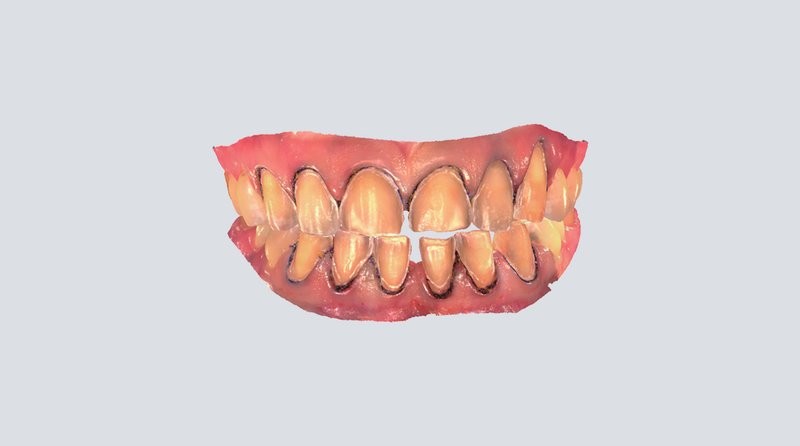
Credit: shining3ddental.com
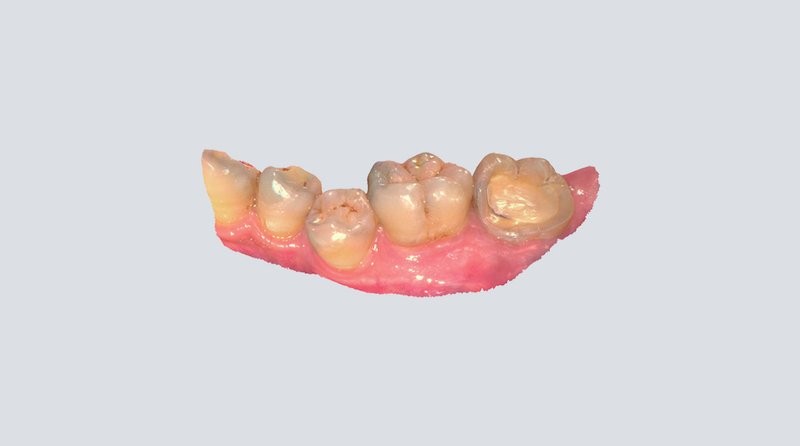
Credit: shining3ddental.com
Read on to see the Aoralscan 3 in action.
Credit: youtube.com
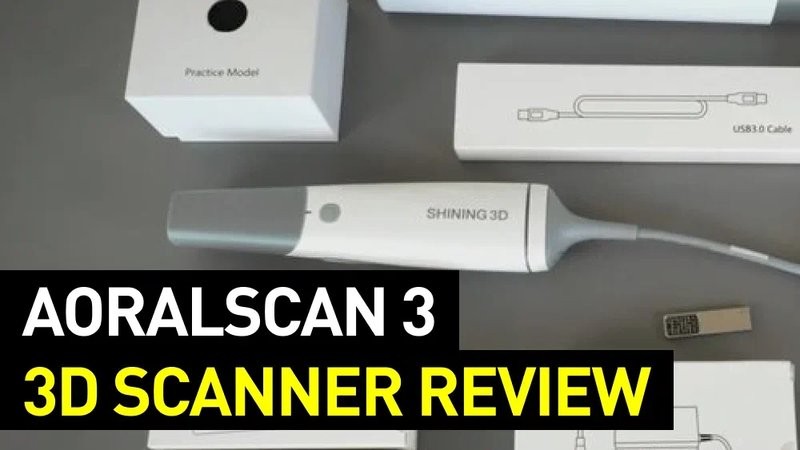
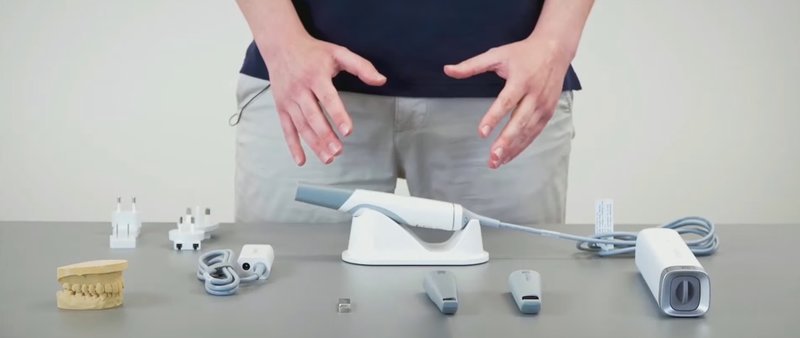
The Shining 3D Aoralscan 3 is supplied with the following equipment:

Credit: youtube.com
For some items, package content may change. In case of any questions, please get in touch.
The unboxing and full introduction of the scanner parts can be seen in the following video by Shining 3D.
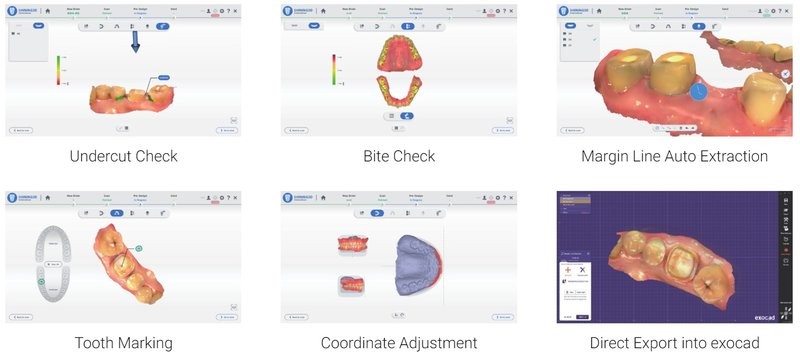
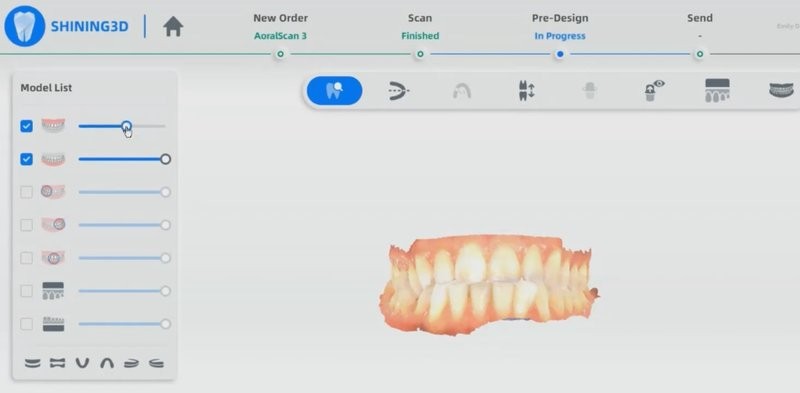
Shining 3D provides the proprietary scanning software for all of its devices. The new version for the Aoralscan 3 enables a number of automated functions based on AI algorithms. The interface of the program is clear and user-friendly.
Credit: youtube.com
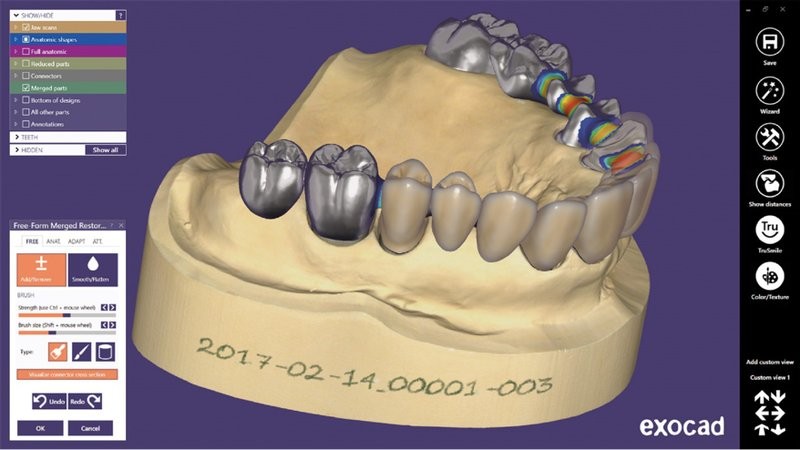
Scanning results can be processed through the powerful dental CAD software. The exocad features speedy operation and ease of use as well as minimized training costs and increased productivity. Due to the program’s reliability and versatility, one can smoothly deal with any complex case found in dental practice.
Credit: shining3ddental.com
In addition to the standard set of indications, the software has numerous add-on modules.

Credit: shining3ddental.com
The ChairsideCAD combines a streamlined workflow with an optimized system. Thanks to a step-by-step guide, it allows mastering the design process with a short learning curve. Create highly esthetic proposals with minimal post processing.
Credit: shining3ddental.com
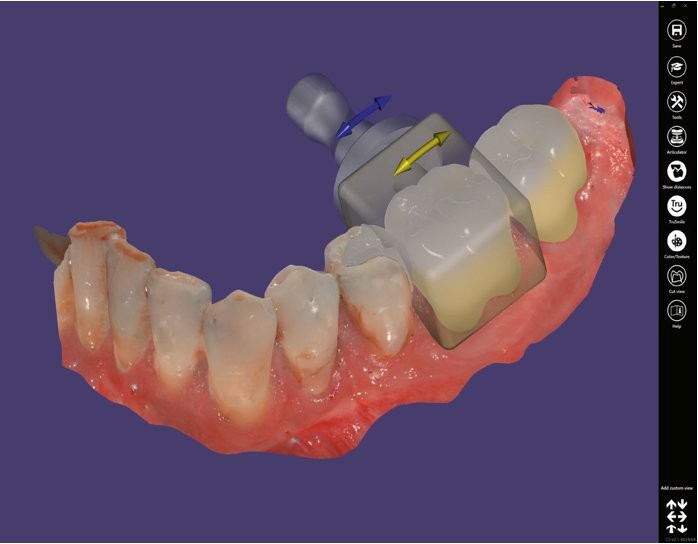
The software enables you to design various esthetic and functional dental restorations and appliances with automated support as well as open tooth and material libraries.

Credit: shining3ddental.com
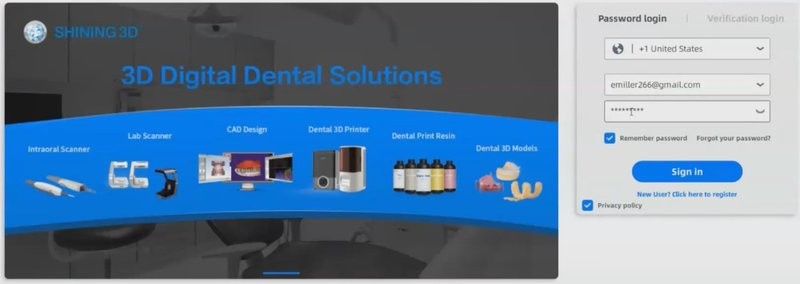
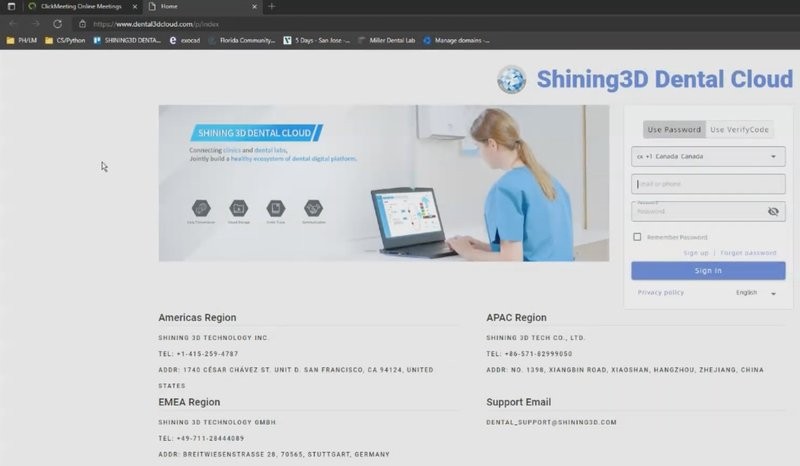
When you open up the software for the first time, it will prompt you to log in through the Shining 3D cloud portal. If you don’t have an account, you will need to register in the system. This process is completely free.
Credit: youtube.com
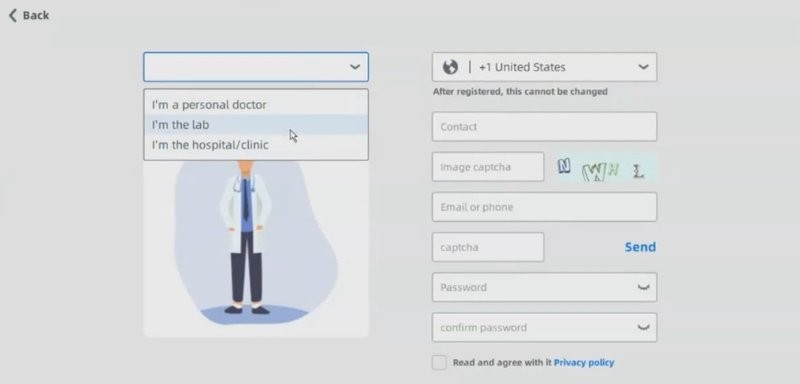
When you sign up as a new user, the first thing you need to do is select the type of your future account. The options are shown in the screenshot below. Next, put your data into the corresponding fields on the right. The second captcha will be sent to your contact number or email. Once you agree with the privacy policy, you are almost ready to start scanning.
Credit: youtube.com
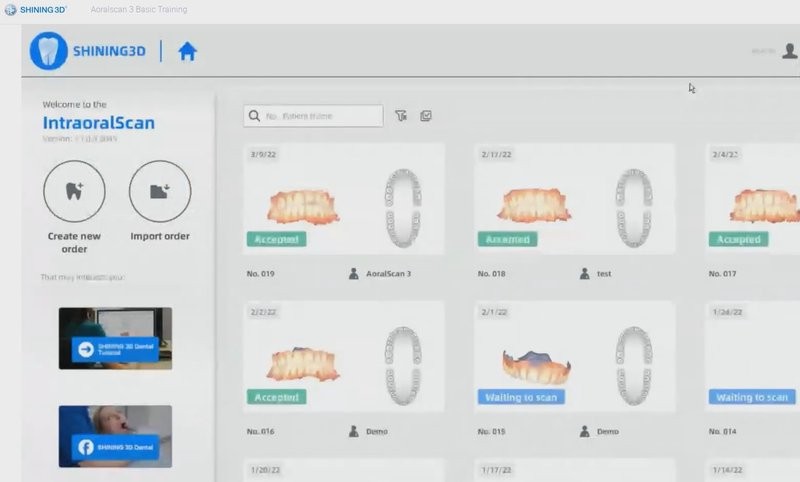
This is what the main screen of the program looks like. Here, you will see all of the cases that you’ve scanned in the past.
Credit: youtube.com
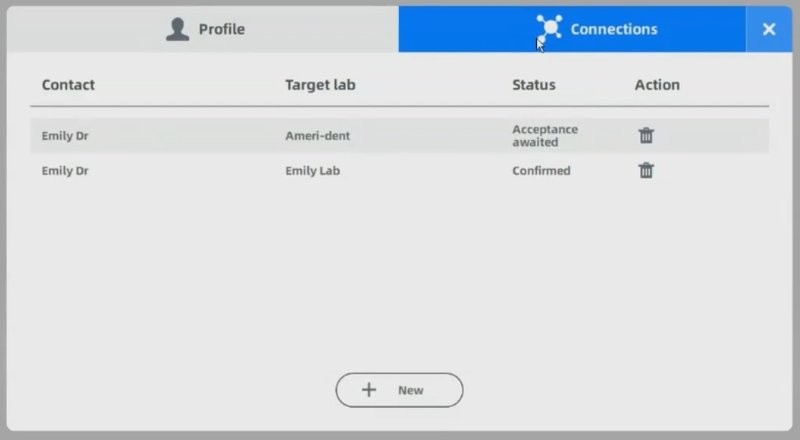
In the top right corner, you can find a couple of useful features. For example, the Profile and Connections tabs. They contain information on your personal data and lab connections respectively. The latter allows you to automatically send the cases to preferred dental labs.
Credit: youtube.com
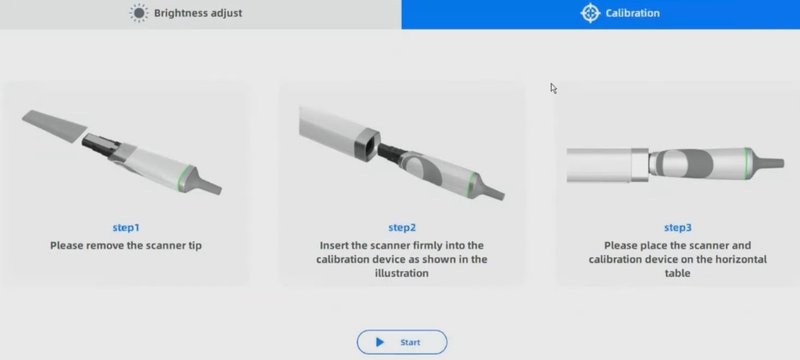
The next step is the calibration. You will need a specific tool for that (comes with the scanner). All the necessary instructions are provided on the screen. It is recommended to calibrate the Aoralscan 3 every 15 days.
Credit: youtube.com
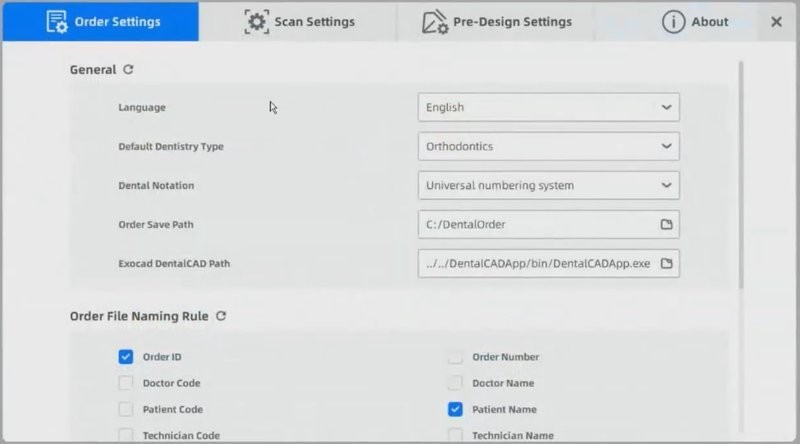
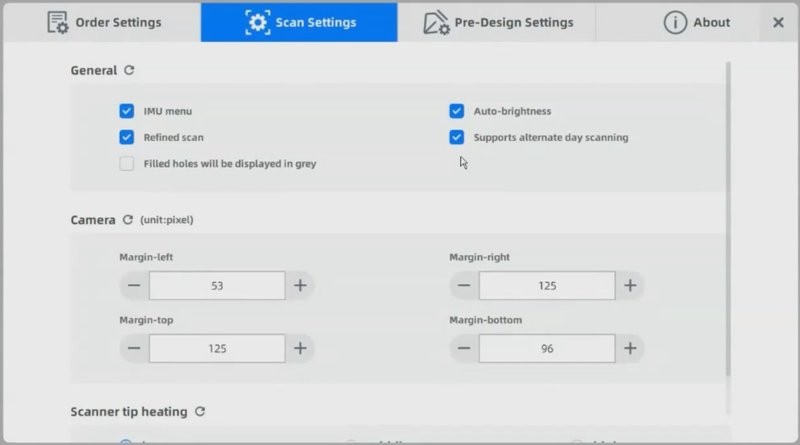
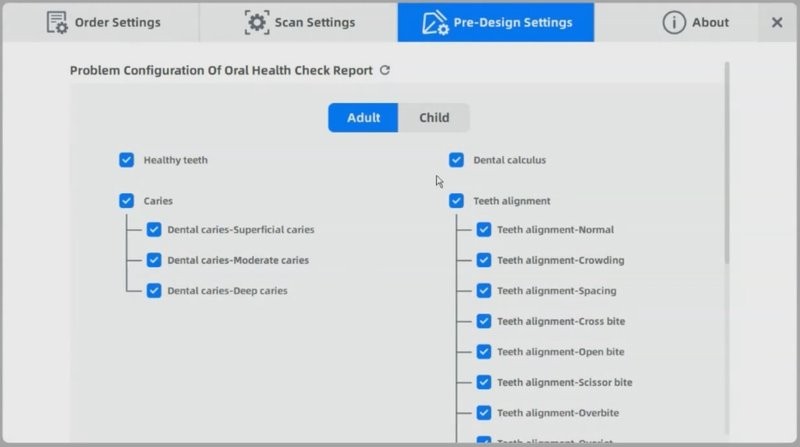
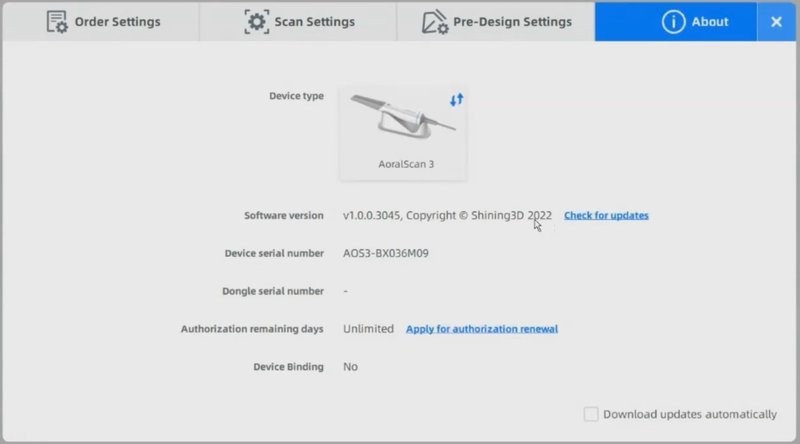
The next thing to point out here is the settings menu consisting of several tabs with various customization options.
Credit: youtube.com
Credit: youtube.com
Credit: youtube.com
Credit: youtube.com
Also, there is a link to the web-based version of the Shining 3D dental cloud portal in the lower left corner of the main screen. There, you can track the progress of your cases, view design images, send messages and notes.
Credit: youtube.com
Now, you are ready for scanning with the Aoralscan 3.
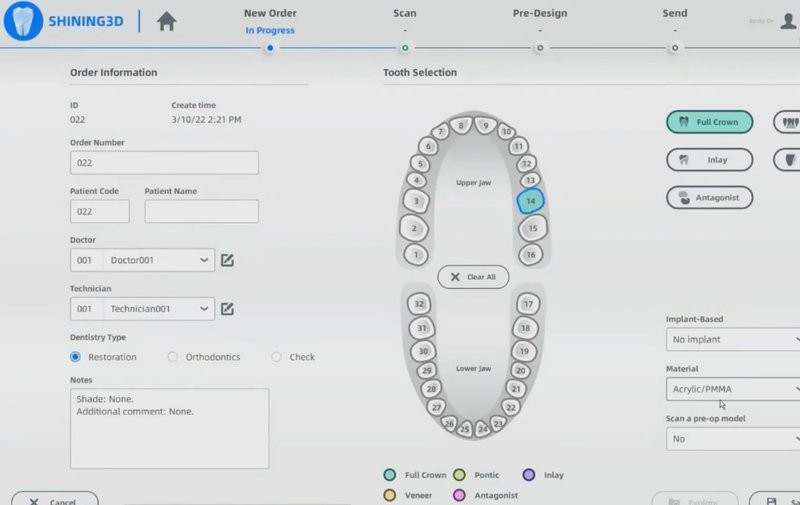
Once you decide to create a new order, the program will open the form, where you can indicate the type of the future model, specifying options (for example, crown, inlay, veneer, pontic, implant, material, etc.) as well as enter the patient’s name, assign a doctor and technician, and leave some notes.
Credit: youtube.com
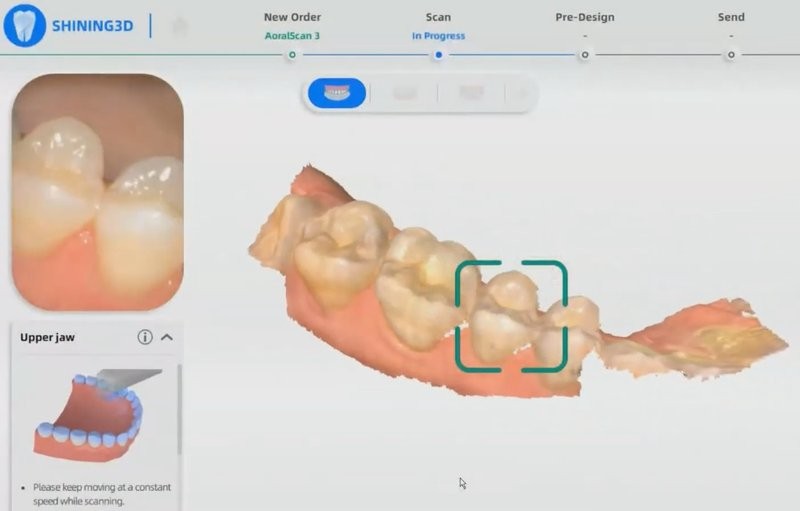
Next, you will get to the scanning window. Turn on the intraoral mode and the AI feature to automatically filter out all unnecessary data. There is also the “Metal tooth scan” function for certain cases. Make sure the patient’s mouth is dry before scanning.
The Aoralscan is really quick, so you will need around 578 frames or 1 minute to capture the whole upper arch.
Credit: youtube.com
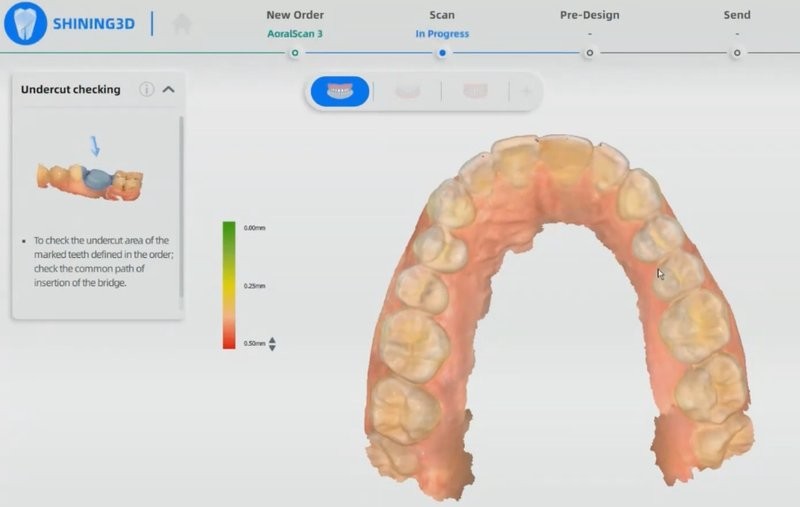
The “Remove isolated data” feature will help in case the AI does not pick up some areas. One can also set a view direction to check the undercuts.
Credit: youtube.com
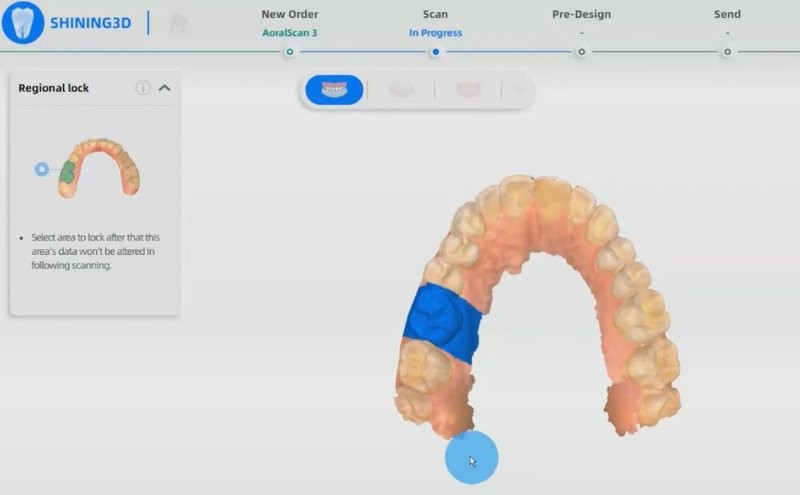
Another handy feature is the “Regional lock”. If you need to rescan some data and keep the other, use the part lock to save all the information you want.
Credit: youtube.com
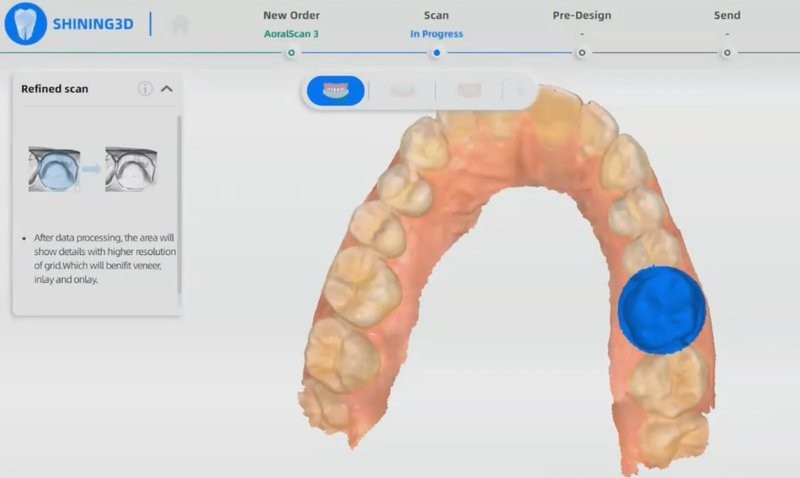
Use the “Refined scan” function to prepare a high definition version of the scan. The tool is especially useful for restorative cases.
Credit: youtube.com
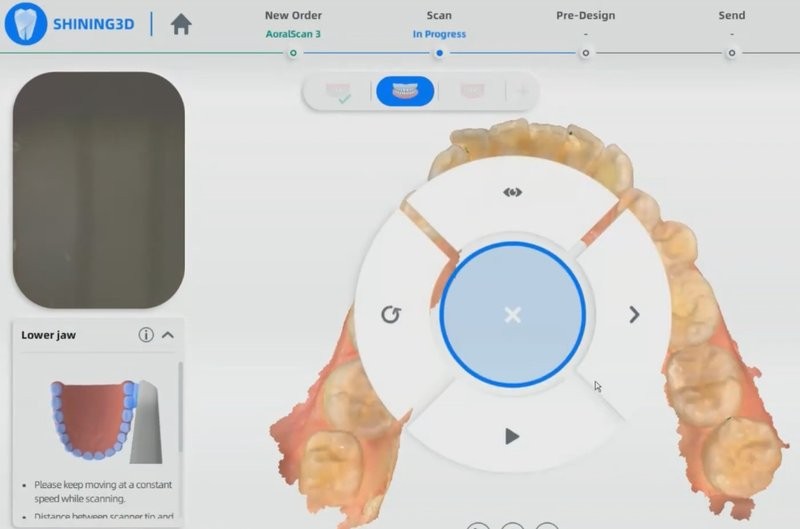
To activate the motion-sensing feature, double click the integrated button on the top of the scanner. This will let you remotely rotate the scan around using the device itself.
Credit: youtube.com
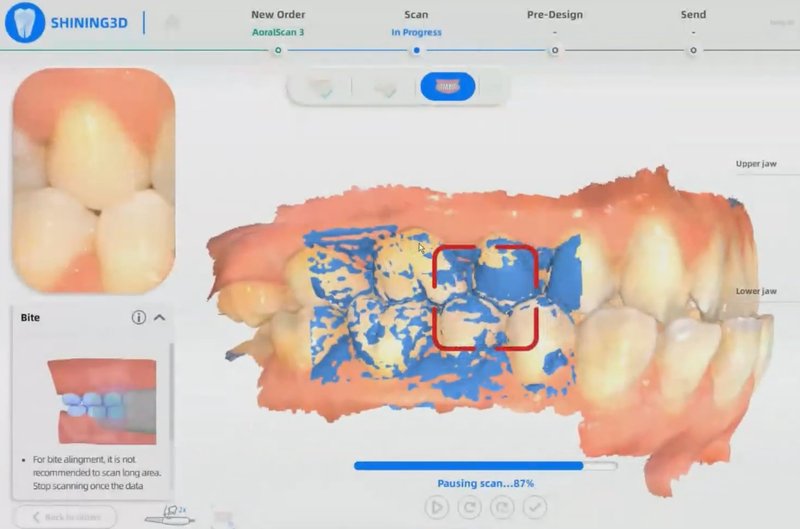
After the upper and lower jaws, you will need to make a bite scan. The scanning software automatically has you capture three bites. If the first one is good enough for your purposes, you can continue with the process.
When you start the bite scan, the program will automatically align two previously captured arches in a few seconds.
Credit: youtube.com
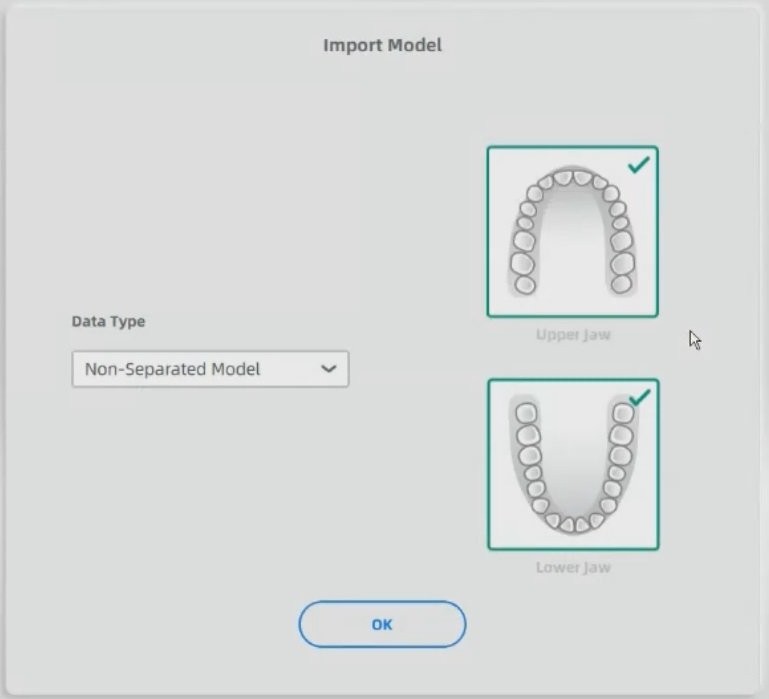
Then, the software will patch all the scan data into a full-fledged model. It will be saved to the computer’s hard drive or other designated location. After that, you can proceed with the pre-design section or just send the resulting model to the lab.
Credit: youtube.com
The AccuDesign option allows you to design a model within the software. If you own one of the Shining 3D printers, you can go straight from scanning to printing.
Credit: youtube.com
This feature gives you the last chance to edit the scan data. Then, you can choose a hollow or solid model, customize it, and add some features, such as a text, frames, or drain holes.

Credit: youtube.com
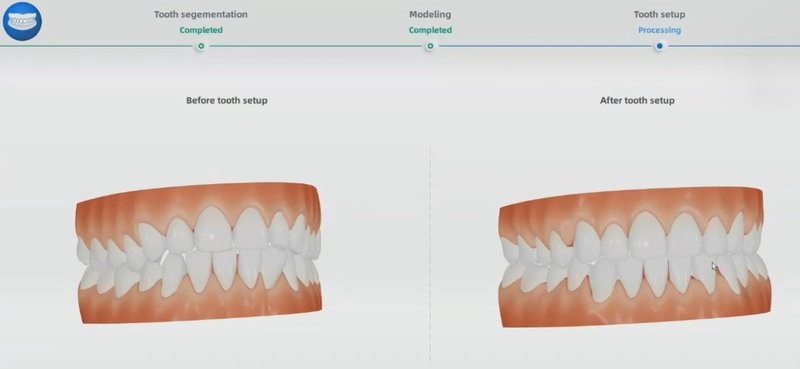
The last module is the Ortho Simulation. It will provide the patient a snapshot of their future smile after orthodontics treatment. It is possible to have different views, export the render, and play an animation of the illustrated changes.
Credit: youtube.com
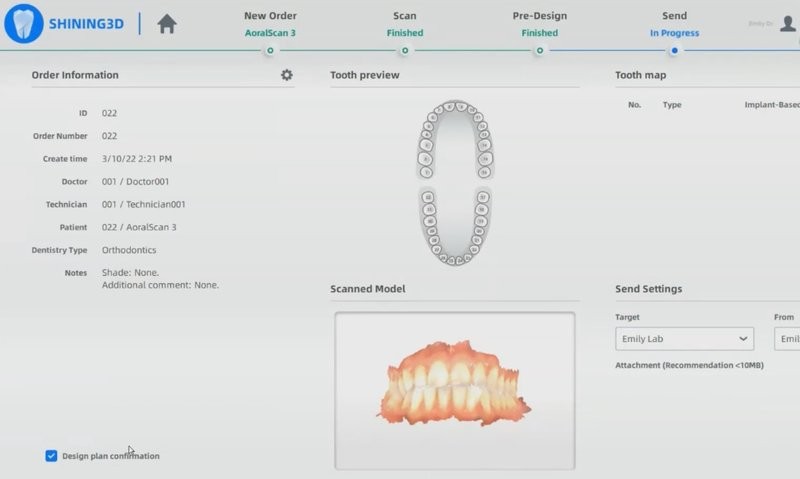
Finally, this is the stage where you send the case to the lab. In the main menu, you will be able to see the status of the current case depending on the lab actions: sending, waiting to be accepted, or accepted.
Credit: youtube.com
The Aoralscan 3 possesses significant advantages compared to the previous iteration — Aoralscan 2. Apart from new flexible software, clear UI, automated AI scan, and handy motion-sensing feature, the devices differ in a few categories:
|
Shining Aoralscan 2 |
||
|
Weight |
240 ± 10 g |
325 g |
|
Dimensions |
281 mm x 33 mm x 46 mm |
280 mm x 40 mm x 55 mm |
|
File formats |
STL, OBJ, PLY |
STL, OBJ |
|
Operational systems |
Windows 10 Professional (64-bit) or later versions |
Windows 10 Professional (64-bit) or later versions |
|
Minimum system requirements |
CPU: Intel Core i7-8700 or higher RAM: 16GB or more Hard disk drive: 256 GB SSD or above Graphic card (GPU): NVIDIA RTX 2060 6GB DDR3 or higher |
CPU: Intel Core i7-8700 or higher RAM: 16GB or more Hard disk drive: 1 TB SATA Hard Drive or above Graphic card (GPU): NVIDIA GTX 1070 6GB DDR3 or higher |
|
Scanning area |
Standard scanner tip — 16 mm x 12 mm x 22 mm; Mini scanner tip — 12 mm x 9 mm x 22 mm |
11 mm x 11 mm |
|
Power input |
12V DC/3 A |
12V DC/1.67 A |
|
Connectivity |
USB 3.0 |
USB 3.0 |
As you can see, the Aoralscan 3 covers a larger scanning area than its predecessor. Apart from this, the newer scanner is a major improvement over the Aoralscan 2 in terms of lightweight and compact design.
Credit: youtube.com
Shining 3D continues to pursue greater levels with their products, and the Aoralscan 3 3D scanner is another example of their innovative approach. The smart design and outstanding features of the device allow to significantly improve dental scanning experience for both beginners and competent users.
Update your browser to view this website correctly. Update my browser now
Write a comment