Hi everyone! In this review, we will talk about the OptimScan-3M and 5M, two industrial metrology 3D scanners produced by Shining 3D. Only differing in their optical equipment (3MP cameras for the 3M and 5MP for the 5M), both devices use non-contact structured-light technology for measurement and inspection of industrial parts.
Fast and accurate, their versatility makes them ideal for multiple applications in a broad range of industries.
Let’s dive into their specs to know more about their scanning potential.
Source: shining3d.com
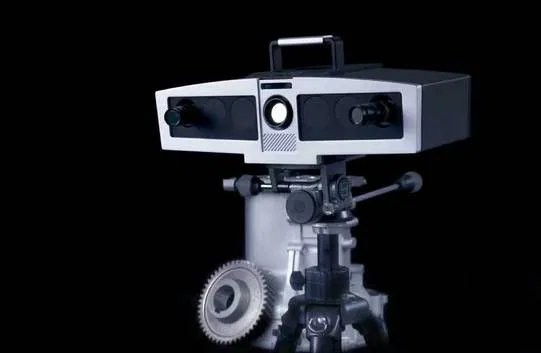
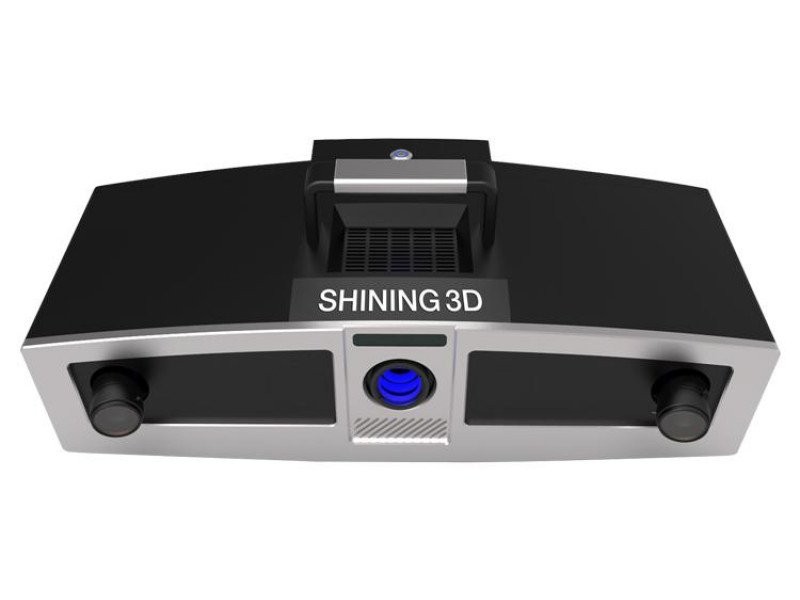
The OptimScan-3M and OptimScan-5M are industrial devices targeted to the professional market. The blue light source alongside the quality made-in-Germany components enable high performance, accurate data capturing, full-size inspection and measurement. They can scan both hard and soft parts with complex surfaces, such as turbine blades.
Both scanners are good and extremely reliable. With three adjustable scan ranges, they let you scan parts of different sizes with high precision. The 3M version reaches a single-shot accuracy of 0.007mm accuracy, while the 5M of 0.005mm. Their single scan speed is < 2s and < 1.5s respectively. With its 5MP cameras, the OptimScam-5M outstands the 3M in terms of resolution. However, depending on your project requirements, the 3M might also be a great pick.
The bundled software is capable of registering the scanning procedures in order to automate repetitive tasks. This strongly increases the overall efficiency of the devices.

Source: shining3d.com
Compatible with ShiningformXOR and ShiningformXOV, these high-precision scanners are particularly suitable for reverse engineering and quality inspection. Targeted towards industrial measurement, they don’t capture colors and textures.
As already mentioned, the OptimScan-3M and the OptimScan-5M share similar features. Let’s have a look at these summary tables to learn more about their specs.
The metrology-grade OptimScan systems are professional tools developed to grant high-precision measurements of industrial parts. Equipped with a blue light LED projector and a set of cameras, they use non-contact structured-light scanning technology for measuring the 3D shape of a product.
Source: my-3d.it
In particular, they project a band of light on the workpiece to reliably reconstruct the surface shape according to the distortion of the line illumination generated. The distortion makes for the accurate retrieval of the 3D coordinates of the details on the product’s surface. The automated process minimizes the risk of manual errors, making for higher efficiency and repeatability.
The OptimScan-3M is equipped with two 3.0MP cameras. Thanks to the reference points optimization, it reaches a single scan accuracy of 0.007mm and a volumetric accuracy of 0.1mm/m (German measuring inspection standard VDI/VDE2634). With a single scan speed lower than 2 seconds, it can scan small objects in a few minutes and 1-meter-long pieces in around 30 minutes. The OptimScan-5M adopts two 5MP cameras and benefits from a greater single-shot accuracy of 0.005mm and a volumetric accuracy of 0.08 mm/m. The increased speed (1,5s) makes for faster operation.

Source: www.exapro.com
You are free to scan parts within a set of three different scan ranges. This makes for more flexibility and convenience of use.
Both devices support either manual or automatic alignment and can be bound to a personal computer via USB.
To improve their performance, you can pair them with the Shining 3D Probe for CMM optical measurement. In this way, you will be able to reach areas that are inaccessible for non-contact devices (deep holes, etc.).
Source: youtube.com
The integrated Shining3D scanning software lets you manage the entire scanning process and adjust the parameters with ease. It is pretty intuitive and simple-to-use and is capable of recording the scanning steps to automatically repeat the procedure for batch inspection. It allows exporting files in a variety of formats compatible with the most popular 3D software.
The scanners come in a protective case that includes all the parts and accessories required.
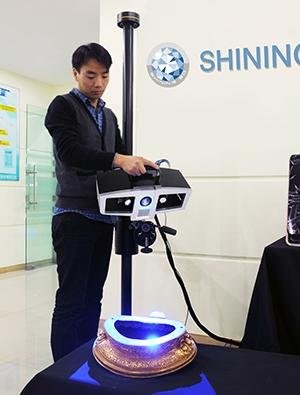
After unboxing the scanner, you have to install it on the included tripod. To do that, first, you have to fix the pan-tilt block on the tripod. Then, you can fasten the device to the stand using the integrated screw. After mounting the scanner, you can plug the power and USB data cables.
Source: 3dscanvn.wordpress.com
When paired with the computer, you have to install both the camera, the dongle driver and the scanner software. A step-by-step guide will walk you through the setup. Then, it’s time to calibrate the device using the included double-sided calibration board and the proprietary software. To perform the task you need to use the black side of the board. Calibrating the white side is optional.
Before starting, place the background cloth on a flat surface and then put the calibration block on it. Place the scanner head on top of the board, launch the software, and select “calibrate” on the system control panel. Then, rotate the scanner vertically by 10 degrees and adjust the height of the tripod so that the red cross and black cross overlap in the middle of the big white spots. Then, move to the next calibration step. The scanner program provides you with all the necessary information required to complete the process.
Shining 3D released a series of video tutorials that explain how to perform most tasks. You can find them on the official Shining 3D YouTube channel.
Here you can have a look at the OptimScan-5M calibration process:
After calibrating your OptimScan, you are ready to scan. Here are a bunch of useful tips to effectively capture and inspect your workpieces.
For large parts, you might start scanning the frame points, export them into a dedicated folder, and then launch a new project setting the captured points as “open frame”. Then, you can scan the part starting from the center.
When capturing a small part, placing it at the center of the camera view is strongly suggested.
If you are scanning without a turntable, attach the reflective markers on the object, especially where the curvatures and shapes change, avoiding holes and grooves. You can put the targets on additional auxiliary areas (such as the background cloth) when scanning thin models.
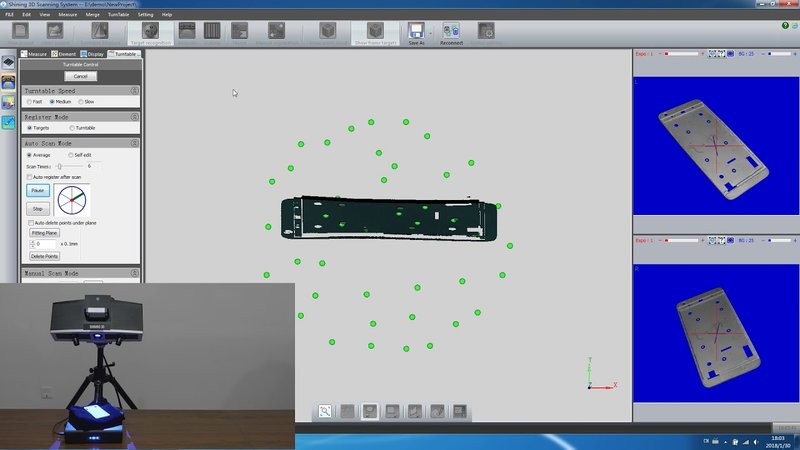
When using the turntable, you have to launch a new project and select “turntable control”. Depending on your requirements, you can set the parameters you prefer in terms of mode selection, rotate direction, rotating angle, and more. After setting the first angle, you can start scanning. At the end of the process, click “align” to automatically align and save the captured data in a dedicated folder. Then, launch a new project and change the rotating angle to capture additional areas from a different point of view. Repeat the process until all the areas have been scanned.
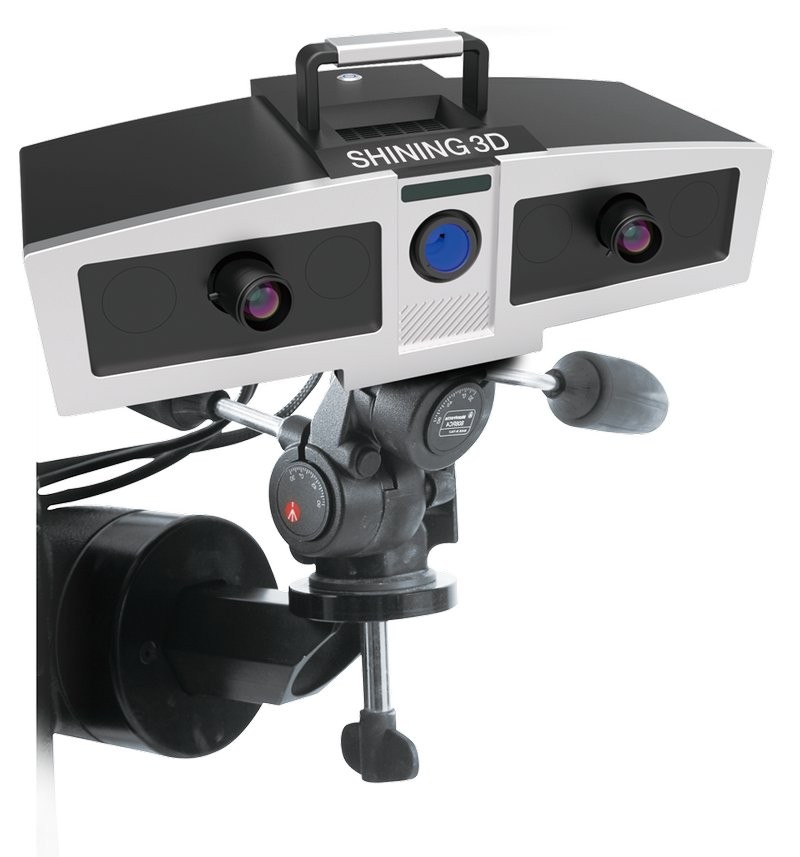
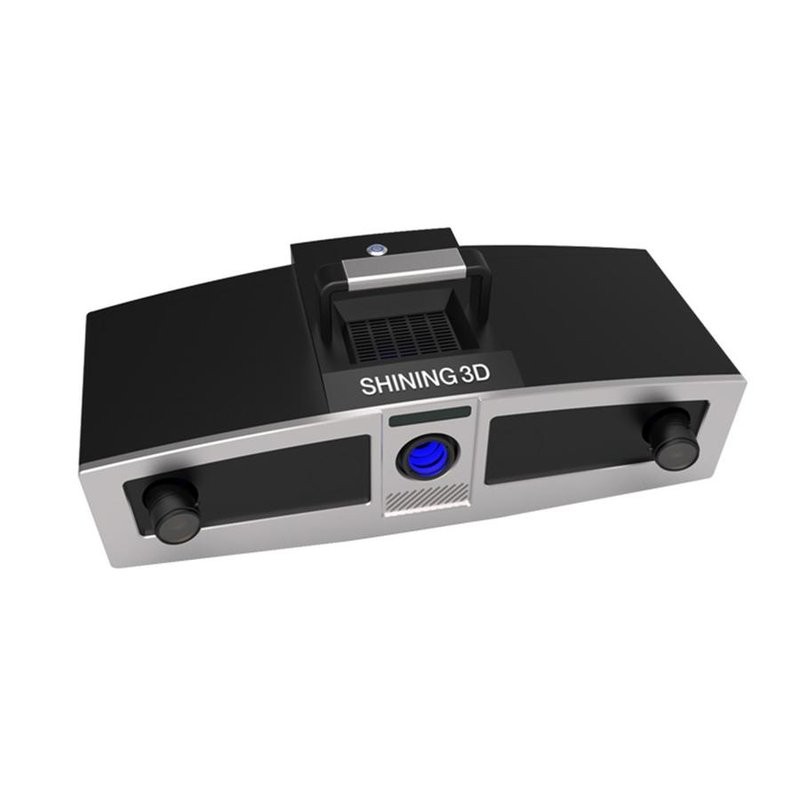
The OptimScan-3M and 5M consist of an aluminum alloy frame combined with carbon fiber. The ergonomic design with integrated handle makes for easy transportation and operation. Each scanner is composed of one projector mounted in the middle front of the device and a set of two cameras placed on the sides.
The OptimScan-3M and OptimScan-5M are high-precision 3D scanners tailored for industrial applications. Their great accuracy and reliability make them ideal for a broad range of uses.
They are capable of inspecting a huge variety of complex parts with intricate surfaces in short times.
Visit our store to buy the OptimScan-3M and OptimScan-5M.
Update your browser to view this website correctly. Update my browser now
Write a comment