
Welcome to Top 3D Blog, a place where makers and 3D printing enthusiasts find high-quality additive manufacturing content. In this article, we are going to review the Artillery Hornet— a sub-$300 FDM 3D printer that offers decent build volume, heated bed, and a handful of other features for a streamlined printing experience. Being able to undergo a dozen useful upgrades, it can even compete with some semi-professional FDM 3D printers in terms of functionality if upgraded properly. Sounds good, but what’s the trick? Besides, which upgrades are necessary? Read the article to find out.
Artillery (also known as EVNOVO) is a young Shenzhen-based additive manufacturing company that was established in 2018. The company found its niche in the production of affordable FDM 3D printers and is dedicated to providing cost-effective yet high-performance solutions in this field. Currently, the manufacturer’s lineup includes the Sidewinder X1, Genius, and Hornet. These are powerful 3D printer kits that come considerably cheaper than their enclosed counterparts while still offering a bigger build volume. All of the machines are installed with a filament run-out sensor and feature a resume printing function. In our opinion, the Hornet features the neatest design among them all. It’s also the only one that has been equipped with a Bowden-type extruder. All in all, Artillery 3D printers can bring good value for their money.
Source: Just Vlad / YouTube
The Artillery Hornet is a desktop FDM 3D printer that offers a decent build volume of 220 x 220 x 250 mm (8.66 x 8.66 x 9.8 inches) and lets you print a single large model or print several smaller ones in one go. It is equipped with a Bowden-type extruder and a heated bed. The printer needs to be assembled and leveled manually.
Source: Just Vlad / YouTube
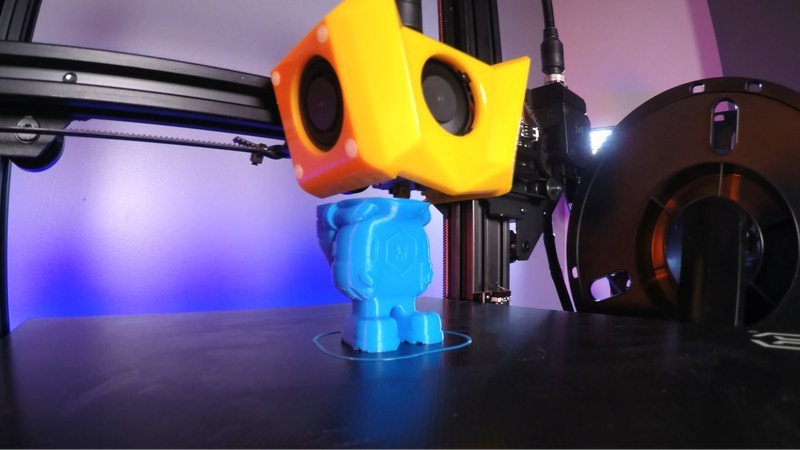
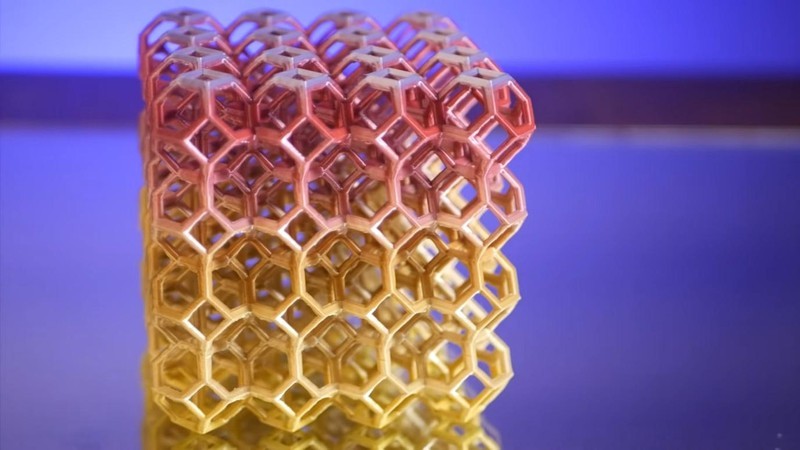
The Artillery Hornet prints at a minimum layer height of 100 microns, which is normal for a 3D printer of its price tag. Despite some visual layering that will be present on 3D printed models, the Hornet can still shape a plethora of well-detailed and intricately designed outputs. Besides, you can improve the surface finish of your parts by employing sanding, polishing, and other post-processing techniques.
Source: neoprod_fx / Instagram
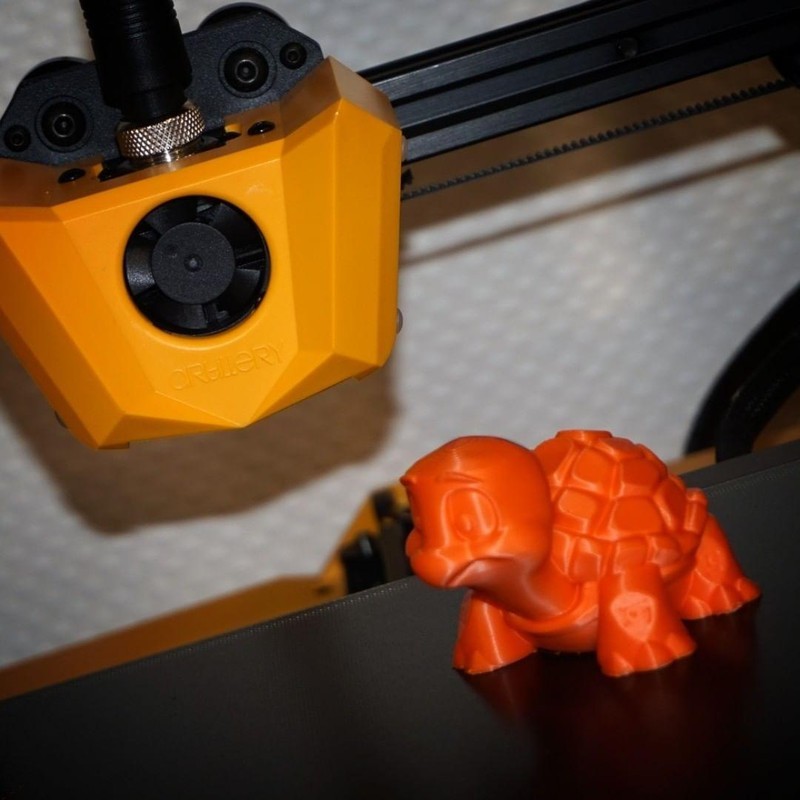
The Artillery Hornet is compatible with PLA, ABS, TPU, Wood, and flexible filaments with a diameter of 1.75 mm. Featuring wide material compatibility and printing at a maximum speed of 100 mm/s, the Hornet would be a good choice for both entry-level and more experienced makers as it becomes really precise and easy to use once assembled and leveled correctly. This affordable FDM 3D printer can be used to produce dimensionally accurate household items, props, toys, accessories, tabletop miniatures, and even hard-to-break prototypes.
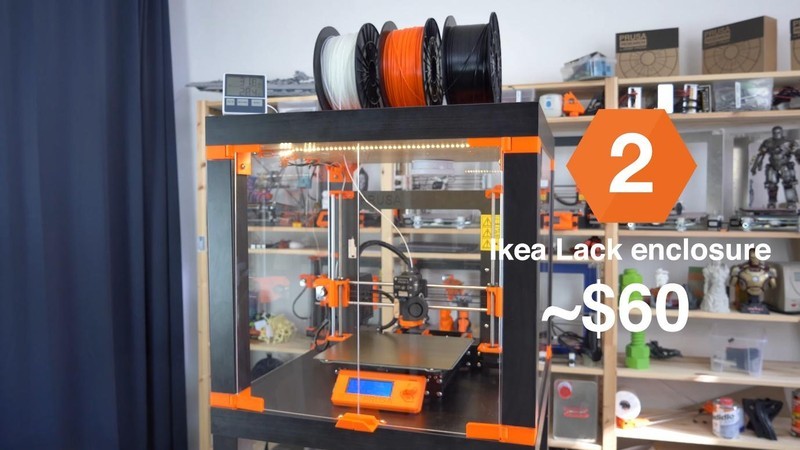
However, you won’t be able to reliably print tall and medium-sized ABS-based models until you upgrade the machine with an enclosure. The importance of an enclosure comes from the fact that a fully enclosed build chamber helps maintain optimal temperature when printing with Nylon and ABS-like materials. It also minimizes warping-related issues, provides additional noise, dust, and odor protection, as well as makes the whole assembly safer by keeping hot and moving parts out of reach. You can navigate to the “Recommended Upgrades” section of this article to learn more about how to install the enclosure and read about other noteworthy upgrades.
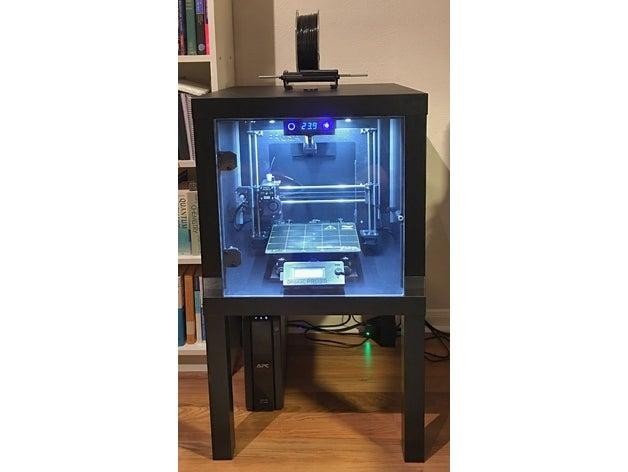
Tinker-friendly LACK enclosure by zuspiel / thingiverse
As we have already mentioned, one of the main advantages of open-frame 3D printers is their endless upgrade potential. You’ll be able to expand the range of printable materials, make printing safer, more consistent, and even benefit from automatic bed leveling. Besides, manual upgrades provide makers with an opportunity to build a 3D printer with the features of a semi-professional machine out of a budget-friendly DIY kit.
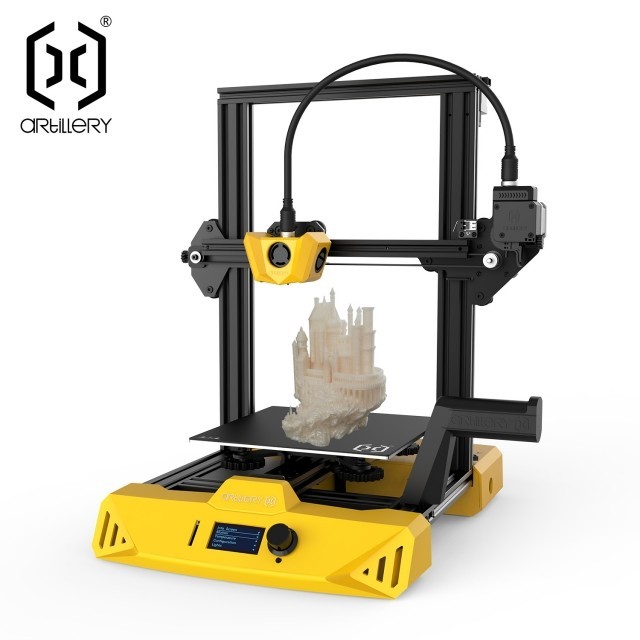
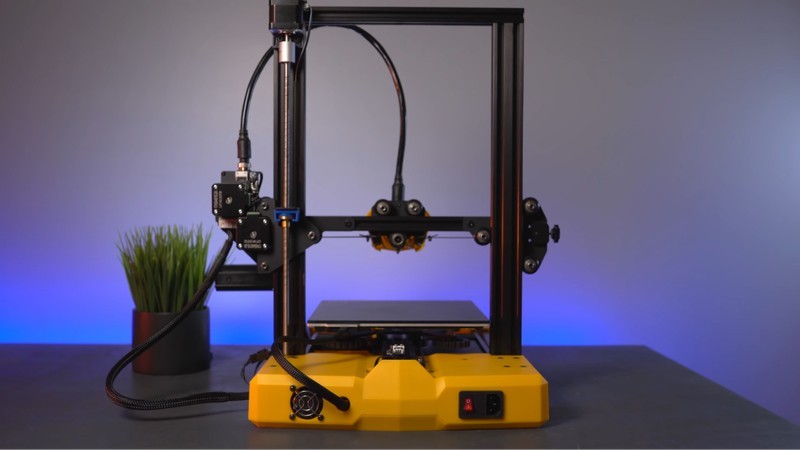
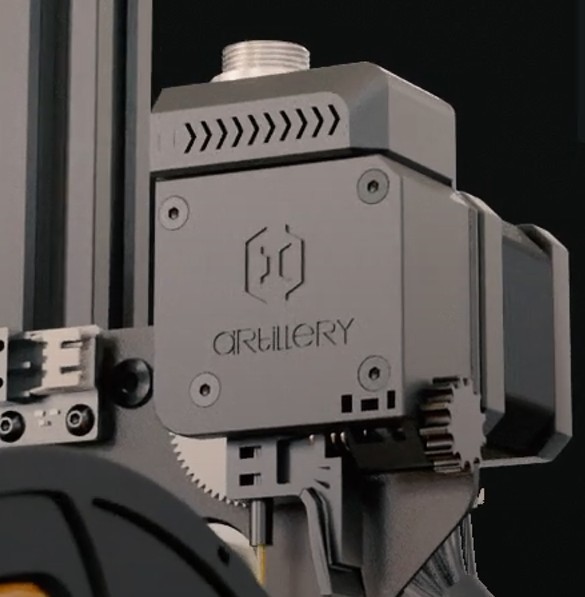
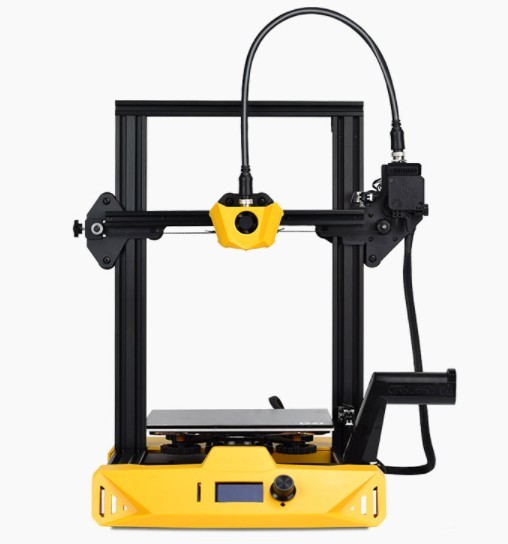
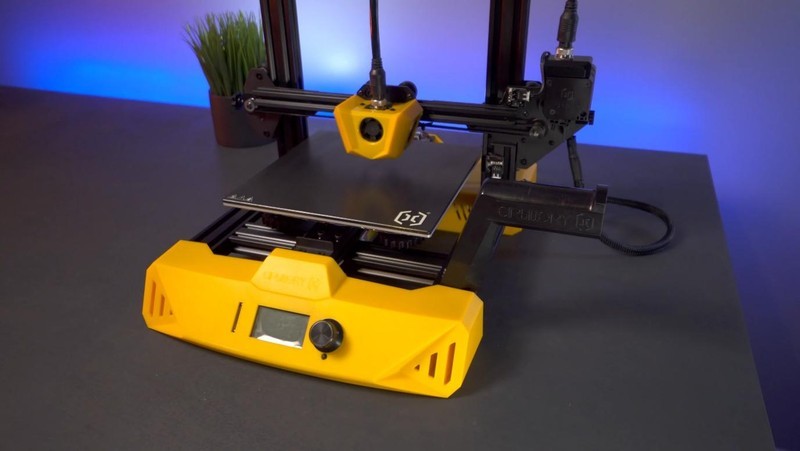
The Artillery Hornet is a particularly neat-looking desktop 3D printer with a yellow-colored base and extruder. The rest of the assembly, including the gantry, is painted black. It is a sturdy medium-sized machine with the dimensions of 470 x 410 x 450 mm (22 x 19.7 x 17.7 inches) and a weight of 8 kg (17.6 lbs), which makes it pretty easy to lift and place on almost any kind of working table. Besides, its futuristic appearance completes the scenery and can prove to be a perfect complement to a home workshop or office.
Source: Just Vlad / YouTube
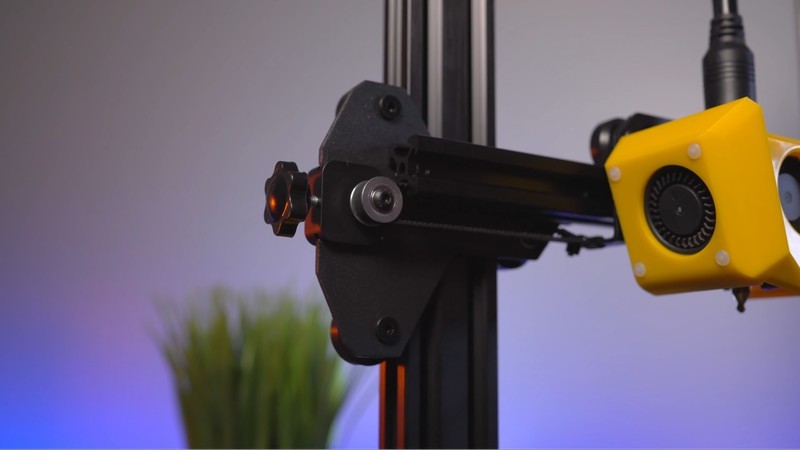
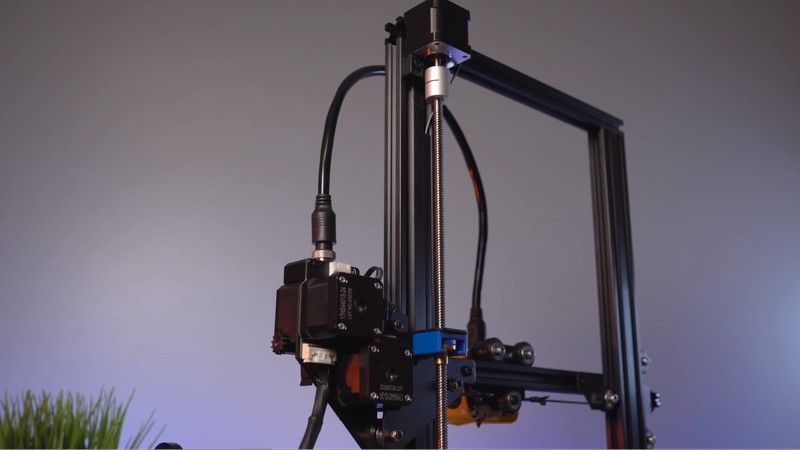
The frame of the printer is made from a high-grade aluminum alloy. In fact, some parts of the assembly are ABS-printed. On an interesting note, the Z-axis motor of the Hornet has an inverted setup — a rarely encountered design that helps minimize Z-wobble issues but can lead to increased banding on upper layers of tall models. The Z-axis itself is supported by a high-precision belt pulley and patent-pending Z couplers.
Source: Just Vlad / YouTube
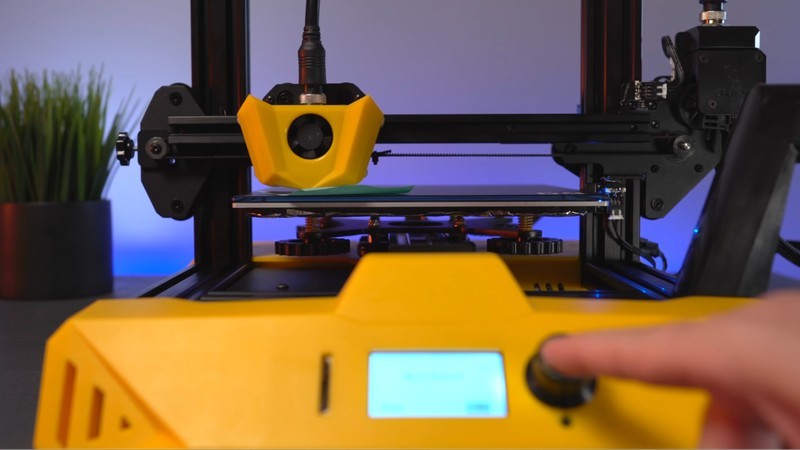
A built-in control screen is located on the front side of the printer base. You can use the rotary knob to navigate through menu options and select the one you need. The UI is pretty straightforward and the controls are easy to get used to.

Source: Just Vlad / YouTube
An SD card slot is another nice addition to the Artillery Hornet’s design. It lets you insert micro SD cards directly into the printer without having to use adapters and readers. The slot is located on the left side of the printer base near the control screen.

Source: Just Vlad / YouTube
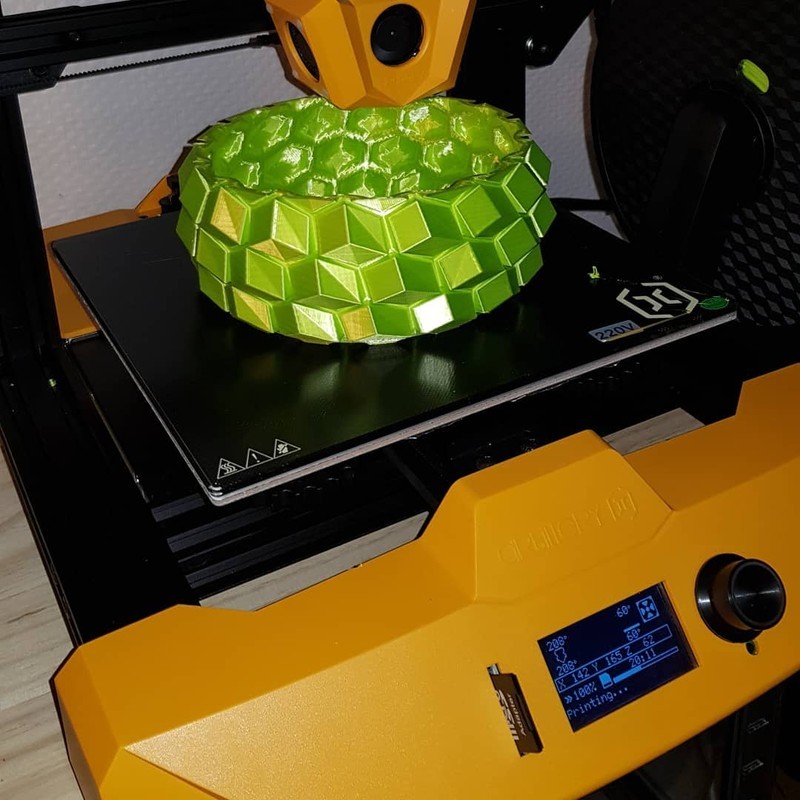
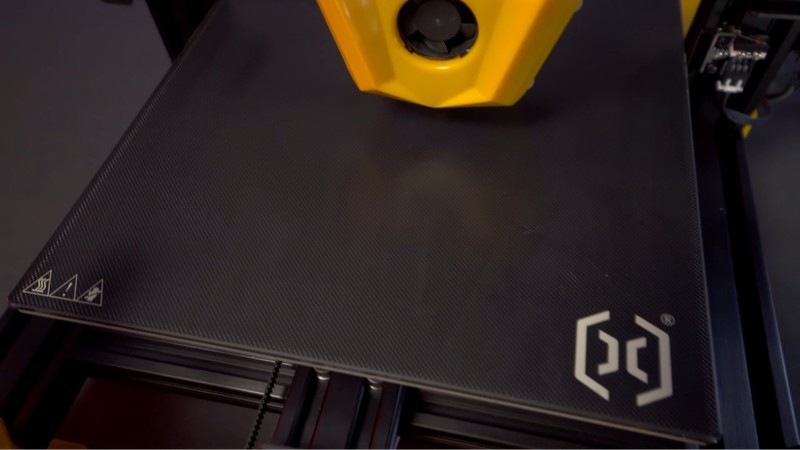
The Artillery Hornet is equipped with a tempered glass coated build plate that can be heated up to 100 °C. The build plate is heated evenly, so the plastic extruded onto the plate is kept heated. This greatly improves layer bonding, prevents most of the warping-related issues, and expands the range of printable materials. One of the minor drawbacks of the Hornet’s heat bed is a layer of glue that lies between the plate and the bed itself. While this indeed helps keep the parts in place, it slows down the heating speed.
Source: Just Vlad / YouTube
Just like the photo demonstrates, the heat bed is even and uniform and there are no bumps on its surface, so it won’t likely cause any problems during calibration. As you can see, there are large leveling knobs installed underneath the build plate. Such a design makes them easy to reach and provides for an effortless calibration once you assemble the machine. On a side note, it is good to see that most of the newly released budget-friendly FDM 3D printers are equipped with a heated bed because it is a must for a wholesome 3D printing experience.
Source: Just Vlad / YouTube
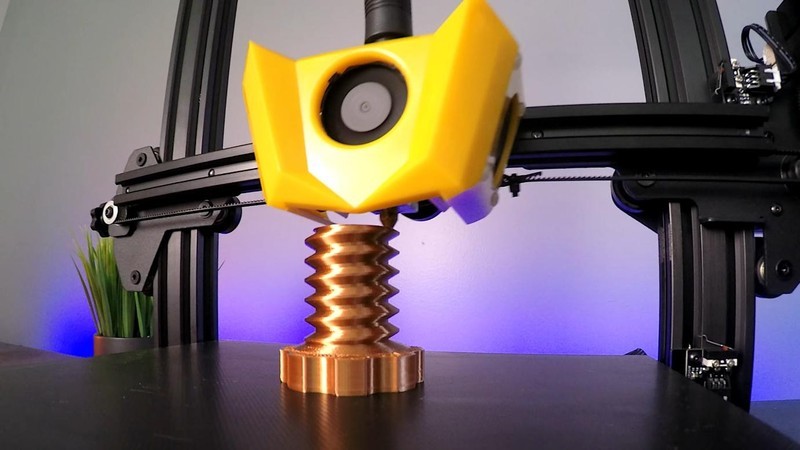
Unlike other FDM 3D printers produced by Artillery, the Hornet is equipped with a Bowden extruder mounted on its frame, so printable materials are pushed into the copper hot end through a long PTFE tube. Compared with direct drive extruders, the Bowden setup is considerably more lightweight, so the print head will move quicker, more silent, and provide you with more precise outputs.
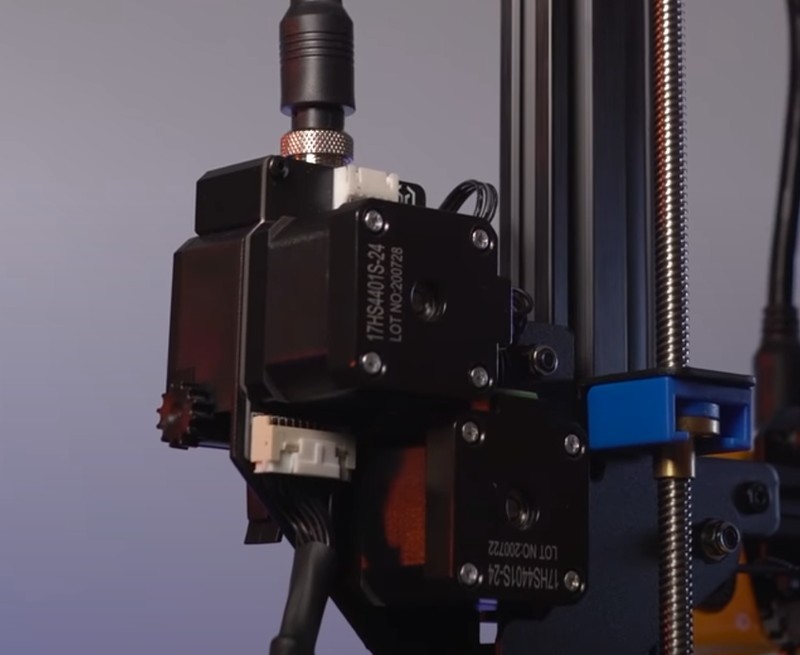
Source: Just Vlad / YouTube
The cons of the setup include the need for additional torque as well as slower extruder-to-nozzle response time. Moreover, the PTFE tube will begin to deteriorate and release noxious fumes into the air in case of overheating. Consider following the manufacturer’s guidelines and don’t print at more than 240°C.

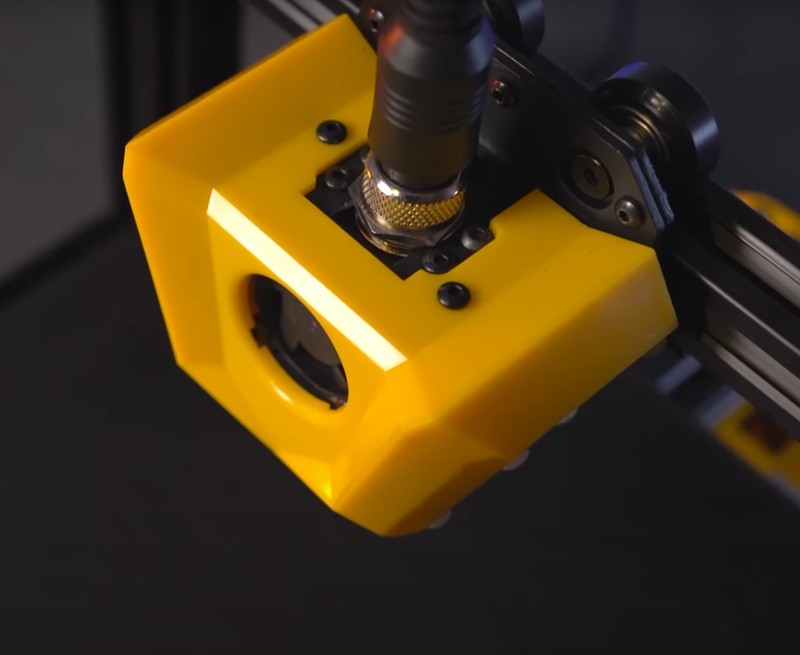
The Artillery Hornet’s PTFE tube design is yet another feature that sparks interest. Unlike most of its transparent see-through counterparts installed on other FDM 3D printers, this particular tube is black and features two connectors on each end that prevent unwanted movements during printing and make the extrusion more precise.
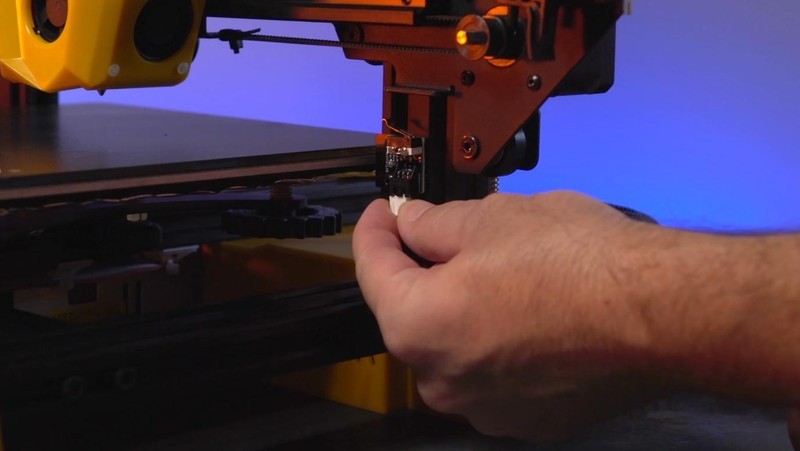
Note that the extruder assembly includes an easy-to-break plastic lever. Make sure to select the automated filament loading process by using the menu before starting each printing session to minimize the probability of the unwanted outcome.
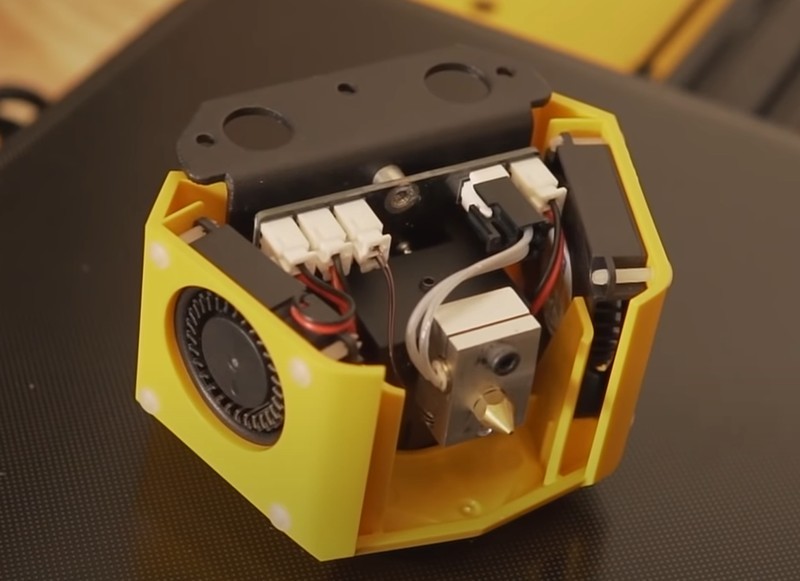
The hotend is covered with a yellow plastic housing with two 3010 radial cooling fans that operate silently when cooling the assembly.
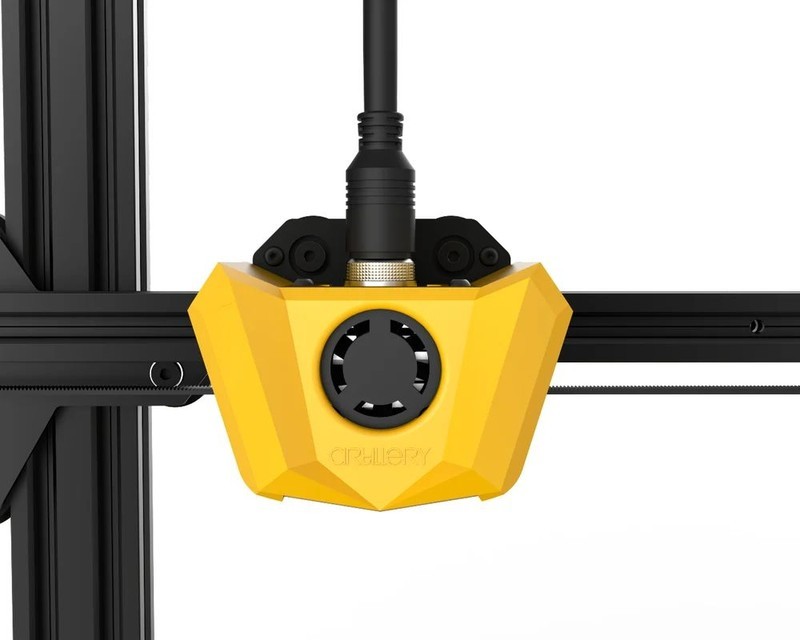
Besides, the assembly includes two 4010 radial fans that will take care of your 3D printed parts by cooling down their layers and keeping optimal temperature during printing.
Source: Just Vlad / YouTube
Now, let’s take a look inside the assembly. As can be seen in the photo below, there is a small breakout board that connects all the parts.
Source: ModBot / YouTube
There is also a self-made heatsink and the heatblock that resembles the design of a V6. The copper-made nozzle of the Artillery Hornet can be heated up to 240℃, which is perfect for PLA-based prints.
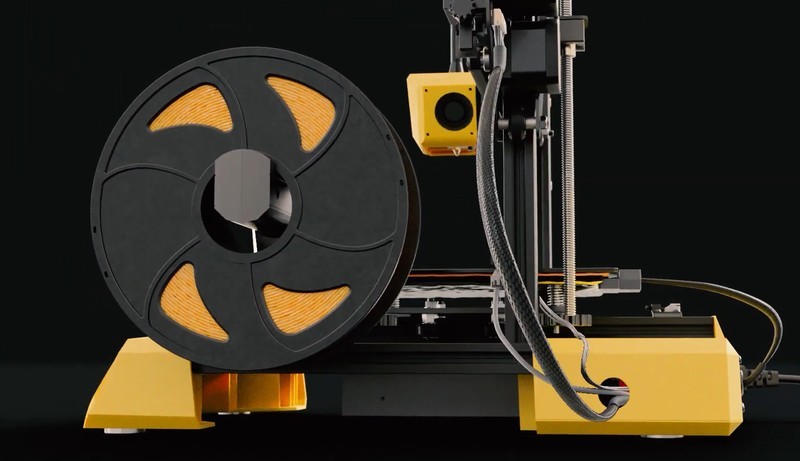
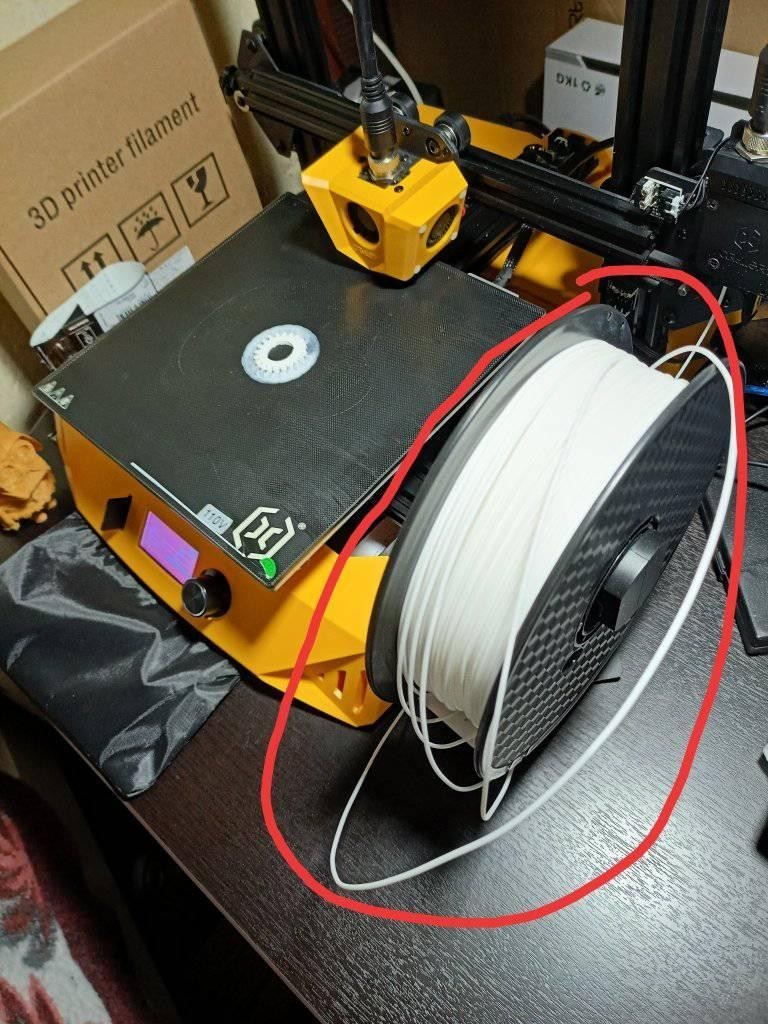
The Artillery Hornet features a filament spool holder that has to be installed on the right side of the printer base, eliminating the need to purchase it separately. Compared with other printers produced by Artillery, the Hornet, in our opinion, offers the best spool holder design among them all. The main reason is that the holder isn’t mounted atop the printer frame, which helps minimize wobble-related issues. The spool holder position can be re-adjusted by moving it back in forth.
Source: 3D Printning Nerd / YouTube
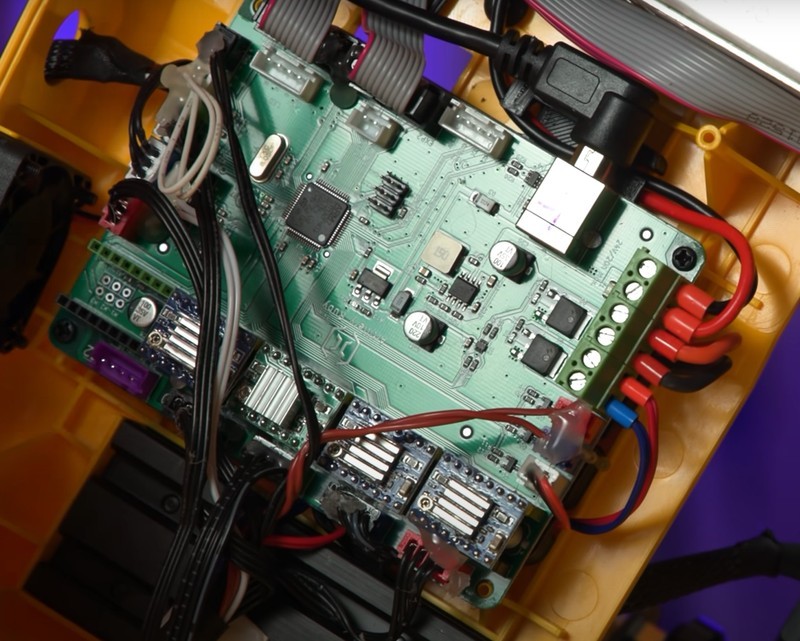
By undoing three plastic screws that hold the base of the Artillery Hornet together and removing its cover, we can see that the printer is powered by a solid 32-bit Artillery Ruby mainboard with quiet drivers for noise-free FDM 3D printing. Keeping in mind that previously released 3D printers by Artillery are equipped with older mainboards, it is a step in the right direction.
The mainboard connectors are covered with a hot-melt adhesive to negate any potential damage that can be caused by improper shipping.
Source: ModBot / YouTube
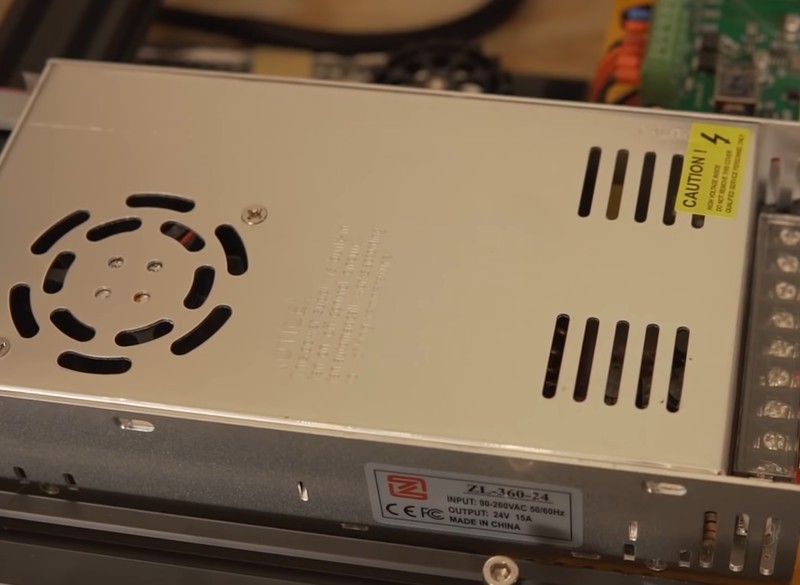
The airflow is ensured by the 4010 cooling fan that blows the air out of the assembly through a hole located on the bottom of the printer base. It also cools down the stepper drivers. All in all, the assembly is thoroughly and reliably ventilated so you won’t likely to encounter any overheating issues.
The Artillery Hornet employs Marlin 2.0.7.2 as default firmware. It is a trusted and time-proved open source solution that boasts a plethora of useful features such as full-featured G-code with over 150 commands, LCD controller UI with 30+ supported languages, standalone SD card printing with autostart, and more.
Source: ultimaker.com
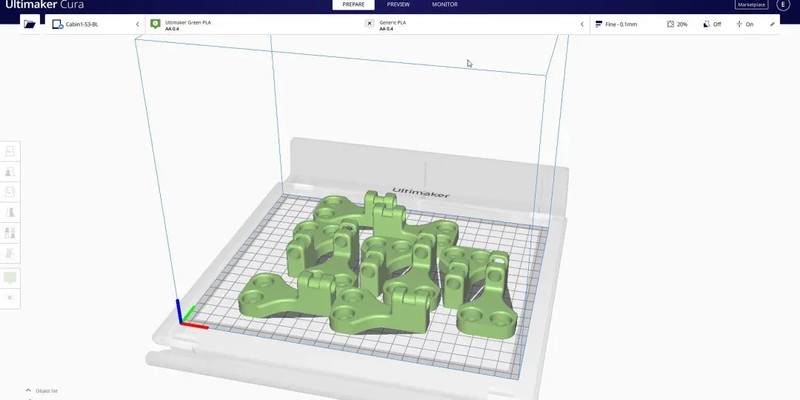
The Artillery Hornet can be used with a variety of slicing software options, so you are free to choose whichever you like the most. For starters, there is Ultimaker Cura — a fast and easy-to-use slicer designed for a streamlined FDM 3D printing experience. It lets you rotate, edit, one-click print your models, build supports, and tinker with advanced print settings to fine-tune the machine. You can learn more about Ultimaker Cura by clicking here.
Source: simplify3d.com
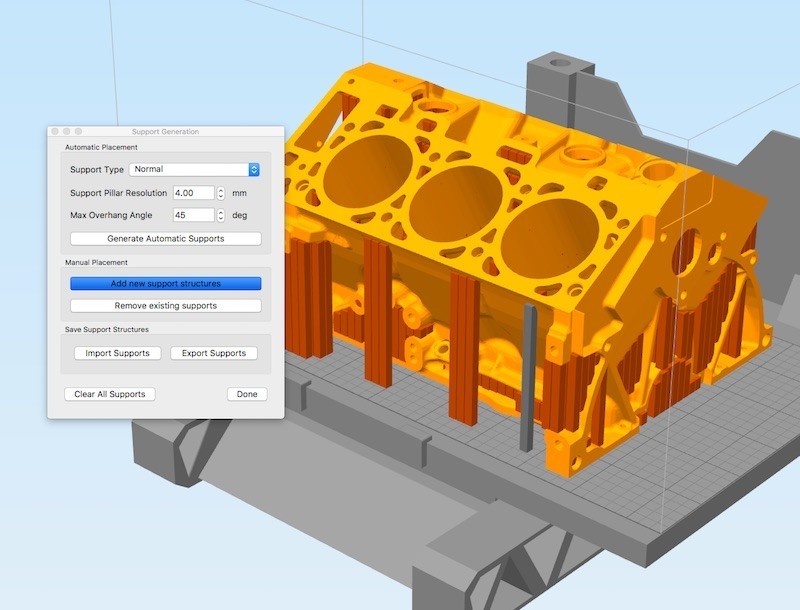
Simplify3D is another powerful slicer that can be used with the Artillery Hornet. It lets you switch between multiple printers and run pre-print simulations to detect design flaws before proceeding to the actual printing process. Just like Ultimaker Cura, Simplify3D lets you build supports automatically or customize them manually as well as tinker with a variety of professional tools and advanced options to ensure the best possible performance.
Source: reprap.org
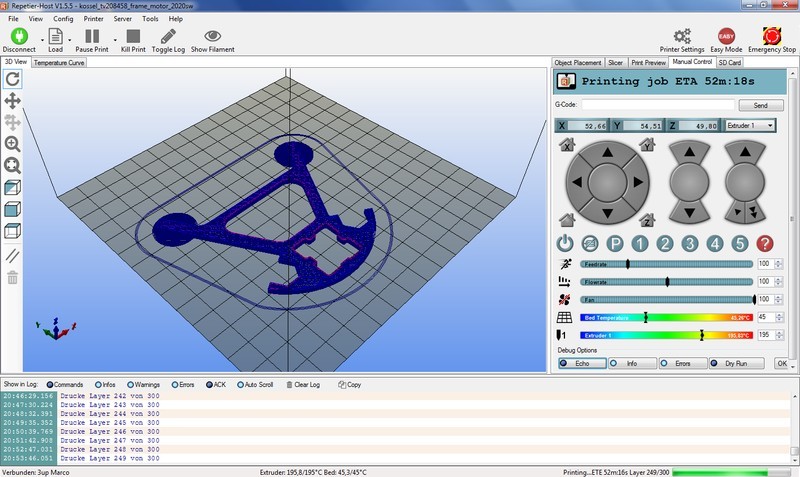
Last but not least, the Artillery Hornet can run on Repetier-Host. It is an all-in-one slicing solution that offers advanced multi-part printing algorithms and can handle up to 16 extruders at once. The software is pretty straightforward and easy to use, besides, it comes with a built-in Repetier-Server so you can access and control your 3D printer from anywhere.
Source: Just Vlad / YouTube
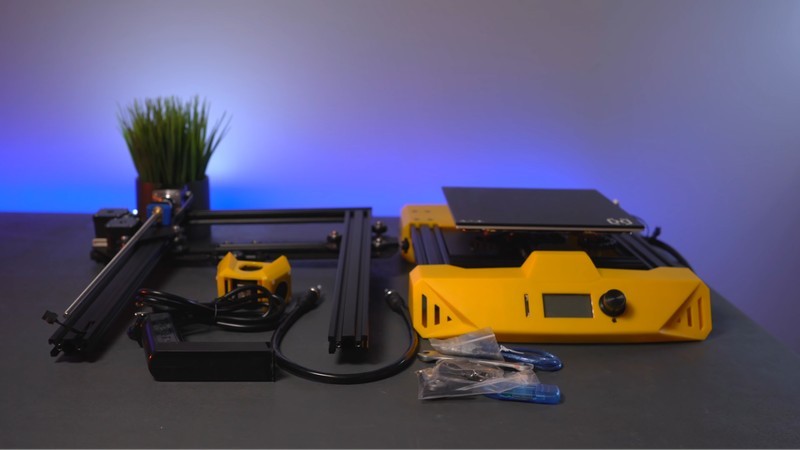
The 3D printer kit is supplied in a standard cardboard box. The contents are reliably packed and include the print base that contains all the electronic components required to operate the printer as well as two gantries that guide the extruder.
Here’s a full list of the items included in the supply package:
For some items, package content may change. In case of any questions, please get in touch.
After unboxing the Artillery Hornet, you’ll need to put it together and complete the calibration process manually. Indeed, you won’t be able to use the device right out of the box but will receive a thorough understanding of how your 3D printer operates. This will come in handy in case of later troubleshooting and upgrades installation. Besides, nothing beats the feeling of achievement that fills a maker’s heart after successfully assembling a 3D printer on their own.
The Artillery Hornet comes with a pre-assembled printer base and gantry, so it can be up and running in less than thirty minutes if assembled and calibrated by an experienced maker.
Entry-level makers, however, should take their time and carefully verify every step at least twice. The assembly process may be slow-paced and even frustrating at first, but we can assure you that it will be worth the hassle once you get the machine up and running.
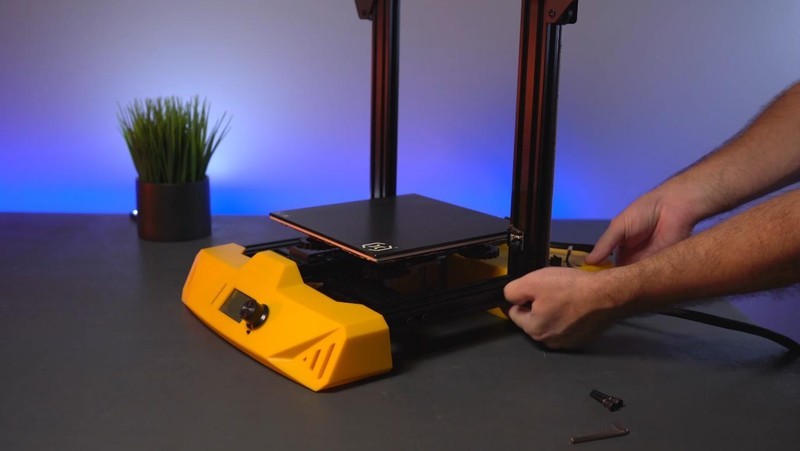
The first step is to install the gantry atop the main printer base, lower the Z-axis, and tighten the four screws located underneath the base until the gantry is reliably fixed.
Source: Just Vlad / YouTube
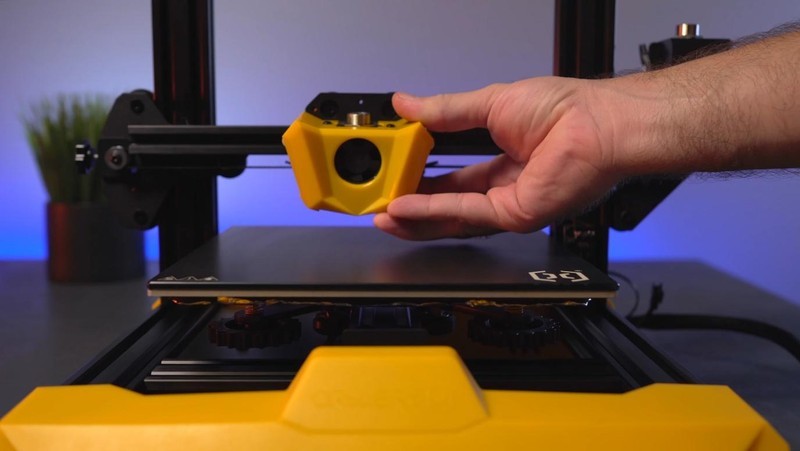
After that, install the hotend assembly onto the bracket and tighten three bolts to hold it in place.
Source: Just Vlad / YouTube
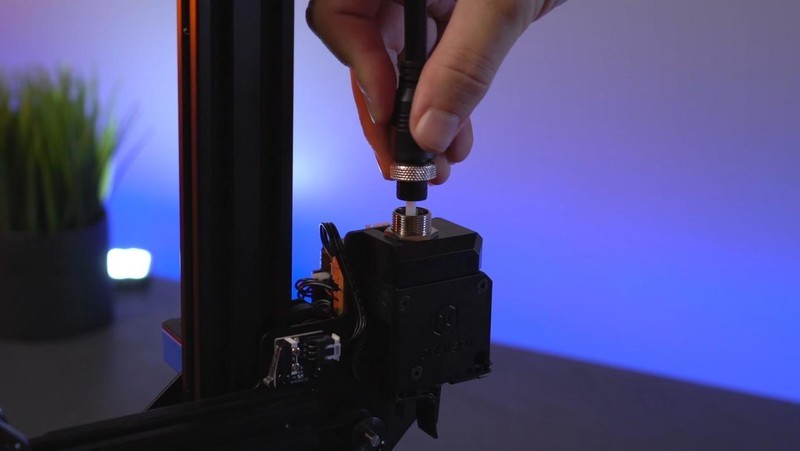
Proceed to install the PTFE tube by plugging it into the sockets located on the hotend and extruder and tighten the rings.
Source: Just Vlad / YouTube
Install the filament spool holder on the right side of the printer so the company logo engraved on the spool holder faces forward. You can re-adjust
Source: Just Vlad / YouTube
Connect the rest of the cables and prepare to level your bed. Before proceeding to the calibration though, make sure to tighten the belt tensioners on the X and Y axes to ensure that your assembly is solid.
Source: Just Vlad / YouTube
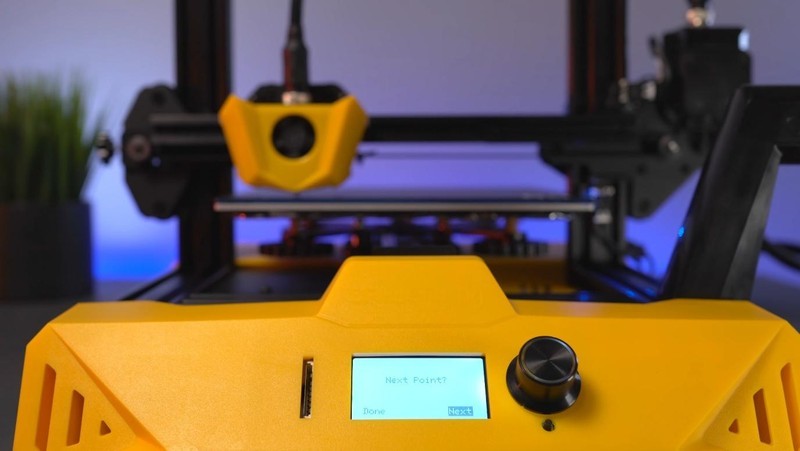
Connect the Artillery Hornet to a power source, turn it on, and begin the bed leveling procedure by using the control screen. Wait until the print head moves into the default calibration position after selecting the “Level corner” option.
Source: Just Vlad / YouTube
Place a piece of paper between the nozzle and the heat bed and readjust the distance between them by rotating the leveling knobs. The corner will be leveled after there is a slight resistance and the piece can no longer be pushed in between the nozzle and the bed without applying some force. After the corner is leveled, click the rotary knob and repeat the procedure until all of the corners are leveled properly.
Source: Just Vlad / YouTube
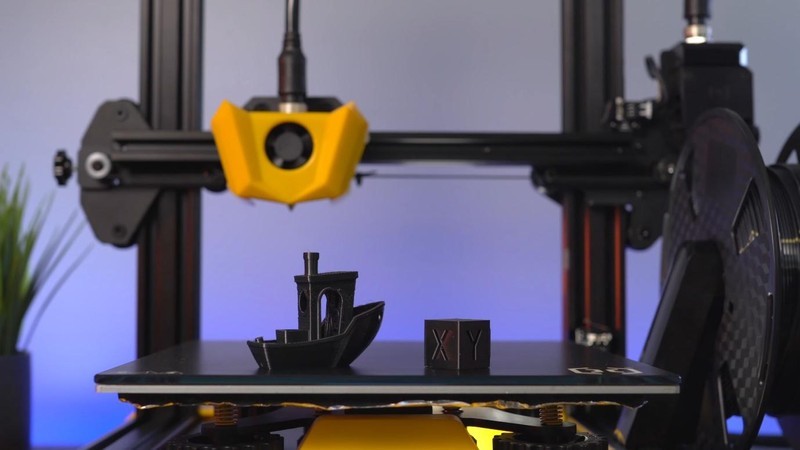
Printing a couple of test models before proceeding to print something big would also be a good idea.
Source: Prusa 3D by Josef Prusa / YouTube
One of the most noteworthy upgrades for the Artillery Hornet is an enclosure. As we have already mentioned, it prevents unwanted temperature fluctuations and helps to maintain better printing conditions for increased quality and consistency of your outputs. Besides, it creates the perfect environment for printing with ABS and other high-temperature plastics. Make sure not to print with ABS until you install a direct drive extruder mod on your Hornet though. You can make the enclosure yourself or order it online
The Artillery Hornet is E3D V6 compatible, so upgrading it with an all-metal hotend for increased performance and high-temperature printing is quite an obvious step.
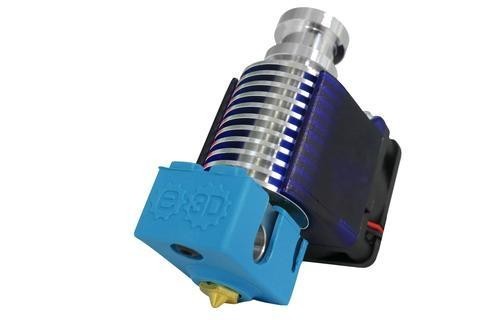
Source: e3d-online.com
This all-metal hotend can be heated up to 285ºC and provides you with wider material compatibility, meaning you’ll be able to print ABS-, PC-, Nylon-, and PEEK-based models. Note that this type of hotend will put more weight on the printer carriage and it will be harder to print with PLA.
Another essential upgrade for the Artillery Hornet is the BLTouch probe for accurate and automatic bed leveling.
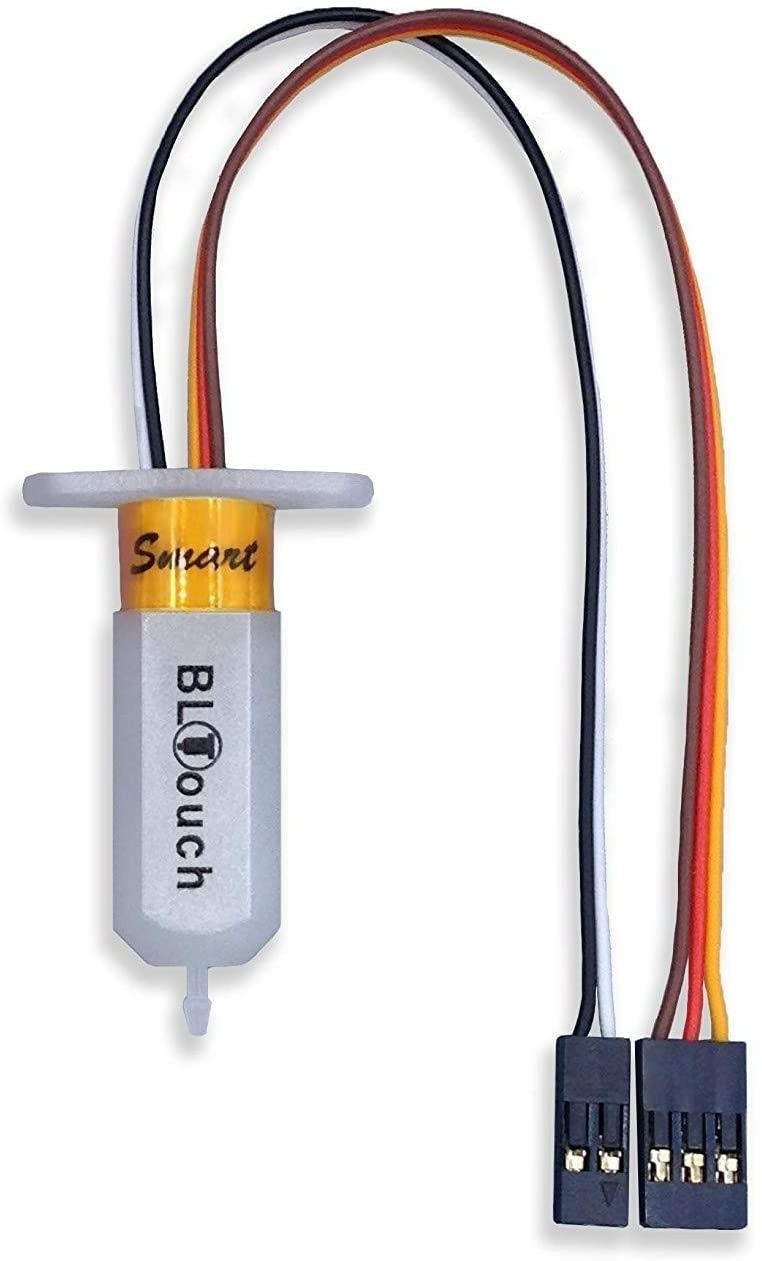
To install the BLTouch, you’ll need to mount it and connect it to the extruder. In essence, the sensor informs your 3D printer about the exact location of the print bed, which, in its turn, resolves a wide array of adhesion and quality issues related to improper bed leveling. The main cons are that you’ll have to install a new mount on the print head and the upgrade requires a basic understanding of how your 3D printer works.
Source: Alex Brunet
Visual horizontal layers are usually caused by vibrations that happen during printing. The most likely cause of vibrations is that the X- and/or Y-axis belt tensioners of your printer came loose. Make sure to tighten them and check whether the rollers of the carriage move as intended without any play. If that didn’t help and the above-mentioned elements are fine, try to reduce combing and make a couple of test prints afterward.
Source: Frank Toscano
If your printer unloads the filament after each printing session automatically, you might want to check the end code of your machine and disable the retraction (;G1 E-6 F9000).
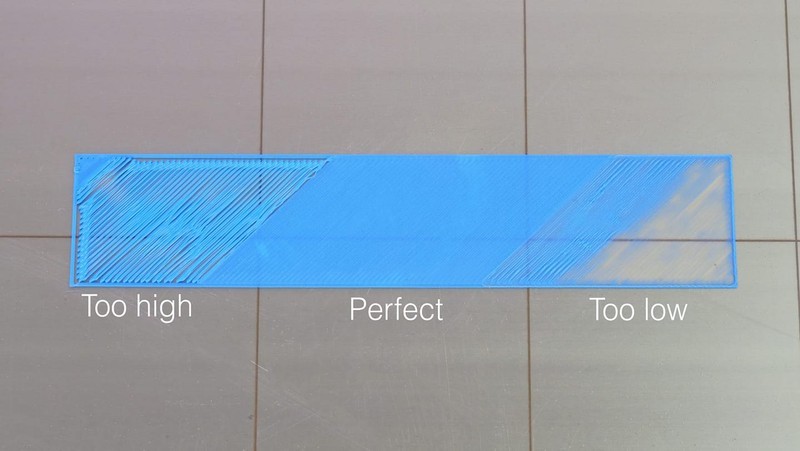
As a rule, first layer issues are connected with improper bed leveling. Take a look at the picture below.
Source: Scott Johnson
As you can see, if the build plate is too low, the first layers of your model will be barely visible. On the other hand, if the bed is too high, the layers will be thin and inconsistent. And if the build plate is leveled just right, there will be no space in between the layers.
Source: Brus Calus
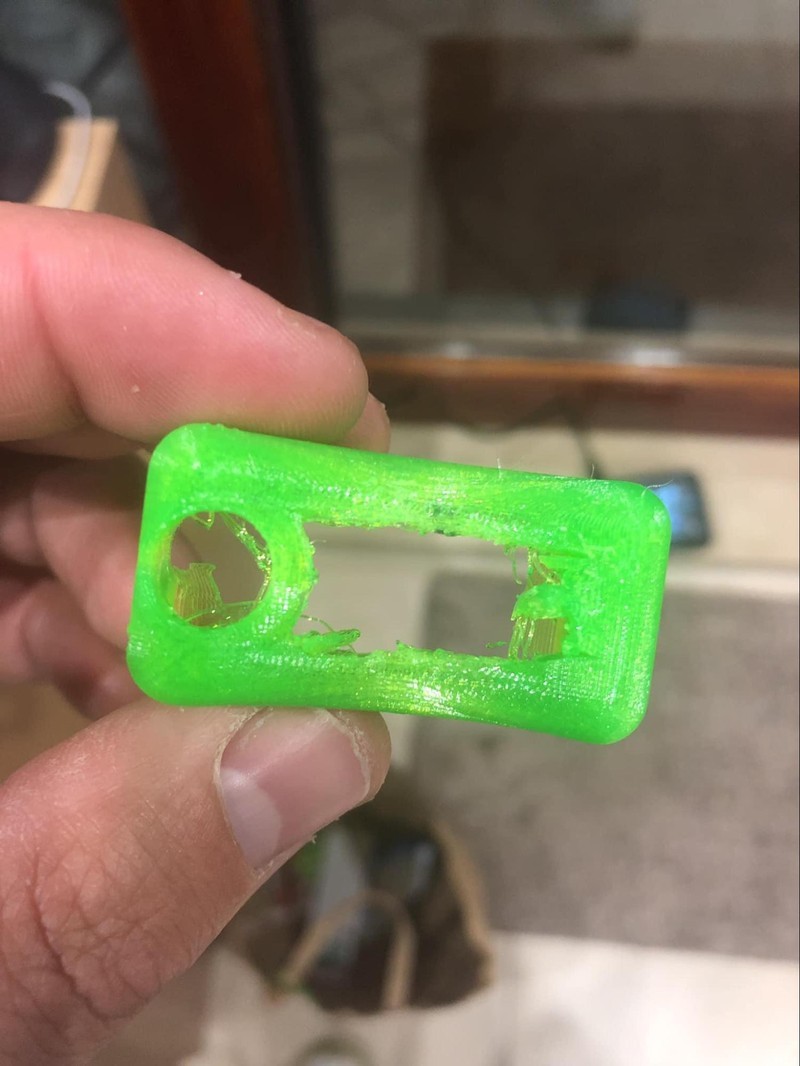
In case you experience inconsistent results when printing with TPU, there must be something wrong with your software settings. You can experiment with the retraction and other slicer settings yourself or click here to download pre-made IdeaMaker profiles for the Artillery Hornet to ensure optimal results when printing with PLA, PETG, and TPU. However, you might still need to fine-tune some of the settings depending on the filament brand you use.
Source: Eduardo Coelho
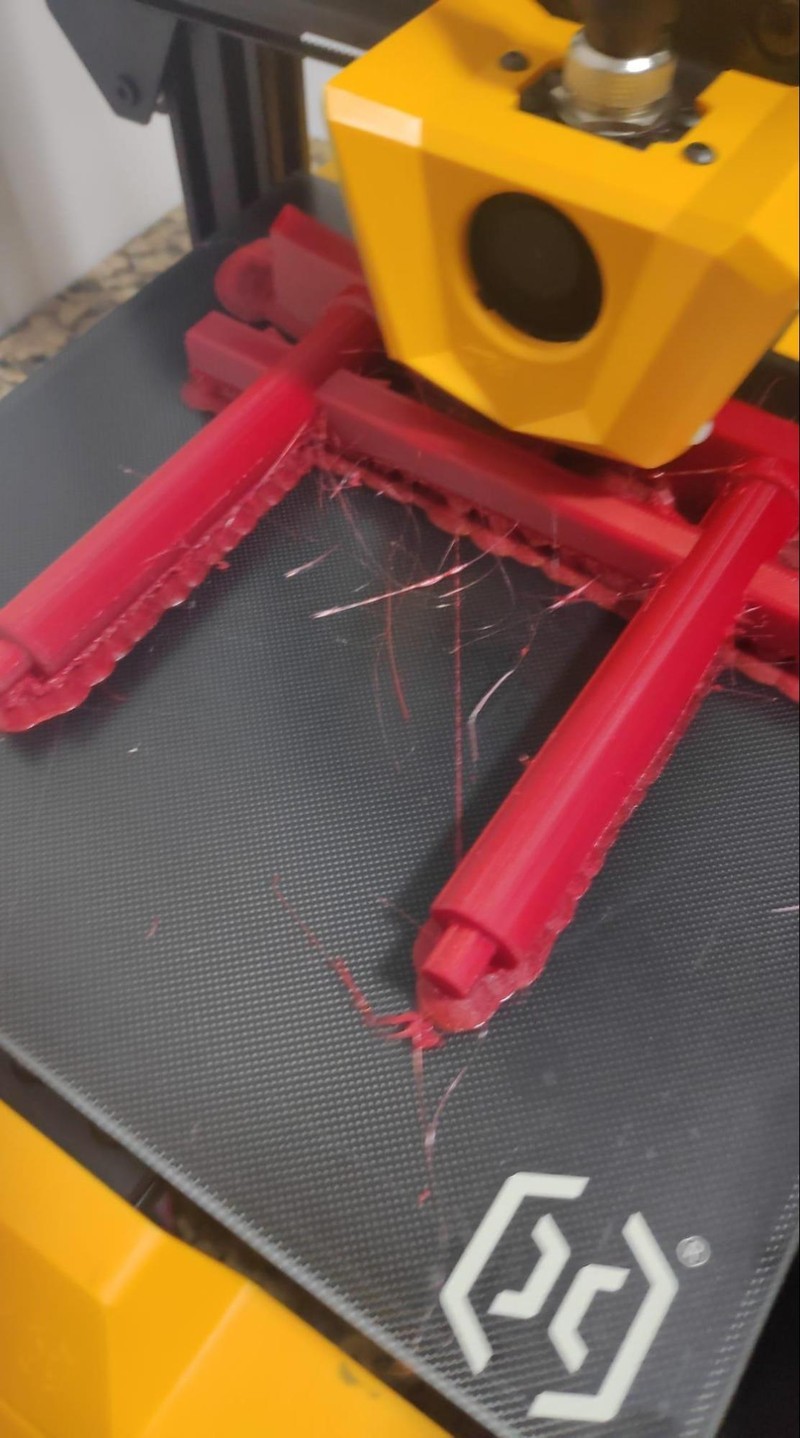
Stringing is one of the most commonly encountered FDM 3D printing issues. It manifests itself by creating thin web-like strings across the 3D printed model. The reason for that is your nozzle deposits melting plastic when moving from one printing point to another, which it obviously shouldn’t. One of the most common solutions would be to enable retraction, a setting that can be found in the slicing software of choice. When enabled, the filament will be pulled back from the nozzle when the print head crosses an empty space. If that didn’t help, try decreasing the printing speed and ensuring no filament residue is left inside your nozzle.
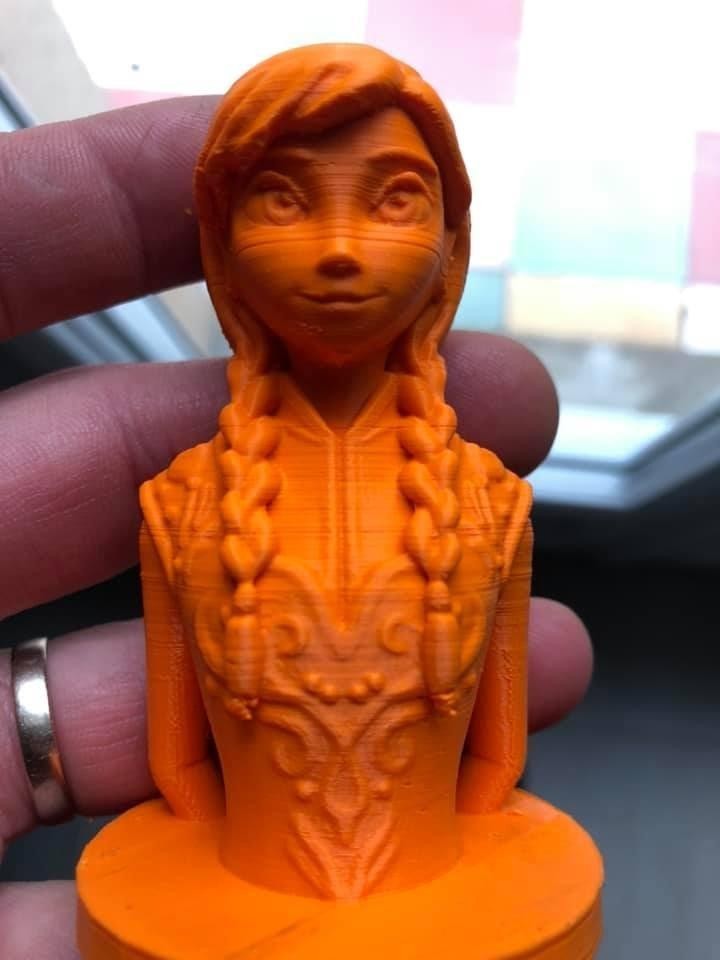
Take a look at some of the prints made with the Artillery Hornet to see if the machine is suitable for your application.

Source: 3D Printing Nerd / YouTube
Source: WildRoseBuilds / YouTube

Source: WildRoseBuilds / YouTube
Source: neoprod_fx / Instagram
The Artillery Hornet is a budget-friendly desktop FFF/FDM 3D printer that offers decent build volume and a handful of other features for a streamlined printing experience. It is equipped with a Bowden extruder that can heat up to 240°C and a heated build plate that can reach 100°C in less than three minutes. Printing at a minimum layer height of 100 microns, it can shape a variety of decently-looking and well-detailed prints. Besides, it has a refined and futuristic appearance and can be upgraded with a plethora of different mods. The Hornet ships in a semi-assembled state and has to be leveled manually. This 3D printer would be good for both entry-level and experienced makers as well as some semi-professional applications after undergoing the necessary upgrades. You can use the Artillery Hornet to print uniquely designed household items, tabletop figurines and miniatures, cosplay accessories, props, hard-to-break prototypes, and much more.
You can purchase the Artillery Hornet from Top 3D Shop. This affordable FDM 3D printer comes with the manufacturer’s warranty. Besides, our team will make sure to provide the best service possible, just like we always do.
Update your browser to view this website correctly. Update my browser now


Comments