Hi everyone! This is Top 3D Blog with another informative addition on the ever-evolving additive manufacturing world. In this article, we are going to focus on affordable FDM 3D printing brought by the Artillery Genius — a sub-$350 3D printer that offers decent build volume, heated bed, and a handful of other features for a streamlined printing experience. Sounds good, but what’s the catch? Read the article to find out.

Artillery (EVNOVO) is a Shenzhen-based additive manufacturing company that was established in 2018. Its current lineup consists of three consumer-grade FDM 3D printers: the Sidewinder X1, Genius, and Hornet. All of them come as 3D printer kits, so each machine is not enclosed by default and has to be assembled manually. This provides users with a steep but enjoyable learning curve and lets them install a plethora of useful upgrades all by themselves. Besides, 3D printer kits are cheaper than their fully enclosed counterparts and oftentimes offer two times their build volume. All things considered, 3D printers made by Artillery can be characterized as powerful and reliable machines that bring good value for their money.
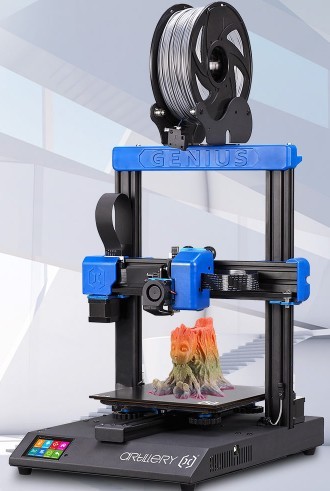
The Artillery Genius is a desktop FDM 3D printer that offers a decent build volume of 220 x 220 x 250 mm (8.66 x 8.66 x 9.8 inches), meaning it can print a single large model or simultaneously print several smaller ones in one go. It is equipped with a powerful Titan direct drive extruder and a heated bed. The printer has to be assembled and leveled manually, which provides the user with an essential knowledge of how FDM 3D printers operate. Besides, it lays a solid foundation for further troubleshooting expertise.
Credit: luisitto_maker / Instagram
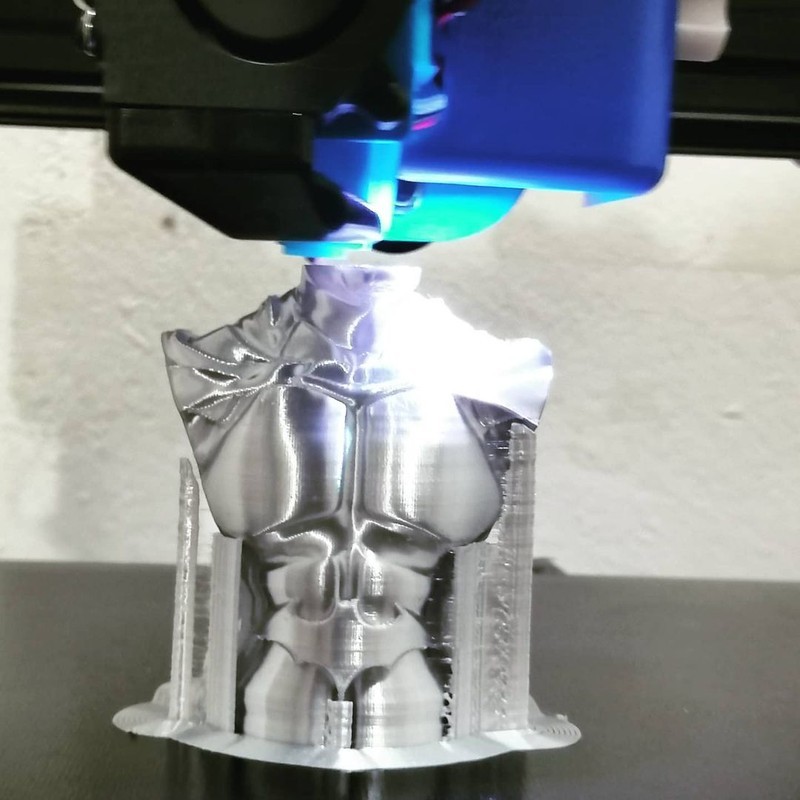
The Artillery Genius prints at a minimum layer thickness of 100 microns, which is average for a 3D printer that comes at a sub-$350 price tag. While models printed with it will indeed have some visual layering, it remains a powerful and reliable machine that can shape a plethora of neat-looking parts. Keep in mind that you can post-process your parts to improve their surface finish.
Credit: tridimake / Instagram
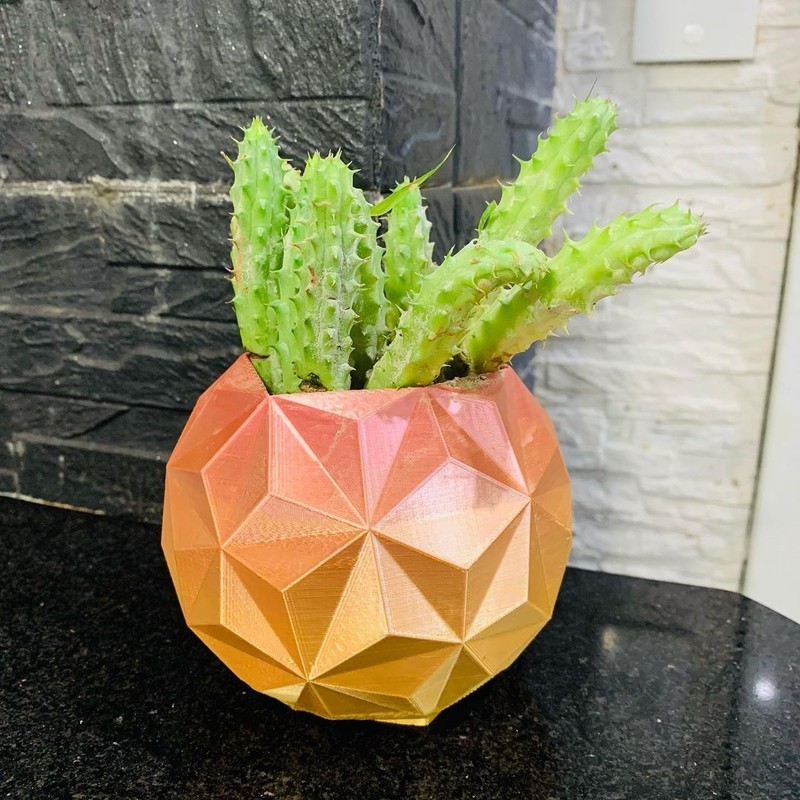
The Artillery Genius can print with PLA, ABS, TPU, Wood, and flexible materials with a diameter of 1.75 mm. Featuring a maximum speed of 150 mm/s and wide material compatibility, this 3D printer can be used for the production of uniquely designed household items, props, toys, accessories, and hard-to-break prototypes.
The only downside in terms of material compatibility comes from the fact that the Genius is not enclosed, so you won’t be able to reliably print large and medium-sized models using ABS until you upgrade the machine with an enclosure. A fully enclosed build chamber helps to maintain optimal temperature conditions required to print with high-temperature plastics. Besides, it prevents unwanted temperature fluctuations, misprints on upper layers, and makes the design considerably safer. You can make the enclosure yourself or simply order it online.

The Artillery Genius is a sturdily built medium-sized desktop 3D printer with a black-colored base and gantry with light blue trims. The printer dimensions are 430 x 390 x 510 mm (16.9 x 15.3 x 20 inches) and it weighs 8.9 kg (19.6 lbs).
Credit: Just Vlad / YouTube
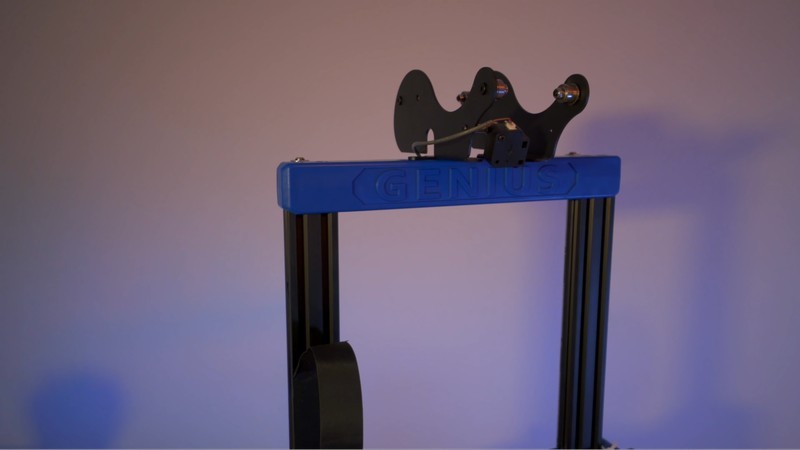
Its frame is made from a high-quality metal alloy. The Z-axis is supported by a high-precision belt pulley and patent-pending Z couplers. Equipped with dual motors and lead screws, the Artillery Genius has a number of tools required for consistent, fast, and precise 3D printing.
Credit: Just Vlad / YouTube
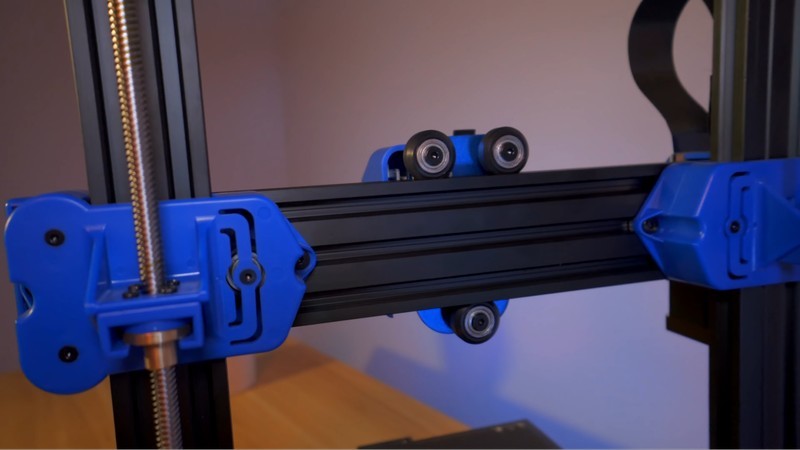
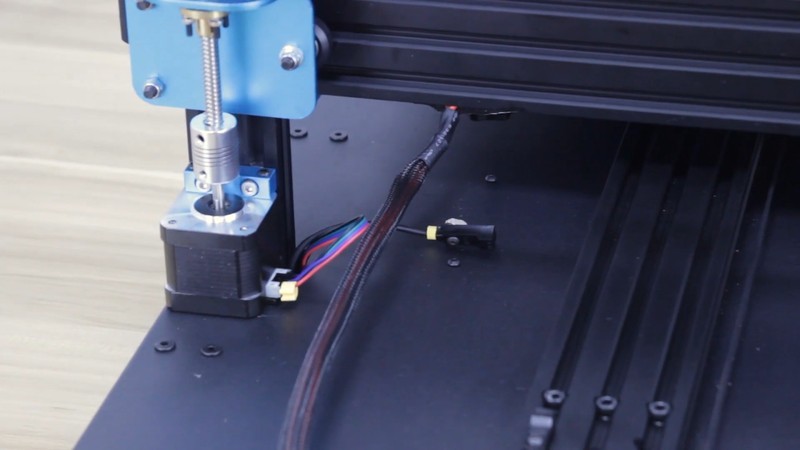
The rods of the printer are supported by clamping shaft couplers that minimize wobble issues and provide for improved stability during printing.
Credit: Just Vlad / YouTube
A built-in color touchscreen is located on the front side of the printer base. The touchscreen is pretty straightforward and easy to use, so the probability of getting confused by its UI and running into some difficulties is very low. Nevertheless, make sure that all of the cables are connected and fixed in place before beginning the printing session.
Credit: Just Vlad / YouTube
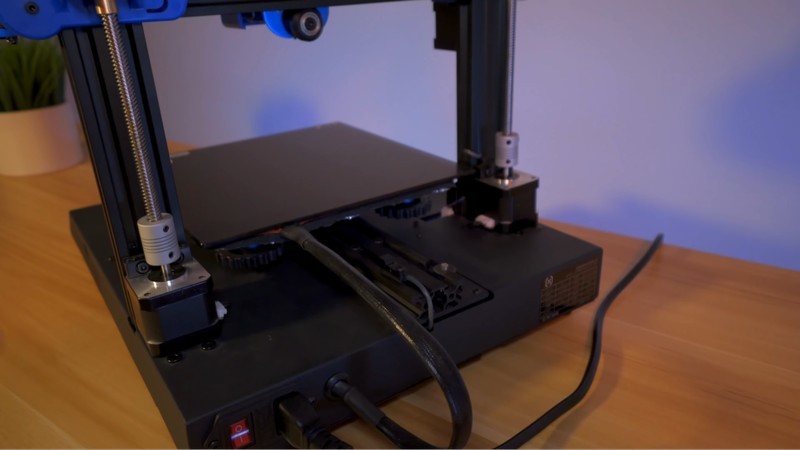
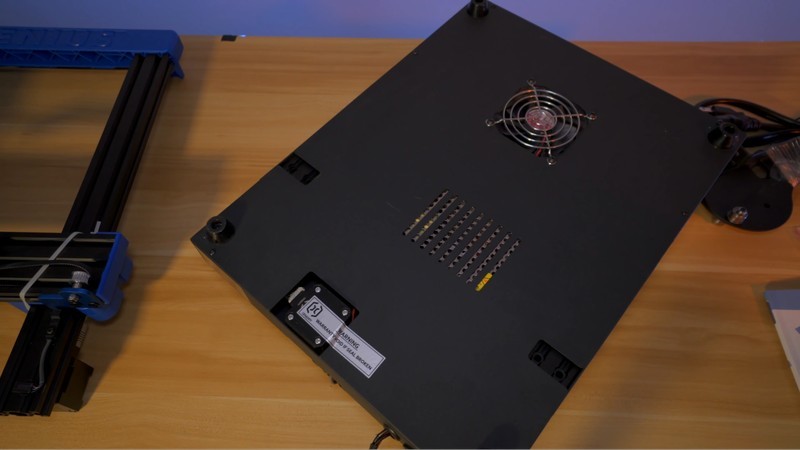
The Artillery Genius is equipped with an all-metal base with ventilation holes. There is a single cooling fan on the bottom of the base that provides sufficient cooling for the printer to work as intended. All of the outside cables that power the main printer elements are neatly arranged, providing the Artillery Genius with a clean and elegant appearance.
Credit: Just Vlad / YouTube
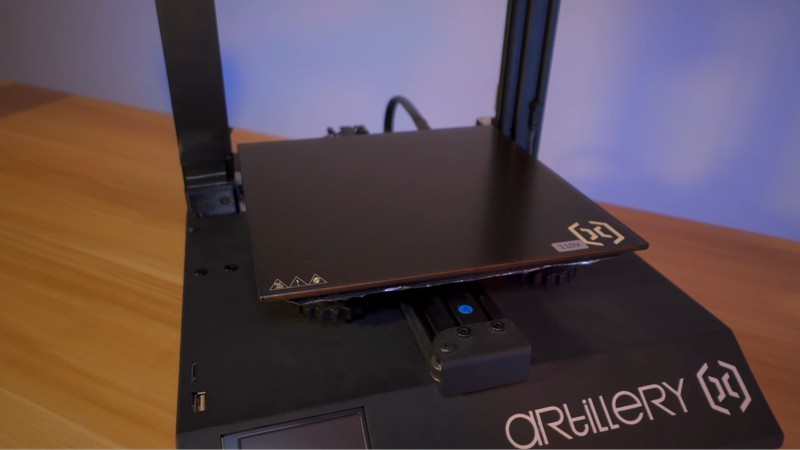
The Artillery Genius has a tempered glass coated build plate that can be heated up to 130°C. One of the most important benefits that heat beds bring is improved layer bonding that is achieved by keeping the extruded plastic in a heated state. This minimizes the amount of warping-related issues that could mess up your entire print and expands the range of printable materials. Clearly a must for a streamlined 3D printing experience.
Besides, the heat bed of the Artillery Genius features impressive heating speed and can reach 110°C in less than 135 seconds. Considering the dimensions of the build plate, the heating speed is pretty fast.
Credit: Just Vlad / YouTube
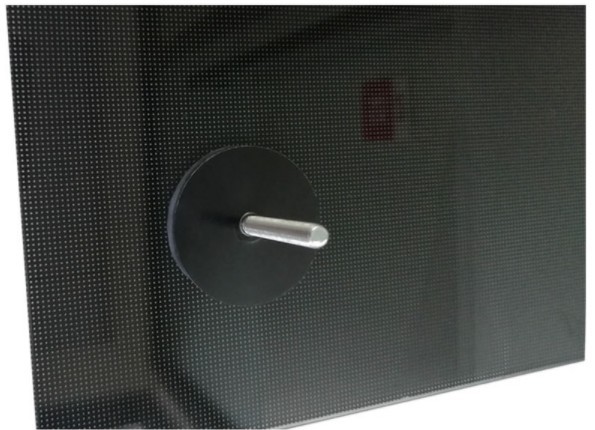
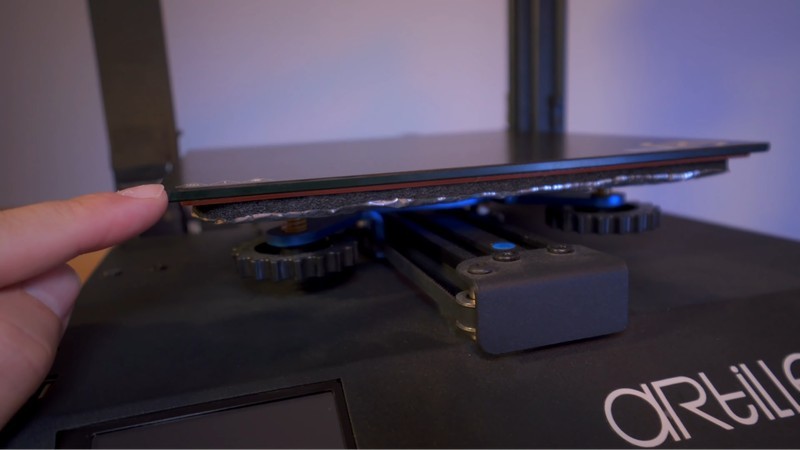
As you can see, the surface of the heat bed is even, so it won’t cause any calibration-related issues. The large leveling knobs installed on the bottom side of the build plate are easy to reach and make for a fast and hassle-free calibration once you assemble the machine.
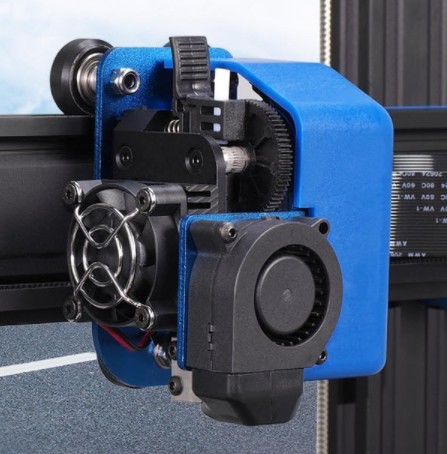
EVNOVO claims that the Artillery Genius is equipped with a direct drive Titan Volcano extruder that makes the extrusion more lightweight and performs better than most of its counterparts. The extruder assembly indeed includes a single nozzle that can heat up to 240°C in less than 3 minutes, which is more than enough to print with ABS-type and other 1.75 mm filaments. Besides, a direct drive extruder ensures better retraction, responsiveness, and minimizes backlash ultimately leading to better extrusion.
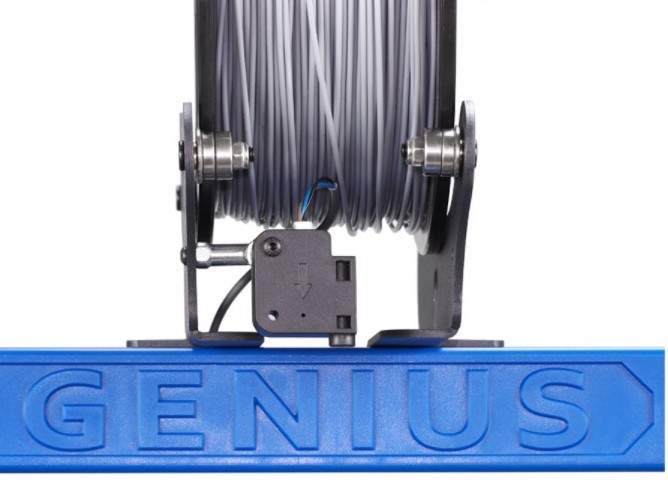
A filament runout sensor and resume printing function are two essential features that every modern FDM 3D printer should have. In our case, the sensor is installed just below the spool holder located on top of the printer. It pauses the printing process if there is no more material to print with or if the filament gets tangled up or broken. The printing process can be resumed manually after resolving the issue.
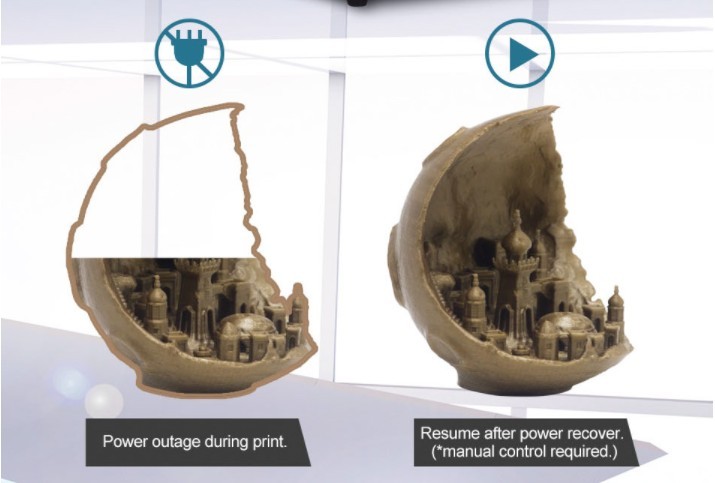
Up next, the resume printing function is an important tool particularly useful if you’d like to print big. It can help save your prints in case of a sudden blackout or power outage. Just like the name implies, the printing process is paused after a power loss and can be resumed when the power is back on again. With a feature like this, you won’t have to worry about blackouts that could make you reprint a large model from scratch.
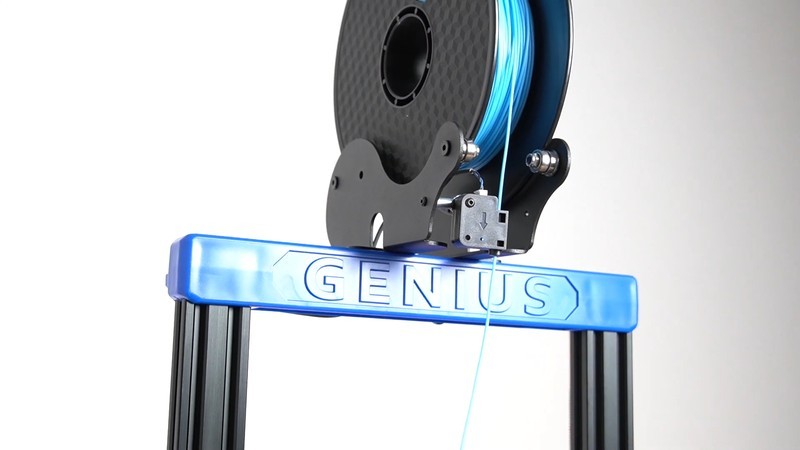
The Artillery Genius comes with a filament spool holder that has to be installed on top of the gantry, so you won’t have to print it yourself or purchase it separately. The spool holder can be re-adjusted depending on the widths of filament spools.

Source: ultimaker.com
The Artillery Genius is compatible with Ultimaker Cura, a swift and easy-to-use slicer that guarantees optimal performance when used with FDM 3D printers. This trusted software suite lets you rotate, edit, one-click print your models, build supports and tinker with other print settings to fine-tune the machine. You can learn more about this powerful solution by navigating here.
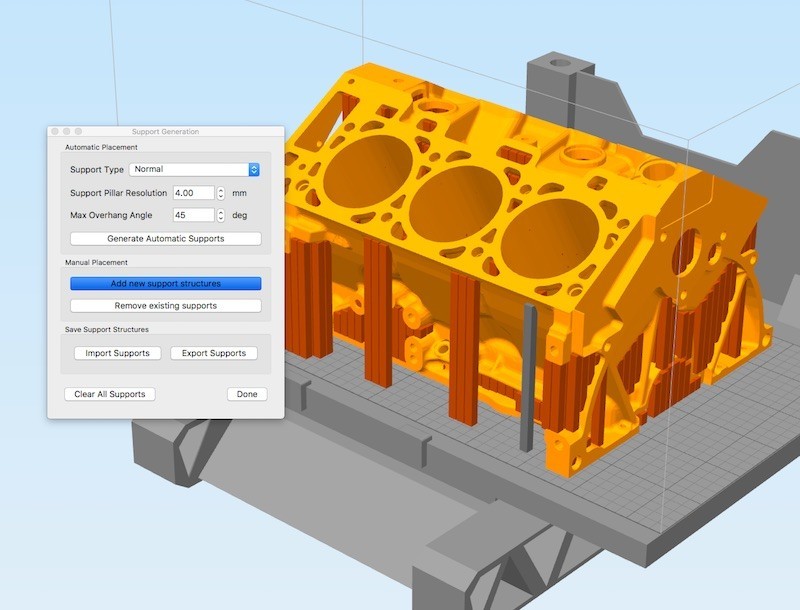
Source: simplify3d.com
Simplify3D is another software suite that can be used with Artillery Genius. It lets you switch between multiple printers and run pre-print simulations to detect design flaws in advance. Besides, it lets you build supports automatically as well as customize them manually and tinker with a plethora of professional tools and advanced options to fine-tune the machine.
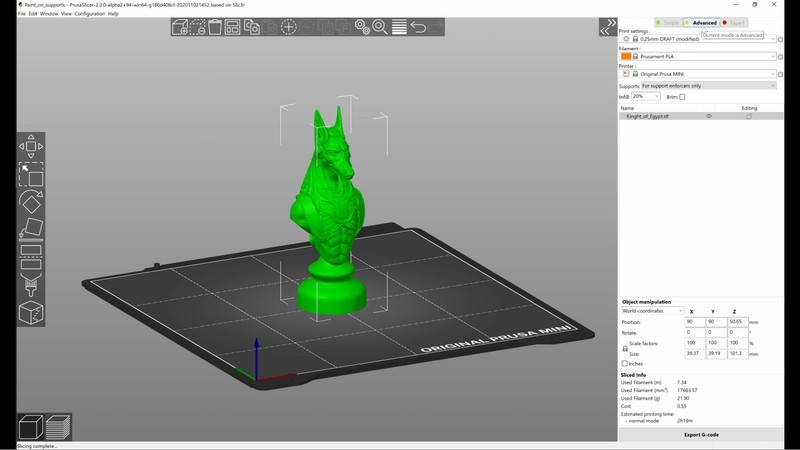
Source: prusa3d.com
Another option would be to use PrusaSlicer, a powerful solution developed by Josef Prusa’s team. The software features the same functionality as Cura and Simplify 3D do, but comes with a self-developed and particularly neat user interface.
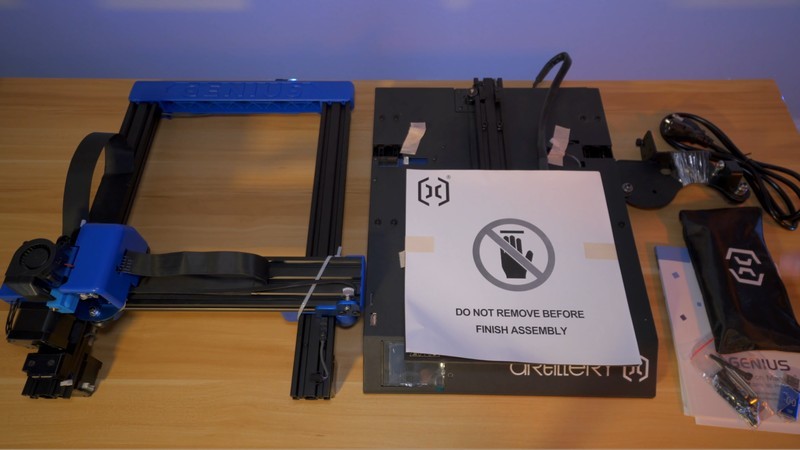
Credit: Just Vlad / YouTube
The 3D printer kit is supplied in a standard cardboard box. The contents are reliably packed and include the print base that contains all the electronic components required to operate the printer as well as two gantries that guide the extruder.
Here’s a full list of the items included in the supply package:
For some items, package content may change. In case of any questions, please get in touch.
After unboxing the Artillery Genius, you’ll need to complete the assembly and calibration before proceeding to the actual printing process. All of the main parts of the machine such as the base and gantries come factory-assembled, so the Genius can be up and running in less than thirty minutes if assembled and calibrated by an experienced maker.
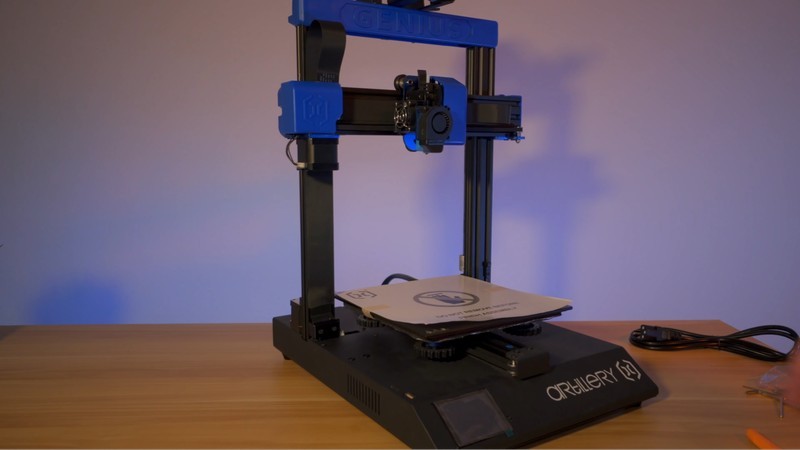
Credit: Just Vlad / YouTube
On the other hand, we recommend inexperienced users to take their time and carefully verify every step twice. The adventure may be frustrating at first, but we can assure you that the understanding of the fact that you can assemble a 3D printer and make it work will be more than satisfying.
After unboxing the printer, install the gantry atop its main base and tighten four screws located underneath the base until the gantry is reliably fixed.
Credit: Just Vlad / YouTube
After that, mount the filament spool holder on top of the frame and connect the filament runout sensor.
Credit: Just Vlad / YouTube
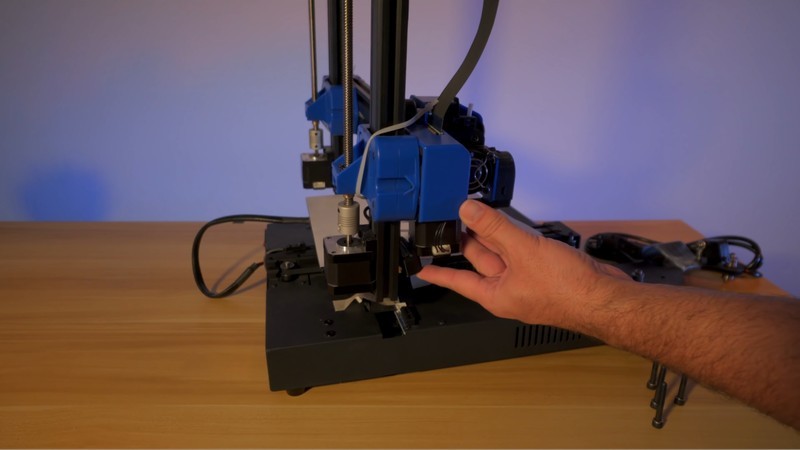
Connect the Z-axis wires, detach the extruder cover and connect the ribbon cable.
Connect the rest of the cables and prepare to level your bed.

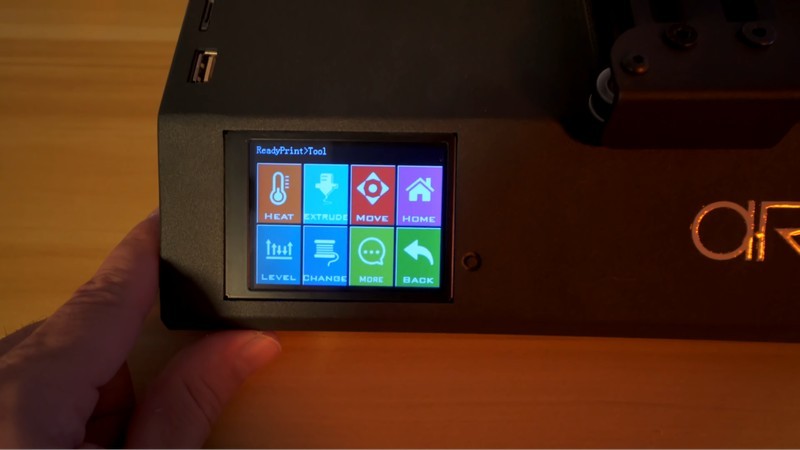
Connect the Artillery Genius to a power source and begin the calibration process by using its touchscreen. After selecting the “Tools” option, click on “Leveling” to see the leveling menu as displayed in the photo below.
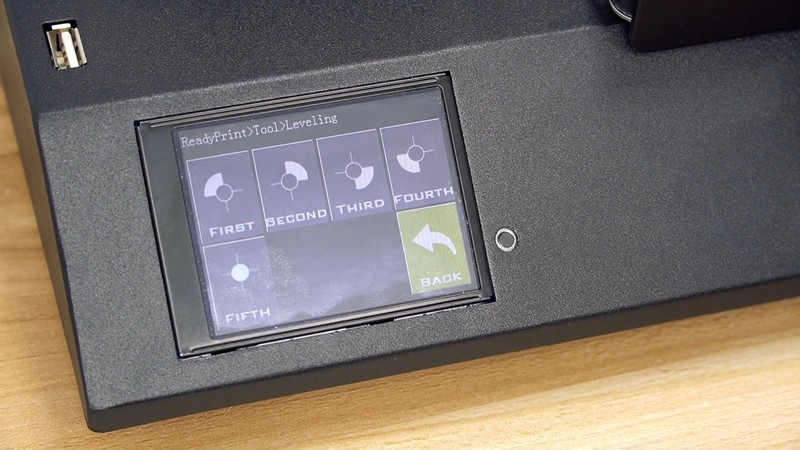
Click on all of the options displayed on the image above except “Back” to check whether the system works as intended. Select the first option again and wait until the extruder halts in the corner of the build plate. Take a piece of A4 paper and place it just below the nozzle. Begin the calibration by rotating the knobs located underneath the build plate until the paper can barely move below the extruder. Repeat the procedure until all four corners are properly leveled.
Make sure to create a couple of small test prints before printing big to ensure that everything is finely tuned.
One of the key advantages of FDM 3D printers without enclosure is their endless upgrade potential. The main point is you can improve your machine with different features like an enclosure, stepper motor dampers, BLTouch probe for automatic bed leveling, and so on. These and other noteworthy upgrades will make your 3D printer even more powerful and convenient to use.
The first upgrade we are going to talk about is a BLTouch probe for assisted bed leveling. This will make your bed leveling automatic and less time-consuming. The Artillery Genius has a dedicated port for a BLTouch probe, so it won’t be difficult to install.
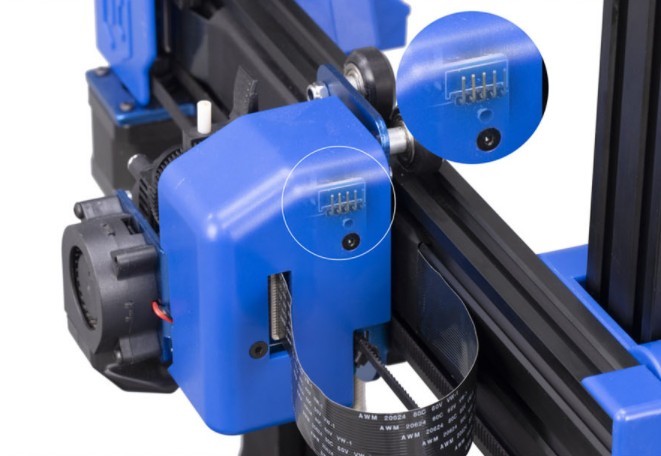
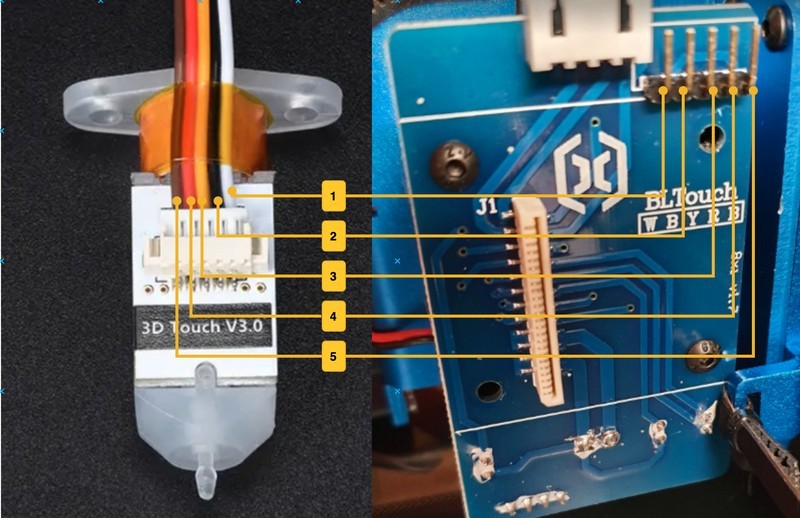
To install the BLTouch, you’ll need to assemble the BLTouch on the mount and connect a cable to it. Download the Waggster Mod, mount and connect it to the extruder. You can learn more by watching this video.
Source: artillery.n3t.ro
The next step would be to update your mainboard firmware. We recommend using Genius Firmware based on Artillery’s Marlin 1.x. After doing this, update the TFT software by copying necessary files to the root of your SD card, plug it into the device and then reboot.
Source: artillery.n3t.ro
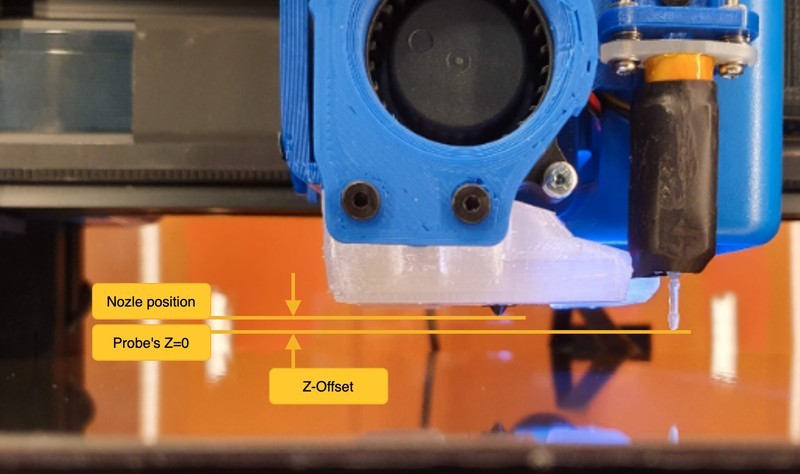
Then, you’ll have to calibrate the Z-offset, which is the distance between your probe’s trigger and the position of the nozzle. Make the initial adjustments while the nozzle is heated. You can use any terminal to check your current Z-offset by entering M503 and looking for the Z-Probe Offset M581. Finally, make some changes to the startup G-code script of your slicer by entering G28 and G29. Don’t forget to heat the build plate before changing the initial G-code.
To make the Artillery Genius even more stable and make the carriage move along a single axis without wiggles and twists, you can upgrade it with a linear rail.
You can find the complete list by clicking here.
Source: Thingiverse.com
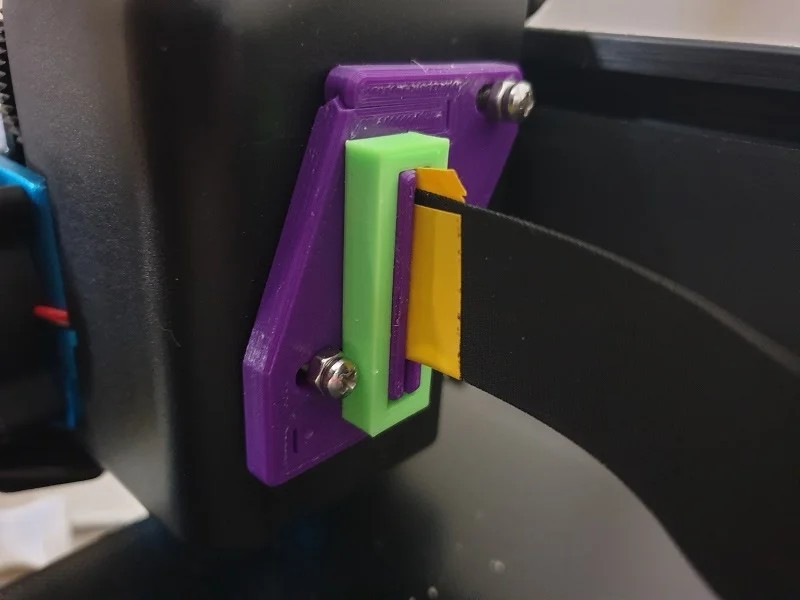
One of the main disadvantages of the Artillery Genius is its unreliable and short wiring. Because of this, the cables tend to slide off every now and then, so printing a couple of cable relief brackets is a good idea indeed. With this upgrade, you won’t have to worry about print fails that happen because of unreliable wiring.
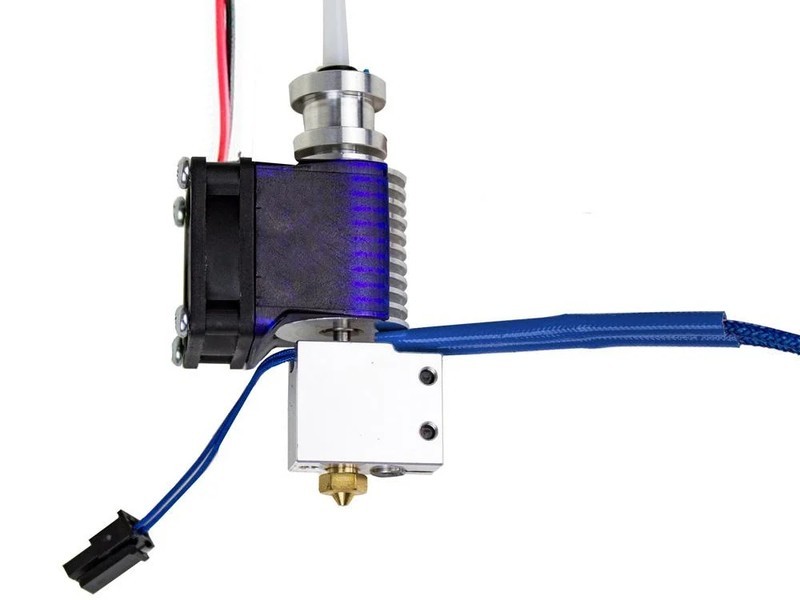
The Artillery Genius comes stock with a replica of the Volcano hotend that doesn’t perform as good as the original one. Replacing the stock hot end with a genuine E3D Volcano will result in faster and more reliable extrusion and let you use larger nozzles. Besides, it increases the maximum extruder temperature up to 285°C, allowing you to print with high-temperature plastics.
If some of the cables that power the bed or extrusion system of the printer aren’t connected or damaged, you won’t be able to start printing unless you fix the problem. Check out the error message in the image below.

Credit: Gosia Kott
To fix this, try reconnecting all of the wires and start printing again. It would also be a nice idea to solder all of the power heating wires since they tend to unstick from the heating element way too easily. If you still get the error message, check whether the wires are damaged and replace if necessary.
Credit: Łukasz Olczyk
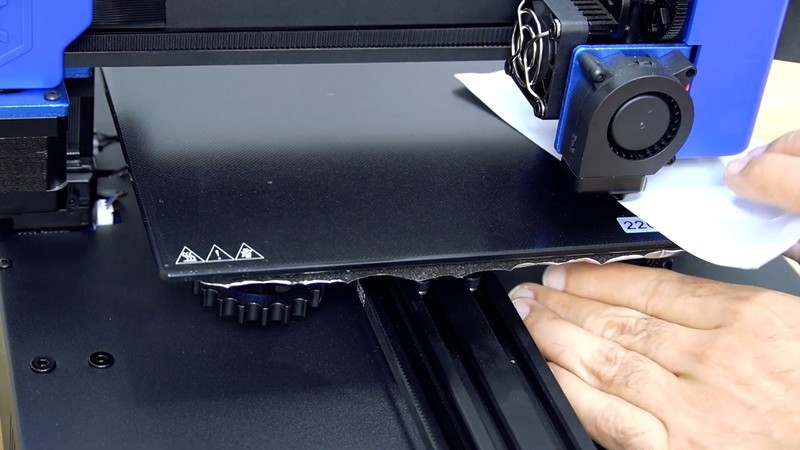
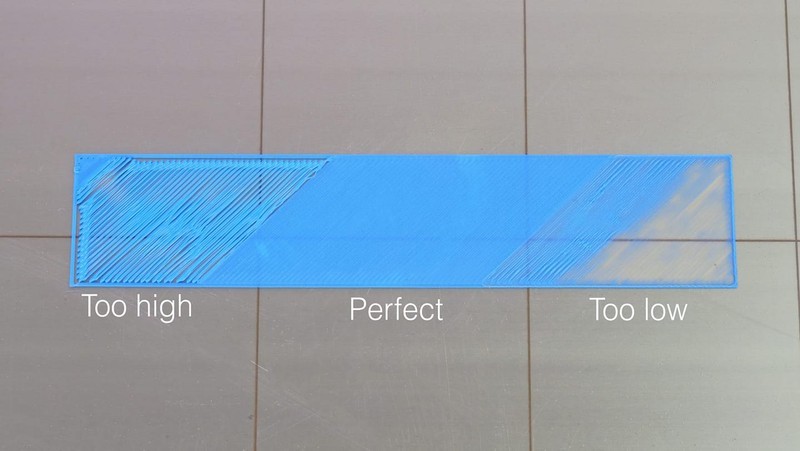
When it comes to the precise printing of the first layers of the model, a lot of makers run into some unexpected results. For instance, if your printer can’t print first layers consistently and makes them look like a mess, the most likely reason is that the build plate isn’t leveled properly. In our case, the print head seems to be set up too high over the bed.
Credit: Scott Johnson
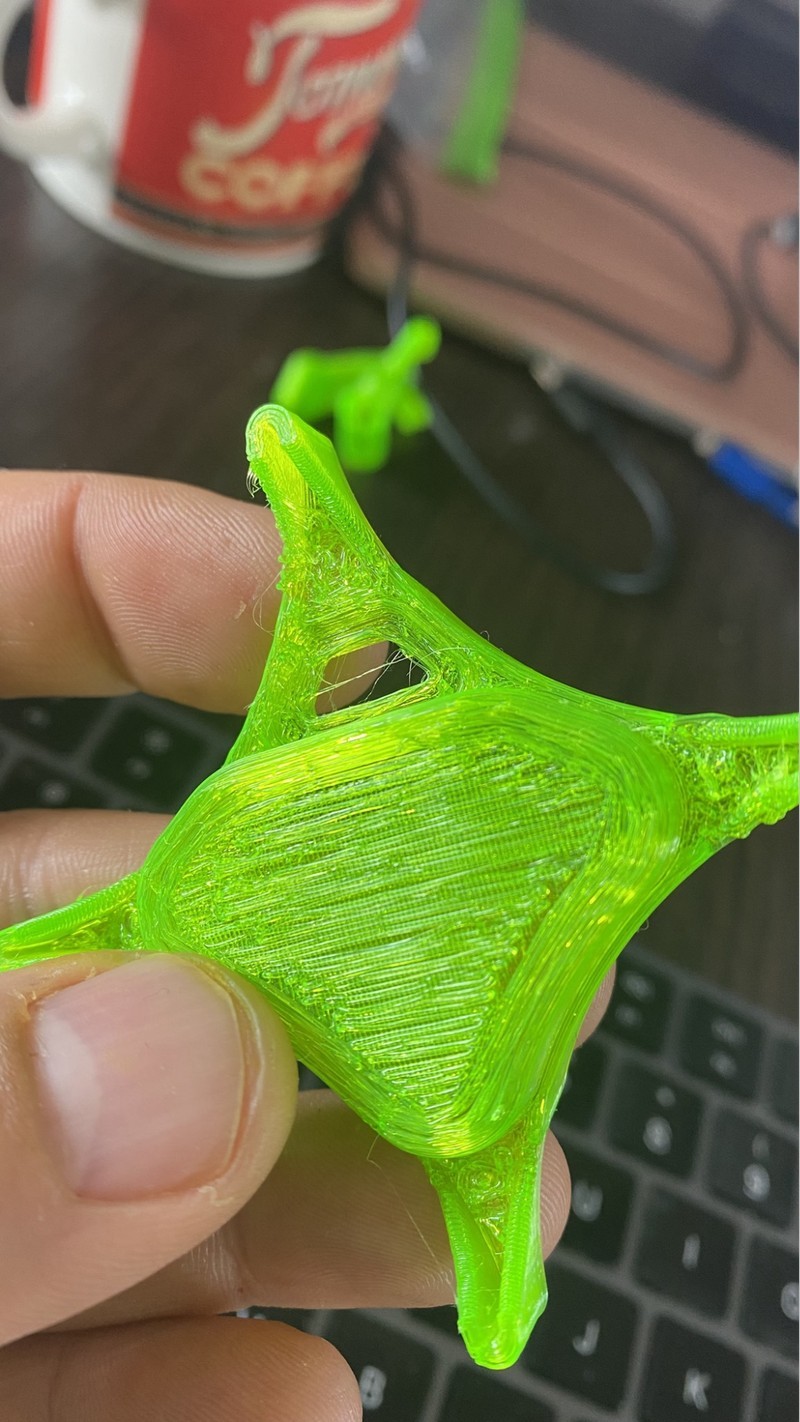
Credit: Jan Woletz
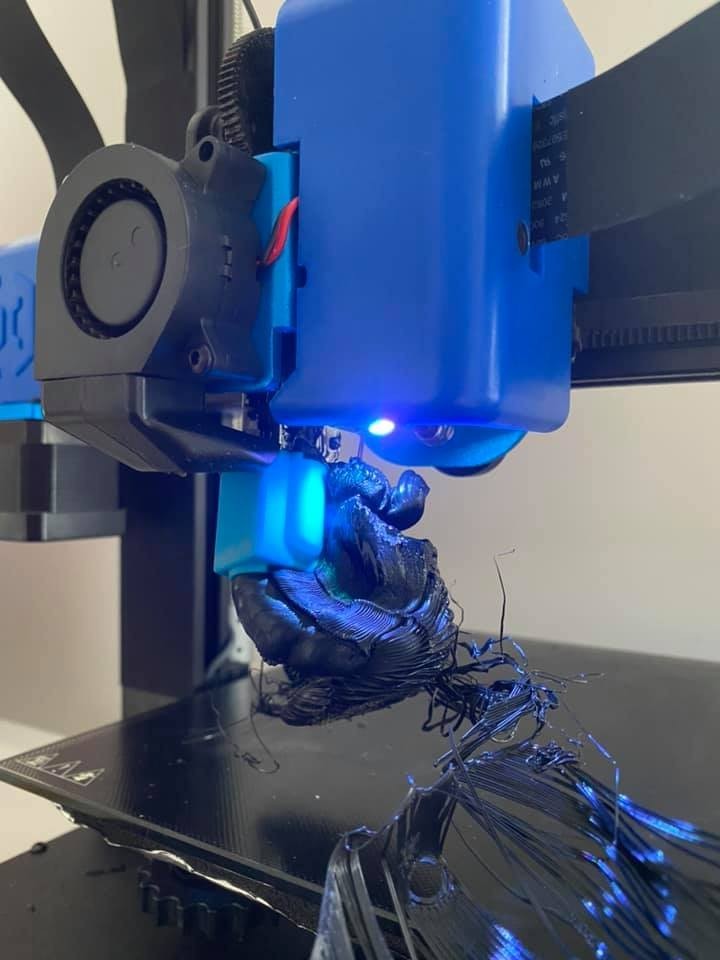
As a rule, the nozzle clogging issues manifest themselves when the temperature of the hot end is too low to print, making the material stick to the inside surface of the nozzle. Besides, it can also happen if some of the extruder assembly parts weren’t tightened well enough by the manufacturer. In some extreme cases, clogging can even create a huge filament bubble like the one in the photo above. To fix the problem, let the print head warm up to about 150°C and carefully peel the melting plastic off. Make sure that all the extruder parts are fixed in place.
Pros
Cons
Check out some of the models 3D printed with the Artillery Genius to see what it's capable of.
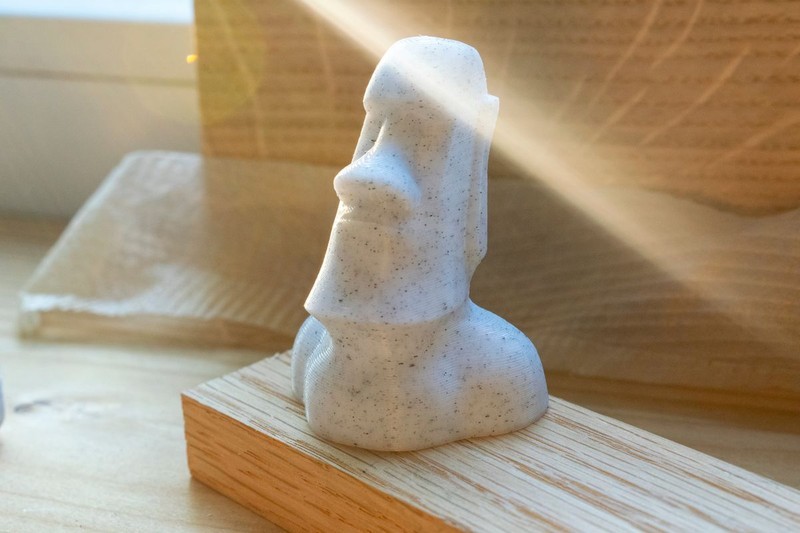
First up is a Moai Statue from Thingiverse printed with Amolen Marble White PLA at 0.4 layer height.
Source: 3dprinteratlas.com
As you can see, this Moai Statue came out well-smooth.
Next up is a vase printed with Dark Grey Galaxy PLA.

Source: 3dprinteratlas.com
Impressive, isn’t it?
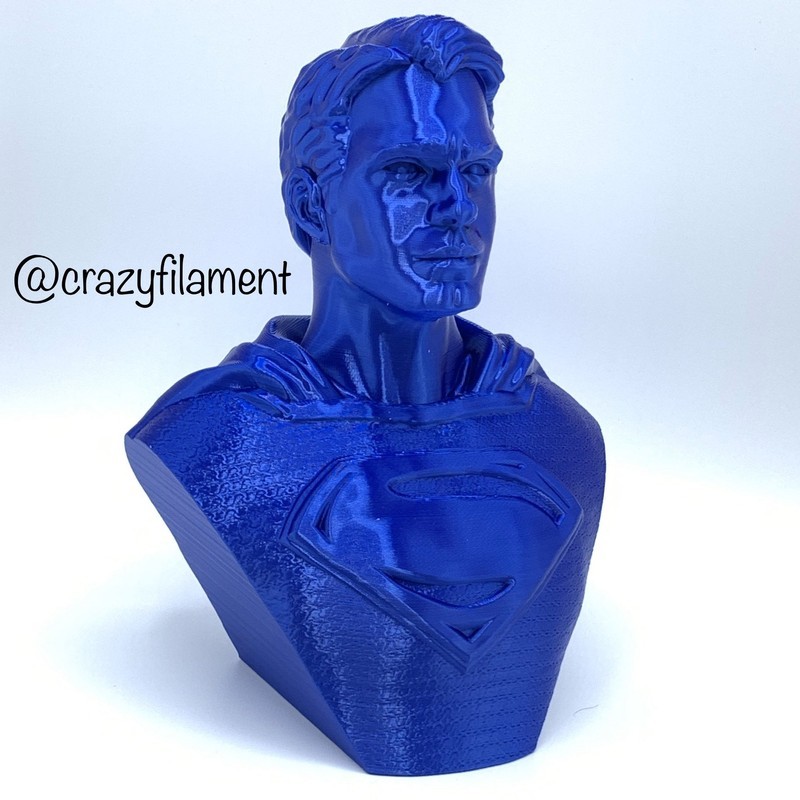
Credit: Crazyfilament / Instagram

Credit: kostodani / Instagram

Credit: kostodani / Instagram
The Artillery Genius is a budget-friendly desktop FFF/FDM 3D printer that offers decent build volume, wide material compatibility, and a handful of other features for a streamlined printing experience. It is equipped with a direct drive extruder that can heat up to 240°C and a heated build plate that can reach 130°C in less than three minutes. The Genius ships in a semi-assembled state, so it has to be assembled and calibrated manually. It indeed has some flaws in its design, but nothing comes as too hard to fix since the machine is highly upgradeable. This 3D printer would be good for both entry-level and experienced makers as well as some semi-professional applications. You can use the Artillery Genius to print uniquely designed household items, tabletop figurines and miniatures, cosplay accessories, props, hard-to-break prototypes, and much more.
You can purchase the Artillery Genius at Top 3D Shop. This affordable FDM 3D printer comes with the manufacturer’s warranty. Besides, our team will make sure to provide the best service possible, just like we always do.
Update your browser to view this website correctly. Update my browser now


Write a comment