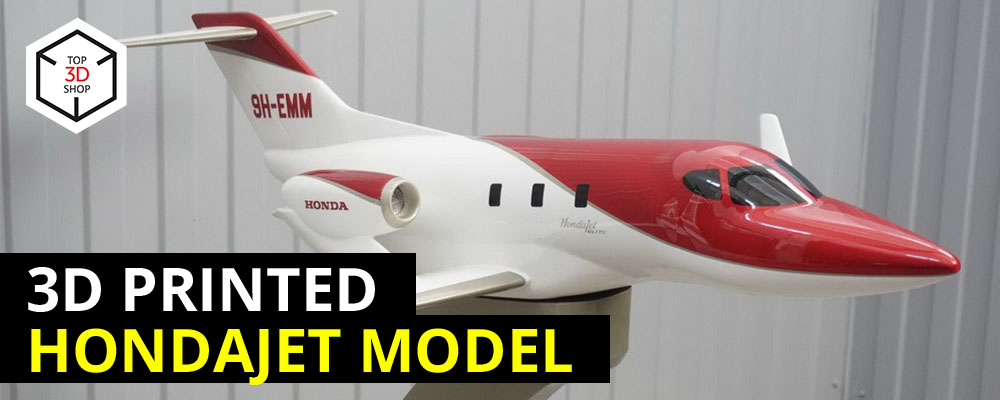
We created a detailed 3D-printed mockup of the HondaJet Elite. Here's how we did it.
About the Aircraft
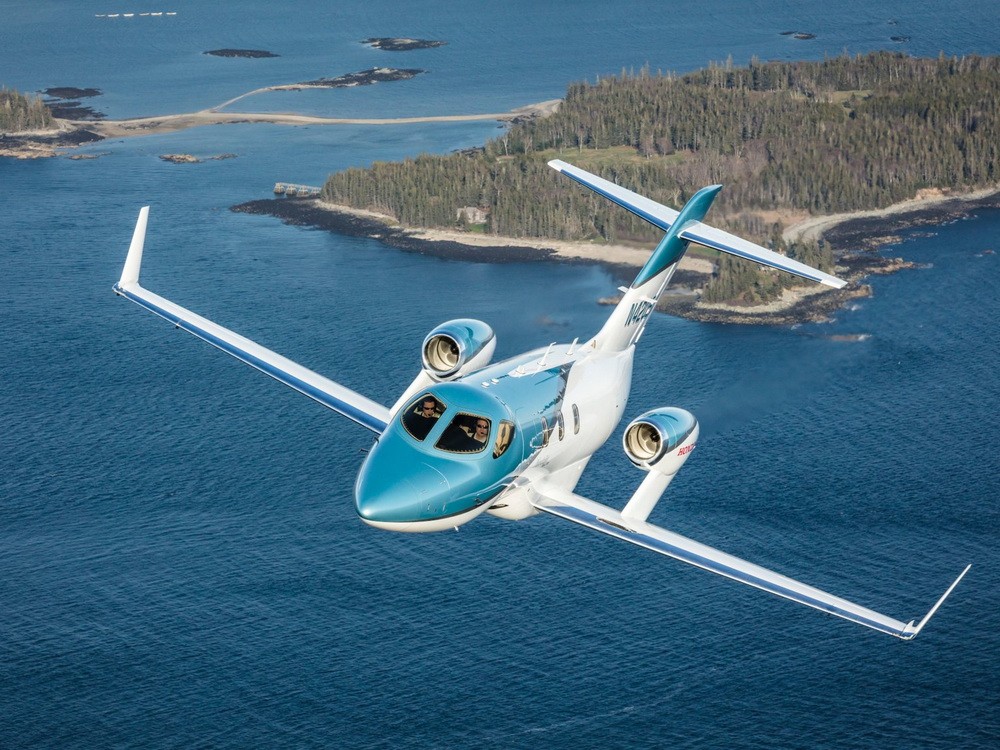
The HondaJet Elite is an upgraded business jet from Honda Aircraft, known for its speed, range, and efficient carbon composite airframe. It seats up to 7 people and has a range of 2,661 km. In 2018, the HondaJet became the best-selling aircraft in its class for the second year in a row - 37 units were sold worldwide over the course of the year.
A client first ordered a digital scan of a 9.8-inch (~25 cm) model brought from Japan. We performed a 3D scan and created the digital model.
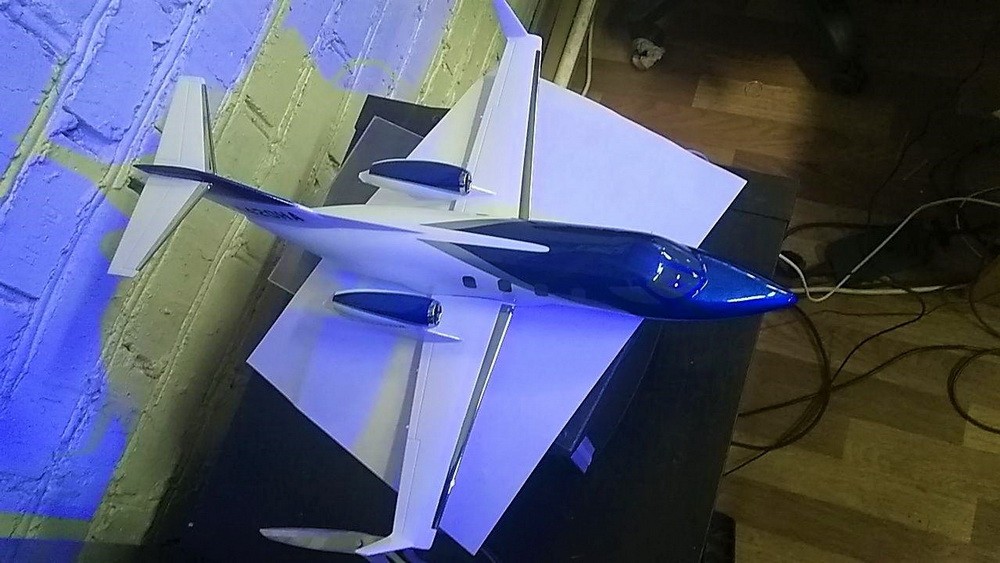
Satisfied with the result, they later requested a 3.2 ft (approx. 1 meter) mockup for air shows. Requirements included durability, transportability, integrated LED lighting, and a stable support stand.
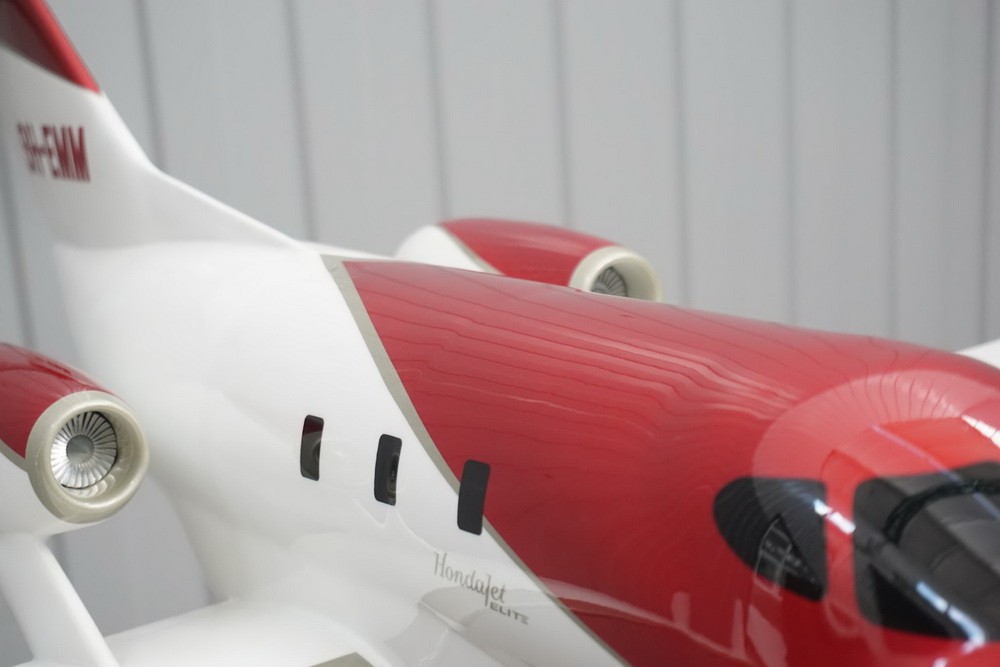
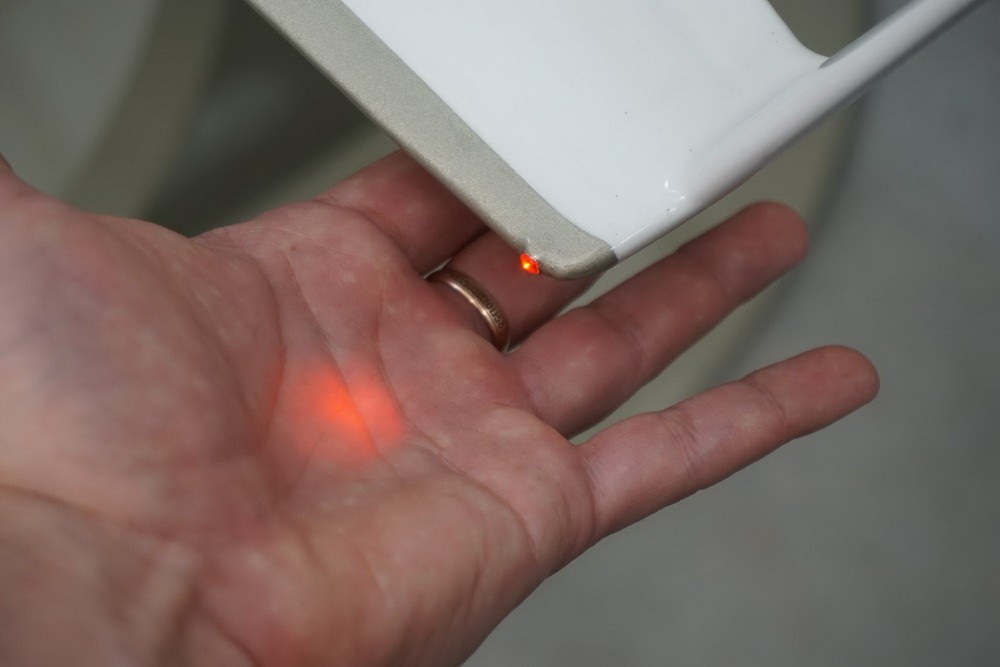
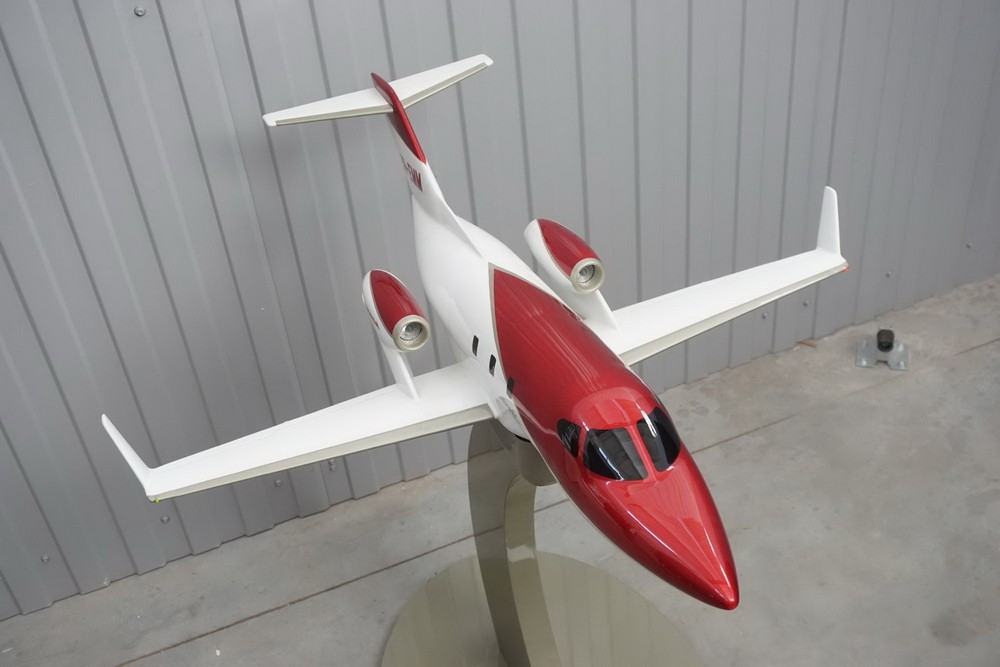
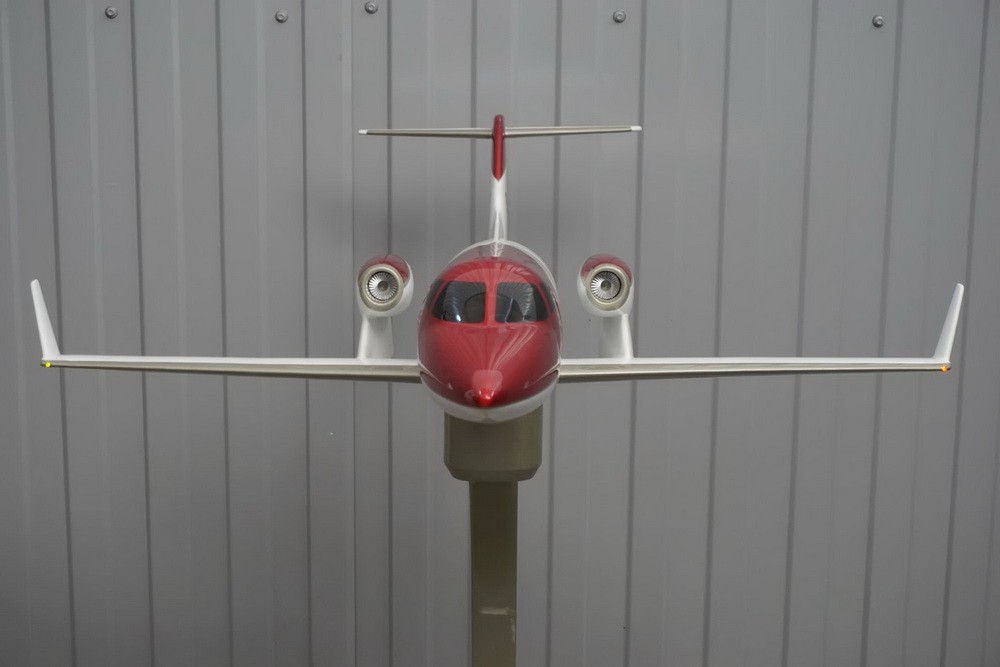
The model was built for exhibition use, requiring frequent transport. It needed to be durable and stable, so it was mounted on a heavy stand. Red and green LEDs were added to the wing edges, and the main body measured about 3 ft (0.91 m) in length.
How we did it
3D scanning
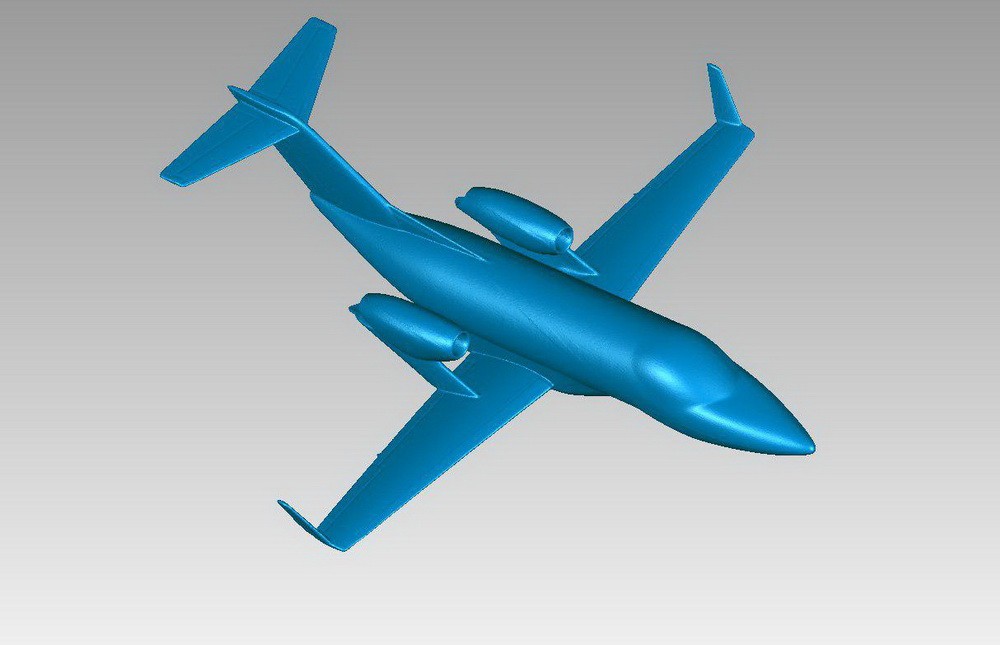
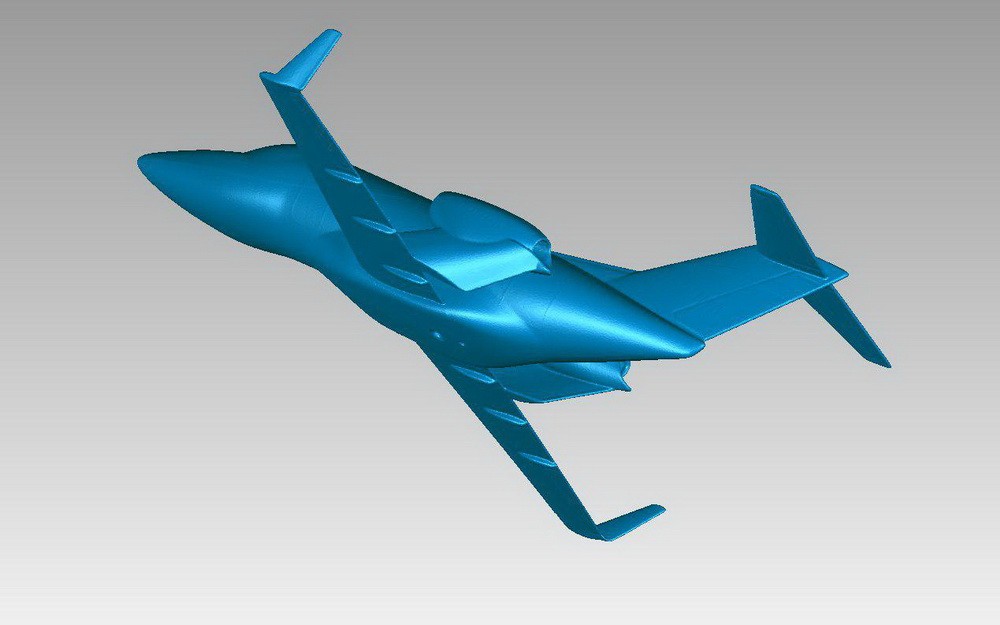
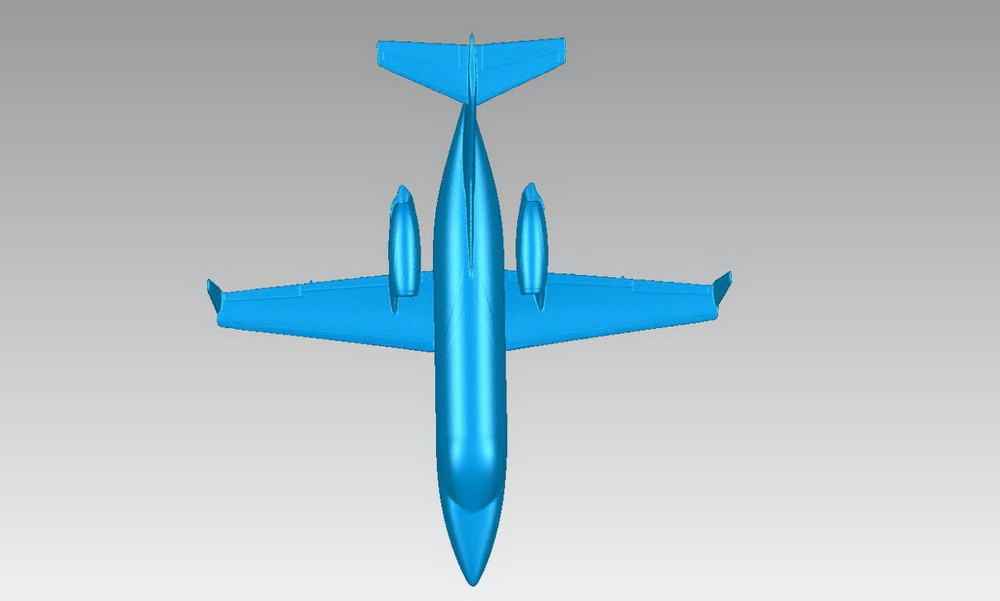
The original metal scale model from Honda was scanned using a stationary structured light 3D scanner. The resulting digital model was scaled and prepared for 3D printing.
The customer required accurate reproduction of all curved surfaces, edges, and fuselage geometry.
The painted and varnished metal model was coated with matting spray to reduce glare and reflections before scanning, improving scan quality.
The aircraft was scanned and processed into a digital STL model, delivered to the client the next day.
This model was later used to create the mockup.
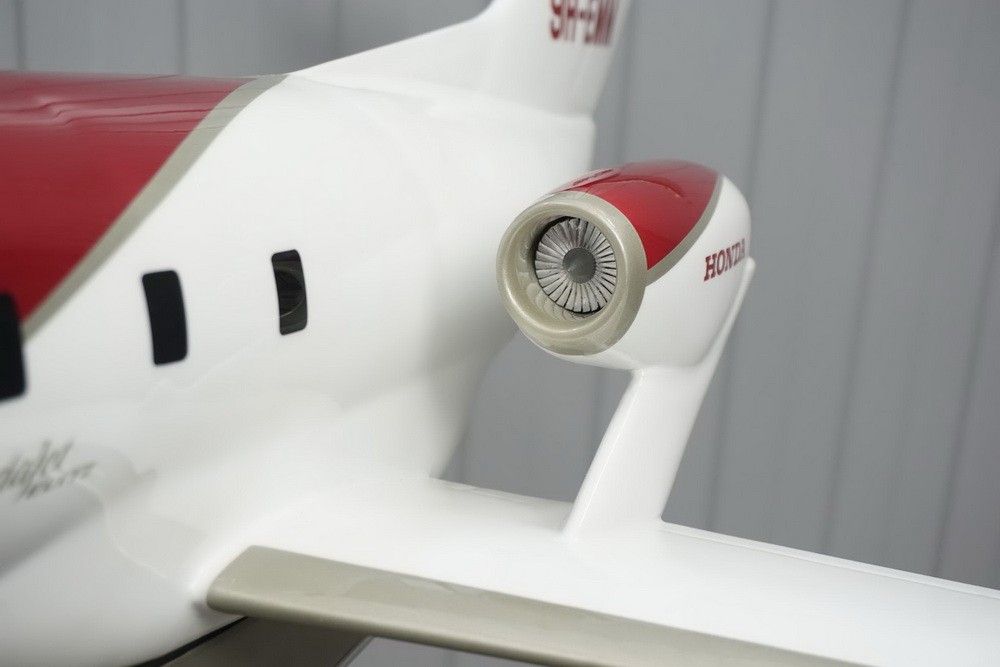
Most of the model was accurately captured by the 3D scan, but fine details like turbine blades required refinement in Geomagic Design X and were printed using a Formlabs Form 2 SLA printer.
The stand was designed as a separate component and is detailed below.
3D printing
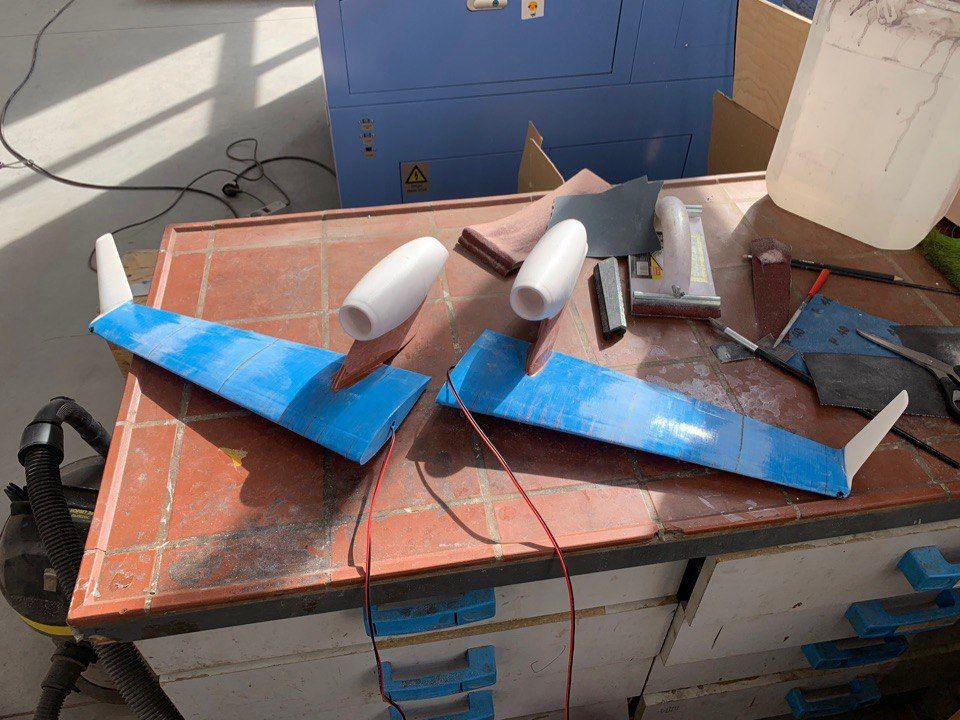
The object was printed in parts on FDM 3D Printers with ABS (Acrylonitrile Butadiene Styrene) filament.
Printing, including redoing some parts, took about 1.5 weeks. The total weight was just under 8.8 lbs (4 kg).
Assembly & Finishing
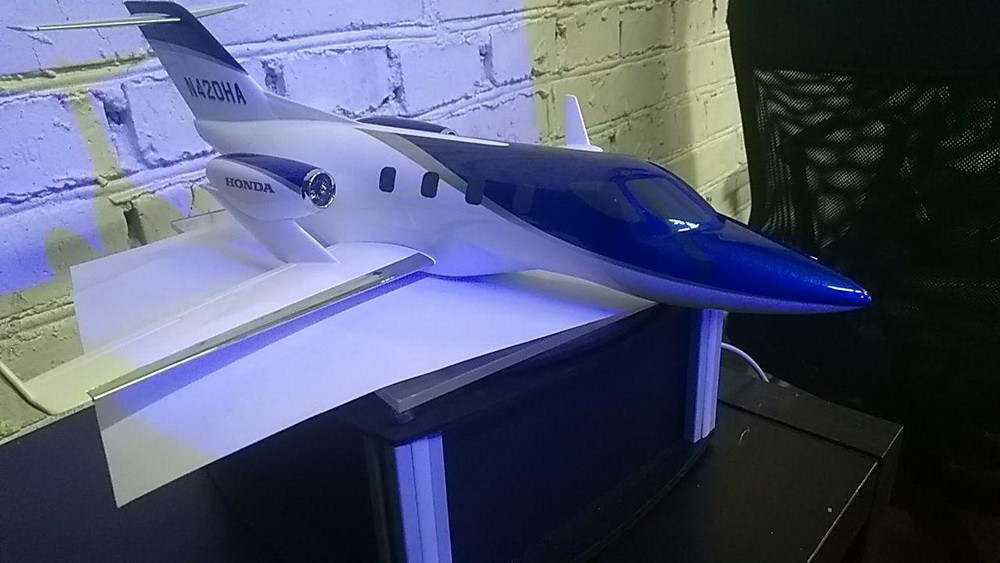
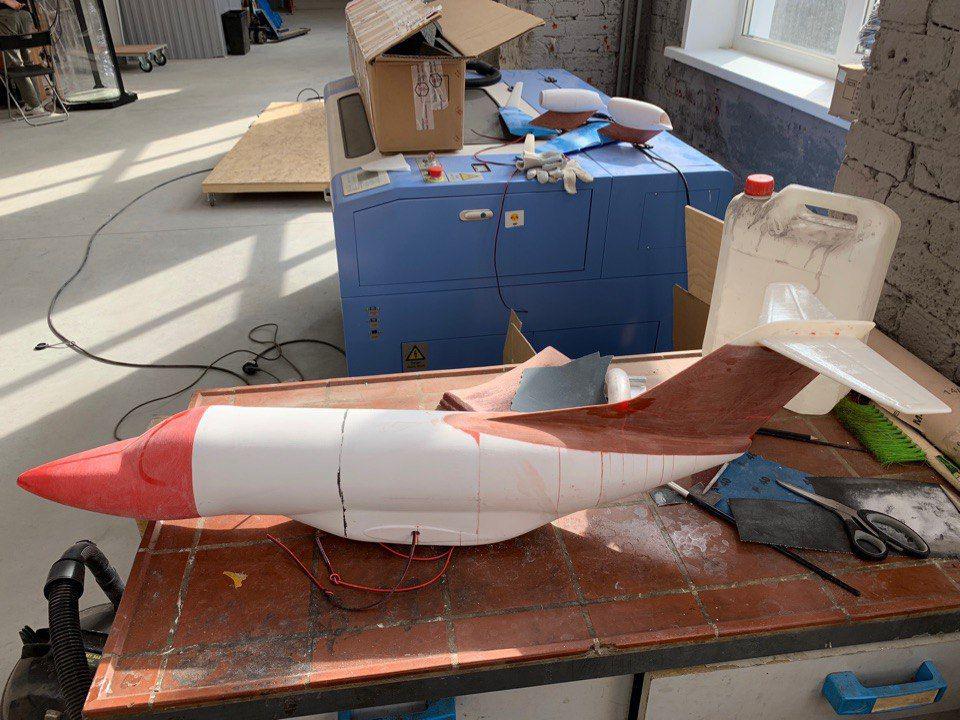
The printed parts were assembled and glued into a single model.
Before the final assembly, our designers teamed up with engineers to consider the type of stand best suited for the model, what materials to choose and how to attach it to the jet. It was decided to drill a hole for a large bolt, insert the bolt and lock it in place using a 3D pen, acetone and some epoxy resin.
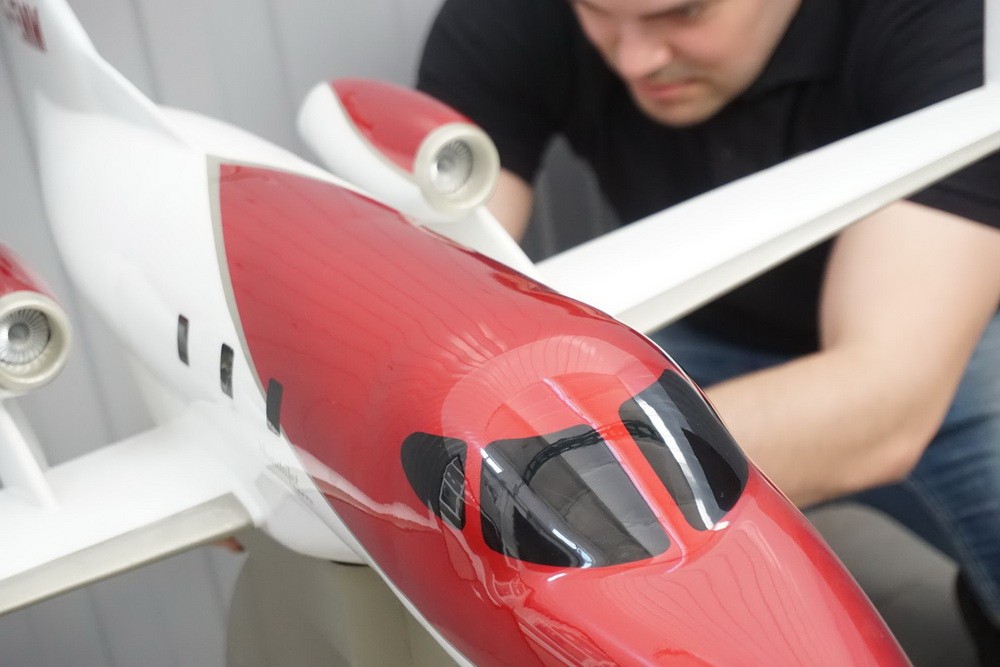
Several layers of primer were applied, and an engineer manually smoothed the jet’s surface. Before painting, the model underwent up to 8 cycles of polishing, priming, and machining.
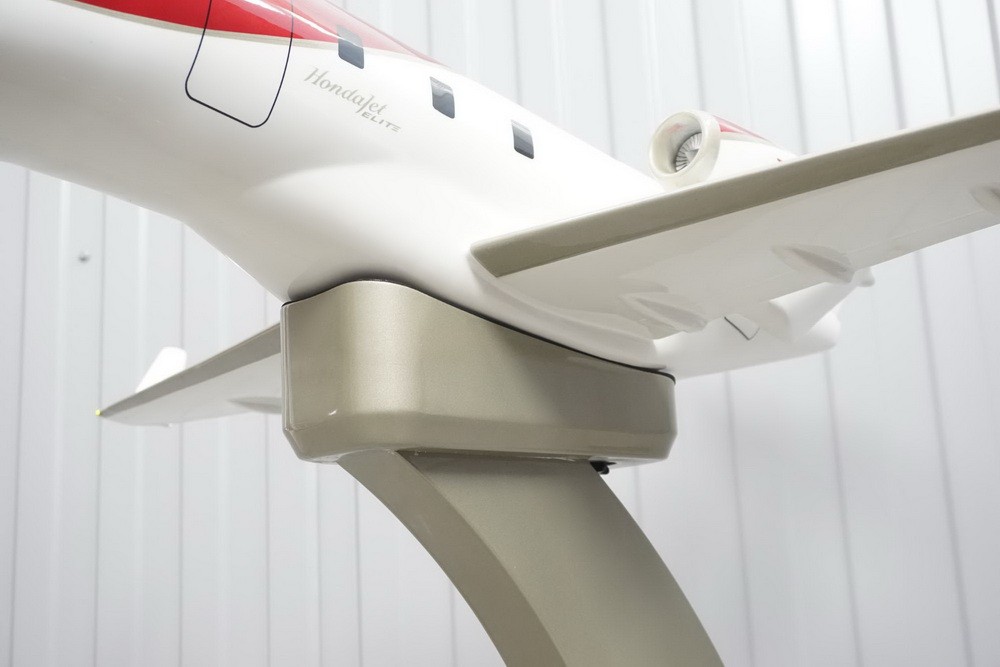
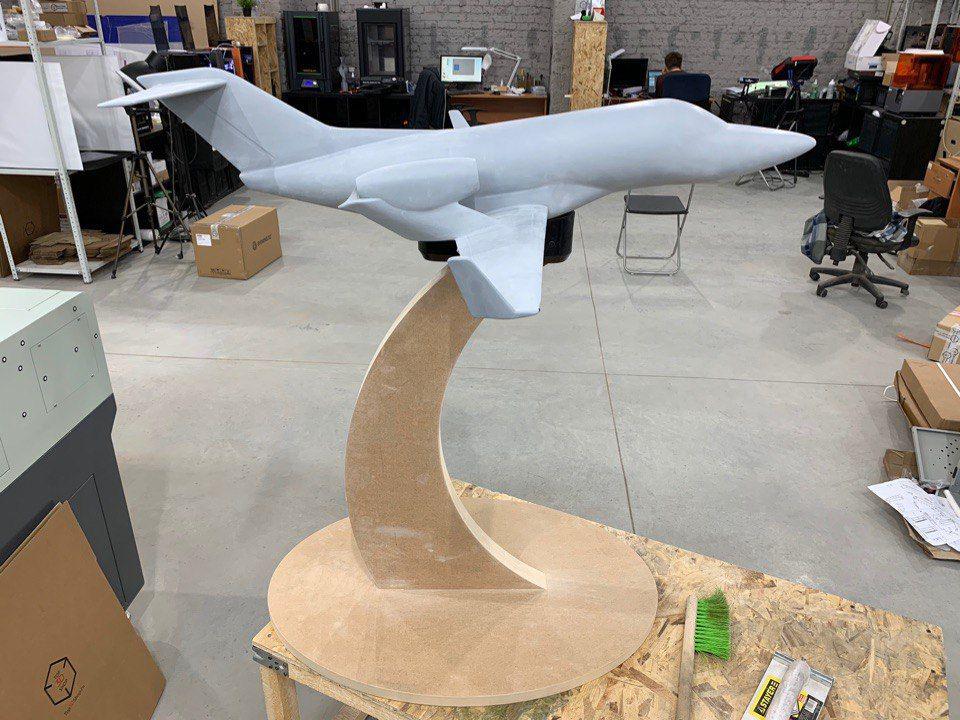
To design a precise support stand, the lower wings and fuselage were scanned using a portable Shining Einscan Pro+ scanner. The model was briefly lifted to capture the underside, and it was reverse-engineered it into an STL file.
The bolt’s insertion angle was critical. We performed reverse engineering to create a 3D model of the upper part of the support stand, aligned it to the aircraft surface, and added a mounting hole to ensure maximum compatibility.
Support Stand
The support stand was made of a 0.98-inch MDF on a milling machine, then it was processed and painted.
All joints were processed with solvents and sealed with a Myriwell RP100B 3D pen.
After assembly, the model was sanded, primed and painted. As a result, all the seams were completely hidden.
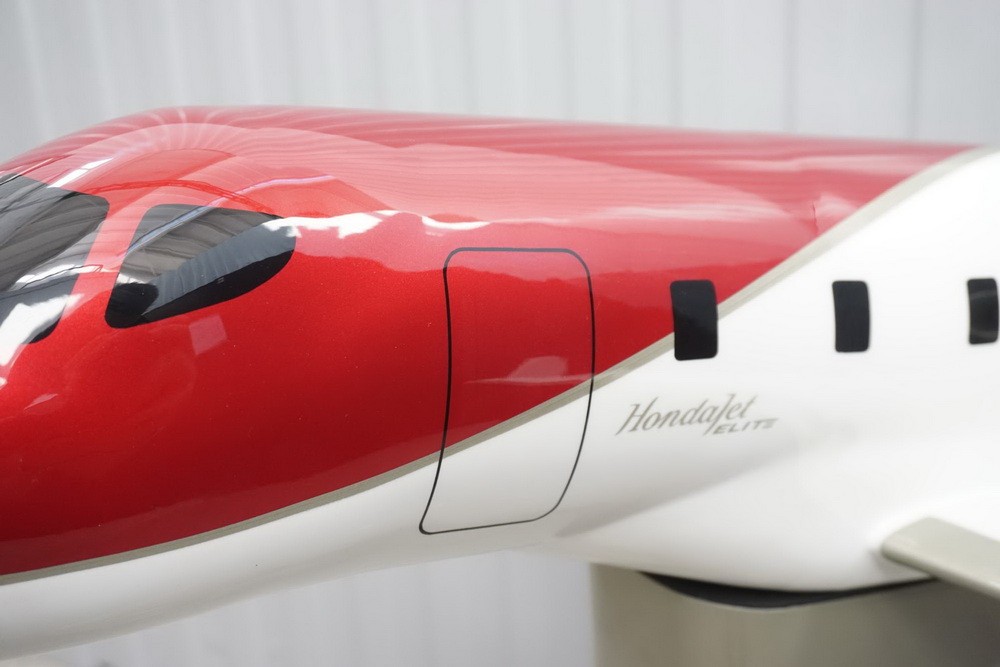
The wiring for LEDs was installed inside the model.
The wire ducts were installed in the wings before final assembly. We initially planned to mount the power supply unit on the support stand or hide it inside the stand. However, this could affect the model’s aesthetics, and having to plug it into a wall outlet was inconvenient. That is why we chose battery power. We milled out enough space inside the stand and installed the battery inside.
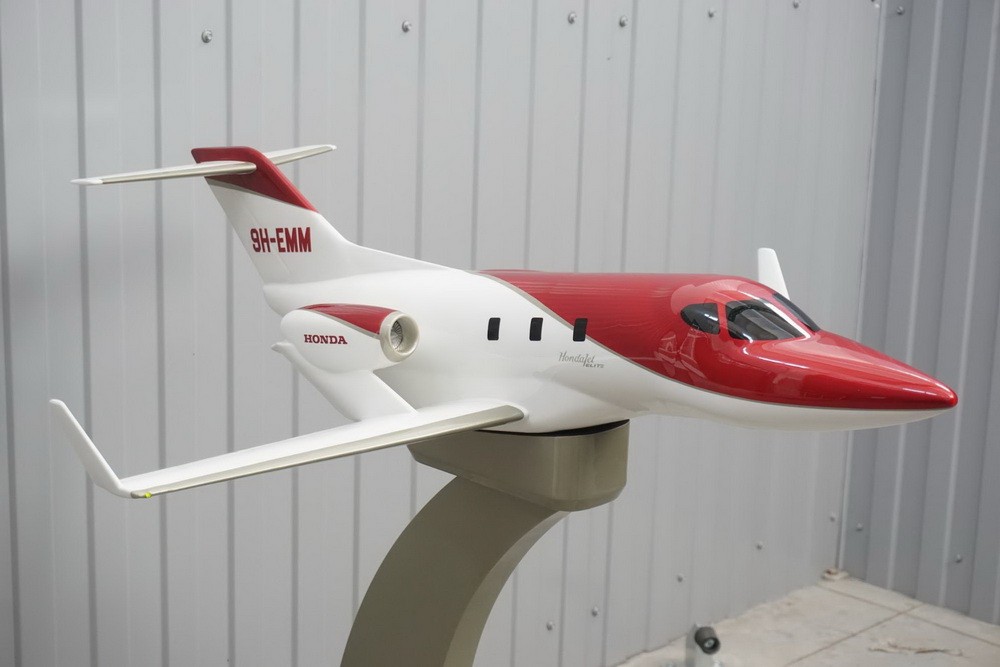
Final Result
The finished mockup is durable, seamless, and presentation-ready, with accurate detailing and internal lighting.
Before 3D Printing
Before 3D printing, models were made manually — slow, costly, and imprecise — or ordered from large manufacturers, making small batches or one-offs expensive and impractical.
Benefits of 3D Printing
3D printing reduces cost and production time while allowing high precision and design flexibility — ideal for mockups, functional models, and custom builds.


Comments