
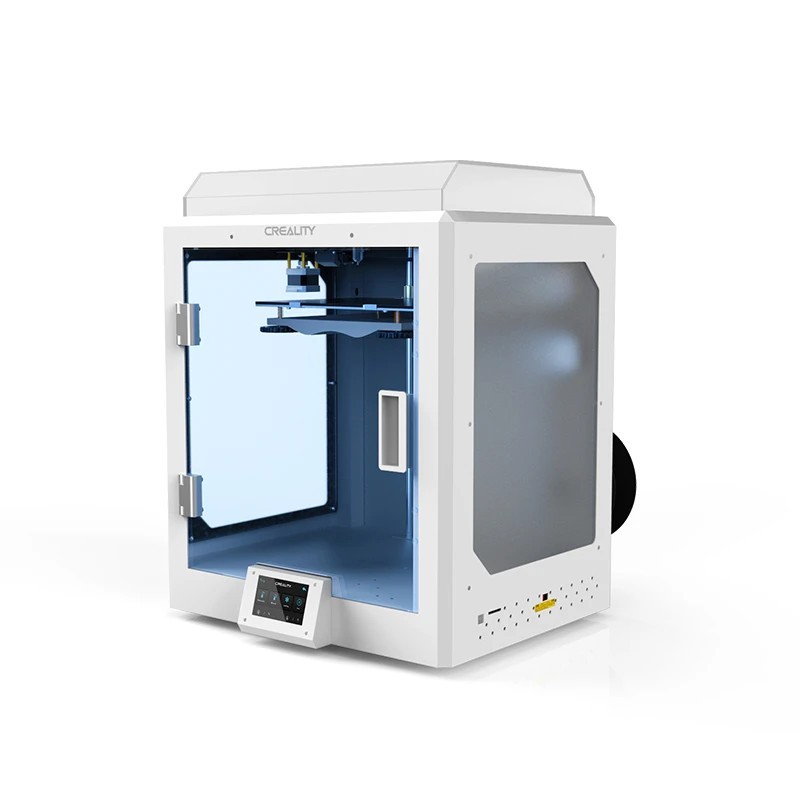
The Creality CR-5 Pro High-temp Version is a fully enclosed desktop FDM 3D printer from Creality’s industrial CR-5 series. It features a steel-frame body, a spacious 300 x 225 x 380 mm build volume, and a high-temperature extruder capable of reaching 300°C — making it suitable for engineering-grade filaments like nylon, polycarbonate, and carbon fiber composites.
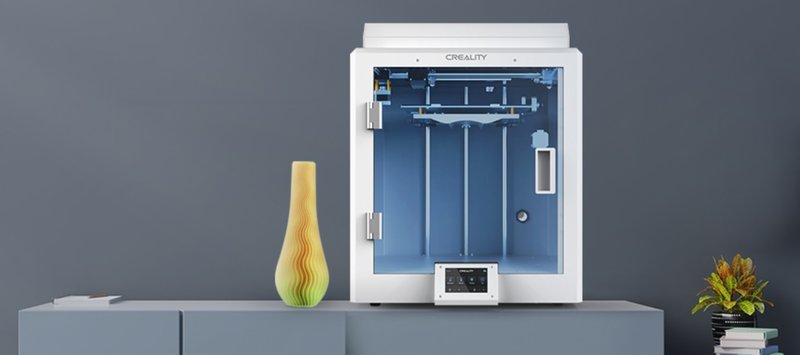
The printer arrives fully assembled. Its modular, fully enclosed frame provides a safe and controlled printing environment, with a brass nozzle, upgraded cooling system, reliable power supply, and sturdy Z-axis. A silent motherboard chipset keeps noise levels low during operation.
CLEARANCE!
Condition: Mint, New Condition.
The story: This 3D printer has been sitting in our warehouse since 2025, mislabeled as a CNC machine. While taking inventory, we realized it’s actually a Creality CR-5 Pro HT. This is a great deal if you’re looking for an enclosed large-format 3D printer (300mm x 225mm x 380mm) for under $500.
See photos here: https://drive.google.com/drive/folders/1o7iqYFxZpfC9jZ8td5K3Do0gpLLVAHNw?usp=sharing
3D printers marked as “Clearance” in the product title are final sales and are not covered by the 14-day return policy.
Watch our in-depth video review of the Creality CR-5 Pro H:
The print area of the CR-5 Pro is fairly large for its tier: it is 300 x 225 x 380 mm.

Also, unlike its predecessors the Pro version has a fully enclosed chamber for temperature stability when printing materials with a high shrinkage rate.
The CR-5 Pro H version is equipped with a high-temperature extruder capable of reaching 300 °C and processing more rigid materials to embark on industrial-level projects.

2 mm thick steel used for the white-painted body provides enough weight and stability to cancel vibrations, wobbling and stepper motor resonance that can lead to distorted and failed prints. Creality went with a lot of steel on this machine. Even the outstanding touchscreen housing is made of steel.

The number of screw joints is minimized with a few visible on the rear side providing for a stylish and eye-catching appearance.

Aside from the rigid body, Creality accounted for reliable mechanics with machined carriages and brackets, going with the Makerbot-based kinematics enabling cylindrical guides and linear bearings. With proper maintenance, the machine's lifespan time can be extended while replacement parts are easy to source.
The X-axis runs on 8 mm guide rods, while 10 mm guides are used for the Y-axis. 6 mm GT2 belts can be replaced with generic non-looped belts.

Since the X-axis is burdened with a motor, Creality chose the lightweight 34 mm Nema 17 and Bowden extruder, to bring down carriage inertia and the related defects carried over to the printed part.

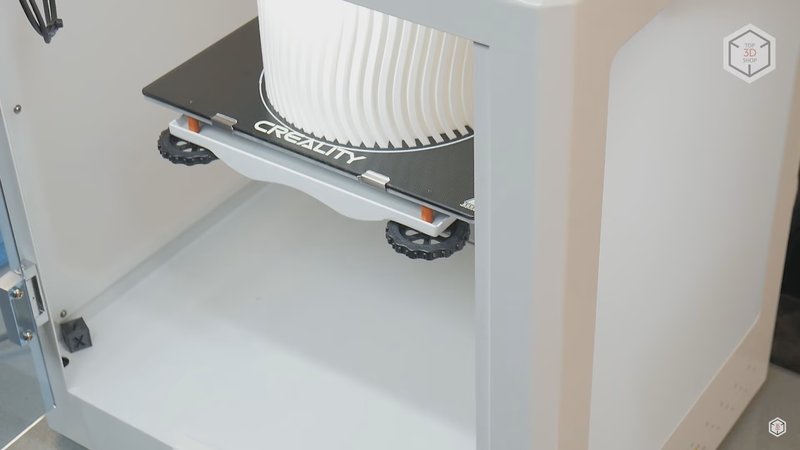
The bed steel platform travels on 12 mm cylindrical guides driven by a 10 mm motor powered screw rod with 4 mm thread lead. In our opinion, this is the sweet spot for Z-axis speed and accuracy performance.

However, Creality might want to revise the bed cantilever design and add more support to the platform.

The hotbed is a 3 mm aluminum plate powered by a 24V heater covered with a removable Ultrabase coated glass plate. The backside of the glass can be used for special adhesive and engineering-grade materials.

The bed plate is spring-loaded, fixed and adjusted with conveniently large thumb screws.

The filament is fed by a Bowden extruder with the so-called dual drive feeder which uses two gears to push the filament into the hotend. This feature provides more efficient extrusion and is powered by a high-torque motor.

Issues with Bowden extruders are usually related with low-quality spare parts, for example, loose fittings can result in play on a brand new device, but this CR-5 Pro H is set up well.
A filament run-out sensor is installed next to the extruder, detecting if the material feed has ceased. When triggered, the printer will pause for spool replacement or material-related troubleshooting.

It should be noted that the parts are of machined aluminum, making them more wear-resistant. Even generic filament can eat-out the channels of plastic parts. This same occurs with PTFE tubing, which is easy to find and replace, but sourcing plastic parts for replacement may become an issue.

The hotend is Creality's in-house development — an all-metal thermal barrier with a custom shaped radiator cooled by a powerful fan. The print space cooling is powered by a 4010 radial fan.

Creality employs proprietary electronic components, the control board is based on the ATmega2560 8-bit controller, silent TMC2208 drivers, 4" Dwin touchscreen, and a 350W power supply. The cable management is excellent.

The 4" resistive touchscreen is surprisingly responsive and easy to navigate. The menu is simple and intuitive, giving access to all the necessary settings in a large variety of languages.

But there are no fine settings for some parameters and those can be changed after connecting the 3D printer to the computer.

The Creality CR-5 Pro High-temp Version can be controlled via PC, remote cloud-based application, or the built-in touchscreen. It features USB and SD card connectivity, making for an effortless standalone operation.
Inside, all the wiring is fixed in dedicated cable channels. The internal lighting is quite bright and activated through the menu, but with no level adjustment.

Although the machine uses mechanical limit switches for axis motion limiting, the original BLTouch calibration sensor is responsible for enhanced precision and faster bed leveling.

The Creality CR-5 Pro High-temp version is available in a stylish white. Its neatly-looking appearance makes it ideal for a number of professional and personal applications. The spool is mounted on the rear side of the machine. The printer dimensions are 530 x 487 x 612 mm (21 x 19 x 24 inches) and it weighs 32.5 kg (72 lbs).
Usually 3D printers in the most affordable segment are offered as DIY kits, requiring the user to take care of assembly. However, in the case of the CR-5 Pro, following a few simple steps in the instructions would be enough to start printing.
First, take out the packaging material from underneath the bed platform.

Next step is to install the side acrylic panels.

Remove all transportation fixers.

The X and Y axes are fixed with a cable tie for shipping purposes.

Lubricate the guiding rods and the Z-axis screw rod if needed. In our case, this was not necessary, but it is best to run some maintenance occasionally.

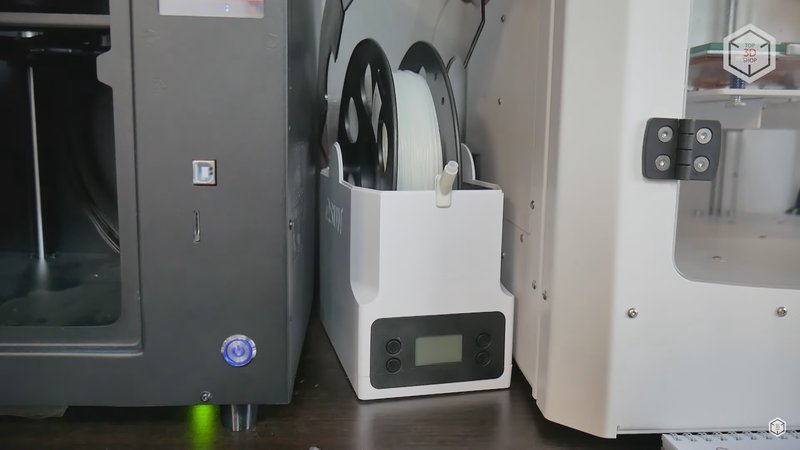
Attach the spool holder, which is designed for spools with a width of more than 90 mm. However, there are limitations to spool diameter, due to the power supply switch located in proximity.

Do not forget to check the voltage before turning on for correct current settings.

Next comes the bed leveling and calibration procedure. This should be done with bed and hotend heating on to medium operating temperatures.
First, the bed surface is leveled relative to the axes planes in various points using a sheet of paper.

The process is controlled through the corresponding menu item by pressing the dedicated calibration points. It is advisable to repeat calibration 2 to 3 times.

At this stage, we can create a curvature grid of the bed. This function will allow you to avoid issues with planting the first layer.

The final step is to feed the filament.

The feeder device allows for manual filament input while there is also the option to do it through the menu, but it turned out to be too time consuming.
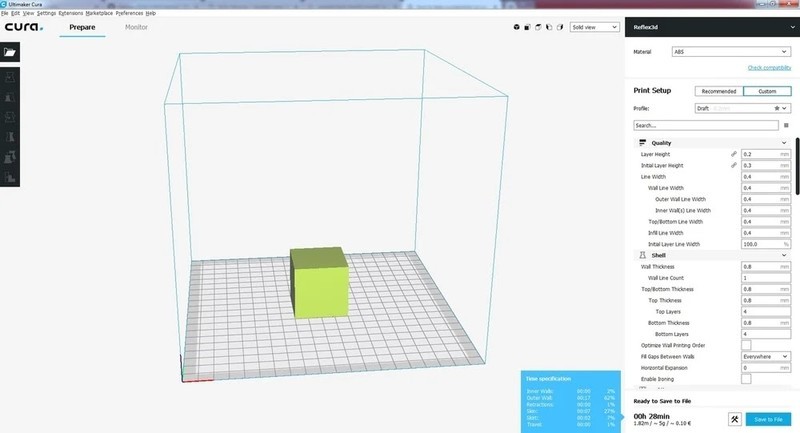
Creality supplies proprietary software Creality Slicer based on the Cura slicing freeware. At the time of this review, the latest version was 4.8.2 available for download at Creality's official website.

At first the software displays a minimum of default settings useful for novice users. This mode is used for fast selecting the material and the print profile. The manufacturer recommends selecting the Creality CT-380 profile for this printer.

Optionally, you can enable all of the settings present in the original Cura software and get full control of the printer's operational settings to be tailored to your project.

The CR-5 can run G-code files rendered in third-party slicer software. The printer can be used with a number of different software solutions like Cura, Simplify3d, Creality, and Repetier-Host slicers. It works with .STL, .OBJ, and .AMF file formats.
The Creality CR-5 Pro High-temp Version is an FFF/FDM 3D printer that can print layers at 100 microns. The print head runs on rods with linear bearings, which makes printing consistent, fast, and precise.
First, we tested how the first layer would adhere with a simple base model stretched a bit along the X-axis.

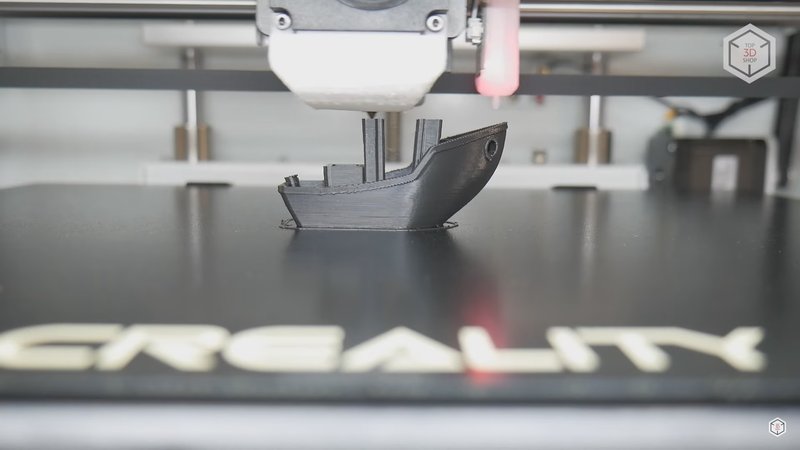
Then the PLA filament was used for printing several calibration test models. They turned out to be quite successful with minimal dimension deviation, straight layer lines, pronounced overhangs, and bridges printed in excellent quality.


Then we decided to flex the machine's mechanics by printing the lamp model. It was printed with basic ABS with no delaminations and excellent bed adhesion, meaning the closed chamber did its job.

Naturally, we installed the top cover and closed the printer's door for better insulation. Getting quality shots is difficult when the CR-5 Pro runs closed, since the cover is matte and the bed platform rises to the top when commencing the print.

Then we switched to a more difficult design and to the rigid natural color PC-ABS material, a mixture of polycarbonate with ABS. Shock and heat resistant, it requires a nozzle temperature of 260 °C and a bed temperature of 110 °C.

Surprisingly, the CR-5 Pro did a great job. We printed out an optical device component that will be exposed to high temperatures. The geometry is not simple and requires support structures. The printed supports came off with little effort, while the quality of the part is excellent.

We also printed out another part to be used in a high-temperature environment.

The next part was printed using pure nylon, which is widely the choice for a lot of industrial and mechanical applications for its abrasion resistance, and being the ideal solution for printing gears. It is also weather and chemical resistant. The CR-5 Pro did a successful print once again due to the closed chamber, and the part was printed without any issues.

Engineering materials are more often available in natural color. Dyes and coloring agents tend to change the properties of the material, usually in a negative way. This can hamper layer adhesion and the overall strength and rigidity of the final print. And there is a set of factors that need to be accounted for to get fast and accurate prints with engineering materials.

The material's water absorption properties play a huge role, and nylon is one of the most hygroscopic polymers. Nylon-based filaments require thorough drying or dehydration procedures before printing. High moisture content affects nylon interlayer adhesion, increases shrinkage during transition from a soft molten state to a solid one. Moist filament tends to experience layer delamination and poor bed adhesion mid-print.
For example, here you can witness the result of an attempt to print with undried nylon filament.

Therefore, the filament spool always needs to be dried before printing. There are both market-available solutions, in the form of cases equipped with heaters and fans, as well as the option to use household electrical appliances, like ovens and fruit dryers. But not all of them can be effective for drying this material, which requires a temperature of 90 °C.
You can also refrain from dedicated drying equipment and dry the spool right in the printer's chamber on the heated bed. Just place the spool on the print bed using a steel object as a base and set the bed temperature, close the cap and the door, and leave the material to dry overnight.

Many types of engineering materials, especially nylon, have relatively high shrinkage rates. The final part's dimensions can alter after the part has cooled off. Reducing the print speed and layer height helps to minimize shrinkage. For example, PA6 nylon demonstrates good results at 30 mm per second for small models. The extruded layer needs time to cool to a solid state before the next one is laid on top of it. Larger prints can be speeded up to 60 mm per second, or even higher. However, higher print and travel speeds may require increased nozzle temperature and reducing the layer height to 0.1 mm.

Also, it is necessary to make adjustments for shrinkage in the slicer in order for the part to turn out to be the right size. There is a simple and quick way to find out the shrinkage percentage. Just print a small cylinder without infill, compare its dimensions with the benchmark dimensions of the model and calculate the difference as a percentage. Further, when preparing the model for printing in the slicing software, change the scale settings of the model along the X and Y axes accordingly.

It is desirable to refrain from print cooling. While some materials require it, especially for complex overhangs and bridges, nylon does not need active part cooling which can be detrimental. So it is better to resort to lowering the print speed for complex geometry sections of the model.

Higher temperature materials may require special adhesives for better layer bondage. The stock ultrabase coating is not intended for applying any chemical adhesives, so we turned to the uncoated glass side of the bed cover. Adhesives come in different forms, in our case it was a transparent jelly substance that was applied to the surface with a plastic card.
Since the machine chamber is passive, that is, without dedicated heaters and only capable of keeping the heat from escaping and preventing airflow, it is advisable to turn on the bed and hotend heating beforehand to create a favorable temperature environment for the print.

Also, we recommend slightly reducing the nozzle clearance for the first layer. In the case with Creality 3D printers, this is easily done through the menu. Also, you can slightly reduce the Z-offset during the printing process for better first layer extrusion and bed adhesion control.

Using the raft option in the slicer software allows you to create a base on the bed surface to print the part on, bringing more accuracy and ease of removal.

Despite the ease of use, we registered some flaws in the internal software. For example, when the print stops, the nozzle just freezes in place, without parking the print head to home position. The blower fan would not turn off even after updating the firmware.

The electronics are powered by a bit outdated processor not quite capable of processing algorithms for improved print quality, such as flow compensation at sharp corners, which helps to avoid bulges at the edges.

The machine seemingly lacks some modern features such as remote file download via Wi-Fi and device management. Here, the files are transferred to the device on a memory card the old fashioned way. However, for an additional $60 you can add the Creality Wi-Fi Box 2.0, enabling remote cloud based file transfer to the printer.

The mechanics are reliable and quality-focused, but there are some assembly issues present. For example, the peculiar offset of the X-axis roller blocked access for belt tightening and led to carriage misalignment and the belt rubbing against the bearing rim.

Still, we managed to fix this by tightening the guide screws on the bottom bracket.
The machine is delivered in a massive wood-frame enhanced box.

The total weight of the device is at 70 lb.

Here is the full run-down of the box's content: documentation, power cable, matt acrylic top cover.

Other parts and components are shipped inside the print area space.

The list includes the 5 mm acrylic side panels, 1 kg white PLA filament spool, spare parts, tools consumables such as a scraper, tweezers, glue stick, hardware lubricant, cable ties, wire cutters, necessary for basic maintenance.

Spare teflon tube, fittings, nozzles, bed calibration sensor tip, computer connection cable, card reader, 8 GB memory card, and spool holder are also supplied with the printer.
For some items, package content may change. In case of any questions, please get in touch.
The CR-5 Pro H is a capable enclosed FDM printer suited for both hobbyist and light industrial use. It features a Carborundum glass-coated heat bed for good adhesion and easy print removal, along with quality-of-life features like resume printing, filament runout detection, auto power-off, and a 4.3-inch touchscreen.
The printer can handle a range of projects — functional prototypes, household items, accessories, tabletop models, props, and more. At the clearance price of $364, it offers solid value for an enclosed, large-format printer with high-temp capability.
Update your browser to view this website correctly. Update my browser now


