
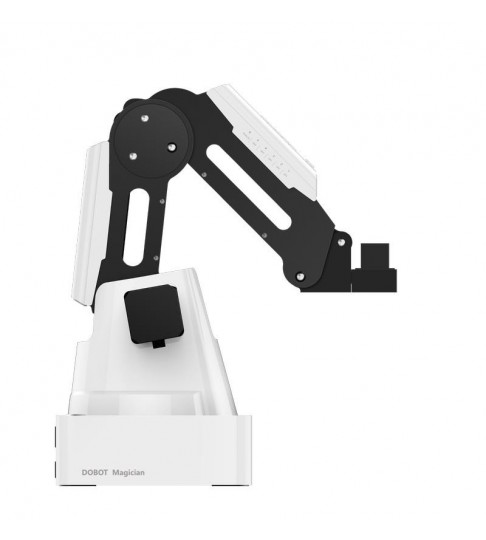
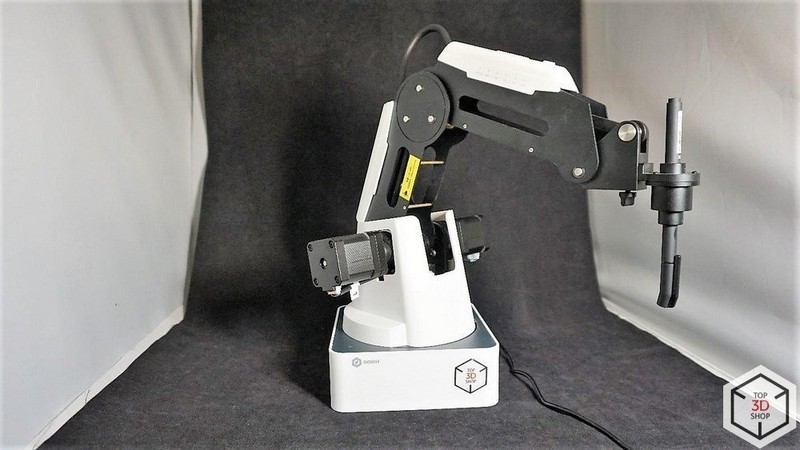
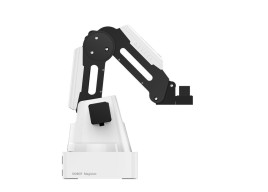
Hi everyone! This is Top 3D Shop, and in this article, we will tell you about a multifunctional desktop robotic arm called DOBOT Magician, which is primarily designed for education and can serve as an introduction to robotics, CNC and additive technologies, the basics of programming, and more.
A short video overview will show you what this robot is capable of. Read the article below to find out more.
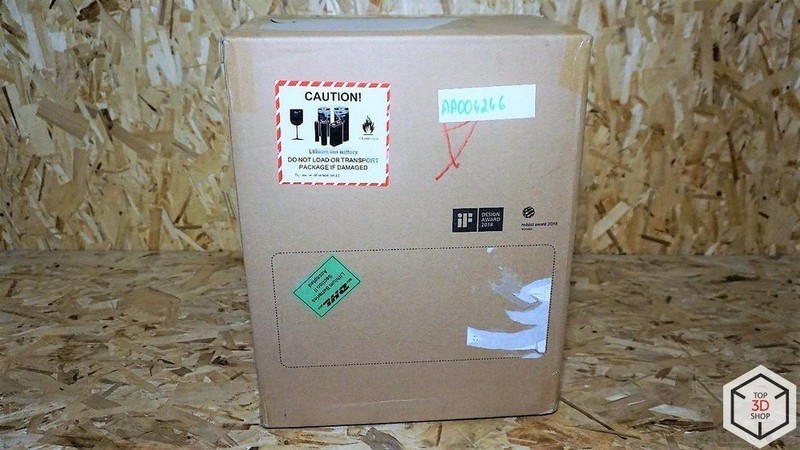
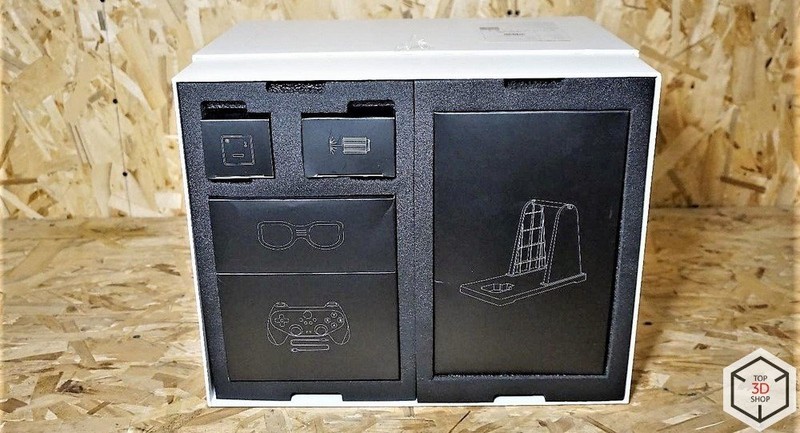
The robot comes in a cardboard box.
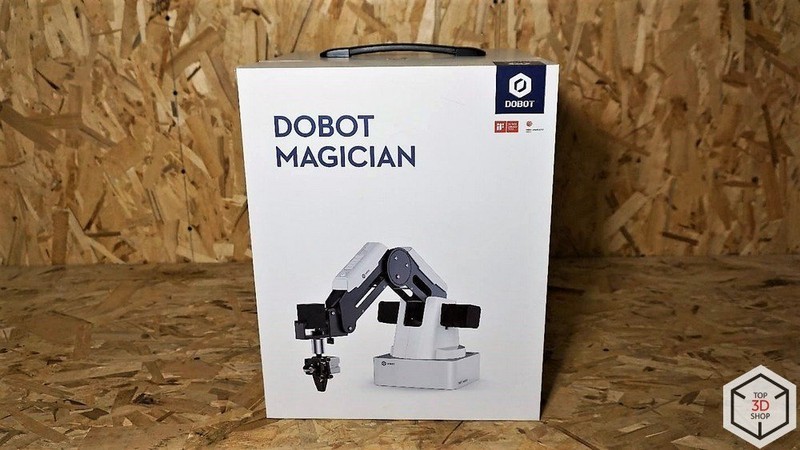
Inside, you will find another one.
It contains smaller boxes in the shipping foam.
The DOBOT Magician comes in three versions: Basic, Educational, and Lite. In our review, we have the Educational set. The Basic set doesn’t provide Bluetooth and Wi-Fi modules, joystick, laser, and safety glasses. The Lite version only weighs 2.4 kg, making it portable and quick to build for different application scenarios. Besides, it supports Bluetooth connection and is supplied with a complete curriculum system divided into three stages from beginner- to advanced learner-level.
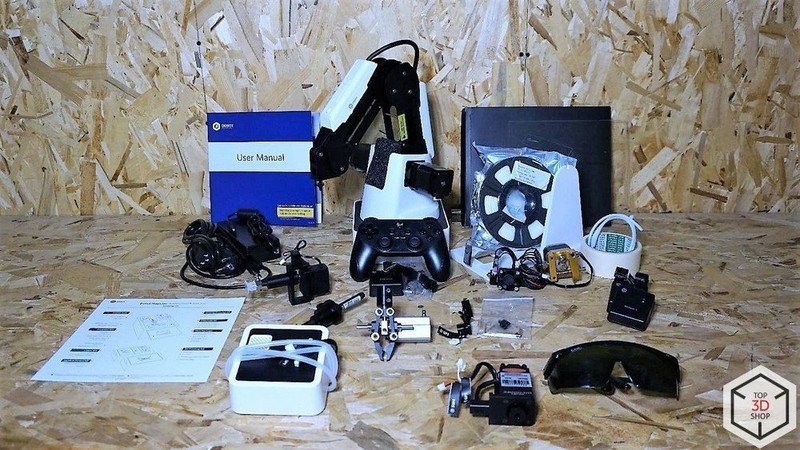
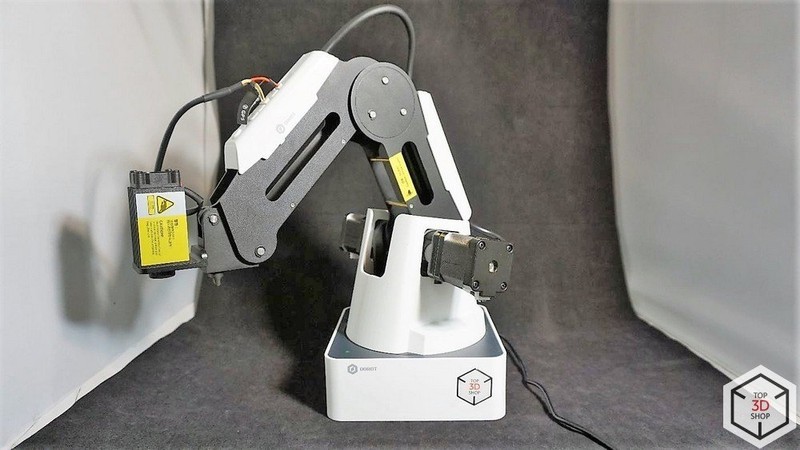
The Educational version of the DOBOT Magician includes a pneumatic gripper, vacuum suction cup, 3D printing kit, laser head, and pen holder. The manufacturer is constantly expanding the range of available attachments and accessories, which are available for pre-order.
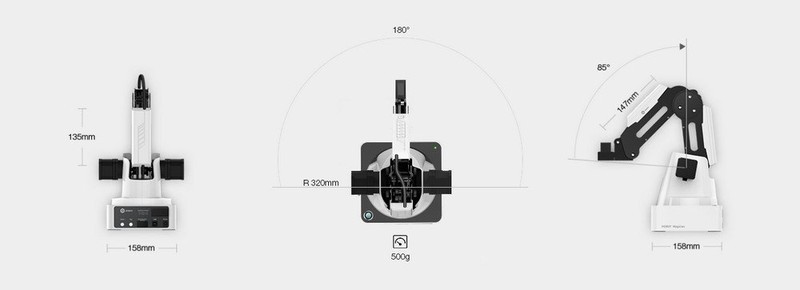
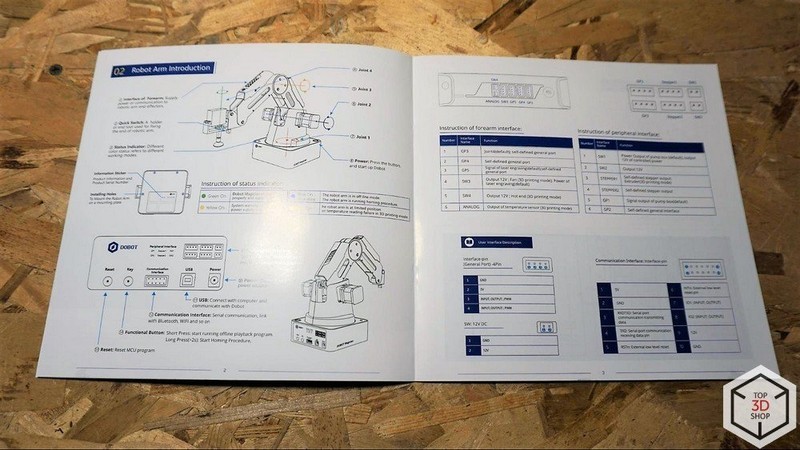
The robotic arm has peripheral connection slots on the second joint and on the back of the base. It is driven by three stepper motors, which are equipped with feedback sensors and gears.
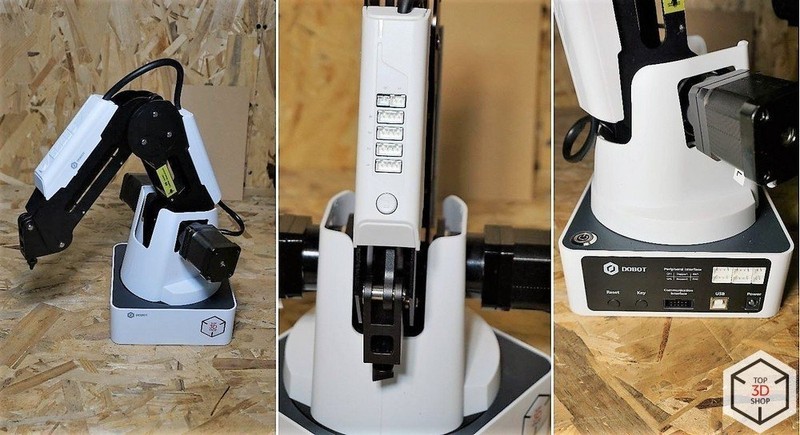
A servo motor acts as the fourth axis of the robot. A vacuum or pneumatic gripper can be attached to it.
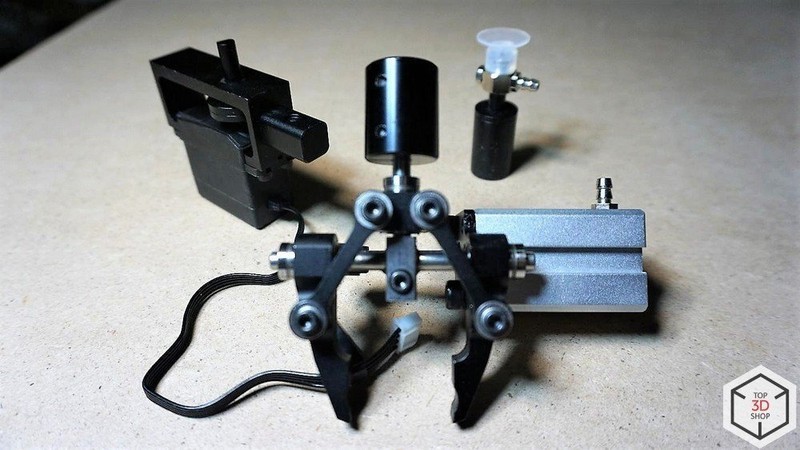
The grippers are driven by an air pump.
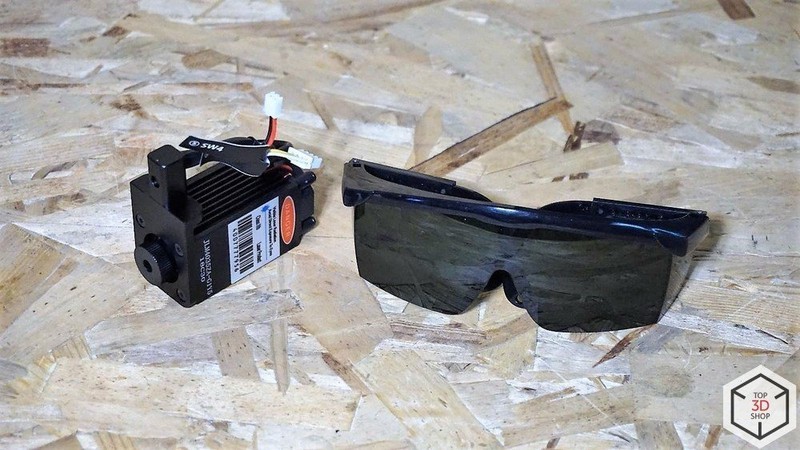
A laser head can be installed as a working tool. There are special glasses included to protect the user’s eyes.
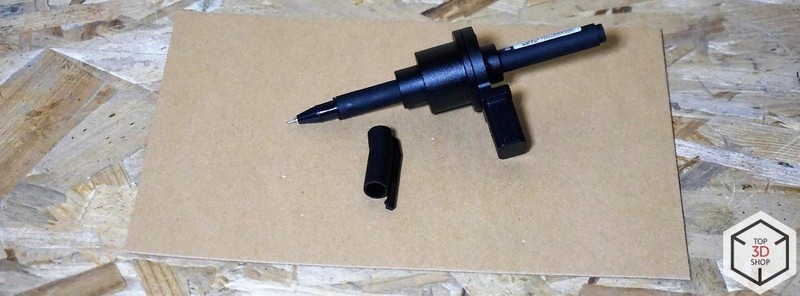
There is a pen holder for writing or drawing. It can use a fountain pen, liner or pencil with a diameter of up to 10 mm.
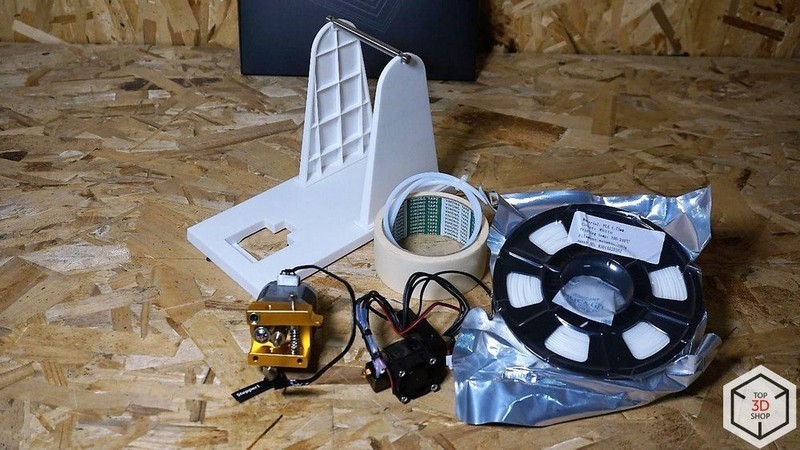
The 3D printing kit includes an extruder unit, filament spool holder, PLA spool, Teflon tubing, glass, and masking tape. The latter is used to fix the glass on the table.
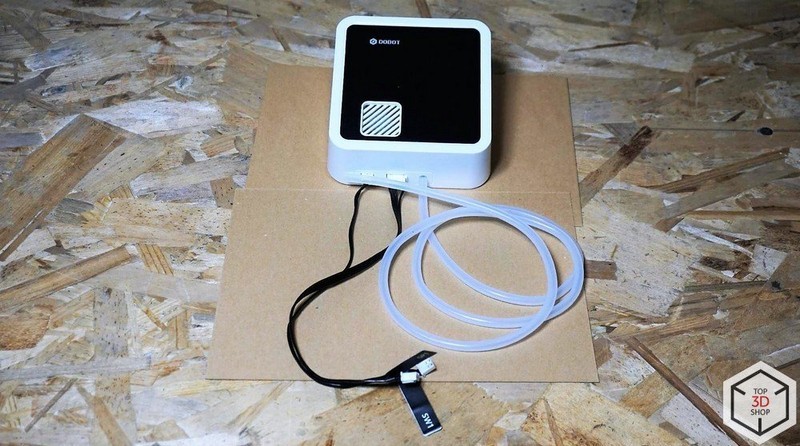
You can control the robot via a computer or remotely, with the joystick connected via Bluetooth. The USB cable is required to charge the battery of the device.
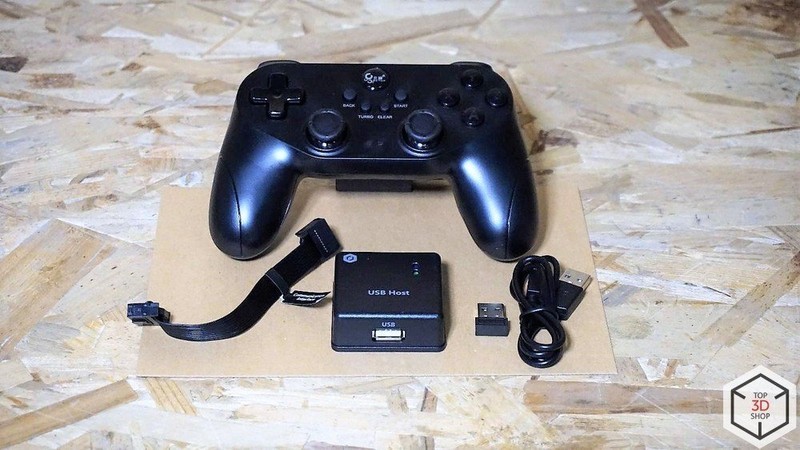
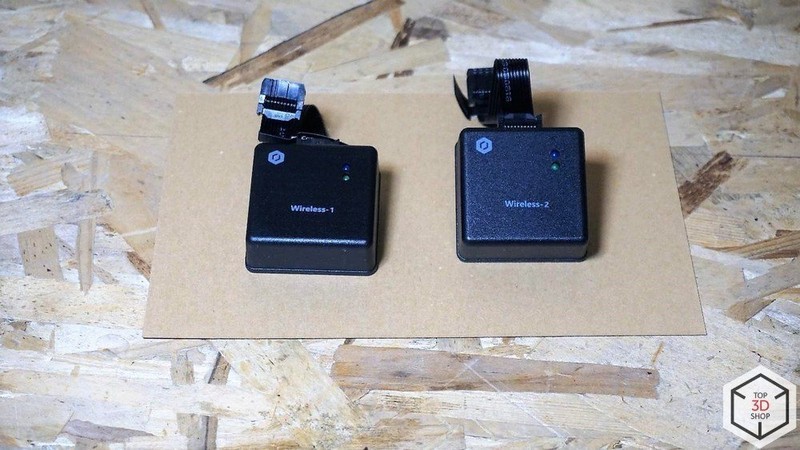
Here you can see the Bluetooth and Wi-Fi modules.
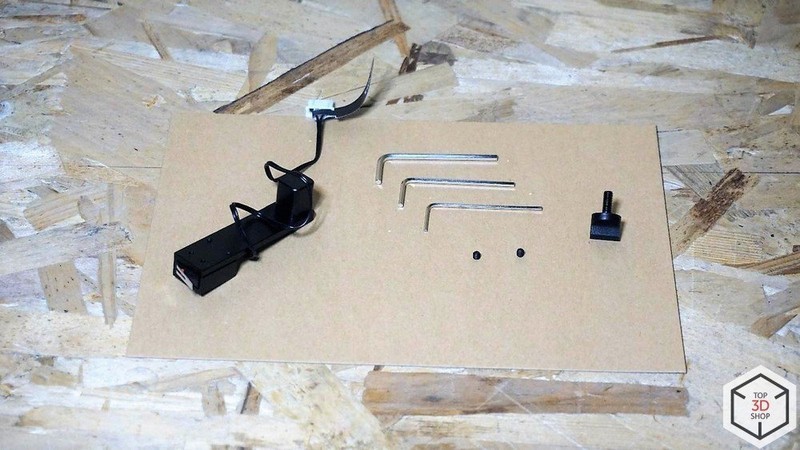
Below is an automatic calibration device, spare screws, and hexagons.
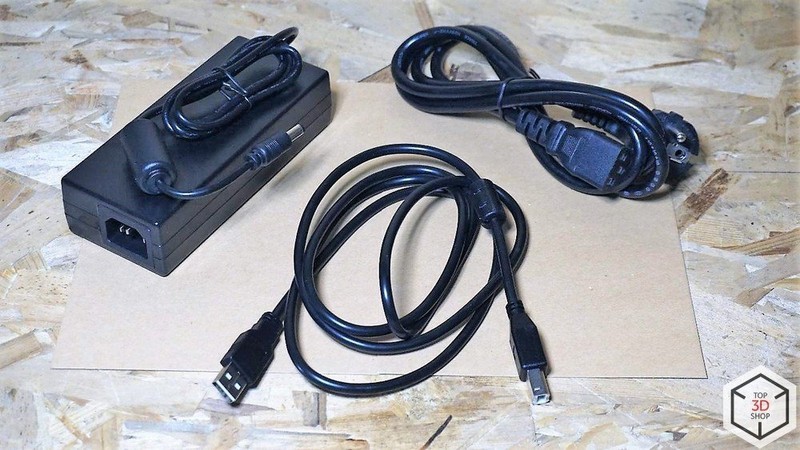
Next comes a power supply and USB cable for PC connection.
Finally, the DOBOT comes with a brief manual.
To control the robot, you need to install the driver and the DOBOT Studio program, which can be downloaded from the official website.
The Magician is compatible with many current hardware and software tools that are widely used in robotics. For example, the device supports the ROS (Robot Operating System) software platform and Arduino microcontrollers.
This is how the home screen of the DOBOT Studio looks like:
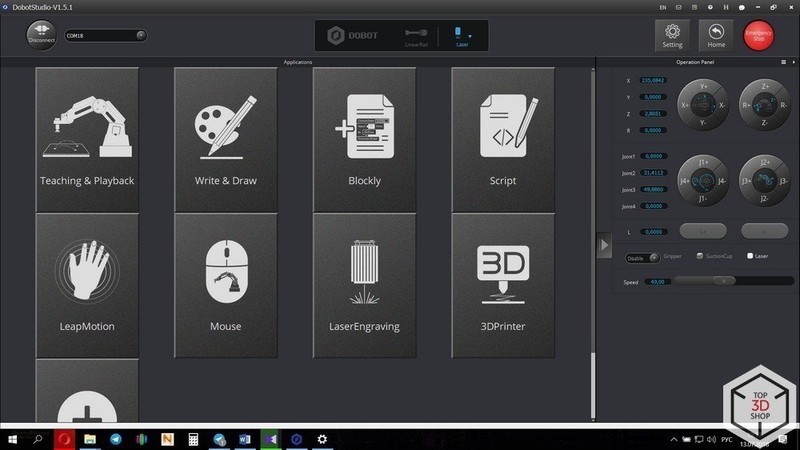
In the main window, you will find the available operating modes, the control panel of the robot (on the right), the settings menu (at the top right corner), the Emergency Stop button, the Home button, and the tool selection window in the middle.
The DOBOT Studio software allows you to control multiple robots simultaneously. In fact, you can create a simulation of an assembly line right on the table, which is really easy due to the robot’s technical parameters, including good repeatability.
The DOBOT Magician is quite versatile to operate. You can program and control the robot in real time using your computer, smartphone, or tablet. Either Wi-Fi, Bluetooth, or wired USB connection can be used as a communication channel. The robot can recognize voice commands and gestures: you can teach it by moving the robotic arm in space and fixing it in the end points. After the procedure is completed, the robot can repeat all the movements.
The main mode is “Teaching and Playback”.
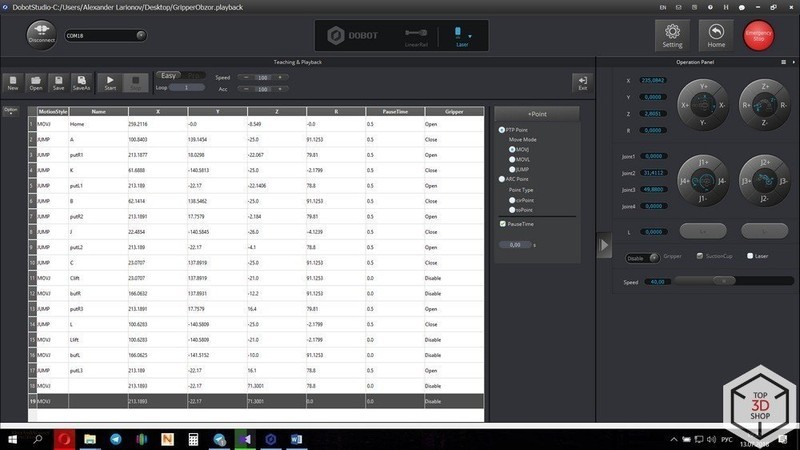
In this mode, you can create control programs. The robot will execute them once or cyclically. You can teach the arm in two ways:
When all the coordinates are fixed and the way of movement is assigned, press the Play button to start the execution of the control program.
The control program can be loaded into the DOBOT’s memory so the machine can execute it offline.
There is a Step Run button for debugging that allows running the program step by step to make sure the movement is correct
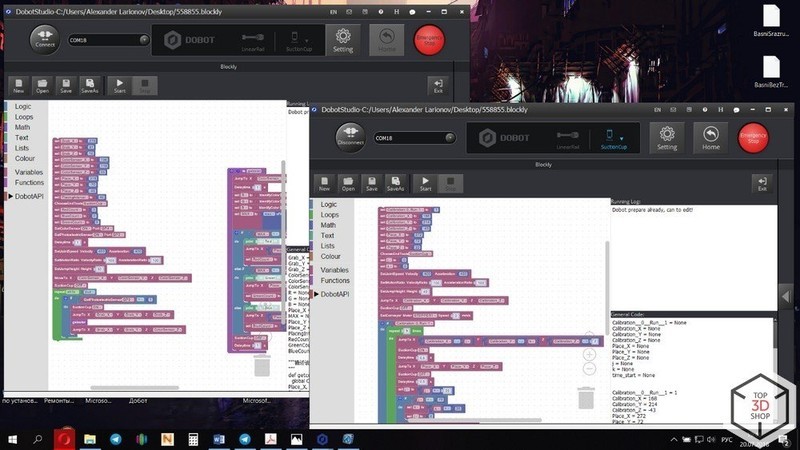
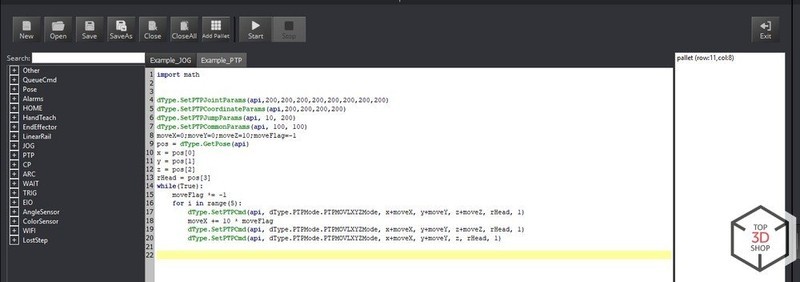
The next two modes, “Blockly” and “Script”, are designed for a deeper exploration of programming and robotics. They allow users to create much more complex algorithms of behavior, including certain conditions to perform various scenarios.
The Blockly mode is great for beginners new to programming languages. Instead of memorizing complex syntactic forms, it uses blocks denoting conditions, cycles, functions, and mathematical transformations. The body of the program consists of different block combinations.
The Scripts mode is for advanced users. Here they can realize the full potential of the robot using the Python programming language.
To estimate the maximum possible range of movement of the device, you can use the Mouse control function.

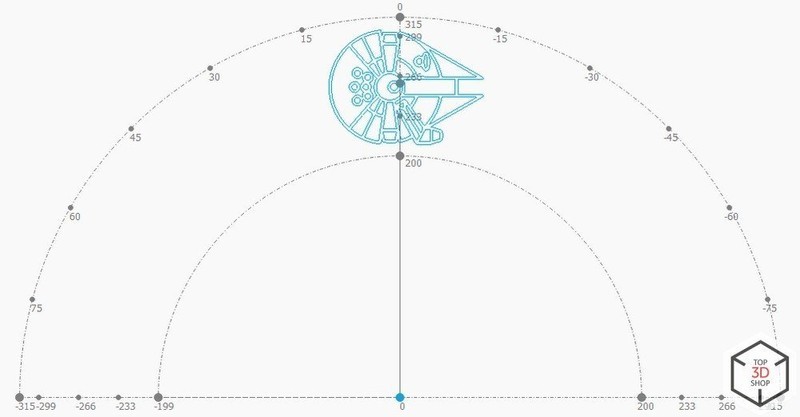
The next mode is “Write and Draw”. It requires an instrument, such as a pen, to be installed in a special spring-loaded holder.
You can create a caption, insert a picture from the built-in library, or add your own.
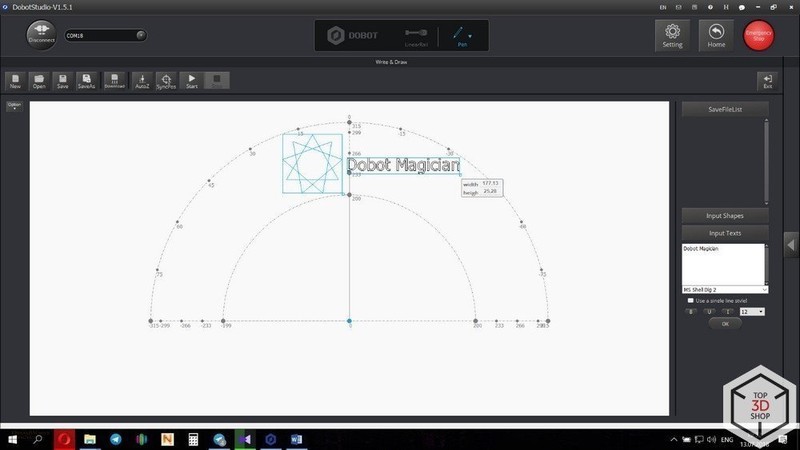
Contours are reproduced with high accuracy.
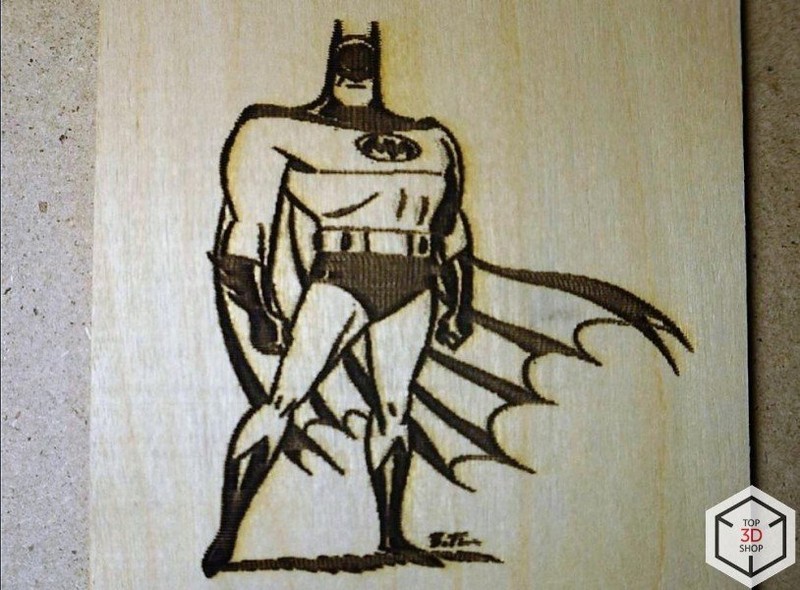
The laser can be used to engrave images.
You can adjust the grayscale range, minimum and maximum power, speed and acceleration in the settings menu.
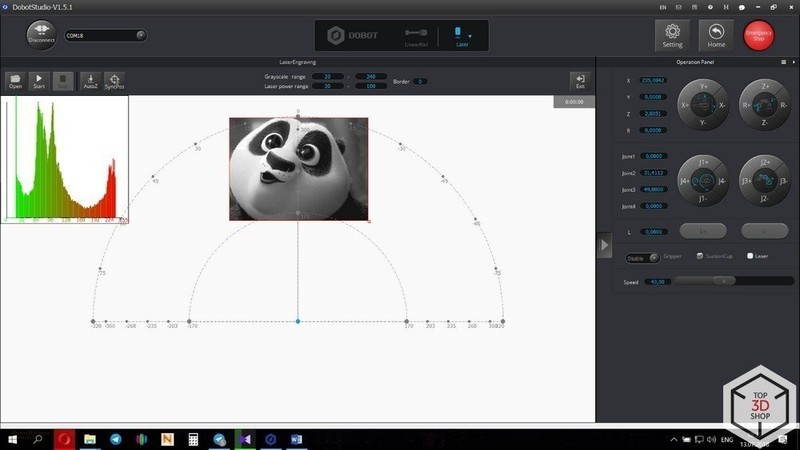
Such materials as wood, leather, paper, cardboard, and acryl can be used in this mode.
Now let’s get to 3D printing. To prepare a file for printing, you will need to download new firmware. When you click the “3D printer” button in the main menu, the program will prompt you to change the firmware, so you just need to wait until the download and installation is complete.
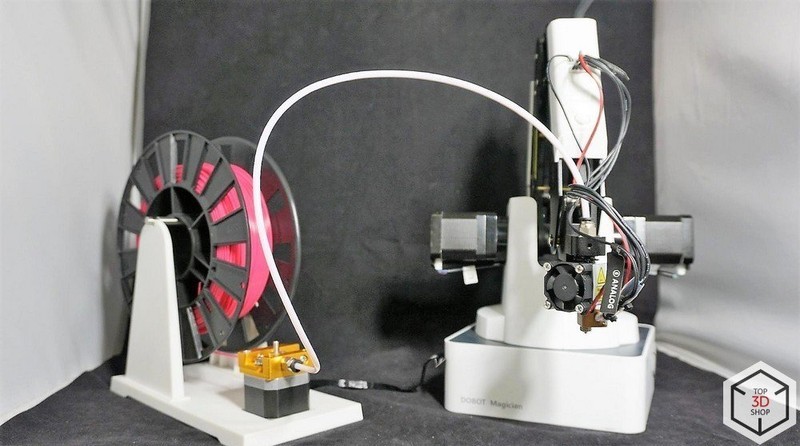
After that, the Repitier Host program window opens. Enter the printer parameters, load the print profiles, and you are ready for slicing.
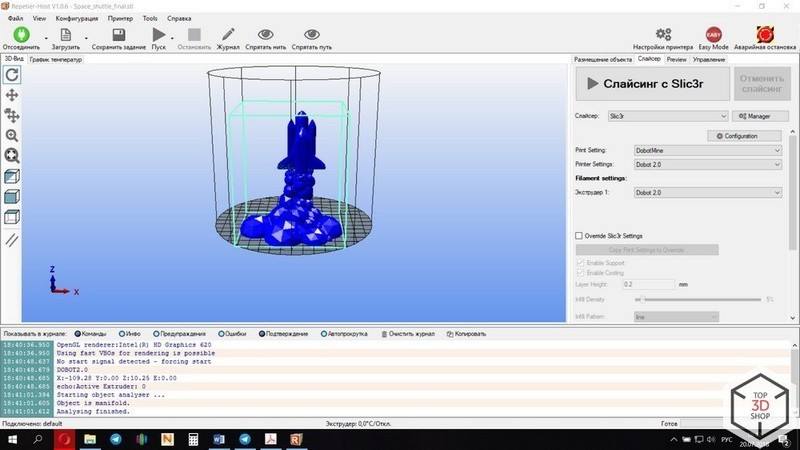
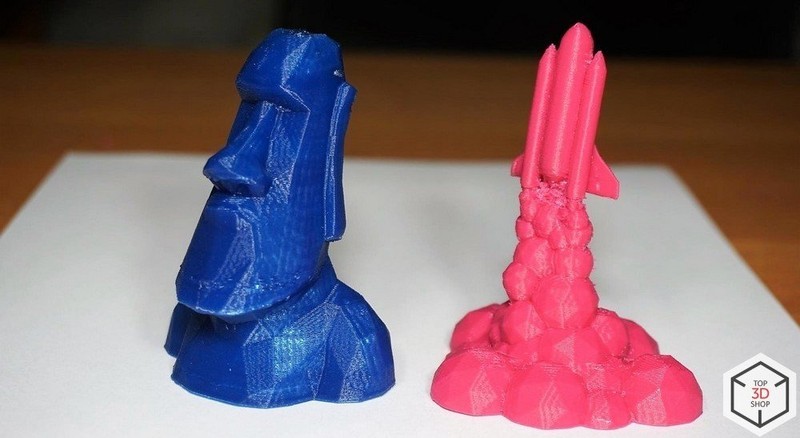
The models shown below were printed at only 4 mm/s, so the whole process took about 14 hours. This is the standard speed taken from the native profile. To make the extruder lighter, the filament feed motor is mounted separately on the spool holder platform. That is why you have to reduce or remove retracts altogether in the slicer settings.
By controlling the robot with a joystick, you can improve your skills in manipulating the device and just have fun.
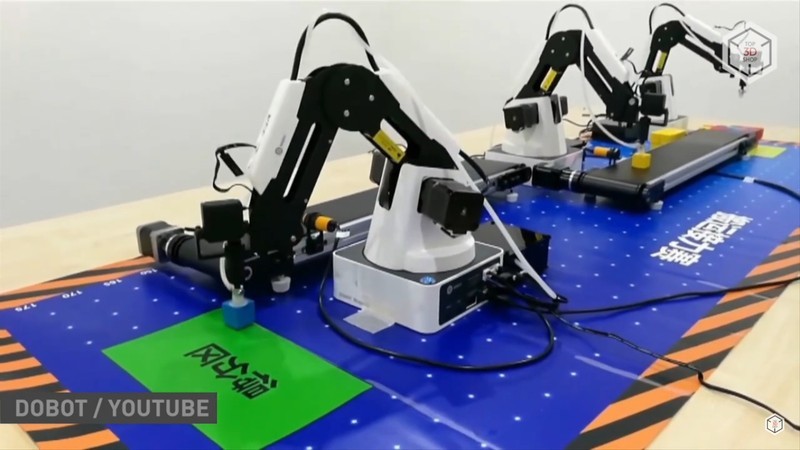
If a better understanding of robots and their applications is required, you can build a small production line with a second DOBOT, conveyor belt, infrared and color sensor. To synchronize and start them, you need to connect both robots to the same computer and open two windows of the DOBOT Studio. The control programs for each device can be downloaded from the manufacturer’s website. Before the first start-up, the system must be calibrated using the program.
According to the set algorithm and intervals, the right robot puts the cubes on the conveyor belt, and the left manipulator registers the presence of the cube on the belt (with an infrared sensor), determines its color (with a color sensor), and puts the cube in the appropriate pile.
The video below shows how the DOBOT Magician is used by Volkswagen.
The device is great for teaching children. The educational process with the robot can start as a simple game thanks to the joystick. The next step is the basics of programming, first in the Blockly and then in the Scripts mode.
The visual and interactive training is much more effective than working with mere code, especially in the beginning.
Considering the interests of more advanced potential users, the developers have provided the possibility of connecting a variety of peripherals, which can be bought separately. These include all sorts of sensors, servo and stepper motors, LEDs, and a number of other electronic devices, such as microcomputers and microcontroller platforms like Arduino. With this in mind, we recommend the DOBOT Magician not only to schools, but also to technical colleges and universities as a highly efficient visual aid.
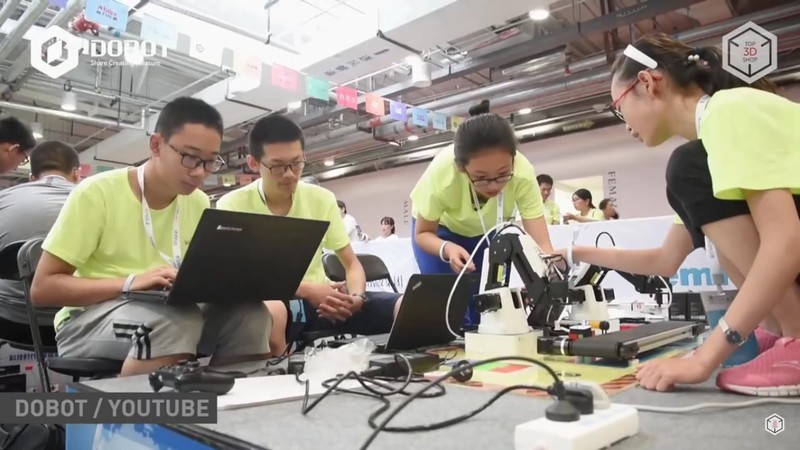
Today, the robot is used as one of the main STEM learning tools in a number of leading educational institutions: for example, Tsinghua University and Shandong University of Technology in China, as well as the Australian University of Technology in Sydney. An international community of enthusiasts study the possibilities of the robotic arm, share their experience, and work on common projects.
Although the DOBOT Magician obviously cannot be compared to a regular 3D printer or laser engraver, it perfectly copes with the tasks it is designed for. The robotic arm has an open hardware and software platform. It is engineered with 13 I/O ports and can work with 20+ programming languages. Various end-effectors allow the DOBOT Magician to move objects, perform laser engraving, 3D printing, drawing and painting, making it an outstanding tool for education.

Update your browser to view this website correctly. Update my browser now

Write a comment