In today’s article, we will discuss the Thor3D Calibry 3D scanner and see how it actually performs through our test scanning sessions.
Thor3D has been manufacturing scanning equipment since 2015, and, at the moment, it has two main models in its lineup: Calibry and Calibry Mini. The main difference between them is the size of the scanned objects, accuracy, and some minor design features.

If you are interested in learning more about what technology Calibry scanners use, how to connect them, all their settings and parameters as well as most of Calibry Nest’s features, we strongly recommend our in-depth review of the Calibry Mini. Here, we will take a closer look at the original Calibry device, talk about the issues we encountered when scanning objects of different types and sizes, and share some advice that may come in handy for the scanner users.
Thor3D Calibry is based on structured light technology and does not conceptually differ from the Calibry Mini. Two cameras and an LED projector are located on the front panel. One of them is used for registering the distortions of the projected grid, while the second camera is responsible for scanning the textures.
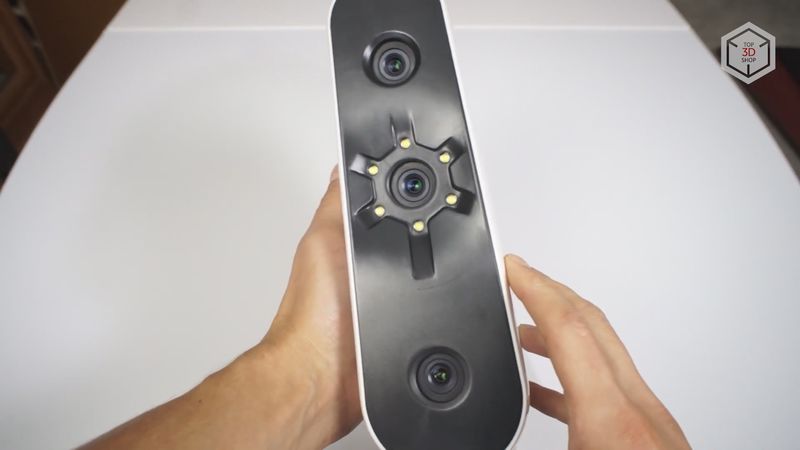
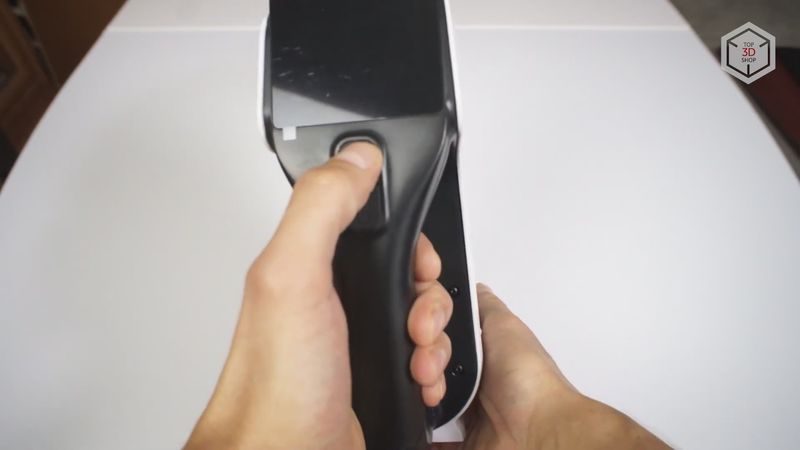
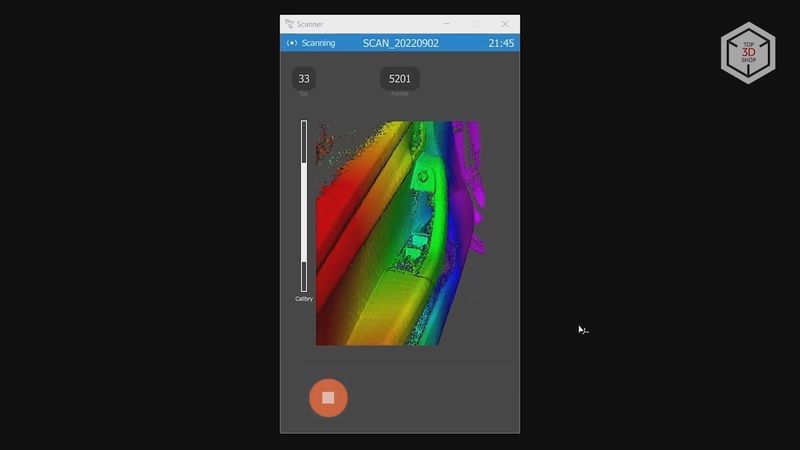
On the rear side, the scanner has a handle with two buttons and a large touchscreen used for configuring the device and managing the scanning process.
The declared technical characteristics of the Calibry are quite different from the Calibry Mini, though, including the fact that the Calibry uses white light in the illumination sequence instead of blue light employed by the Mini. You can find the exact specifications in the section below.
The software for processing the scans and creating 3D models is the same for both devices. It is called the Calibry Nest and the license comes with the scanner. The program has just about every feature you might need when scanning. Naturally, it allows you to configure scanning parameters, control the process, combine scans of different parts of an object into one whole scan, and create 3D models from a point cloud.
There is also a set of functions for editing the rendered models, for example, filling holes, smoothing surfaces, simplifying the geometry and even taking measurements, and more. There are also several functions for working with textures, such as changing brightness, contrast, and color management.
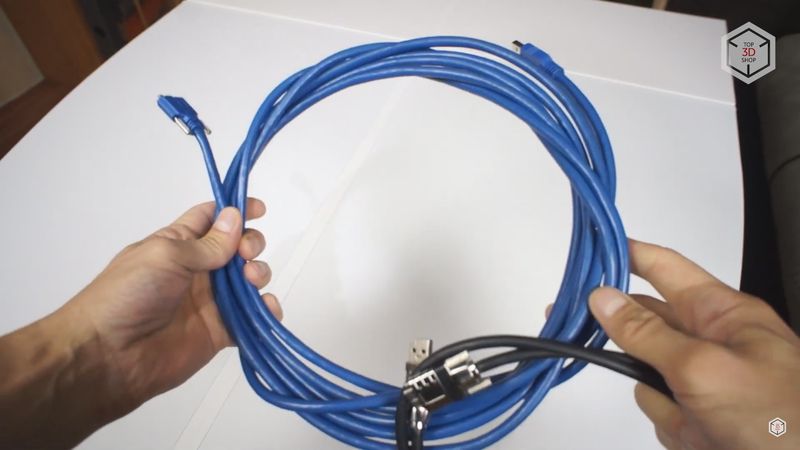
Thor3D Calibry’s package is about the same as the Mini’s. First, the kit contains two USB cables for connection, one of which is 5 m long, so that you can move freely with the scanner when working with large objects.
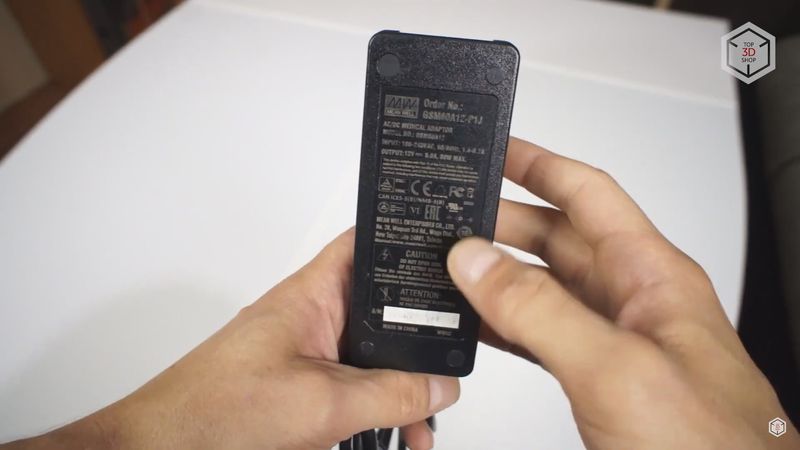
Next comes a Mean Well 12V 5A power supply.
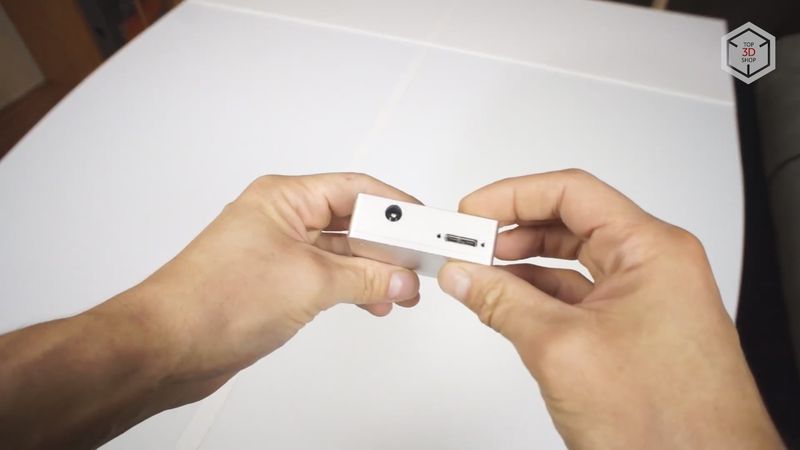
Then, a small unit called the Power Injector, which is used to power the device and transfer data from the scanner to the computer.
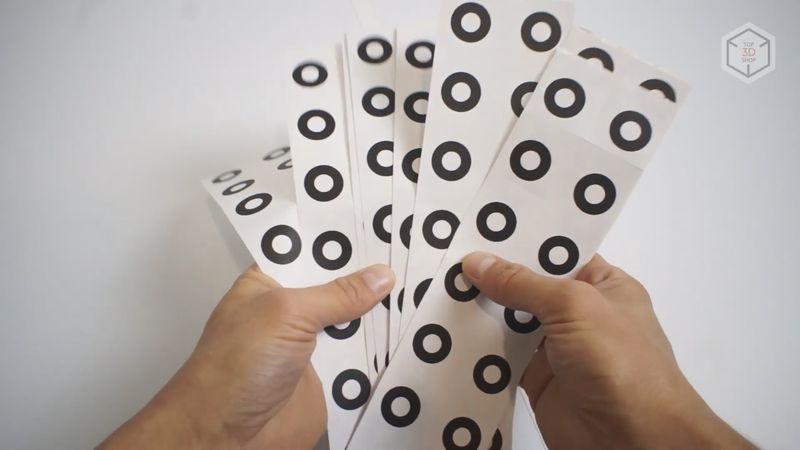
A set of adhesive markers as well as reusable magnetic ones are also in the box. Obviously, they can be used when scanning metal objects, or simply glued on to the flat surfaces.
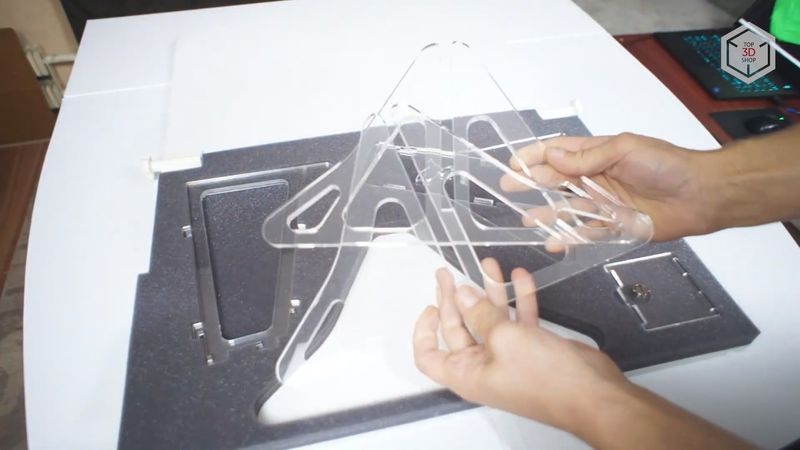
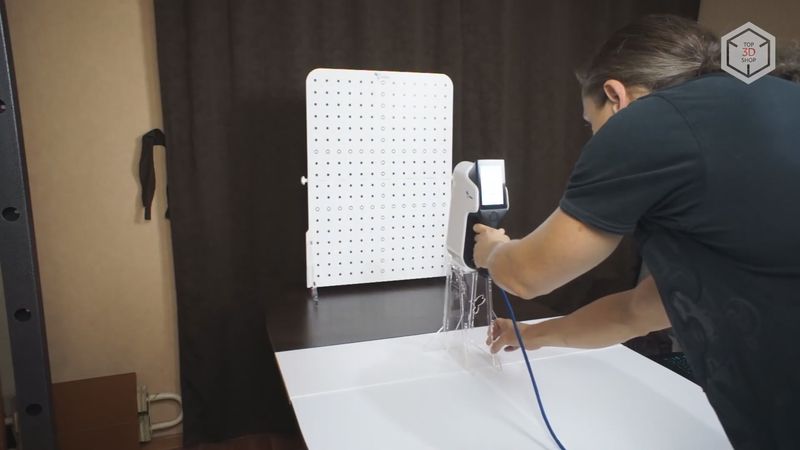
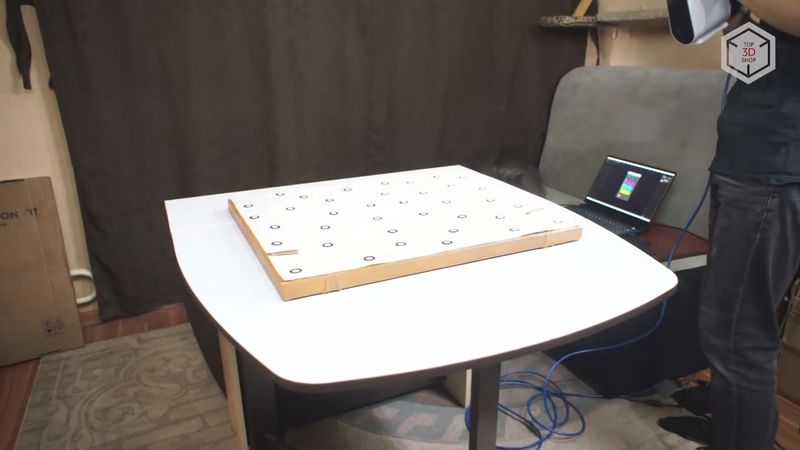
A separate box contains a calibration kit, which includes a large folding calibration panel, acrylic feet, as well as a modular stand for the board and the scanner itself.
The Calibry connection procedure is exactly the same as for the Mini, so we will skip this part. But the calibration, although not fundamentally different, has its own distinctive features due to the difference in the scanning area.
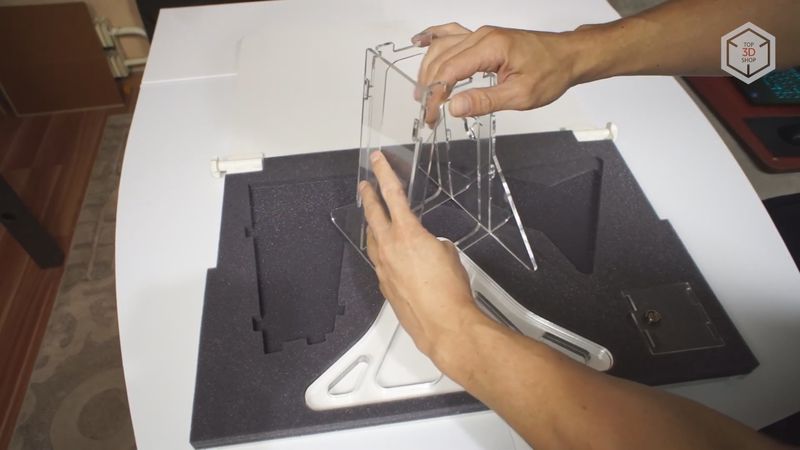
The first step is to assemble the stand for the scanner and position the device at the correct height and angle for calibration. The stand comes in four parts and is easy to assemble.
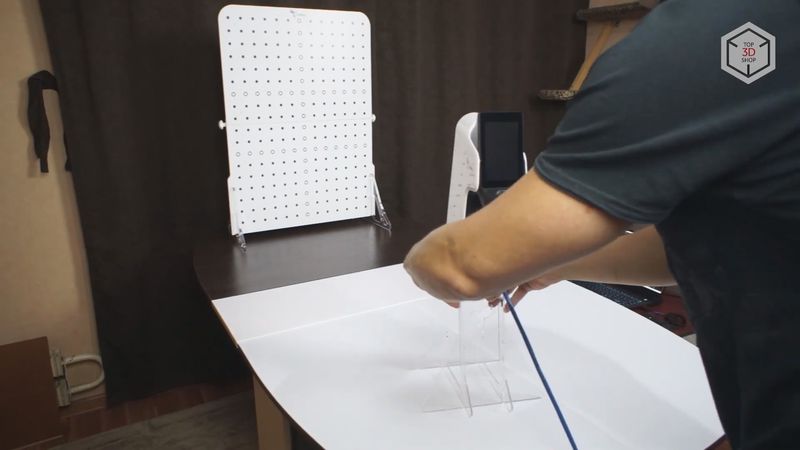
The 5th part, being the plate with the screw, needs to be fixed to the bottom of the scanner. It is screwed into the threaded hole that can also be used for a tripod.
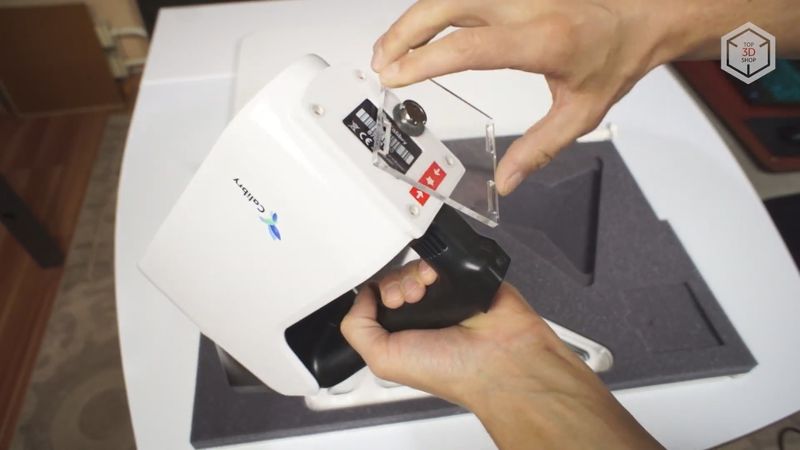
After that, the scanner with the plate can be placed on top of the stand, so that the Calibry logo is at the back.
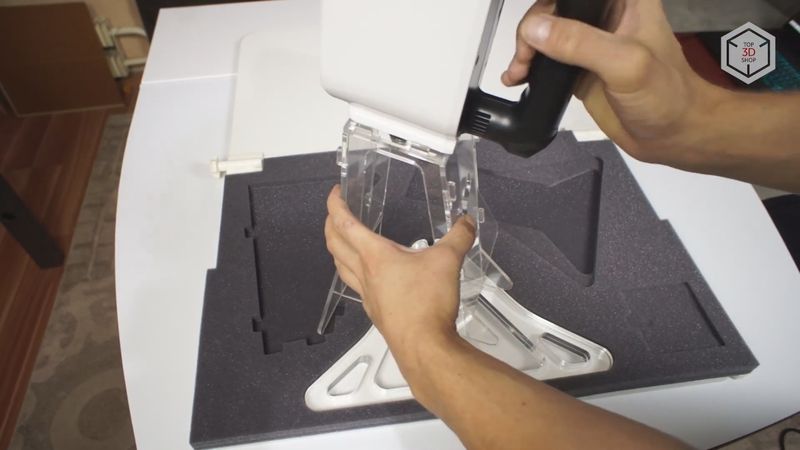
The calibration panel must be unfolded and fixed in this state with the help of two thumb screws on the sides. The two acrylic feet need to be attached to the bottom of the panel.
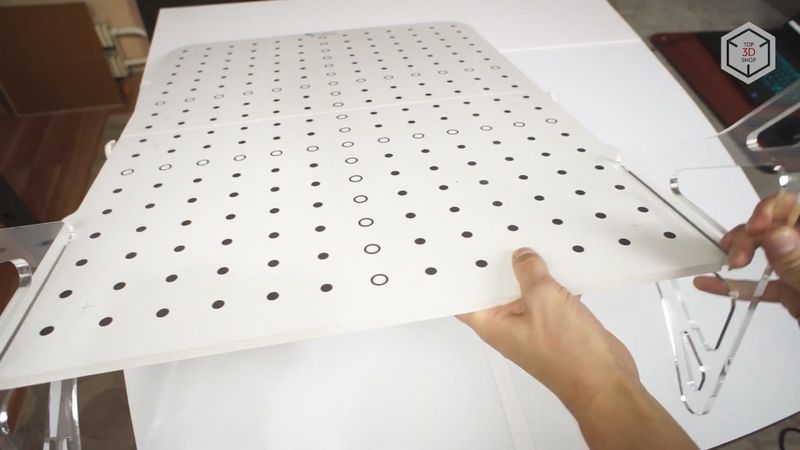
Place the panel on a table or other flat surface and then fix the scanner on the stand in front of the panel.
The next step is to access the Calibration tab in the scanner’s touch screen menu.
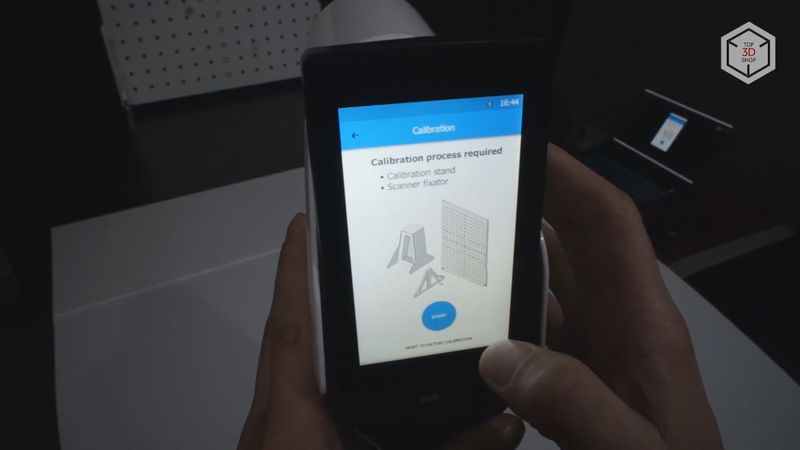
Like the Calibry Mini, we will see two black and two orange circles on the screen. They need to merge together by changing the position of the scanner relative to the panel. When the outer and inner circles are aligned, they will change color to blue and the “Freeze” option will appear.
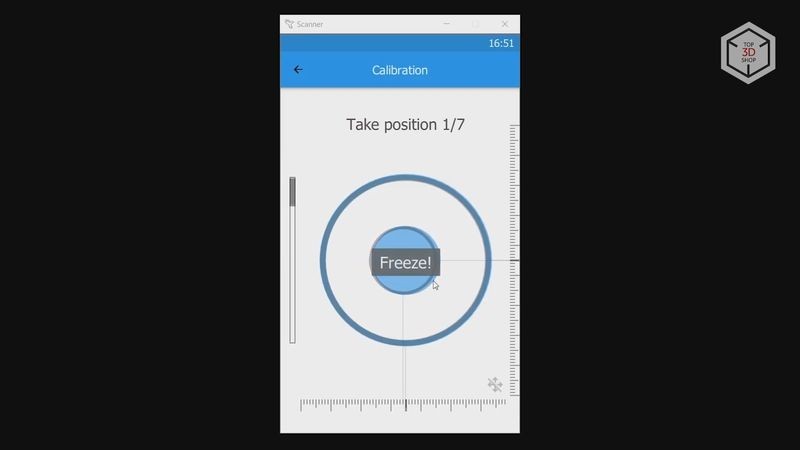
Release the scanner and wait until two smaller circles appear on the screen. Then, the device is moved away from the panel and, just like in the first step, the two circles merge once again. Repeat this procedure 7 times, moving the scanner further and further away from the calibration board. When all 7 steps are completed, the scanner will calculate the received data and reboot.
Considering the time it takes to assemble the stand and install the panels, the Calibry takes slightly longer to calibrate than the Mini. In addition, you need to take into account that at the final stages the scanner will be quite far from the panel, therefore you need substantial space for the calibration procedure.
Just like the Mini, the Calibry needs to be recalibrated after transportation or every few days. Not that it is absolutely necessary, but it is better to spend 5 minutes calibrating than to find out that the results are inaccurate later.
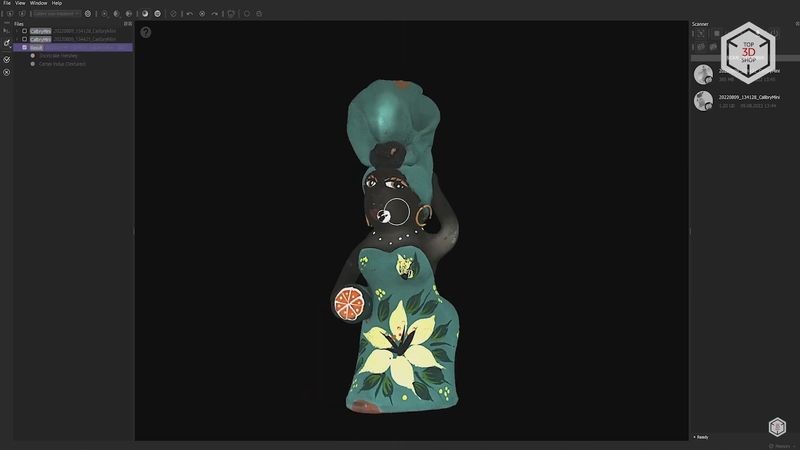
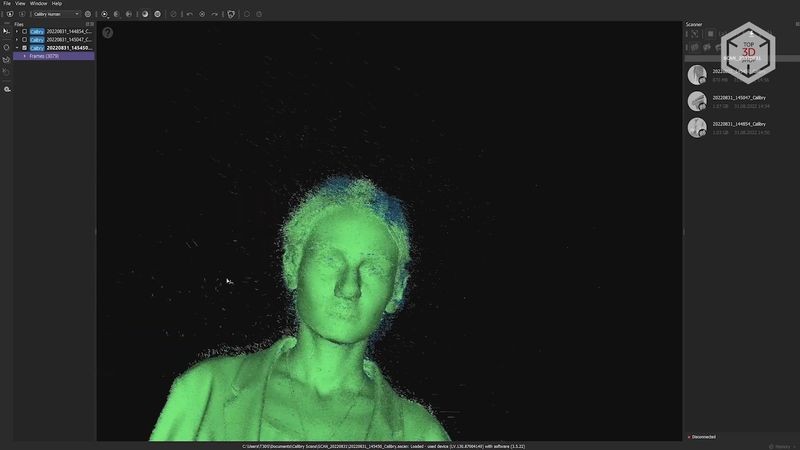
For the first tests, we chose a human scan. People can be scanned for a variety of purposes: medical, clothing design, computer games, 3D presentations, or simply for 3D printing miniature figures.
First we tried to scan a girl in full size. Several factors must be taken into account for this project. Firstly, it is desirable that the clothes are not too dark, shiny, translucent, and are void of fur, complex overlaps and twists. In our case, the model was wearing blue jeans, a white blouse and a green jacket.

Secondly, when scanning, it is better to choose a pose with no areas inaccessible to the scanner. We did not have any specific goal, therefore, we did the full size human scan with arms straight down, to simplify the task.
Thirdly, it is quite difficult for a scanner to capture hair, especially if it is loose or lush. The scanner’s light can get lost in the hair, creating a lot of noise. For this reason the hair was hidden into a bun. At the same time, individual hair locks still remained loose. Further on we will discuss how this was reflected in the scan.
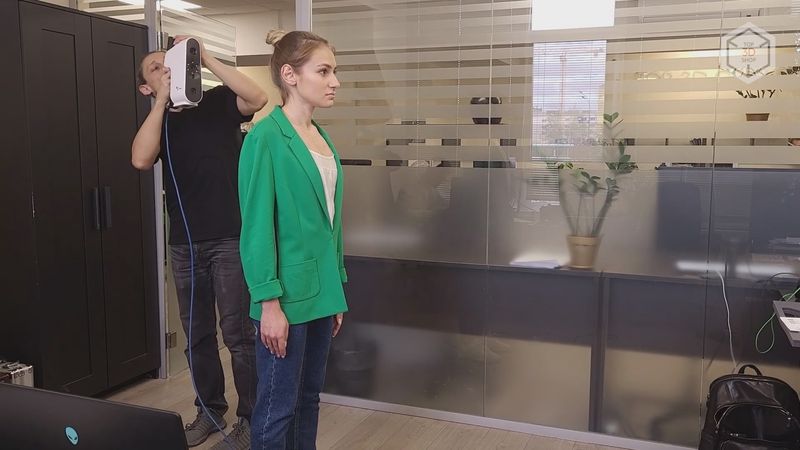
In addition, it is important that the room is lit as evenly as possible. Otherwise, even though the scanner has a flash function, some areas may generate texture errors. Naturally, there should be enough space around the person, about one and a half meters from all sides, so that you can safely move around with the scanner and avoid getting the connected wiring into the frame.
In general, despite the seeming simplicity, quite a few conditions must be met for a good result. We did not have a lot of time and the opportunity to choose the location of the scan, so some of the conditions were not met. In addition, the person being scanned must have extremely good self-possession. A complete scan can take about 5–7 minutes, and it is quite hard to stand completely still all this time. In addition, the chest may move slightly when breathing, and this also generates defects during scanning.
Considering all the above, you need to scan a person in one go and there is no leeway for pausing mid-scan since it is simply impossible to assume the exact same position for a second time.
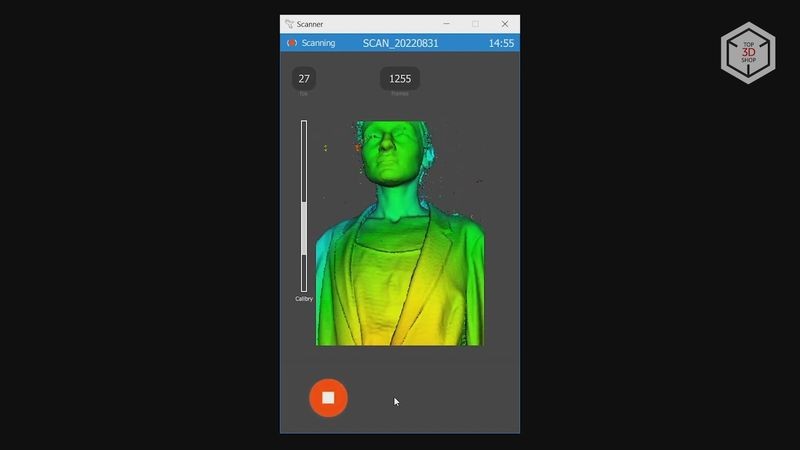
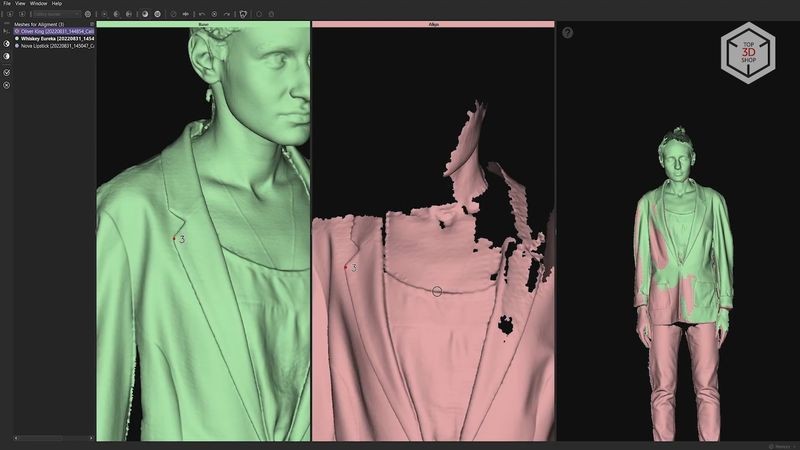
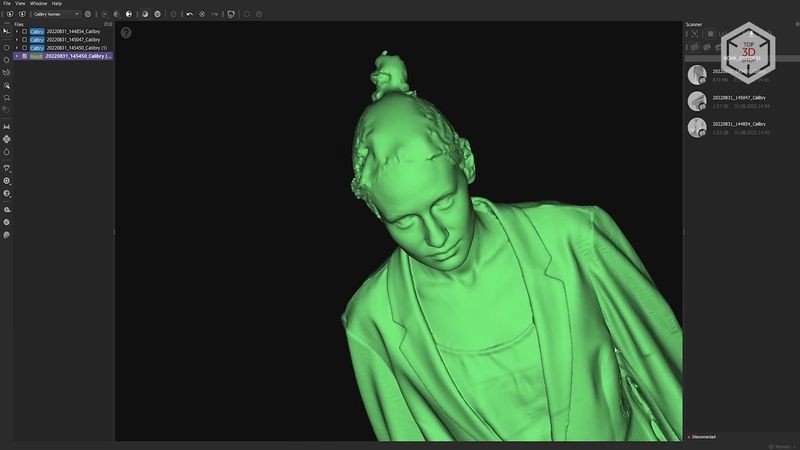
In general, we still managed to make the full body scan. The device lost tracking twice, but we immediately restarted the session and continued. As a result, we got three separate scans. In one of them, the scanner began to form a displaced point cloud after losing tracking. These shifted frames could be moved to a separate project and aligned with the main scan, but there was very little data there. So we just removed them.
There was quite a lot of noise in the scans, especially around the head and generated by the hair. All this noise can be eliminated by turning on preliminary cleaning when processing the scans, but most of the hair would be removed along with it. If you follow the manufacturer’s recommendations and turn off this option, the noise remains and is used when creating the mesh. It is difficult to call such a result a high-quality hair scan.
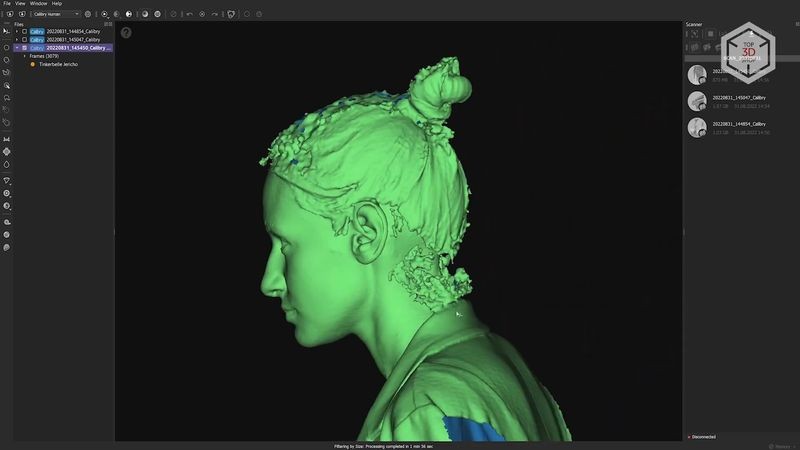
So it is better to create a mesh excluding the noise, fill the resulting holes and edit the geometry in the post-processing stage, using 3D sculpting software, such as ZBrush, Blender, or even Meshmixer.
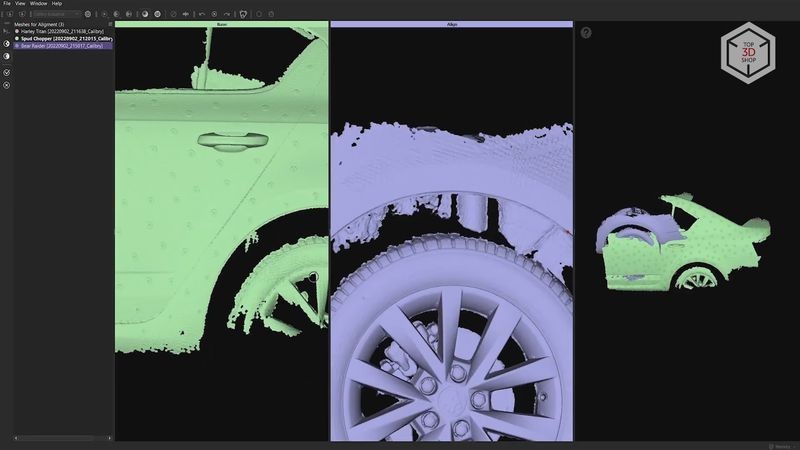
As a result, after tweaking with the settings and processing methods, we combined the obtained scans based on points in Calibry Nest. This procedure was explained in our Calibry Mini review. The final mesh is generated from the resulting point cloud after linking the scans together.
Calibry Nest has two readily available profiles for the Calibry scanner: Industrial and Human. Obviously, in our case, we need to use Human. However, the resolution is set to a relatively low value of 1.8 mm. This resolution does not provide for high details, and the resulting mesh is completely smoothed out.
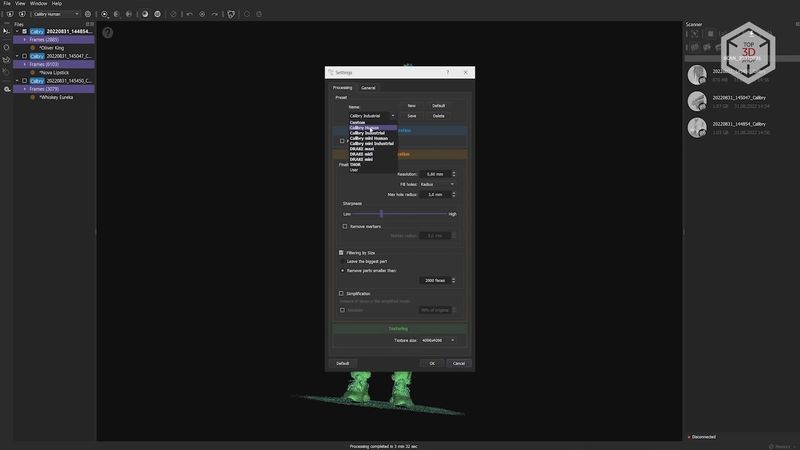
Therefore, we chose a higher resolution of 1 mm. Still low, but already better. All holes were filled automatically, most of them quite successfully, except that there were obvious flaws on the head. But, as we said, these can be edited in post-processing.
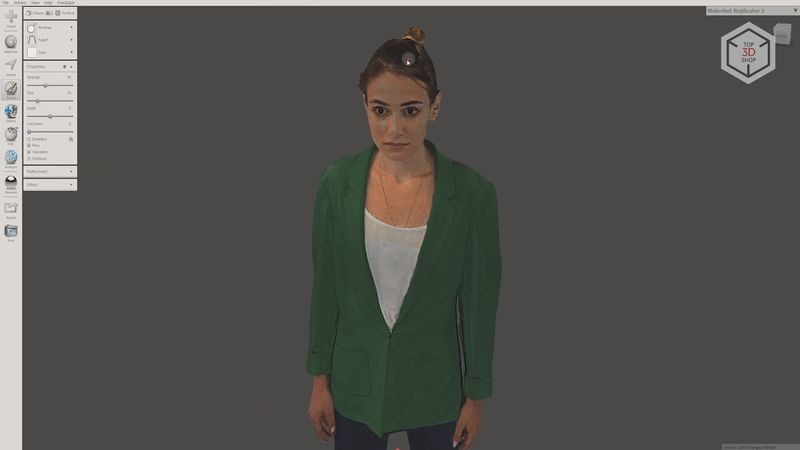
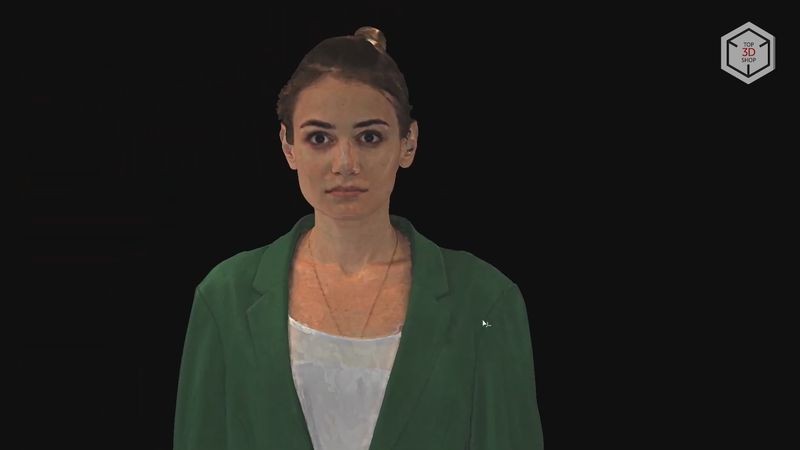
The final step was to add textures with plenty of data captured. There are some minor imperfections when going from the lit section to the shadowed ones, but these are really insignificant. With a strong desire, the textures can also be edited manually in some graphic editing software. In general, the result can be considered acceptable. If you follow all the tips we covered earlier, most of the issues can be avoided.
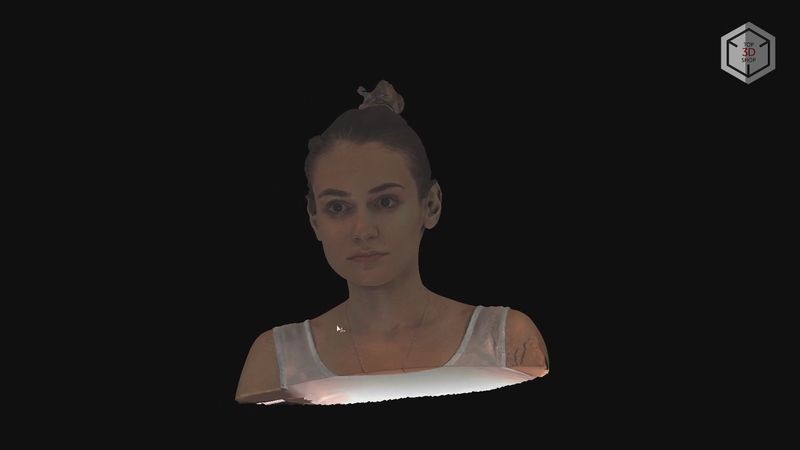
For the second test, we tried to scan the same model, but not in full length — only the head and shoulders area. The girl was seated on a chair for more stability when remaining motionless. And the hair was slightly moistened with water.

For face scanning it is extremely important to avoid blinking and following the scanner with your sight. It is best when the scanned person is looking exactly at one point, which can be difficult when the projectors light and flashes hit the eyes.
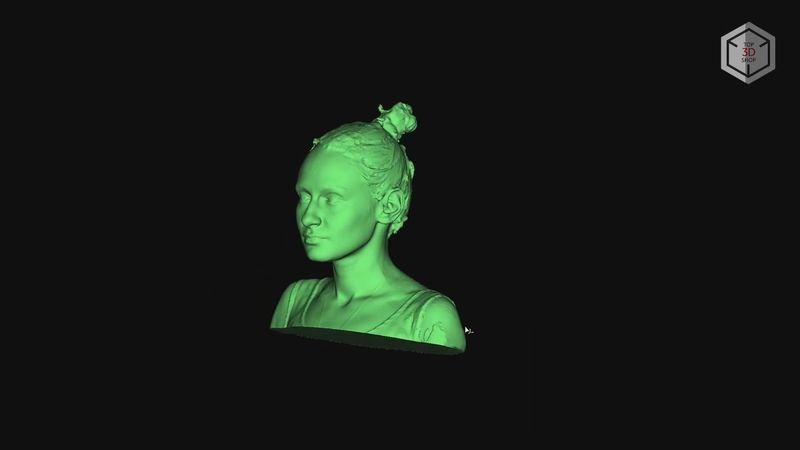
This scan took one single run to make without losing tracking. Therefore, the processing was much easier and faster. The moisted hair turned out good — though not perfect, it is much better compared to when the hair was dry. As a result, we got the following 3D model. In our opinion, the quality is quite decent.
Next, we moved on to scanning technical objects, or rather, individual mechanical parts. 3D scanning is often used in the automotive industry for a variety of purposes: tuning, restoration, prototyping, and so on.
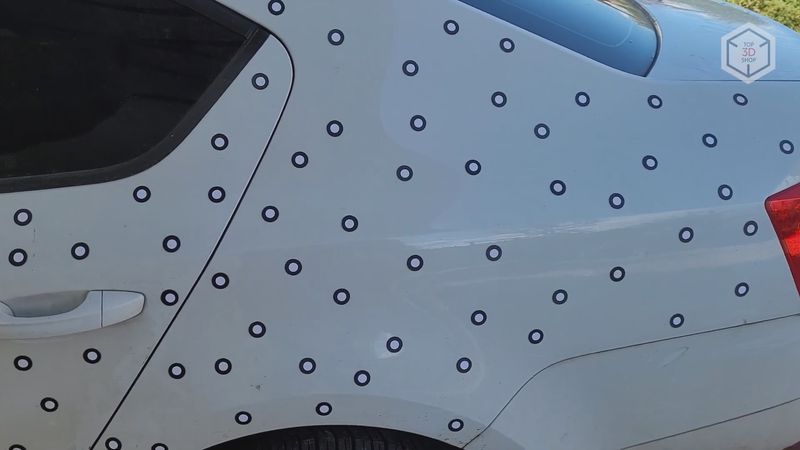
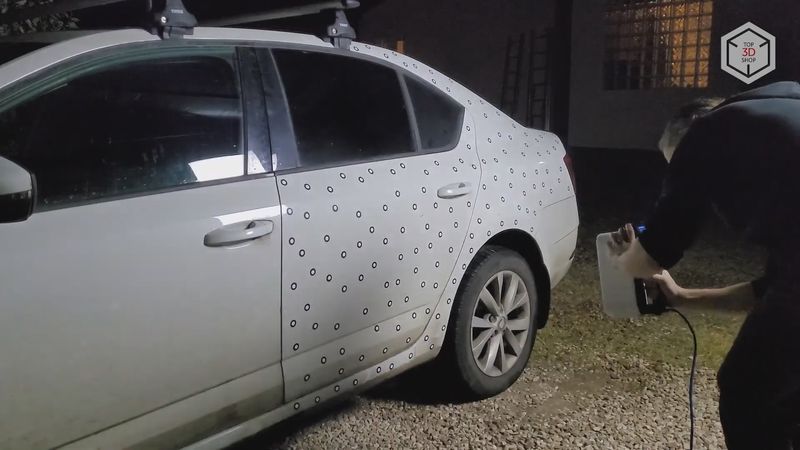
First, we tried to capture the rear fender and tailgate of a Skoda Octavia. Since there are few pronounced geometry features in these areas, we had to scan with markers.
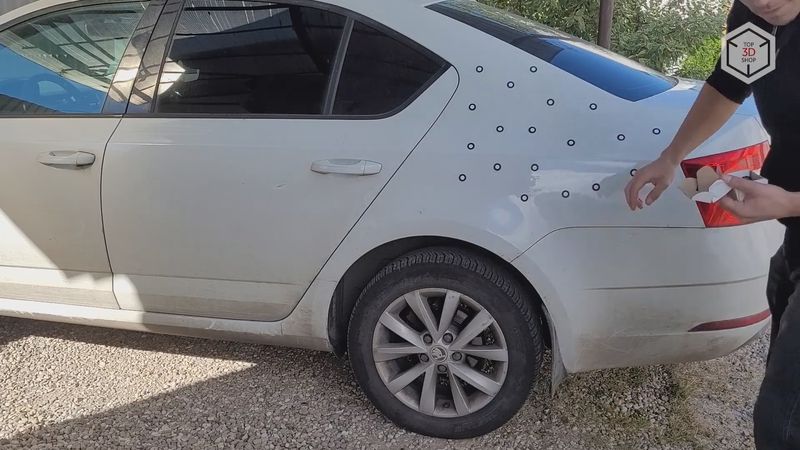
Magnetic markers came in handy here, and they turned out to be very convenient to apply. The door and fender are made of metal, and the markers held perfectly. In the case of scanning a plastic bumper, for example, it would be necessary to cover it with glued-on markers.
We made the first attempt at scanning outdoors during daytime and in sunny weather. These conditions proved to be challenging. Even in the shade, the scanner was simply unable to capture the areas that were slightly tilted to the sky. Changing the settings did not help. We could, of course, cover the car with matting spray. But first, this is not always possible. And second, this would not help much, since the scanner cannot register markers in such a highly illuminated environment, and tracking is immediately lost when refraining from the use of markers whatsoever.
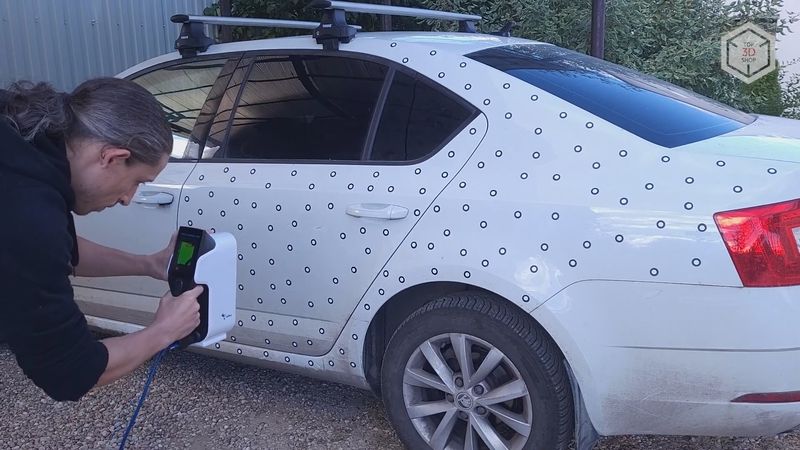
As a result, we decided to wait for the evening and try again in a dark environment. And we ran into no issues in these conditions. The scanner captured everything that was needed without any difficulty. The windshield, though, could not be scanned, even though it was tinted. There is a very simple hack for scanning windshields and glass — you can simply cover them with adhesive paper based tape. In this case the scan is successful with no issues in the process.
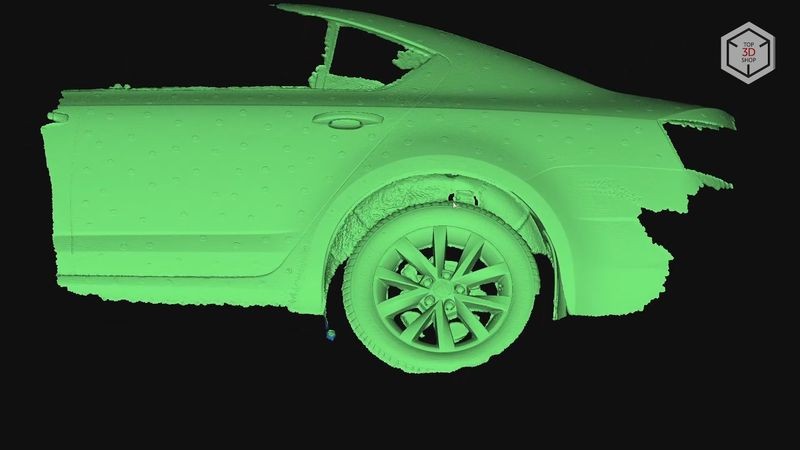
In addition, we also partially scanned the wheel directly on the car without markers, using geometry tracking. The main scan was subsequently combined with that of the wheel. The result turned out excellent.
You can scan the entire car using the same technique by making separate scans of different areas, and then combining them into one master 3D model.
In the case of scanning the fender with the door, we were lucky with the color of the car, since white surfaces are quite easy to scan. Therefore, for the second technical test, we tried to scan the black lining of the front door of the same car. And if in the first case we used low projector brightness, when the “drop” in the upper right corner of the scanner’s touchscreen was not completely filled, when scanning the door surface, the brightness was set to maximum, with the “drop” completely full.
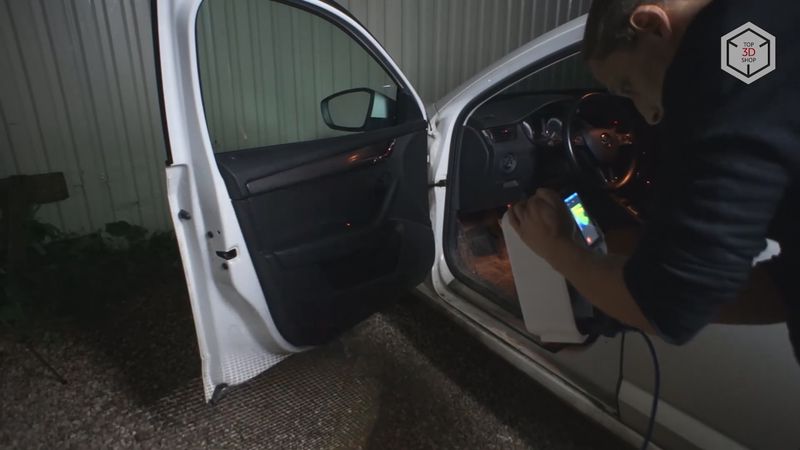
In the case of scanning the fender with the door, we were lucky with the color of the car, since white surfaces are quite easy to scan. Therefore, for the second technical test, we tried to scan the black lining of the front door of the same car. And if in the first case we used low projector brightness, when the “drop” in the upper right corner of the scanner’s touchscreen was not completely filled, when scanning the door surface, the brightness was set to maximum, with the “drop” completely full.
Since this area has a lot of geometry features, the scanner was successful in combining individual frames with each other without losing tracking. As a result, we were able to scan everything we needed in just a couple of minutes. The scan processing was also quite fast. And we got a very high-quality scan of the car’s front door trim.
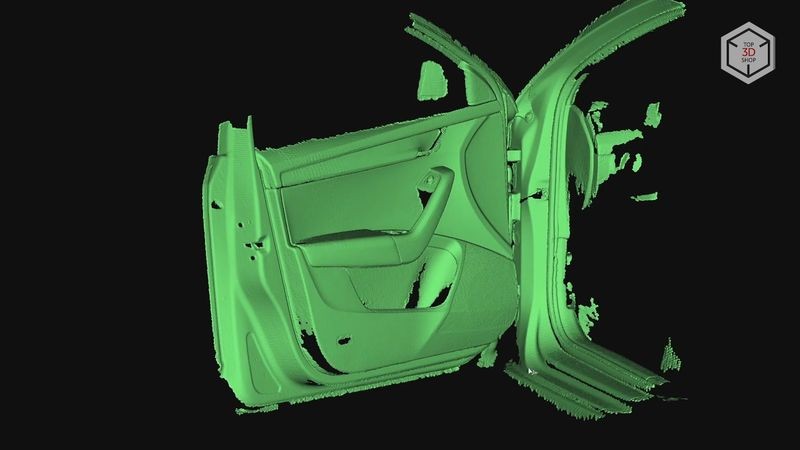
Keeping in mind that we scanned the whole car without disassembly and not all the areas were accessible to the scanner, the result can be considered great.
For the last tests, we chose artistic models. 3D scanning of art objects is used to digitize museum exhibits or restore antiques.
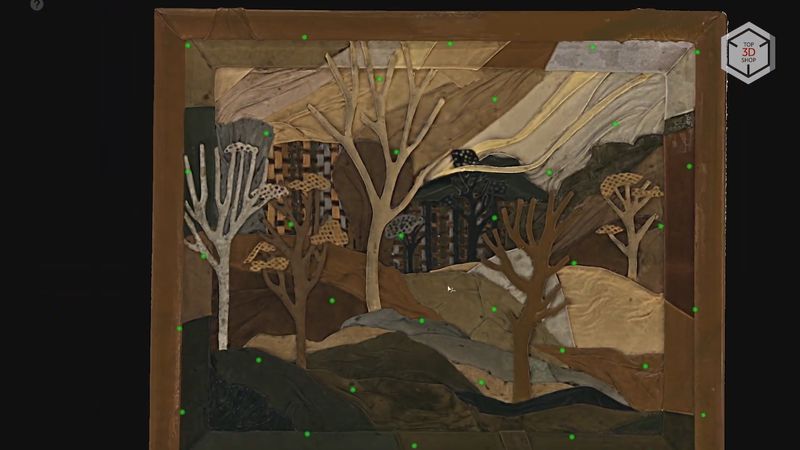
We took a picture made of leather for the first artistic test. The painting has а unique and embossed geometry, as well as many dark and light areas of different hues. Although Calibry is not the best option for scanning such detailed objects, it was interesting to see how it would cope with this task.
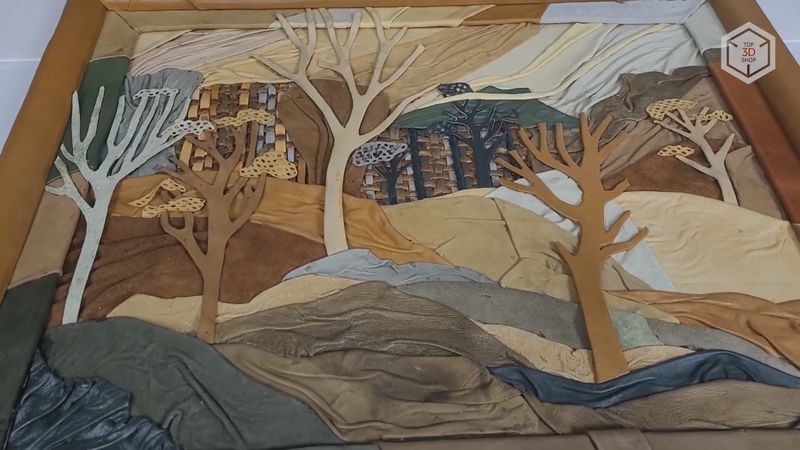
No special conditions were required, we simply placed the picture on a flat surface and carefully scanned all the accessible areas from different angles. The brightness of the projector for this scan was set to medium in order to capture both the bright and dark areas.
This scan took literally two or three minutes. The device did not lose tracking and generated plenty of data to combine the frames. It did not make much sense to scan the reverse side of the painting, but we wanted to end up with a solid 3D model containing all the sides. So, we laid out the magnetic markers on the surface to scan the rear area.
After that, both parts of the picture were aligned and combined; again, with no issues in the process. The rendering was done with the maximum resolution setting for this scanner — 0.6 mm. Detailing, to be sure, is not very high, being on the verge of the scanner’s capabilities. But the experiment can be considered a success, resulting in a good quality scan.
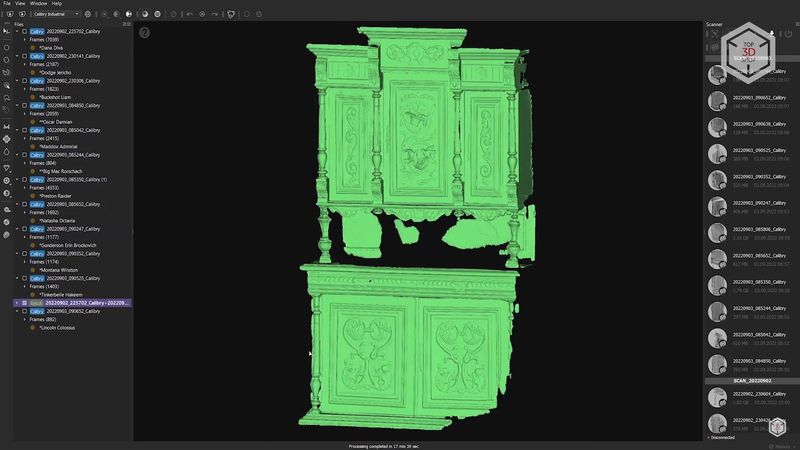
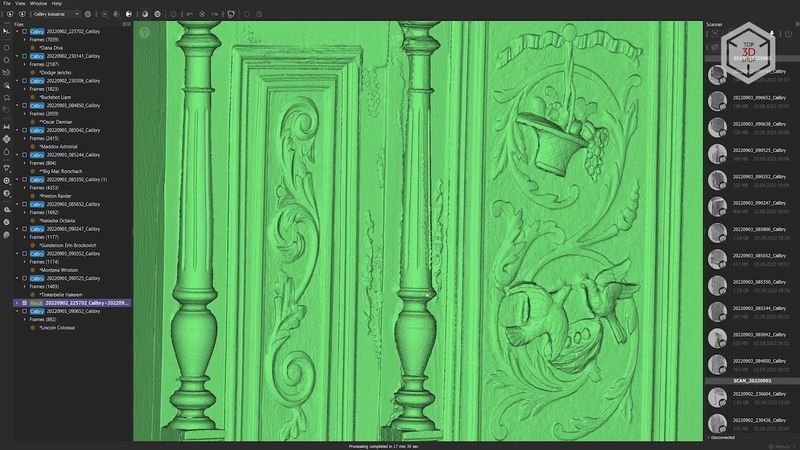
Finally, we decided to scan a large antique display cabinet. It was not possible to capture it entirely in one run, so we tried to scan its front side with all the beautiful carved ornaments. Such a scan can be useful if, for example, part of the ornament has been lost and there is a need to restore it using the remaining sections as a reference.
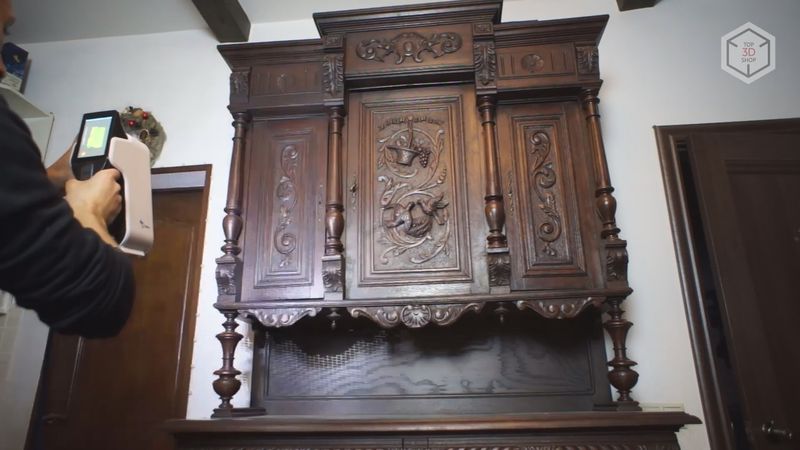
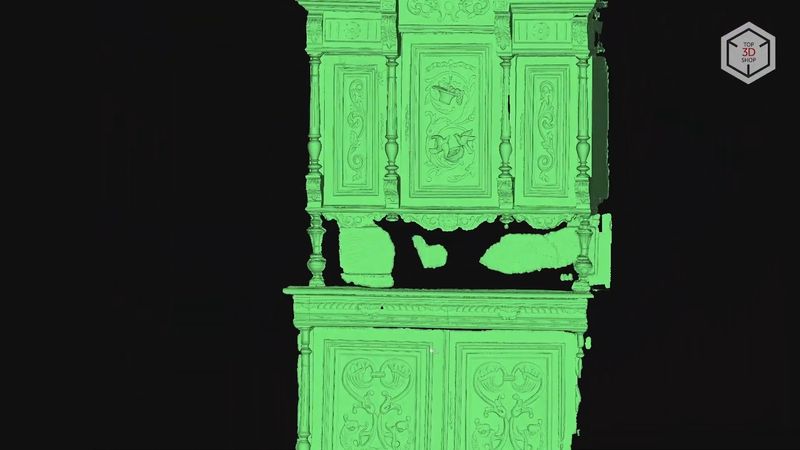
The display cabinet is quite dark, so the brightness of the projector was set to maximum. Tracking was lost when moving from the top to the bottom; moreover, we tried to close the doors, but they moved slightly during the scan. This became evident during the processing stage, when the cabinet was no longer accessible for a repeated scan. Always take this point into account. All the details and features should remain exactly on the same spot on all the scans when we are dealing with separate scans that will be combined later.
Otherwise, there will be misalignment when combining the scans which cannot be easily corrected. In any case, the scanner did a good job. And if we needed to reproduce a specific section of the ornament, this scan would be quite enough for reference.
The Thor3D Calibry did a good job in all of the test scans. Not all the scans were successful from the start, but we were able to get acceptable results in all the tests eventually. Most of the issues were caused by non-compliance with the necessary scanning conditions. But these conditions do not apply specifically to this scanner, but to any 3D scanner based on structured light technology.
The touchscreen located on the device can definitely be considered as a great advantage. There is no need to get distracted by looking at the computer screen or changing scanning settings. In our opinion, such a touchscreen would be a welcomed addition to any handheld 3D scanner.
Like the Calibry Mini, the original Calibry surprised us with its ability to easily capture black surfaces with no matting spray used. The scanner’s software does have some flaws. Some functions are not present at all, some do not work as we would expect them to. But in general, Calibry Nest is quite convenient and provides the user with almost everything necessary for processing the captured data.

Update your browser to view this website correctly. Update my browser now


Write a comment