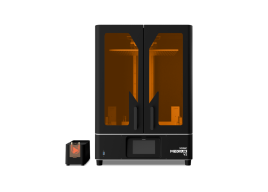
Phrozen Sonic Mega 8K 3D Printer: In-Depth Review
In just a few years, Phrozen has become one of the leaders in the production of resin 3D printers for almost any task. Today, we’d like to talk about the model with the largest printing area and unprecedented resolution in its segment, the Phrozen Sonic Mega 8K 3D printer. Read the review to learn about all the features of the device as well as assess the quality of actual printing.
- Potent 15" 8K monochrome LCD screen for top-quality outputs
- Minimum layer height of 10 micron with an XY positioning accuracy of 43 µm ensures extremely smooth surfaces
- Impressive build area of 330 x 185 x 400 mm is ideal for mass production and large-scale detailed models
- Reliable all-metal frame in combination with precise dual linear rail and ball screw design ensure increased printing stability
- Open material system allows using both self-developed and 3rd party 405nm resins
- The printer is supplied pre-calibrated and ready for work right out of the box
- One of its kind device in terms of resolution and build volume
- In contrast to the Phrozen Transform, the printer does not provide Wi-Fi connectivity
- Requires sufficient space with proper ventilation alongside a large amount of materials for printing and cleaning
- Might be complicated and expensive to work with
Specifications

Unpacking
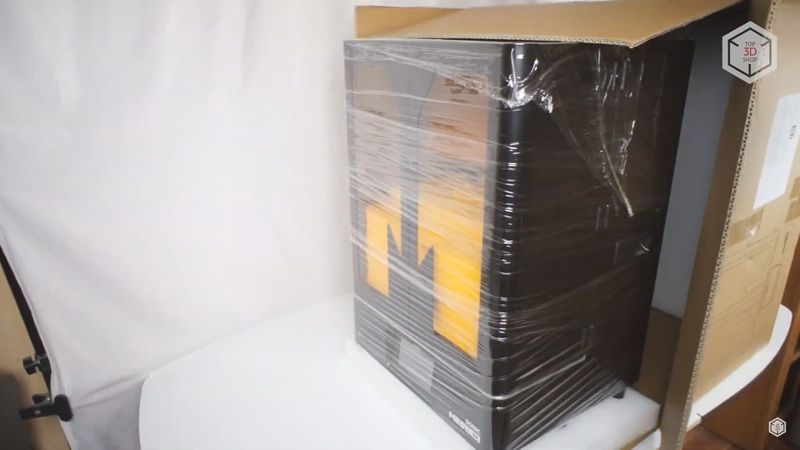
Owing to its impressive size, the printer comes in a large and heavy box, fully assembled and ready for use. One person might be able to take the printer out of the box and set it up, but that may be challenging, so it is better to get a helping hand since it weighs a hefty 77 lbs (35 kg), while its outer dimensions are roughly 15 x 18 x 26 inches (400 x 470 x 680 mm), so keep that in mind when preparing your workplace.
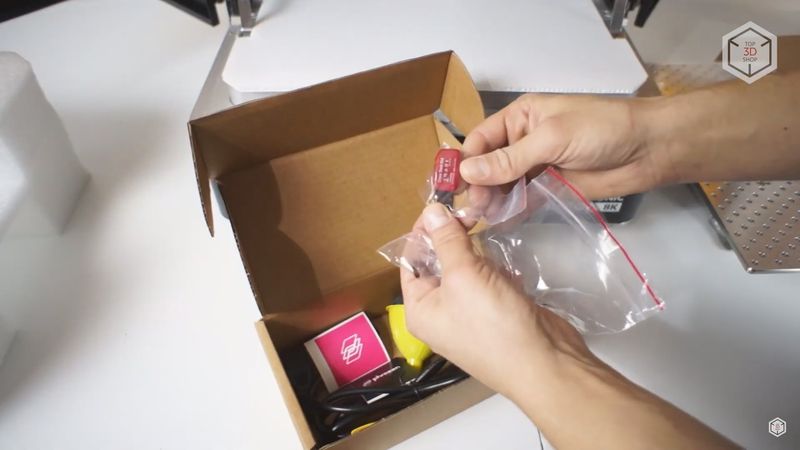
Inside the machine, in addition to the printing platform and the vat already in place, there is a box with the necessary tools.
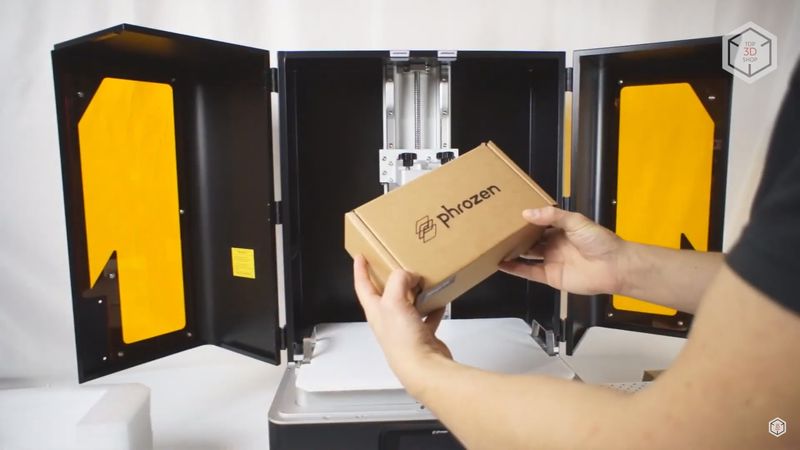
The package content is quite standard and does not differ from other Phrozen 3D printers: a small user manual guiding through the first start-up procedure and the basic slicer settings, a warranty card, a separate bag containing two handles with screws and an allen key (these need to be screwed to the doors), an 8Gb SanDisk USB flash drive, a small plastic funnel to pour the resin (considering the amount of resin this machine handles, this funnel looks lackluster, but it is better than nothing), a pair of rubber gloves, a few decorative Phrozen stickers, a plastic scraper for mixing the resin in the vat and a metal scraper to remove the model from the platform.
It is better to use a silicone scraper instead of the former in order to prevent the vat film from scratching, while it is also advisable to get a wider scraper and sharpen it well instead of the latter.

Lastly, we find two power cables — each for a particular outlet.
Structure and design
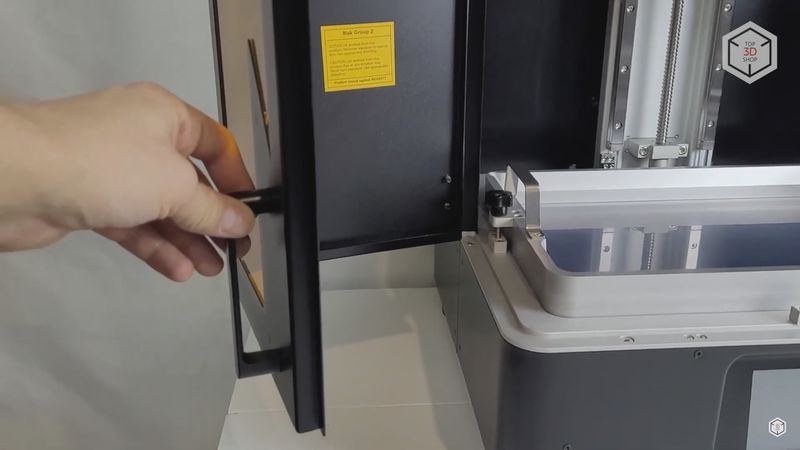
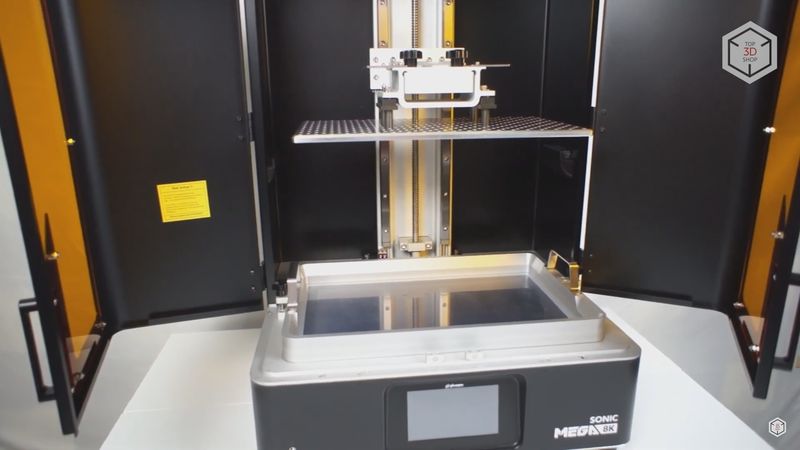
The printer itself is a metal cabinet of a rather impressive size. It has two L-shaped hinged doors with UV-proof plastic windows that open from the front.
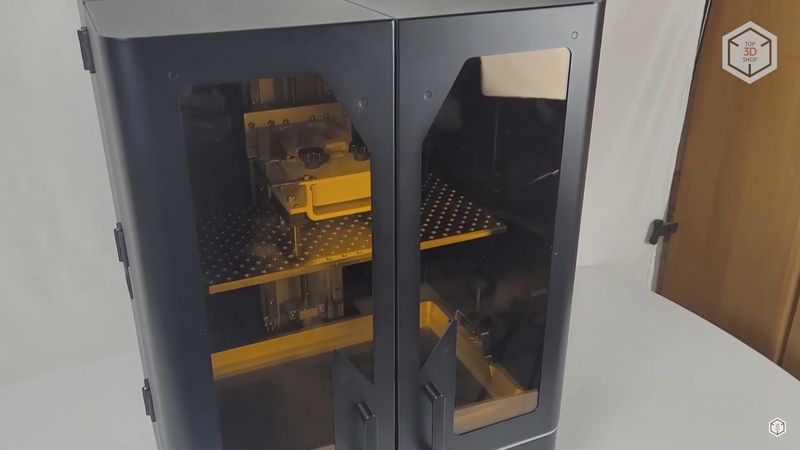
The hinges of the doors are located closer to the back wall, which grants easy access to the printing area from almost any angle. Keep in mind, though, that you need a decent amount of room beside the printer to open the doors fully.
The machine seemingly features quite an ordinary design for MSLA printers, except for the scope: its printing area is roughly 13 x 7 x 16 in, or 330 x 185 x 400 mm. That is even larger than that of many FDM 3D printers.
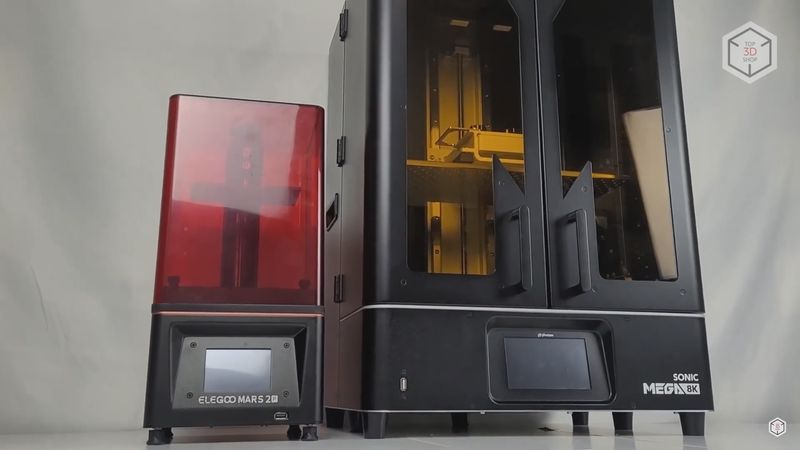
For reference, here is the Phrozen Mega 8K next to the popular mid-size Elegoo Mars 2 Pro. The difference is striking: it looks like the entire Elegoo Mars could fit in the Mega 8K’s chamber.
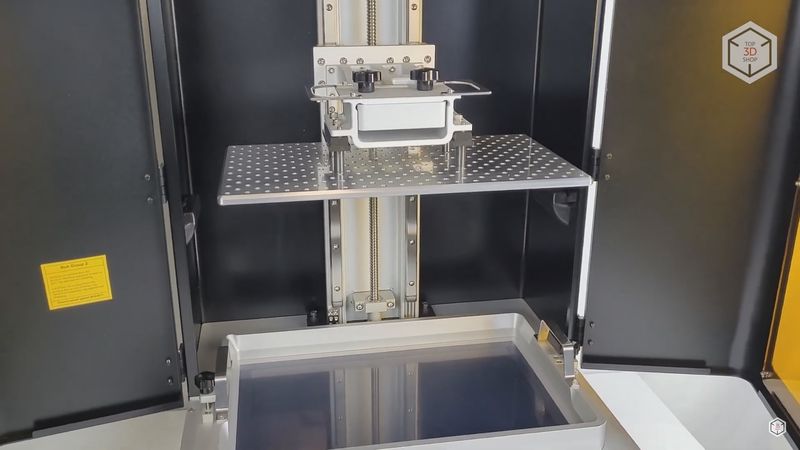
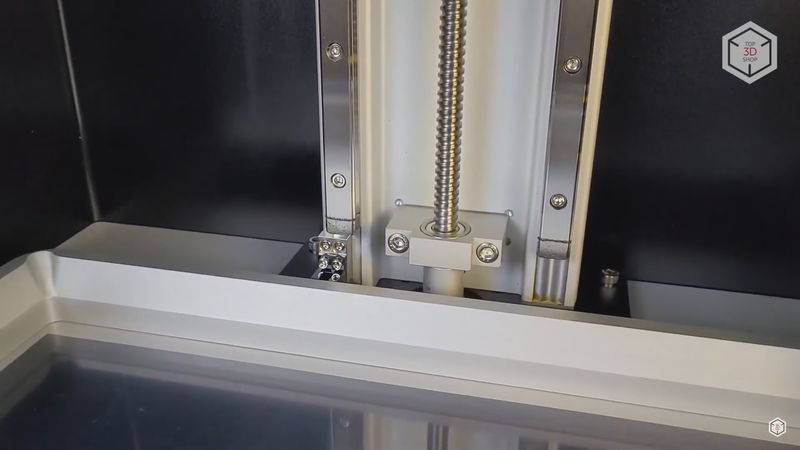
The Z-axis is moved by a motor hidden in the base unit along two MGN15 rails using a ball screw drive. This should be enough to cope with the peel force generated by a footprint this large. The optical endstop sensor is located at the bottom.
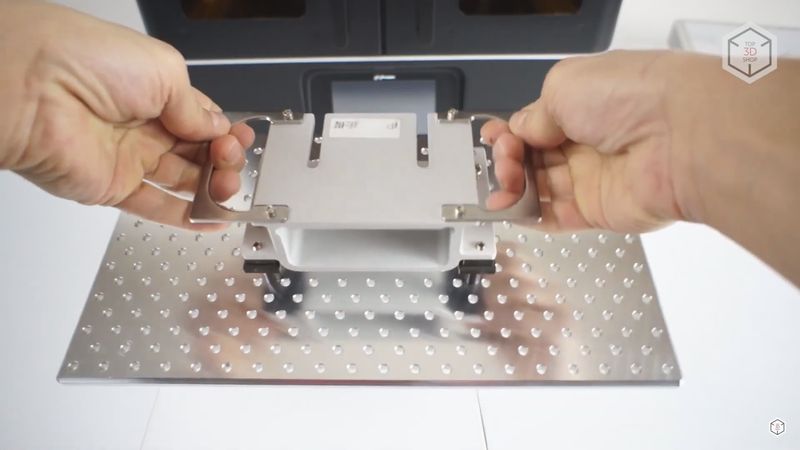
The print platform is made of a 9 mm thick aluminum perforated sheet. The general consensus used to be that in a resin printer, a perforated platform greatly improves adhesion, but recently most manufacturers have stopped using such plates even in large machines. There are pros and cons to this solution, but more on that later.
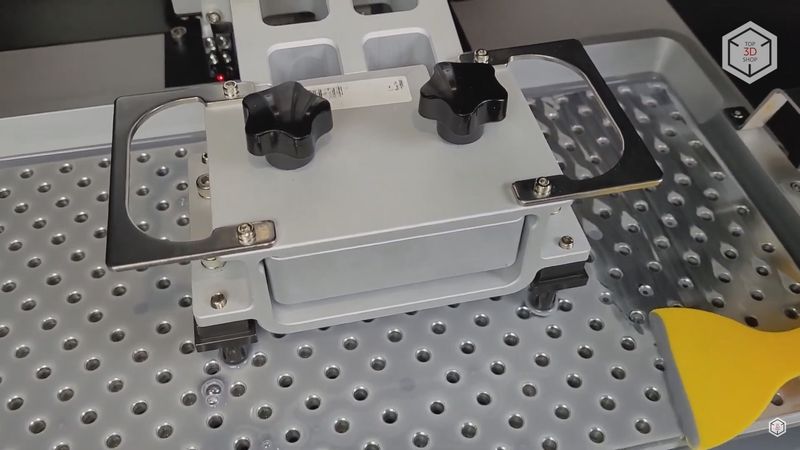
The calibration of the printer is a little different than what we are used to. Here, the platform is not just fixed with a few screws, but rather engages four locking screws and four fixing ones. We saw a similar system on the Wanhao GR1 printer.
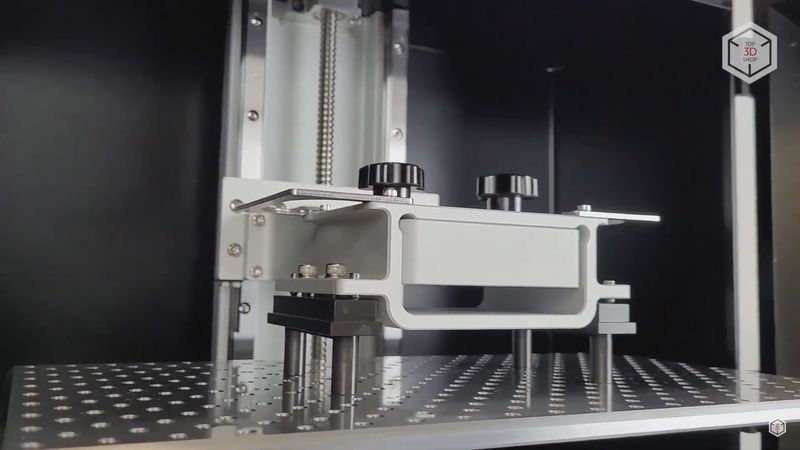
The point is, the manufacturer does not expect the user to meddle with the initial calibration at all — the printer is factory-calibrated. But as they say: “better safe than sorry.” Still, we will not be going through the calibration and checking process for this printer — there is a dedicated video on Phrozen’s YouTube channel describing this procedure.
The platform is fixed to the carriage with two thumbscrews and has two handles on each side. This is really useful because both the platform itself and the models hanging on it can get quite heavy.

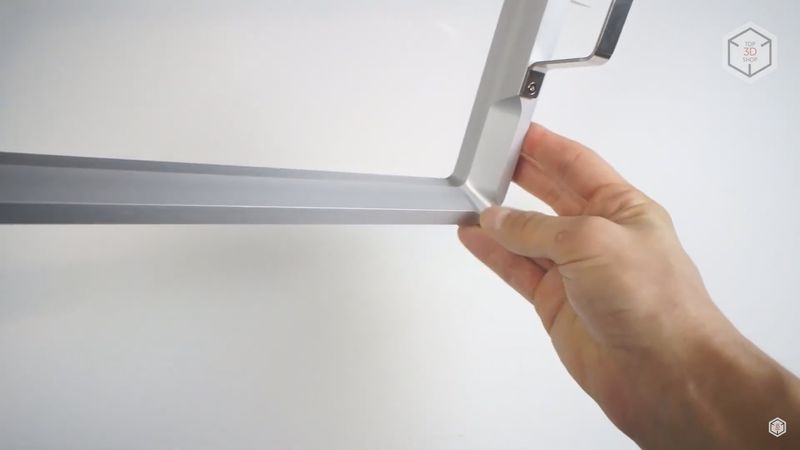
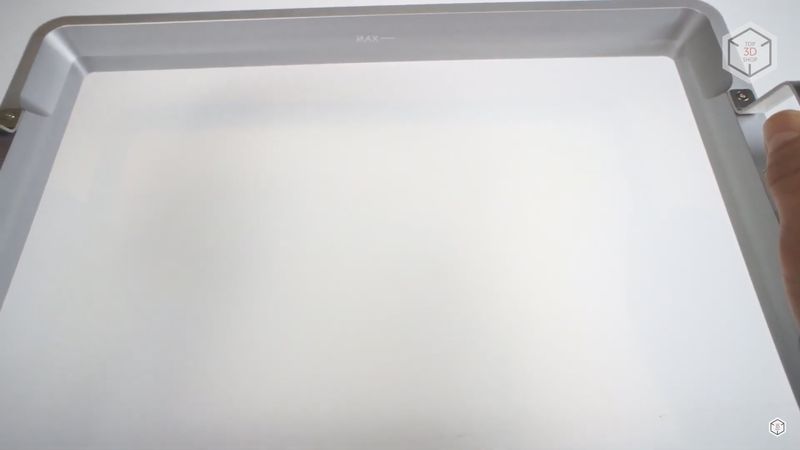
The resin vat is basically no different than those in smaller printers, except that it is huge and also has two handles on the sides. Made of aluminum, the surface is extremely smooth, leaving it free of resin after draining. Likewise, no fibers are left on the surface after wiping it with a paper towel.

There is a small cutout for resin drainage in one of the corners. To be fair, it is quite small and does not do much, but a good addition overall.
There is a ‘Max’ mark on the back wall, and the resin level must not go above this mark.
The vat is fixed with two screws on each side.
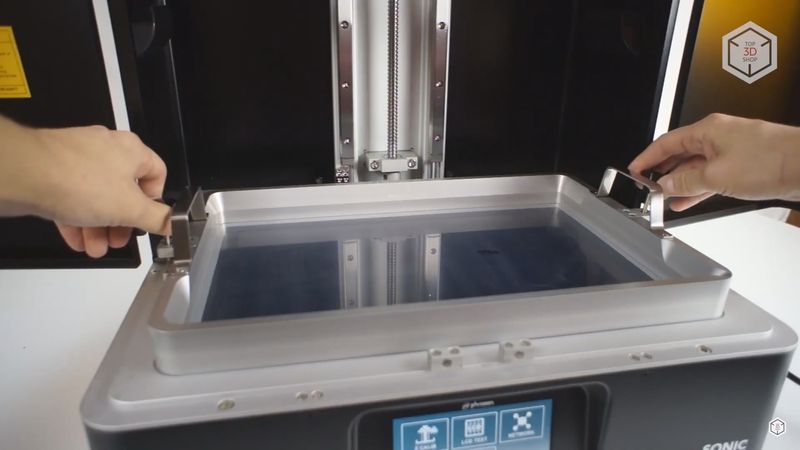
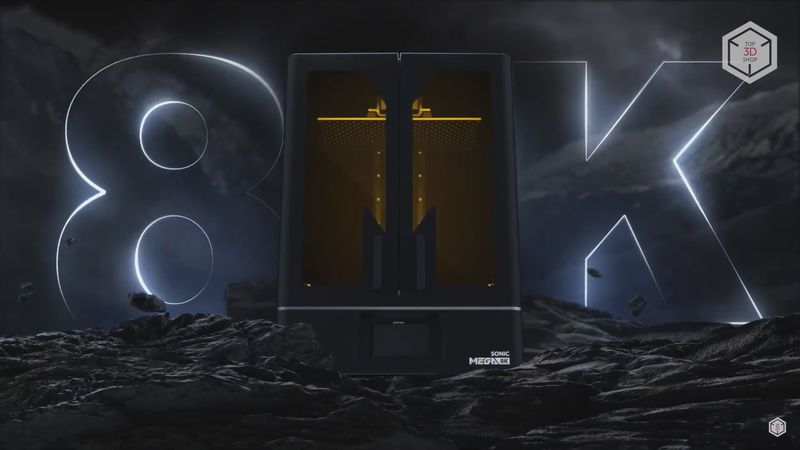
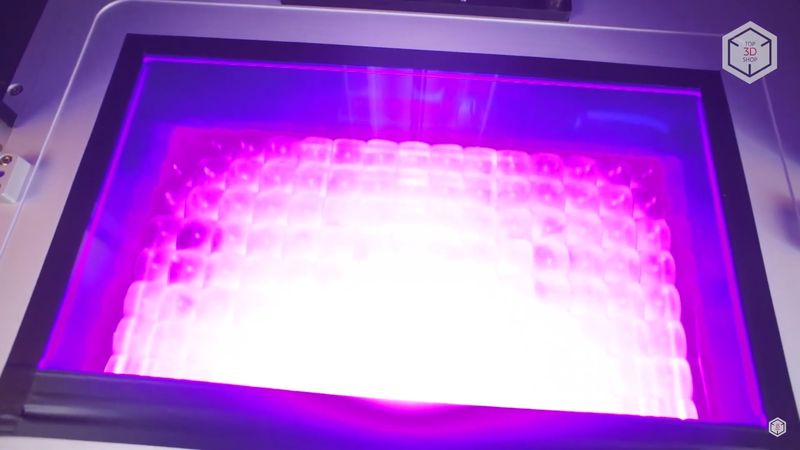
Perhaps the main distinguishing feature of this printer is its huge, 15" monochrome LCD panel with 8K, 7680x4320 pixel resolution. Including the diagonal, each pixel is only 43 microns in size. Those are certainly not the smallest pixels for a resin 3D printer, but considering the size, it is very impressive for modern tech. Besides, the monochrome LCD screen cures layers faster, while its lifespan is much longer compared to RGB panels.
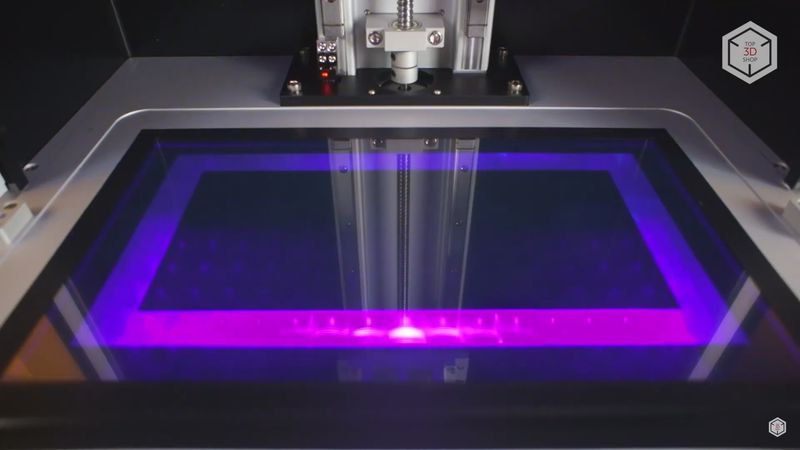
Curing is powered by the proprietary ParaLED 3.0 lens system which has a good track record and became a standard for the Phrozen printers. The light wavelength is the usual 405 nm, which means you can safely use any conventional resin for MSLA 3D printers.
Basically, the Sonic Mega 8K looks like a usual example of professional MSLA equipment, only it is huge and perfectly tailored to produce large objects with a high level of detail.
The only things missing seem to be air filtration and maybe a heater to maintain preferable printing temperatures. Not that it is necessary, but it would be a great addition.
Controls and connectivity
We are not going to disassemble the printer and look at the electronic components. But it is definitely worth noting that the installed motherboard and its firmware are by ChiTu — the company that produces one of the most popular slicers for resin 3D printers, ChiTuBox. Therefore, the Mega 8K is optimized to work with this slicer and can utilize all of its features and new functions.
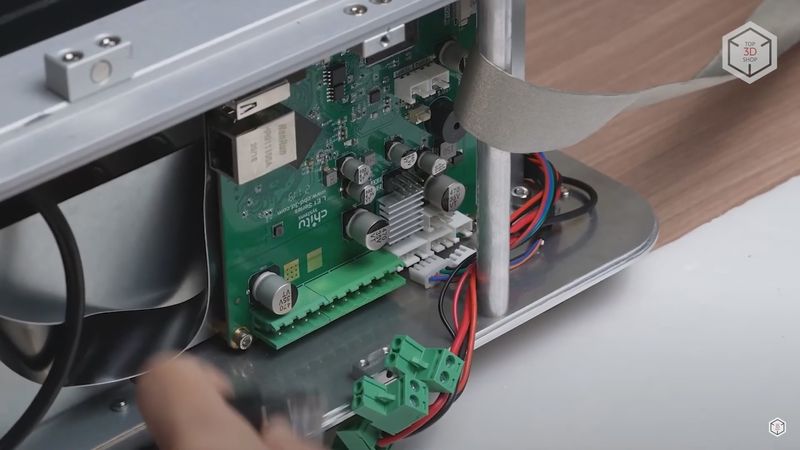
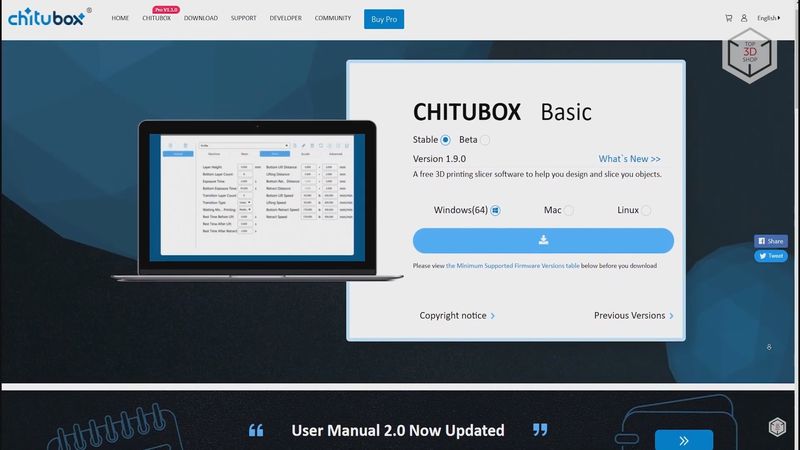
This does not mean that you are limited to the ChiTuBox only. Other popular slicers such as Lychee or FormWare are supported too. But only with ChiTu’s proprietary slicer can you unlock the latest features supported by this particular board and firmware. We used the free ChiTuBox version 1.9.0 for our tests.
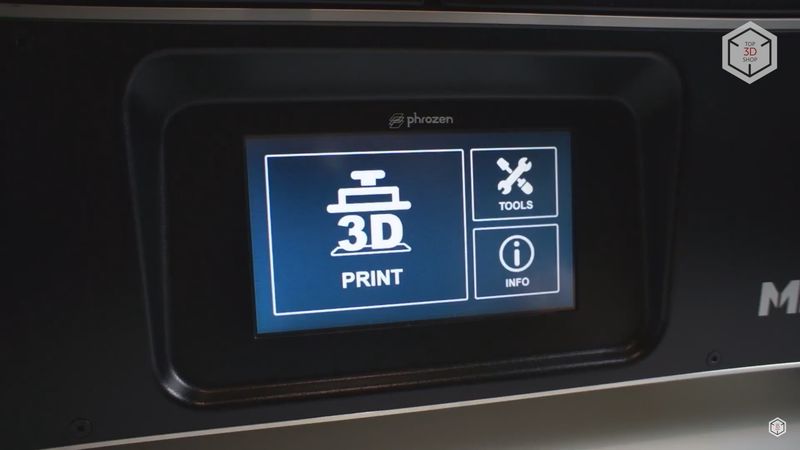
The touchscreen on the front panel is the main tool to control the printer. The menu is the same as with most Phrozen machines, and has all the necessary functions: calibration, manual movement of the axes, cure check, remaining resin curing function, information, print menu, network setup. Everything is familiar, functional and concise.
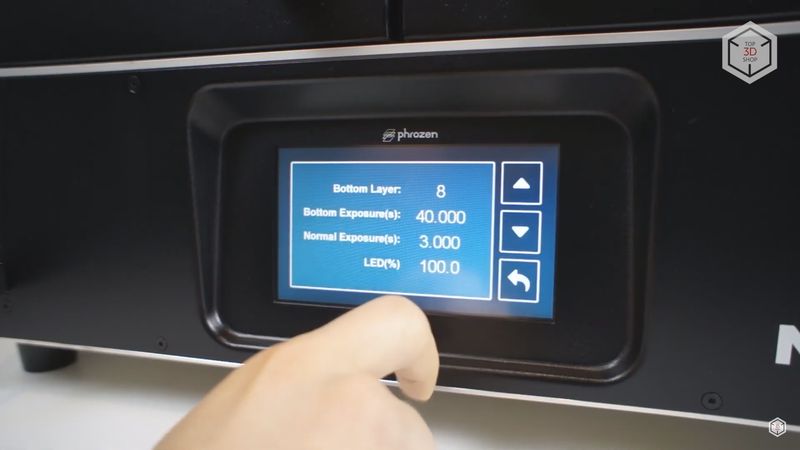
You can change the curing settings during the print process. The screen sensor works as intended, all taps are registered and no false responses were noticed.
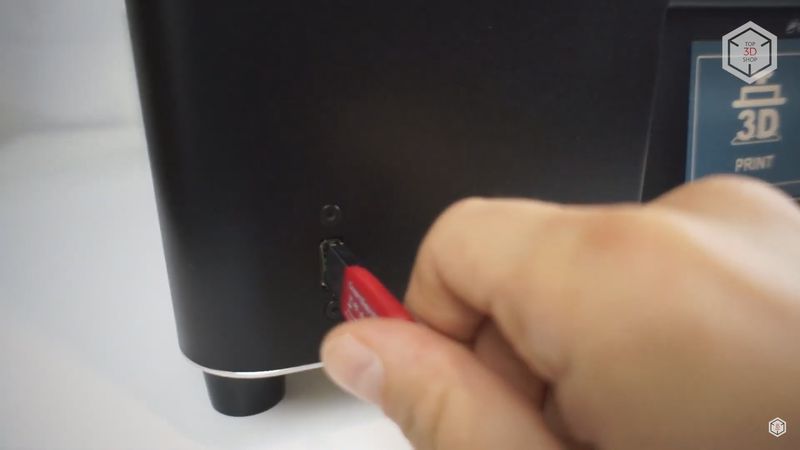
It is possible to print models from a USB flash drive using the port to the left of the screen, or you can connect the printer to your local network via an Ethernet cable and upload files to the machine directly from your computer.
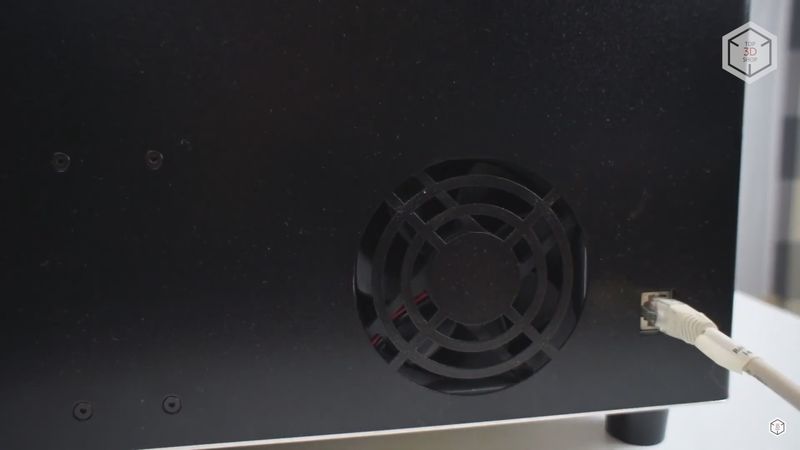
Transferring files over the network is not very fast, and given the resolution and that you are likely to print large models on this device, the sliced files may be quite bulky. Sometimes they can reach 1Gb.

So it is simply impractical to transfer such files over the network. It is much faster to copy the file to a flash drive and print directly from the USB.
Getting ready
Now let’s prepare the machine for printing. After checking the calibration, the screen, and the projector’s operation, you can set up the slicer. Click on the ‘Add printer’ button in the settings, select the 8K from the list, and it is done.
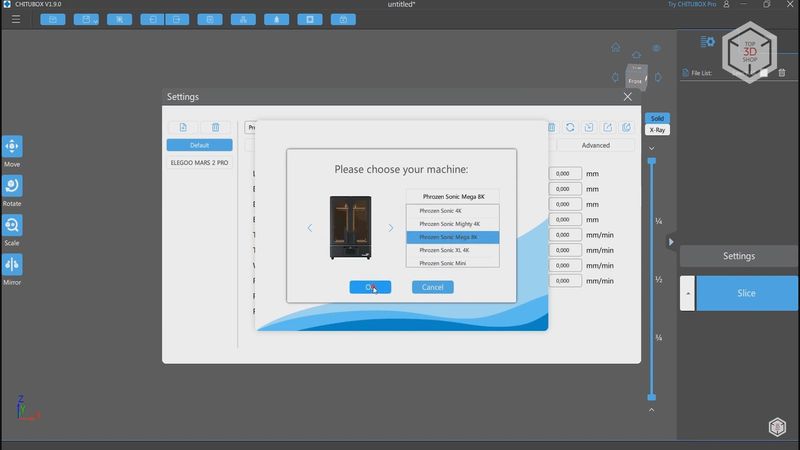
All of the basic parameters, such as screen resolution and print area size, are already configured. The curing time and motion speeds for some resins are already saved into the readily available presets, too. We will be using the high-resolution Phrozen Aqua Grey 4K modeling resin. The profile for this resin with a layer height of 50 microns is already there. Even so, it makes sense to run a couple of test prints to make sure that the settings work with a specific resin on a particular machine.
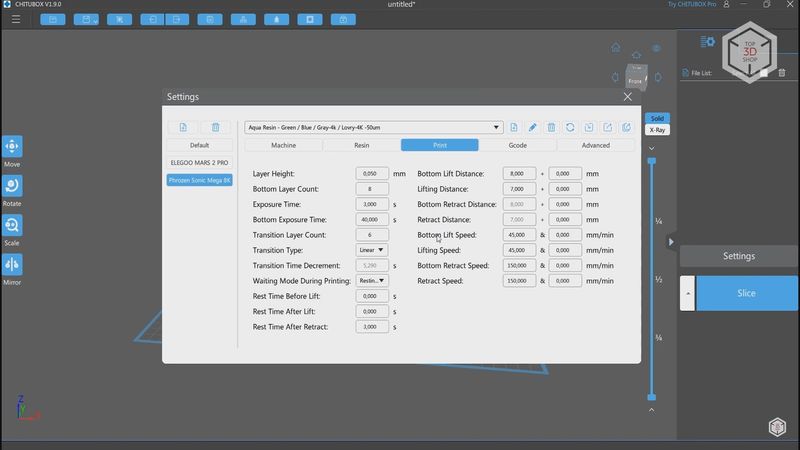
In our case, we ended up with a curing time of 60 sec for the first layers and 3 sec for all of the remaining ones. In addition, we played a little with the platform motion speed setting between layers. This is just one of the functions of the ChiTu firmware. It is called TSMC or Two-Stage Motion Control. This feature allows setting two speeds for raising the platform and two speeds for lowering it, both for the first and the remaining layers.
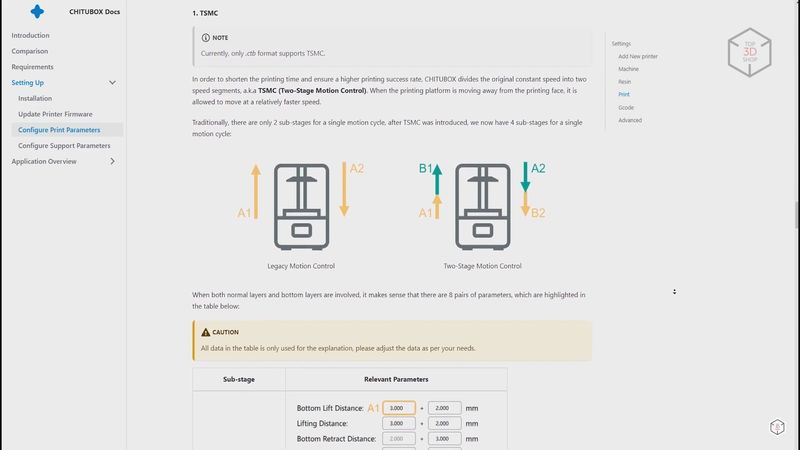
We cherry-picked these settings to minimize the risk of the part sticking off the platform. Print speed was not the primary concern. However, if you spend some time and fiddle with these settings, the printing speed can be ramped up. You can see how to use and configure this feature in the instructions on Phrozen’s website.
Test printing
Rook
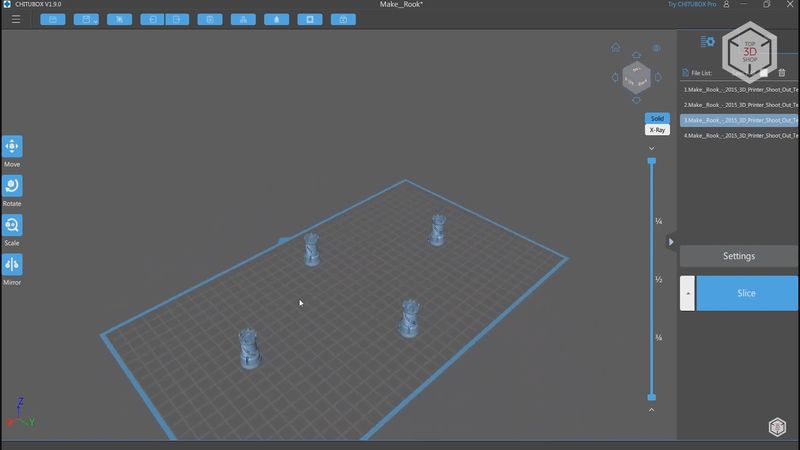
For the first test, we decided to print something small. One of the most popular test models for resin 3D printers is the rook.
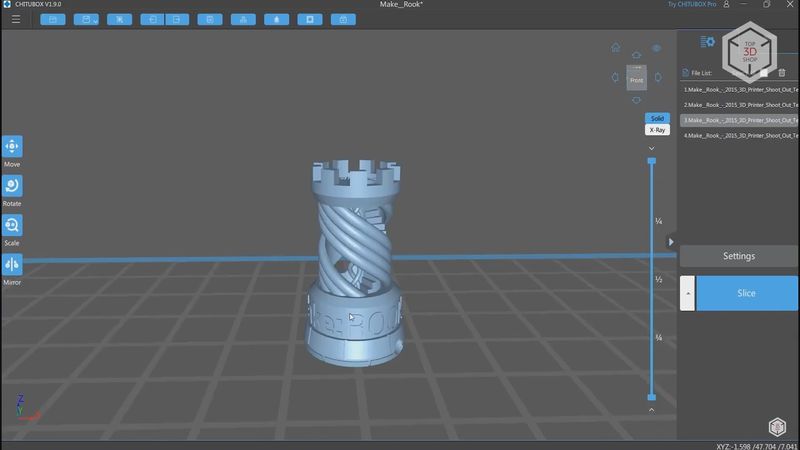
But it did not make sense to print it alone on such a huge printer, so we put four pieces in different areas of the platform. At the same time, we would check the calibration.
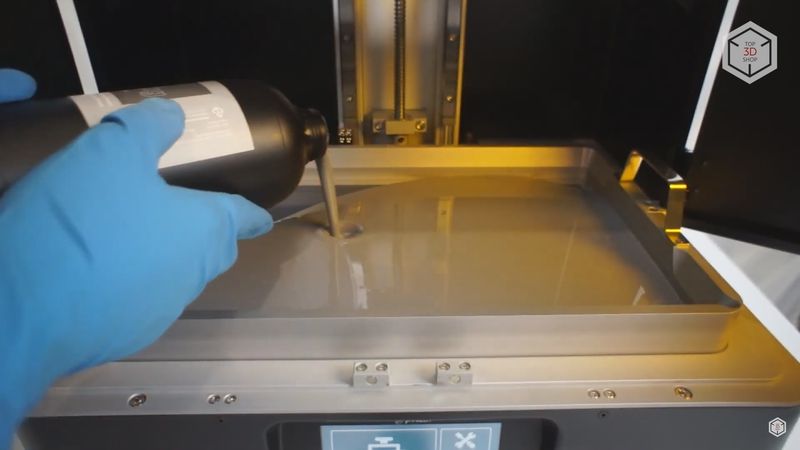
Despite the fact that the models are small, it is necessary to pour a lot of resin into the tank, at least 0.5L is needed for the resin to cover the surface of the film. And you have to pour at least 1L to do full-scale printing. Sometimes you even have to refill the resin when printing large models.
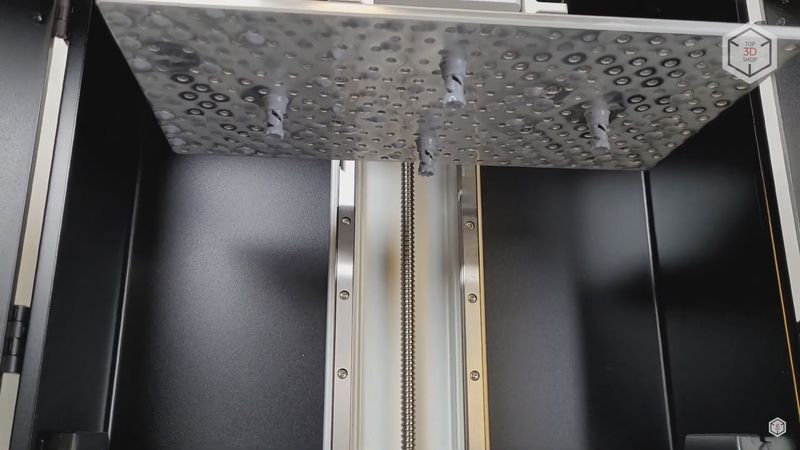
We started printing and immediately noticed one of the advantages of the perforated platform: usually, when printing on a resin 3D printer for the first couple of hours there is no way to tell if the model had stuck to the platform or not — this can only be determined by the sound of the model peeling off the film. Here you can see almost immediately that some of the holes remained sealed and no resin was able to sip through them, which means the model was stuck to the platform in these areas. Given the volumes of resin and the difficulty of cleaning the printer, the perforated platform can save you a lot of time.

On the other hand, there is a disadvantage to this kind of setup. Since the platform is flat, the resin left on its top has nowhere to drain off. It makes sense to carefully clean it off the moment the platform stops sinking into the resin. Otherwise, after the print, you will have to wait a long time draining it into the vat, and the resin can leave splashes on the printer’s casing when dripped from a distance. There is no particular need in this process, but this will add to the convenience of use.
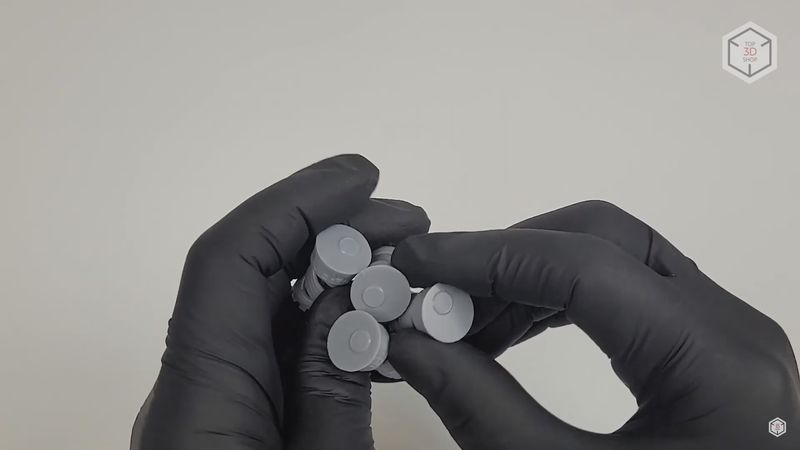
So, after a couple of hours, we got four rooks. They were printed directly on the platform. This was risky: the models are small and it was not clear how the holes in the platform would align. But we were lucky that all of the four rooks did not peel off and at the same time could be removed from the platform easily.
Qualitywise, it is hard to make any reservations. The layers are stacked evenly, the level of detail is immaculate, and given the size of the printer, the overall experience is extremely satisfying. There are no blurs from screen pixelization, all the letters are printed clearly, the overhangs are even, and the smallest elements are in place. The result is impressive!
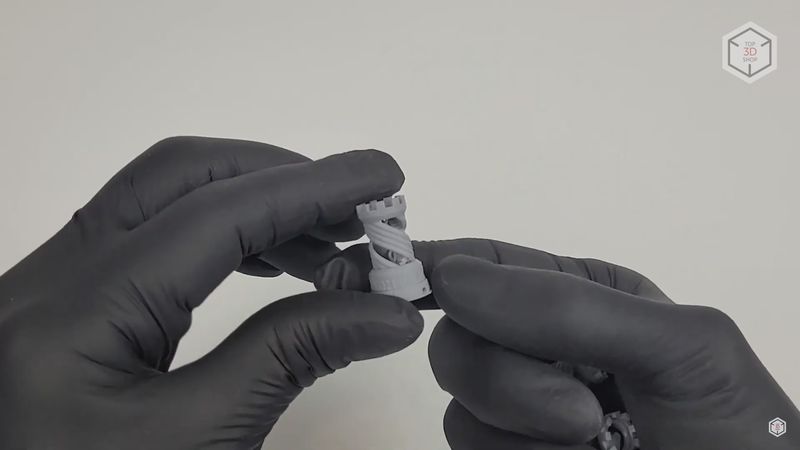
The only minor annoyances are the bulges clearly standing out on the surface that adhered to the platform caused by the holes in the plate. This is the reason why the vast majority of the time you will be printing on this machine with supports.
You can print directly on the platform, but the bottom layer will always be covered in these kinds of bulges.
Chainmail
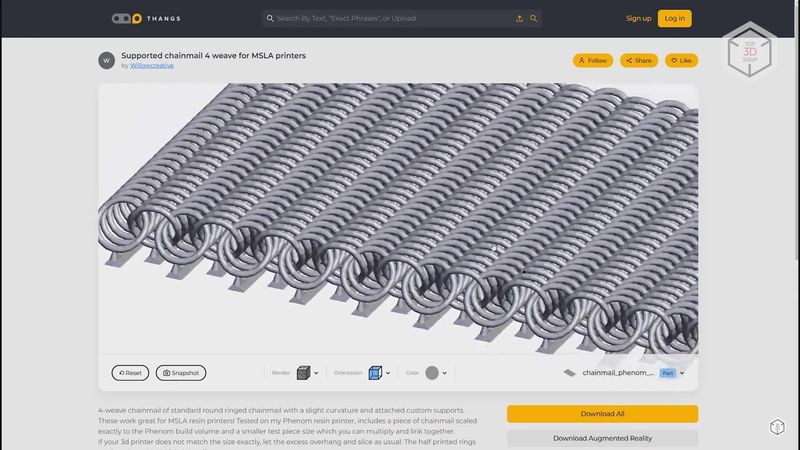
In the second test, we decided to check the curing uniformity over the entire print area. Sometimes the light from the projector does not reach the screen’s corners and the resin in these areas cures less than in the center of the platform. For this test, we took a chainmail model from the Thangs website. This is a vast number of rings intertwined with each other, with each ring based on one small support structure, while the supports are in turn connected with small lines.
Aside from curing uniformity, there is a lot that can go wrong here — it is enough for one ring to break away from the support and all the surrounding elements can get damaged. Unfortunately, that’s what happened to us. A couple of rings broke off the support and damaged several rings next to them.
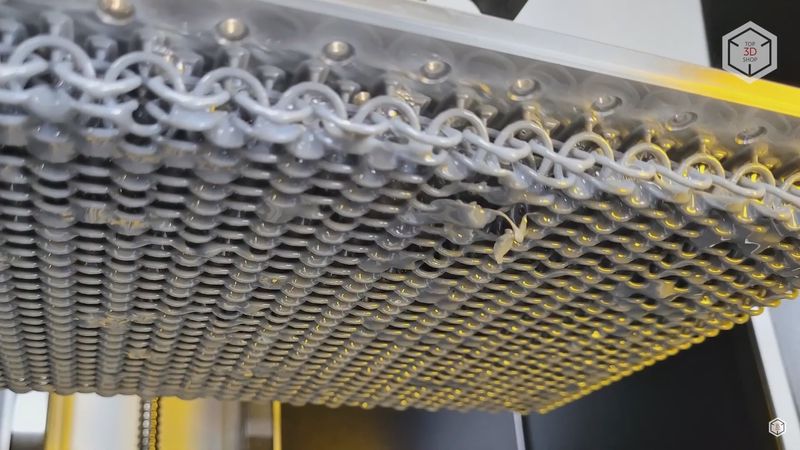
At the same time, the supports in this area were printed fine and did not stick off the platform. The rest of the chainmail turned out perfectly.
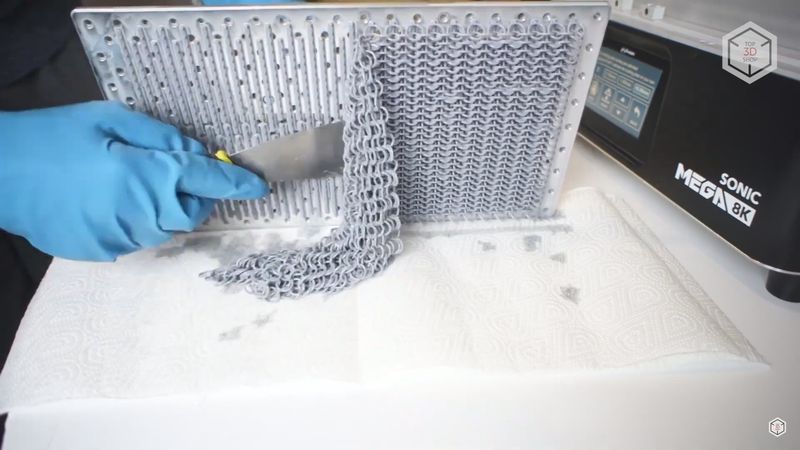
All of the rings are spot on at the edges and corners, all of them are uniform and do not stick to each other.
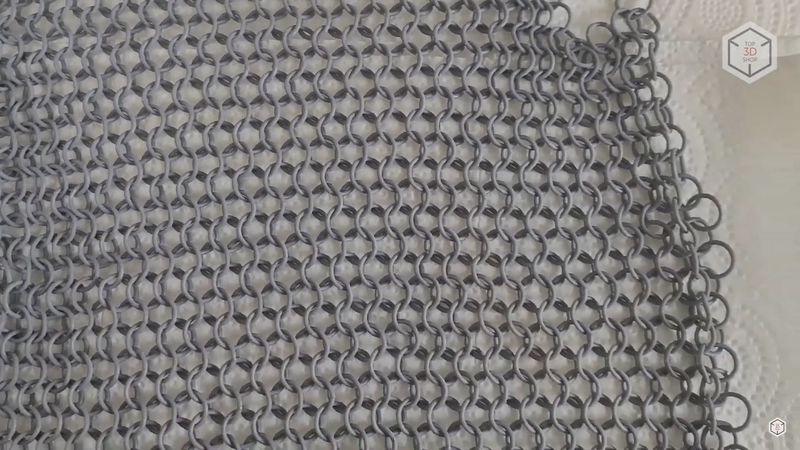
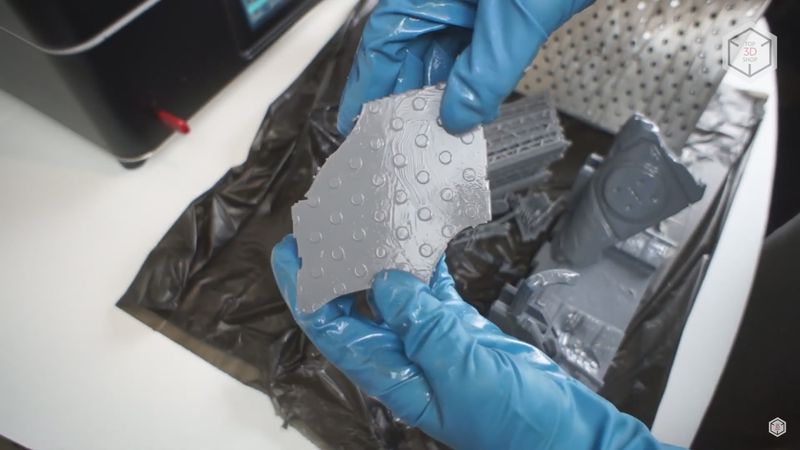
After rinsing and additional curing we ended up with this chainmail cloth. Pleasant to the touch, yet not completely intact.
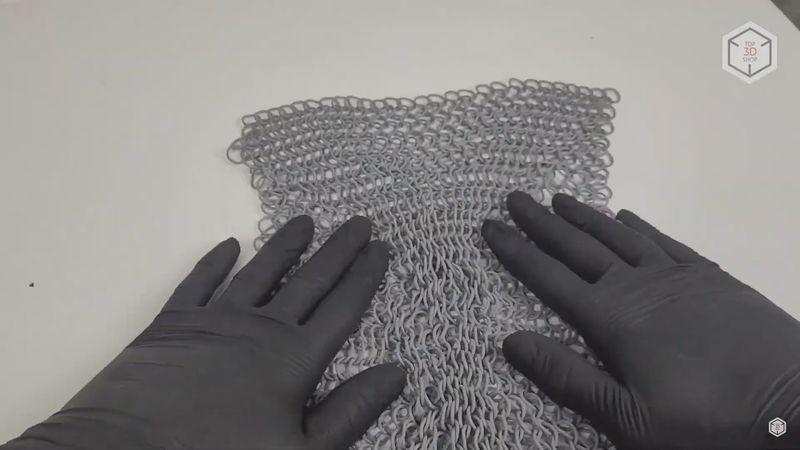
It was impossible to continue printing immediately after this session because of the damaged rings. Some could remain in the resin and damage the film in the vat or even the screen. So, we had to drain and filter all the resin and wash the platform and the vat before the next print. Honestly, this is the most negative experience associated with this printer.
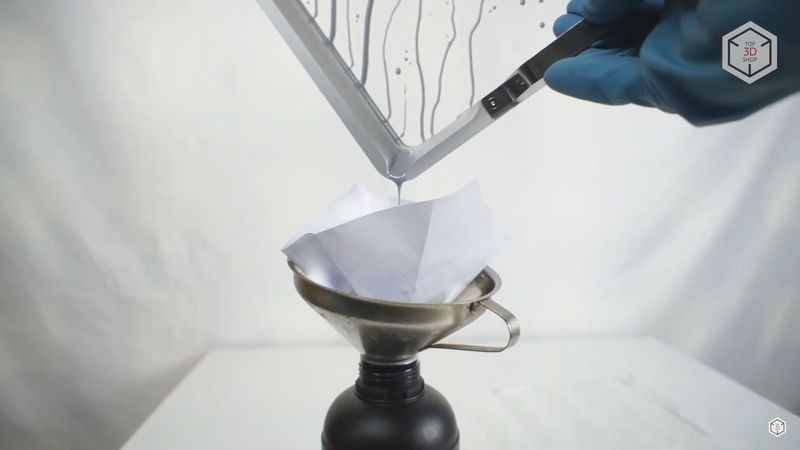
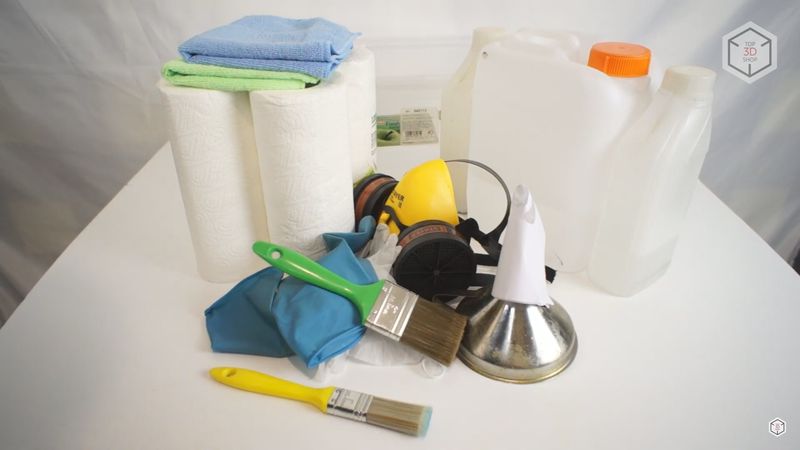
For these procedures, you will definitely need a well-ventilated room, a ton of alcohol, a mountain of paper towels, a respirator, good rubber gloves, a fairly large basin, funnel, filters, etc. Ordinary paint brushes can also be helpful as long as they are soft and resistant to alcohol. Most importantly, it takes a lot of time. It takes at least an hour to carefully drain and rinse everything. And if you need to take the model off, remove the supports, and rinse it out, it can take a couple of hours.
If you thought using regular resin 3D printers like Anycubic Photon or Elegoo Mars was a hassle and a mess, after the Mega 8K it will seem like child’s play — this is a serious machine.
Alien
After thoroughly cleaning the machine, we decided to print something really big and beautiful. This model is from the malix3Design website. They have a lot of highly detailed models of movie and game characters. The models are not free, but they are good value for the money.
We decided to try printing a diorama with the Alien and its victim. The model is large and complex. It would not even fit in the print area of the 8K, in one piece including the stand. But fortunately, there is a version that is broken up into several parts.

We decided to print the Alien in its entirety. We managed to fit it on the platform at a certain angle, though it was tight. We added a raft under the supports just in case. It turned out that this model needs a lot of support structures since it has many small elements and details at different angles.
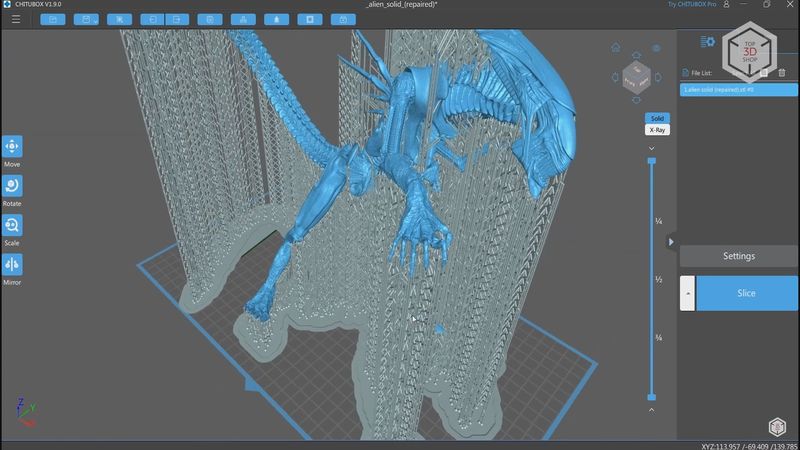
For the most part, we added light supports. In the areas difficult to reach, which are initially printed in the air, we added medium supports for stability. It would probably have been cheaper and easier to print this model in parts, and even hollow out some of them, but the goal of this print was to give the machine a challenge.
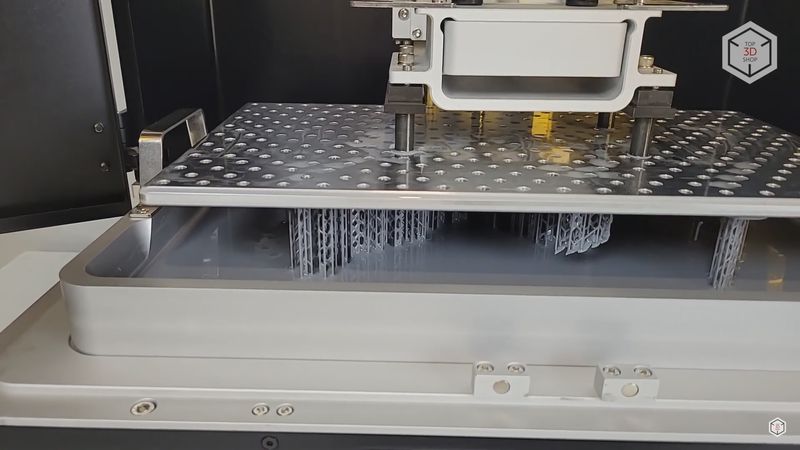
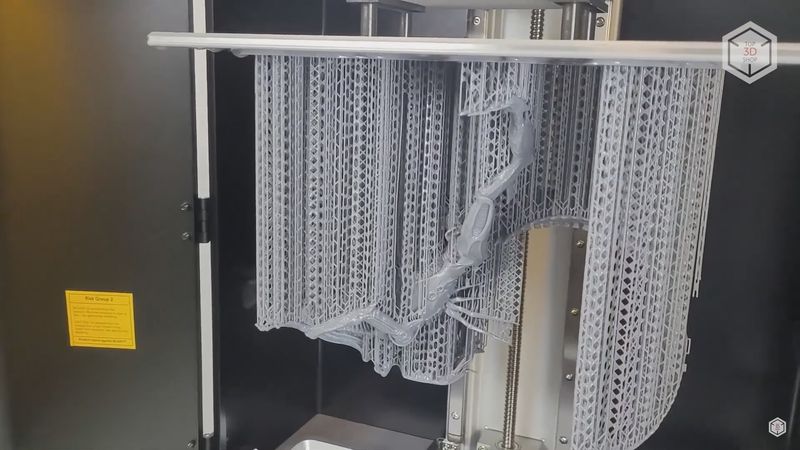
The printing was successful and 32 hours later we saw the whole Alien on the platform. A couple of freestanding supports broke off during printing but had no effect on the overall quality. The bulk of the supports held up and did their job.
Getting the Alien off the platform was not very difficult.
Next came the most dangerous adventure, we needed to remove the supports without damaging the model itself. We decided to do it before rinsing and since the supports were light we managed to remove almost all of them just with gloved hands. At the same time, they almost did not leave any marks, of course, some small dots are visible, but on such a model they are almost unnoticeable. Furthermore, they can be removed in post-processing.
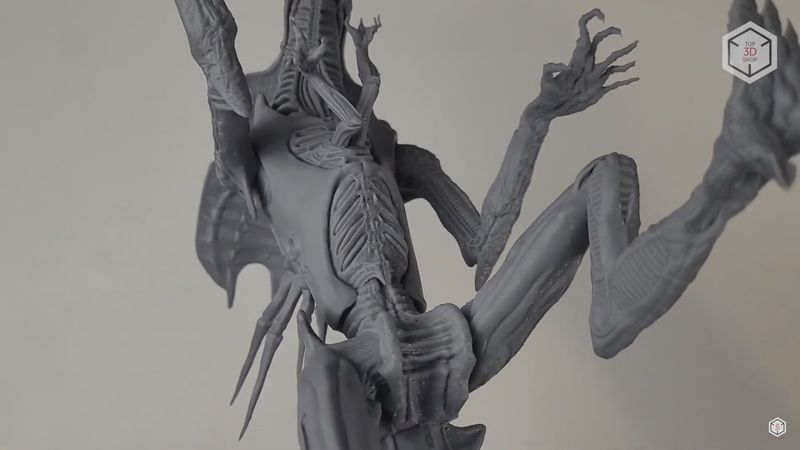
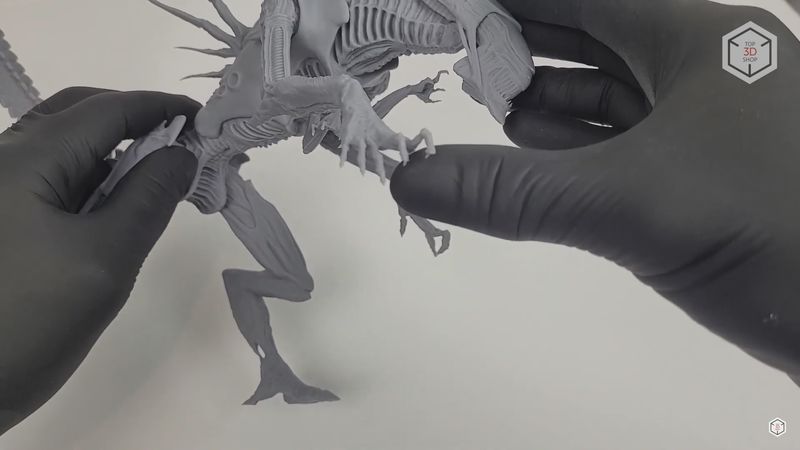
We carefully rinsed the model in alcohol, removed the remaining small supports with a brush, and ended up with this Alien. Saying that it turned out well would be an understatement — the model is simply gorgeous, and you can stare at it for hours. The detailing is phenomenal, the number of small elements is just uncountable. Everything is printed out well and not a single layer stands out.
The model, though, has a couple of small flaws. For example, some clawed fingers detached from the supports and flattened out. And we have already mentioned the traces from supports visible on the smooth areas. But all this is insignificant, considering the overall complexity of the model. Besides, it is not the printer’s fault, to be sure.
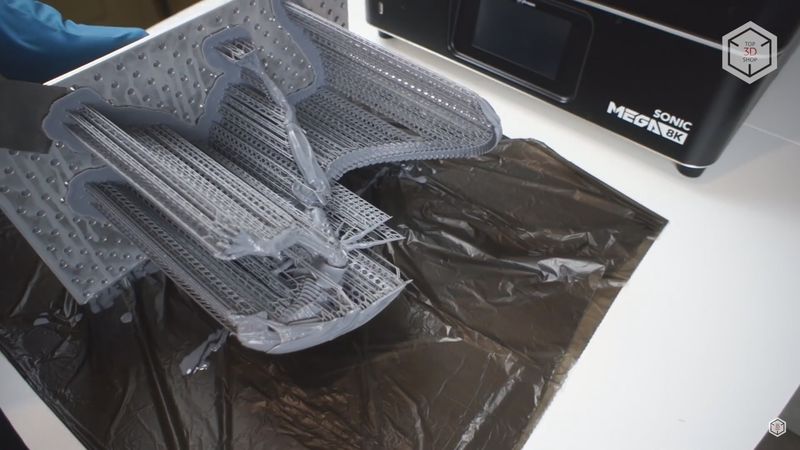
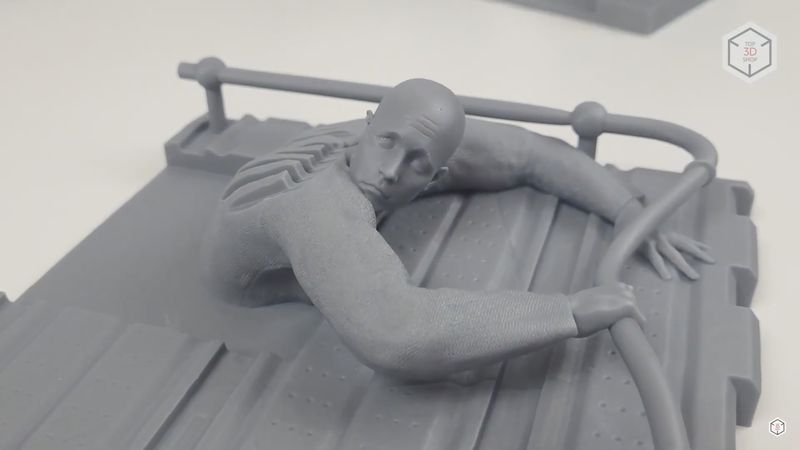
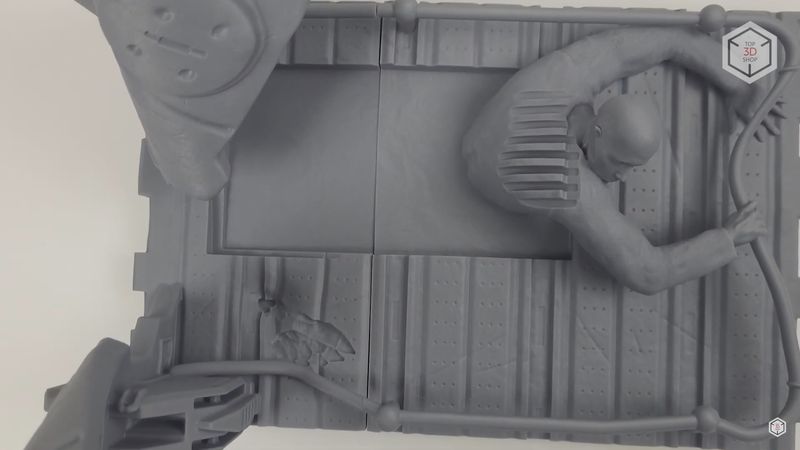
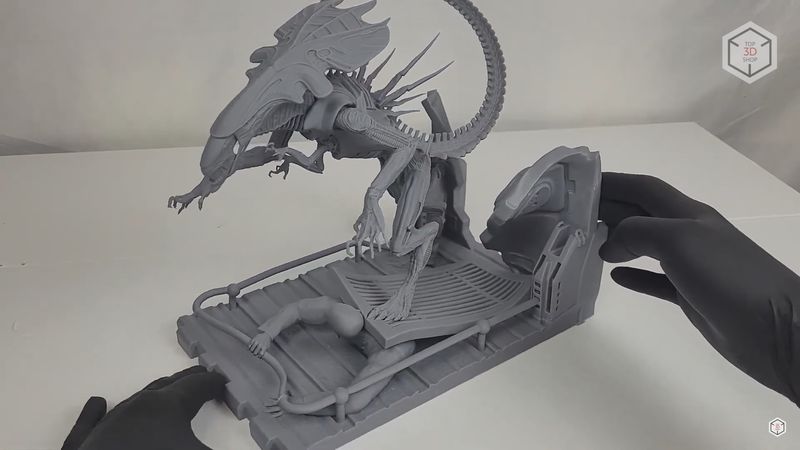
We set up the Alien for additional curing and got busy printing the remaining parts. There were three of them: two parts of the platform with the frightened man and a separate grid this man is pushed against.
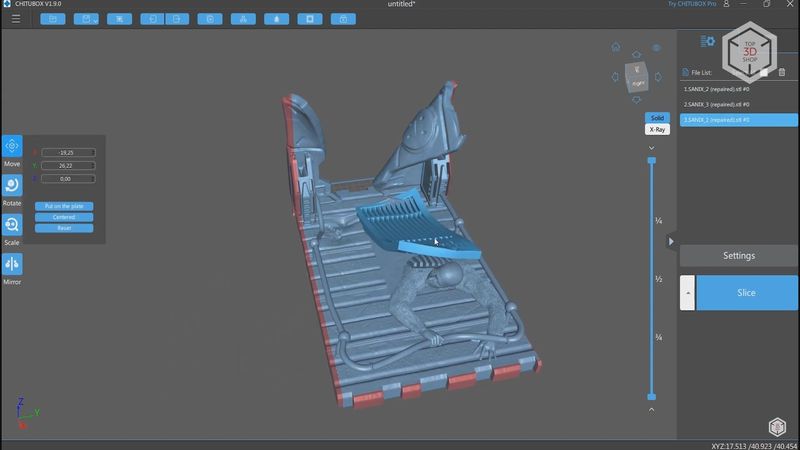
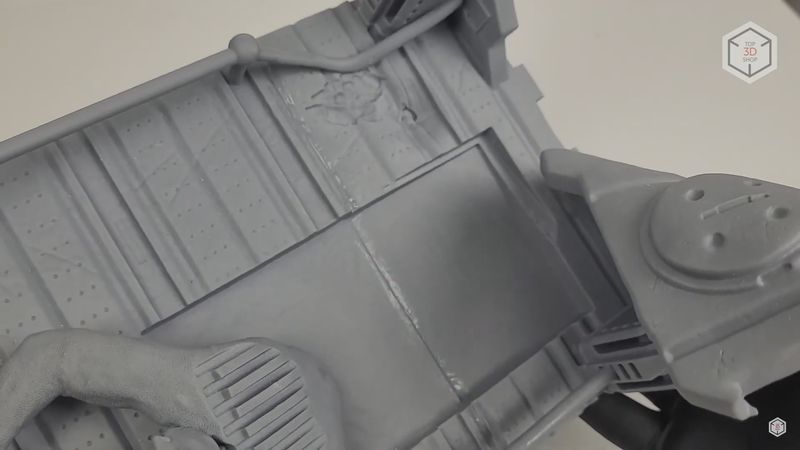
The larger part of the platform was sent to the printer. It, too, needed to be tilted at an angle so the visible areas would have the least traces of the supports, which were plenty. It also took more than a day to print it out. Despite that a lot of the model’s geometry had contact with the film in the vat, the model is quite uniform. Again, there are no protruding layers, bent corners or offsets.

This part was also washed and left to cure, while we sent the remaining two parts to the printing.
On the whole, they turned out well too, although the second part of the platform was initially being printed from the areas that should be glued together later on, and they turned out a little distorted in geometry — the supports did not all hold up. This part had to be sanded down after printing.
For gluing we decided to use another interesting device from Phrozen — the Cure Beam. In essence, it is a UV flashlight, adapted for curing photopolymer models. In short, there is nothing outstanding about it, but it is convenient to use.
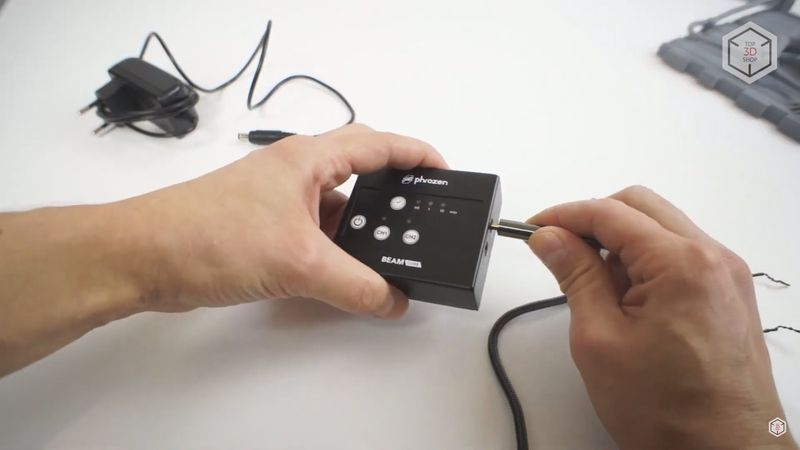
The principle for gluing the model with resin is to drop some liquid resin on the glued area, wipe off the excess, and then treat this area with the UV flashlight for a few dozens of seconds. If the gaps between the surfaces are large, the procedure should be repeated until the desired result is obtained.
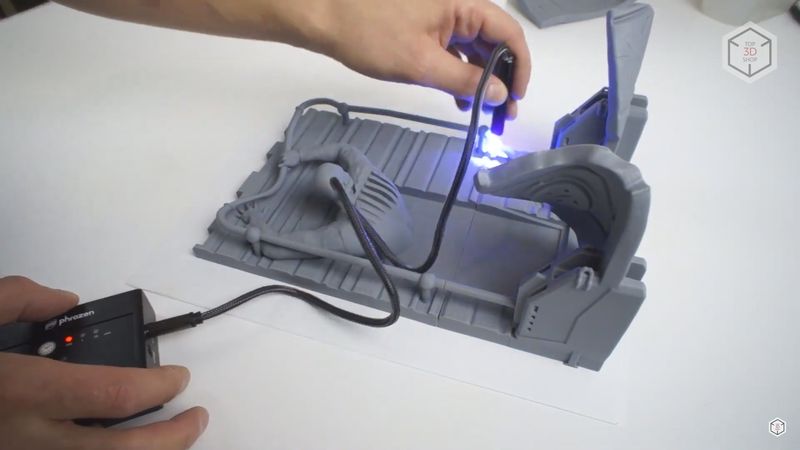
This way, the models are practically soldered together. The only thing is, the added resin is a lot shinier than the rest of the printed model, so the seam may be visible under certain lighting. On the other hand, if the model involves post-processing and painting, all these areas will eventually be hidden under a layer of paint.
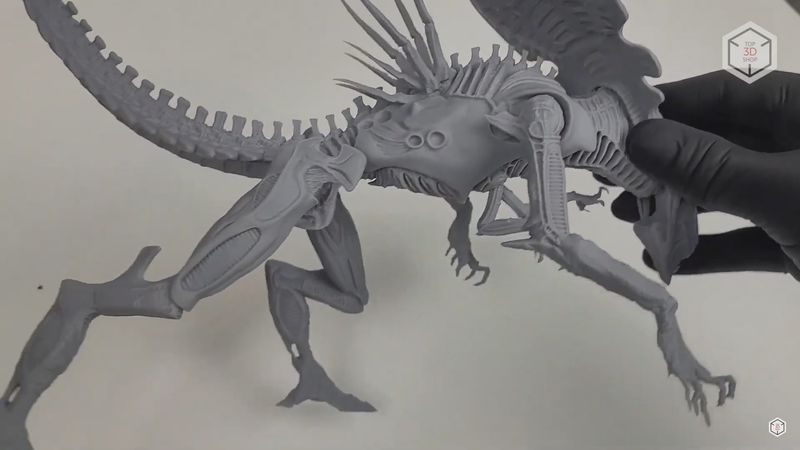
After gluing and a little work on the seams, we got this Alien. The diorama is very nice. At the same time, there is some weight to it and it feels solid. In fact, there is a contradiction with the Alien lore. We will not go into the details of the Alien’s life cycle, but it seems that this is the Alien Queen, so she should be two to three times higher than the human. And here she is not much bigger than a normal trooper. Anyway, that’s not our concern.
Bottom line
The Phrozen Sonic Mega 8K is an excellent 3D printer in its class: boasting a huge printing area, monochrome screen with 8K resolution, quite reliable mechanics that can handle really complex tasks, simple, but also functional and stable control board and firmware. What is missing is air filtration and a heater for the printing area.
The drawbacks for the most part are not related to the printer, but rather to the technology of resin printing in general. The Mega 8K is really hard and expensive to work with. You need a lot of resin and consumables, a specially equipped room since you need a lot of space and good ventilation, and a lot of time for the seemingly typical procedures of draining the resin and cleaning the printer. But if you need to print large, detailed models and are willing to put up with the hassle, this printer is definitely for you. With the right approach, it can work around the clock and produce really great-quality parts.
FAQ


Write a comment