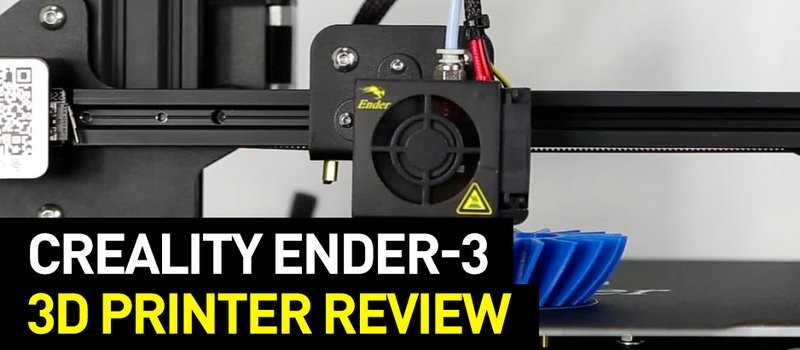
Hi everyone! In this review, we will talk about the Creality Ender 3, a low budget FDM 3D printer produced by the Chinese manufacturer Creality. Well-known for its incredibly low price, this open-source cartesian-style 3D printer is one of the best and most affordable 3D printer kits currently available on the market. Open-source and easy-to-assemble, it supports virtually unlimited upgrades, which can make it capable of printing high-quality parts with ease.
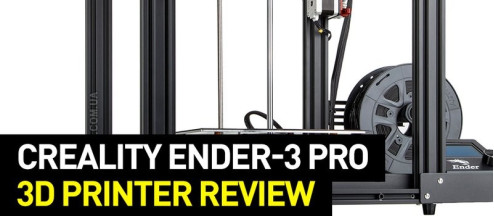
Although the manufacturer has released two updated versions of their flagship model, the Ender 3 Pro and Ender-3X, the Creality Ender 3 keeps being a chart-topper.
In this Creality Ender 3 3D printer review, we will analyze the specs and features of this budget printer, trying to find out why it is so popular.

Source: www.creality3dshop.eu
Wallet-friendly, infinitely hackable, and decently accurate, the Creality Ender 3 might sound too good to be true. That’s why lots of newbies frequently ask themselves: where is the catch?
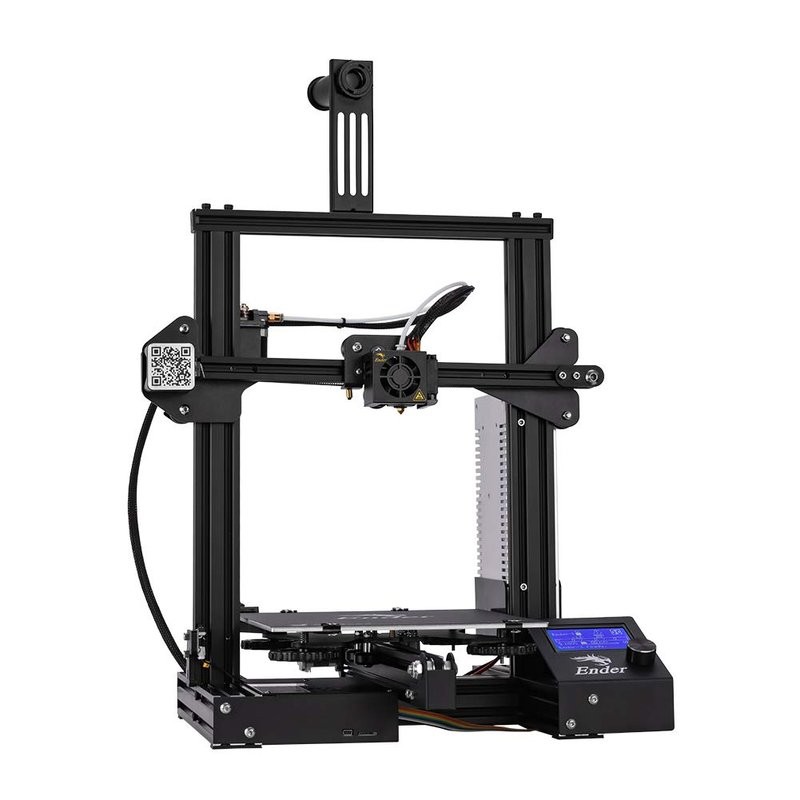
Well, we can say it loud. There is no catch at all. The Creality Ender 3 is extremely good value for the money. It is a well-built, safe device that can produce good quality outputs with almost no effort. It benefits from quality-of-life features, including a power recovery function, a tight filament pathway, and a heated bed with a viscose surface sticker similar to the BuildTak one. Also, it offers a decent build volume of 220 x 220 x 250mm, which lets you easily print large parts in one go.
The machine prints well with a variety of filaments, including PLA, PETG, and ABS.
Source: amazon.com
Of course, it isn’t all puppies and rainbows. Indeed, the Creality Ender 3 does have some flaws, but none of them are insuperable. For example, it might experience some warping or adhesion issues when printing with ABS-type materials. Its irregular base could generate some wobbles. Also, it does require manual bed leveling. By the way, spending a little bit of time tweaking lets you solve almost any issue.
In short, considering its low price, the Creality Ender 3 is one of the best budget 3D printers you will ever put your hands on so far. No wonder that so many people have already chosen it.
Let’s start with a brief overview of Creality Ender 3’s technical specifications.
And now, let’s dive into them to better understand their meaning.
The Creality Ender-3 is an FDM 3D printer. This means it prints parts by melting and extruding a thermoplastic filament through a heated single extruder equipped with a Bowden feeder system. The extruder module has been designed for printing with generic 1.75mm filaments, no matter the brand. The pathway between the Bowden extruder and the hot end is tight and narrow, this might help when printing flexible filaments but might cause some difficulties when trying to insert the consumable into the route.
Also, to effectively print with flexible materials, upgrading to an all-metal extruder, or switching to a Direct Drive system is preferable.
Source: creality3dshop.eu
Like in all the Cartesian-style printers, the Ender 3 print head moves along two axes, the X and Z axis, while the bed moves along the Y-axis. During its path, it gradually deposits the melted filament layer by layer. Depending on the height of each layer, you will get parts with a different level of detail. In particular, depending on your printing requirements, you can set the layer height between 100 to 400 microns. The lower the height, the higher the resolution.
The device can print parts at a maximum speed of 200mm/s.
Source: www.creality3dshop.eu
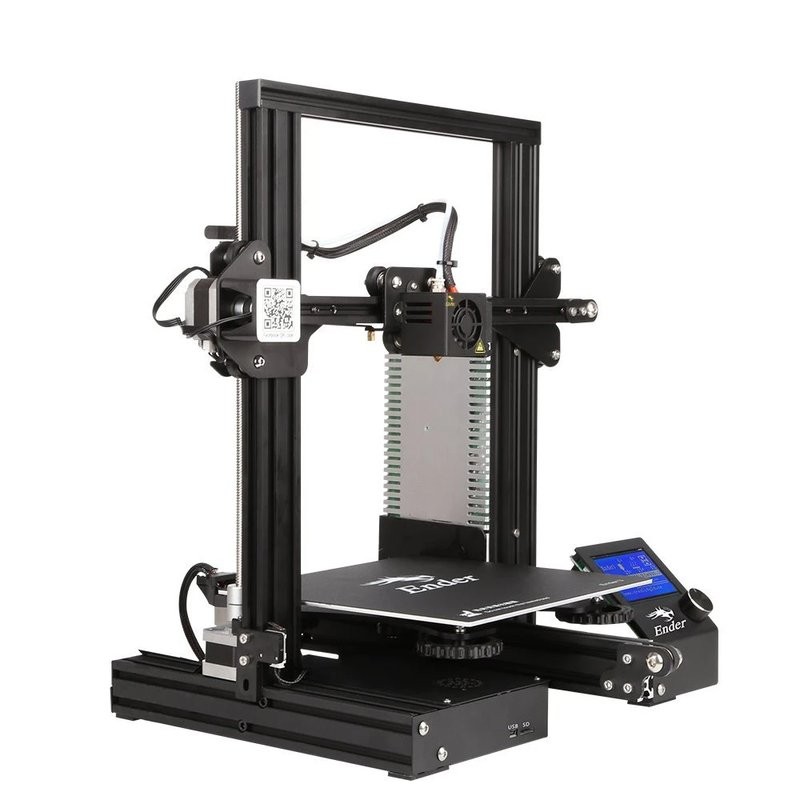
The Ender 3 consists of a metal structure. Both the frame and the Z-axis single leadscrew are made of aluminum. This results in a decently stable construction with reduced vibrations.
Credit: Instagram.com
The build volume of the printer is 220 x 220 x 250mm. The machine comes with a heated aluminum bed covered with a BuildTak-like sticky surface, which should make almost any print stick well to the bed without the need for hairspray or glue sticks.
However, switching from the stock bed to a glass or a magnetic flexible one seems to grant way better adhesion and low warping. No wonder that replacing the print bed is one of the most common Ender 3 upgrades.
Source: www.instagram.com
One of the main features that make this printer stand out from the competition surely is its low price tag. Some additional noteworthy features are the fully open-source system and the print recovery function.
The open-source system lets you conveniently mod the printer replacing its components or adding extra accessories leaving room for lots of upgrades and hacks.
Source: www.instagram.com
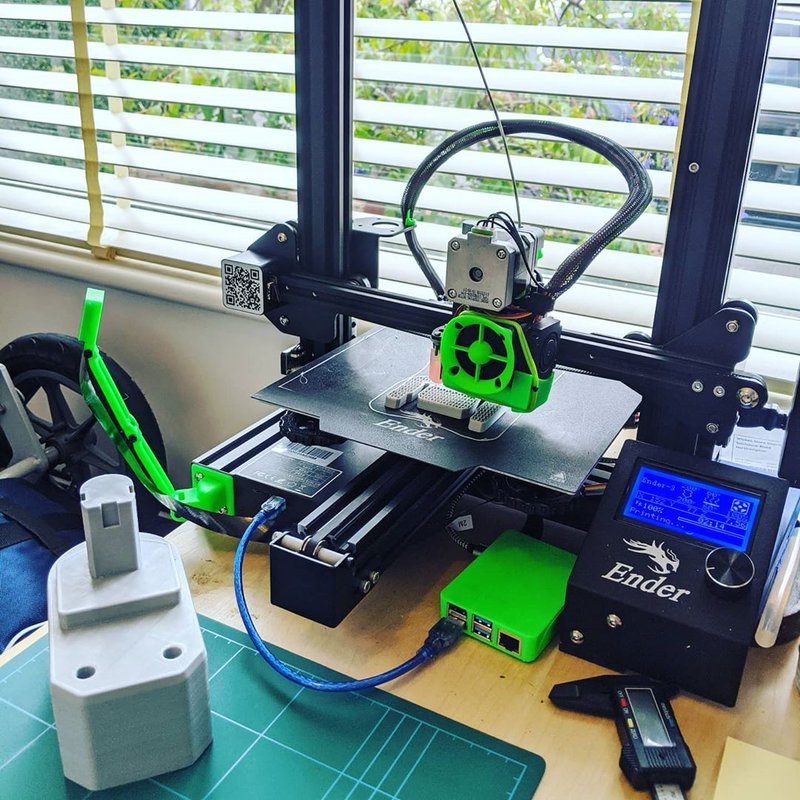
For example, one user hacked his Ender 3 revising the cooling fan shroud, adding a Raspberry Pi with Octoprint and a camera to always keep an eye on the printer. It also replaced the Bowden extruder with a Direct Drive kit.
With the right improvements, you will get a reliable 3D printer capable of producing high quality parts while granting stable performance over time.
Source: www.reddit.com
The print recovery feature prevents print failures due to power loss or accidental disconnection. It has been designed to immediately save the printing progress to let you restart the print job in a different moment, exactly from where it left off. A great feature for a budget device.
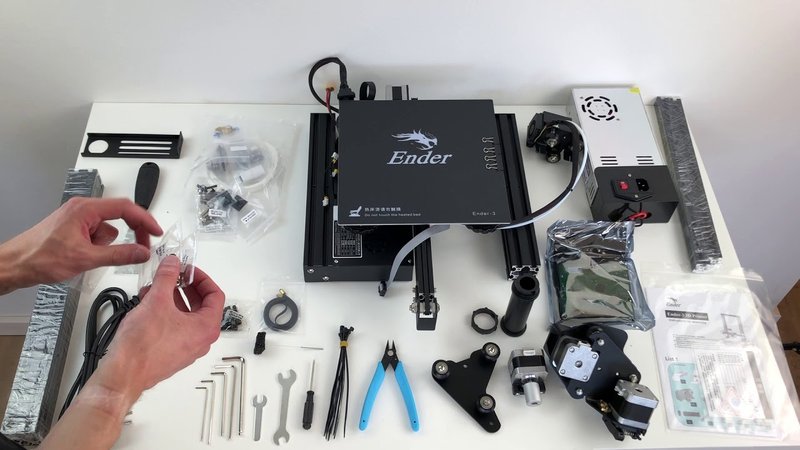
The Creality Ender 3 is a pre-assembled kit that ships flatpack. Some of its parts, such as the base unit and the hot end, come already assembled streamlining the assembly process. Indeed, to get the printer up and running you’ll only need to screw the main components together and plug some wires.
The package contains all the necessary parts to set up the printer and some extra elements. It includes:
Source: iam3dpro.com
Besides the essential components required to assemble and operate the printer, the package also contains a sample of PLA filament, a USB stick with the user manual, the assembly instructions, a set of tools to build the device, a spatula for removing the prints from the bed, a needle for cleaning the nozzle, some useful spare parts (eg. spare nozzles), and an SD card with a card reader.
Setting up the printer is not so difficult but requires some time. The shipping box includes an assembly manual that will guide you through the process. The Ender 3’s assembly instructions are broken down into 12 steps. Unfortunately, some of them are missing detailed explanations. This makes the setup slightly longer than expected.
All the components of the kit correctly fit together, without gaps. This reduces the odds of play. By assembling the printer on your own, you'll get solid knowledge of all its parts and how they interact together. This will streamline the upgrading process, giving you the possibility to modify the printer to fit your imagination.
The Creality Ender 3 manual is more than enough to successfully assemble the printer. However, to facilitate your work, have a look at this great step-by-step video tutorial. It will guide you through the entire assembly process letting you save some time.
The Creality 3D Ender 3 is an open-frame all-metal 3D printer. The structural components are made of extruded aluminum. This makes the device stiff and sturdy resulting in stable performance. Thanks to its rigid base, you can comfortably move the machine around without the need for re-calibration.
The printer adopts V-slot aluminum channels and POM wheels for precise positioning and smooth motion. It features a single Z-axis leadscrew that relies on angled bearings. This system lets it keep the horizontal support perpendicular to the vertical one. The Ender 3 is engineered with a Bowden-style extruder with an aluminum channel. This results in greater rigidity and better print quality.

Source: letsprint3d.net
The base unit comes in one piece, housing both the power supply unit and the mainboard. This gives a compact and sleek look to the entire construction. The printer build platform is placed upon the base unit, making for more stability.
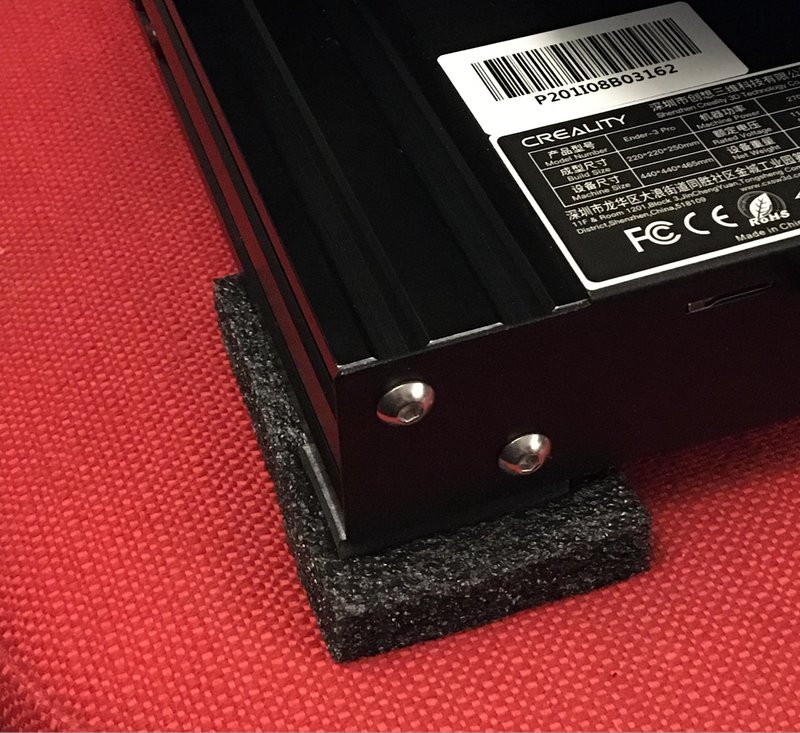
Unfortunately, the printer base is uneven. This might cause some wobble while printing. To solve the issue, you can place a small paper wedge or the black foam padding the printer comes with under the device. This will help reduce both vibrations and noise.
Source: www.reddit.com
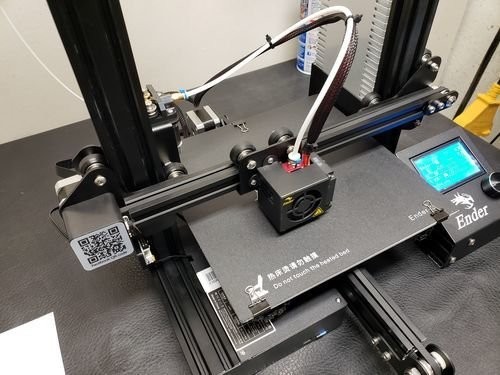
The bed is manually calibrated. The leveling process can be performed using the large dials placed under each corner of the bed. Thanks to their large size, the knobs are extremely easy to turn, streamlining the overall calibration process. To check if the bed is properly leveled, you can move both the X and Y-axis to the corners using the integrated LCD control display.
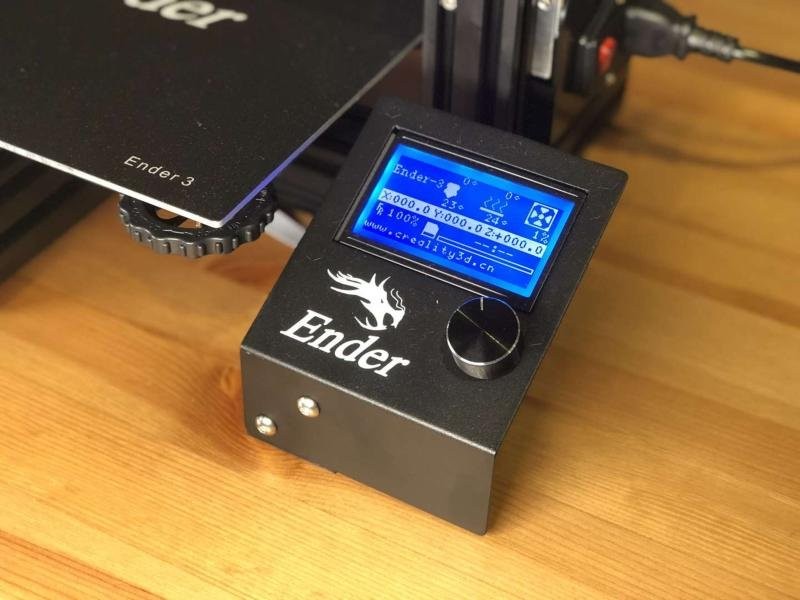
Like in most Creality 3D printers, you will find the LCD display with a rotating knob on the right side of the machine. The screen is attached to the device. Easy to navigate, the control display lets you manage a variety of settings and keeps you updated on the printing progress.
The machine has a small footprint being a good fit for almost any tabletop. Its external dimensions are 439 x 409 x 465 mm. It only weighs 6.9 kg.
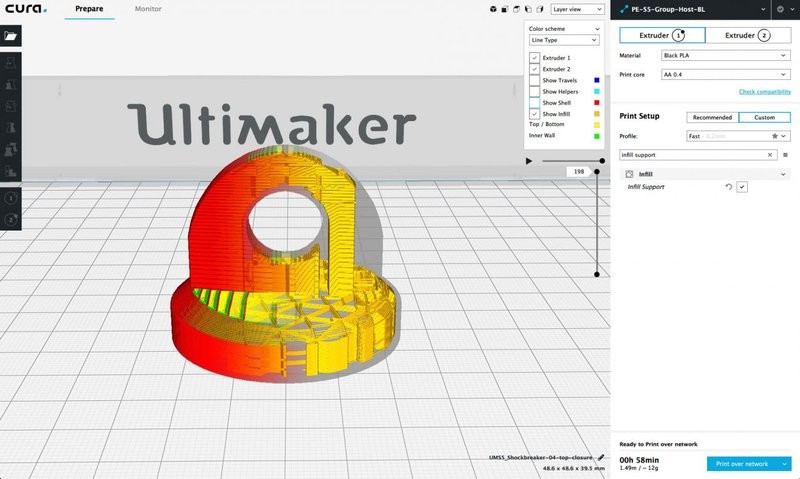
The Ender 3 is compatible with most of the common slicers available on the market, including Cura and Slic3r.
Source: additivenews.com
Using the popular Cura Slicer streamlines your 3D printing experience. This free and open-source program gives you wide control over the printing settings. It features ongoing upgrades and provides over 400 settings to fine-tune your print model and get optimum printing results.
Also, it includes a perfectly working pre-set Ender 3 printer profile. We will talk about it later in this review.
Before slicing your 3D model, you need to generate it. How to do that? Well, you need a 3D modeling software that lets you edit and sculpt watertight models suitable for 3D printing.
Meshmixer, Tinkercad, and Fusion 360 are some of the most common programs used by the 3D printing enthusiast community.
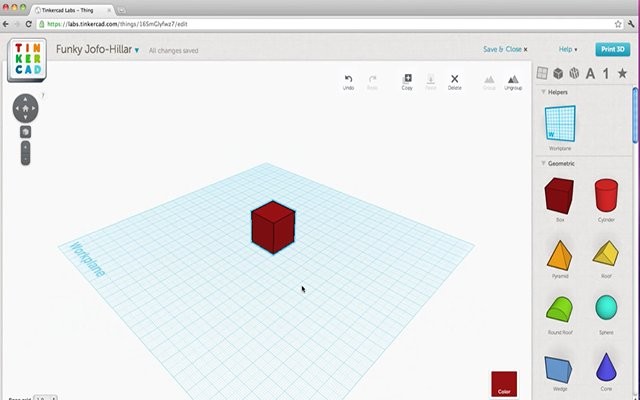
If you are a beginner, we suggest starting with Tinkercad, a browser-based 3D modeling software. Thanks to its ease of use, it is considered one of the best entry-level 3D modeling programs.
Source: chrome.google.com
In any case, you are free to use any other software capable of exporting watertight 3D models suitable for printing (STL, OBJ, etc.).
If you are planning to upgrade your Ender 3 by installing the laser engraver upgrade kit, IMG2GCO might come in handy.
IMG2GCO is a script generator designed to control and use the laser engraving head, letting it move in a pattern. It doesn’t include any safety feature, that’s why it should be used only by expert users.
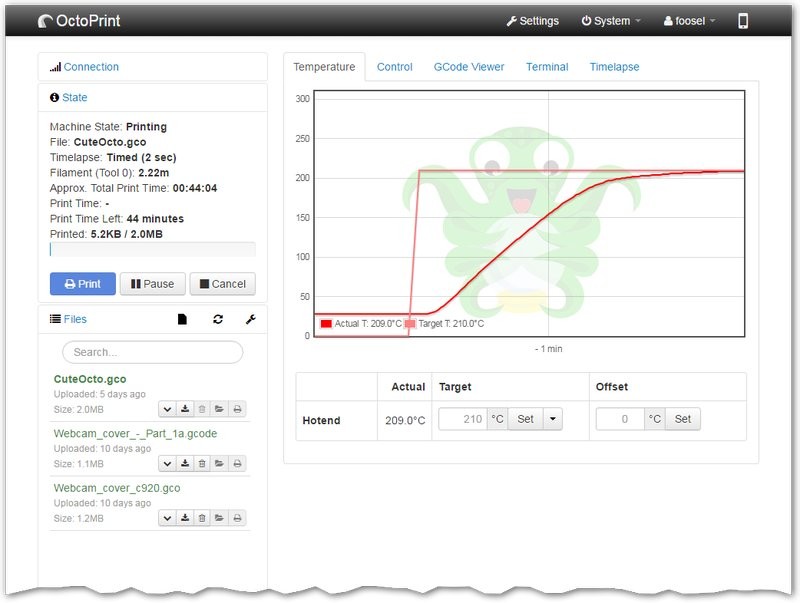
Last but not least, let’s talk about OctoPrint. It is one of the most recurring Creality Ender 3 upgrades. OctoPrint is an open-source, easy-to-install 3D print controller app. It enables Wi-Fi connection, giving you the possibility to remotely control your prints.
Source: https://octoprint.org
The Creality Ender 3 comes stock with the popular Marlin firmware. Multiple Ender-3 reviewers suggest upgrading the stock firmware to get the most from your printer. Indeed, doing that will let you benefit from some extra features, including thermal runaway protection, manual mesh leveling, or BLTouch auto bed leveling.
If you are a tinkering type, you can easily update the Ender-3 Marlin firmware to benefit from some of these advanced features. Online you will find a lot of useful videos explaining the entire procedure.
If you need to restore the stock firmware, you can simply do that by downloading the original file on the Creality 3D official website.
The Ender 3 features a mini USB port and an SD card reader. This lets you operate the printer from a USB-tethered computer or independently via a USB stick or an SD card.
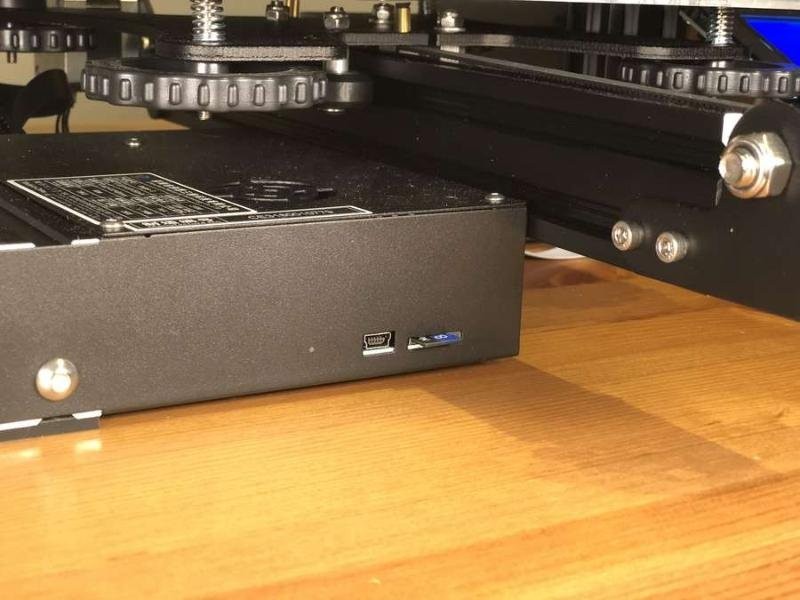
Operating the printer via a USB-tethered is quite simple. You’ll only need to connect the machine to the computer via a USB cable. The printer uses an FTDI USB to Serial adapter chip driver, which automatically enables USB connection between the devices.
However, if the computer doesn’t recognize the printer, you might need to download and reinstall the driver to restore the connection.
The Ender-3 is an open-source printer. It comes with a Bowden extruder that adopts PTFE tubing. For this reason, its hot end can only heat up to 255°C. Its operating temperature is ideal for printing with PLA, ABS, TPU, PETG, flexible and exotic filaments.
The brass nozzle makes for great printing performance with almost any consumables, except abrasive ones. The heated bed reaches a temperature of up to 110°C, making the printer compatible with ABS-type materials.
Thanks to its open nature, the Creality Ender 3 can print with almost any 3rd-party 1.75mm filament, providing you with a broad range of material choices. This results in high design flexibility.
If you are planning to use your Ender 3 with the Cura Slicer, here you can find some useful info.
As already mentioned, the Cura library includes a default Ender 3 printer profile with pre-set values. The profile works really well, that’s why we strongly suggest loading it before launching your first print.
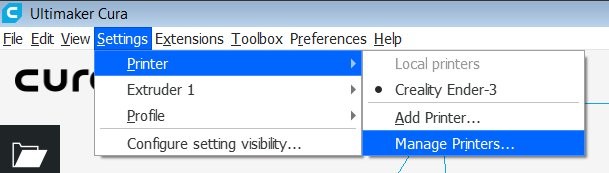
Follow these instructions to load the profile in your slicer:
Source: www.emcu.eu
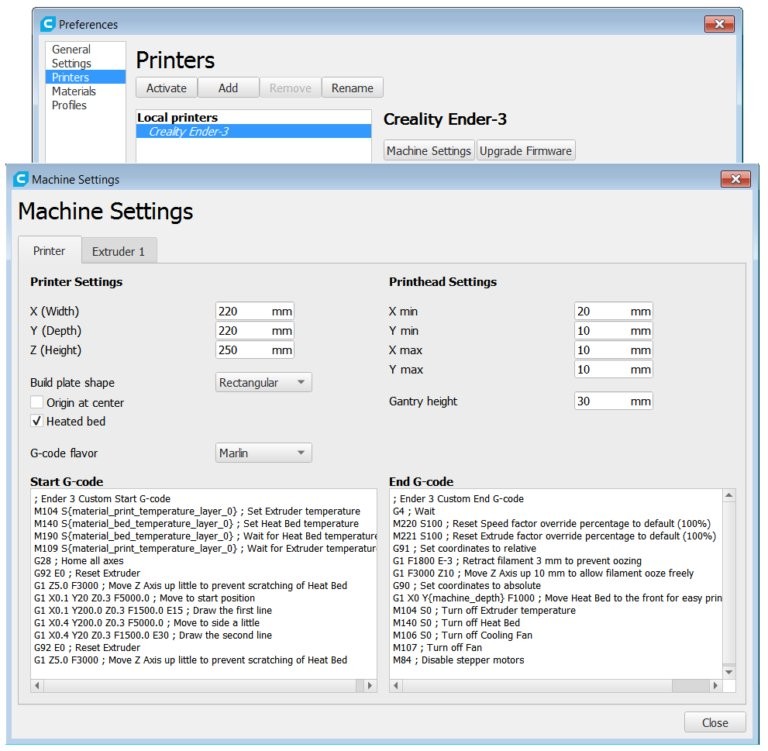
in the preferences window, click on add and, then, add a non-networked printer
select Creality and then Ender 3
Source: www.emcu.eu
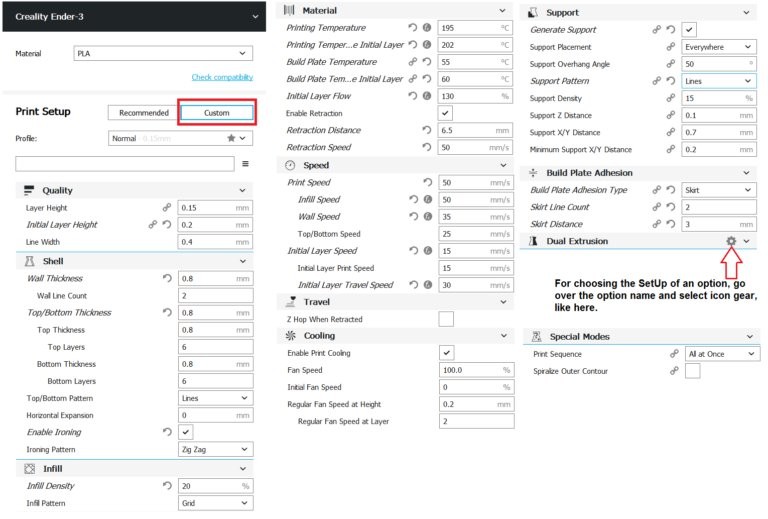
The profile includes all the main settings ideal for printing with the Ender 3 3D printer.
Here are some recommended settings for successful PLA, ABS, and PETG printing on your Creality Ender 3.
Source: www.emcu.eu
Add them into Cura to start printing with your preferred filaments flawlessly.
The Creality Ender 3 is a great printer capable of producing good quality parts out of the box. Being an open-source device, it leaves room for lots of hacks that might improve its functionality and performance.
Some upgrade kits are available directly on the official Creality 3D store, others might be available from 3rd-party vendors.
If you are interested in them, here is a short list of the upgrades you should have a look to:
Besides paid improvements, there are a lot of upgrades that can be self-produced directly on your Ender 3.
You can find most of these printable upgrades using our 3D printer files search engine. Just type the name of the part in the search bar and browse the results.
As already mentioned, Creality 3D released a couple of upgraded versions of the Ender 3, namely the Ender 3 Pro and the Ender-3X.
Unlike the original Ender 3, the Creality Ender 3 Pro features an improved 40x40 aluminum extrusion for the Y-axis. It makes the printer more rigid and stable, enhancing print quality.

Source: www.creality3dshop.eu
It replaces the standard metal bed with a magnetic print bed, the C-Mag. Detachable and flexible, this print bed facilitates print removal. In the 3 Pro, the board fan is placed at the bottom of the printer. Last but not least, the Ender 3 Pro is equipped with an improved Meanwell Power Supply Unit, which is thinner and quieter than the one used on the Ender 3.
The Ender-3X comes with a tempered glass bed, which is also considered a must-have upgrade for the standard Ender-3. The glass plate enhances printing adhesion while facilitating the removal of the printed parts. The 3X also includes an MK-10 extruder, a V-slot with POM wheels, and a set of 5 additional nozzles.
Source: www.creality3dofficial.com
Considering the features and the prices of the three models, purchasing an Ender-3 and upgrade it seems to be the best bang for the buck.
Pros:
Cons:
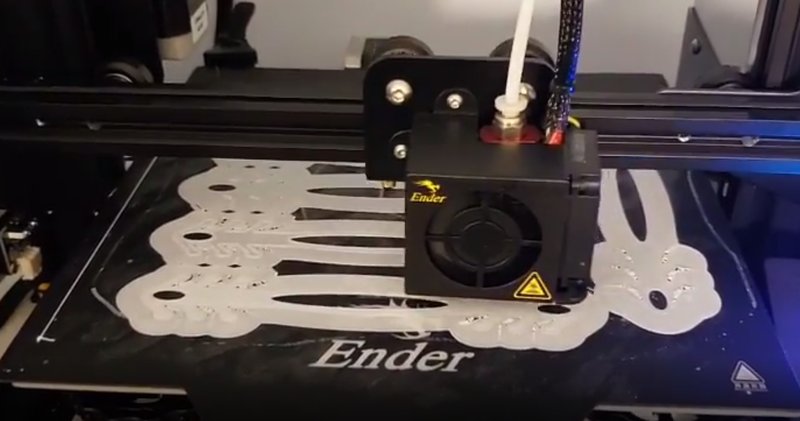
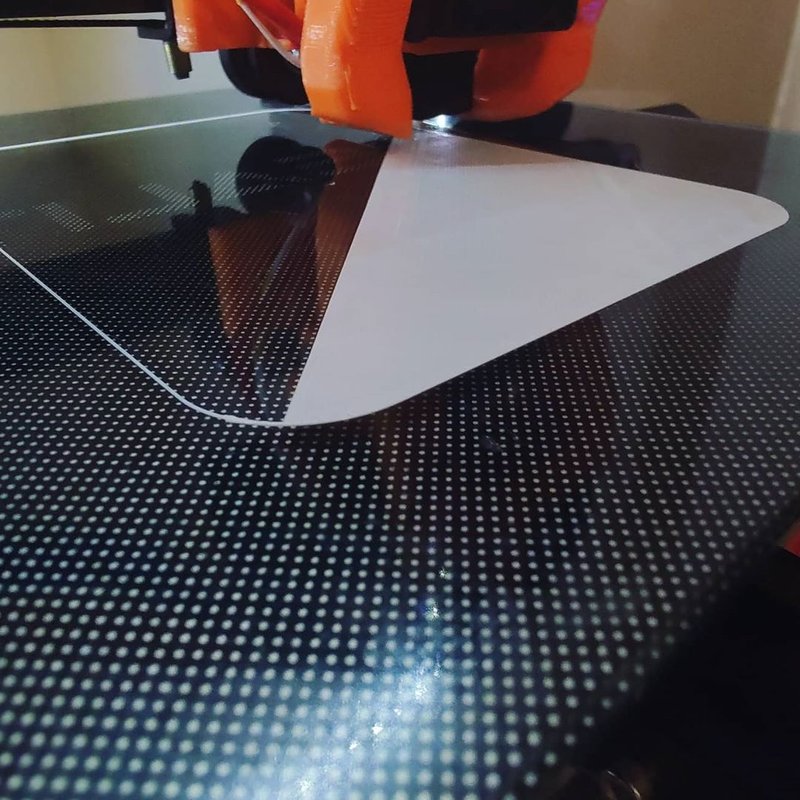
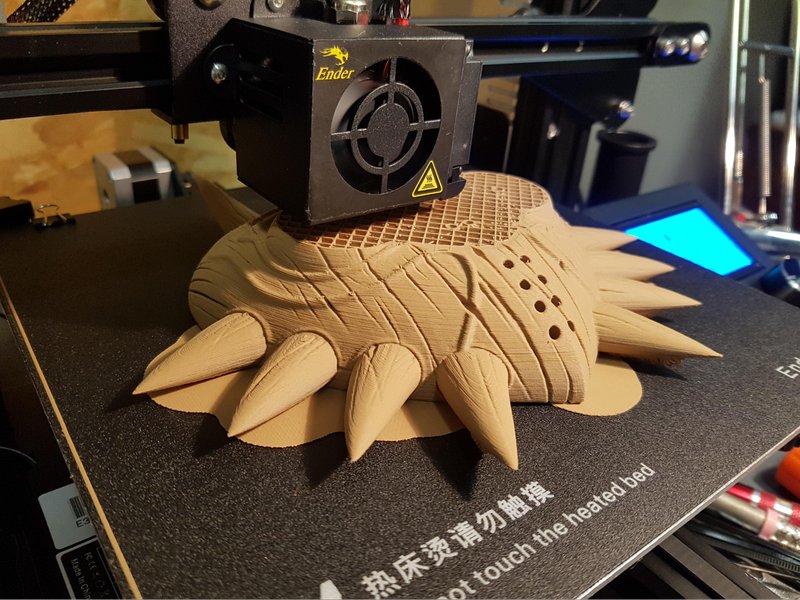
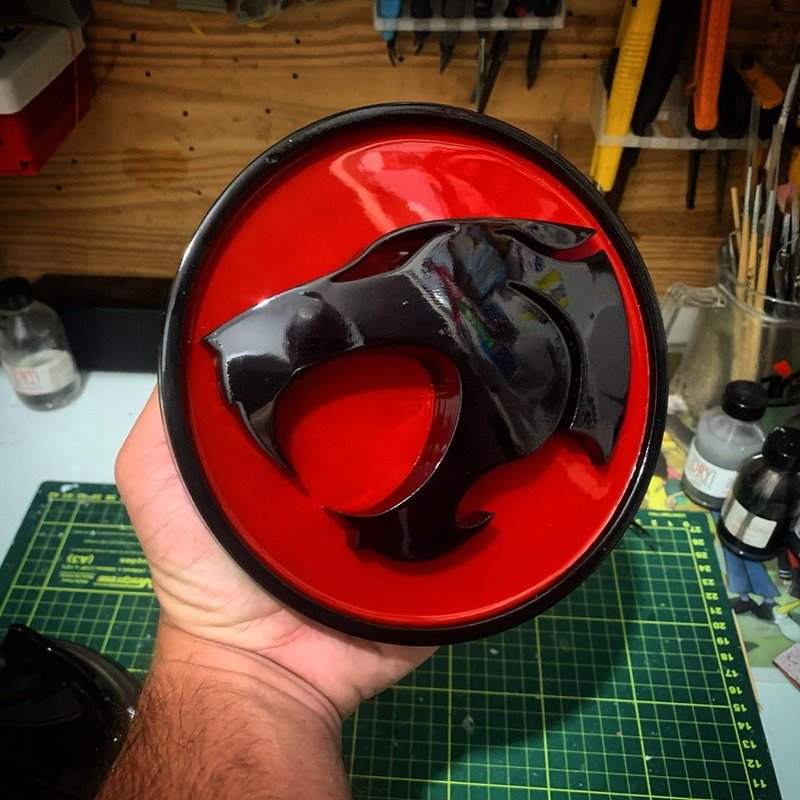
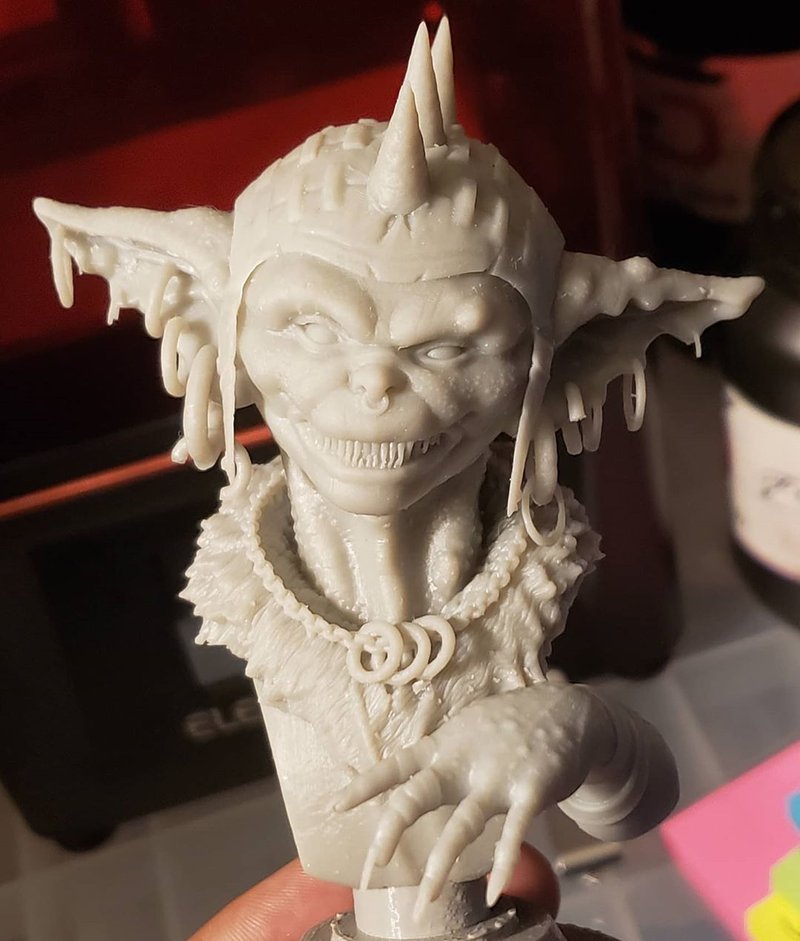
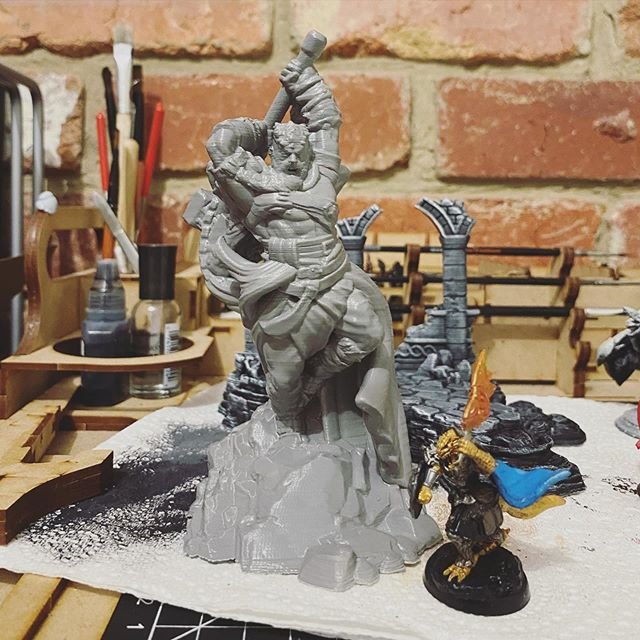
The Creality Ender 3 can boast decent accuracy, especially after a lot of tinkering. Take a look at these models and check out their good surface finish:
Source: www.instagram.com

Source: www.instagram.com
Source: www.instagram.com
Source: www.instagram.com
The Creality Ender 3 is a valuable Do It Yourself 3D printer. Sold at an incredibly low price, it includes a set of quality features generally found in more expensive FDM printers. Its open-source nature gives you the opportunity to turn into a real workhorse. The upgradability, quality, and compatibility with several materials make it worth its price.
The Creality Ender 3 is a great choice for both newbies who love making their hands dirty and tinkerers. You can purchase it on Top3DShop.
Update your browser to view this website correctly. Update my browser now


Write a comment