Modern industries rely heavily on accurate measurements that can sometimes be achieved only by means of high-precision technological equipment. Where minor details are crucial, human capabilities often fail to provide the required data to get flawless results.
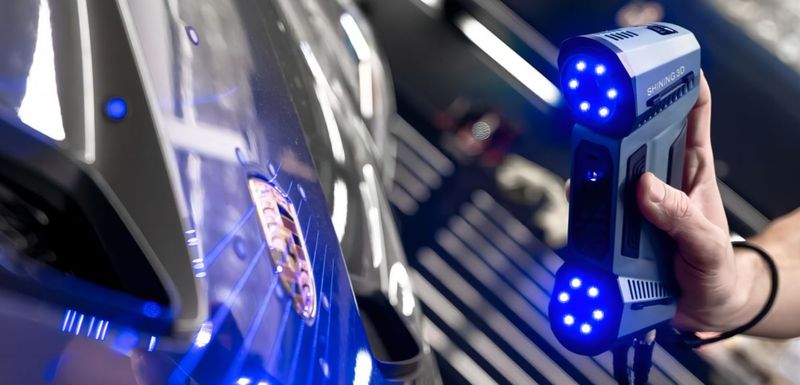
As one of the leading developers of quality metrological solutions, Chinese company Shining 3D has introduced a handheld 3D scanner with a highly effective dual light source. The compact and lightweight FreeScan Combo model combines blue laser and infrared VCSEL technologies that cover a variety of application scenarios with several multi-purpose operating modes.

This is Top 3D Shop, and today we are going to review the specs, main functions, and potential use cases of the new FreeScan Combo 3D scanner from Shining 3D.

Shining 3D has been developing and manufacturing high-precision 3D digitizing and 3D printing equipment since 2004. It is known to provide a wide range of top-quality yet affordable devices and software for digital dentistry, metrology, design, and other industrial and creative spheres.
The main product lines of Shining 3D include handheld 3D scanners, desktop 3D scanners, and 3D inspection systems. Being advanced and complex solutions based on innovative technologies, they aim at enhanced functionality as well as accessibility on all the stages of production, from 3D digitizing and CAD design to manufacturing and inspection. Another focus of Shining 3D is strict compliance with international quality and safety standards alongside maintaining impressive product performance.
The company is headquartered in Hangzhou, China and has subsidiaries in Hong Kong; Stuttgart, Germany; San Leandro and Tampa, the United States. With more than 900 employees, Shining 3D boasts a global team capable of effectively supporting users worldwide.
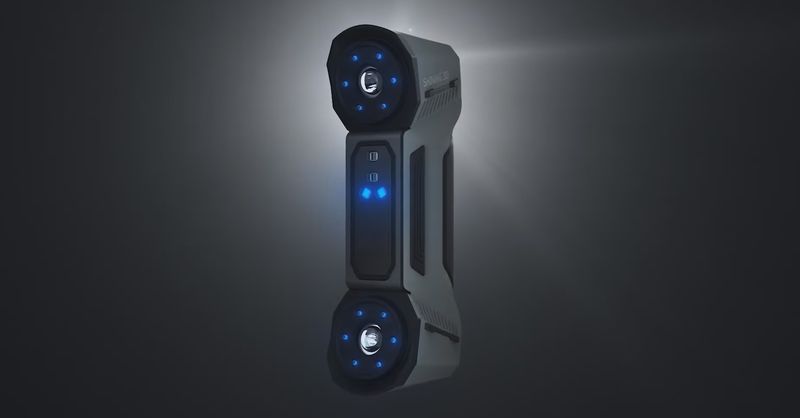
The FreeScan Combo is a professional handheld 3D scanner from Shining 3D designed for simple operation as well as fast and accurate data capturing. Due to its high-tech dual light source system, ergonomic design and budget-friendly price, the device is an ideal tool to achieve highly detailed outputs in a fast, streamlined, and beneficial way.
Here is the list of the features that make the FreeScan Combo 3D scanner perfect for versatile industrial applications:
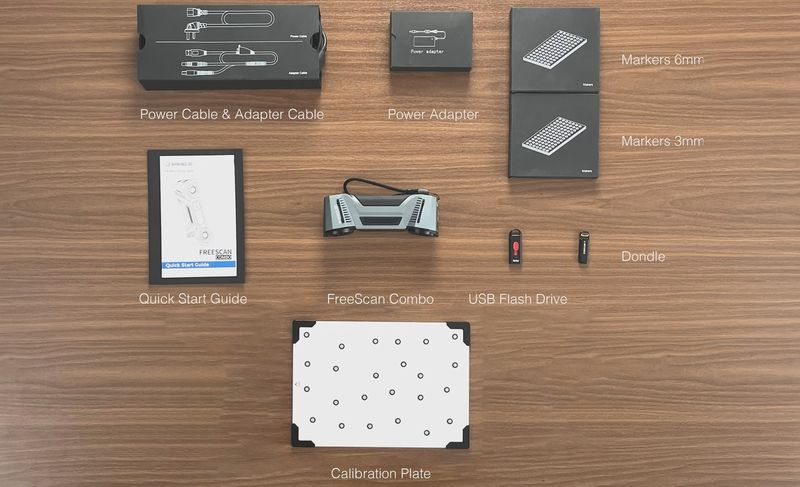
Let’s take a brief look at the supply package for the FreeScan Combo.
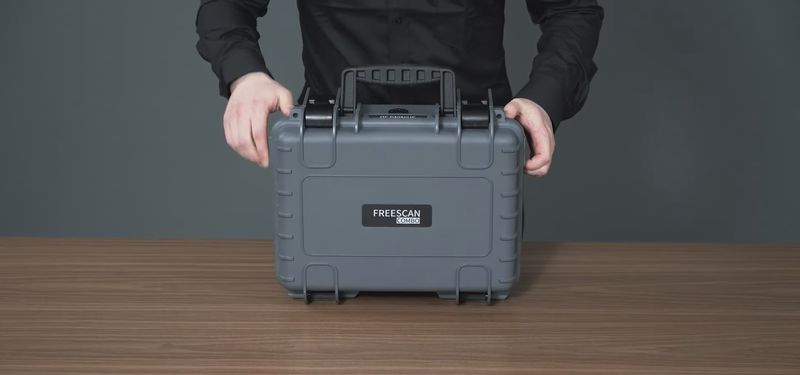
The 3D scanner is delivered in a reliable plastic case for safe and easy storage and transport of the device along with all the parts necessary for operation.
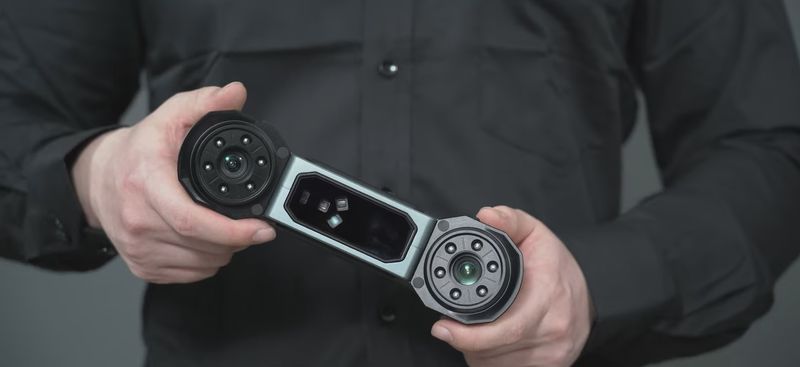
Inside the case, there is the scanner itself that comes fully assembled, with a handy wrist strap attached.
Next to the device, one will find power and adapter cables. The latter provides rapid data transmission for a really smooth scanning process.

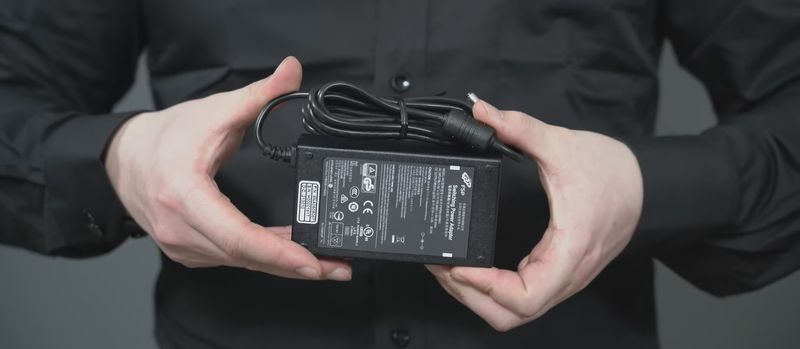
Under the cables, the package contains a power adapter with 12V and 5A outputs. It is recommended to use the right one to prevent overvoltage while using the scanner.
Apart from the already mentioned devices, there is a USB flash drive with the installation package and user manual.

Also, the case contains a dongle required to run FreeScan software.

At the bottom of the case, there is a calibration board used to tune up the FreeScan Combo to ensure high-quality scanning.

The top of the case contains two packs of markers, 6 mm and 3 mm. These will come in handy for high-quality scanning with the blue laser light source.

Finally, there is a quick start guide on the FreeScan Combo to help the user make successful first steps in 3D scanning with the device.
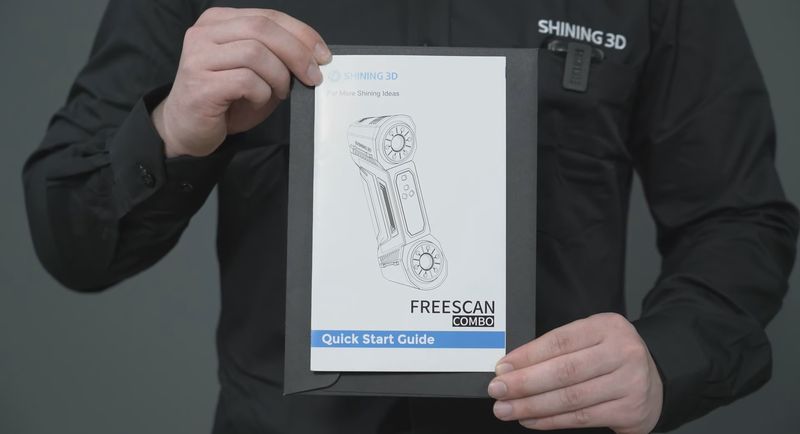
So, this is the full package for the Shining 3D FreeScan Combo.
The first thing to do after unboxing the FreeScan Combo 3D scanner is to calibrate the device so that it can provide quality outputs. For this, one will need the calibration board supplied with the device.
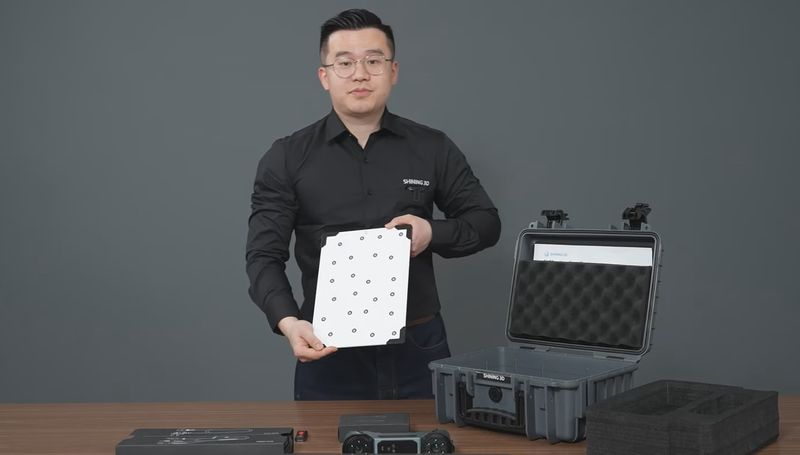
The whole process is quite easy and will take mere minutes due to the scanner’s good camera feedback.
1. Start with connecting the FreeScan Combo to your computer with the cables. It is recommended to use the attached wrist strap to prevent the device from falling.
2. Once the FreeScan Combo is connected, it is time to install software from the USB flash drive.
3. Next, plug in the dongle to run software.
4. Launch FreeScan from the desktop and perform registration if needed.
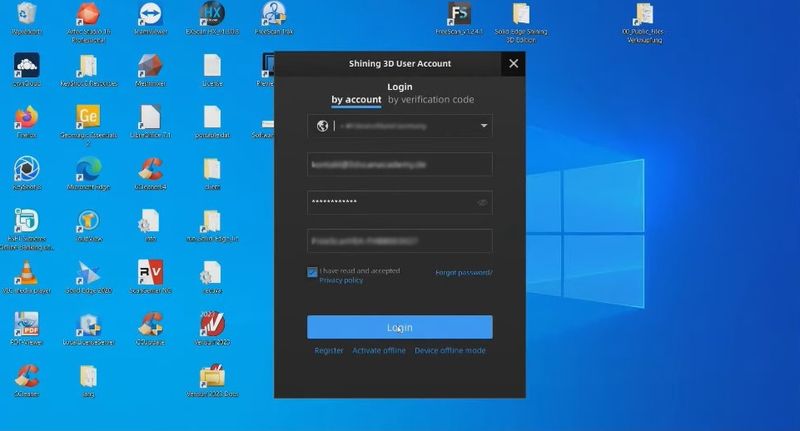
Credit: 3D Scan Academy / YouTube
5. When logged in, you will see the main menu. In the top row is the calibration option; it also states the date of the last procedure that can help the user keep the device properly maintained.
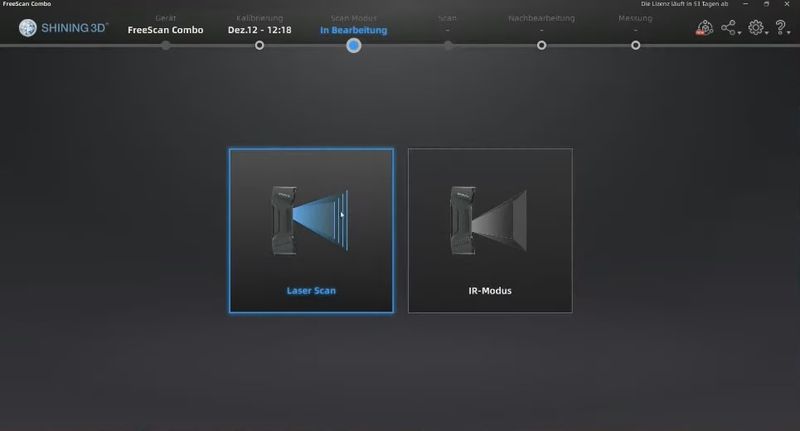
Credit: 3D Scan Academy / YouTube
6. The calibration process for the FreeScan Combo is fully explained and illustrated in the program. On the right, there are instructions to follow for each step, while on the left you can see a graphical representation of the procedure with all necessary marks. It is important to keep the calibration board free from the scanner cables and other obstacles.
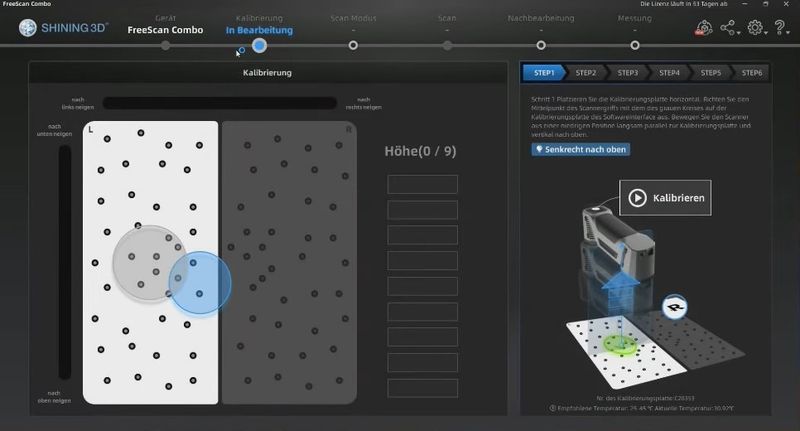
Credit: 3D Scan Academy / YouTube
7. Complete all the stages to get a properly calibrated 3D scanner ready for high-precision work.
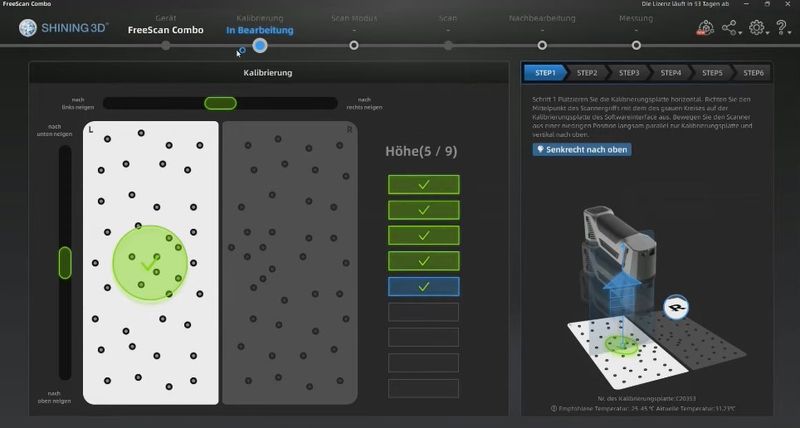
Credit: 3D Scan Academy / YouTube
Let’s go over the main points of the scanning process with the FreeScan Combo. The procedure is through the proprietary FreeScan software featuring a number of automated functions for easier and better-quality data acquisition.
To start working in the Laser scan mode, it is necessary to create a new project group or choose the existing one. Each project should occupy a separate folder to save data properly. To create a working backup, one should copy the whole folder.
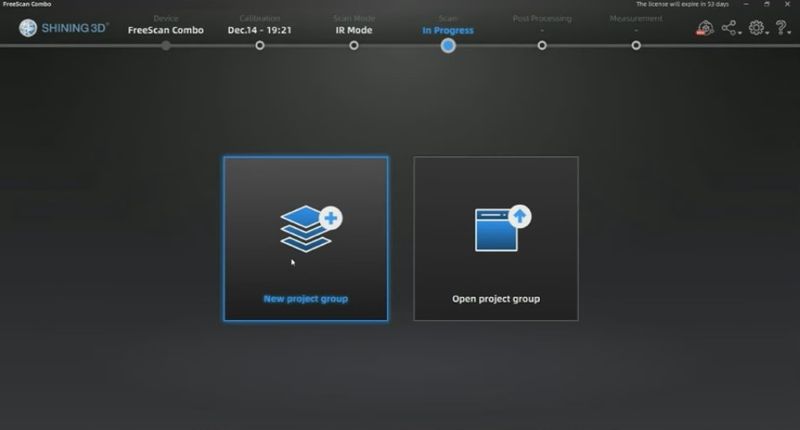
Credit: 3D Scan Academy / YouTube
The Scan Setting menu has all the necessary parameters that are well-known to experienced users, such as the Light Source Mode selection, the nature of the scanned Object (with a reflective or normal surface), the camera sensitivity check, and several additional toggles like Outdoor Mode, Local Enlarged View, and View Lock.
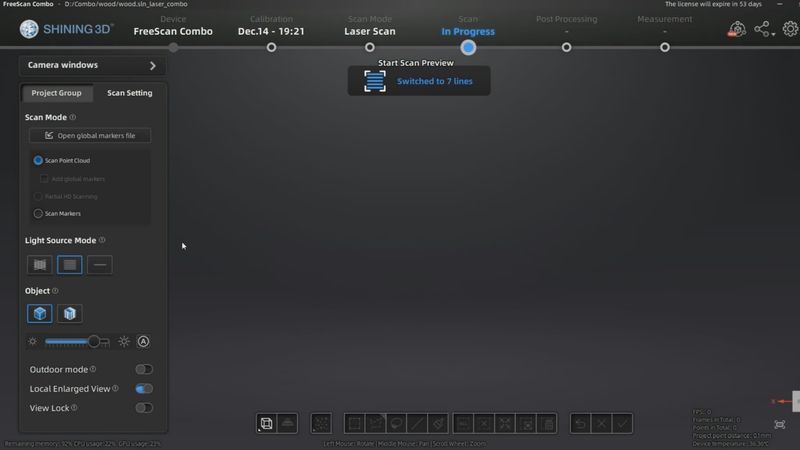
Credit: 3D Scan Academy / YouTube
As for three scanning modes, one can activate them by the scanner’s control buttons. The same goes for zoom and brightness adjustment.
To initiate the scanning process, one can also use the corresponding control button on the device or the software launch button. No pre-adjustments are required. Due to the high data acquisition speed, scanning with the FreeScan Combo is really fast and efficient.
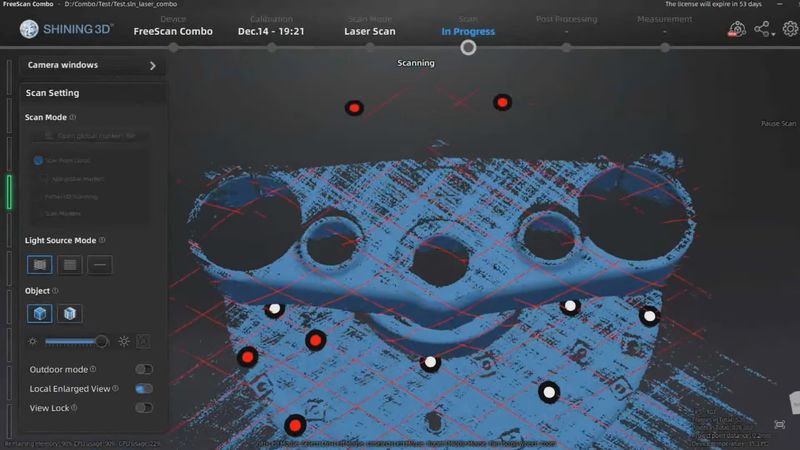
Credit: 3D Scan Academy / YouTube
After generating point clouds, it is possible to get a high-quality 3D model. For example, the object below was scanned at the standard 0.2 resolution in the crossed laser lines mode.
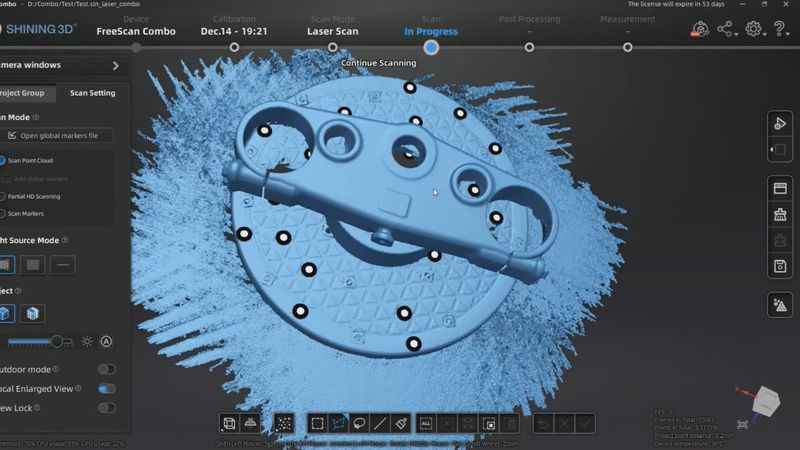
Credit: 3D Scan Academy / YouTube
FreeScan software provides a number of useful tools and functions to edit the resulting point cloud. Importantly, the program has an intuitive interface with integrated instructions to help novice users.
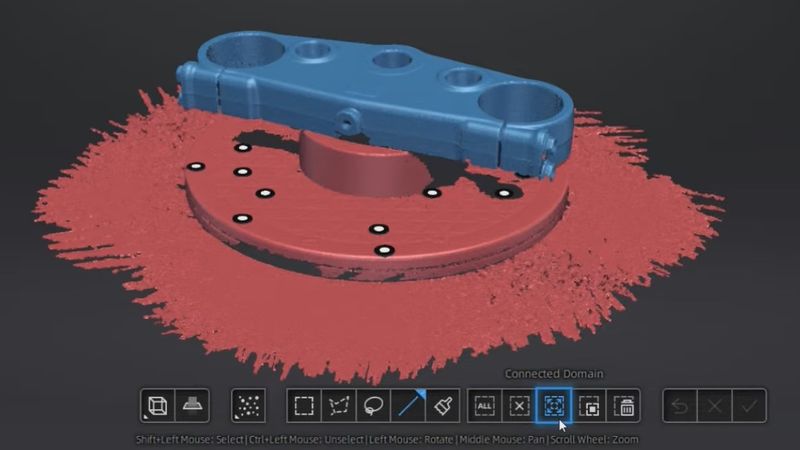
Credit: 3D Scan Academy / YouTube
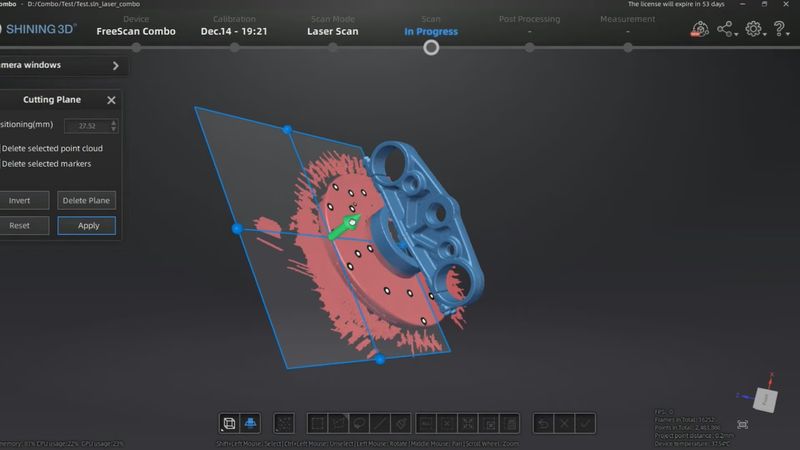
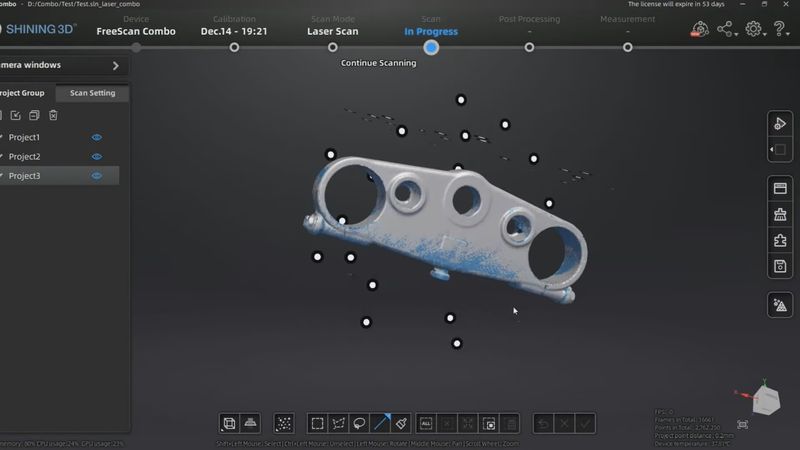
To get the complete view on the object, especially when it comes to complex technical parts, one often has to scan it from different perspectives. For each of them, it is necessary to create a new project group. Later, they can be combined to form a full-fledged 3D model.
Advanced Cutting Plane functionality as well as other thoughtful functions will significantly simplify the point cloud processing stage.
Credit: 3D Scan Academy / YouTube
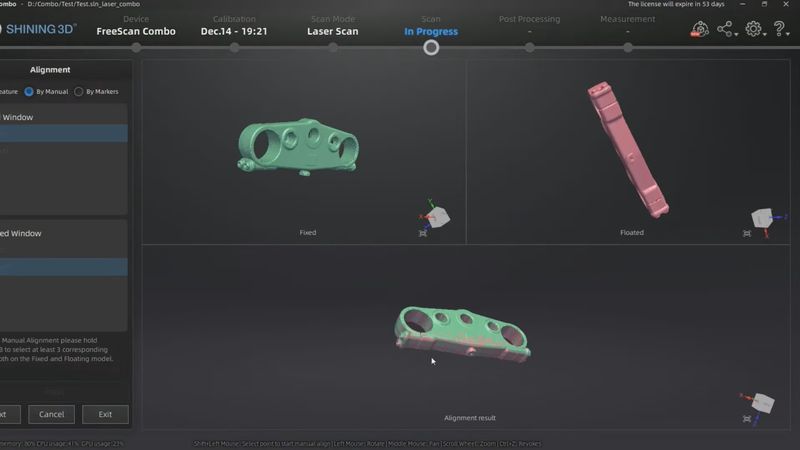
As for alignment, it is represented by three common methods — manual, by feature, and by markers. All three options are decently optimized and do not require much effort to achieve a perfect result.
Credit: 3D Scan Academy / YouTube
Credit: 3D Scan Academy / YouTube
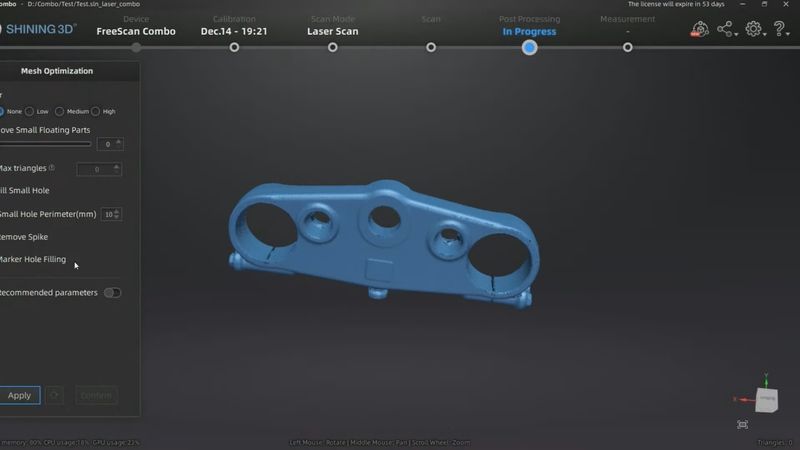
In terms of mesh optimization, the program offers several filter options, small floating parts removal, hole filling, and more. If not sure, one can always select the recommended parameters.
Credit: 3D Scan Academy / YouTube
The final model in this case looks absolutely gorgeous, especially when it comes to small clearances. As can be seen, the combination of the FreeScan Combo’s scanning modes proves very effective.
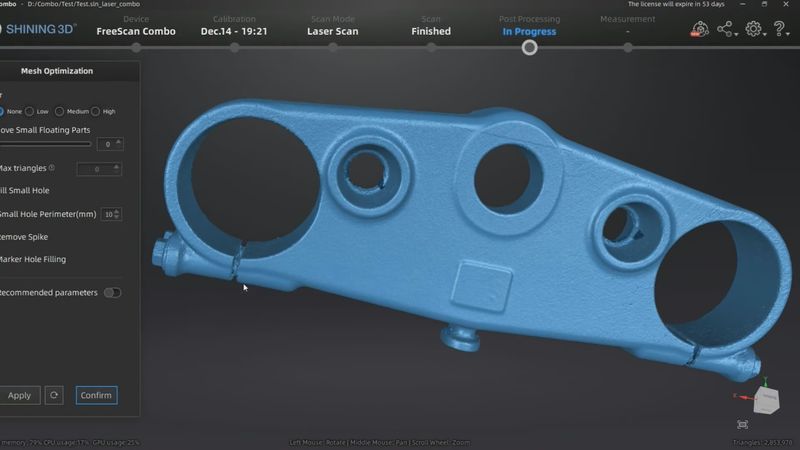
Credit: 3D Scan Academy / YouTube
Infrared VCSEL is a rare technology applied in 3D scanners. With the Combo model from Shining 3D, it comes as a perfect addition to the wide spectrum of the scanner’s professional applications thanks to its clear benefits.
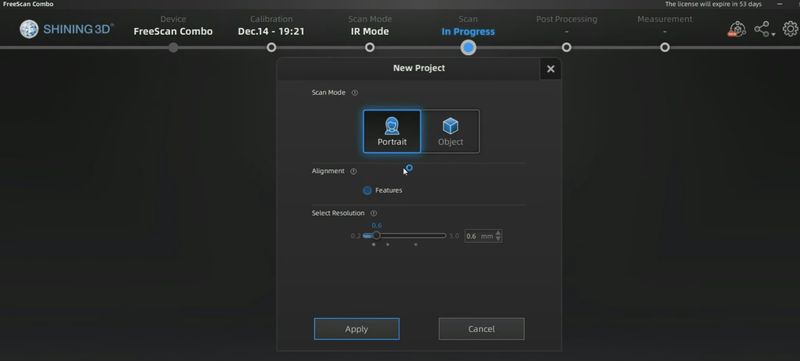
For IR scanning with the FreeScan Combo, two operating modes are available — Portrait and Object. The first one allows for comfortable scanning of people and animals, while the second mode enables fast marker-free scanning of objects with rich geometry. Choosing the Object mode, one can select the size of the scanned object, alignment mode (Features, Hybrid, or Global Markers), and desired resolution before starting the scanning process.
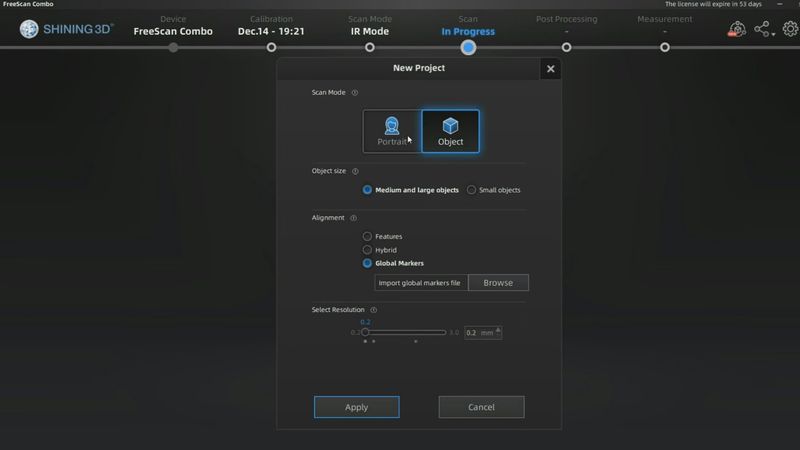
Credit: 3D Scan Academy / YouTube
When choosing Global Markers as your alignment mode, it will also be necessary to import their file. It can be previously scanned in the blue laser mode or downloaded from a web-source.
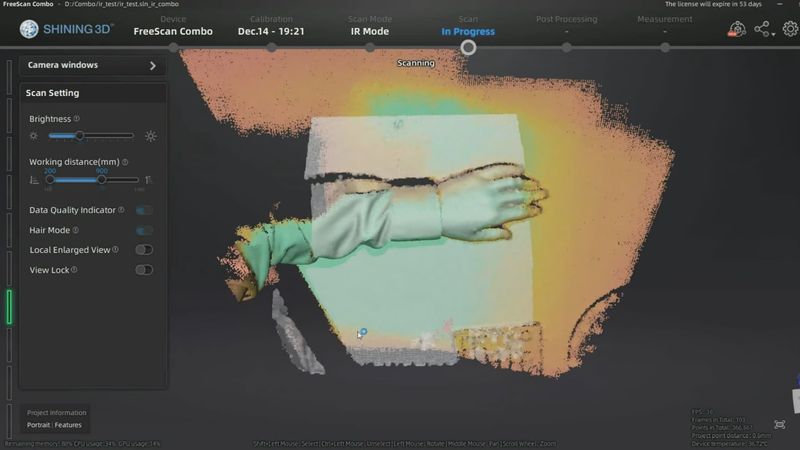
Once scanning is started, you will see a preview of the process. Here, it is possible to change basic scan settings, such as brightness and working distance, to get the best results.
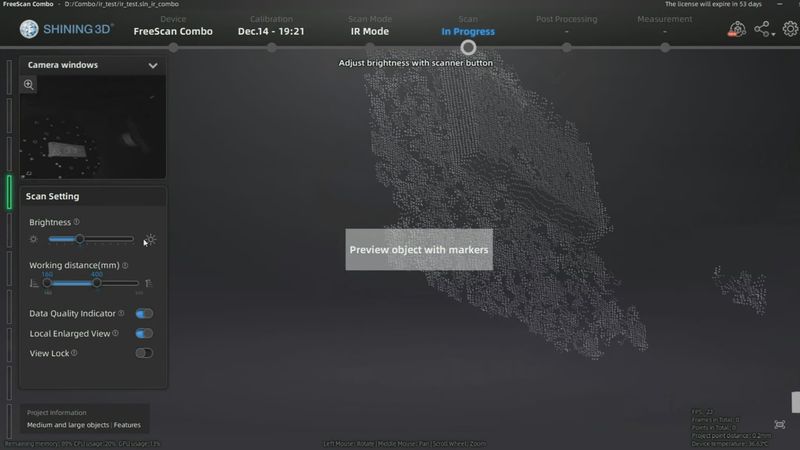
Credit: 3D Scan Academy / YouTube
Considering the high sensitivity of the device as well as the general principle of IR scanning, different objects might require several attempts to choose a proper alignment mode, especially when it comes to higher resolution.
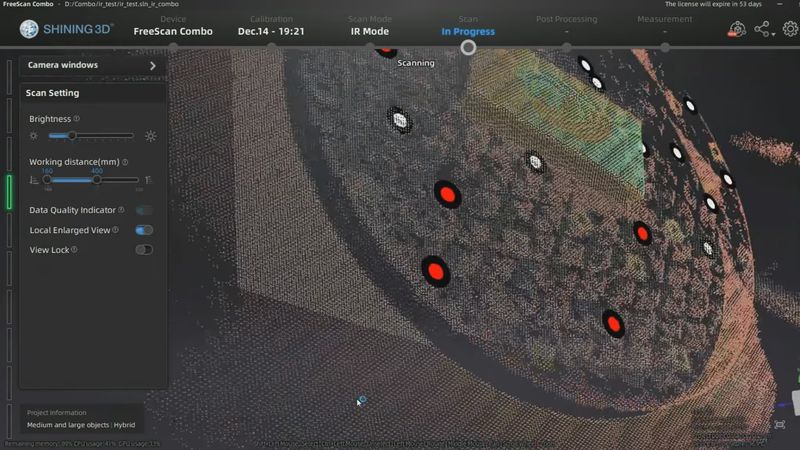
Credit: 3D Scan Academy / YouTube
In contrast to the laser scanning mode, here it is possible to create a watertight or semi-watertight model through meshing.
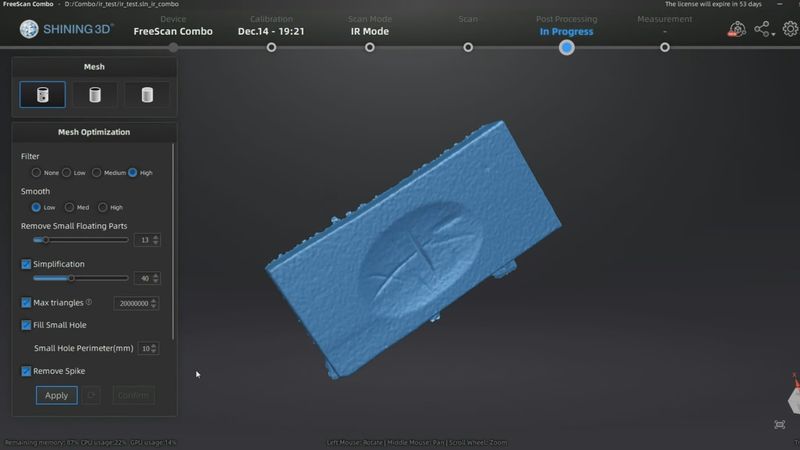
Credit: 3D Scan Academy / YouTube
Still, what best demonstrates the capabilities of the IR mode is not technical scans. It will become a perfect tool for medical applications implying body parts scanning.
For the Portrait mode, only alignment by features is available since in this case the scanner deals with organic shapes. The resolution option here is not that important.
Credit: 3D Scan Academy / YouTube
The sensitivity of the FreeScan Combo in this mode allows the user to move more freely and ensures a workable scan basis with less information acquired, which is particularly useful when working with people, animals, or slightly moving objects.
Credit: 3D Scan Academy / YouTube
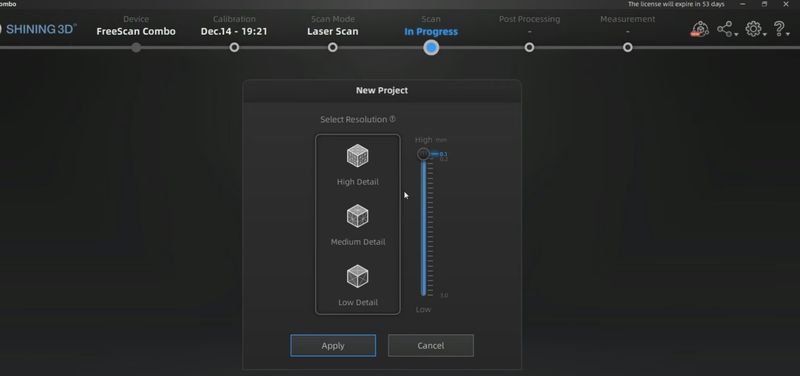
The FreeScan Combo offers three resolution options for each operating mode — low, medium, and high level of detail. The latter allows scanning objects with complex geometry at 0.05 mm point distance to get exceptionally detailed 3D models. Please note that for the IR mode, the upper limit is 0.2 mm.
In case of blue laser scanning, by default the user gets access to the maximum of 0.1 mm.
Credit: 3D Scan Academy / YouTube
The outputs will still be impressively fine (the sample below is a piece of wood captured with the 7 parallel-line scanning mode), but what will be the difference at 0.05 mm?
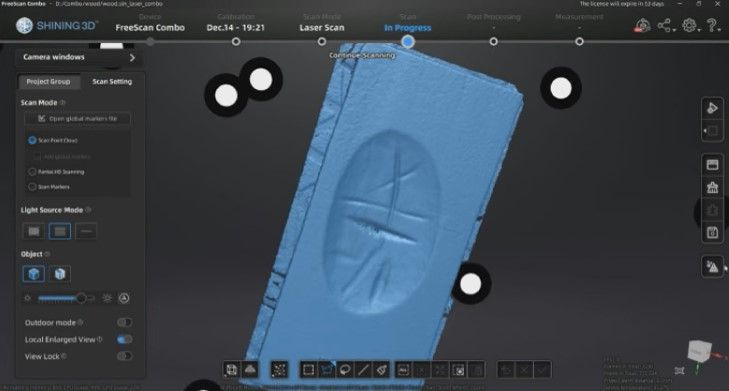
Credit: 3D Scan Academy / YouTube
To check this out, one will need to turn on the Advanced mode in the software settings.
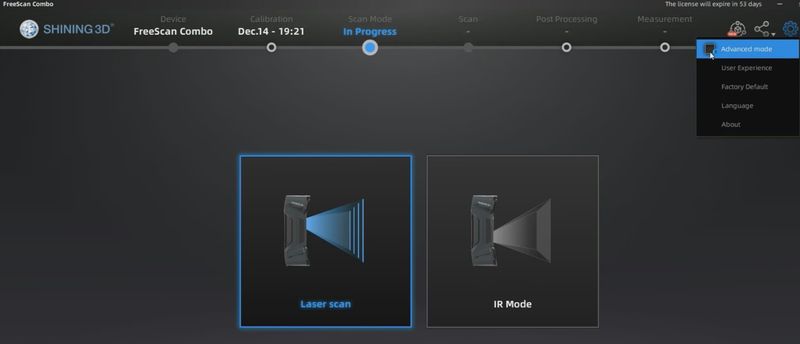
Credit: 3D Scan Academy / YouTube
When in the advanced mode, it is possible to make scans with the highest resolution the FreeScan Combo is capable of. This will definitely increase the load on the user’s PC, since it will take more resources to process the doubled amount of points.
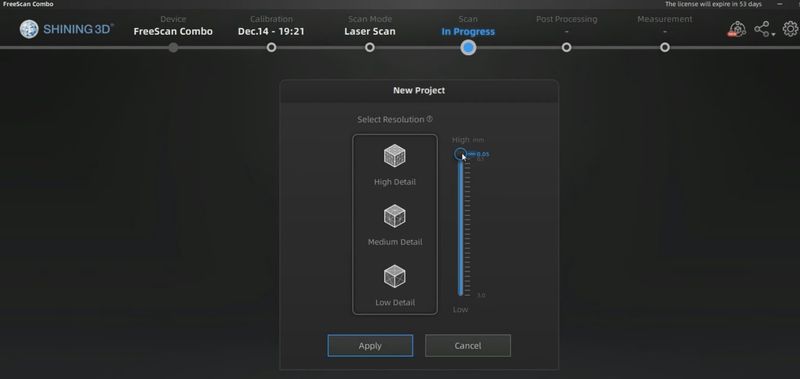
Credit: 3D Scan Academy / YouTube
However, a distinctive feature of this set-up is a higher level of noise in the processed scans compared to 0.1 mm.
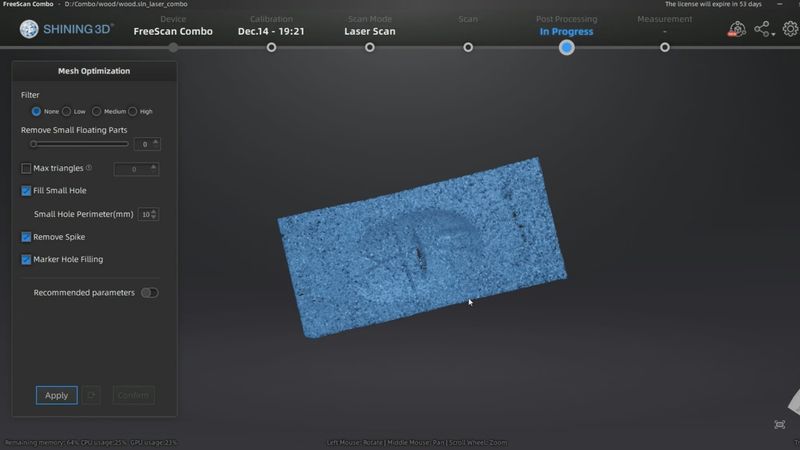
Credit: 3D Scan Academy / YouTube
Meshing in this case will not improve overall scan quality noticeably, so it is better to optimize the data first with the help of a dedicated function. It will optimize and generate a point cloud to provide higher quality outputs without loss of scan information.
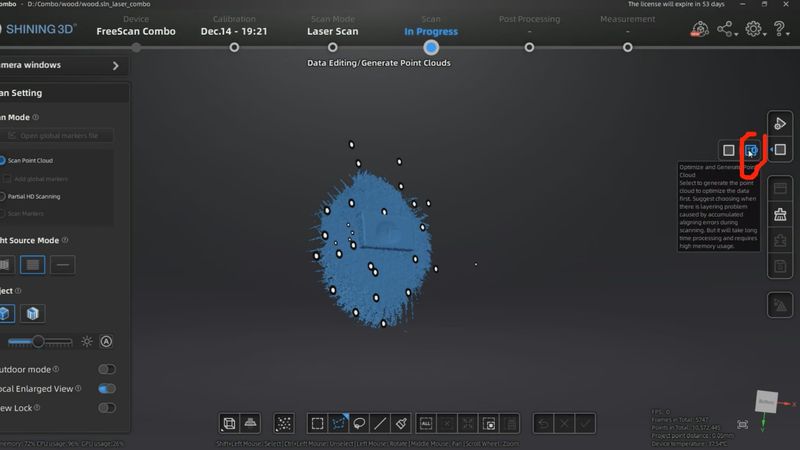
Credit: 3D Scan Academy / YouTube
In this way, you will carefully get rid of noise and achieve more accurate results with the highest level of detail.
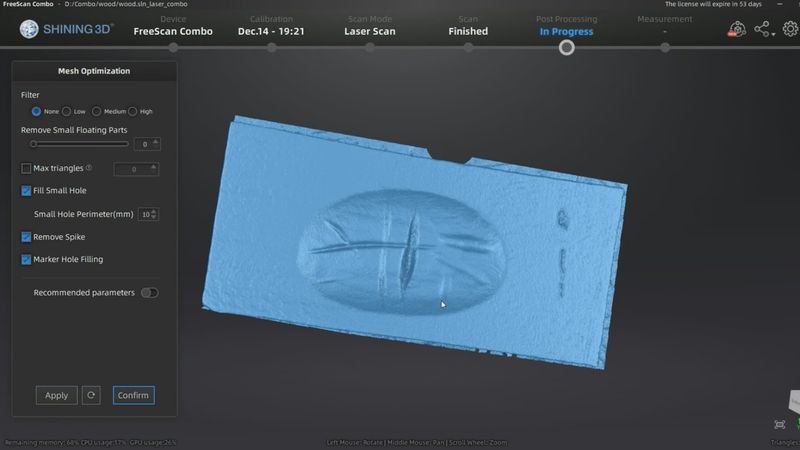
Credit: 3D Scan Academy / YouTube
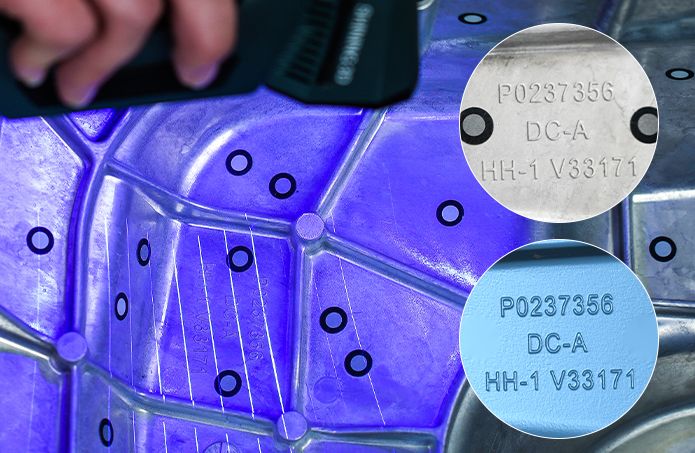
There is also a partial HD scanning option available that does not require the advanced mode to be enabled. It will come in handy, for example, for technical parts that have important markings or complex structure details.
When initial scanning of the object is finished, choose the relevant option in the Scan Setting menu. Then, select desired resolution (on the left) and area that should be re-scanned for more data.
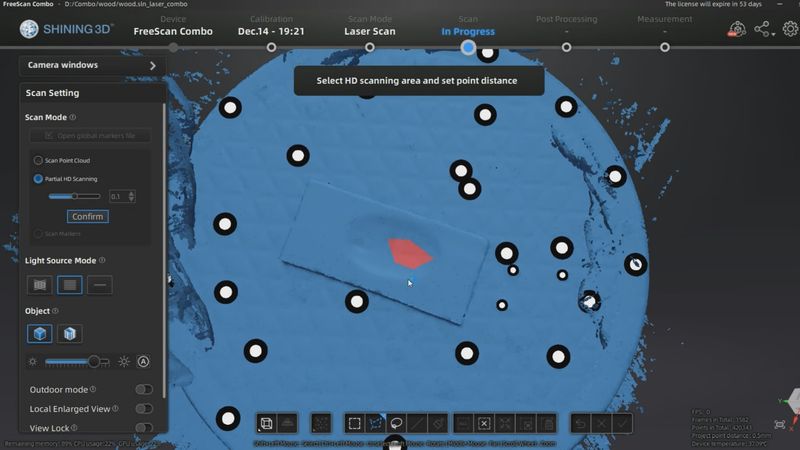
Credit: 3D Scan Academy / YouTube
After meshing, you will see that the area of interest is captured with the selected level of resolution.
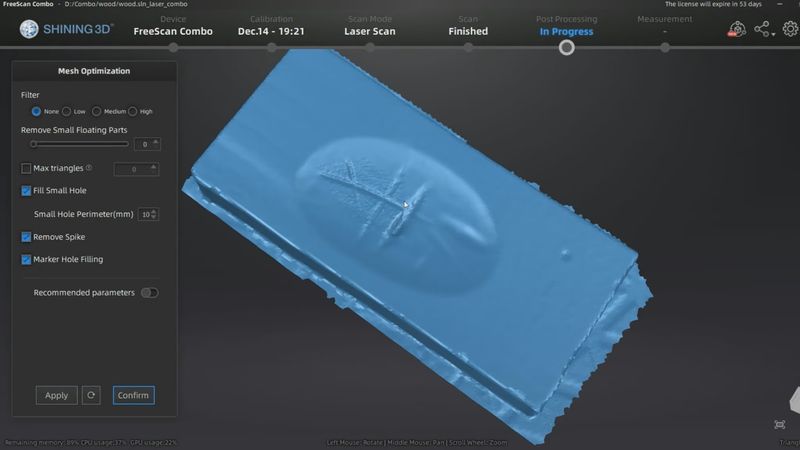
Credit: 3D Scan Academy / YouTube
As mentioned above, the FreeScan Combo 3D scanner from Shining 3D can be used to achieve metrology-grade precision in reverse design, additive manufacturing, inspection, and multiple production spheres, including automotive, aerospace, rail transportation, casting and foundry, heavy industries, medicine, mold manufacturing, and more.
Below, you can find examples of scan models created with the device:
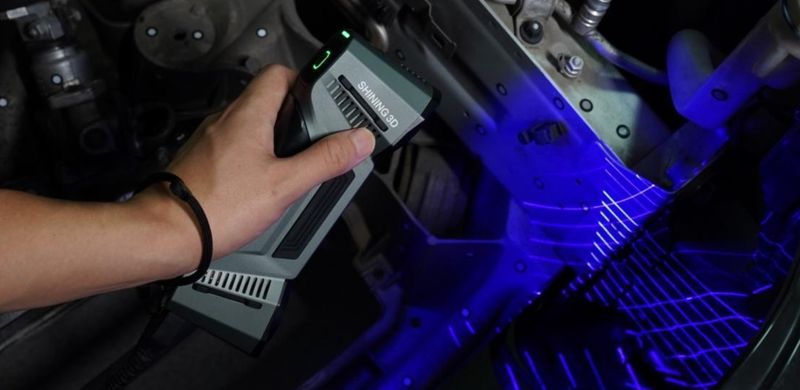
For a brief demonstration of the scanning process with the FreeScan Combo, check out the official video from Shining 3D about capturing 3D data of a Mercedes-Benz:
The Shining 3D FreeScan Combo 3D scanner is a powerful hybrid model that perfectly complements the company’s comprehensive product line. Due to its diverse scanning modes, rich functionality, and compact design, the device is perfect for scanning a wide variety of objects regardless of their size, form, and surface. The integrated VCSEL technology offers new opportunities for body scanning and fast marker-free data acquisition for objects with complex geometry, while multi-line scanning mode allows for reliable digitizing of black and reflective surfaces.
One of the main advantages of using the FreeScan Combo is definitely its brand user-friendliness that marks all Shining 3D equipment. Thanks to this feature, the device will fit both beginners and experienced professionals aspiring to further simplification, convenience, and improved quality of 3D scanning.
Update your browser to view this website correctly. Update my browser now
Write a comment