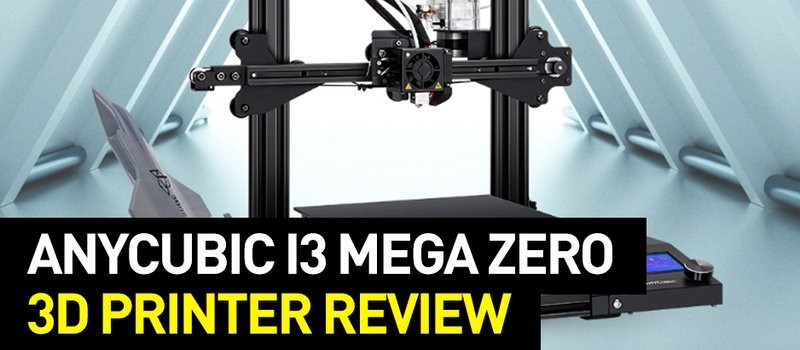
Hi everyone, and welcome to Top 3D Blog. This time, the spotlight is taken by the Anycubic Mega Zero — one of the best budget FDM 3D printers perfect for entry-level users and hobbyists. Nevermind the affordability of the device, because it will certainly be able to surprise you with its level of performance and various useful features, which will also be highlighted throughout the review. By reading this article, you’ll be able to decide whether this printer is worth your attention and will be able to suit your needs or not.
And now, without further ado, let’s proceed to the actual review.
Source: anycubic.com
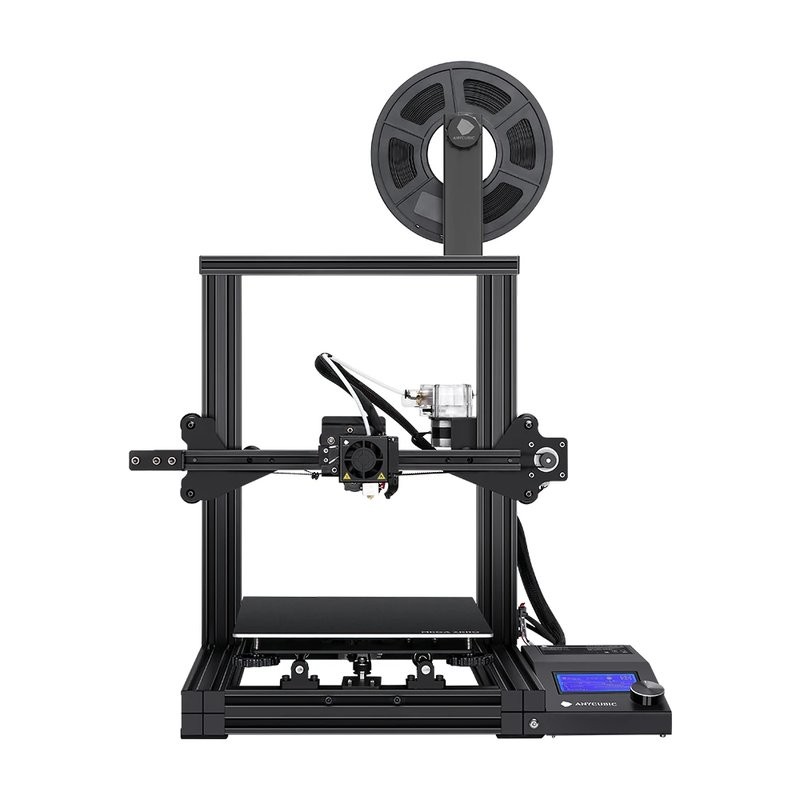
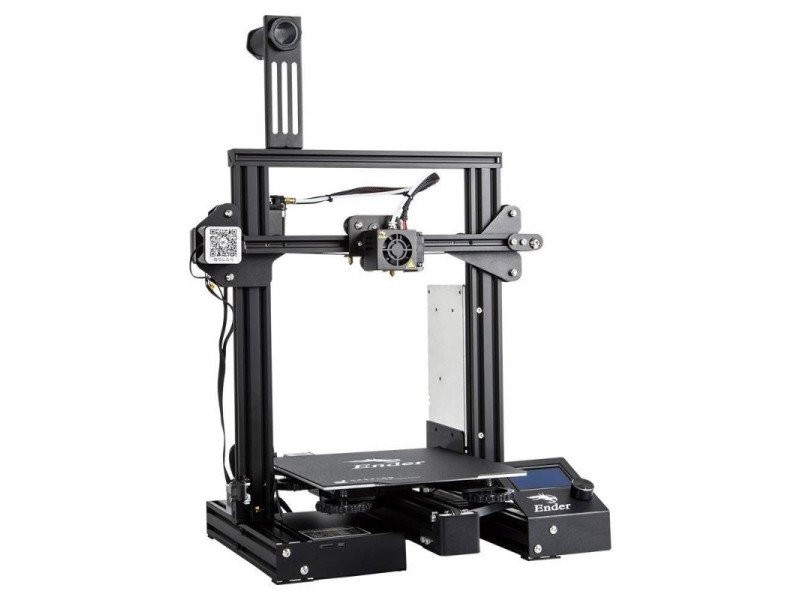
The Mega Zero is one of the latest additions to the Anycubic lineup. It is a budget-friendly and well-designed desktop FDM (Fused Deposition Modeling) 3D printer ideal for entry-level users. Anycubic is a Shenzhen-based company renowned for manufacturing cheap yet efficient devices, as well as for its customer-oriented approach. You can learn more about Anycubic by proceeding to an in-depth brand review.
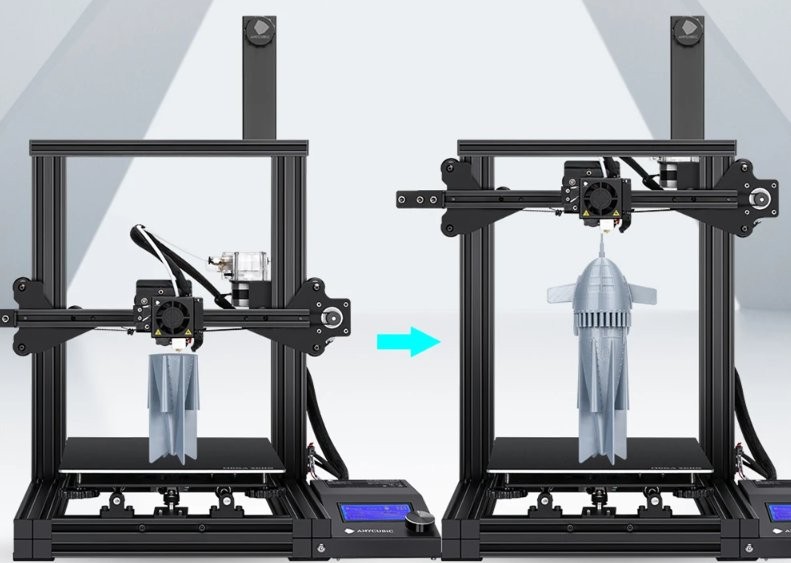
Featuring a 220 x 220 x 250 mm build volume, the printer allows making quite large products considering its size and price. This machine will be a good choice for educational and training purposes, as well as for everyday personal use. For instance, you can use it to print tabletop models, original souvenirs, uniquely designed and useful household items, and much more. Besides, it has a compact yet neatly-designed body, making it a perfect fit for any desk.
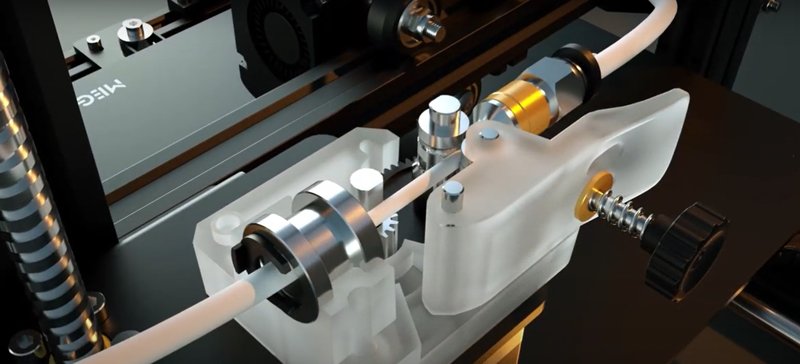
The printer also features a double gear extrusion system for more torque, which is yet another great addition considering the Mega Zero’s price. Employment of the Bowden-type extruder ensures smoother extrusion, provides compatibility with flexible materials such as TPU, and prevents the filament from tangling and clogging the nozzle.
Source: youtube.com
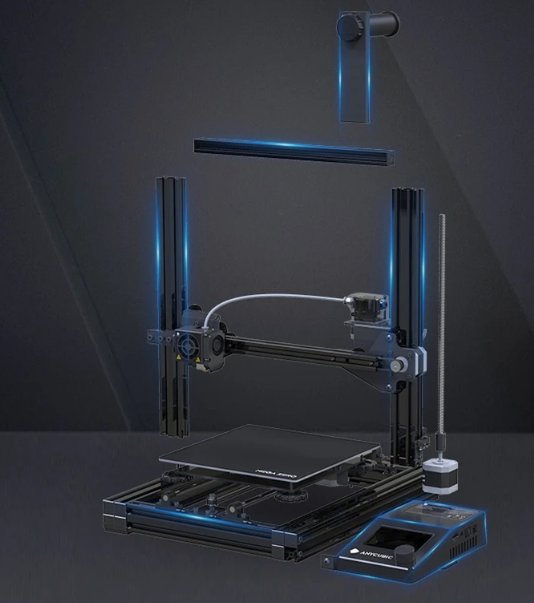
The device has been constructed in a solid and sturdy fashion. It features a high-precision aluminum body and closed-loop system at the bottom, providing additional stability during operation. Besides, the Mega Zero is equipped with a dual Y-axis screw rod mechanism that ensures synchronous operation and prevents unwanted vibrations that could otherwise be caused by a prolonged printing process, making the platform reliable to print on during its movement.
Source: youtube.com
Unlike its predecessors, the Mega Zero has been equipped with a metal build plate that can’t be heated. This was the step Anycubic had to take to keep the device cost at a sub-200$ mark. However, this is highly unlikely to cause any serious issues because PLA, TPU, HIPS, and other filament types compatible with the device don’t really require a heated bed. In reality, the only possible downside is an increased risk of the product being peeled off, which is not at all applicable if the bed is properly leveled and the printed model is of an average scale. In case you’d like to print a large-scale product, we advise applying a UHU/BIC-type glue stick at the bed, outlining the location of the future print. A layer of glue will do the trick allowing you to print large-scale parts without any problems.
Source: youtube.com
Another peculiarity is a smart bed leveling system. Even though the machine requires manual calibration which is pretty obvious for its price tag, the calibration procedure is really easy to complete thanks to the assisted leveling system. All you need to do is to push and navigate through the UI with the rotary knob, which makes the interaction unique but instinctive.
Source: youtube.com
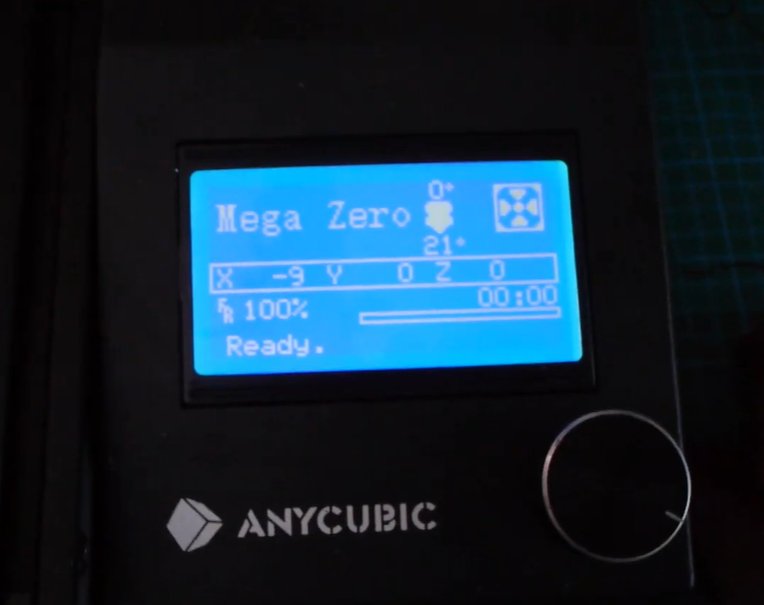
The control unit of the device is located on its right side. This unit features a display with a friendly UI and an above-mentioned rotary knob that needs to be pushed in order to confirm the decision. All the relevant data is displayed on the unit’s monochrome screen by showing white characters on a blue background. It displays values for current and target nozzle temperature, printing progress bar, XYZ coordinates, and other important information. It also allows correcting the printing and ventilation speed as well as nozzle temperature during the printing process.
The Anycubic Mega Zero’s design features an independent power adapter, separated from its control unit. This provides additional safety, heat reduction, and prolongs the service life of internal electronic components. The spool holder is located atop the gantry.
Source: banggood.com
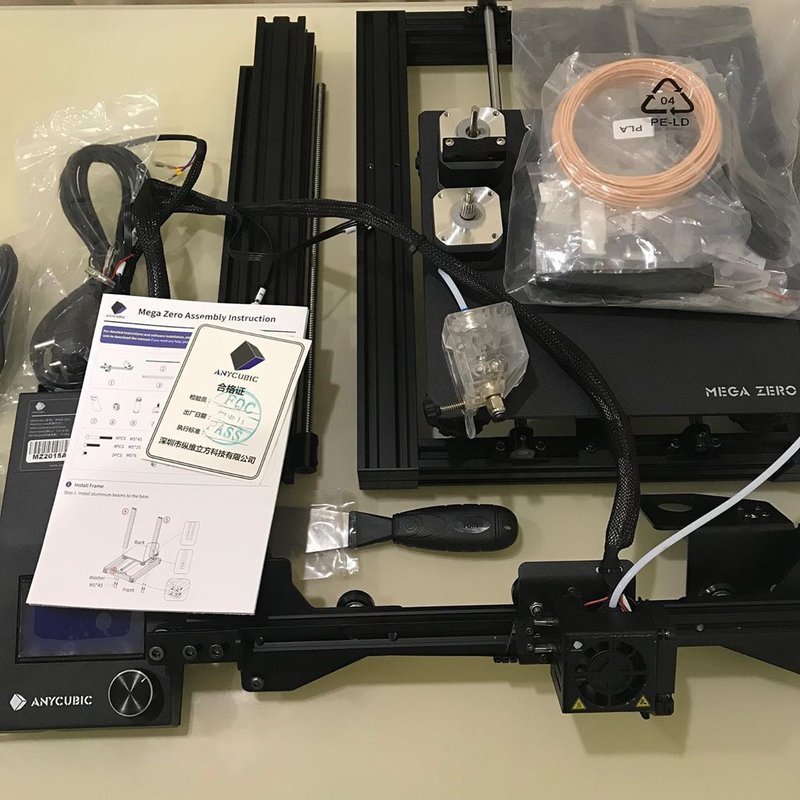
Even though the machine comes in a semi-assembled state, it features a modular design ensuring simple assembly to save your time and get started in a rapid fashion.
Some users may consider the DIY-style of a 3D printer to be a clear downside of such a device. However, it’s not as simple as it seems. On the one hand, it indeed delays the long-anticipated moment of the printing process and may cause malfunctions in case of improper assembly. On the other hand, if you were the one who assembled your printer, the chances are that you’ll be able to locate and fix any emerging problems yourself. Besides, it is really satisfying to assemble a 3D printer by your hands and successfully use it afterward. In addition, the DIY-type machines are highly customizable and can undergo a variety of user-implemented upgrades, making it ideal for makers in love with tinkering.
Source: banggood.com
Another important addition to the machine’s functionality is resume printing option. This feature will come in handy in case of a sudden power outage. It helps to save time that otherwise would’ve been wasted on the additional production of models that (in a worst-case scenario) were already more than half-completed before a blackout took place. By using this option, you won’t have to start anew — instead, the printing process will continue right where it left off.
Source: planetroid.com
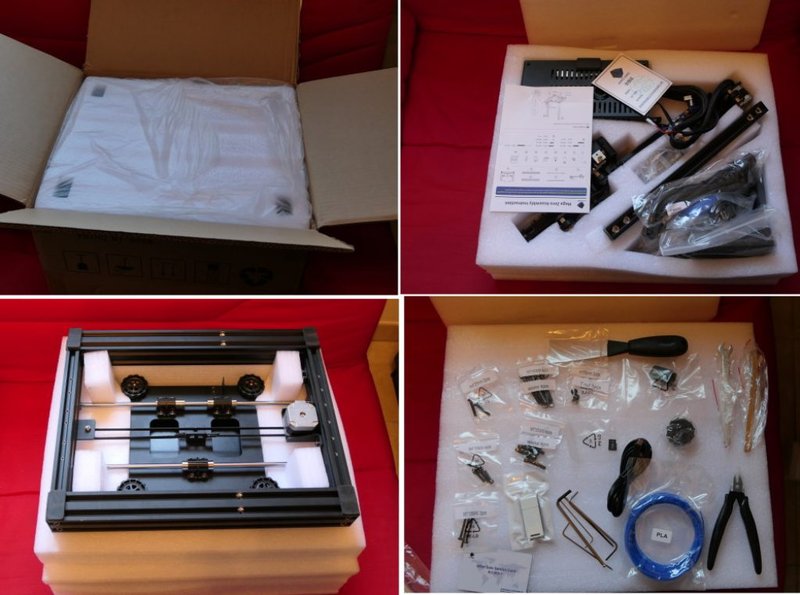
Inside the box, there’s everything one needs in order to begin the immersion in the 3D printing world including:
Source: instagram.com
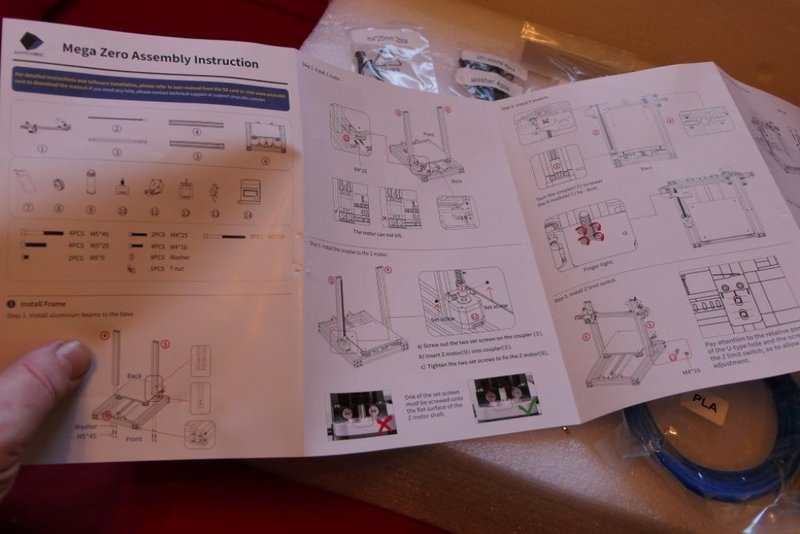
The printer is supplied in a semi-assembled state. However, the assembly process won’t be a pain in the neck, since there’s a detailed user manual containing thorough assembly instructions with step-by-step pictures shipped together with the printer. The estimated time for completing the assembly process is one hour, but we’d recommend taking it slowly but surely.
Source: planetroid.com
Moreover, the most tricky units have already been put together by the manufacturer. The 8Gb memory card supplied with the device features an extended digital version of the manual, so you might want to check that out too.
There’s also a detailed video guide demonstrating the step-by-step assembly of the printer kindly provided by the manufacturer, which can be found below.
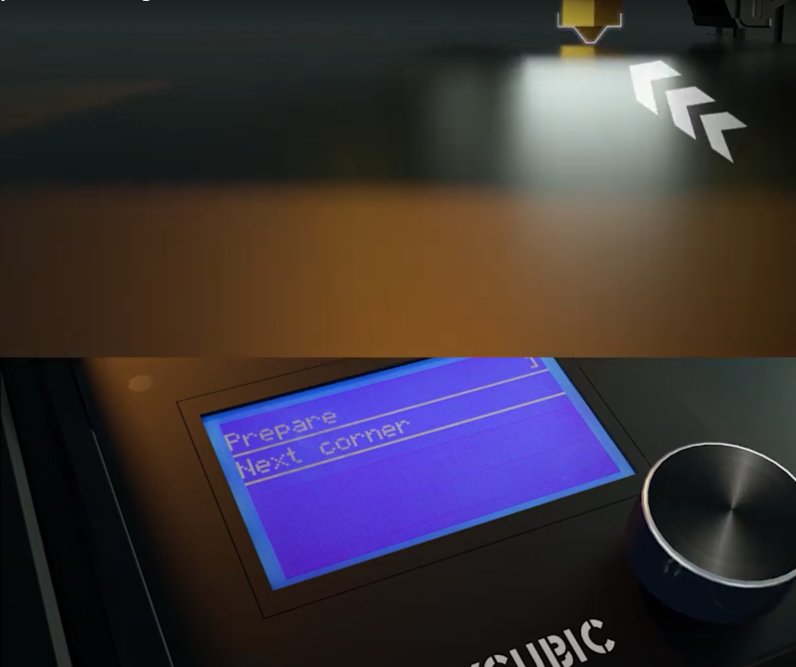
After assembling the device, you’ll have to level the bed, which is quite simple thanks to the assisted calibration system. In order to level the bed, choose the ‘HOME’ option and then pick ‘HOME ALL’ to return the print head into the default position. After this, select ‘Prepare’ and then choose the ‘Level Corners’ option (which won’t appear until you’ve chosen ‘home all’). Put a sheet of paper under the nozzle and adjust the nozzle height until the paper is in a tight position and removing it from below the nozzle leaves a little bit of a mark in there. Then, choose the ‘Next corner’ option and repeat the paper-nozzle procedure for 3 remaining corners. We recommend completing the procedure twice.
Once you’ve assembled the printer and loaded the filament, it’s finally time to begin your printing journey.
The memory card that comes together with the device contains two models to try the printer out. If you’re looking for more interesting examples than the ones provided by the manufacturer, try checking websites with lots of fascinating yet free 3D models, such as Thingiverse or MyMiniFactory.
Source: youtube.com
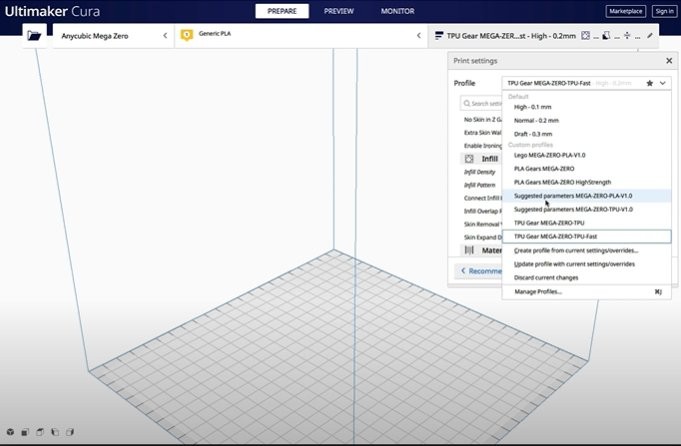
The recommended slicing software solution provided by the manufacturer is the well-known Ultimaker CURA. The digital manual situated on the memory card will guide you through the installation process as well as recommend optimal settings. In addition, the card contains two pre-installed Cura profiles ideal to use with PLA and TPU materials.
Besides, if Cura doesn’t work for you, you might want to try another software solution, such as Slic3r. Some users report that switching to Slic3r helped them to avoid failed prints when nothing else could.
What is the difference between the Anycubic Mega Zero and the Creality Ender-3 Pro?
The Anycubic Mega Zero and the Creality Ender-3 Pro are both gantry-type FDM printers with the same build volume, and both are equipped with a single extruder. Besides, both printers feature the resume printing function. In our humble opinion, the most important advantage of the Ender-3 Pro is a heated bed which can be heated up to 110°С — hence the increased price tag.
The table below compares between different characteristics of the Mega Zero and Ender-3 Pro:
|
Anycubic Mega Zero |
Creality Ender-3 Pro |
|
|
Heated bed |
n/a |
yes |
|
Supported file formats |
.STL, .OBJ, .DAE, .AMF |
.STL, .OBJ, .AMF |
|
Printable materials |
PLA, TPU, HIPS, Wood |
PLA, ABS, WOOD, TPU, gradient color, carbon fiber |
|
Nozzle size |
0.4 mm |
0.4 mm (options for 0.2/0.3 mm) |
|
Connectivity |
SD card, USB cable |
SD card |
|
Slicing software |
Cura |
Cura, Repetier-Host, Simplify3D |
|
Input |
220 V AC, 50/60 Hz |
AC 110-120V/6,8A 200-240V/3.4A 50-60Hz |
|
Outer dimensions (mm) |
504 x 396 x 607 |
440 х 440 х 465 |
|
Weight (kg) |
6.4 |
6.9 |
|
Price |
The prices are subject to change.
All in all, the Mega Zero is cheaper, more lightweight and supports USB connectivity.
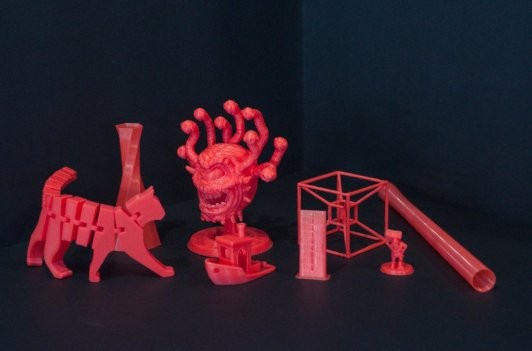
Check out some of the most outstanding models printed with the Anycubic Mega Zero.
The Anycubic Mega Zero is ideal for printing tabletop miniatures and other small-scale figurines. Take a glance at these neatly-looking models printed by James M.
Source: amazon.com
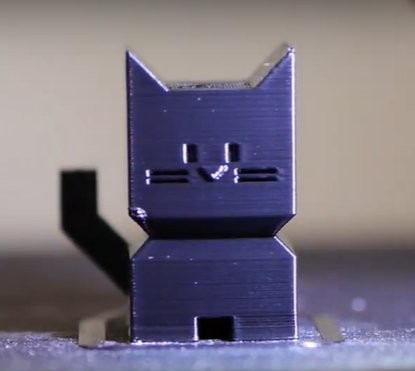
Or take a look at this cute cat printed by Todd Munro.
Source: youtube.com
Source: instagram.com
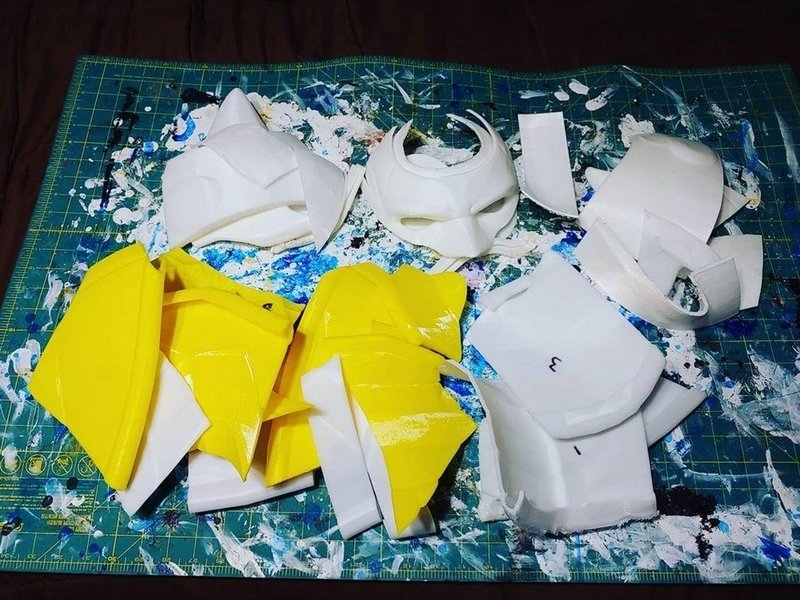
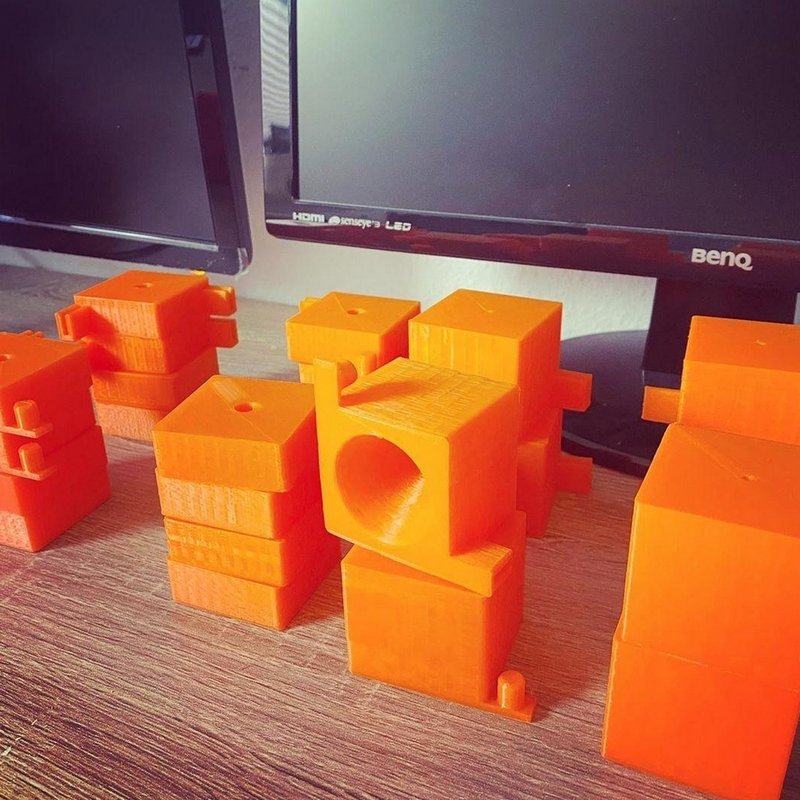
Here are 52 separate parts of a Batman costume printed and designed by an Instagram user toby_warnes_nova. It includes helm, shoulder, and neck pieces all made on the Anycubic Mega Zero using TPU filament.
Source: instagram.com
These impressive 3D printed enclosures were built by an Instagram user kr3atix_3d. Such parts were initially designed to be put underneath IKEA lack tables, but the concept evolved into something greater. You can check the original design at thingiverse.
Source: instagram.com
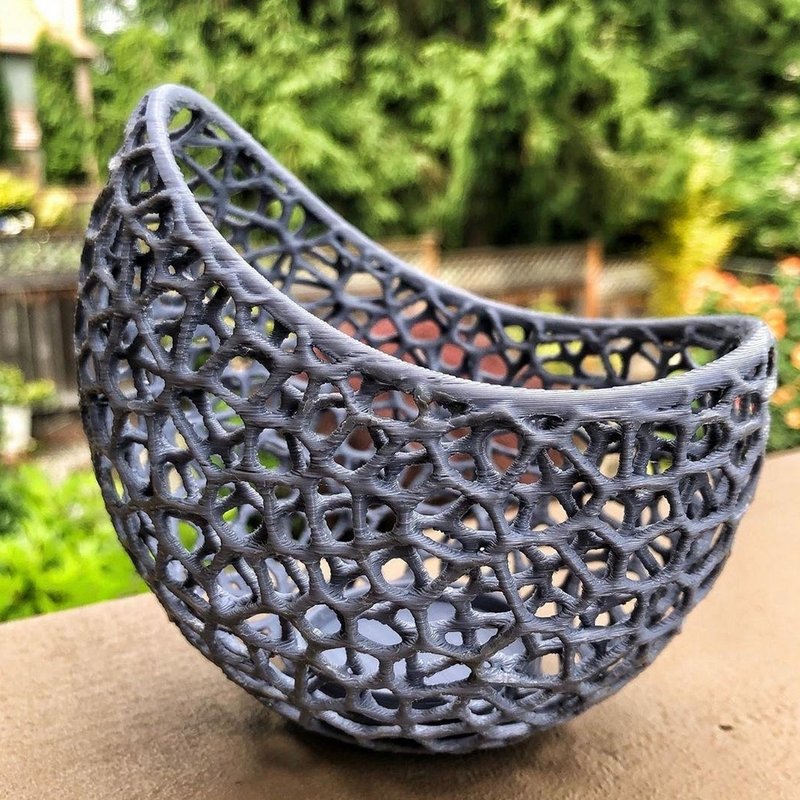
The image above shows a remarkable Voronoi-style candle holder 3D printed by an Instagram user gadgetismic. Made with eSUN’s PLA+ filament, the model took 7.5 hours to be printed without supports at 25% linear infill using Cura software.
By using additive manufacturing, you’ll be able to make a number of useful and original household items to repair or upgrade your furniture and electronic devices, as well as freshen up the outlook of your room with uniquely-designed parts.
Source: instagram.com

Source: instagram.com
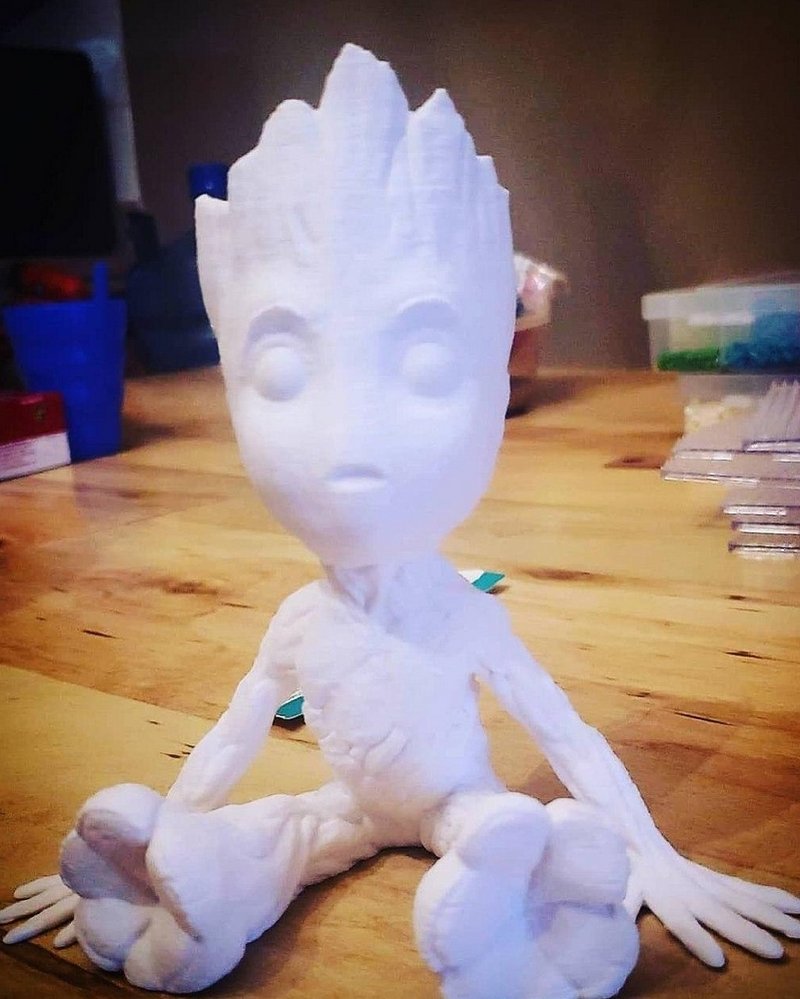
This outstandingly detailed and neat-looking Groot has been printed and then painted by shinyseb.

Source: thingiverse.com
In times of current epidemiological unease, one of the most relevant use cases would be making protective equipment such as face shields for you and your loved ones. Besides, your local health facilities and related organizations will definitely benefit from additional supplies like that.
It only takes one hour to print a single protective face shield. You can find the video guide and other related files by clicking this link.
The main pros and cons of the Anycubic Mega Zero are the following:
Pros:
Cons:
The Anycubic Mega Zero is one of the best budget offers available at the current 3D printing market. This desktop FDM 3D printer is ideal for entry-level users and hobbyists, allowing to make a variety of products including souvenirs, household items, and more. The Mega Zero can be employed for both educational purposes and personal use. It is an upgradable device that offers a variety of useful features unexpected for its price tag.
You can purchase the Anycubic Mega Zero at Top 3D Shop. This reliable and affordable device comes with the manufacturer’s warranty. In addition, our team will make sure to provide the best service possible, just like we always do.
Update your browser to view this website correctly. Update my browser now

Write a comment