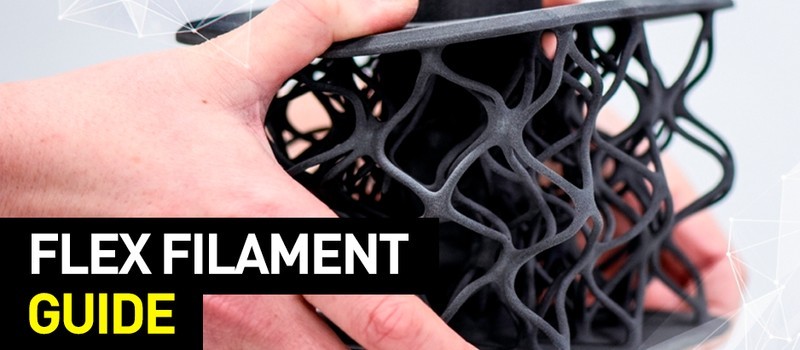
Flexible plastics are among the most popular 3D printing materials that boast a wide array of applications. As a rule, these flexible polymers are employed to create elastic shock-absorbing parts like gadget cases and sports shoe soles.
Due to their physical properties, however, there are several important storage and printing rules that must be followed to uncover their full potential. Read the article to find out how to reliably print with flexible filaments and organize your workflow in a streamlined fashion.

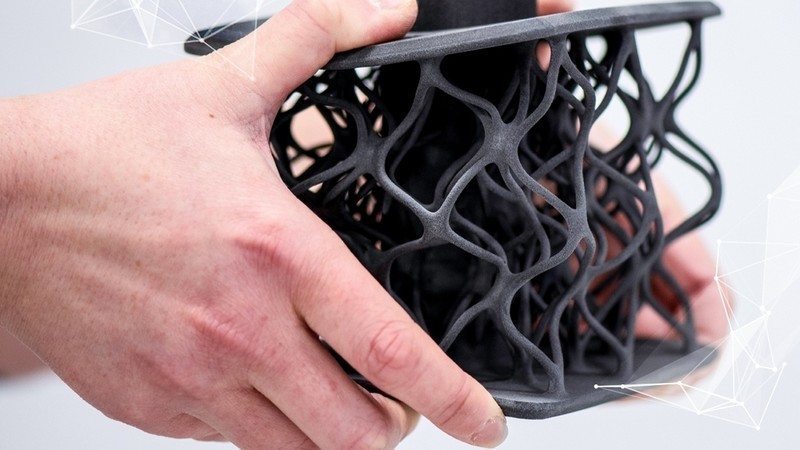
Source: aerospace.basf.com
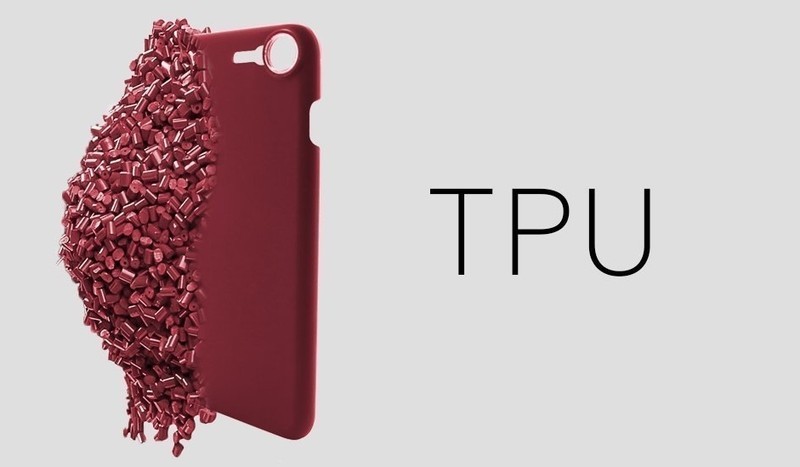
Flexible plastics come from a common category of elastic filaments and are called thermoplastic polyurethane (TPU). Since TPU belongs to the category of thermoplastic elastomers (TPE), there may be some confusion involving these terms. As for this particular article, we will be using "printing with flexible materials" as an equivalent of "printing with TPU".
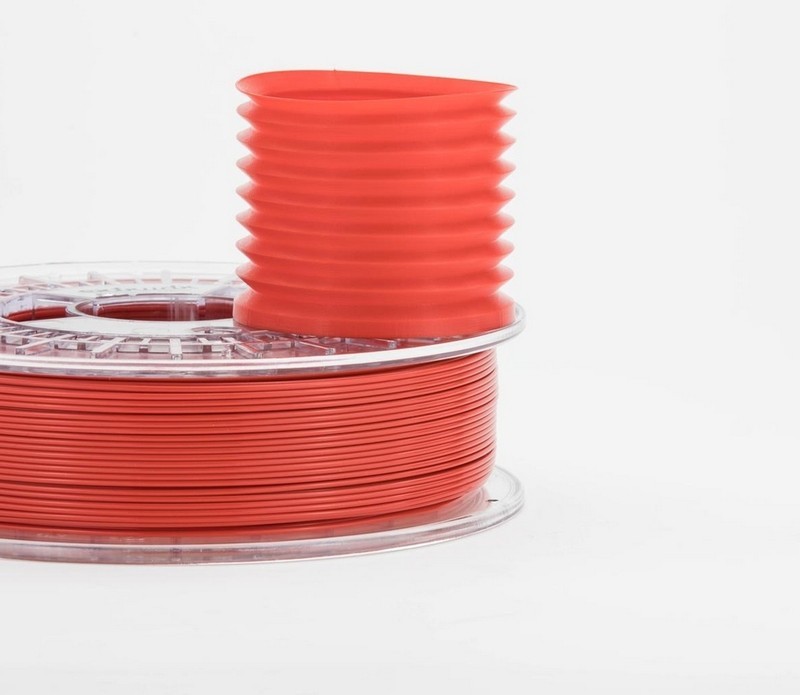
Source: felfil.com
Source: en.wikipedia.org
Thermoplastic polyurethane was first created in 1959 by Lubrizol Engineered Polymers, a Berkshire Hathaway company. The thing that determined the physical properties of TPU was the decision to unite the features of copolymers with rigid and elastic structures in one. To be more precise, the rigid blocks of copolymers included in the formula consisted of isocyanate, while the elastic ones consisted of polyol. By mixing the polymers in various proportions, the company has been able to create different kinds of TPU. Some of the created materials were elastic like rubber, and are now widely used in 3D printing, while the other ones were incredibly tough and hard to break.
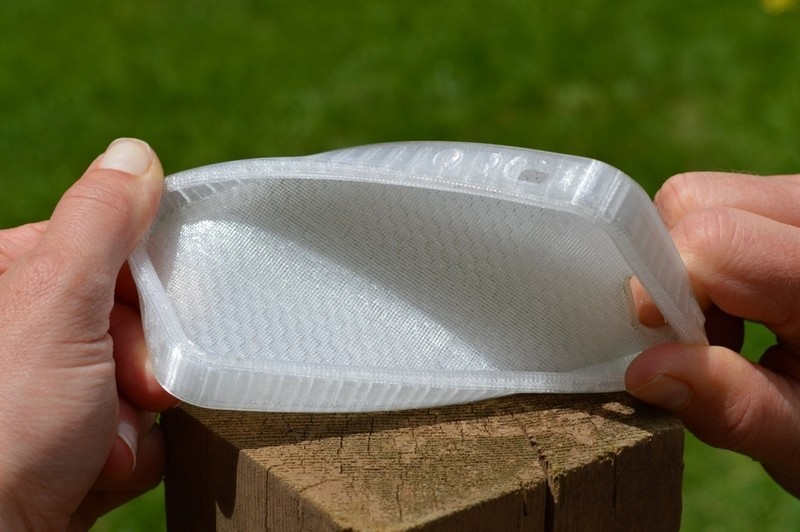
Flexible plastics are light-colored elastic materials that, compared with their ABS-based counterparts, can withstand higher torsional and tensile stress. The main features of such polymers are:
Source: beeverycreative.com
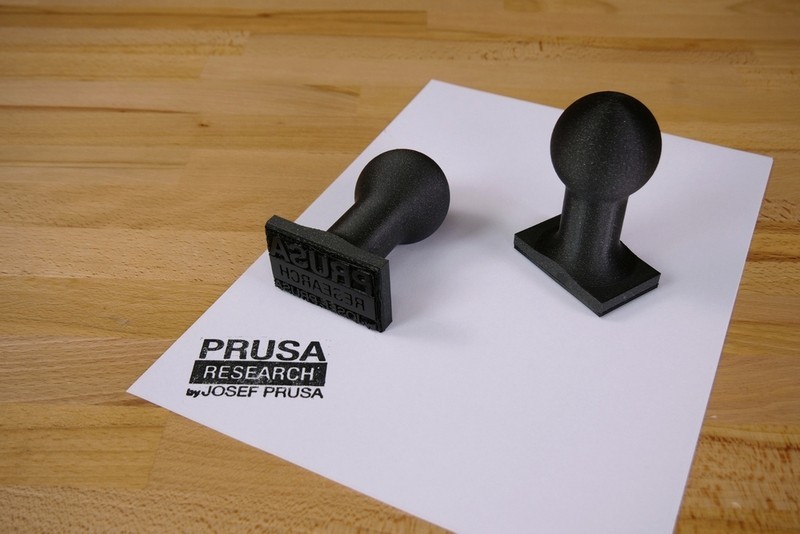
Touching upon post-processing capabilities, TPU-based models can be easily sterilized, welded, machined, dyed, printed, and cut. The material offers outstanding temperature resistance and good corrosion resistance at room temperature. TPU-based products are resistant to engine oils and lubricants, even at high temperatures. Moreover, TPU is soluble in aromatic hydrocarbons such as benzene and toluene at room temperature. Besides, TPU-based products dissolve in acetone, methyl ethyl ketone, cyclohexanone, methyl pyrrolidine, and tetrahydrofuran.
To test out the capabilities of TPU, six identical models printed with different filaments were partially immersed in a particularly strong Nitro-P solvent. The TPU-based part absorbed the liquid, resulting in a 50% increase in volume. However, after the evaporation of the solvent, the model assumed its original volume without losing any of its physical properties.
Source: 3dprintingmedia.network
Source: extrudr.com
Just like the case with other filaments, there is a set of safety rules that must be followed when printing with flexible materials to ensure a secure and hassle-free workflow. Make sure to wear gloves to protect yourself from thermal burns. Use respirators and print in well-ventilated premises. If possible, print on a fully enclosed device that features a reliable and effective ventilation system. In case the molten polymer comes into contact with human skin, pour some cold water over the place and follow the standard thermal burn treatment rules. After hardening, the polymer will fall off on its own.
Moreover, make sure to organize the disposal of flexible plastics correctly. Burning them would not be a good idea since the polymer releases toxic fumes of carbon monoxide, nitric oxide, hydrogen cyanide, and isocyanate when burned.
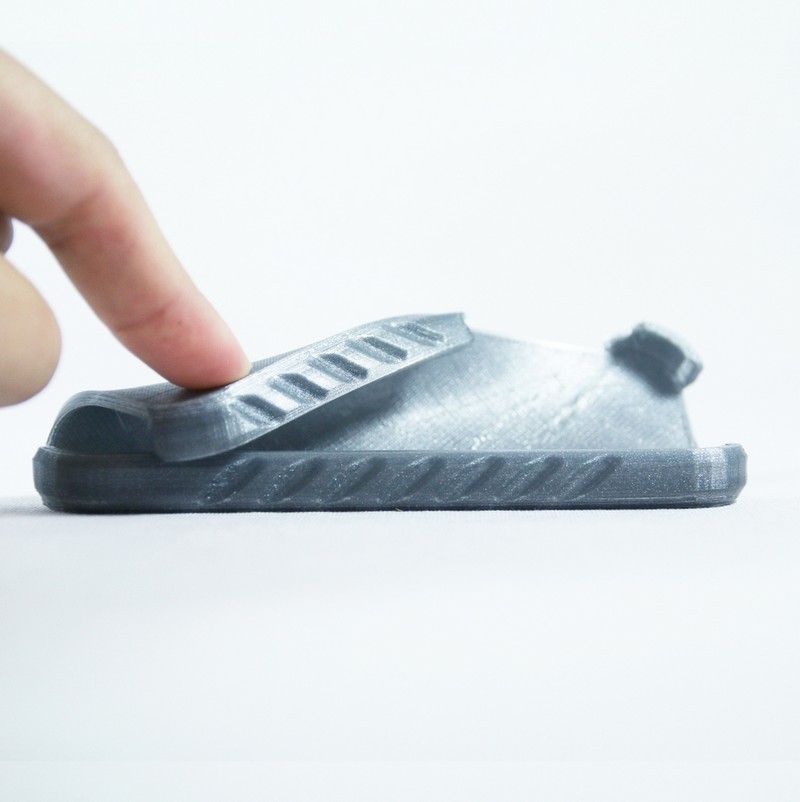
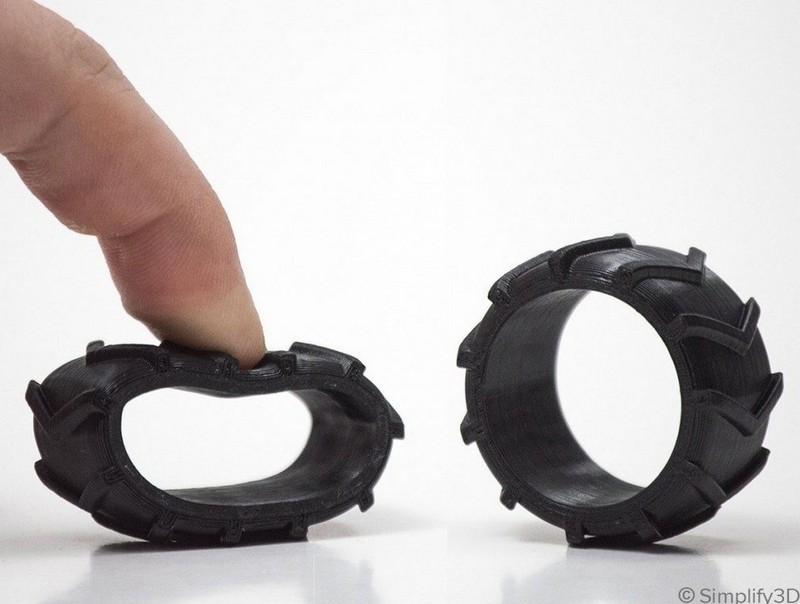
Flexible plastics are used to create durable yet resilient parts like dampers, shock absorbers, and flexible connection elements. Along with the creation of such supporting elements, flexibles are employed in unique large-scale projects. For instance, XEV Limited, a Chinese startup, developed an electrical car prototype with body parts 3D printed with Nylon, PA, and TPU. The price for a two-seater city car the size of a Smart City Coupe was supposed to be $10,000. Sadly enough, the inventors could not find investors to start mass production.
Source: amfg.ai
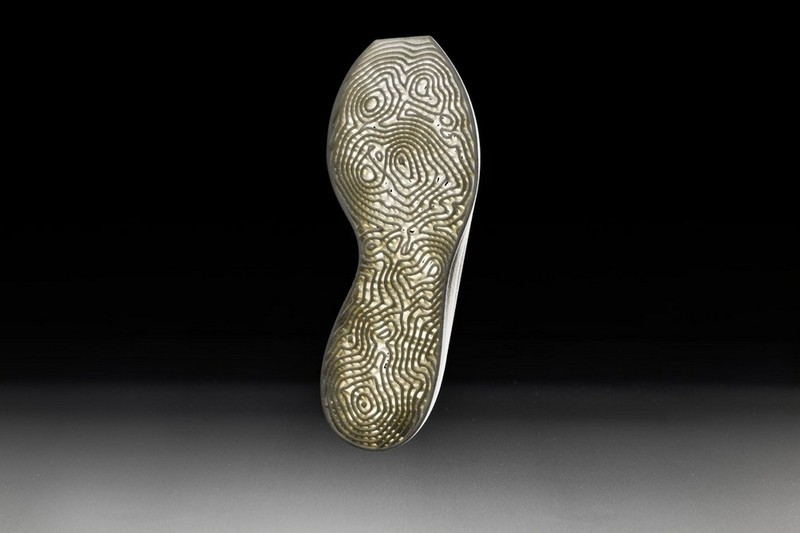
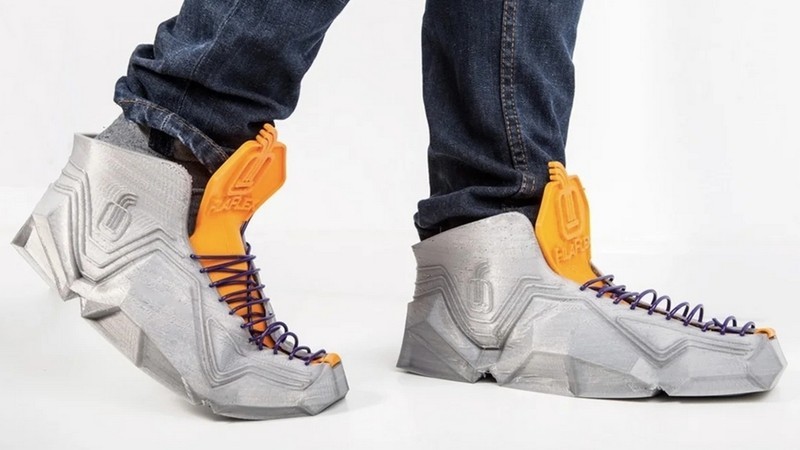
On the other hand, New Balance, a well-known US-based manufacturer of athletic shoes, created a series of running shoes with elastic soles 3D printed with flexible materials. According to the company’s statement, the solution united the benefits of 3D printing and advances in materials science to achieve the optimal balance of flexibility, strength, weight, and durability. The sole has been designed in a particularly efficient way to ensure even distribution of heel-caused pressure over the whole sole, making for a comfortable and convenient solution.
Since flexible filaments are hygroscopic, they are prone to absorbing moisture when left open in rooms with high humidity. To ensure reliable long-term storage, the filaments should be vacuum-sealed together with a desiccant. If you are unsure whether the filament was properly stored before the printing session, make sure to process it in a filament dryer (e.g. Wanhao Box 2) before proceeding to the actual production.

Source: reddit.com
To achieve optimal first layer adhesion when printing with TPU, keep the heated bed temperature at around 45—60 °C. Besides, covering the print bed with masking tape or using a sheet of polyetherimide (PEI) as a base would also be a good idea.
3D printing with flexible filaments may become challenging due to the material properties. The polymer becomes extremely viscous when heated, which may lead to clogging when printing too fast. However, there’s always a recommended printing speed proposed by manufacturers that depends on the filament brand. The recommended value usually lies within the range of 10 to 30 mm/s, meaning that the correct printing speed can be found after making a couple of test prints and seeing what suits your particular filament better.
To reliably print with flexible plastics, make sure to turn on all the ventilation systems offered by your machine during printing.
After a TPU-based part has been printed, you can provide it with an even smoother and glossier appearance. Place it in a special oven (front side up), set the temperature to 200°C, and wait from two to three minutes. The top layer will melt just enough to improve the model’s outlook without deforming it.
Due to the physical properties of flexible filaments, it is particularly challenging to polish TPU-based parts manually. This can be very time-consuming, therefore, we recommend using a CNC machine to polish such prints. The supports of TPU-made parts, however, are incredibly easy to remove and can be detached even with a box cutter.
Another way to post-process a print made from flexible materials would be to cover it with a flexible filler. This approach is especially useful in case you are working with large models and don’t require millimeter-precise dimensional accuracy.
TPU-based parts can be glued together just like all other plastic-made parts. To do this, you can use special rubber-to-rubber adhesives. Moreover, you can employ aprotic solvents like tetrahydrofuran, dimethyl sulfoxide, and dimethylformamide.
Just like the case with parts made from ordinary FDM 3D printing materials that are similar to the conventional thermoplastics, models printed with TPU must be cleaned and dried. After adding a small layer of adhesive, firmly press the two parts that need to be glued together against each other and allow the adhesive to dry.
Recommended settings:
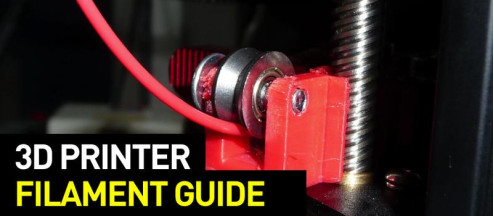
It is extremely important to minimize nozzle clogging when printing with flexible materials by providing vertical filament-to-nozzle feeding. Luckily, the Anet A8 3D printer’s extruder can be installed with a guide that should be placed between two gears for a streamlined printing experience. Please check the video above for a detailed installation process.
Recommended settings:
Just like the deal with the Anet A8, it is important to ensure optimal filament feeding before printing with flexible materials on the Creality Ender 3 too. There’s a special nozzle cap that can be installed onto the extruder to prevent clogging and other related issues like gears-induced filament chewing.
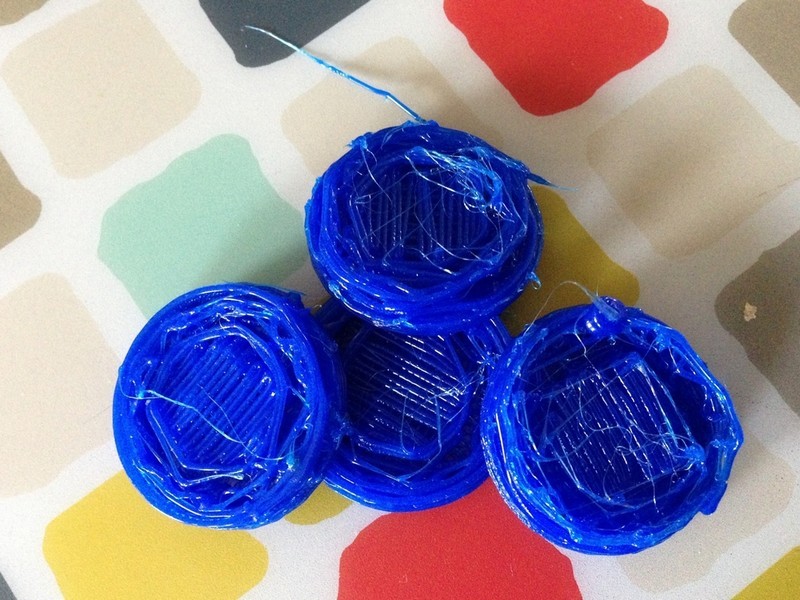
One of the most common issues that goes hand in hand with TPU 3D printing is stringing. The problem manifests itself by creating thin threads between the walls of a printed model. Some users resolve the issue by burning string with a gas burner. This may sound effective, but there is a high risk of damaging the printed model during the process. Obviously, the best way to fix stringing is to prevent it from happening by turning on the retraction and adjusting the nozzle temperature along with printing speed.
Wall delamination is yet another common problem that occurs due to improper filament storage. The issue can be solved by drying the filament before printing. As you can see, unlike stringing, delamination is much easier to fix.
Source: print.theporto.com
To get rid of stringing once and for all, consider doing the following:
Source: reprap.me
Source: simplify3d.com
Source: gizmodo.com
Source: blog.prusaprinters.org
Elastic flexible plastics are used to create resilient yet durable parts on FDM 3D printers. Parts printed with TPU will feature astonishing temperature resistance, high tensile, torsional, and compressive strength. That’s why this material can be used to create anything: a smartphone case, a cosplay costume, or even car body parts. Due to the physical properties of the material, however, TPU may be challenging to print with for entry-level makers. Nevertheless, the challenges are incredibly easy to overcome if one adjusts the print setting before printing as well as stores the filament properly. Consider following the guidelines presented in this article to ensure yourself with a hassle-free and streamlined printing experience.
Update your browser to view this website correctly. Update my browser now

Write a comment