The art of engraving has been known to people since ancient times. First engraving techniques appeared in China more than 3000 years ago. The idea of creating unique objects has attracted people for centuries, but hand engraving was a meticulous process requiring serious skills. That all changed with the invention of the laser and, later, laser engraving technology which gave everyone a chance to become a creator.
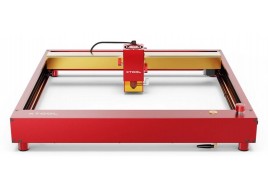
This is Top 3D Shop, and today we are going to review the xTool D1 Pro laser cutting and engraving machine. We will spot the differences between all the D1 Pro modifications and have a look at the range of accessories offered by the manufacturer for more convenience and versatility.
The xTool brand of laser cutting and engraving machines is a part of the Chinese-based Makeblock company, founded in 2012 by Jasen Wang who got his master’s degree in Aircraft Design at Northwestern Polytechnical University in 2010. During his university years, the company’s founder, an enthusiast maker, was into robotics, and in 2013, the Makeblock company started a robot project on Kickstarter. In 2014 the company released mBlock, an online block-based coding platform for children learning STEAM. From 2014 to 2018 Makeblock released a series of educational robots and in 2018 they launched MakeX Robot Competition for kids. To support STEAM education and inspire children’s creativity, the company designed the Laserbox, its first laser cutter and engraver, in 2019. Since then, Makeblock shifted its focus to laser cutting machines, and the xTool brand appeared. Today the company is dedicated to developing innovative products to support people’s desire to express themselves through creation.
The xTool D1 Pro laser cutter and engraver is an incredibly capable and reliable machine that handles a variety of materials and comes in three laser power options, namely 20, 10, or 5 W. The top 20W model is one of the most powerful diode laser cutters in the market. The difference between the three versions is detailed in the table below.
|
Model |
xTool D1 Pro 20W |
xTool D1 Pro 10W |
xTool D1 Pro 5W |
|
Machine power |
120 W |
60 W |
36 W |
|
Laser electric power |
84 W |
40 W |
25 W |
|
Laser module output power |
20 W |
10 W |
5 W |
|
Laser spot |
0.08 x 0.10 mm |
0.08 x 0.06 mm |
0.06 x 0.06 mm |
|
Working area |
430 x 390 mm |
430 x 400 mm |
430 x 400 mm |
Other parameters are identical for all the three xTool D1 Pro versions.
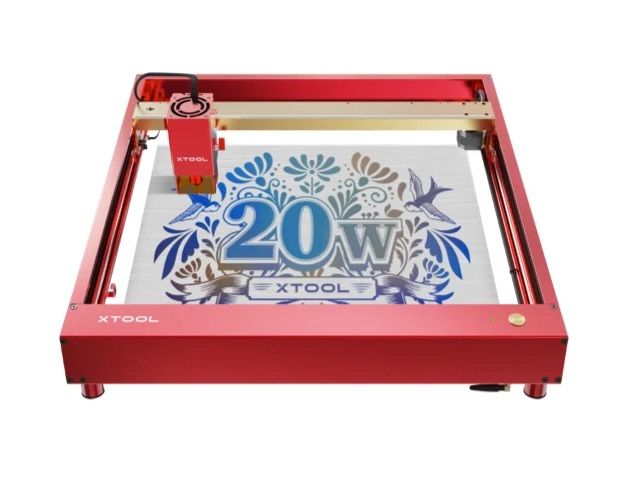
Compared to its predecessor, the xTool D1, the Pro model has a more advanced laser module and 2.5 times higher speed. It also features some new safety functions and comes in a golden red color in addition to the D1’s metal gray one.
The xTool D1 Pro is a DIY kit featuring an open-frame design with a robust aluminum frame and steel linear rails and rollers. It is equipped with two NEMA17 stepper motors, and the XY axes are driven by synchronous belts.
Four proximity limit switches on the ends of both axes detect the boundaries of the working area and prevent the laser head from hitting the frame. If the head runs too close to the frame, the alarm sound is heard. The limit switches allow setting the home position of the machine automatically and work with absolute coordinates.
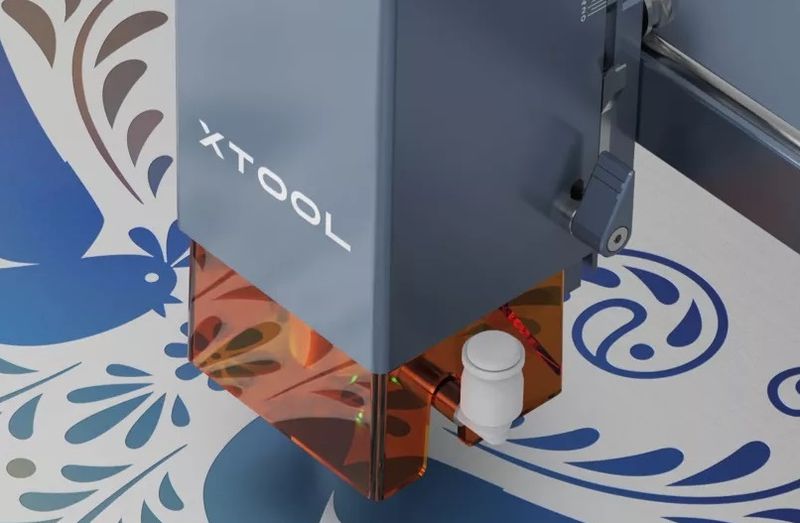
The D1 Pro is equipped with a 20, 10, or 5 W laser module. The 20 W module consists of four separate 5 W lasers, their beams focused on a single spot. With the 10 W module, you get the power of two 5 W lasers also combined in a single module. The compressed laser spot technology provides highly precise engraving results at faster speeds.
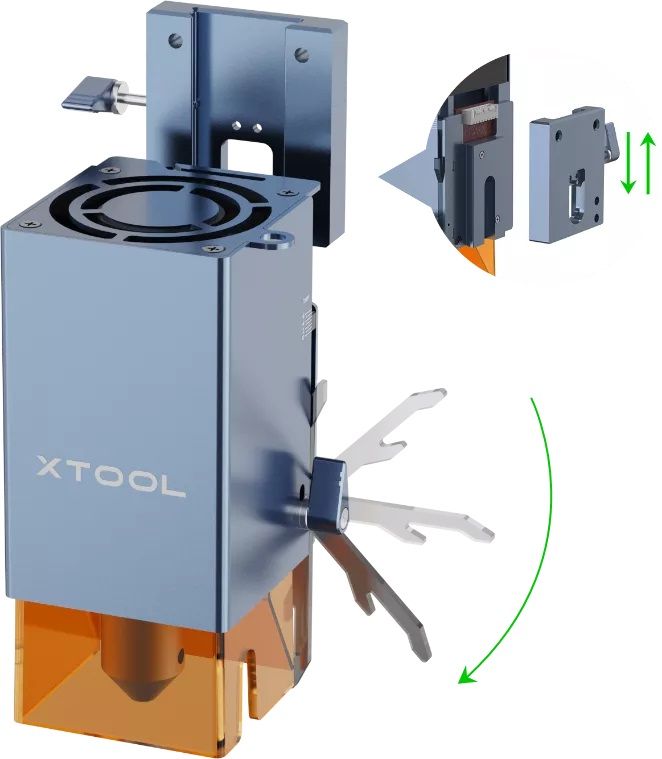
The bottom of the laser module is covered with a transparent orange shield which protects the user from hazardous laser beams and keeps the lens from dust when cutting. While the diode laser works in the visible spectrum, it is extremely important to protect eyes from emission. Remember to wear safety goggles each time you work with the machine. There is a pair of ones in the box with the D1 Pro, but you may want to buy another pair with a rating of OD6 or higher to be sure your eyes are protected properly.
Due to its powerful laser and advanced stepper motor drivers, the xTool D1 Pro can reach an incredible speed of 400 mm/s, allowing for significant time-saving on your projects, which is especially important for those running a business.
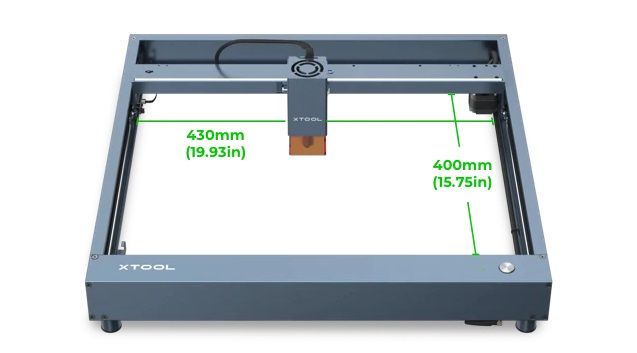
The working area of the D1 Pro is 430 x 400 mm for the 5 and 10 W models, and a bit smaller (430 x 390 mm) for the 20 W version due to the larger laser head size. This basically covers the needs of most projects and even allows for batch-manufacturing of smaller objects.
The maximum workpiece height of 50 mm can be increased with the use of optional risers, each 4-piece riser set increasing the height by 45 mm.
One more upgrade, compared to the D1 model, is a flame detector and a shake sensor. If the material accidentally catches fire, the machine automatically stops, as well as in case somebody lifts or pushes it — the built-in gyroscope will detect the change in position and activate the emergency stop.
The D1 Pro is a highly versatile device capable of working with a wide range of materials. Due to the powerful quad-laser module, the D1 Pro 20W can cut through a 10-mm basswood or an 8-mm acrylic plate in one pass.
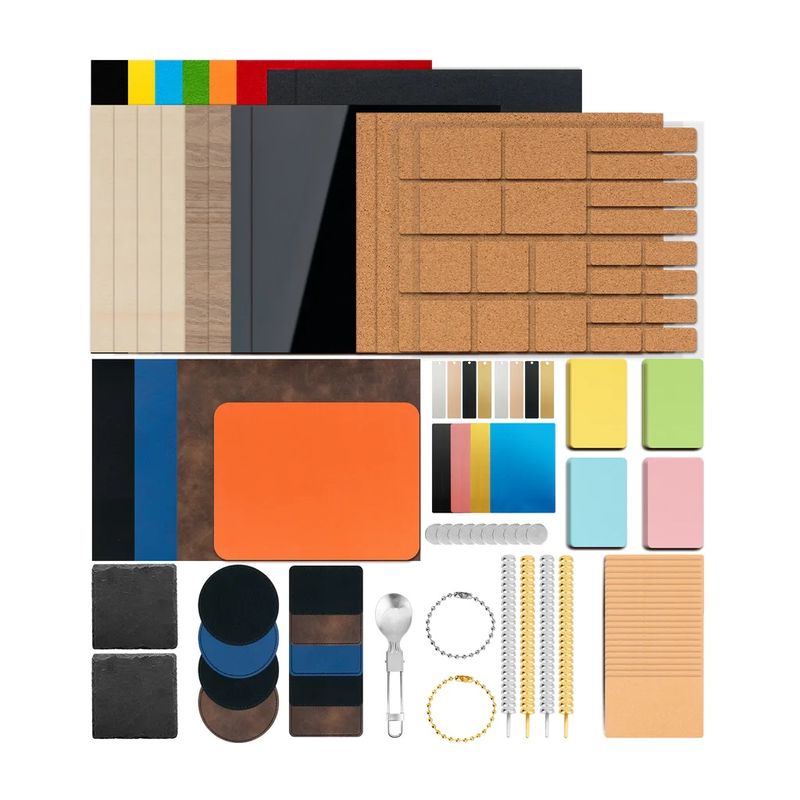
The machine can cut different types of wood, bamboo, paper, cardboard, cork, acrylic, leather, and fabric, as well as engrave on these materials. Besides, there are even more materials suitable for engraving, such as coated metals (with electroplating or paint layer), stainless steel, ceramics, glass, stone, marble, and more. You will find the list of compatible materials and recommended settings on the manufacturer’s website.
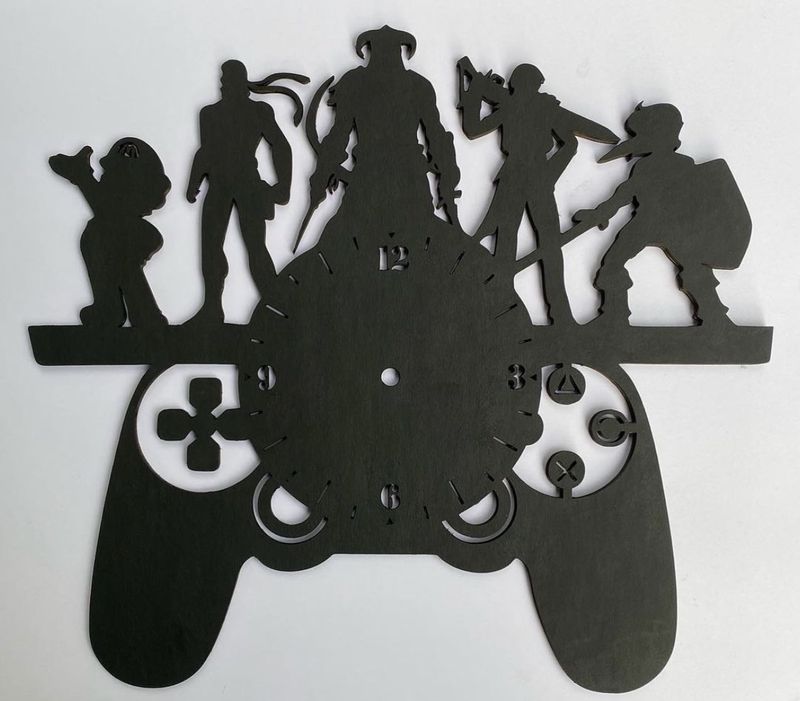
The D1 Pro 20W has an interesting capability of color engraving on metals like stainless steel. The surface layer is oxidized by a laser beam, and the particular color depends on the engraving settings, such as power and speed.
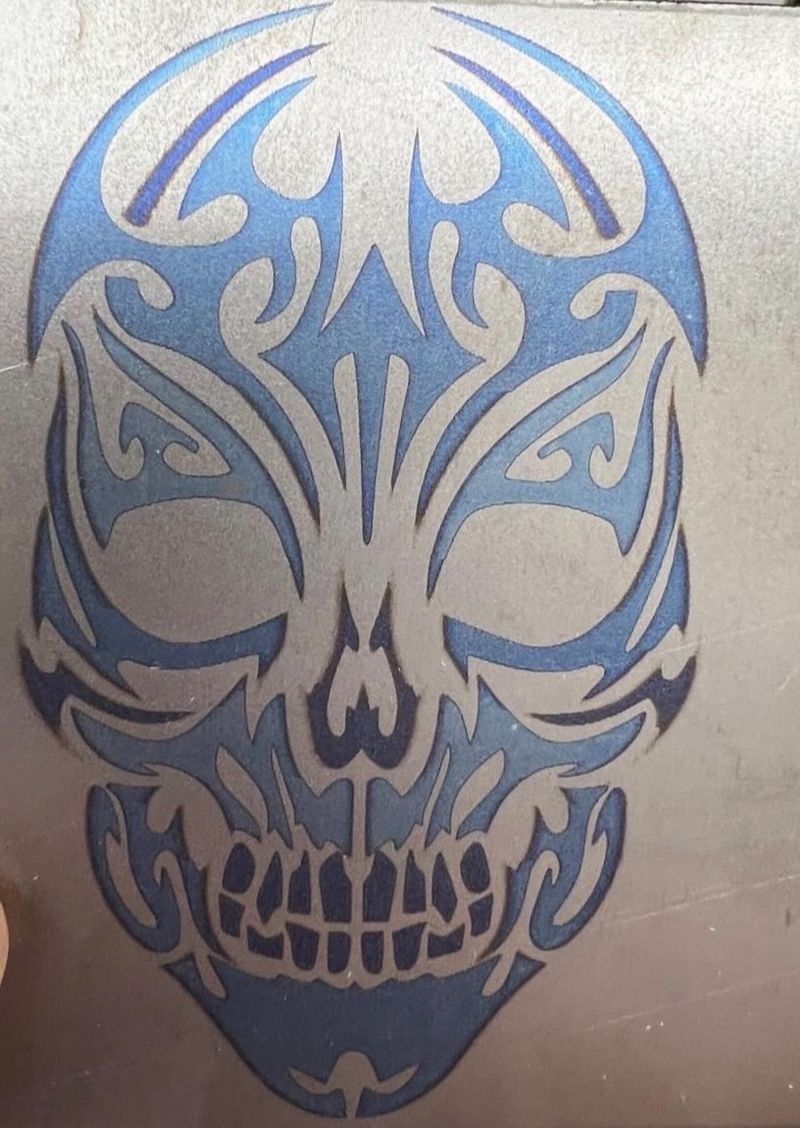
Credit: @builddadbuild / Instagram
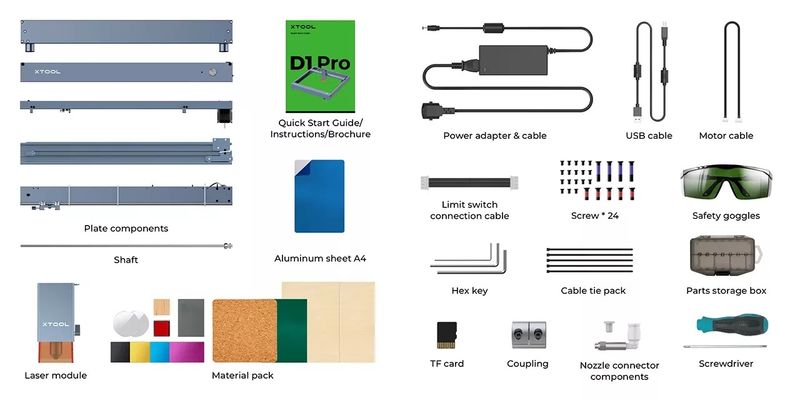
The xTool D1 Pro comes as a DIY kit requiring assembly. All the machine parts are securely packed into the box. Besides, there are all the necessary tools and screws, connection cables, and zip ties to fix the cables to the frame. In the box you will also find safety goggles, an aluminum protective sheet the size of A4 paper, a sample material pack, and a quick start guide with a brochure containing plenty of inspiring project ideas.
The assembly process is pretty simple and takes only about half an hour thanks to the clear and detailed instructions. The video tutorial below will help you assemble the D1 Pro and start your first project.
Plug in the power cable and connect the D1 Pro to the PC either via a USB cable or Wi-Fi. Do not forget to insert a TF card into the corresponding slot before you proceed with cutting.
Once the machine is assembled and connected, you need to adjust the focus along the Z-axis. The focusing mechanism on the D1 Pro is simple and well thought-of. There is a lever on the laser head which you pull down and manually move the head so that the lever touches the material surface. Then you tighten the thumb screw and pull the lever back up.
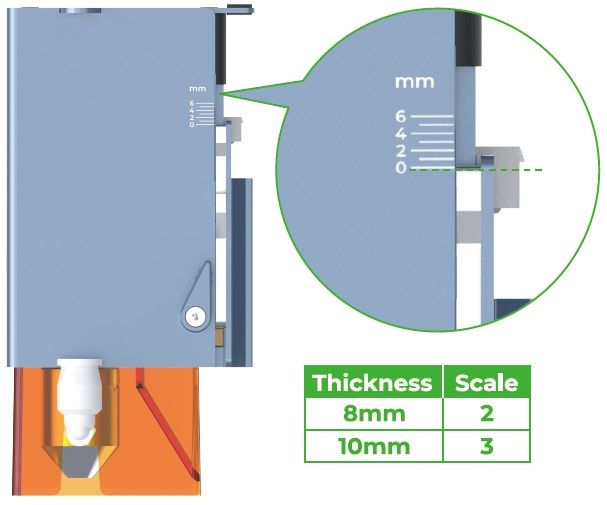
When performing a cutting job on the 20W version, the user can manually set the focus not on the surface but at the center of the workpiece to be cut. The scale on the side of the laser module helps precisely adjust the focal length depending on material thickness for optimal cutting results. Now you are ready to start.
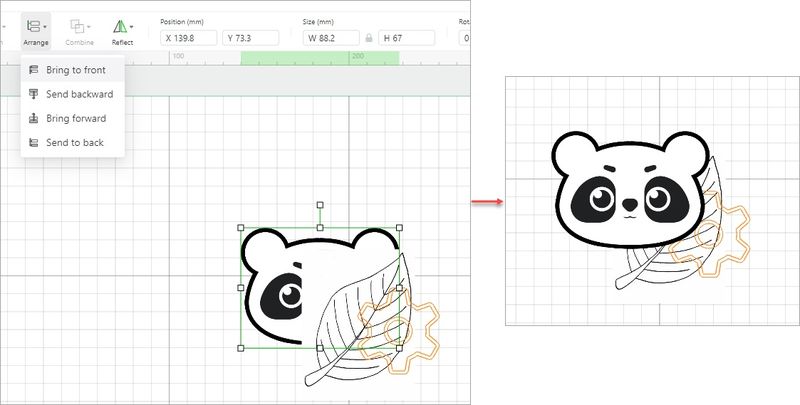
The D1 Pro is compatible with the dedicated xTool Creative Space software available for Windows and macOS. It has all the necessary functionality for most projects and allows for firmware updates. XCS supports most common vector and raster file formats, such as SVG, DXF, PNG, JPG, and BMP. Once the image is imported, you can edit it by inserting elements or text, or drawing a vector path. XCS allows you to group two or more elements and edit them as a whole. You can align and distribute multiple elements according to the chosen style, as well as arrange the elements, bringing them forward or sending backwards.
The Array function allows you to create multiple copies of a single element, which can be useful for batch production.

There are also other changes you can apply, such as flipping, rotating, changing size, or setting the position of an element on the canvas. All the functions are intuitive and the interface is simple and user-friendly, so even beginners will be able to create various designs with ease. Besides, there is a tutorial on using XCS on the manufacturer’s website.
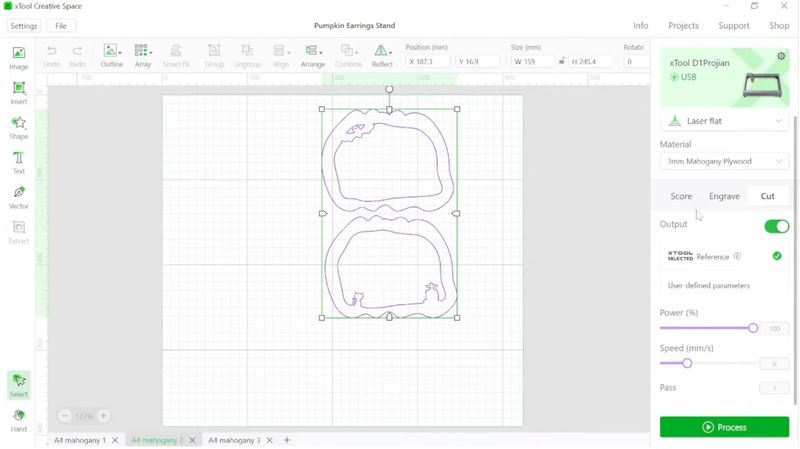
As soon as your design is ready, you need to adjust processing parameters, such as processing mode, power, speed, and number of passes. For engraving bitmap images there are additional parameters, such as bitmap mode and resolution.
For more complex projects, LightBurn can be used, which is more capable and supports more file formats.
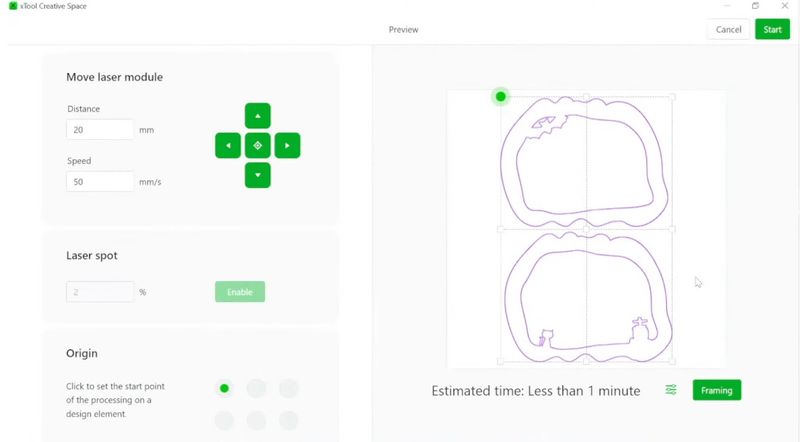
When you are done with your project’s design and settings, click Process to start cutting or engraving. You will see the preview window where you will be able to define the starting position of the laser head and learn the estimated processing time. To check if your design is properly aligned with the workpiece, click Framing, and the laser head will move, showing the area to be processed. Once everything is fine, click Start, push the Start button on the machine, and wait for your design to be processed.
To enhance the capabilities of the D1 Pro and ensure safer and more convenient operation, xTool offers a variety of add-ons to be used with the machine.
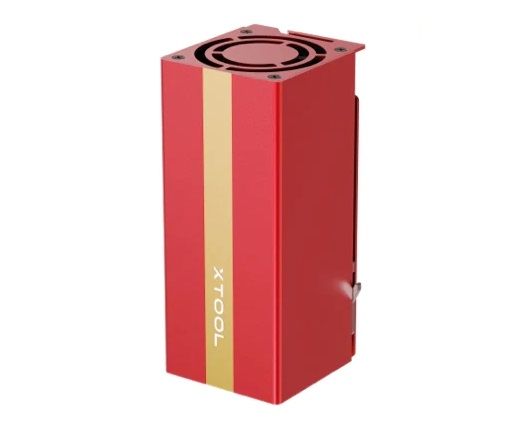
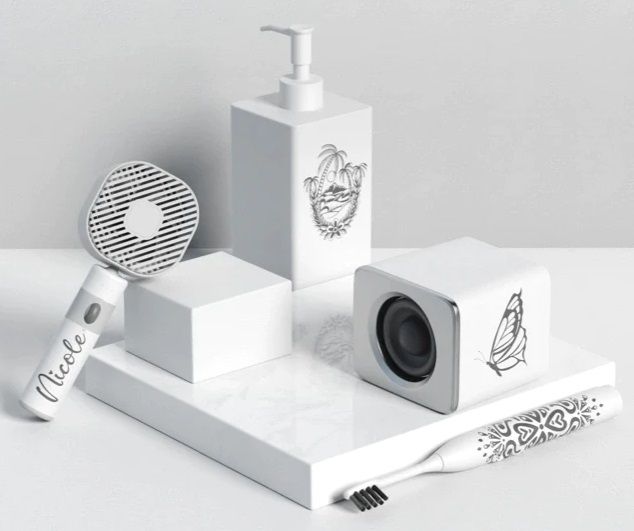
The infrared 1064 nm laser module is perfect for engraving on all kinds of metals, such as platinum, gold, silver, titanium, copper, zinc, aluminum, stainless steel, and others. The infrared laser also allows engraving on plastic and acrylic, leaving absolutely no burn marks typical for other laser types.
You can buy the xTool D1 Pro 2-in-1 Kit (20W or 10W versions) including both diode and infrared laser modules.
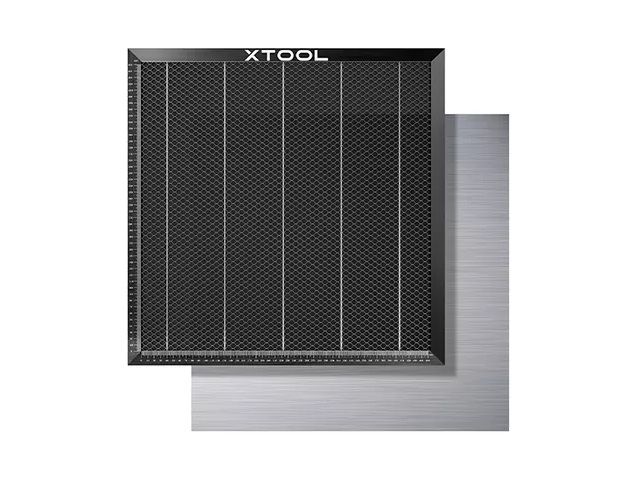
The Honeycomb Panel Set consists of an aluminum plate and a honeycomb working panel, both having dimensions of 50 x 50 cm. They are used for placing the materials to be processed and protect the working surface under the machine. The honeycomb structure speeds up smoke exhaustion and prevents the material from turning yellow.
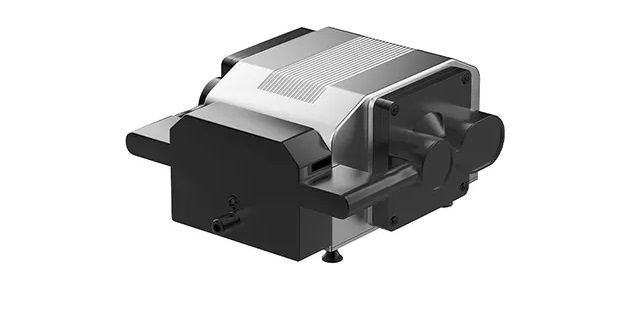
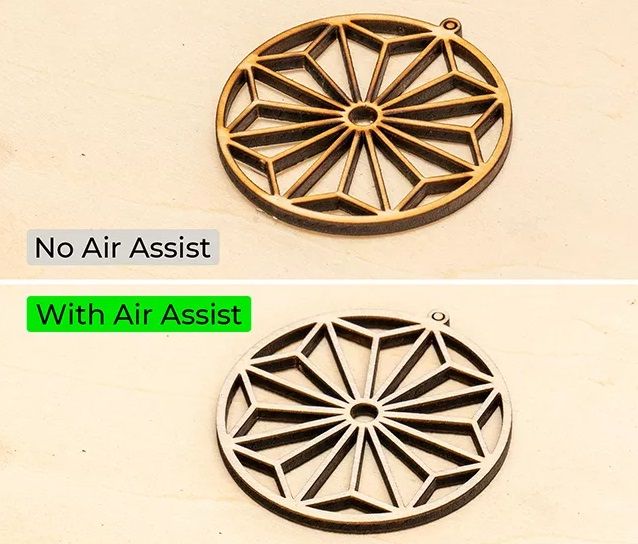
The Air Assist Set is connected to the laser head and blows away smoke and dust, protecting the laser lens. An output power of 30 L/min efficiently reduces the temperature on the material surface, preventing discoloration and ensuring a clean result with smooth cut edges.
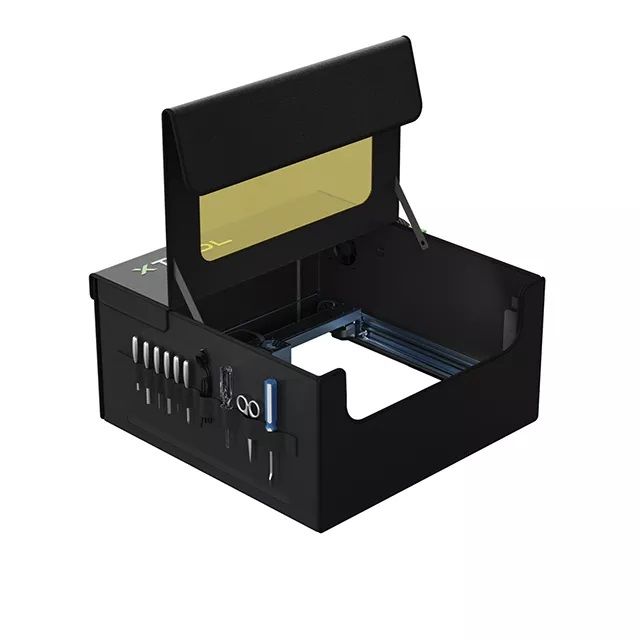
As the D1 Pro features an open-frame design, a foldable protective enclosure is indispensable for those who want to use the machine indoors safely and comfortably. The enclosure has three-layer walls, with the inner layer made of flame-retardant polyester and the middle layer being high-hardness honeycomb board material. The PU outer layer can be easily wiped and cleaned. With the enclosure, the user gets efficient ventilation and protection from dust particles, odors, and noise. For those using the D1 Pro with the Extension Kit, there is an add-on to the standard enclosure increasing its size.
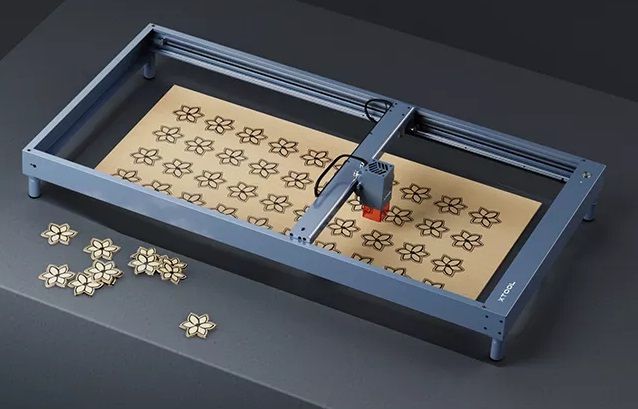
The Extension Kit for the D1 Pro increases the machine working area to the impressive 936 x 432 mm, which allows for much more efficient production.

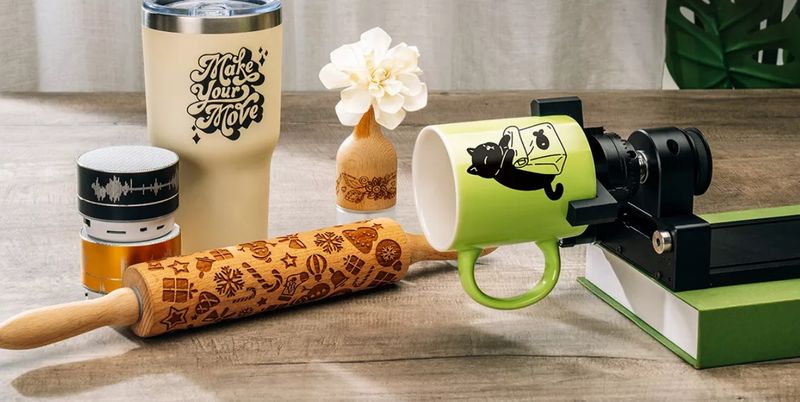
The RA2 Pro 4-in-1 rotary attachment allows engraving not only on flat objects, but also on spheres, rings, and cylinders and includes roller, chuck, sphere and ring rotary.
With additional risers, you can engrave on objects with a diameter of 3–198 mm. The use of the rotary attachment greatly expands the scope of application for the D1 Pro laser engraver, providing even more room for creativity.
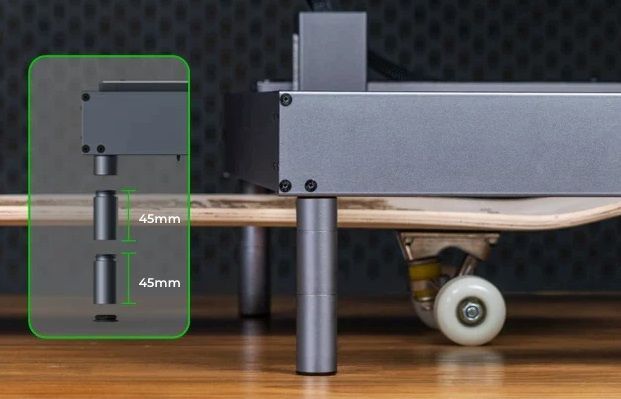
To work with larger objects, one can use additional risers on the four corners of the D1 Pro. A set of risers includes 4 pieces and adds 45 mm to the maximum object height of 50 mm. You can use multiple riser sets simultaneously.
With the xTool D1 Pro laser cutter everyone can become a creator. Being fairly affordable and easy-to-use, the machine is a good choice for hobbyists, while its capabilities and processing quality make it perfectly suitable for those wishing to start a small business.
Look at this brilliant home decoration idea from Instagram user @signal43. The children will not forget the Wi-Fi password anymore.
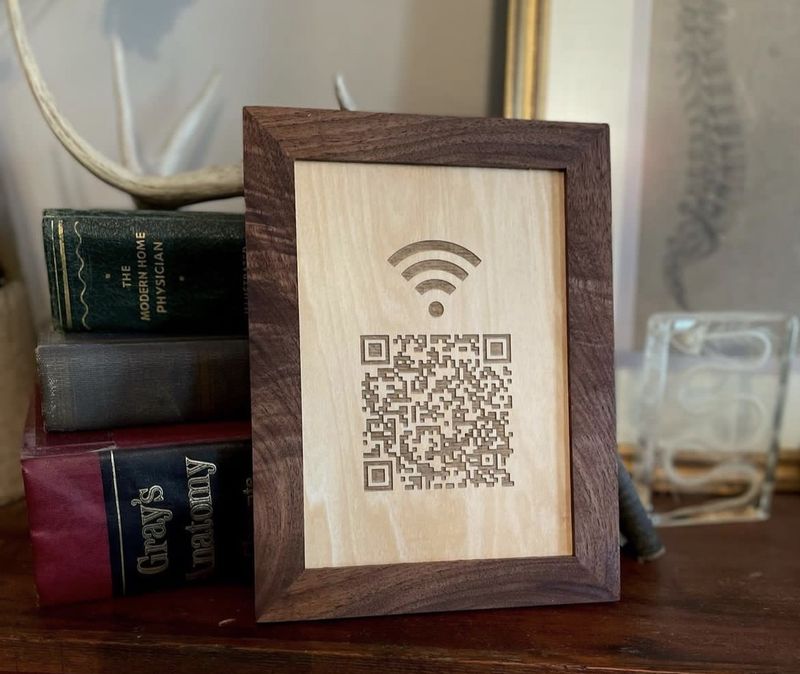
Credit: @signal43 / Instagram
Kaydee Krafts creates beautiful lamp shades, home decor elements, jewelry, and other nice things, using the xTool D1 Pro.
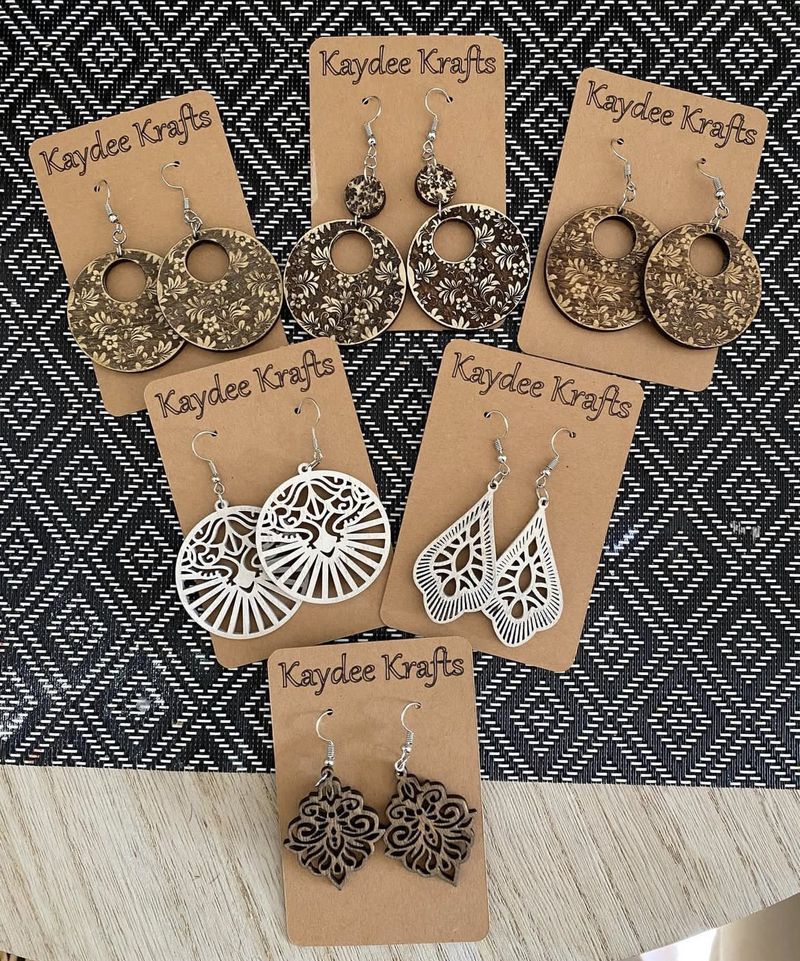
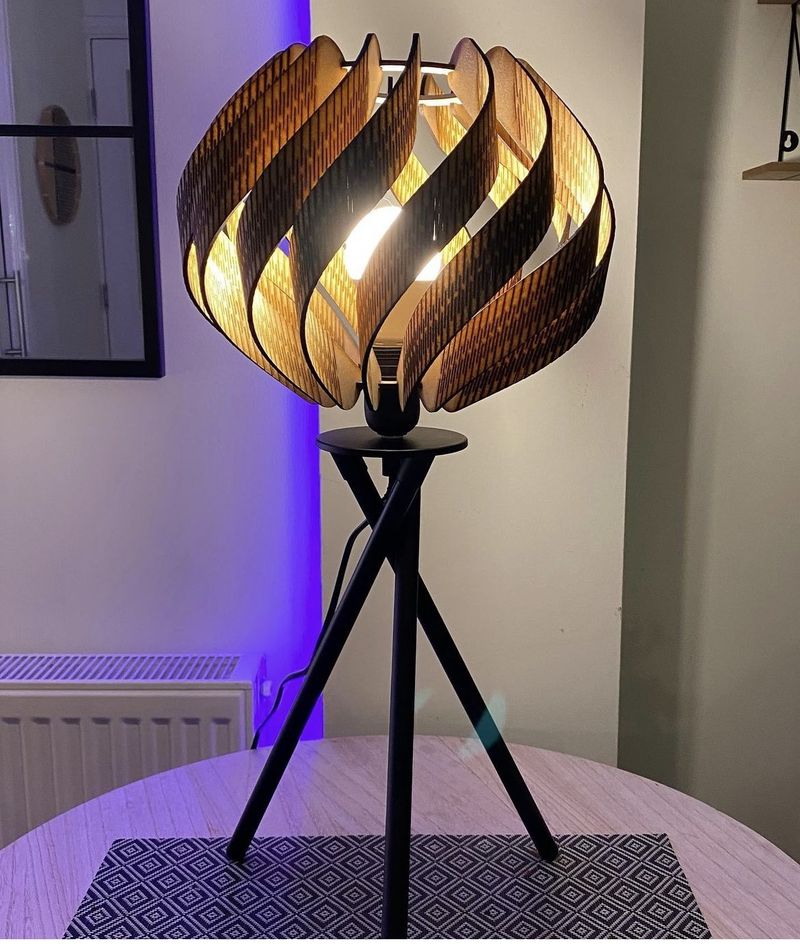
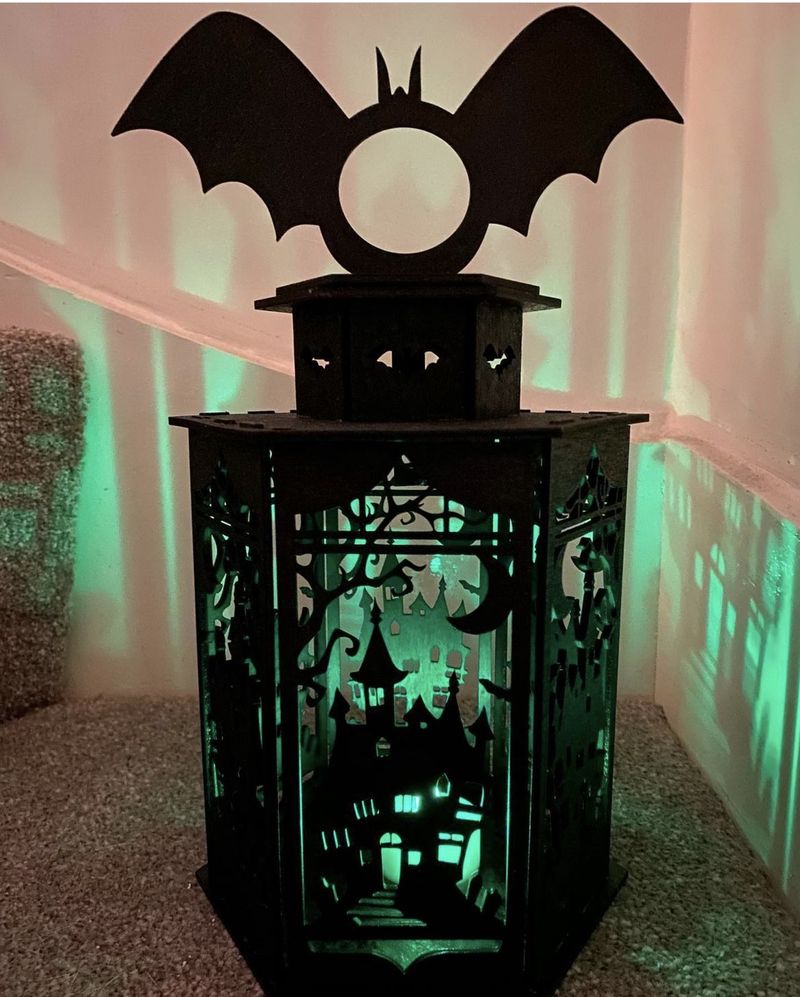
Credit: @kaydee_krafts / Instagram
The xTool D1 Pro is a highly capable and versatile machine offering tons of applications and equally suitable both for home use and a small-to-medium business. The 20W version boasts one of the most powerful diode lasers in the market, and a large variety of optional equipment greatly add to the convenience of use and enhance creative opportunities.

Update your browser to view this website correctly. Update my browser now

Write a comment