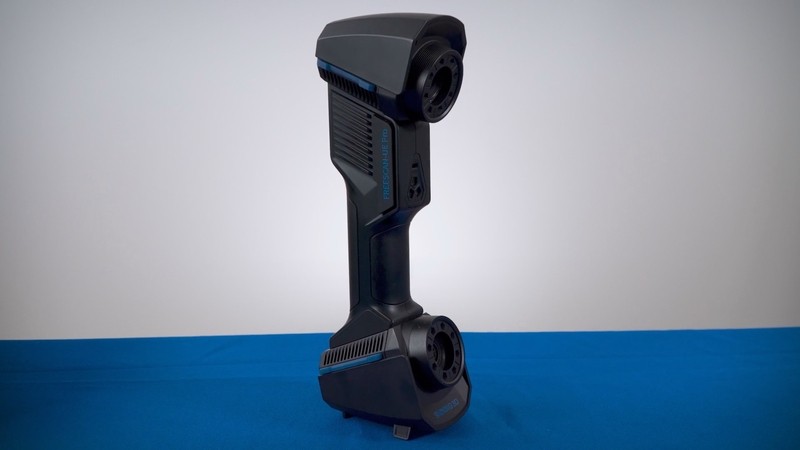
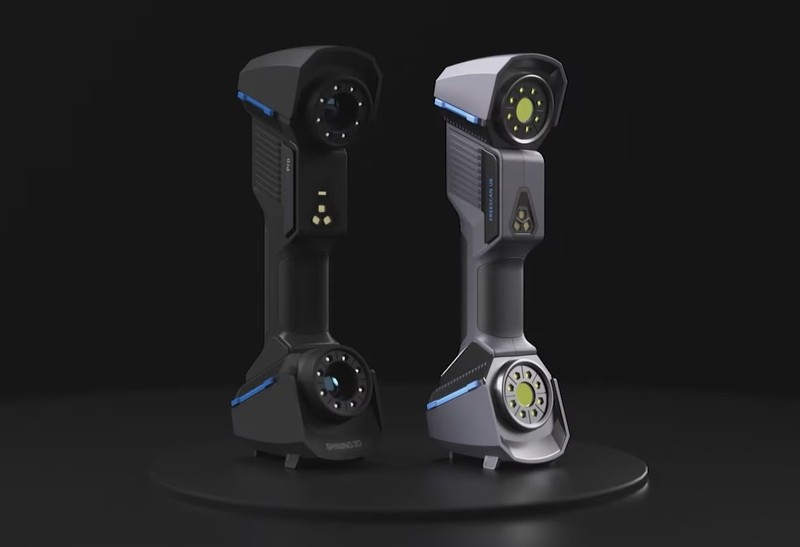
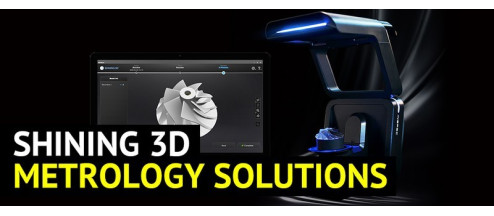
Shining 3D is a major developer and manufacturer of state-of-the-art 3D software and equipment for dentistry, inspection, design, and more. Freescan is the series of 3D metrology solutions represented by several high-precision devices. The recent model, Freescan UE Pro, is an upgraded version of the Freescan UE 3D scanner, which inherits outstanding accuracy and lightweight design of the original, while taking fine scanning to the next level.
This is Top 3D Shop, and today we are going to review the specs and important features of the Shining 3D Freescan UE Pro.
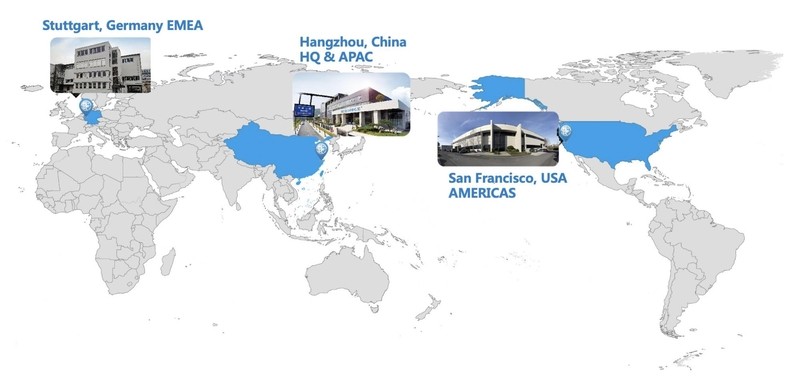
Shining 3D is a China-based company headquartered in Hangzhou. Since 2004, it has been developing innovative technologies for additive manufacturing. Shining 3D is a large-scale producer that has offices in Stuttgart, Germany and San Francisco, USA.
Credit: shining3d.com
The company aims to make modern 3D technology accessible to all types of consumers. The factories in Hangzhou, Beijing, and Tianjin in China produce an extensive selection of modern, reliable, and versatile 3D devices.
In particular, Shining 3D provides a comprehensive range of 3D scanners of different types and automation degrees.
Credit: shining3d.com
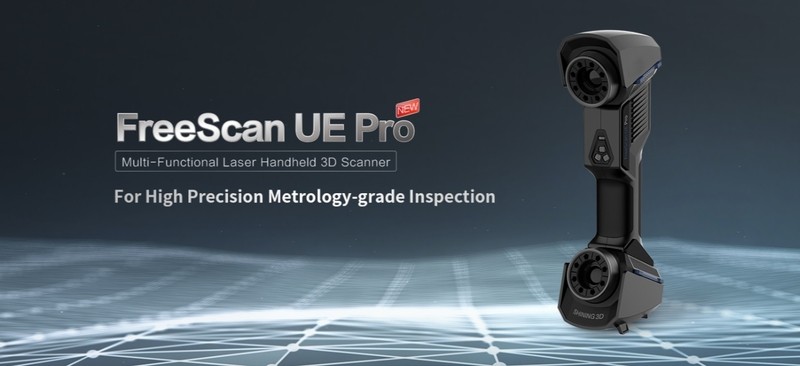
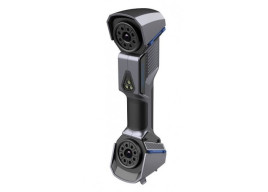
In April 2022, Shining 3D announced their new multi-functional handheld laser 3D scanner — the Freescan UE Pro. Due to metrology-grade precision, high performance, and lightweight design, this professional device is ideal for different sized scanning scenarios, such as inspection, reverse design, additive manufacturing, etc.
Here is the list of the features that make the Freescan UE Pro 3D scanner perfect for multiple applications:
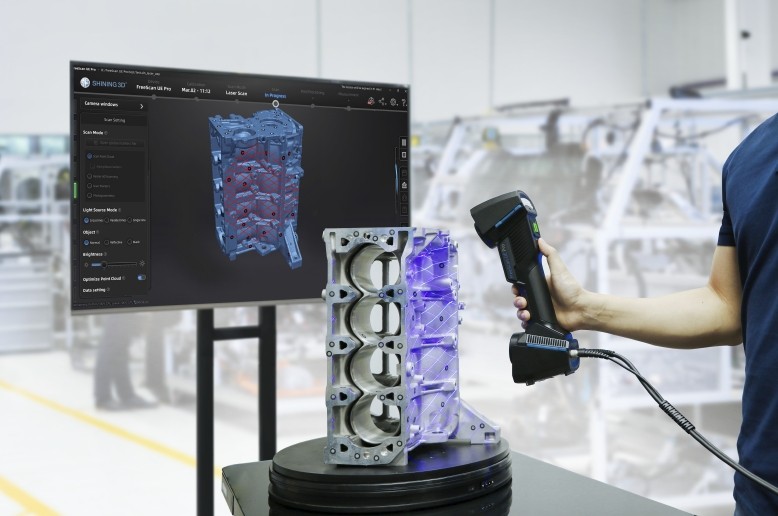
The render below is a vivid demonstration of the scanner’s ample capabilities:
The unboxing of the scanner can be seen in the following video by Shining 3D.
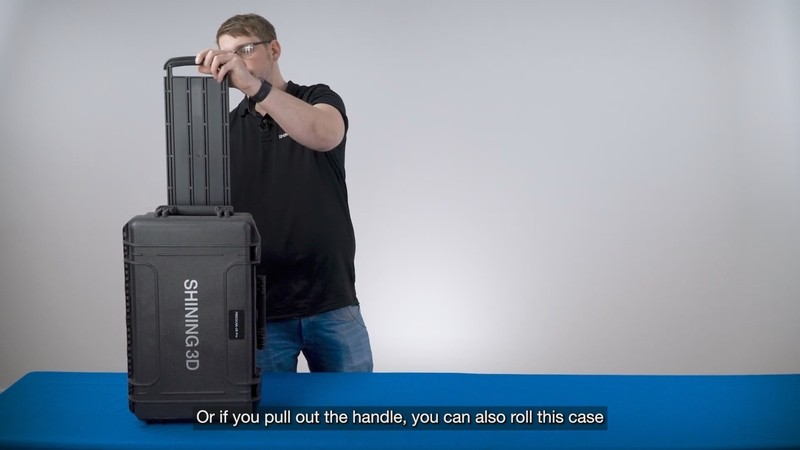
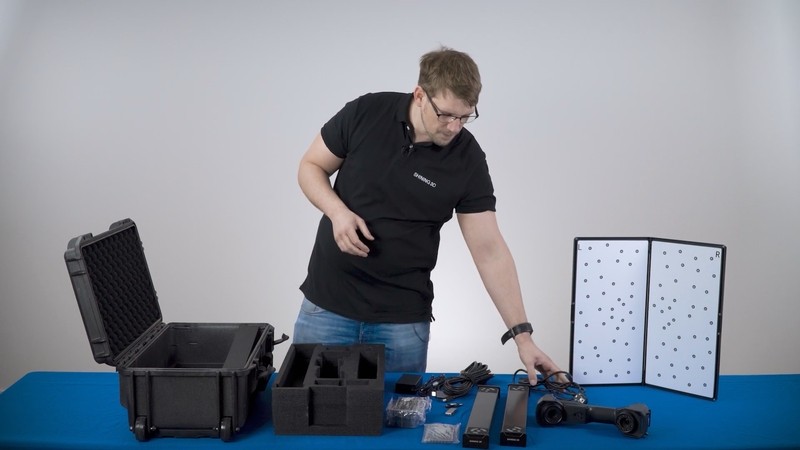
The Freescan UE Pro comes in a transportation case for professional digital equipment. The case can be easily carried or rolled with its handles.
Credit: youtube.com
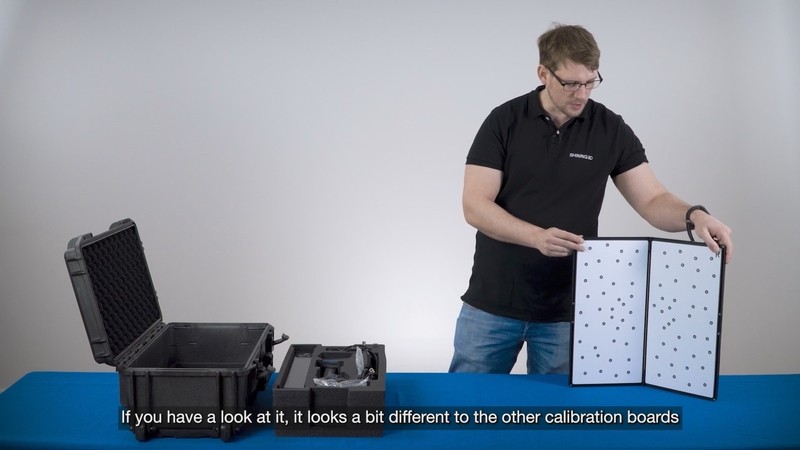
Inside the case, you will find all essential parts required to operate the scanner, including a calibration board.
Credit: youtube.com
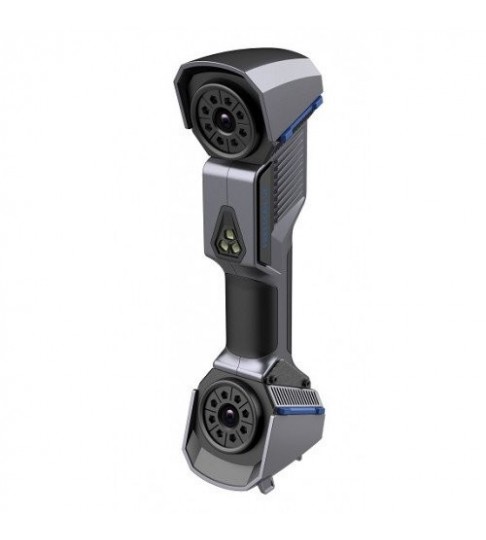
Then, you get the Freescan UE Pro scanner itself.
Credit: youtube.com
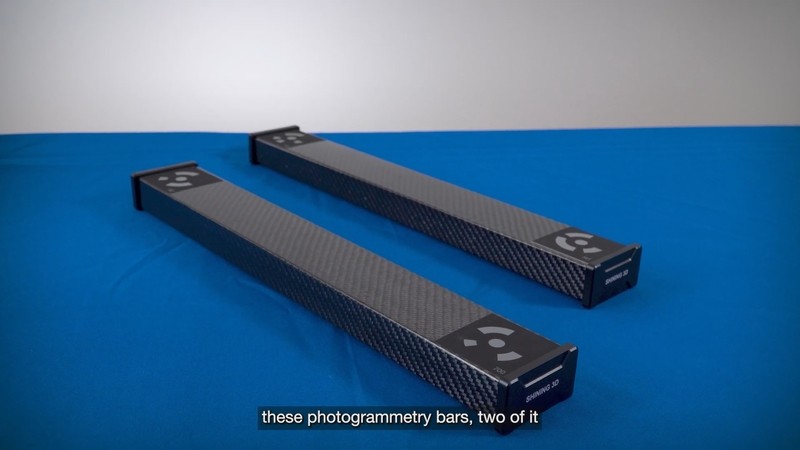
Due to the integrated photogrammetry function, the device is supplied with two patented photogrammetry bars.
Credit: youtube.com
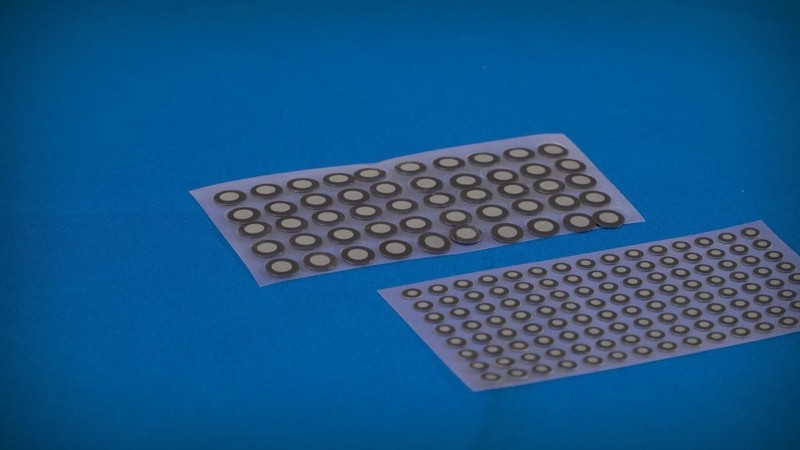
Next, the kit contains two packs of markers of different sizes. The software will automatically recognize which markers you are using. You can also use both types simultaneously.
Credit: youtube.com
Moreover, the package contains two connection cables, a USB stick with the software and photogrammetry bars information, a USB dongle needed to run the software, and a power supply.
Credit: youtube.com
Before you start scanning with the Freescan UE Pro, you need to perform calibration.
The calibration board comes along with the device. It consists of two sides marked with L and R (left and right respectively).
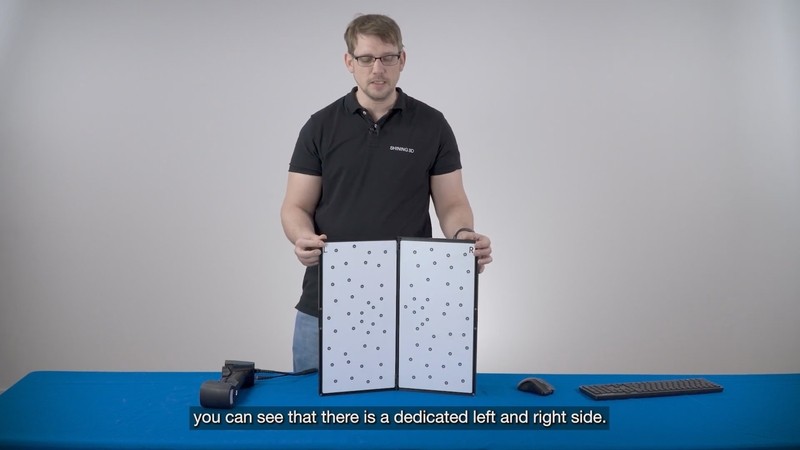
Credit: youtube.com
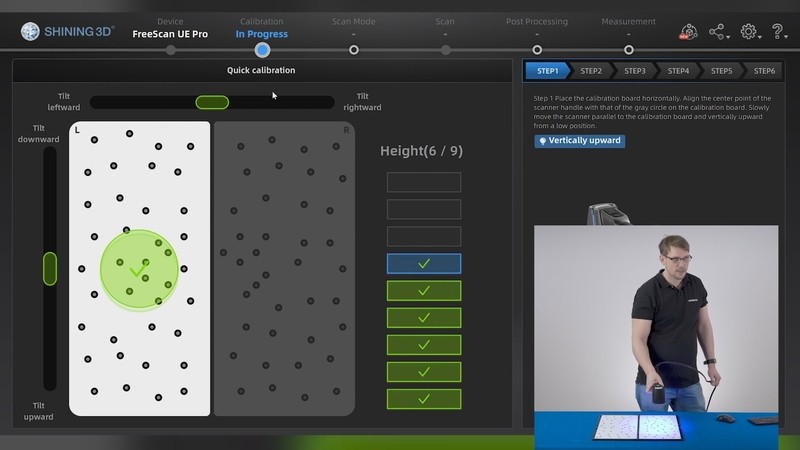
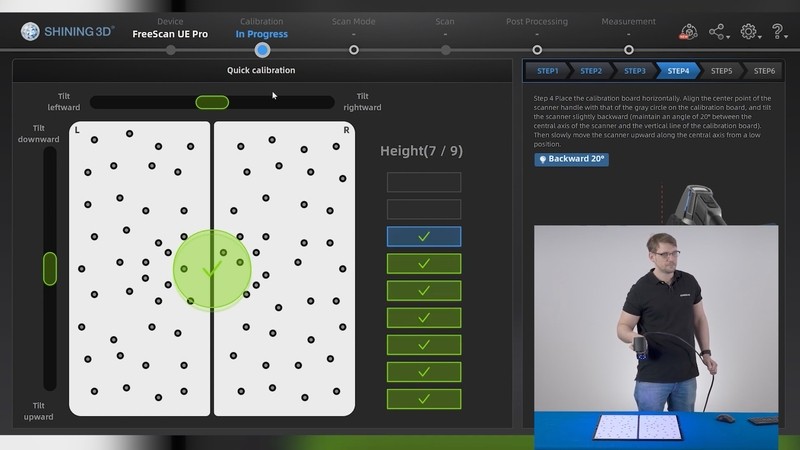
Put the board on a flat surface in front of you, so that its right side is on your right and left side is on your left. In the software, select the Calibration mode.
The first step is to calibrate the five parallel laser lines. Hold the scanner over the left side of the calibration board and push the start button on the device once. You will see the laser lines on the board and the required position of the scanner in the program window. If the scanner is too close to the surface, you will hear the sound. If you move the device slowly up, the height positions will turn green. The click sound means the process is successful. When all positions are captured, this calibration phase is finished.
Credit: youtube.com
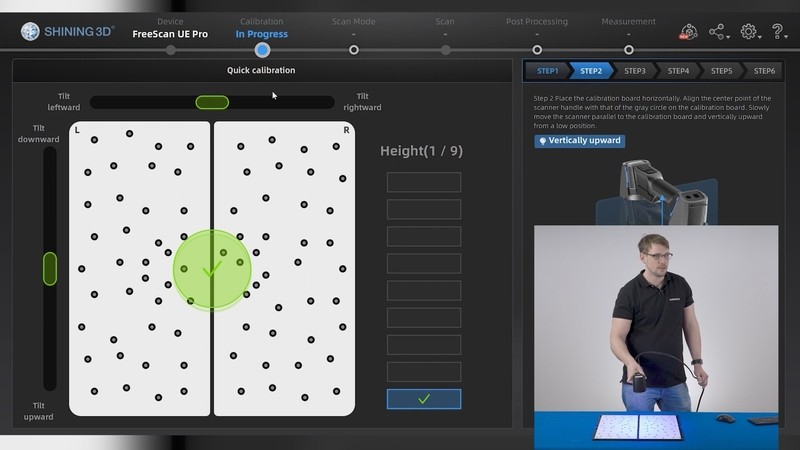
The next step is the calibration of the crossing and single line. For that, aim the scanner at the center of the board. Check the software for reference to find the right position. If the target is green, you can start to slowly move the scanner up until every box is checked green. If you are too fast and miss a certain position, just go back to where you left off, find the position, and slowly move up again.
Credit: youtube.com
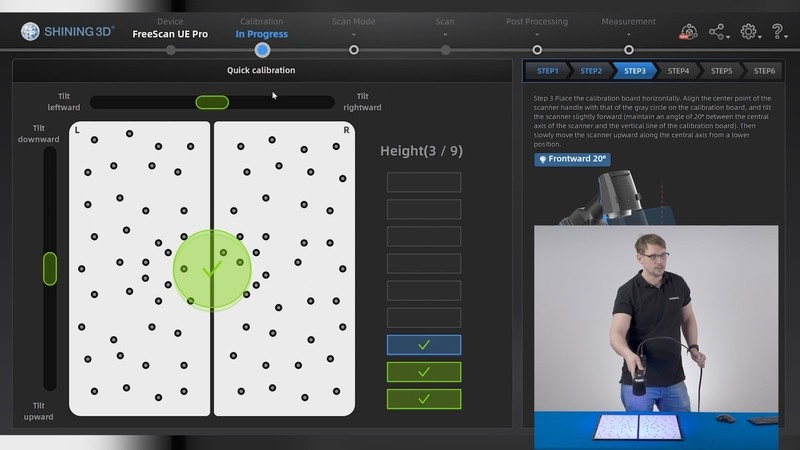
Now, it’s time to calibrate cameras. Put the scanner close to the board, tilt it forward to about 20 degrees, and move upwards again.
Credit: youtube.com
Next, do the same for the back: tilt the device backwards as shown in the preview and move upwards. Repeat the same for the right and left sides.
Credit: youtube.com
Finally, the software will calculate the result. If it is unsatisfactory, you need to repeat these steps. Otherwise, the calibration is done.
The whole process can be viewed in the tutorial video from Shining 3D.
The manufacturer provides a detailed guide on how to scan with the Freescan UE Pro model.
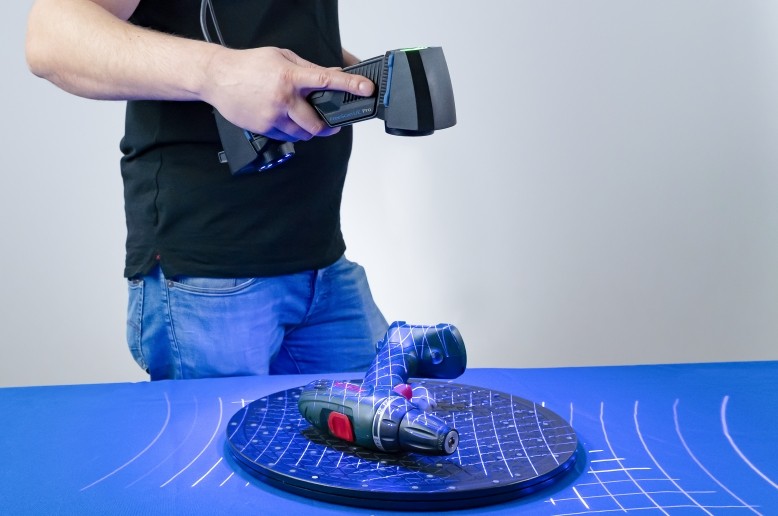
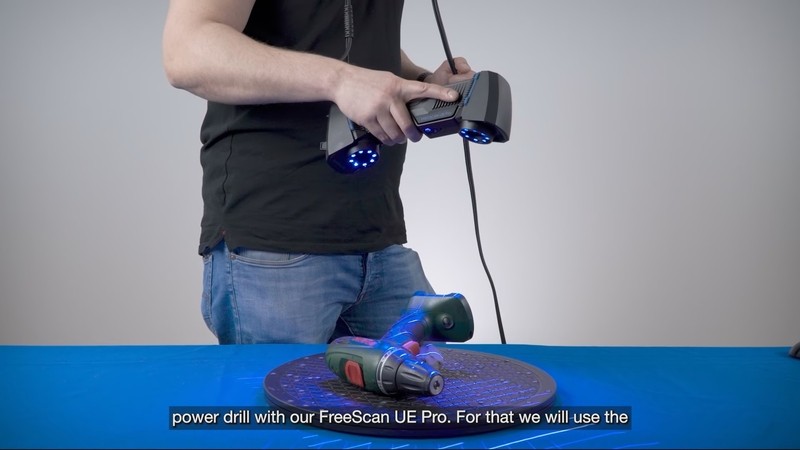
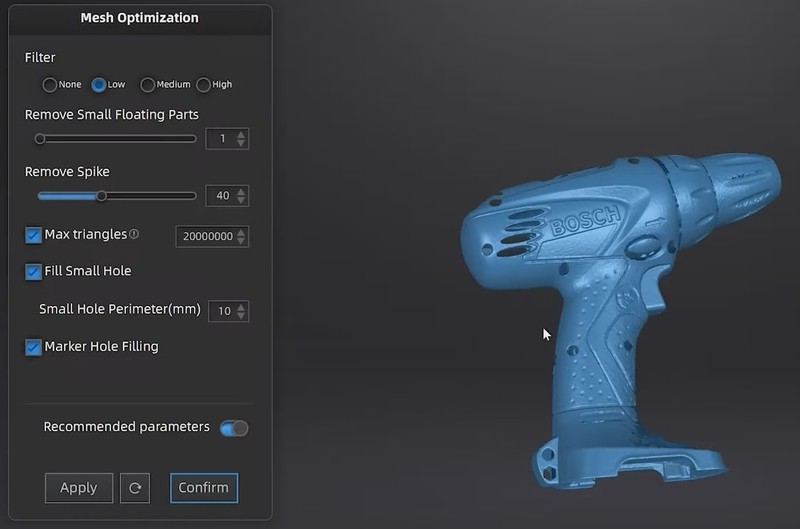
Let’s go over the main points of this process on the example of a power drill scanning.
With the crossing laser lines, it is possible to capture the whole object. The 5 laser lines mode will help to get more details, and the single line is the best for capturing the hole in the base. Also, a turntable and a piece of clay will be used for better handling and easier scanning.
Credit: youtube.com
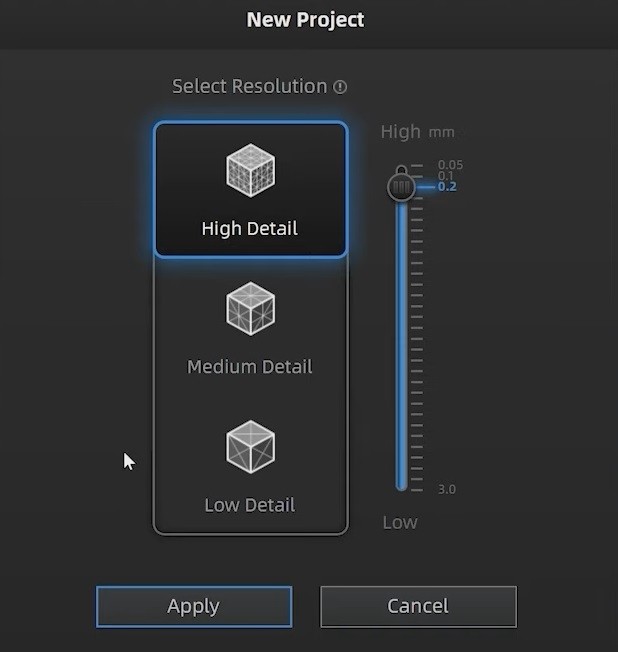
The next step is to run the software and create a new project. Then, you can select the desired resolution. The higher it is, the more detailed the resulting scan will be. However, the scan speed will also decrease.
Credit: youtube.com
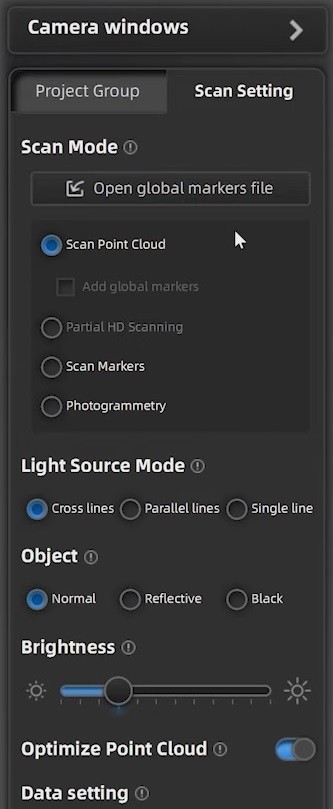
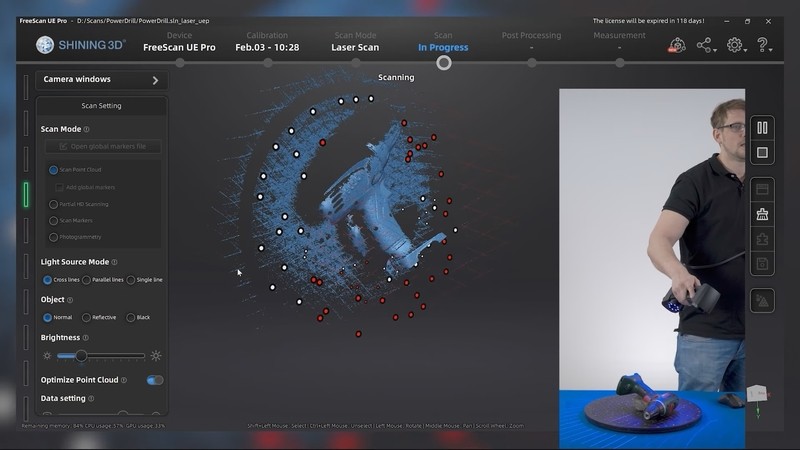
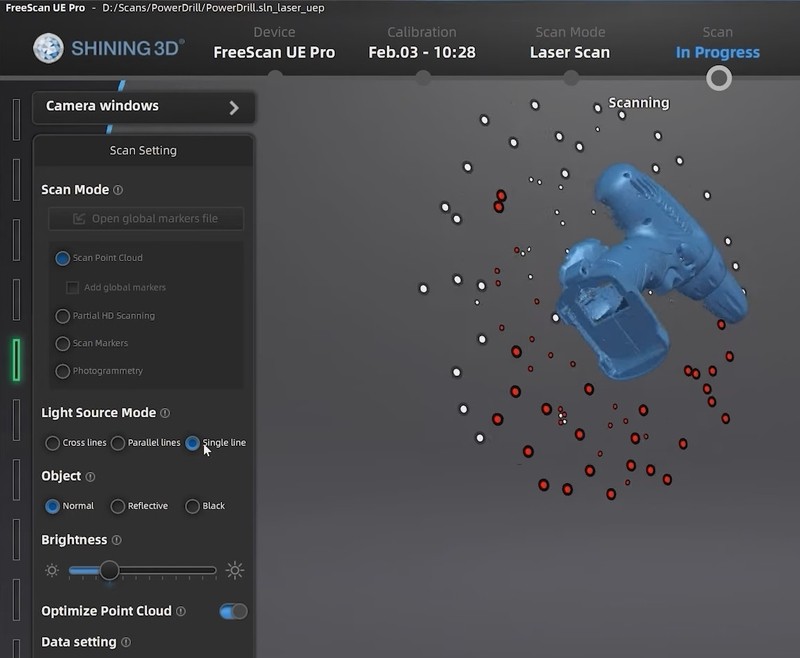
When you click the Apply button, you get to the scan mode. On the left side of the screen, you can find the camera windows and scan settings.
Credit: youtube.com
When all necessary parameters are set, take the scanner and push the start button once. That will activate the preview mode. The bars on the left side of the screen and the light indicators on the device itself show the distance between the scanner and the object. Green means the right distance. If you get too close to the surface, the light will turn red, and blue vice versa. So, you need to find the correct position and press the start button again to initiate scanning.

Credit: youtube.com
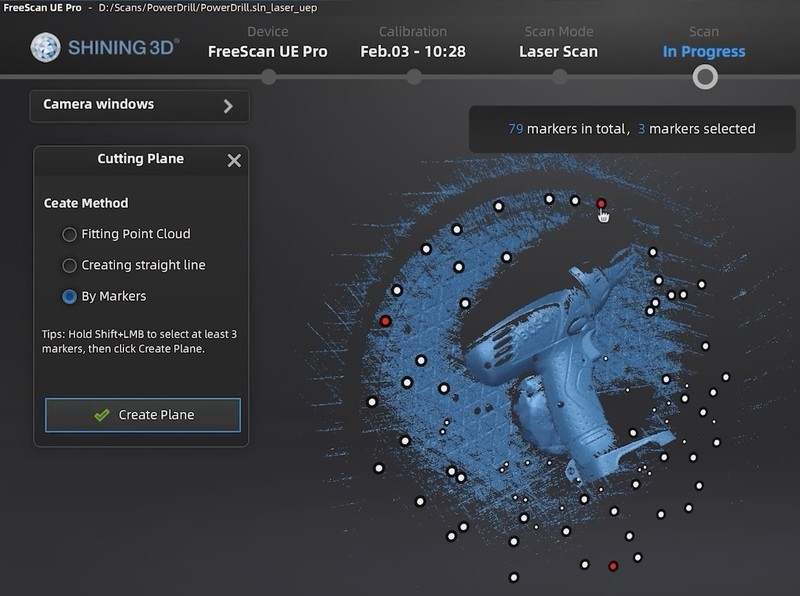
It appears that a lot of the turntable surface is captured along with the object. To avoid gathering redundant data, you can use the Cutting Plane function.
Credit: youtube.com
Stop scanning and go to the icon labeled ‘Cutting Plane’ (at the bottom of the screen). Here, you have different methods to create the plane: a point cloud, straight line, or markers. With the last option, hold the Shift key and click with the left mouse button on the markers you want to use for the plane (three are enough).
Credit: youtube.com
When the plane is created, you can move it up and down by clicking and holding it. Use the controls on the left to further adjust the plane to the desired spot. Click the Apply button to delete the whole red area at once.
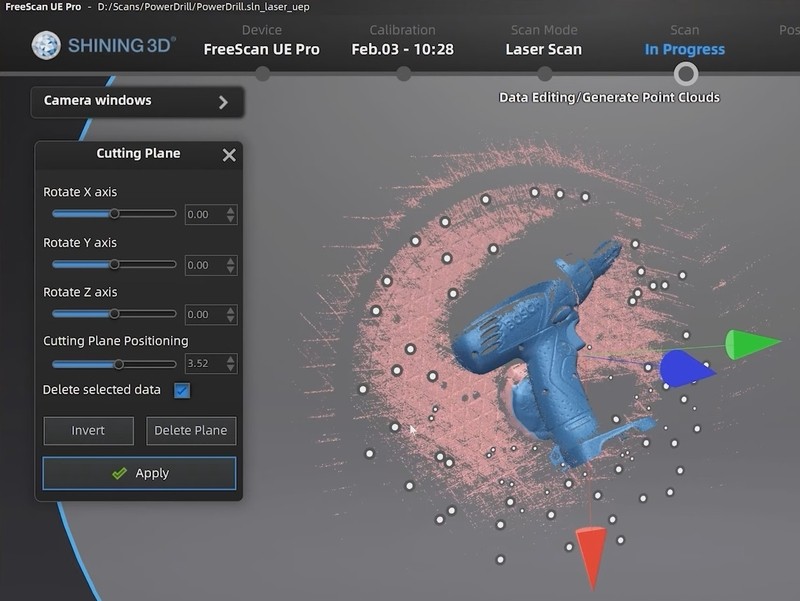
Credit: youtube.com
When scanning is resumed, you will see that everything below the cutting plane is automatically not captured anymore. Also, regardless of the tilt angle, the markers will be still detected by the scanner.
Credit: youtube.com
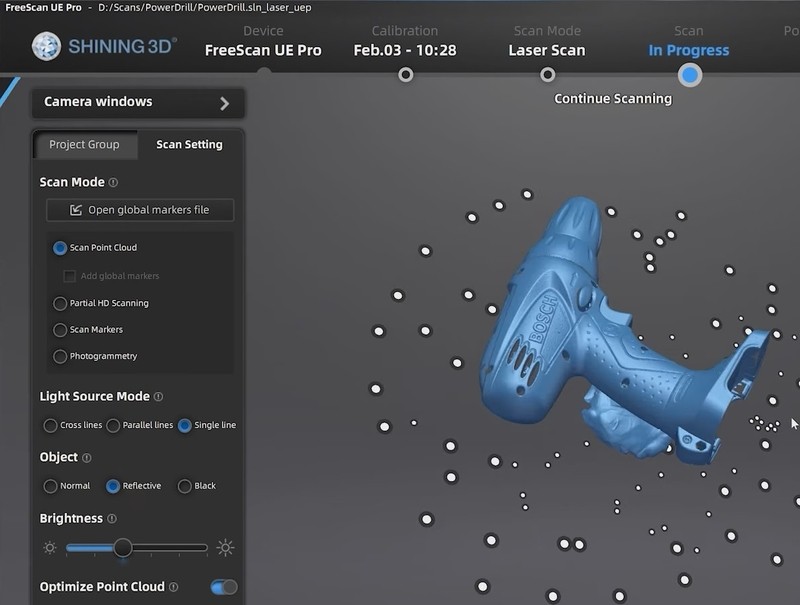
With the cross lines mode selected, it is not possible to scan deep inside the aforementioned hole in the base of the drill. This is why it is better to switch to the single line mode by clicking the icon in the software. To do this, you can also press and hold the red button on the device itself.
Credit: youtube.com
If the software isn’t capturing enough data, you can switch the object type to reflective.
Credit: youtube.com
After scanning, if you hold the start button for a longer time, the Generate Point Cloud function will be automatically triggered.
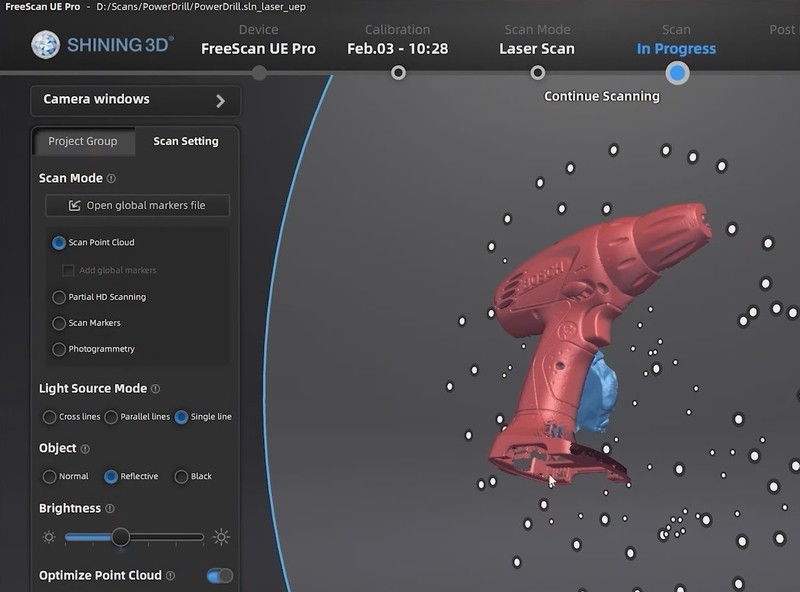
To get rid of the unwanted data, such as the piece of clay in this case, you can mark the object with the Paint Brush and click the Connected Domain icon. If some data is missing, you can edit it by holding the Shift key and clicking the left mouse button.
Credit: youtube.com
Then, invert the selection and delete the selected area.
Credit: youtube.com
When the first scan group is ready, you can add another by going to the Project Group tab on the left side and clicking the plus icon.
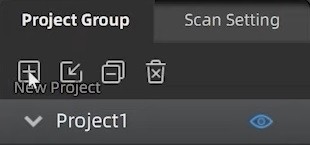
Credit: youtube.com
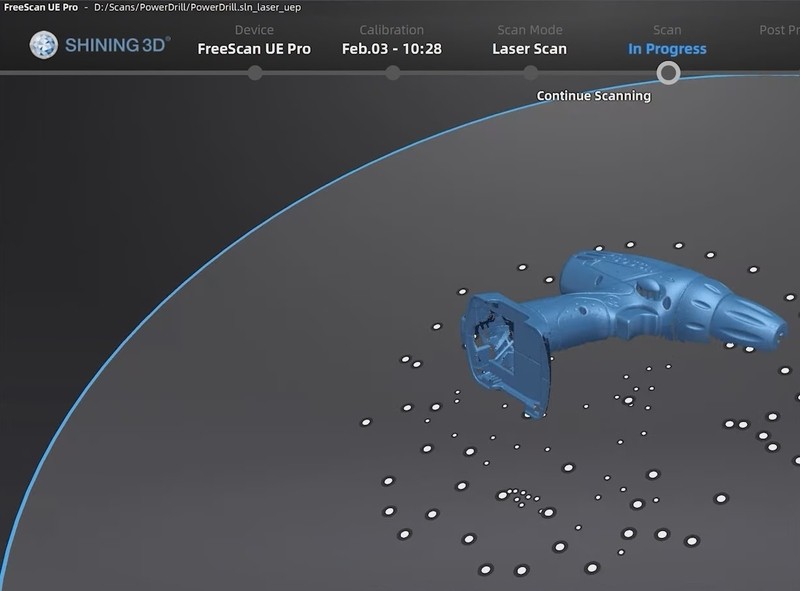
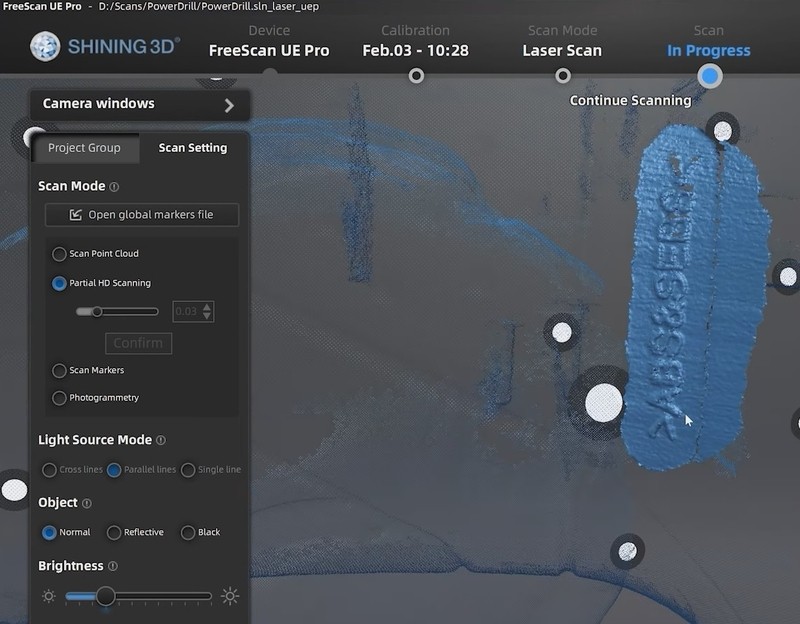
Turn around the object, go back to the scan settings, and resume the process. The steps are essentially the same.

Credit: youtube.com
If the object has areas with small details you want to capture for the future 3D model, you can use the Partial HD Scanning function. For this, activate the function and select the area for re-scan by holding the Shift key and clicking the left mouse button. Set the new resolution and click the Confirm button. The selected data will be deleted and further replaced.
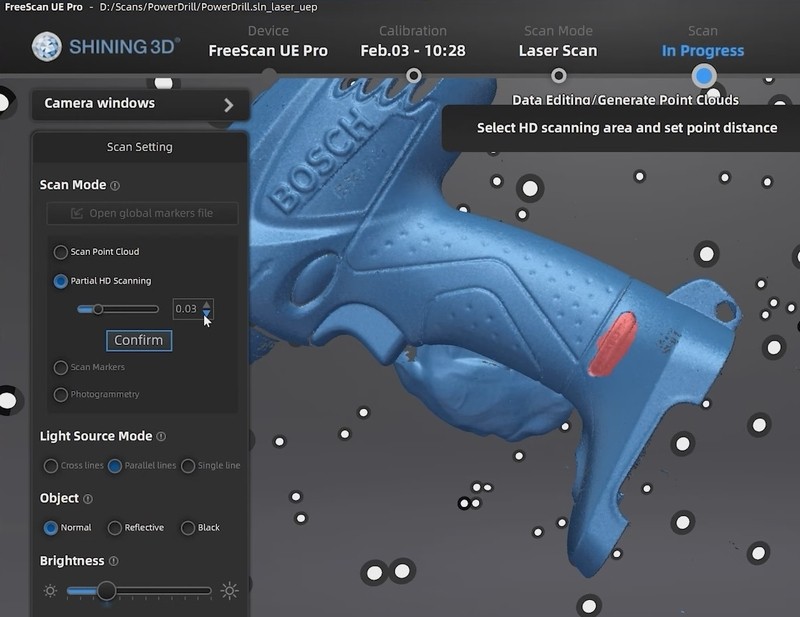
Credit: youtube.com
Because of the high point distance, scanning will be slower. Plus, it’s better to move the device much closer to the surface for the function to work properly. Ensure that the object is not too big or place additional markers around the area you want to capture in the HD mode.
Credit: youtube.com
When all the necessary scan groups are created, you are ready to align them. Switch them all to visible and see that they are not aligned at all. On the right side of the screen, you can find the puzzle icon, which will activate the alignment function.
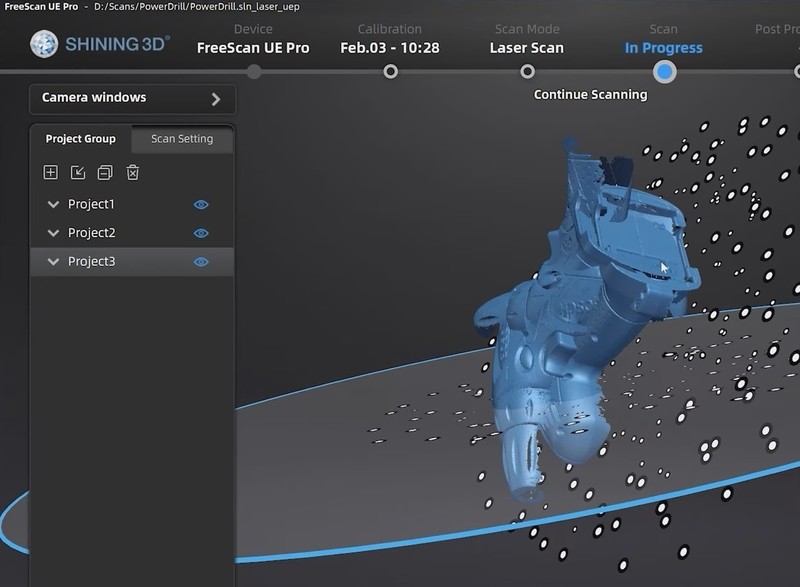
Credit: youtube.com
Here, you can choose from three options: alignment by feature, manual, or by markers. For example, select the first and third scan groups to align them by features. Click the Apply button and see the result in the bottom window marked by different colors. If they are mixed together well, the process is successful. Click Next to align the remaining scan group.
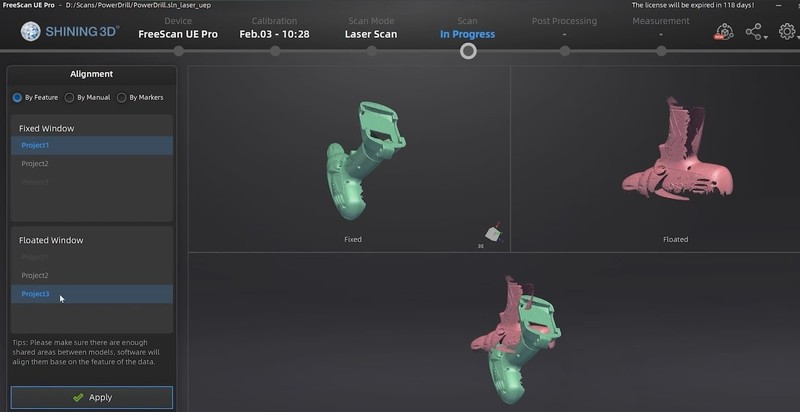
Credit: youtube.com
If you are satisfied with the result, click on the Mesh Model button on the right side of the screen. Adjust the settings on the left, click the Apply button, and the software will make the mesh of your object in the STL format. Once it’s done, click the Confirm button.
Credit: youtube.com
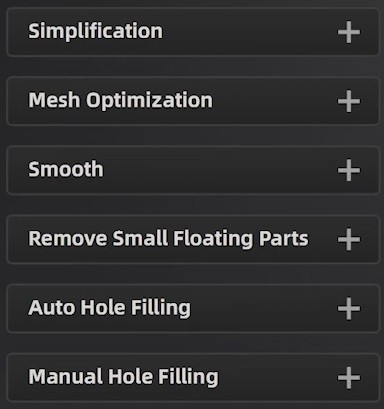
Then, you can use various post processing features.
Credit: youtube.com
Now you know how to use the Freescan UE Pro 3D scanner.
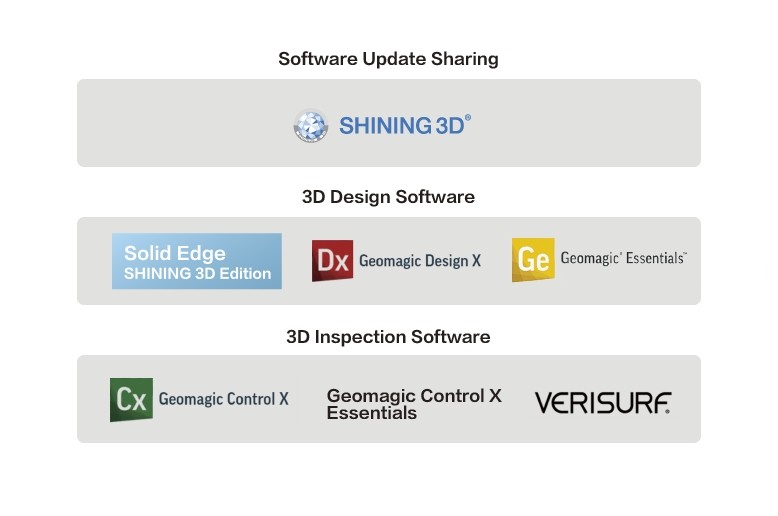
Shining 3D provides the proprietary scanning software solution for all of its devices. The new version for the Freescan UE Pro enables a number of handy functions for various purposes. The interface of the program is clear and user-friendly.
The scanner is compatible with the relevant design and inspection software, such as the Solid Edge SHINING 3D Edition, Geomagic Design X, Geomagic Essentials, Geomagic Control X, and Verisurf.
Credit: shining3d.com
The Freescan UE Pro model is ideal for multiple tasks connected with inspection, reverse design, additive manufacturing, etc.
Thanks to the videos from Shining 3D, you can find out more about using the device for various projects.
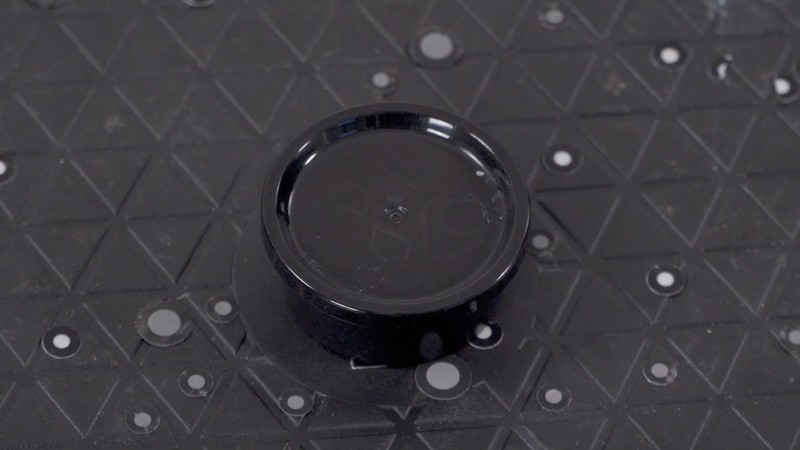
The video demonstrates the work of the five parallel laser lines and their difference from the multi-crossing lines on the example of a bottle cap scanning.
The object is quite small and has water drops on the top that can be hard to capture depending on the mode selected.
Credit: youtube.com
At first, the cap was scanned in the crossing lines mode with the reflective object type. The result was not that satisfactory.
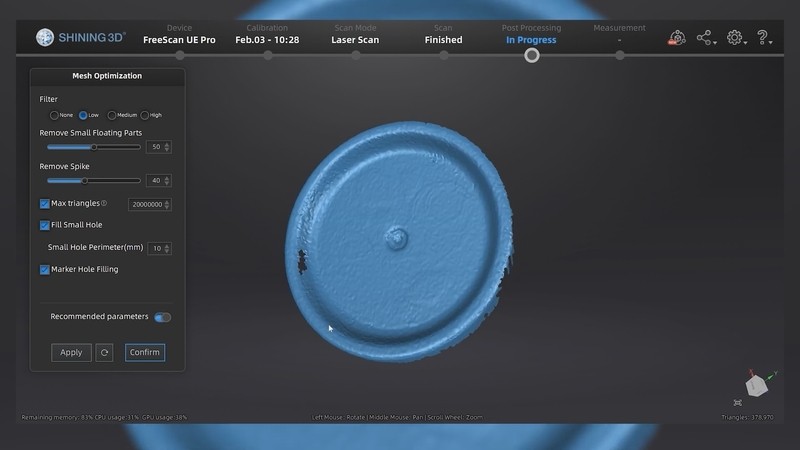
Credit: youtube.com
Next, the parallel lines mode was chosen (the object type remained reflective). The scan area here is not so big, so the scanner should be moved much closer to the target. As for the result, all the water drops are highly visible.

Credit: youtube.com
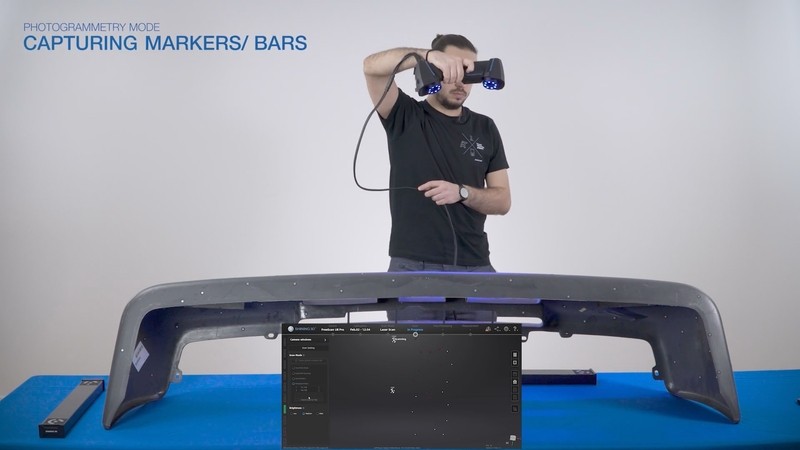
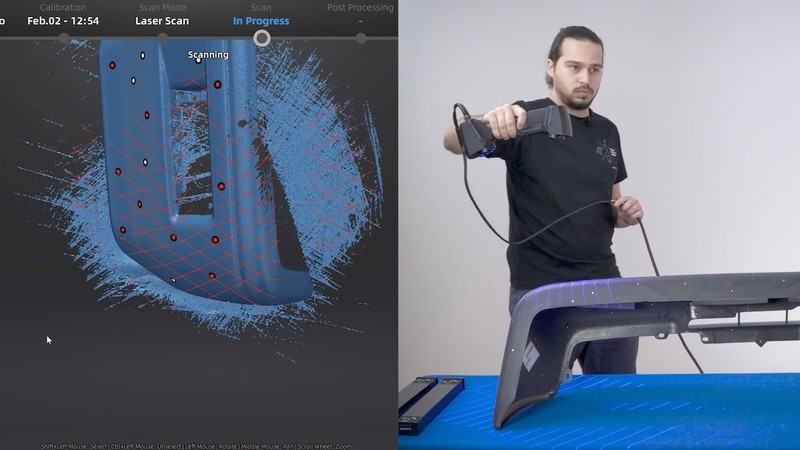
In this video, you can see how the Shining 3D’s new patented technology works. It is a live-tracking photogrammetry system that allows to get much higher accuracy by direct scanning of markers and two special bars.
For this demo, the team chose a car bumper. The bars were placed around the object and then scanned along with the markers.
Note that the bars are not required during the scan process.
Credit: youtube.com
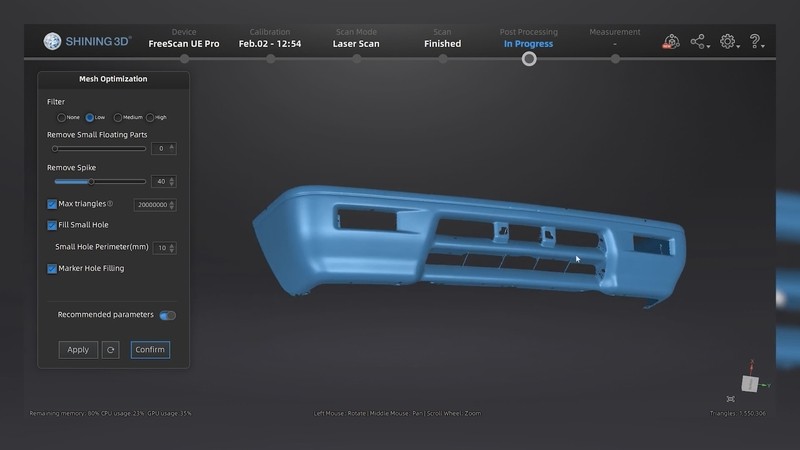
After the markers optimization, the bumper was scanned in the standard mode with the black object type.
Credit: youtube.com
The resulting mesh shows high accuracy even for a large part like this. Moreover, it was created in just a couple of minutes.
Credit: youtube.com
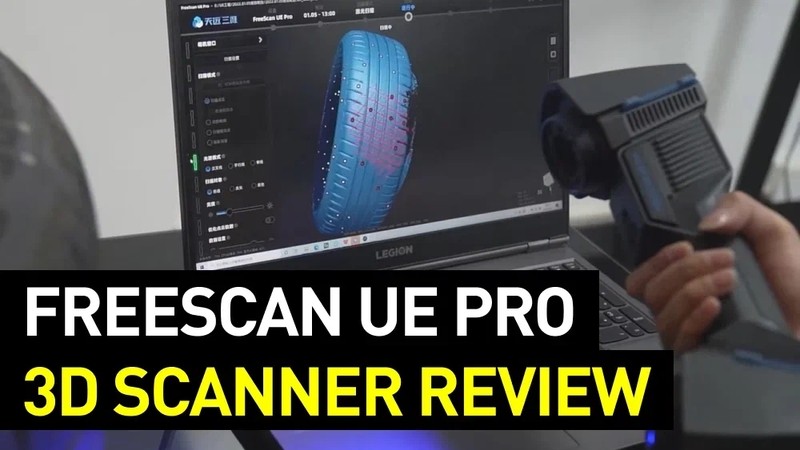
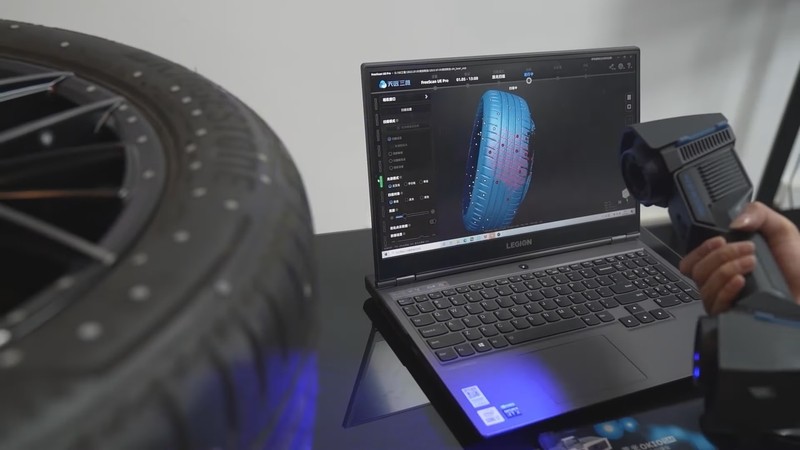
The versatility of the Freescan UE Pro enables you to use multiple scan modes for a single project, just like with this car tire.
First, it was scanned in the cross line mode to get the general outline of the object.
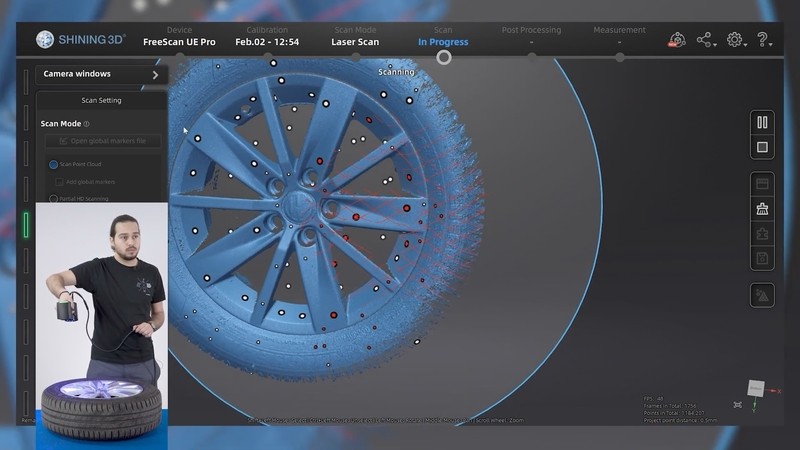
Credit: youtube.com
Then, the device was switched to the single line mode to get deeper holes and other difficult to reach data.
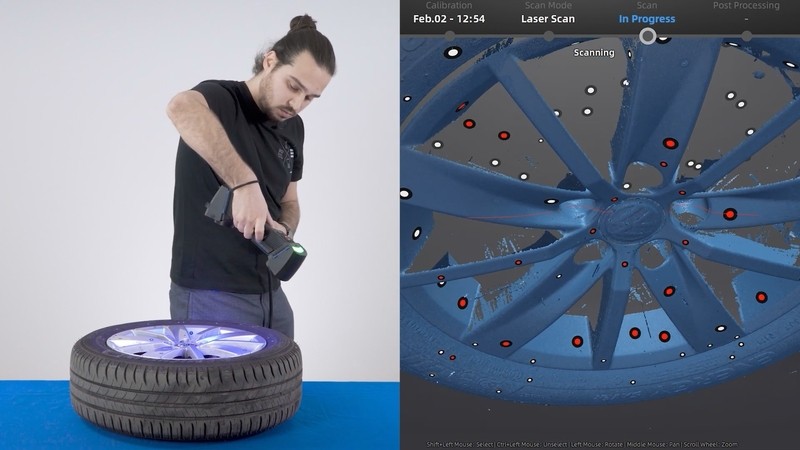
Credit: youtube.com
Finally, the five laser line mode was used to get fine details in high resolution.
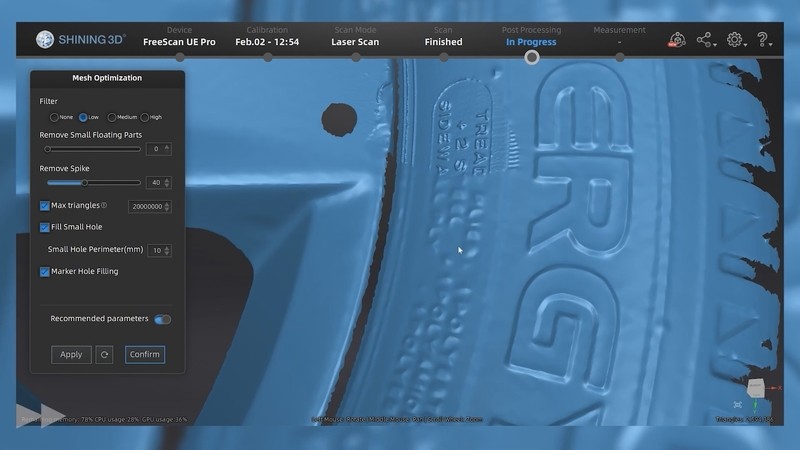
Credit: youtube.com
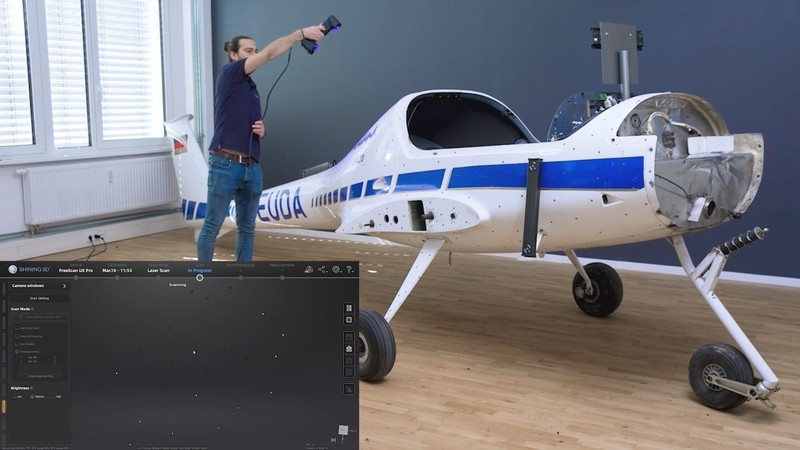
The ultimate challenge for the Freescan UE Pro was a full-scale two-seater airplane.
For the first step, the bars were attached to the body of the airplane.
Credit: youtube.com
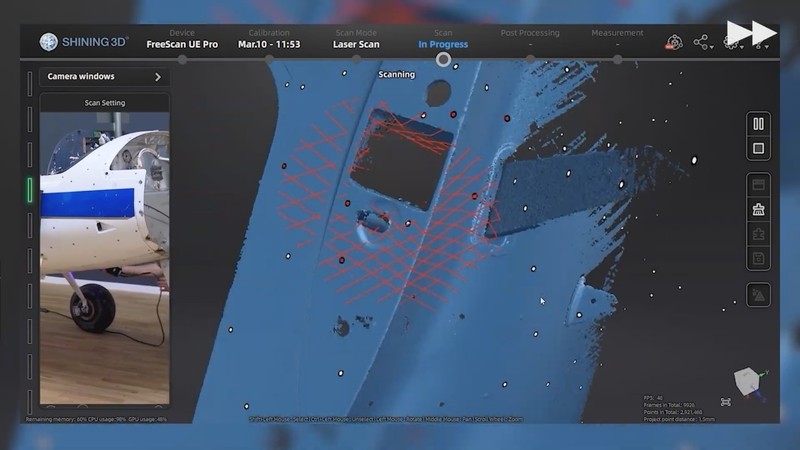
Next, the object was scanned in the multiple laser lines mode.
Credit: youtube.com
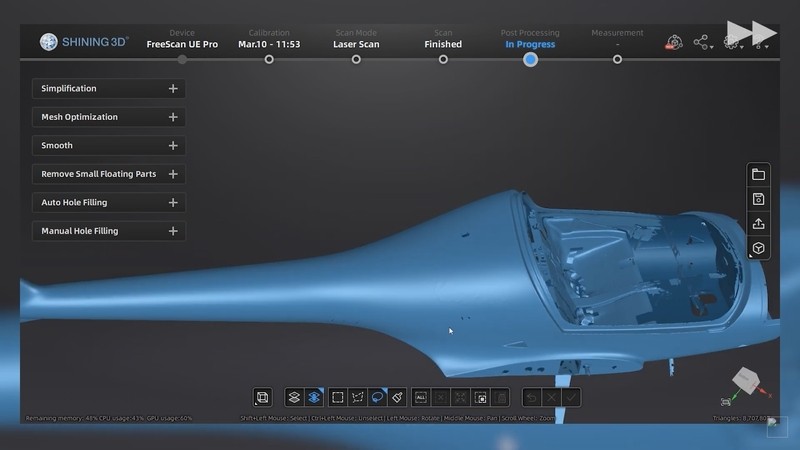
As expected, the final mesh looks very accurate due to the integrated photogrammetry technology.
Credit: youtube.com
The Freescan UE is a handheld laser 3D scanner that inherits the common feature of all the products in the Freescan series — high measurement accuracy. It comes in two versions: UE7 and UE11. The latter has the same features as the base model, except for the scan speed. As for the UE Pro, there are some major differences in several important categories.
|
Freescan UE |
||
|
Scan modes |
Multiple Lines Scan, Single Line Scan, Fine Scan |
Multiple Lines Scan, Single Line Scan |
|
Scan accuracy |
Up to 0.02 mm |
Up to 0.02 mm |
|
Volumetric accuracy |
0.02+0.03 mm/m (standard mode); 0.02+0.015 mm/m (built-in photogrammetry mode) |
0.02+0.04 mm/m |
|
Scan speed |
1,850,000 points/s |
650,000 points/s (UE7); 1,020,000 points/s (UE11) |
|
Working distance |
300 mm, 200 mm |
500 mm |
|
Max. scan depth |
170–680 mm |
300–700 mm |
|
Max. scan range |
600 x 550 mm |
510 x 520 mm |
|
Light source |
26 laser lines, single laser line, 5 parallel laser lines |
14 lines + 1 line blue laser ray (UE7); 22 lines + 1 line blue laser ray (UE11) |
|
Light category |
Class II (eye safe) |
Class II (eye safe) |
|
Connectivity |
USB 3.0 |
USB 3.0 |
|
Dimensions |
298 x 103.5 x 74.5 mm |
298 x 90 x 74.5 mm |
|
Weight |
840 g |
750 g |
|
Recommended computer configuration |
OS: Win 10, 64 bit; Graphics card: NVIDIA GTX/RTX series cards, higher or equal to GeForce RTX 3060; GPU memory: ≥6 GB; Processor: I7-8700; Memory: ≥32 GB |
OS: Win 10, 64 bit; Graphic Card: NVIDIA Series, GTX1080 and higher; GPU Memory: ≥4 GB; Processor: I7-8700; Memory: ≥32 GB |
As you can see, the Freescan UE Pro boasts a higher scan speed, has more advanced scan modes, and covers a larger scan area than its predecessors.
The Freescan UE Pro 3D scanner introduced by Shining 3D is a worthy addition to the company’s product line. The metrological accuracy, broad functionality, user-friendly automation, and smart design of the device will significantly improve scanning experience in many areas for both beginners and competent users.
Update your browser to view this website correctly. Update my browser now


Write a comment