
It’s been almost ten years since the Wanhao company entered the additive manufacturing market. Now it offers a wide variety of 3D printers of different sizes, kinematics, technologies, and price categories. Last year, the manufacturer introduced a new lineup of budget-friendly FDM devices — the Wanhao Duplicator 12.
The model range comes in four options of different sizes: D12/230, 300, 400, 500, the latter three resembling the Duplicator 9. The 230 model is quite different from them in terms of design and looks like the Creality Ender-3. All versions of the D12 are available with either a single or a dual extruder, which uses two feeders to print the filament through one nozzle.
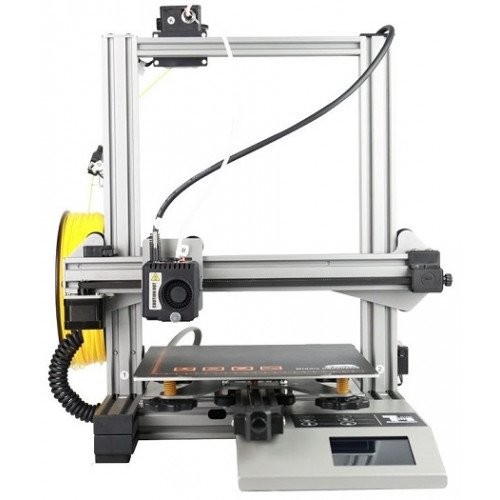
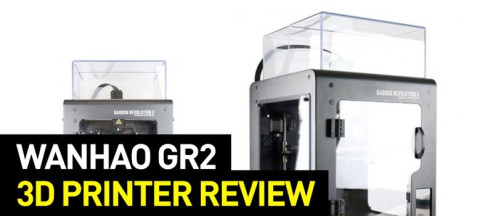
This is Top 3D Shop, and in this detailed review, we will tell you about the youngest model from the line — the Duplicator 12/230, namely, its dual extrusion version.
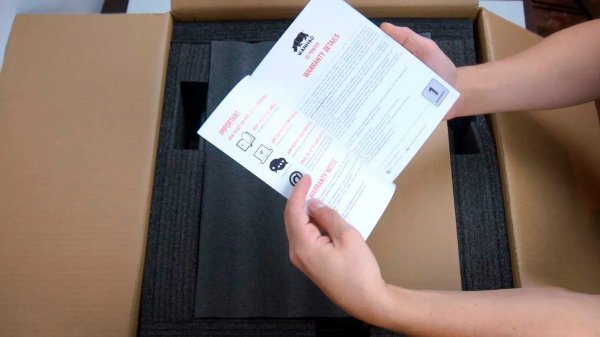
The printer is shipped in a cardboard box, with some protective elements inside to avoid damage during transportation. On top, you will find a user manual in English, which contains all the information about assembling the printer and using the slicer.
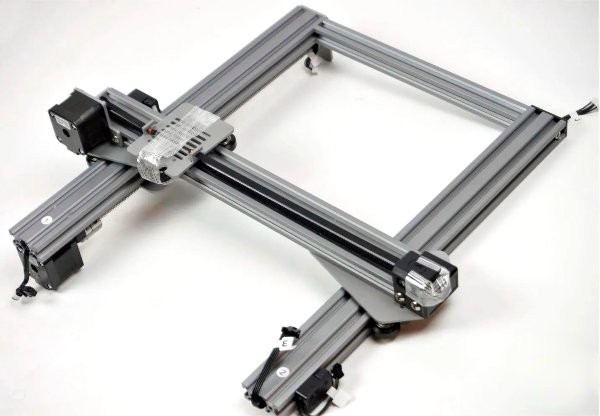
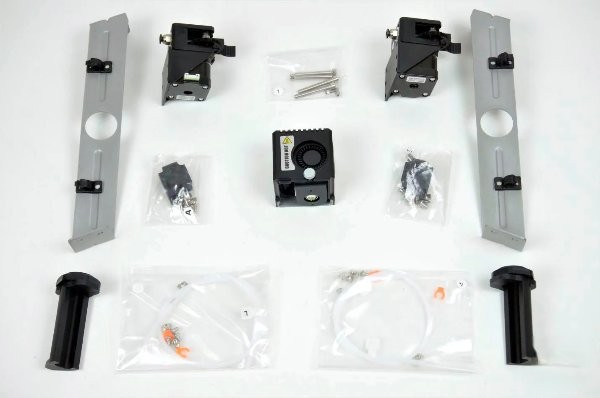
A small box contains a set for the second extruder: a Teflon tube with fitting clips, screws, T-nuts. Also, there is a filament spool holder, a feeder with the motor, and a filament runout sensor. Next, we see another feeding mechanism, which in fact is the first extruder. There is a print head, a second filament holder, and a power cable. Below is an assembled gantry with installed motors and tensioned belts.
The next items are a removable flexible print surface, two PLA samples, and one more box, which contains a Teflon tube for the first extruder, screws, and a set of tools for assembling and using the printer.
The tool kit includes:
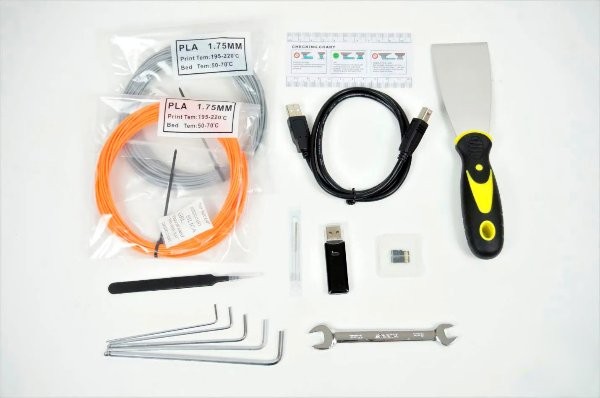
At the bottom of the box, there is a control unit with a power supply and a print bed.
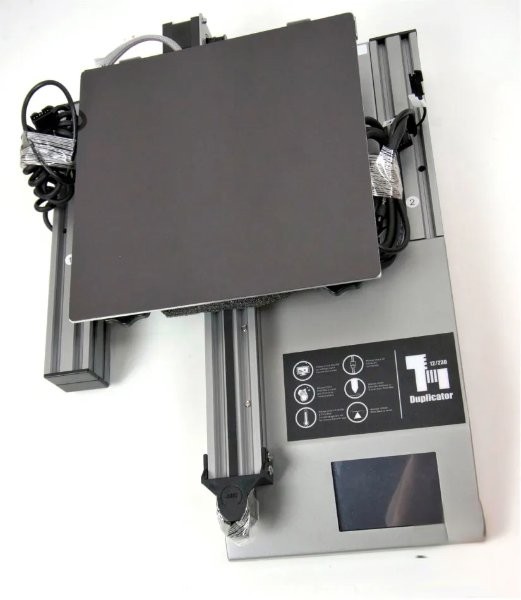
The Wanhao D12/230 3D printer features Prusa-like kinematics and a build volume of 230 x 230 x 250 mm.

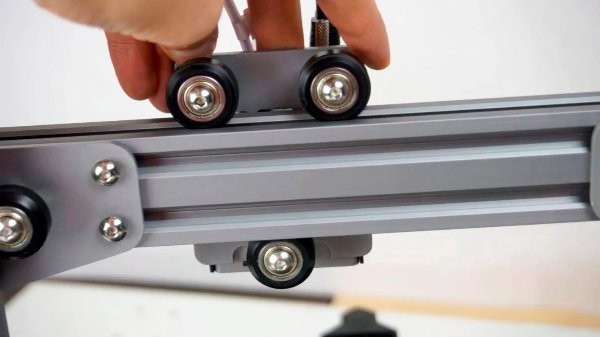
The mechanism uses the Openbuilds system with rollers.
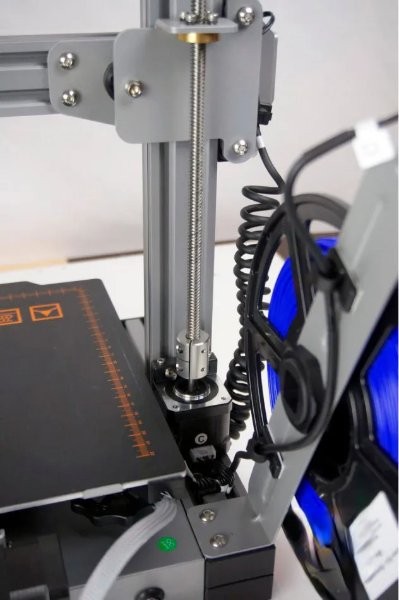
The Z-axis is driven by a single trapezoidal screw motor. At the top, the screw is held by a bearing. As practice shows, with such a build volume, one motor is enough for the axis to rise evenly.
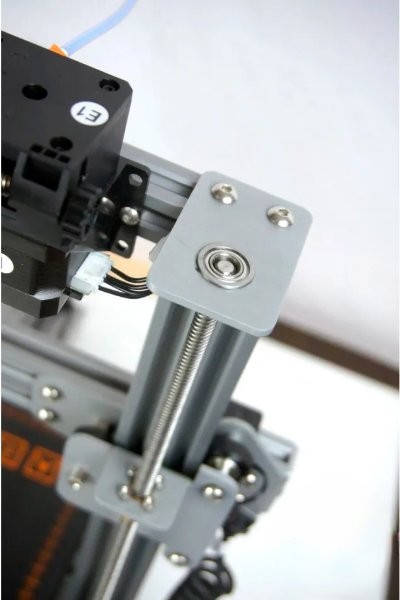
The Y-axis moves along a 20 x 40 mm profile.
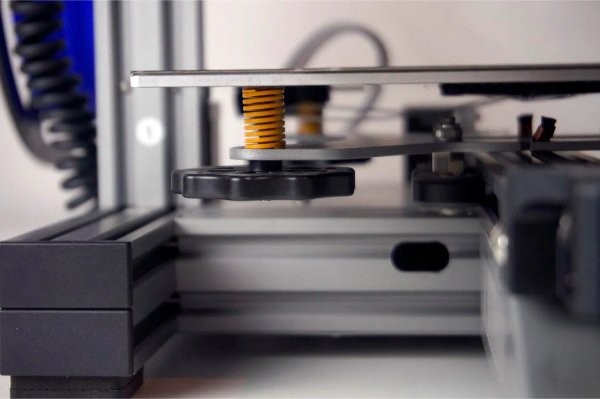
The bed adjustment knobs are large and comfortable. The springs look impressive, holding their shape and not bending to the sides.
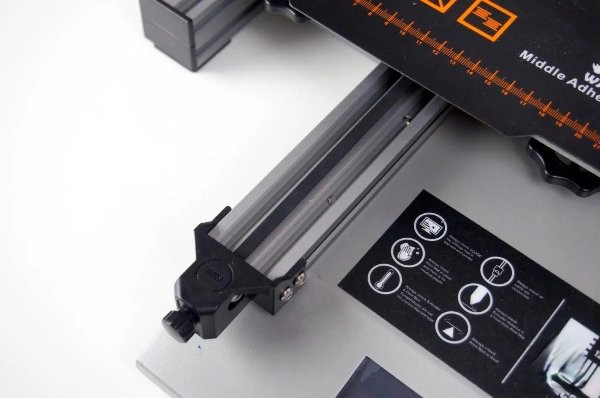
There is a belt tensioner in the front, which is very convenient. The heated bed operates at 24 volts.
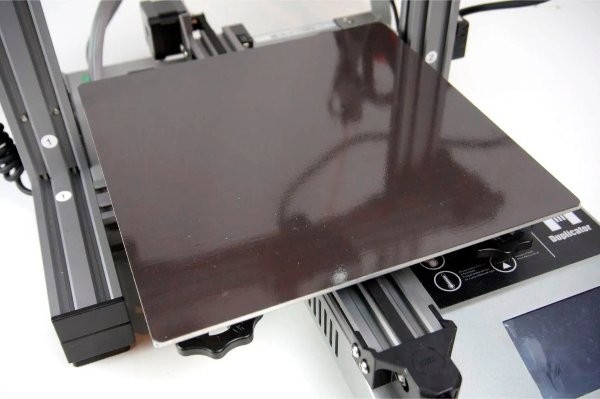
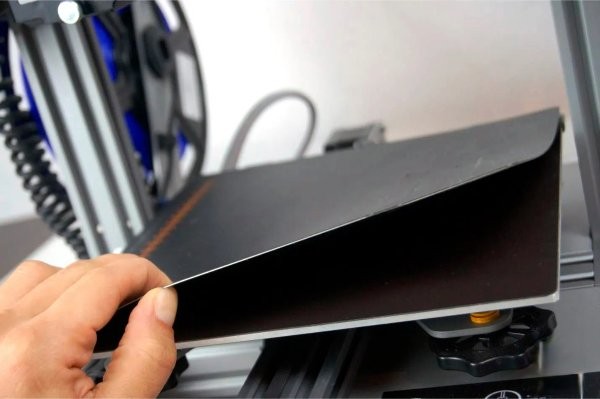
The bed has a magnetic surface and a flexible metal sheet with an adhesive coating.
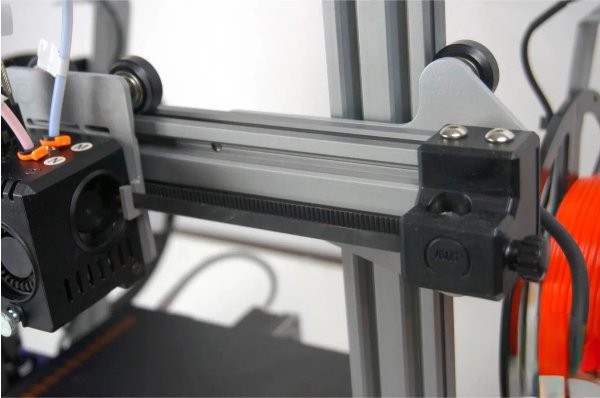
The X-axis, too, moves along a 20 x 40 mm profile and is equipped with a belt tensioner.
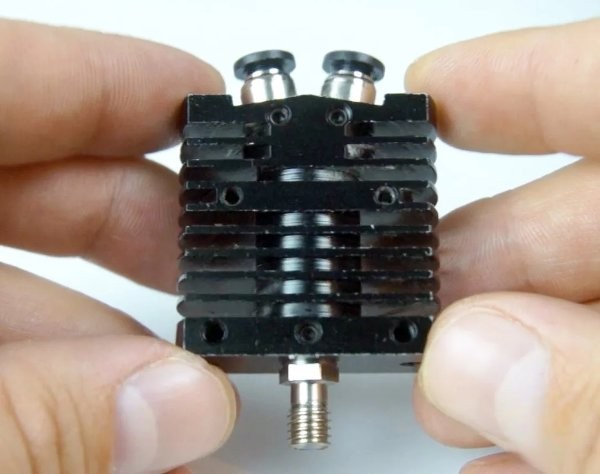
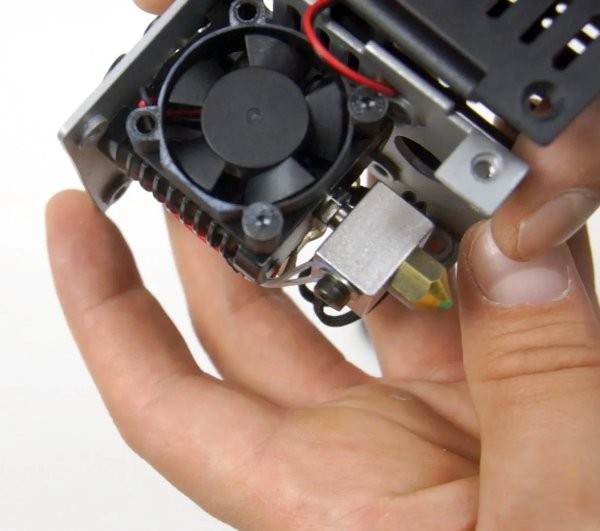
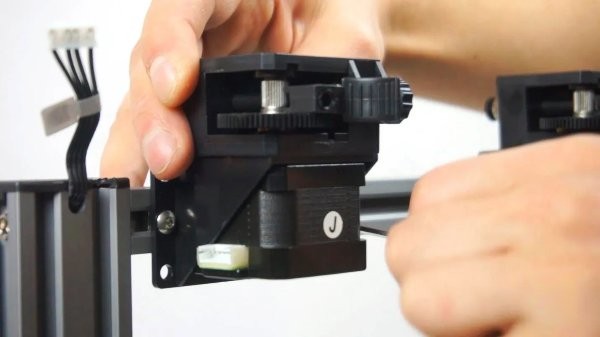
The hotend is enclosed with a plastic casing. It is attached to the carriage with two screws at the back.
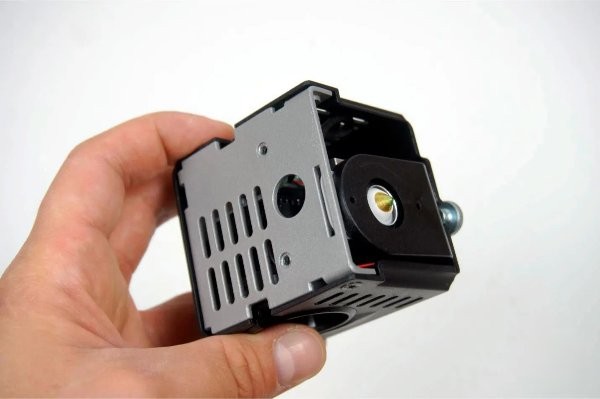
In front of the bottom, there is a thumbscrew, which holds the air duct for prints. It is pressed against the 4010 turbine fan. The blowing is circular and is implemented in such a way that the airflow cannot reach the heating block — it goes to the tip of the nozzle alone.
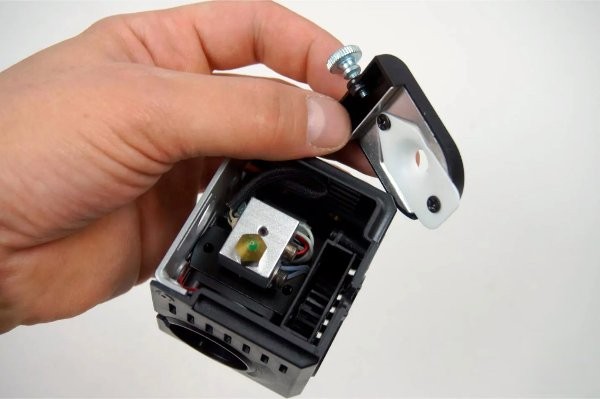
The heatsink is cooled by a conventional 4010 axial fan. The Y-shaped hotend uses one nozzle, with two filaments loaded into it. When printing with two materials, the plastics flow in turns, as if giving way to each other. That is, when changing the material, one filament is pulled back, and the other one is loaded through the free channel.

The advantage of this method is that there is no need to calibrate separate hotends, and the plastic does not leak from the inactive nozzle.
The heating block is similar to the E3D v5.
The nozzle resembles the MK8, but it is slightly larger and has a small Teflon tube inside.

The thermal barrier between the heatsink and the heating block is not all-metal, and it also has a small tube.
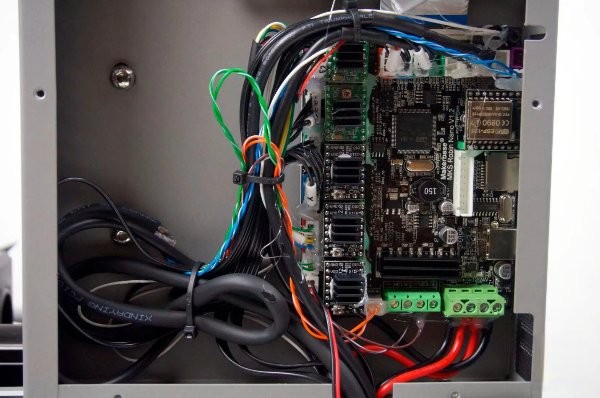
Inside the print head, there is an adapter board and a twisted-pair cable with RJ45 connectors, that is, a regular network cable.
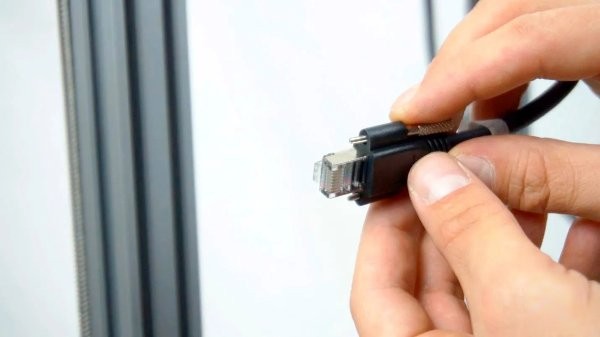
On the side of the hotend, the connector has fixing screws, so there is no dangling.
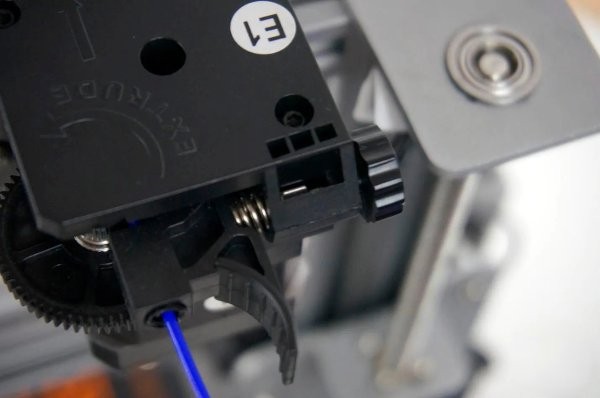
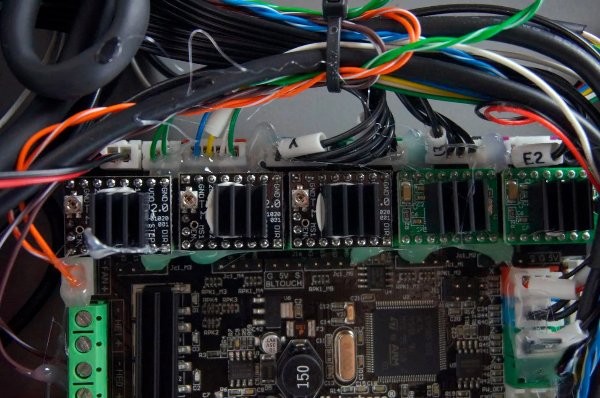
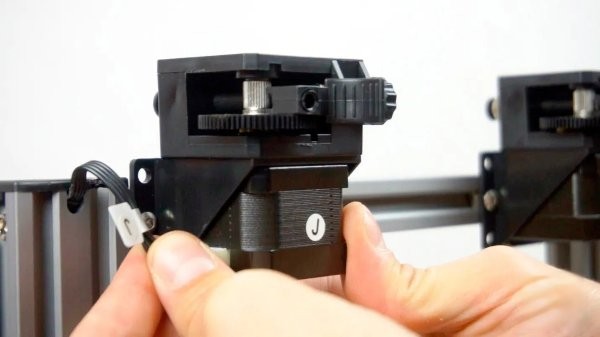
The printer is equipped with two feeding mechanisms of the Titan type featuring a gearbox to increase the torque and feed accuracy. But unlike BMG mechanisms, the feed gear is located on one side, and on the other side is a reciprocal roller. The Titan is more convenient to use when loading and unloading filament.
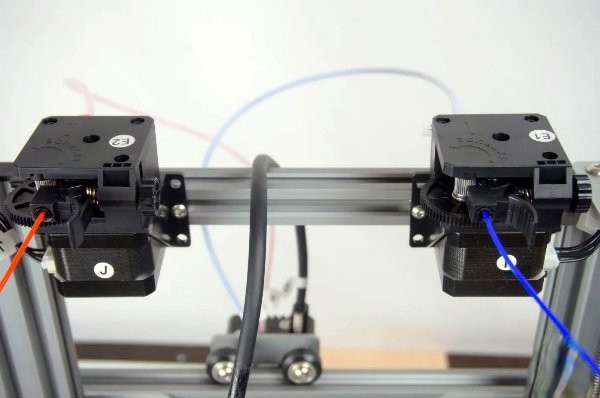
Each feeder has an adjustment knob on the left.
Both extruders are equipped with a filament runout sensor.
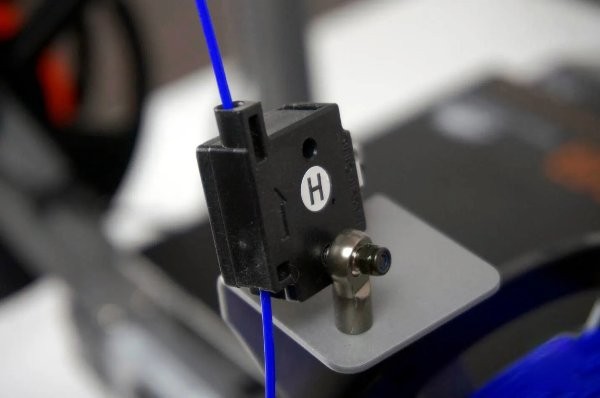
It should be noted that there has to be filament in both sensors even when printing with a single extruder — otherwise, the printer will show an error. To prevent this from happening, you can simply take a piece of filament and insert it into the sensor of the inactive extruder.
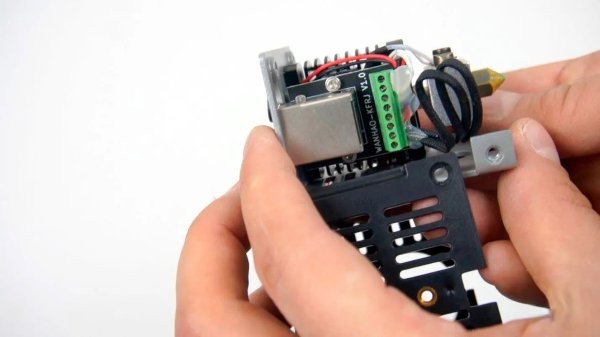
The control board in this device is the common 32-bit MKS Robin Nano v1.2.
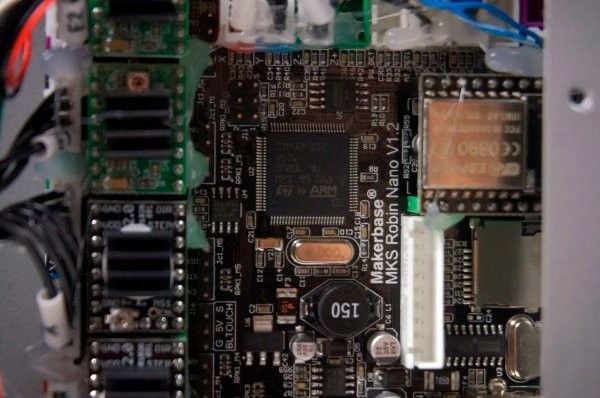
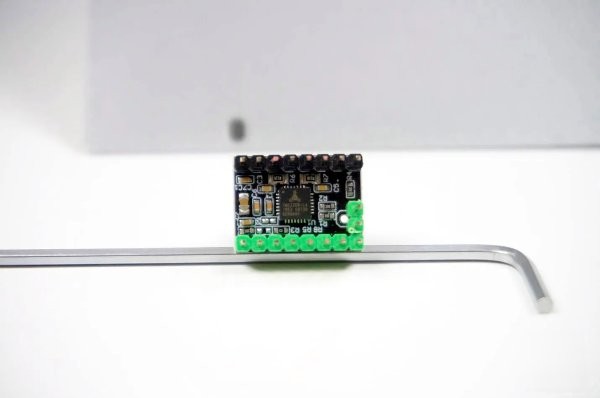
The XYZ axes use the quiet TMC2209 drivers, while the extruders are equipped with the A4988. All the drivers are removable.
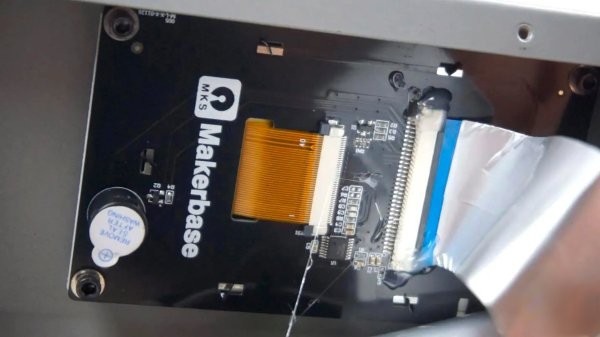
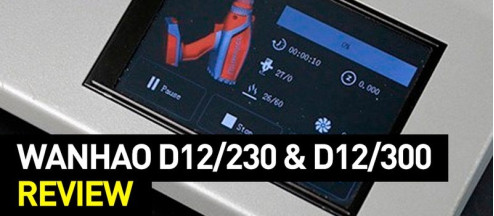
A Wi-Fi module is already installed on the board. The display is standard — the MKS TFT35 full-color touch screen.
The wiring seems to be placed rather carelessly. Instead of shortening it to the required length and carefully separating the power section from the signal one, the manufacturer just tightened the wires into a bunch.
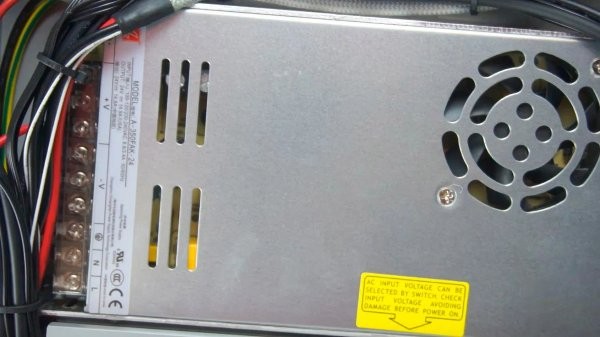
The device uses the reliable Chuanglian power supply unit, with 350 watts being quite enough for such a printer.
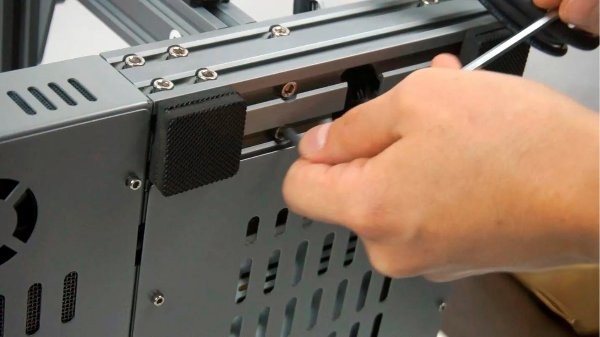
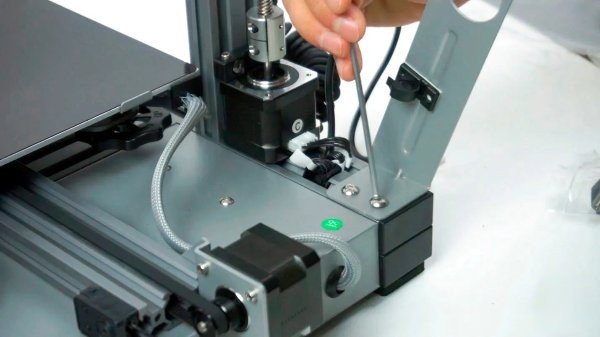
Now let's dwell on assembling the printer, which appears to be fairly easy. First, attach the gantry to the bottom with 4 screws.
Tighten the print head on the X-axis carriage.
Install the feeders on the top profile.
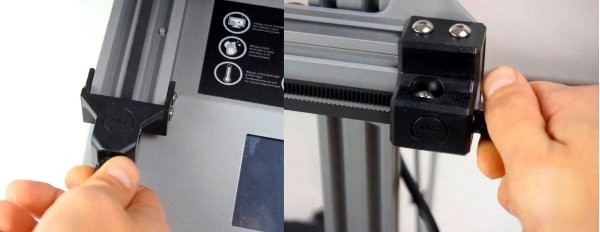
On the back, screw the filament spool holders and the filament runout sensors.
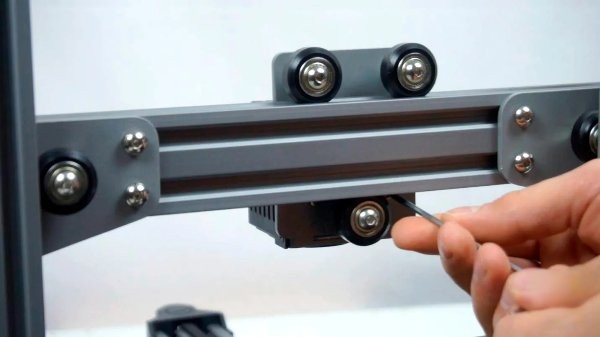
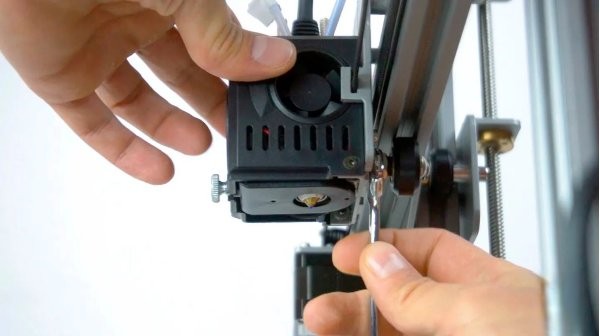
After that, tighten the belts using the tensioners on the X and Y axes.
It is advisable to check the pressure of the rollers to the profiles. If necessary, use the wrench to adjust the eccentrics on all carriages and achieve such pressure so that nothing dangles but at the same time moves freely.
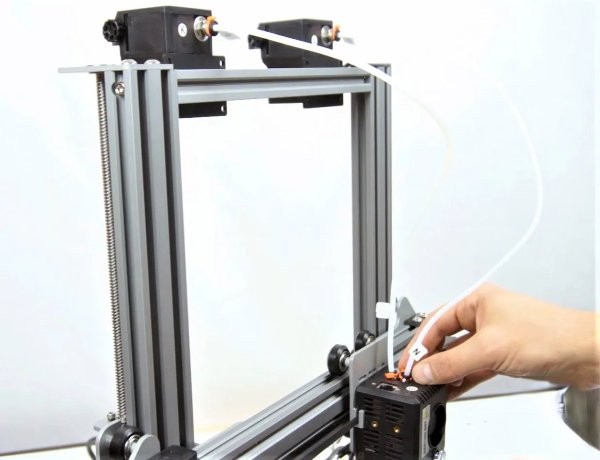
Connect the wires — for convenience, they are all marked.
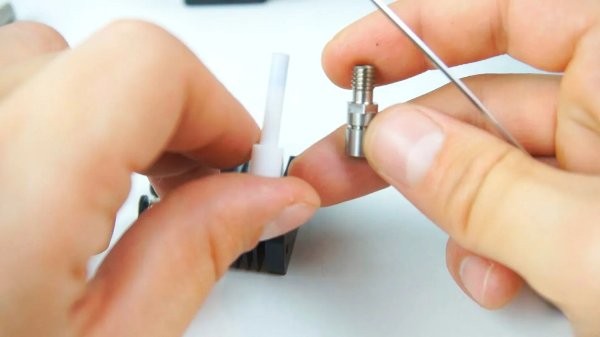
Insert the Teflon tubes that go from the feeders to the printhead. Finally, install plastic clips on the fittings so that the tubes do not play in them.
In total, the assembly takes about an hour.
To prepare models, Wanhao offers using the proprietary slicer. In fact, it is a rather outdated Cura slicer converted for Wanhao printers.
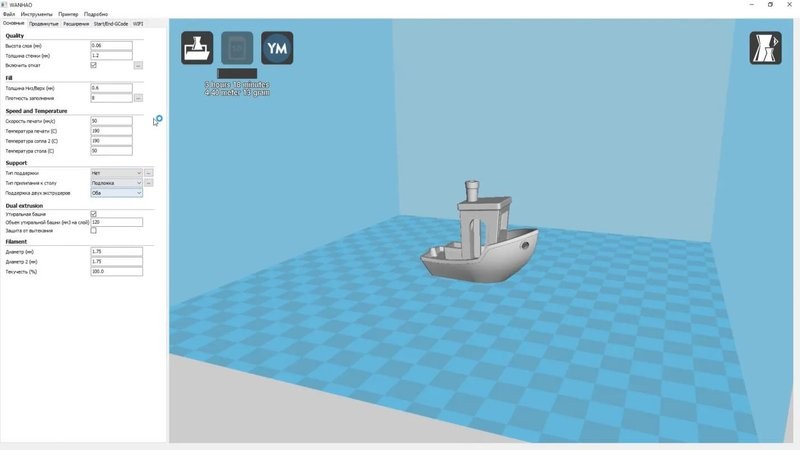
Instead, we decided to employ the Cura v4.5. Fortunately, the printer reads the regular G-code, so almost any slicer can be used for this device.

Although there are newer versions, the Cura v4.5 is probably one of the most stable ones. Besides, it is perfect for this type of dual-extrusion printing.
To create a new profile for the printer using this slicer, you need to select Custom FDM Printer and specify the parameters of the device.

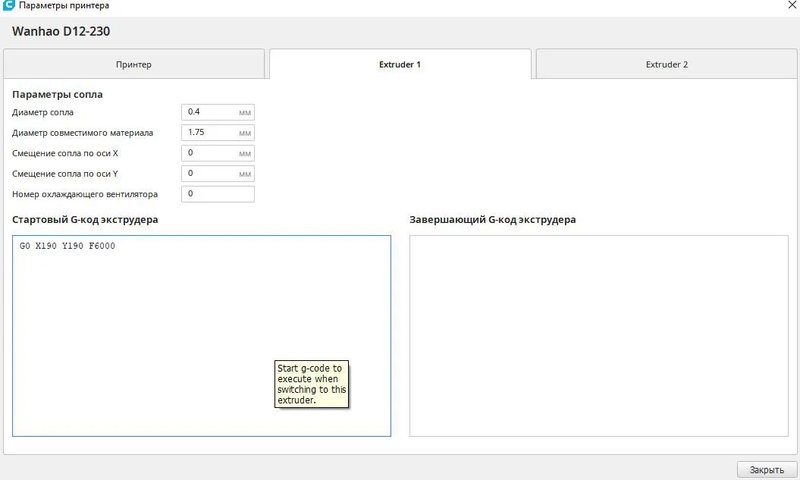
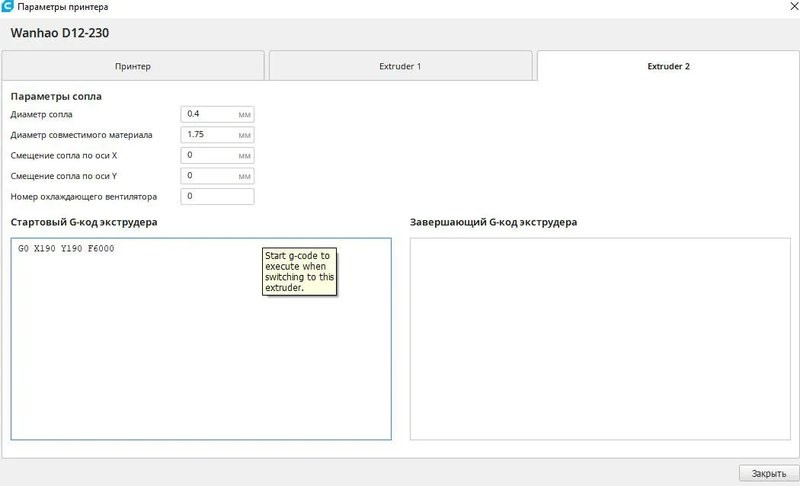
In addition to the main parameters, the most important thing is to set 2 extruders and check the Extruders Share Heater box. In the settings of each extruder, specify the filament diameter of 1.75 mm.
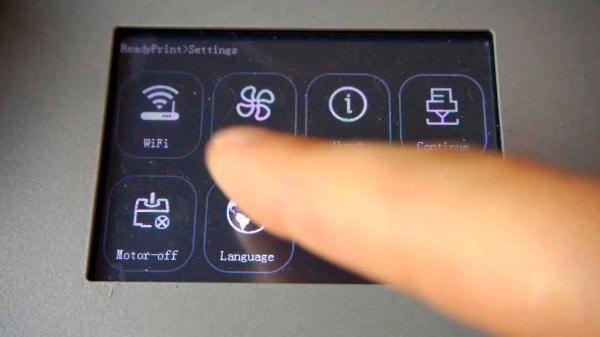
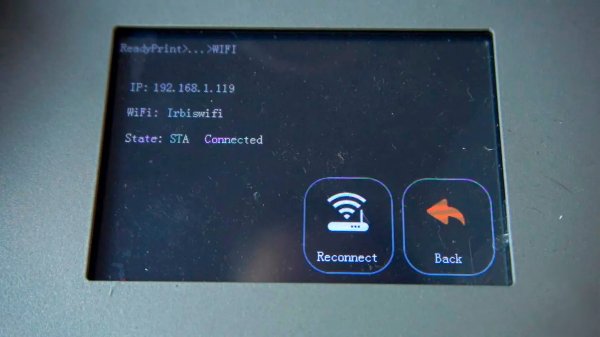
To connect to the printer via Wi-Fi, you need to tap the corresponding item in the screen menu settings, select your Wi-Fi network, and enter the password.
The printer will get an IP address, which is displayed on the screen.
How to set up the connection in the Wanhao slicer is described in the user manual.
To connect from another version of Cura, you need to go to the Ultimaker marketplace, find MKS Wifi Plugin, and install it.
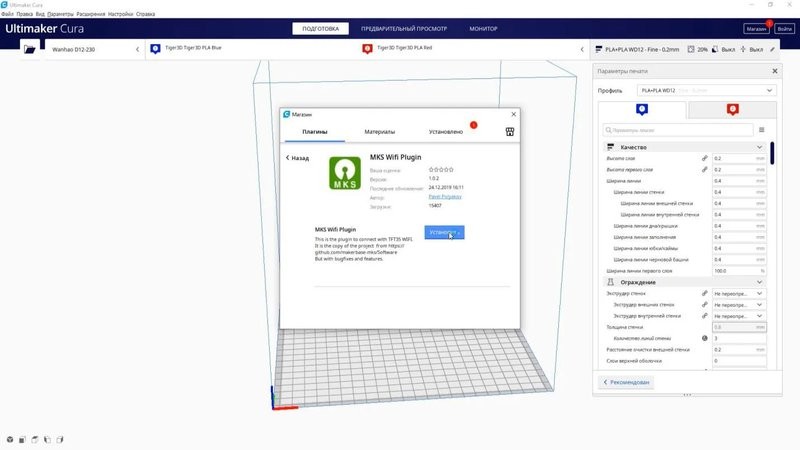
After the Cura is rebooted, the MKS Wifi button will appear in the printer settings. You need to click on it, add the IP address provided to the printer, and click Connect.

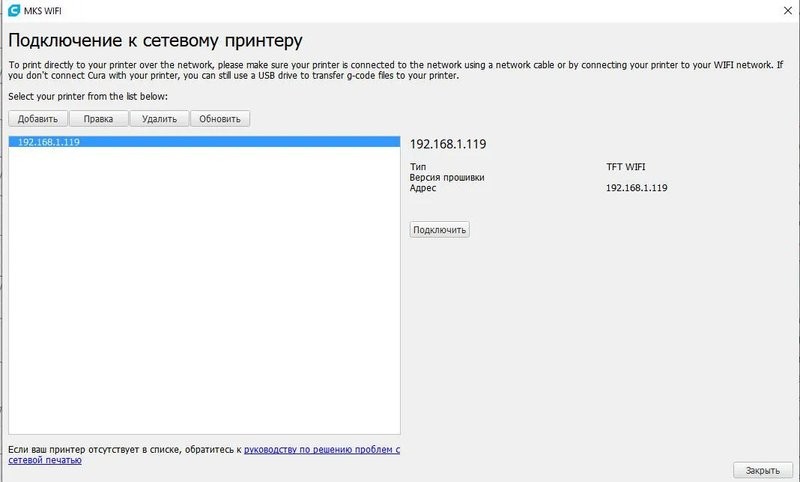
The printer control menu will appear in the Monitor tab. After a model is sliced, it is possible to send it to the device and start printing.

The function is convenient, but keep in mind that files are transferred rather slowly. This is not critical when sending small models, but if the file is tens of megabytes, the download may take several minutes.
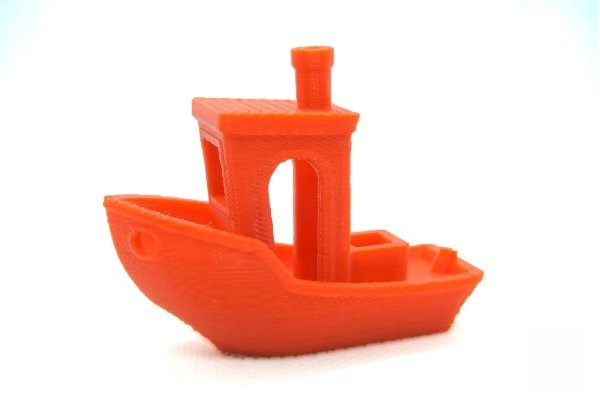
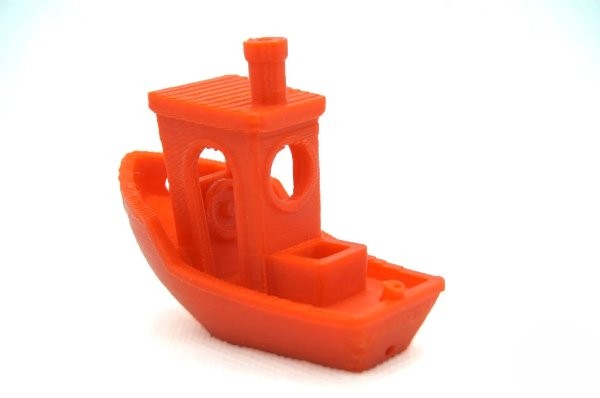
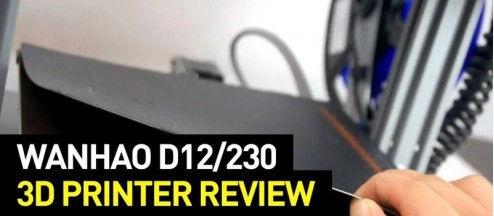
The ship was printed with PLA from Tiger3D. Although there are some problems with airing, it turned out well — there are no gaps, leaks, or strings. Printing temperature: 190 °С. Retraction speed: 25 mm/s.
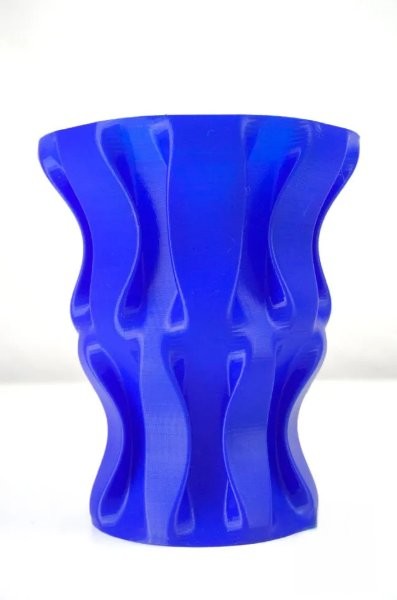
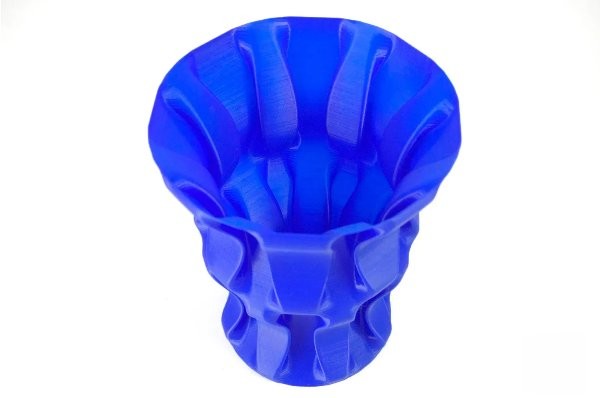
The vase was printed to test the device for wobbling along the Z-axis and see how even the layers will be. The print speed for the outer walls was 40 mm/s, the layer width is 0.6 mm; a 0.4 mm nozzle was used. The resulting object looks great. There is not a single flaw on the surface, all layers are even, no wobbling is observed, nor are there any gaps.
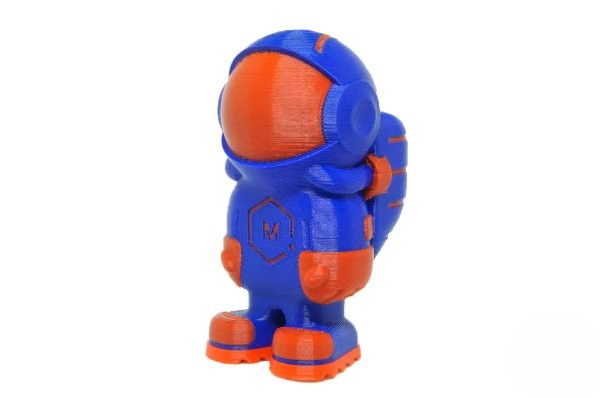
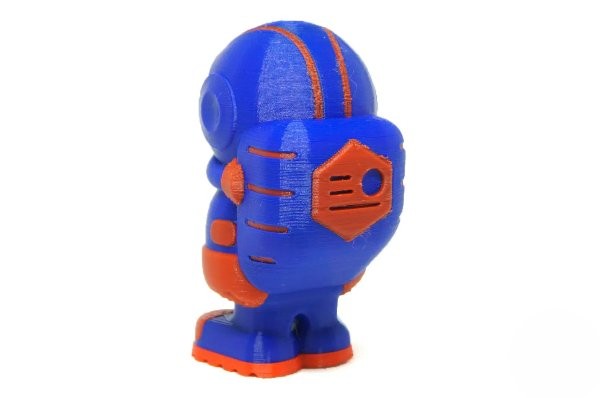
Now let’s proceed to dual extrusion printing. Look at the model of an astronaut below. The print looks good, despite some leaks in a couple of areas.
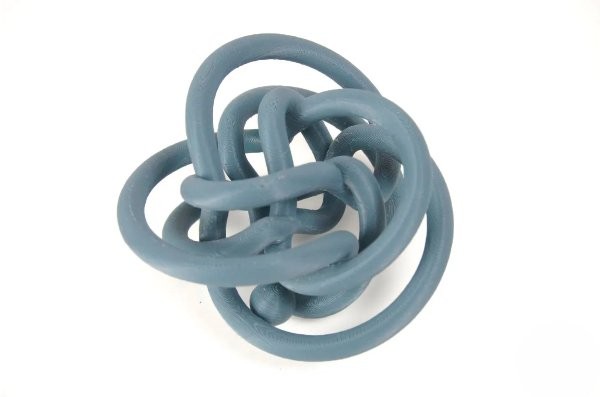
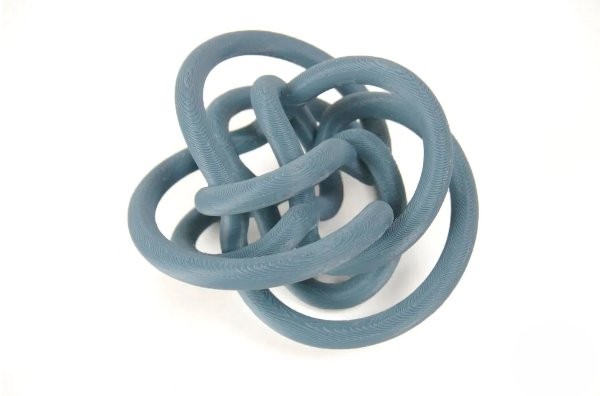
The next model was also created using dual extrusion. But this time, it was employed to print soluble supports. The object is a complex labyrinth with a small ball inside, which rolls after removing the supports. It was printed in 21 hours. Object material: PLA; supports material: PVA. The gaps between the model and the supports were set at 0 for all axes. The result looks amazing.
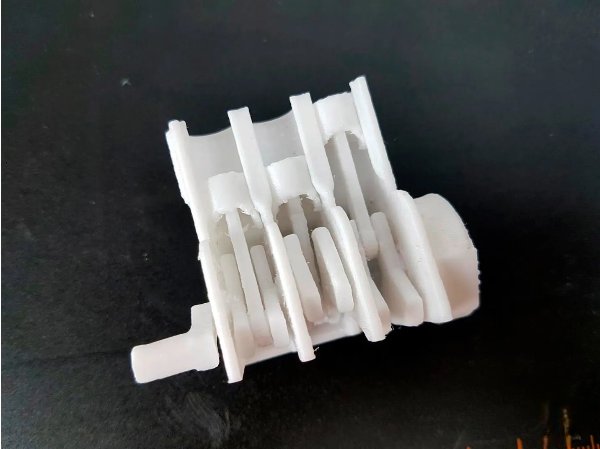
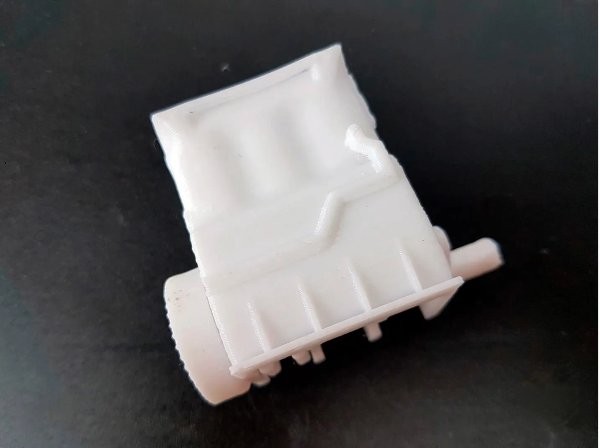
And the last model was printed with PETG using single extrusion. The object is a small motor that was intended to move, imitating the work of an internal combustion engine. The model does not seem to have considerable shortcomings; more importantly, it works.
The Wanhao D12/230 3D printer boasts wider possibilities in comparison with its predecessors. The device features a dual extruder with the ability to print objects using two colors of material. This also allows for the production of complex products utilizing soluble supports. Thanks to the high heating temperatures, the printer is compatible with a wide range of filaments with a melting point of up to 260 °С. A number of smart features such as a filament runout sensor, removable magnetic print surface, Wi-Fi connectivity, convenient belt tensioners for precise adjustment, and other useful functions enable flawless operation and provide quality results. The printer is suitable for a variety of applications, for example, prototyping, education, the production of hobby items.
Update your browser to view this website correctly. Update my browser now


Write a comment