The gradual introduction of 3D printing into regular production processes already requires from FDM technology not only the possibility of simple prototyping but deeper interaction with production chains. We are talking about the manufacture of real products of small series. And if it is required to create a durable part with certain performance characteristics, one cannot do without specialized devices and materials.
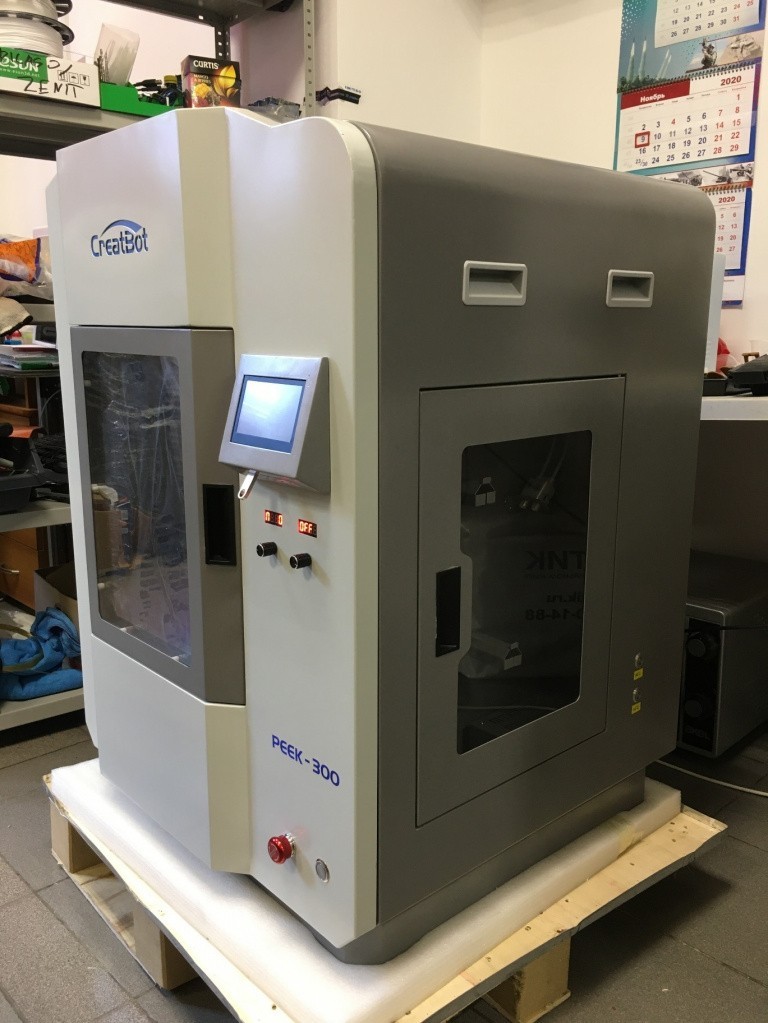
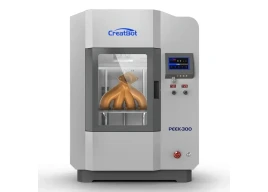
The Сreatbot company has firmly established itself in the market of professional FDM solutions, having a whole line of high-temperature 3D printers for working with engineering and refractory plastics. This article will look at one of the brand’s high-end products — the Creatbot PEEK-300 designed to print with professional-grade materials such as PEEK, Ultem, and so on.
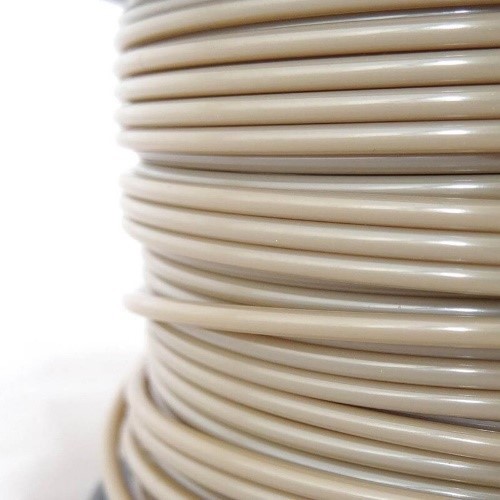
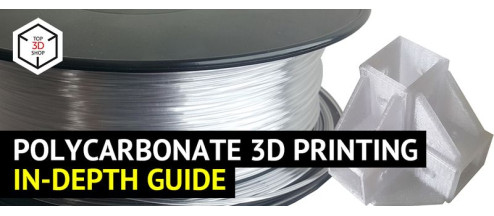
PEEK is a special material that can withstand high operating temperatures — from -40 to 260 °С, the softening point standing at about 300 degrees. The high tensile and flexural strength, even when exposed to high temperatures and chemicals, makes it indispensable for objects requiring increased durability. PEEK boasts relatively low shrinkage and low flammability/hygroscopicity, it is also suitable for contact with food. Even ultraviolet rays can only change the color of the plastic without affecting its structure.
Consequently, PEEK is rather particular about devices to print it — it requires specialized solutions tailored for this material.
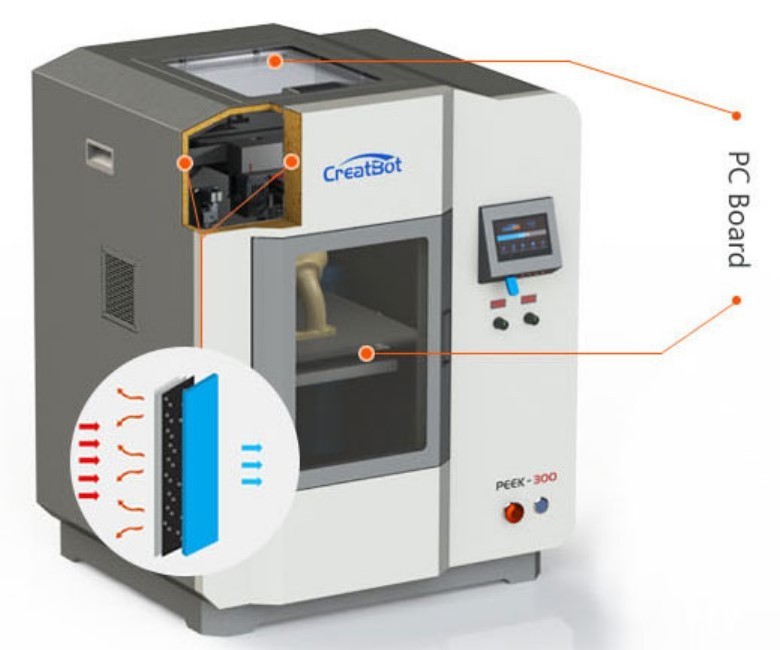
To begin with, the PEEK-300 3D printer sports a unique function called Direct Annealing System (DAS), which means it can anneal the material right during printing. Other important features for PEEK printing include the maximum extruder and bed temperatures of 500 and 200 degrees respectively. More than that, the printer is equipped with a heated build chamber (up to 120 °С). A HEPA filter installed on the wall of the device eliminates possible harmful vapors. The printing unit has a highly efficient liquid cooling system. Read on to learn more about the smart features of the device as well as discover the peculiarities of its design, kinematics, and electronics.
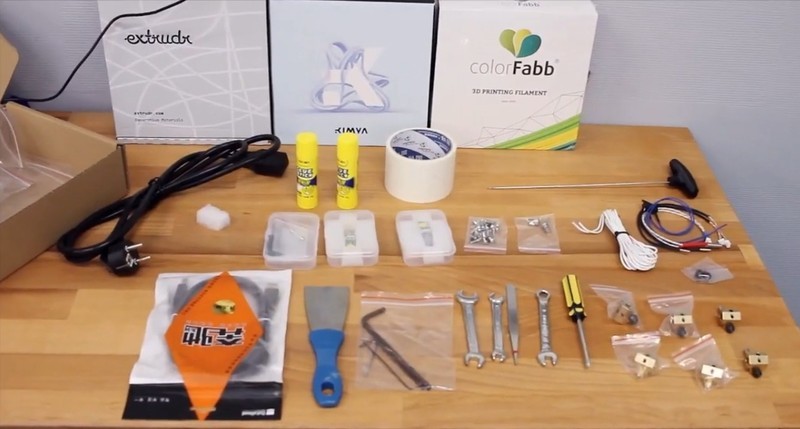
The printer comes with a set of all the necessary items including:
Also, the supply package contains a carbon fiber build plate already installed in the printer.
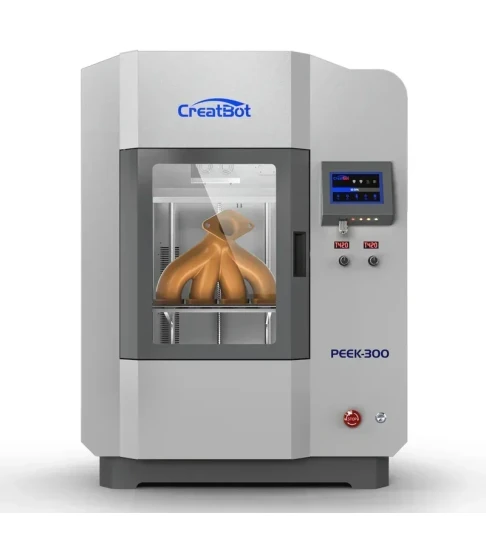
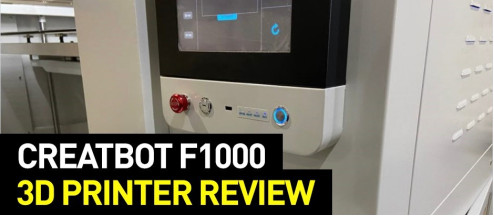
The design of the Creatbot PEEK-300 looks immensely robust and laconic. On the front, we can see an inspection door and controls: a branded Creatbot touchscreen with a USB connector, temperature regulators for the DAS system, emergency and power buttons. The right side contains a filament compartment and buttons for operating it — the material can be dried at 40 or 60 °С.
There is another inspection door on top to facilitate access to the print unit. The doors made of double glass are characterized by an impressive thickness to eliminate heat loss during printing.
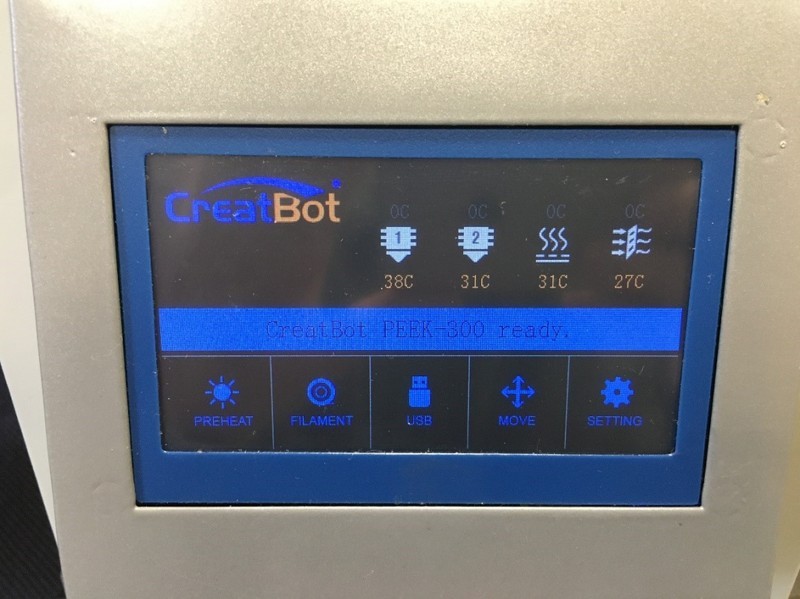
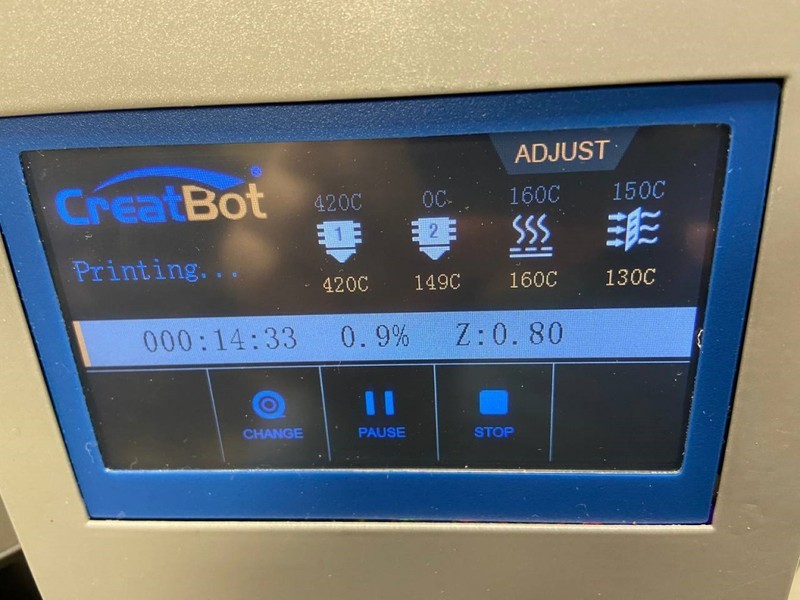
Since all Creatbot printers have a common platform, their control interface is also about the same, with little change to be noticed.
In addition to the temperature icons at the top right, the main window contains buttons for quick activation of preheating and changing the filament, the menu for a USB stick, the menu for movement along the axes, and advanced settings.
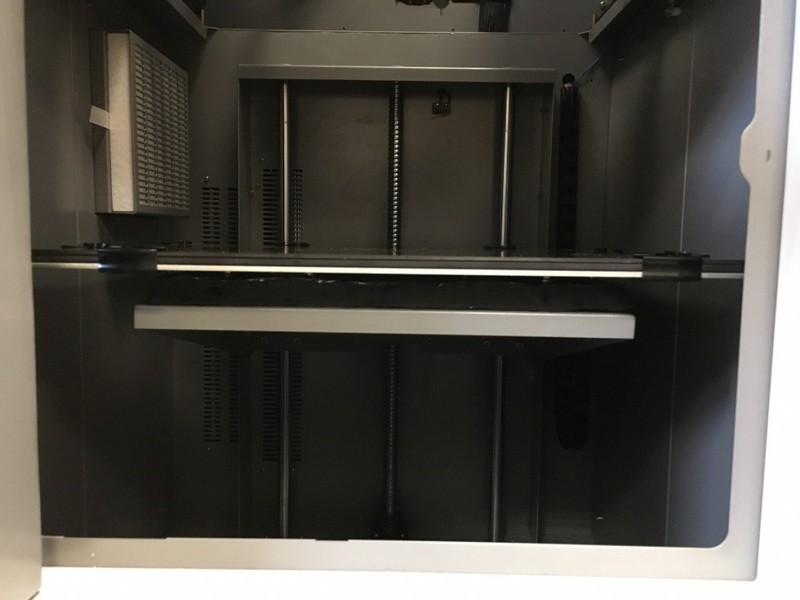
The Creatbot PEEK-300 has a fairly impressive build volume of 300 x 300 x 400 mm. The printer boasts one of the “hottest” print beds available on the market — the system allows reaching 200 °С on the surface, which is enough to print with virtually any refractory material. A HEPA filter and a vent are installed on the left side of the build chamber; the activated carbon filter layer additionally cleans the air from vapors.
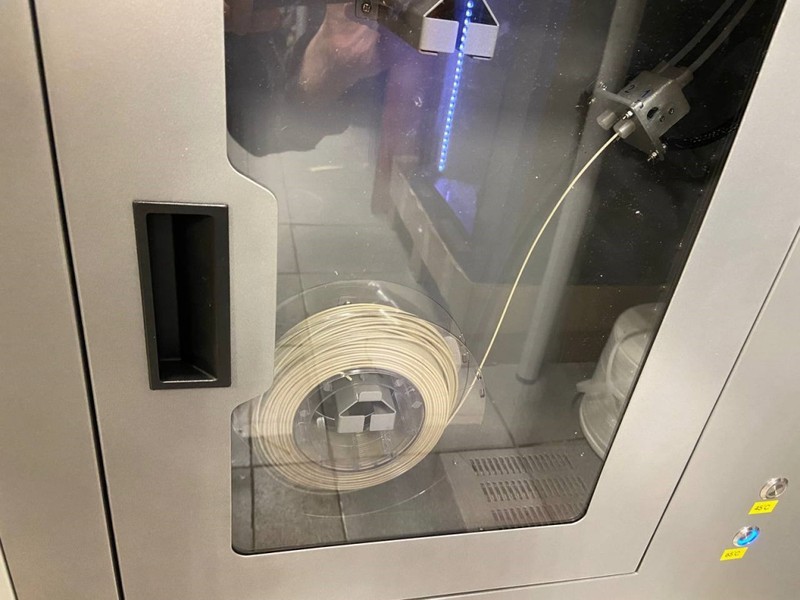
The material is fed from the filament compartment on the right side of the device, which contains a heating module for drying the plastic, brackets for two spools, filament presence sensor, and temperature sensor.
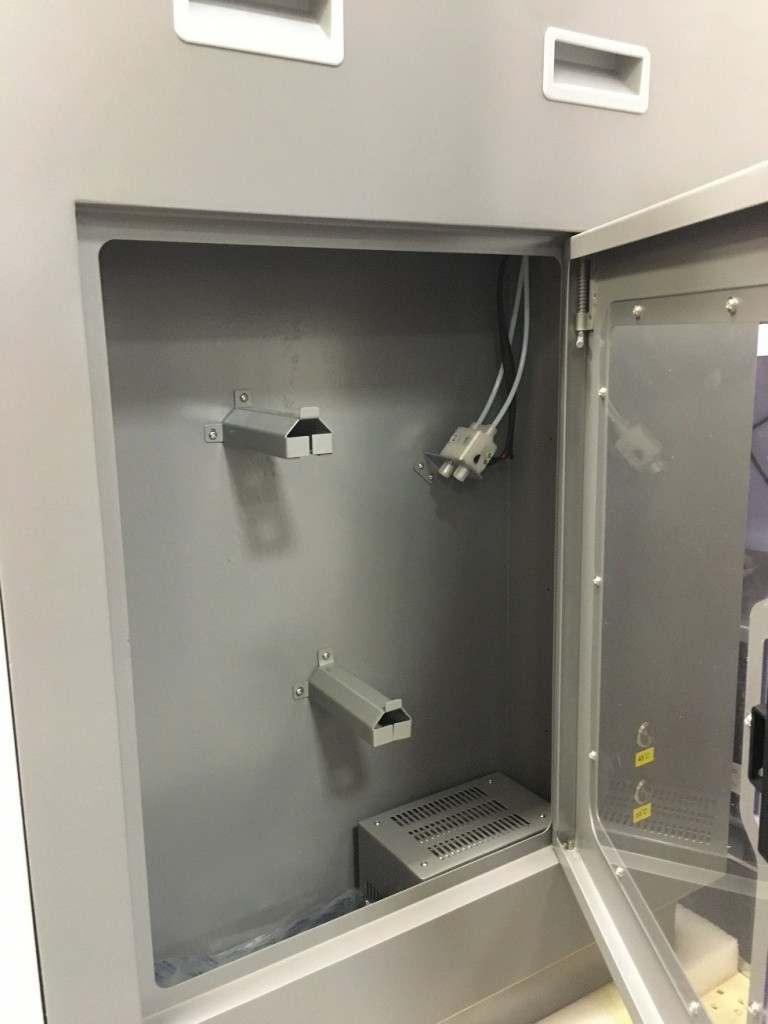
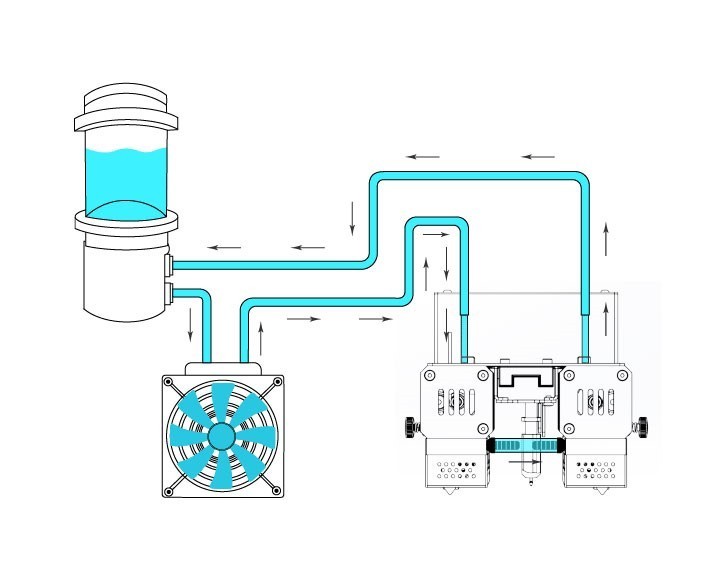
The most interesting part of the device appears to be the print unit since it has liquid cooling and direct annealing systems. The rear compartment of the printer contains a reservoir with water, a pump, and a heatsink, through which the liquid heated in the print unit is cooled. There is also a compressor and a heater for the DAS system there. The performance of such a solution is much higher than that of conventional air cooling, and given the maximum heating of the nozzle up to 500 degrees, the system is bound to be efficient.
The air duct of the Direct Annealing System provides flow temperatures of up to 120 degrees. This allows for the annealing of materials such as PEEK and PEI, and thanks to the same high temperatures of the build chamber, the final polymerization process can proceed much faster than with the conventional method.
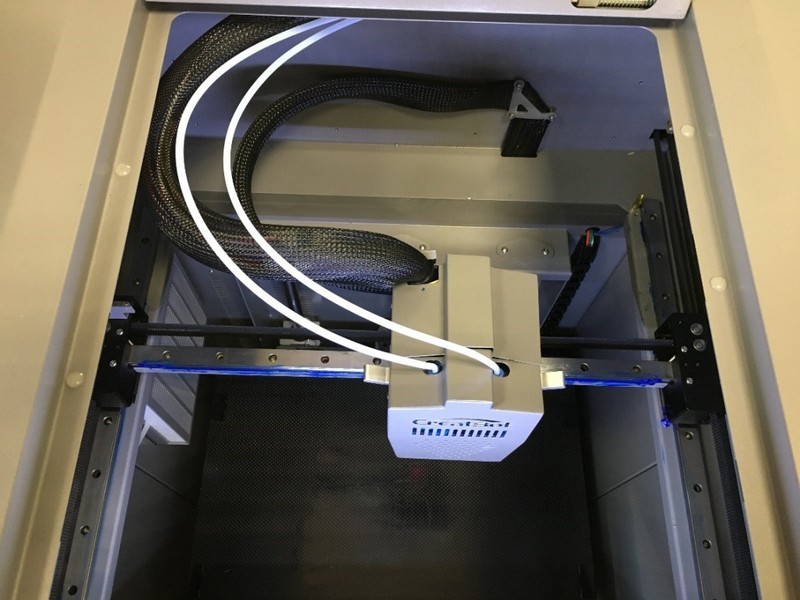
The print head is equipped with two feed mechanisms and two hotends, the extruders are motorized (as in Raise3D printers). The hotends are raised/lowered by means of screw gear. Like other professional Creatbot models, the PEEK-300 has a BLTouch bed leveling sensor on the back wall of the print unit.
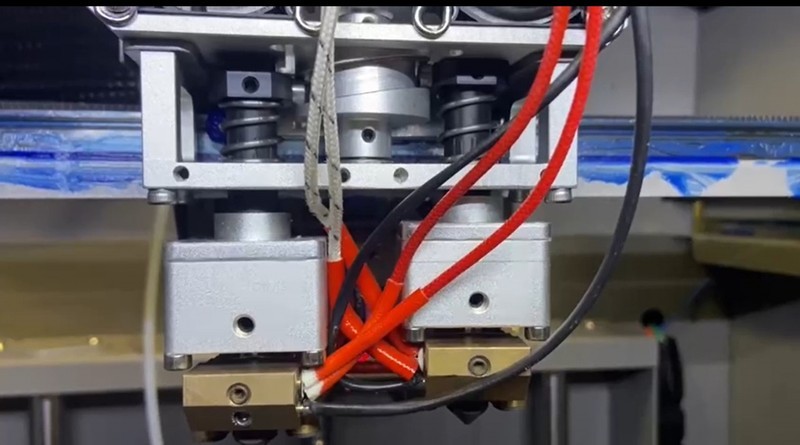
The Creatbot PEEK-300 is compatible with 0.3–1.0 mm nozzles, brass or steel. When working with refractory and abrasive materials, it is preferable to use a steel one. All-metal extruder tubes replicate those on the D600 models, except that they cool better and withstand heating of up to 500 degrees.
Unlike its predecessors, the Creatbot PEEK-300 features H-Bot kinematics. Belts are divided in height, classic stepper motors behind the back wall in the electronics compartment act as drives. The milled carriages of the X-axis are made of metal, the device uses thick Hiwin rails and a 10 mm belt with a steel cord. The kinematics are perfectly implemented and finally based on a modern scheme. (The blue substance in the photo is shipping lubricant.)
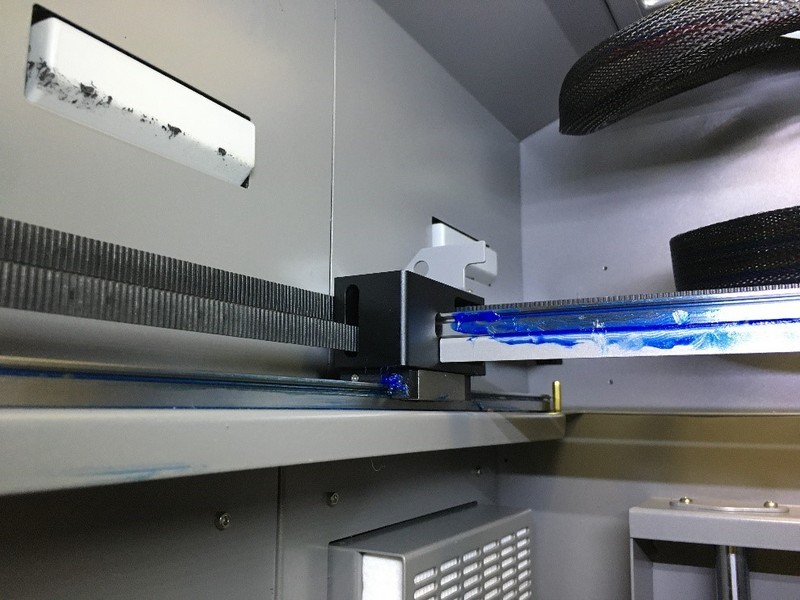
The belts are located outside the chamber, as well as all delicate electronics, except for the control elements of the printing unit.
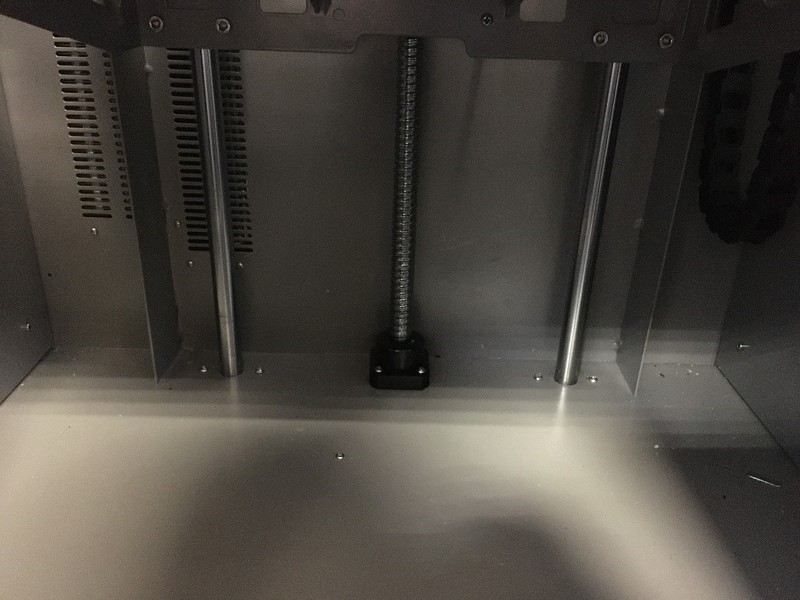
The Z-axis, as expected, moves using a fixed ball screw along two 16 mm guides.
The Creatbot PEEK-300 is compatible with any open-source software, for example, Cura, Kisslicer, or Simplify3D. However, the manufacturer recommends using the proprietary CreatWare slicer based on Cura.

Now, let’s look at how a PEEK printing process is actually carried out and print a couple of objects with the Creatbot PEEK-300.
By itself, PEEK is not hygroscopic; however, in some conditions, condensation may form even inside a hermetically sealed package. Therefore, after unpacking the material, first it must be placed in the open air or a drying chamber.
Next, we need to make sure that the reservoir of the liquid cooling system is filled with water at a sufficient level.

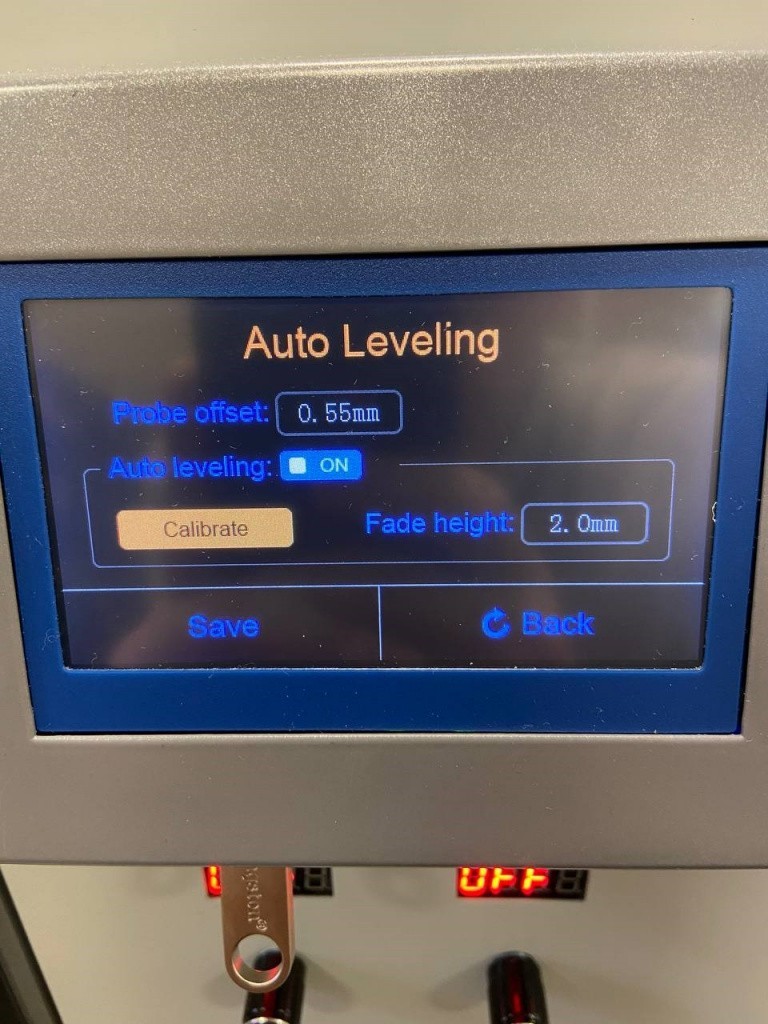
Bed leveling before printing is necessary since it is important to ensure the maximum adhesion of the material to the surface. Although the device has the auto calibration function, it is also possible to make adjustments using the leveling screws under the print bed. It is strongly recommended to perform calibration on the bed already heated.
The next step is to preheat the 3D printer. The bed and nozzle temperatures should be 150–160 and 400–420 °С respectively; it is also necessary to heat up the build chamber.
After preparing a model in the slicer, we save the file on a USB flash drive and apply an adhesive onto the print bed. Since the Creatbot PEEK-300 uses a carbon plate as the surface of the print bed, the best option seems to be a PVA glue stick.
After the temperature in the chamber has stabilized and the spool in the filament compartment has sufficiently dried, we can start the printing process.
As the part is being printed, let’s talk about how PEEK is to be post-processed.
Polyetheretherketone is a very capricious material; during printing, the slightest temperature fluctuations can lead to incorrect crystallization and affect the result. It is therefore crucial that the temperature sensor of the extruder be well-calibrated and the external environment not cool down until the process is complete. After printing, PEEK must be annealed in a special way:
However, thanks to the Direct Annealing System the PEEK-300 is equipped with, the annealing time is reduced and its scheme is altered. The material goes through two stages of crystallization — at the moment it comes out of the nozzle and on getting into a hot environment.

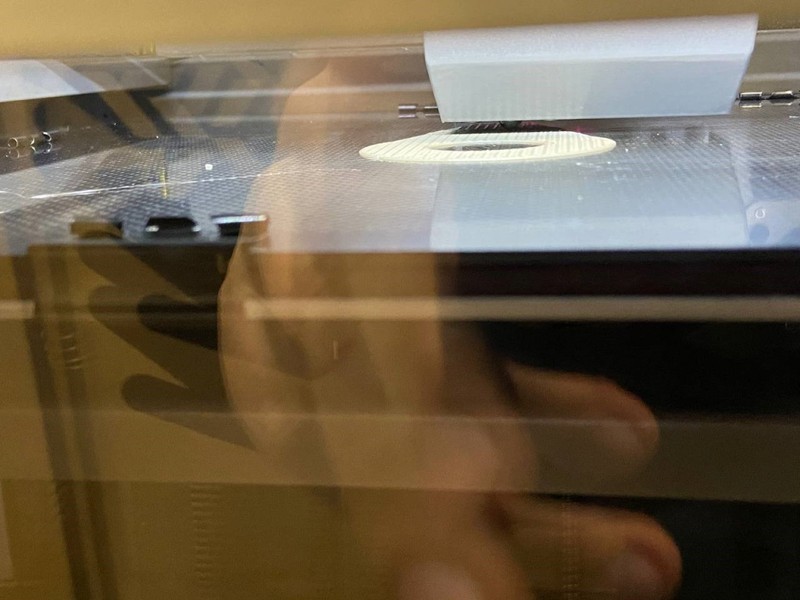
In the meantime, the device has finished the printing process.
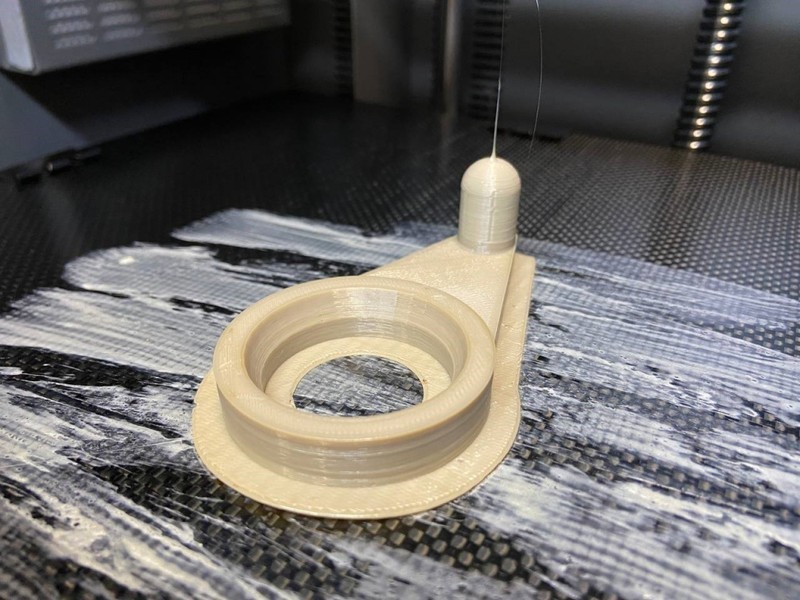
As is evident from the photo, the print is successful. The uniform color testifies to the process having proceeded correctly. The part does not delaminate and lies flat on the surface. Yet, additional annealing is still necessary.
Correct annealing of the material after printing must be carried out in a special muffle furnace or a powerful industrial drying oven. But if the product is provided with an even ambient temperature and is placed in a (hot air) oven, the maker can achieve a good result.
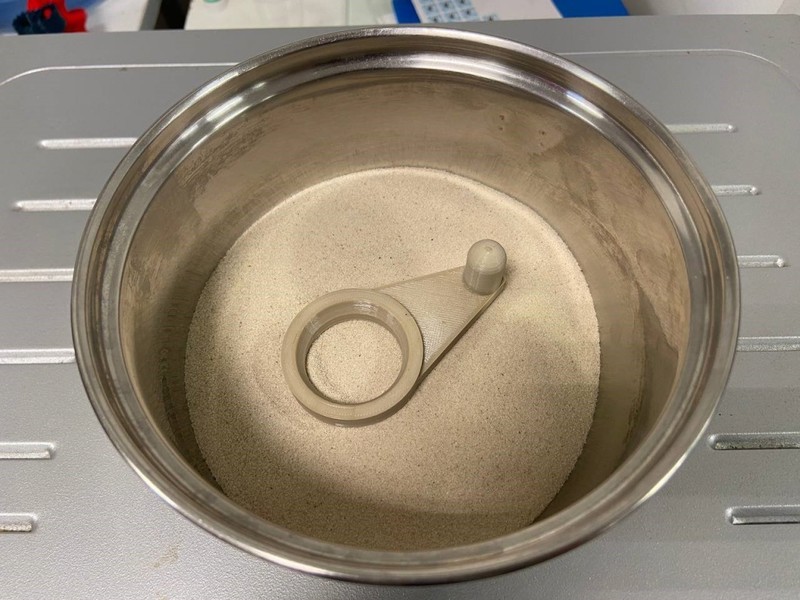
First, put some silica sand in a metal container to insulate the surface. Place the product and pour in the sand on all sides with an even layer.
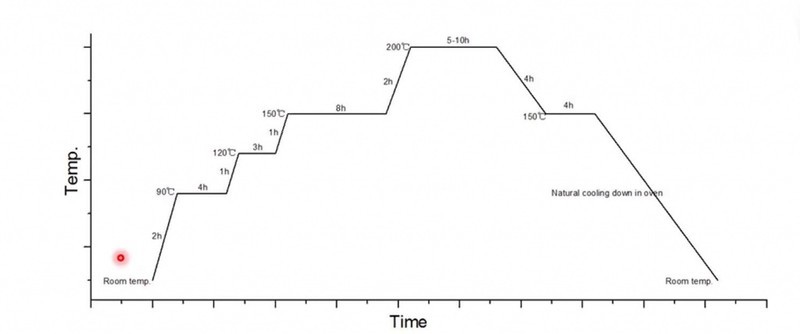
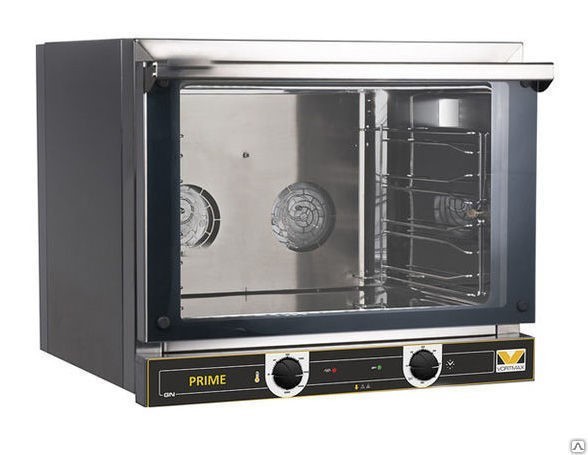
We place the container in a regular convection oven and carry out annealing according to a simplified scheme:
The final step is to turn off the heating and wait for the oven chamber to cool down to room temperature. Then the container can be removed.
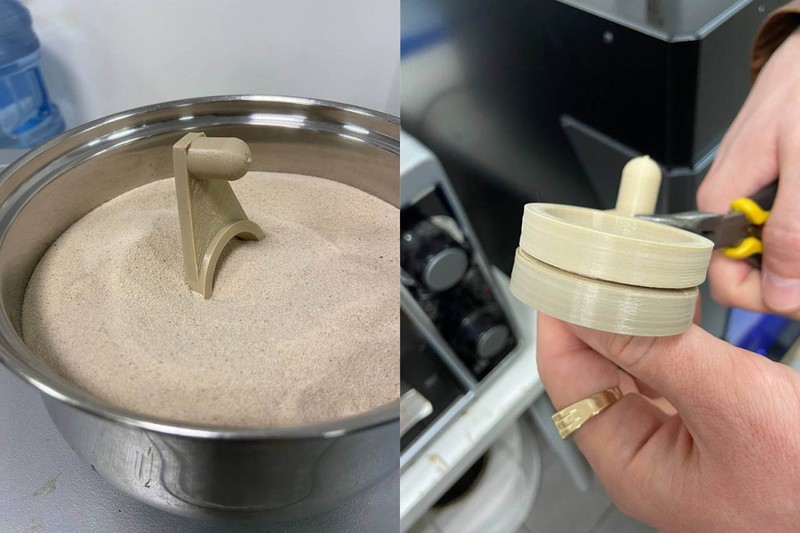
So, we can observe a change in the color of the part (the second photo shows the comparison with a non-processed model). This indicates that the annealing has been performed properly. Besides, now the plastic feels much harder and less flexible.
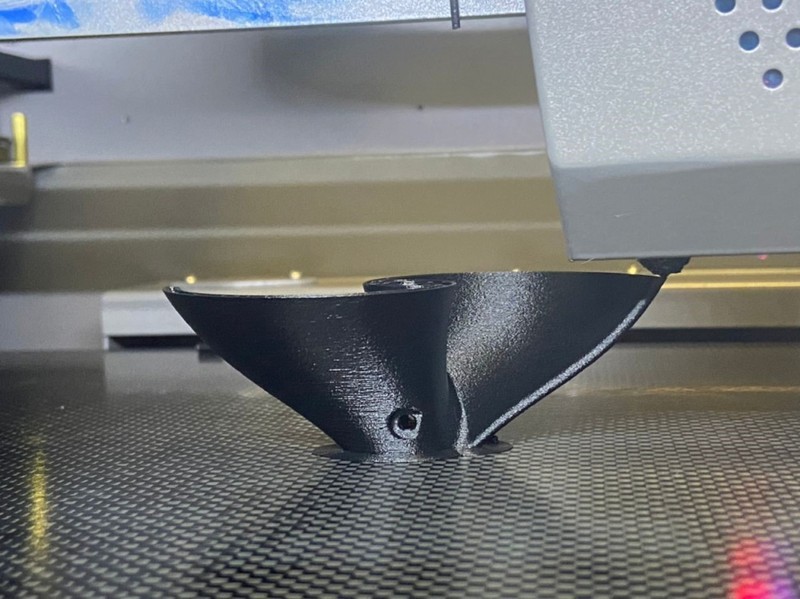
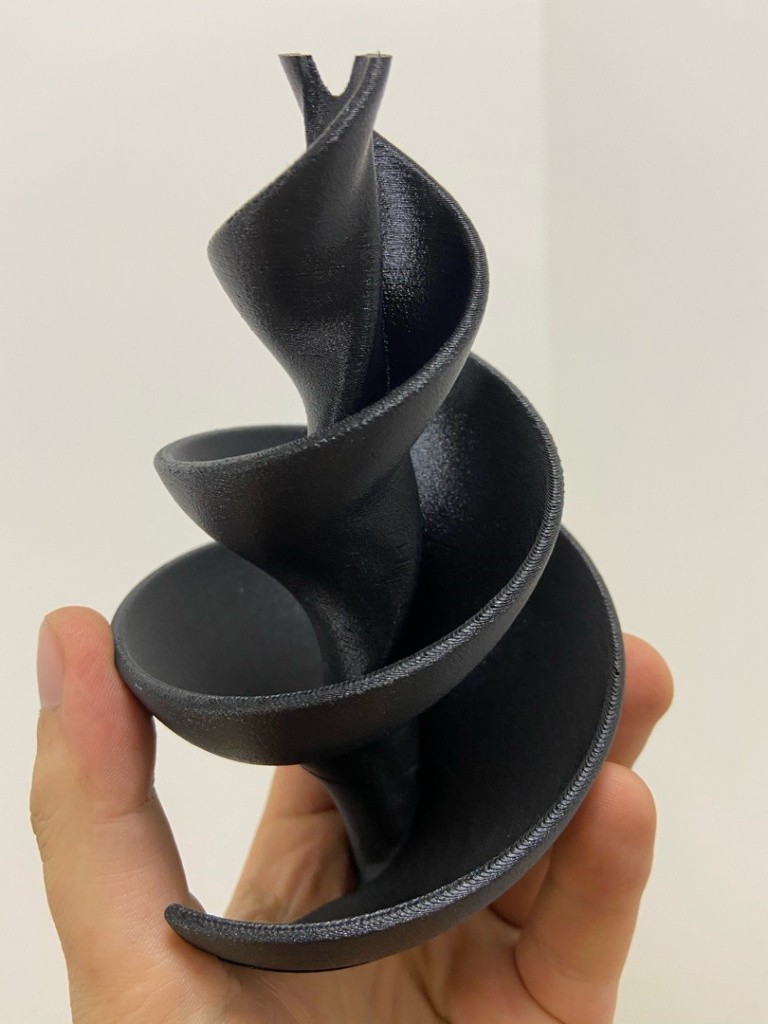
Have a look at another model printed with the Creatbot PEEK-300 — an impeller made of Ultran. Layer height: 0.2 mm, extruder/print bed/build chamber temperatures: 300/120/70 °С, no supports used. As is seen from the photos below, the quality of the print is superb.
When using PEEK plastic in 3D printing, it is necessary to follow the correct sequence of the process stages and perform all post-processing procedures. This material is extremely demanding on the design and capabilities of a 3D printer. Moreover, subsequent annealing can drag out the production process for up to 90 hours. Fortunately, with features such as the Direct Annealing System, this time can be significantly reduced to 25–30 hours.
When creating the PEEK-300 model, Creatbot took into account all the specifics of working with this material and released a machine that perfectly copes with the task. Apart from that, the dual print head with an automatic nozzle switching system allows the Creatbot PEEK-300 to print objects with complex geometry using soluble HIPS supports. Printing control systems, reliable electronics outside the heating zone, professional and modern kinematics, elaborate filament drying and feeding mechanisms are proven advantages of the device. Having refined the experience gained during the development of the D600 Pro, the company created another worthy solution that fulfills its purpose exceptionally well.
Update your browser to view this website correctly. Update my browser now

Write a comment